SearchAssist provides an intelligent, contextual, and personalized experience in every interaction across web and mobile channels. You can enhance the search capabilities of SmartAssist by integrating it with the SearchAssist application.
How Does It Work?
- Set up SearchAssist: Add all the information sources agents might need in their searches, like web pages, data, documents, and content from apps like ServiceNow and Confluence. Learn more.
- Link SearchAssist with SmartAssist: Administrators can link the SearchAssist application with the SmartAssist application, as explained in this document. Once linked, SearchAssist content is automatically available for SmartAssist as a service in runtime. Learn more.
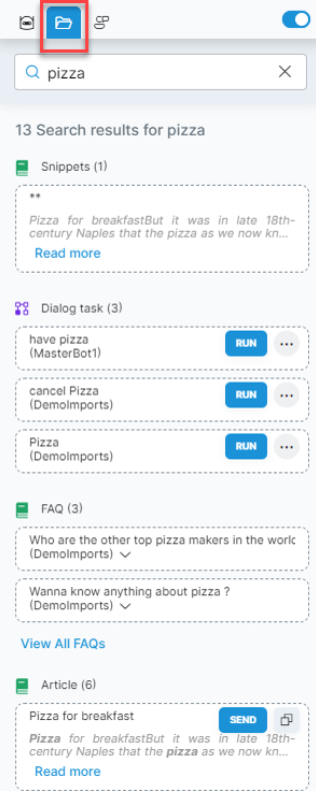
- View SearchAssist data in SmartAssist: In the SmartAssist widget, agents can view relevant Snippets and Articles from the SearchAssist application, and Dialog tasks and FAQs from the XO Platform or the Use Cases of the SmartAssist application. Learn more.
How to Link SearchAssist with SmartAssist?
Linking a SearchAssist application with SmartAssist is a two-step process:
- Enable the communication channel in SearchAssist: To enable the communication channel in the SearchAssist application, refer to this guide. When the communication channel is enabled, it provides the client credentials that are required for linking the SearchAssist application with SmartAssist.
- Use the client credentials to link the SearchAssist app with SmartAssist: See the steps below.
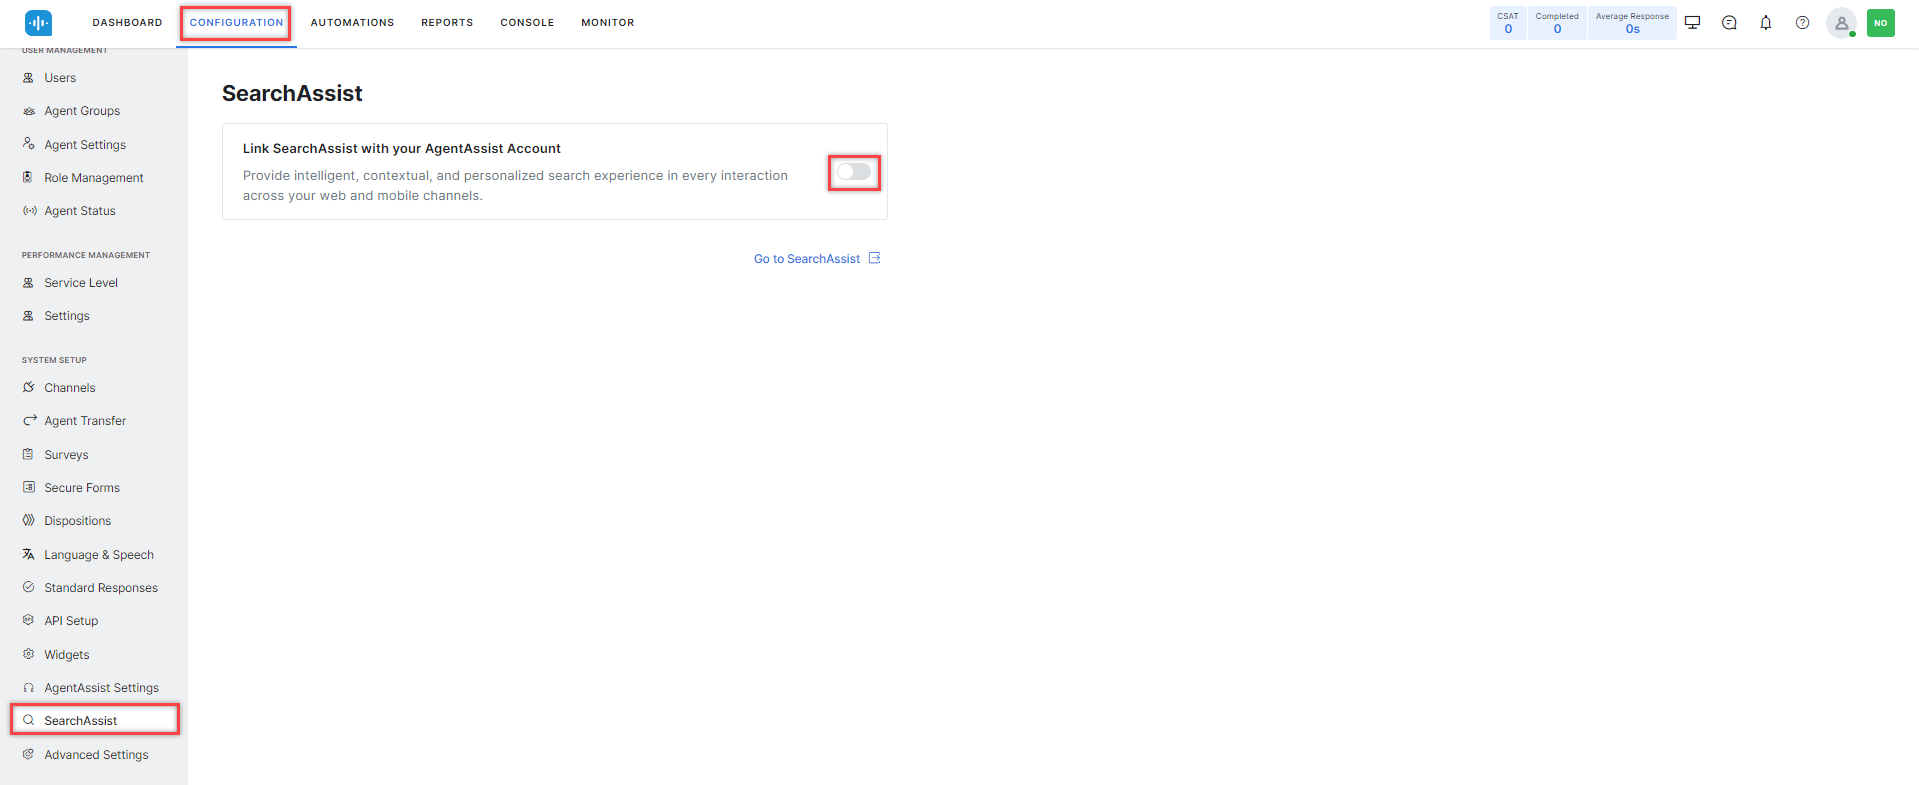
Steps to link the SearchAssist app with SmartAssist:
- Log in to the SmartAssist application.
- Enable SearchAssist from AgentAssist Settings.
- Go to CONFIGURATION > SYSTEM SETUP > SearchAssist.
- On the SearchAssist page, turn on the Link SearchAssist with your SmartAssist Account toggle.
- Enter the following client credentials generated by the SearchAssist application:
- Domain URL: This is the URL where the SearchAssist application is hosted.
- Stream ID: This corresponds to the App ID provided by the SearchAssist application.
- Client ID: The Client ID generated by the SearchAssist application for communication.
- Client Secret: The Client secret generated by the SearchAssist application for communication.
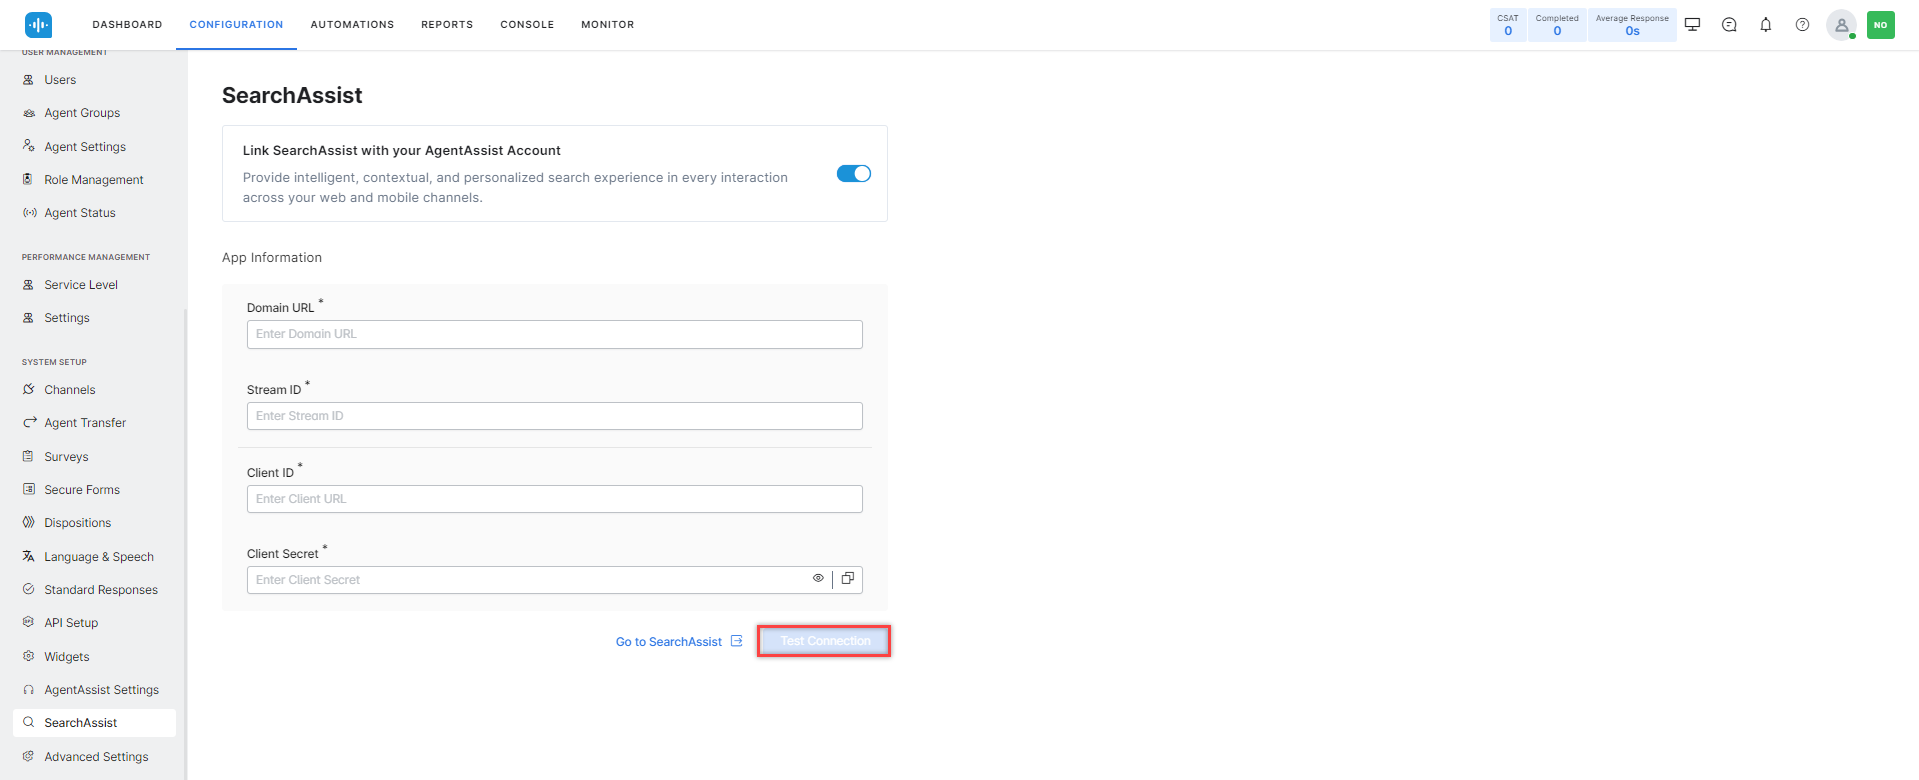
- Click Test Connection to verify the configuration.
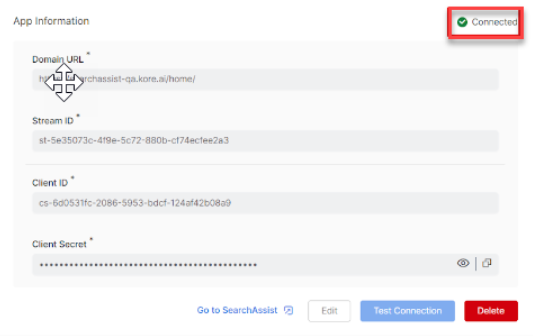
SearchAssist is linked with SmartAssist upon successful verification of the App Information and is marked as connected.
How Does It Help Agents?
When SmartAssist is integrated with SearchAssist, data from all the sources configured in the SearchAssist application are accessible to agents via the AgentAssist widget > Library tab. In the search results, Snippets and Articles are shown from the SearchAssist application, and Dialog tasks and FAQs are shown from the Use Cases of the AgentAssist application. Agents can quickly review the results and refer to the relevant information. They can also share relevant information directly from the search results with the customer. The screenshot below is an example showing an agent searching for “pizza” on the Library tab.