
The Conversation Automation feature integrates SmartAssist into the Kore.ai XO Platform to handle customer conversations using an AI-enabled virtual assistant (bot).
A conversational bot is an AI-enabled application that simulates human conversation through voice commands, text chats, or email messages. It leverages AI to respond to human queries upon understanding intent and analyzing the context of the conversation.
Benefits
- Integrate XO Platform bots with SmartAssist to automate omnichannel customer case handling;
- Connect SmartAssist to XO Platform features that let you design, train, deploy and analyze integrated bots.
The Automations Live Board
To use conversational automation, you must create and configure a bot within the Kore.ai XO Platform. The bot is integrated into the Automations section of SmartAssist. Please refer to the XO Platform documentation for more information on working with bots. Once a bot is integrated, relevant features are available within SmartAssist, such as Automated Dialogs within Conversation Use Cases.
All integrated bots are listed in SmartAssist under the Automations section.
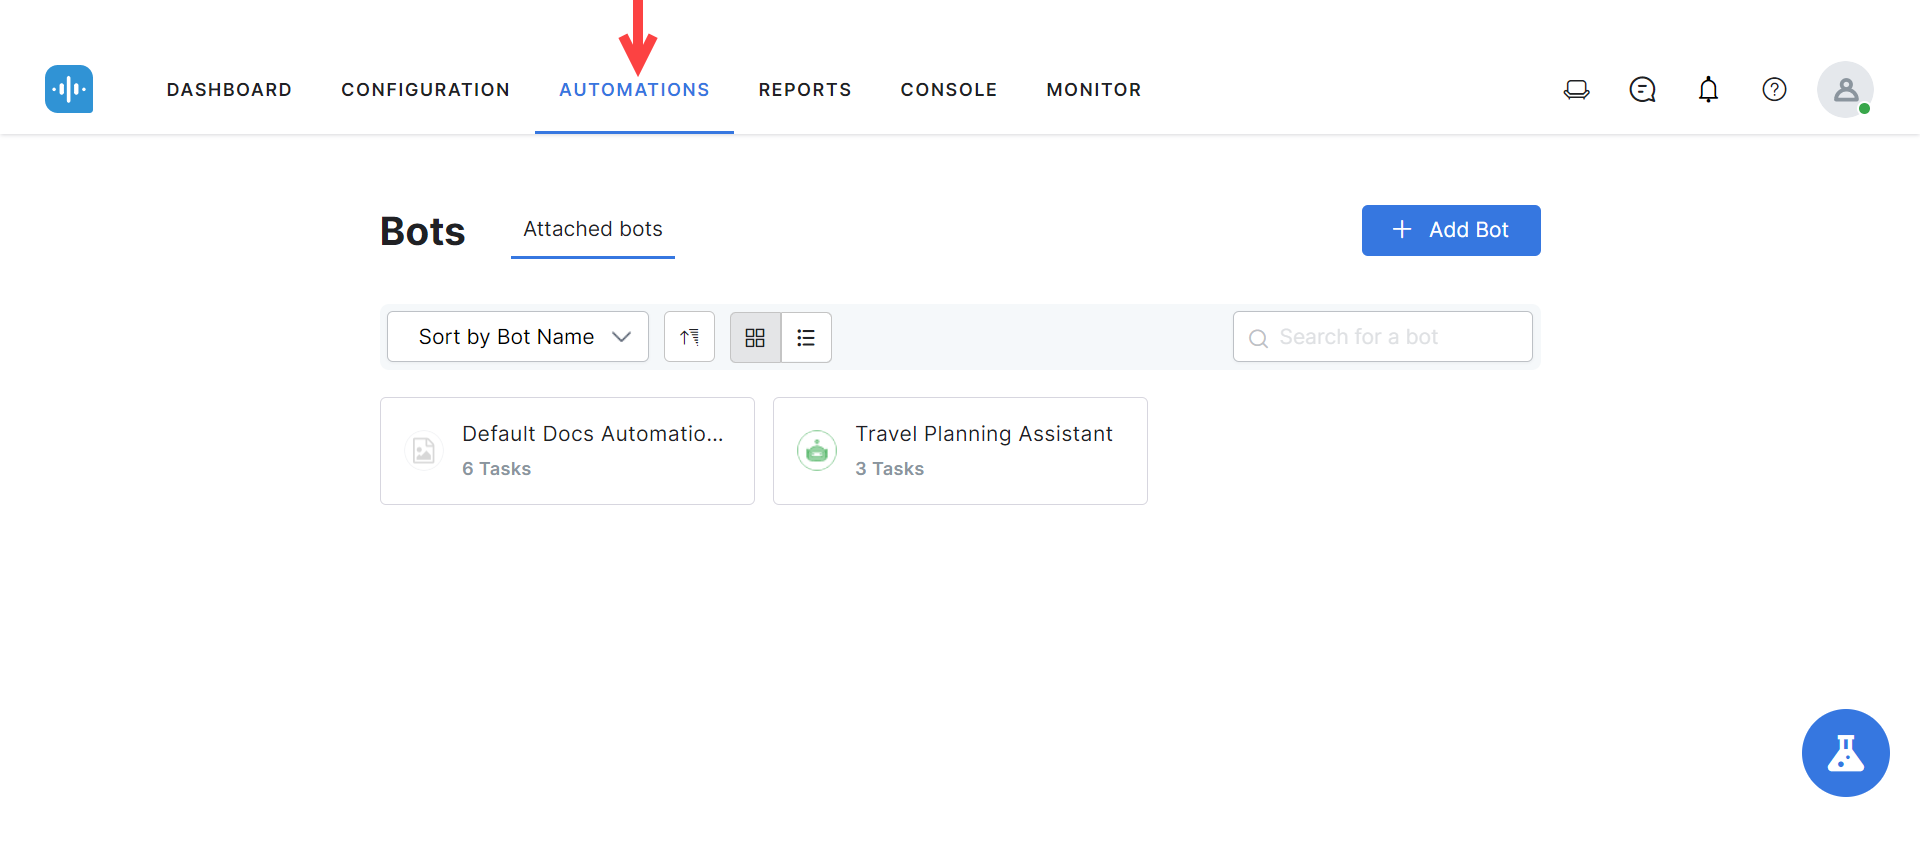
The Automation section includes the following features:
| Feature | Description |
|---|---|
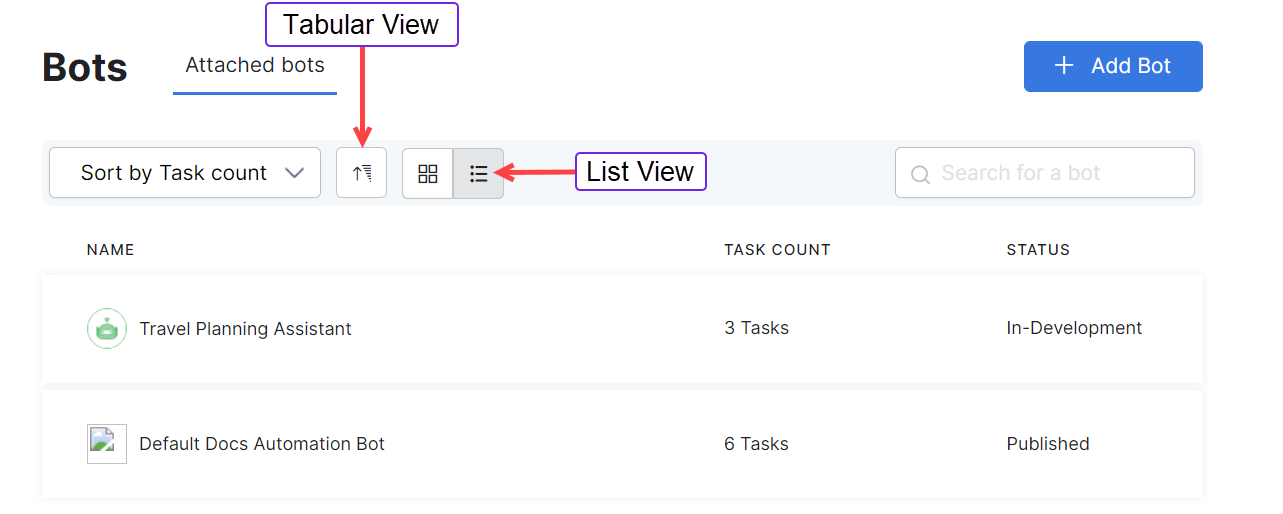
| Sort (dropdown) | Sort the bots list by Bot Name, Task Count or Status. |
| Sort Order (button) | Click to choose sort order: ascending or descending. |
| Tabular View (button) | Click to select the tabular view. This option shows the list of bots in tabular format and displays the bot name and the task count for each bot. |
| List View (button) | Click to select the list view. This option displays available bots as a list and shows the following fields: Bot Name, Task Count, and Status (either In Development or Published). |
| Search (Field) | Use the search box to enter keywords matching the name of the bot that you are looking for. |
| + Add Bot (button) | Click to create a new bot – either by attaching one from your XO Platform library or by creating it from scratch. |
Attach a Bot from the XO Platform Library
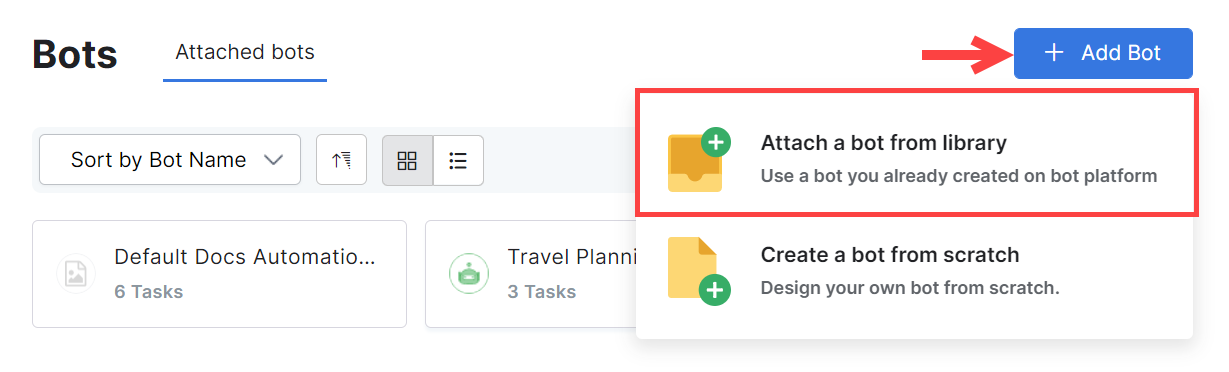
If there is an existing bot within your XO Platform account that you would like to attach to SmartAssist, you can do so from within the Automations > Bots section. Follow the instructions below to attach the bot:
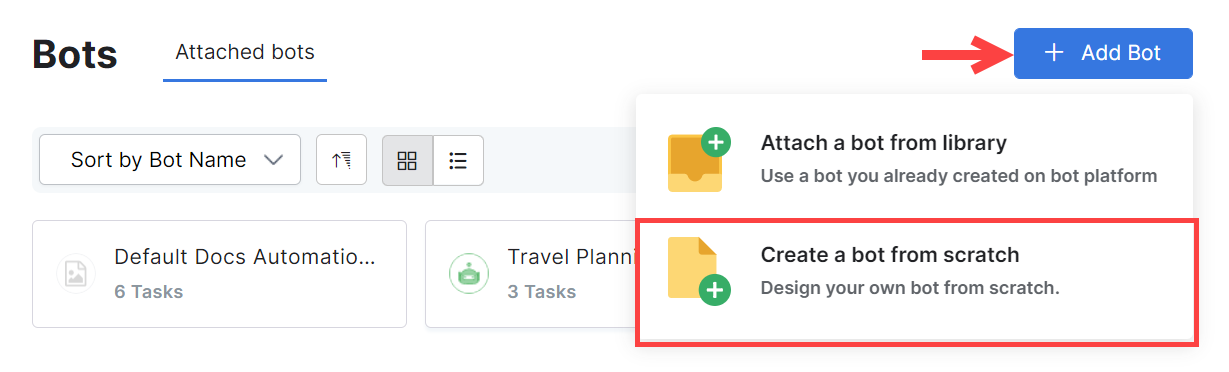
- Click + Add Bot, then select Attach a bot from library.
- Next, select the bot from the list of available bots.
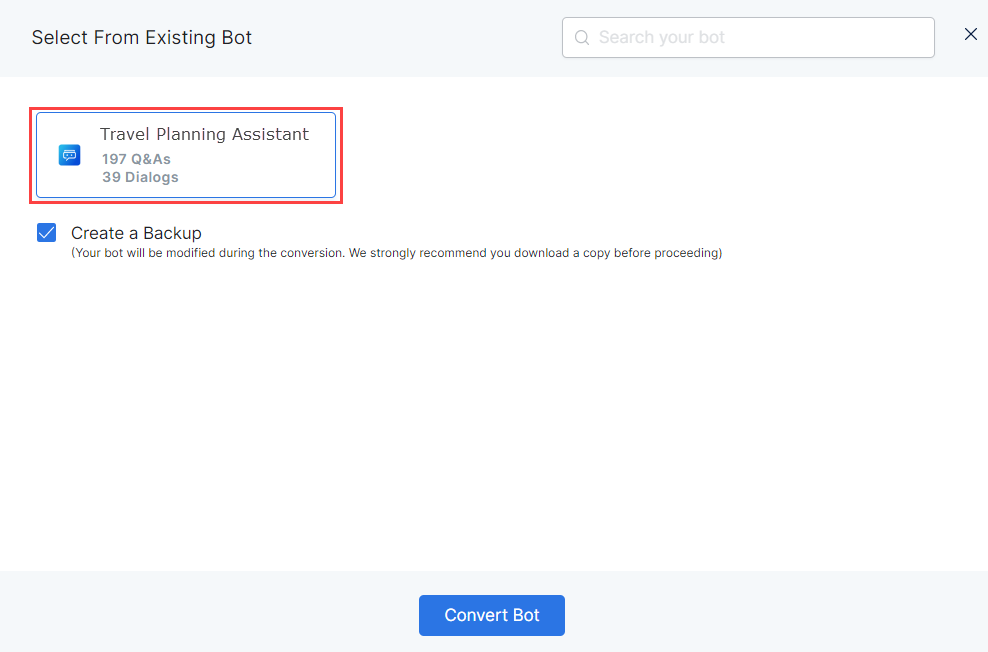
- Check the Create a Backup checkbox. This will create a copy of the bot before conversion. Converting the bot for SmartAssist use will modify it. We strongly recommend backing it up.
Note: The backup might take some time, depending on the size of your bot. Please allow the backup to complete. 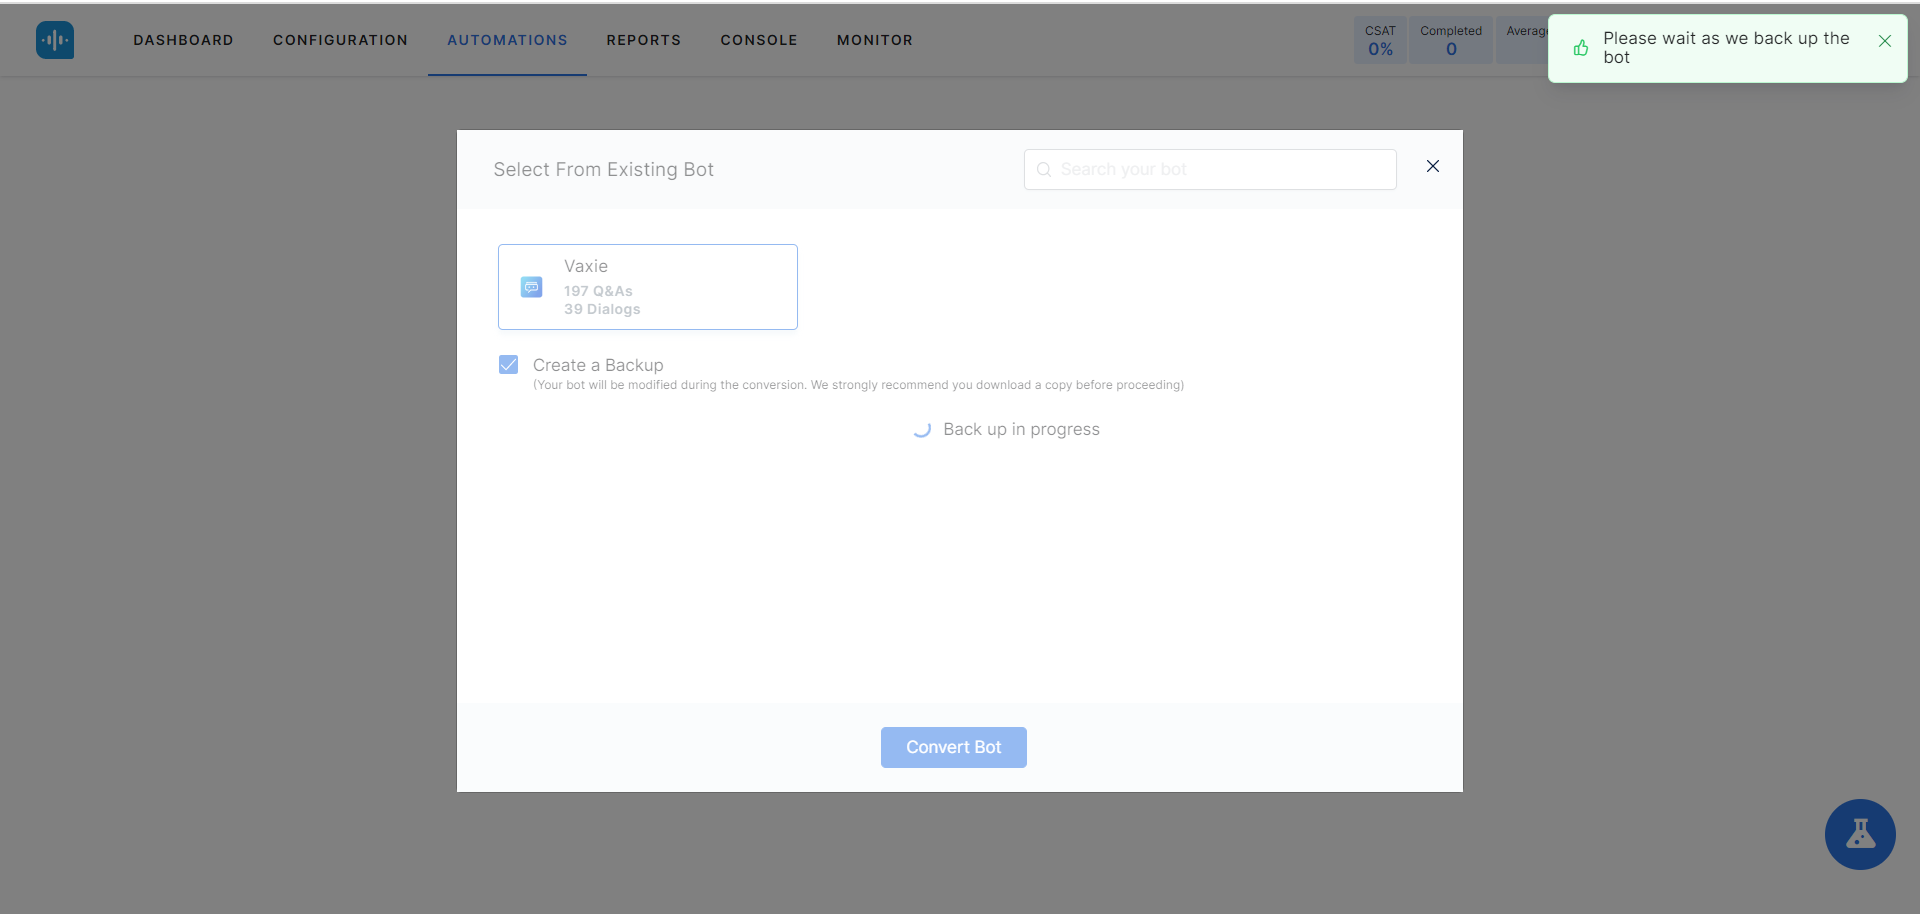
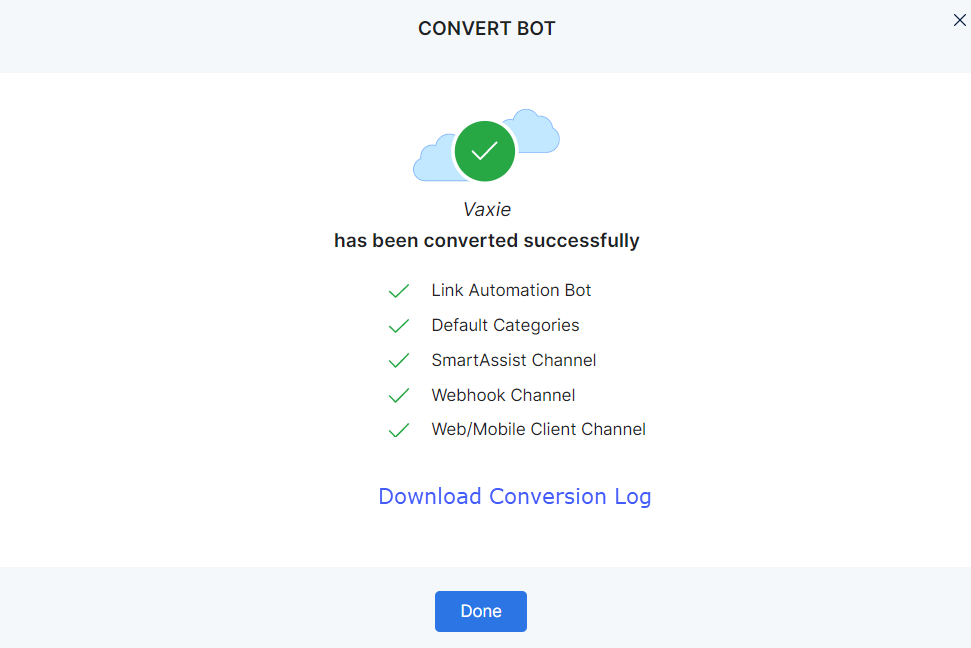
- Once the backup is done and the bot is converted, the process completes successfully. You can download a conversion log for details.
- Once the bot is attached, it is listed under the Automations > Bots section of SmartAssist.
Import a Bot
To import a bot, follow these steps:
- In the Automations > Bots section, click + Add Bot, then select Create a bot from scratch.
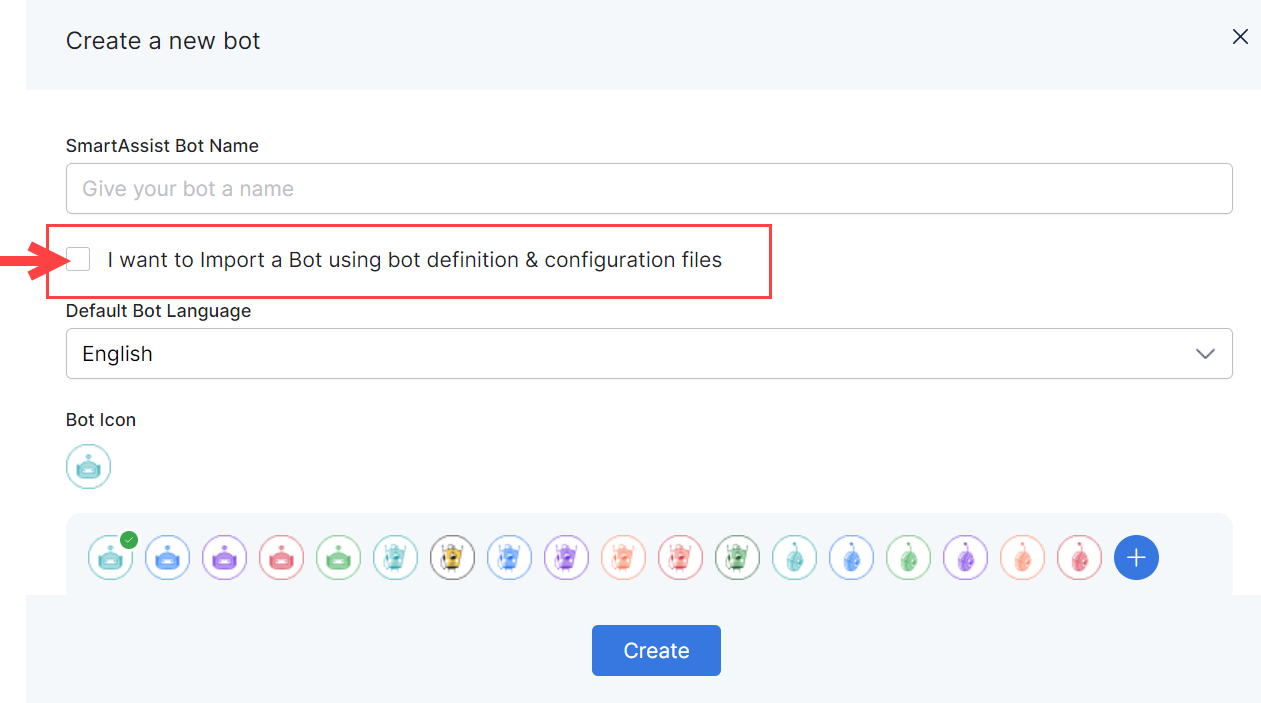
- In the Create a New Bot window, check the box next to I want to Import a Bot using bot definition & configuration files.
- The window now switches to the import options.
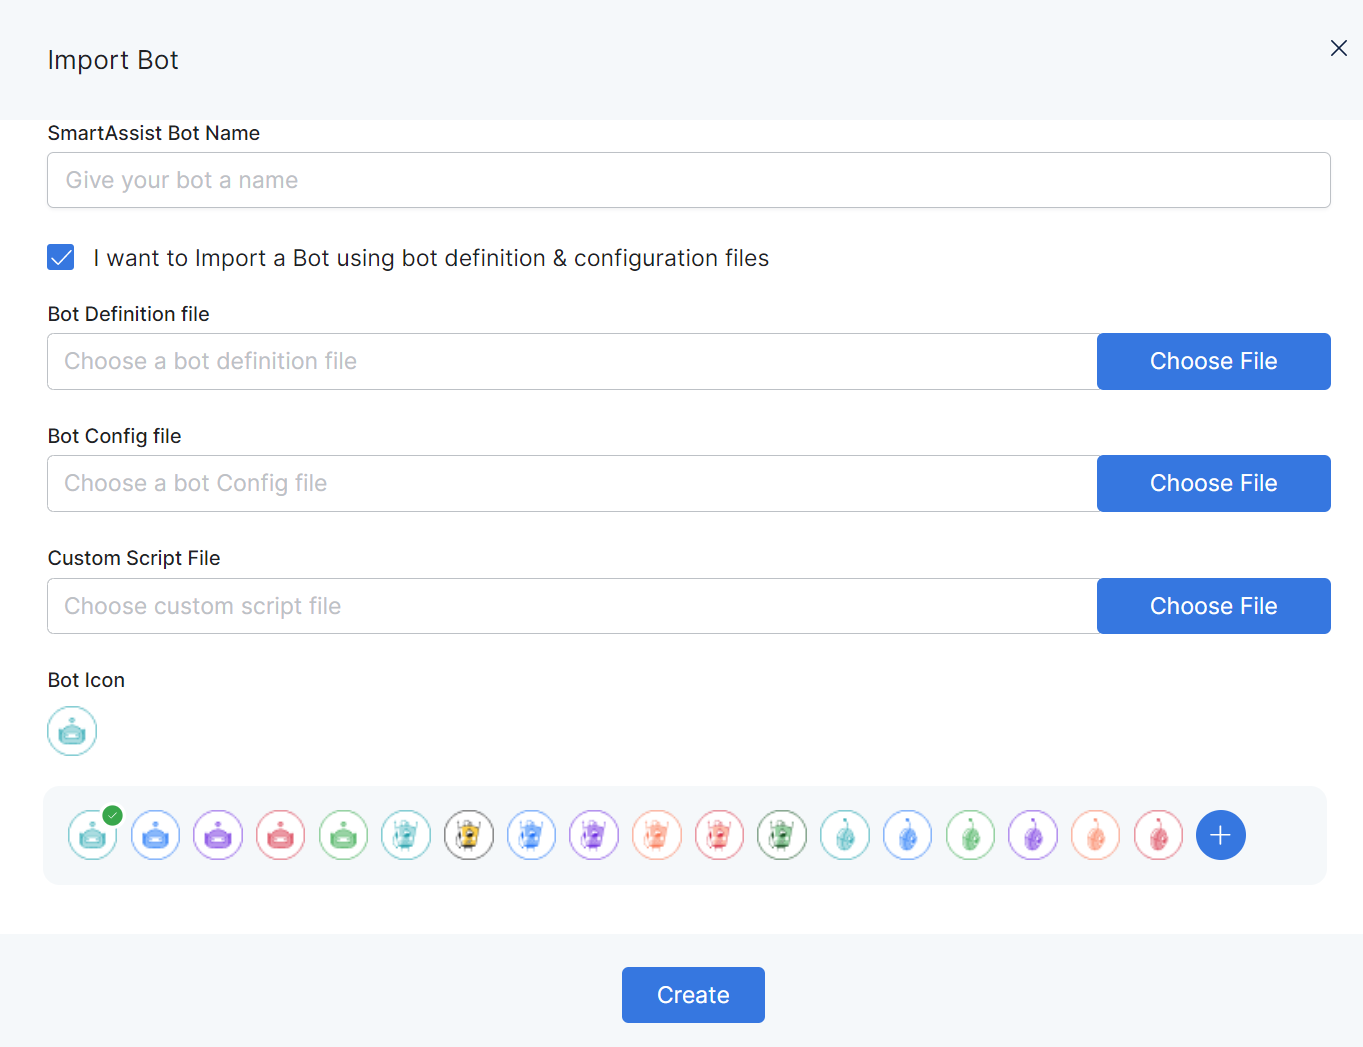
- Enter the SmartAssist Bot Name for your bot (make sure it is the same as the one used within your import files. Select an icon or click the + button to add your .png file.
- To configure the import, you must upload the following files: Bot Definition, Bot Config, and (optionally) a Custom Script.
Note: To obtain these files, you must have previously exported them from within the XO Platform. Learn more about Exporting Platform Bots. - Click Create when you are ready to begin importing. SmartAssist will display information about the progress of your import while it is occurring.
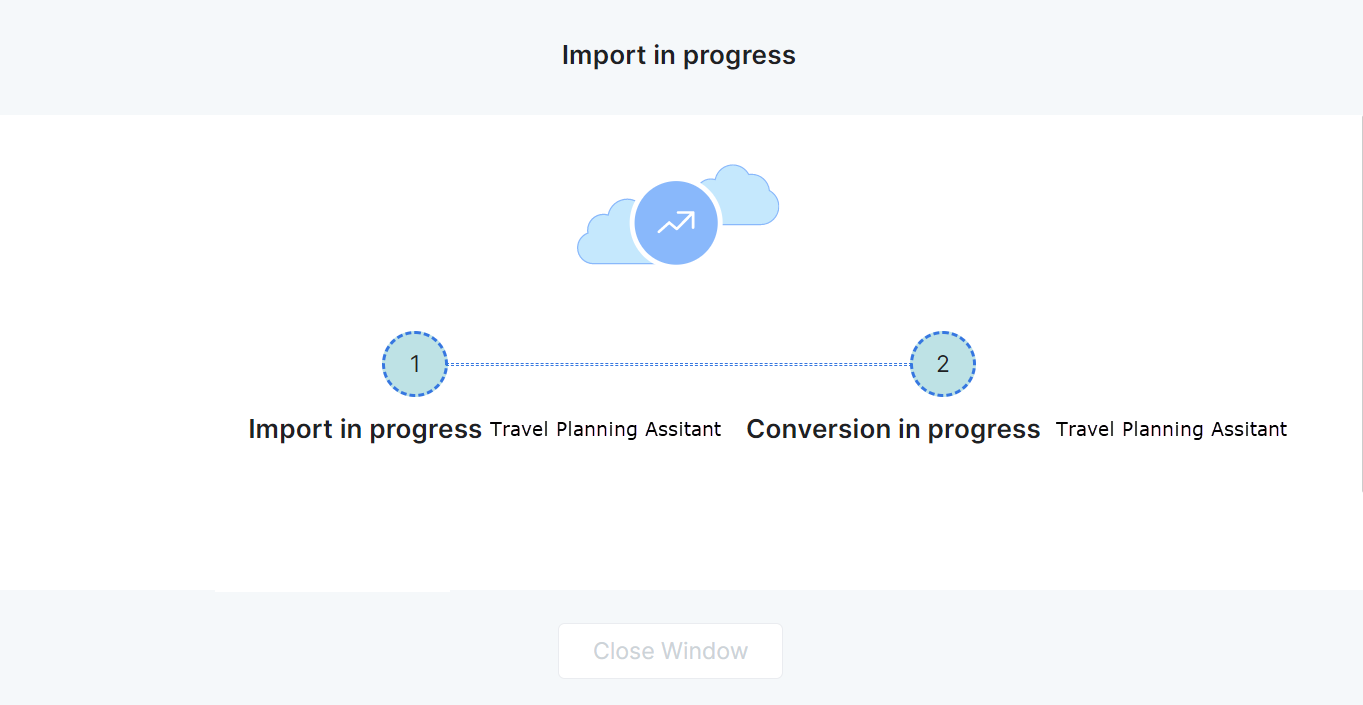
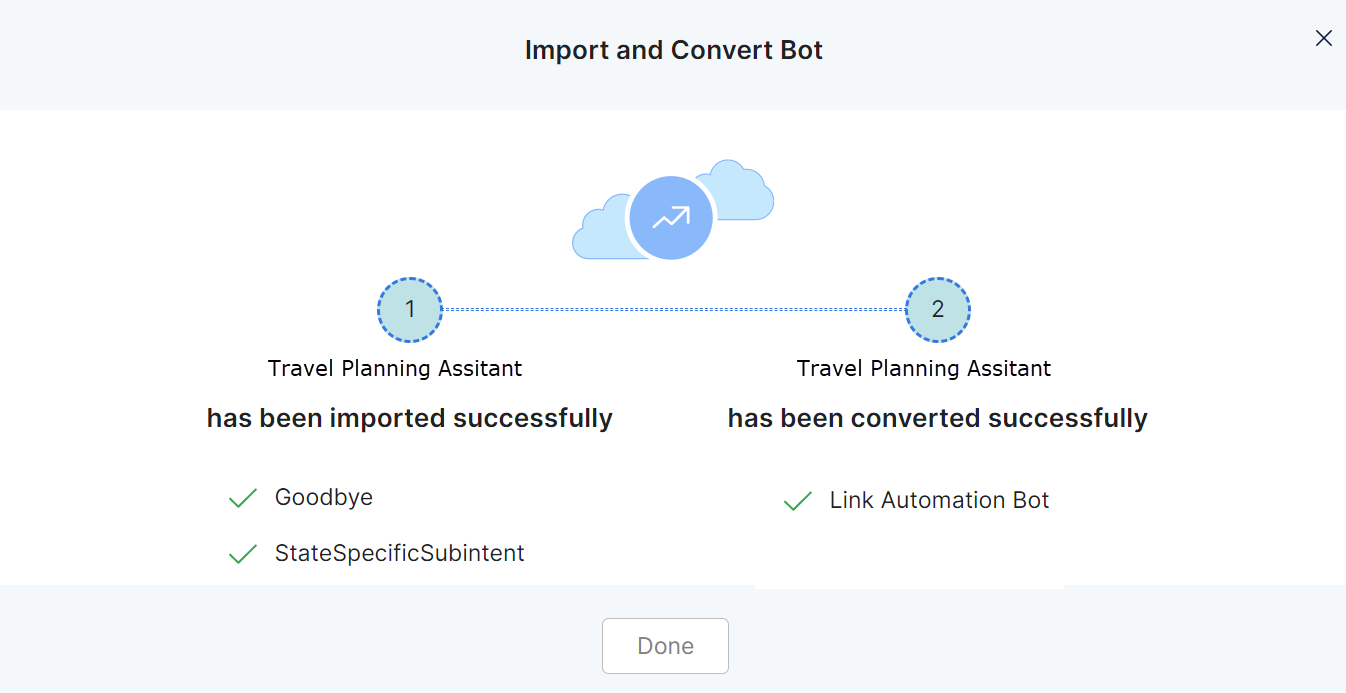
- When the import is completed successfully, click Done.
Note: The import will fail if there are any errors within your source files. Please check the files and fix the errors. An example error is shown in the screenshot below. Contact SmartAssist support if you require assistance. 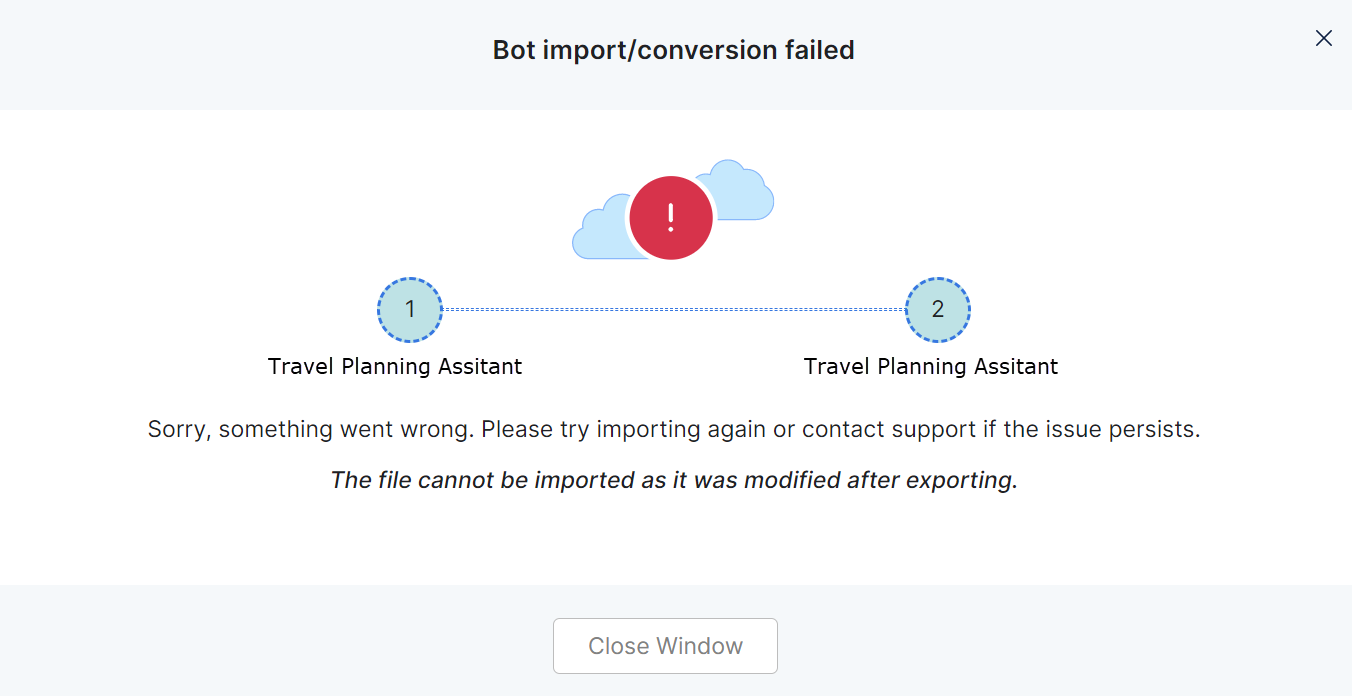
- Once the import is done, the imported bot is listed in the Automations > Bots section of SmartAssist.
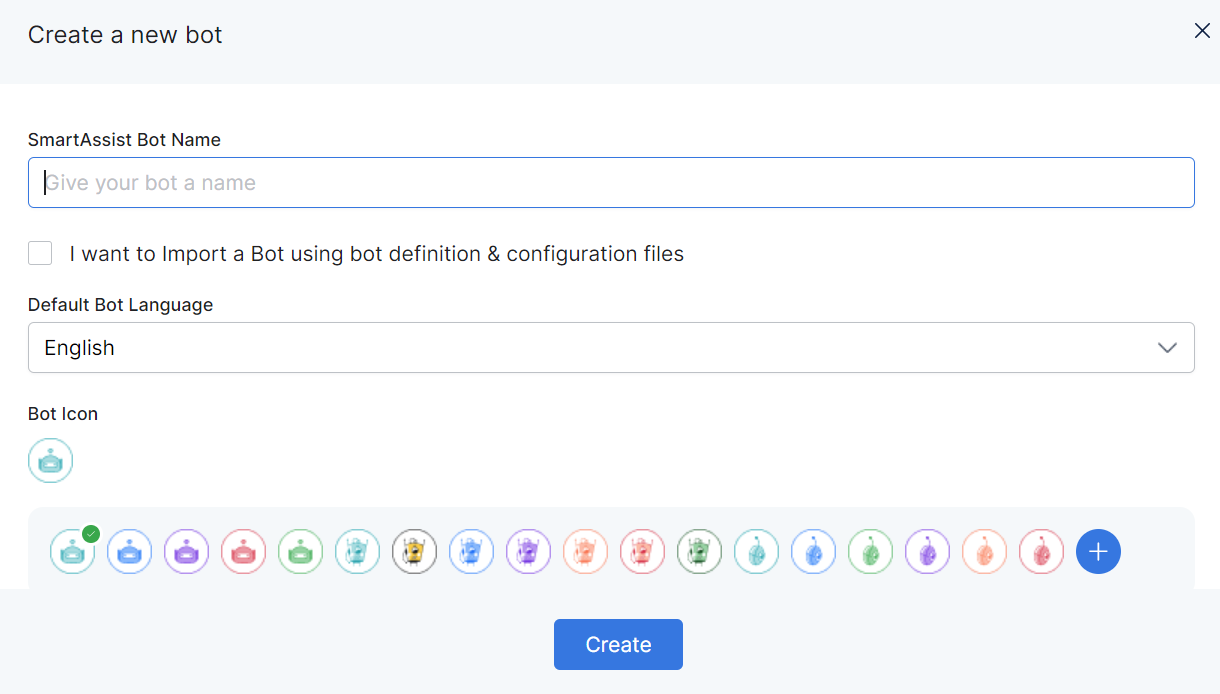
Create a New Bot from Scratch
To create a new bot, follow these steps:
- Go to Automations > Bots and click the Add Bot button.
- In the menu, click Create Bot from Scratch.
- In the Create a New Bot window, provide the SmartAssist Bot Name, select the Default Bot Language from the dropdown list, then choose a Bot Icon. You can select one of the available icon options or upload your .png file using the + button.
- Once the bot is created, it is listed under the Automations > Bots section of SmartAssist.
Configure a Bot
To configure a bot to handle conversation automations, you need to use the Kore.ai XO Platform. This is integrated into SmartAssist and is accessible by going to the Automations > Bots section and clicking on the bot you want to configure.

Once selecting the bot, you can proceed to configure it within the embedded XO Platform interface. Bot configuration is done according to the XO Platform Documentation. Your configuration will be available for SmartAssist automations, for example, within the Flow Designer or for Automated Dialogs in Conversation Use Cases.