
Surveys let you send customers a satisfaction survey after they interact with your business.
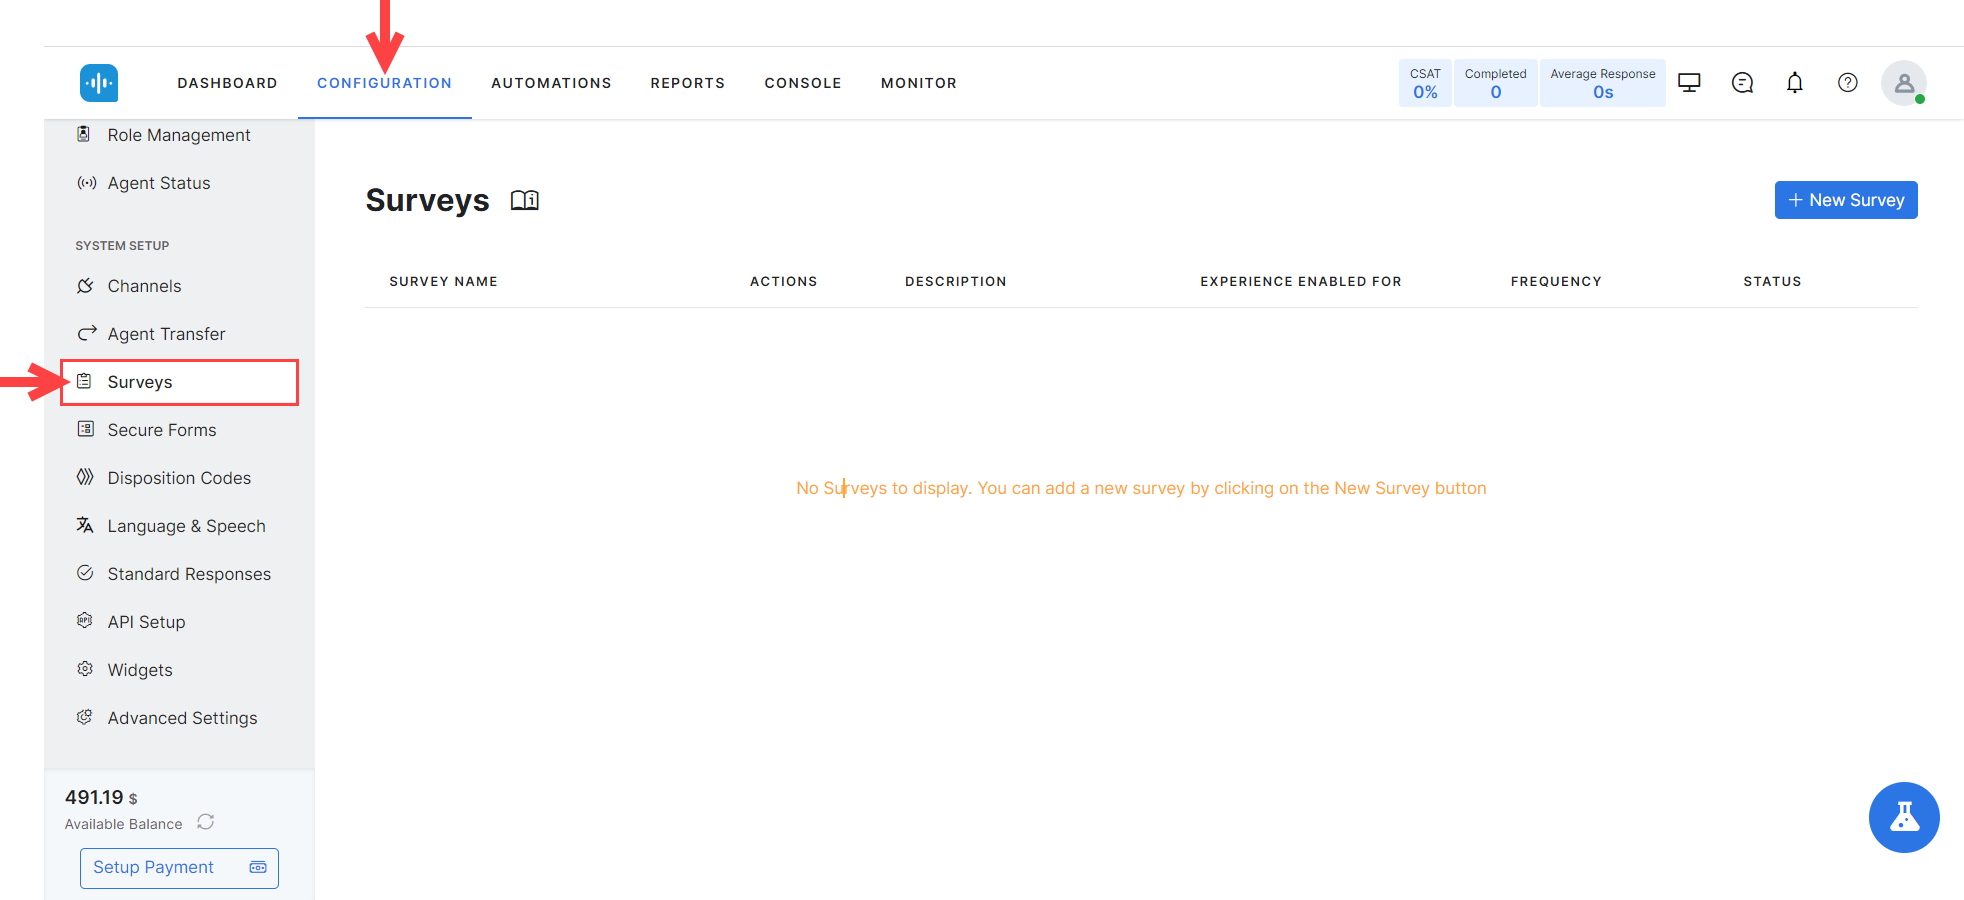
To access surveys, go to Configuration > System Setup > Surveys.
How Surveys Work
The Surveys feature lets you get customer satisfaction ratings after conversations. You can only create one survey, which you can assign to voice, chat, or both.
The survey is sent according to a frequency that you can customize. Once a customer conversation ends, the customer will be asked to provide feedback using a survey form.
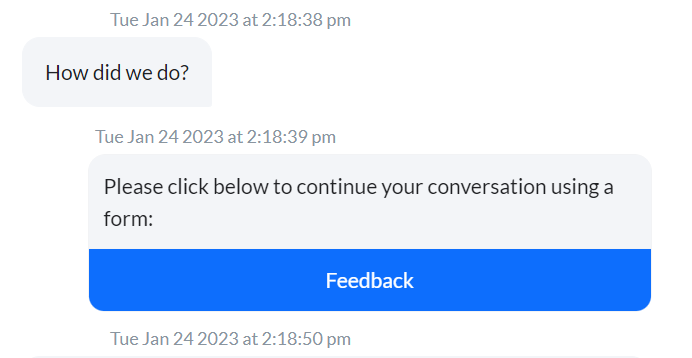
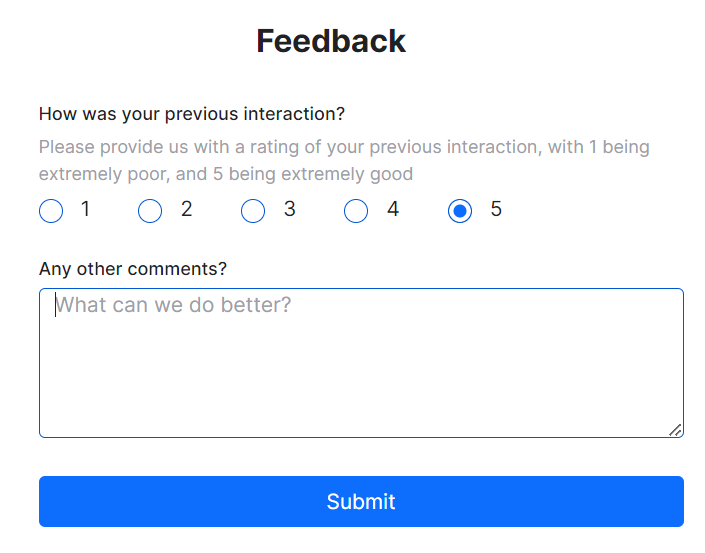
When clicking the Feedback button, customers see a short survey through which they can rate the conversation on a scale from 1 to 5 (1 is extremely poor, while 5 is extremely good.).
The submitted rating reflects in the Dashboard, under the Queues and Agents view, as the Average Satisfaction Rating and Customer Satisfaction by Channel.
The Surveys Live Board
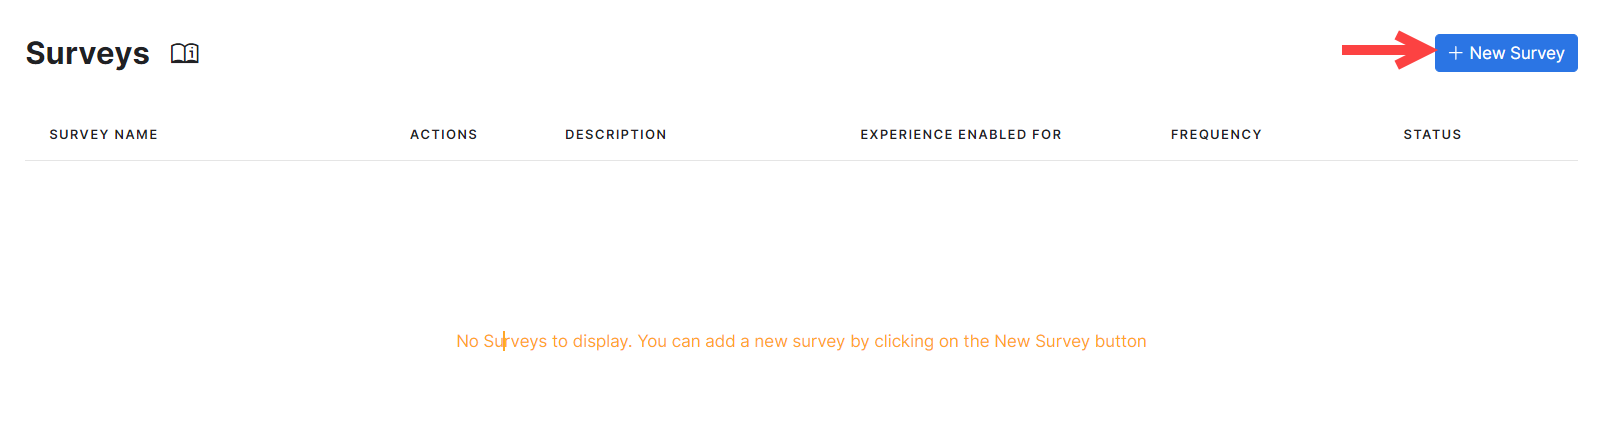
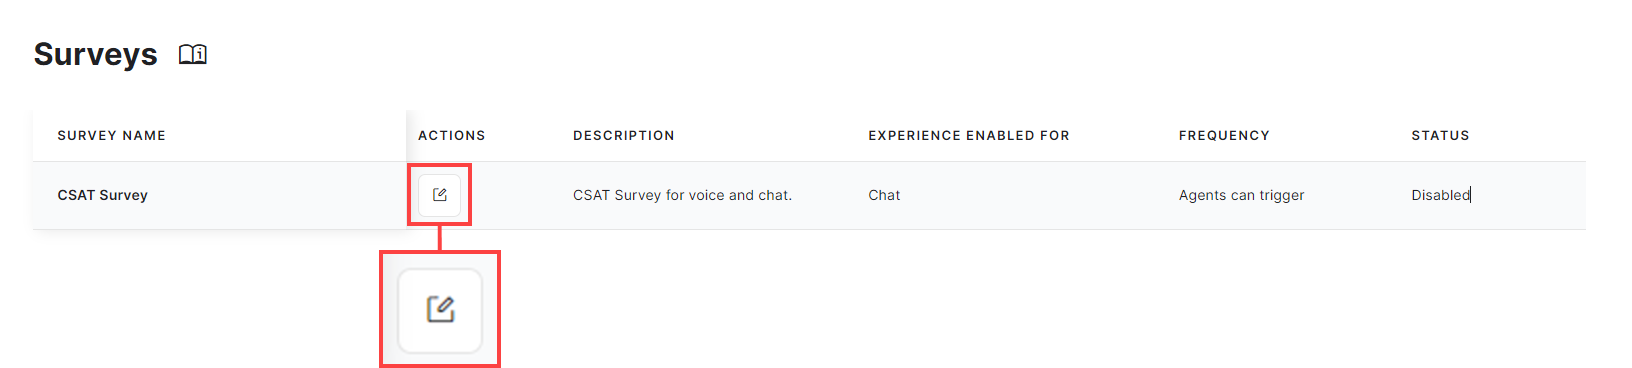
The Surveys section lets you create a survey or view and edit an existing one. In addition, you can find the following information:
- Survey Name: The name given to your survey.
- Actions: An Edit action is available under this column, allowing you to make changes to an existing survey. This action only displays if there is a survey created.
- Description; The description provided for the survey.
- Experience Enabled For: The channels for which the survey is enabled.
- Frequency: The frequency with which the survey goes out:
- None: The survey displays to everyone,
- Show to every nth user: The survey displays once every set number of customers,
- Agents can trigger: The survey only displays to customers to whom agents choose to send it.
- Status: Enabled or Disabled.
Create a Survey
To create a survey, follow these steps:
- Go to Configurations > System Setup > Surveys.
- In the Surveys section, click the + New Survey button.
- In the New Survey window, configure the following:
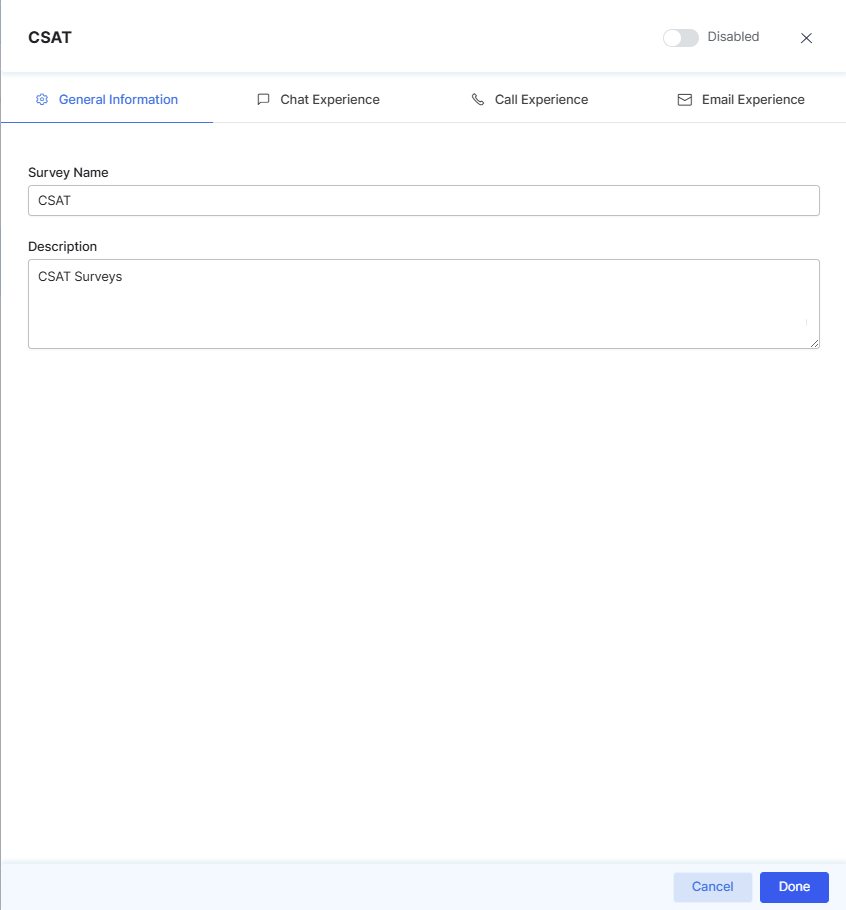
General Information
Under General Information, provide information for the following mandatory fields:
- Survey Name: The name by which to identify the survey.
- Description: A short description of the survey.
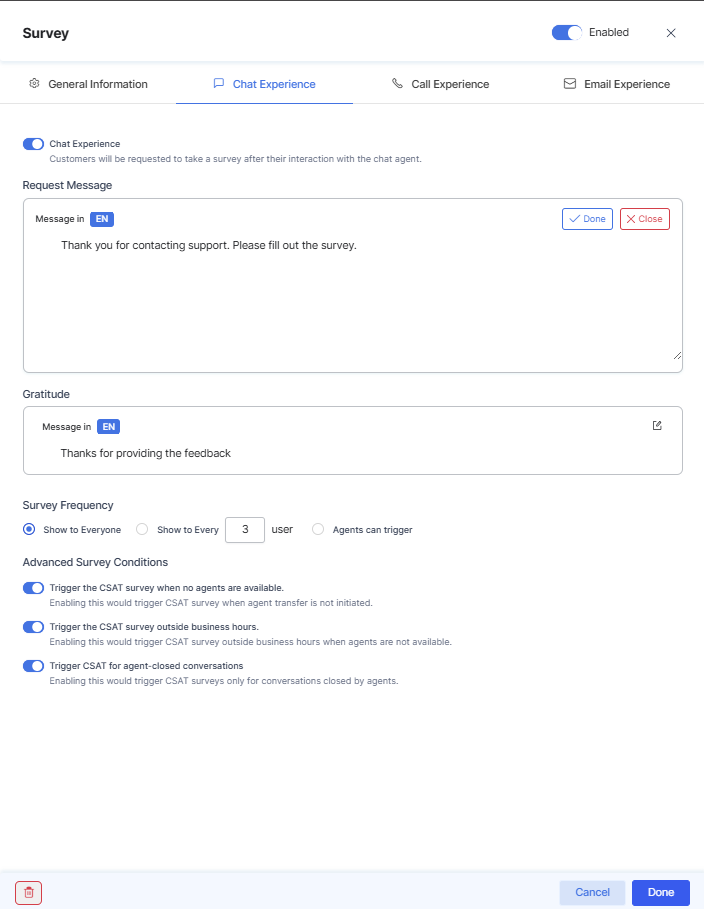
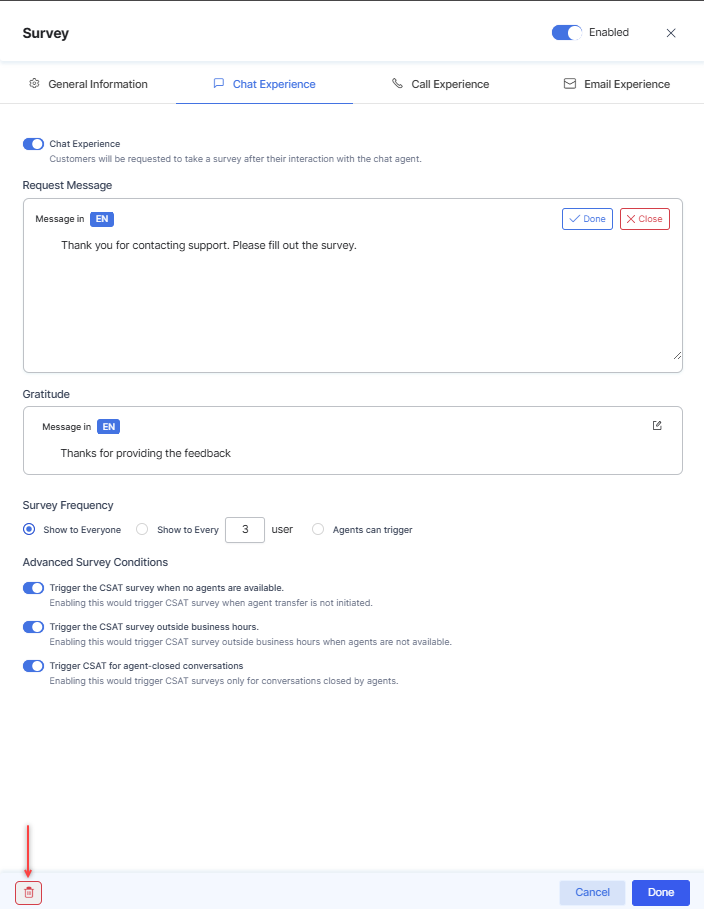
Chat, Call, and Email Experience
The Chat, Call, and Email Experience tabs provide access to the following features:
- Click the Chat, Call, or Email Experience tab.
- Enable the Chat Experience, Call Experience, or Email Experience to request customers to take the survey.
- Configure the Request and Gratitude messages that appear to customers before and after they take the survey.
- Choose the message language, type the message in, then click Done.
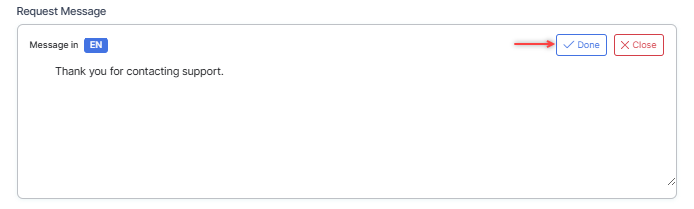
- Choose the message language, type the message in, then click Done.
- Set the Survey Frequency by configuring the following options:
- Show to Everyone – Select this option to make the survey visible to all the customers.
- Show to Every nth User – Select this option to make the survey visible to every nth user. For example, if you enter 2 in the input textbox, the survey will appear to every second customer.
- Agents can Trigger – This will let the agents trigger the survey.
- Advanced Survey Conditions
- Trigger the CSAT survey when no agents are available: Triggers a CSAT survey when agent transfer is not initiated.
- Trigger the CSAT survey outside business hours: Triggers a CSAT survey outside business hours when no agents are available.
- Trigger CSAT for agent-closed conversations: Triggers CSAT survey for conversations closed by agents.
- Turn on the toggle at the top right corner to ensure the survey is active.
- Click Done to begin sending it to customers. If you do not want to do so, leave the survey disabled.
Edit a Survey
To edit a survey, follow these steps:
- In the Surveys section, click the Survey Name or the Edit icon.
- Make the required changes in the survey window, then click Done.
Delete a Survey
To delete a survey, follow these steps:
- In the Surveys section, click the Survey Name or the Edit icon.
- In the survey configuration window, click the Delete (bin) button on the left side of the bottom toolbar.
- Confirm your choice.