
The Manage Layout option allows you to add, delete, and switch between different layouts. While creating a new layout, you can add customizable widgets to the interface.
Notifications
Notifications are real-time alerts that keep agents informed about crucial events and updates. Notifications play a key role in enhancing the user experience by improving responsiveness, productivity, and workflow management. By promptly alerting agents about New Conversations, Message from other Agents, Error prompts, Transfer Request, etc., notifications ensure that agents can prioritize their workload effectively and deliver swift, personalized customer service.
The Notifications icon helps you choose preferences to get notified about upcoming events, agent responses, and the type of sound generated upon receiving updates.

Notifications is compatible with the following browsers:
- Google Chrome
- Mozilla Firefox
- Microsoft Edge
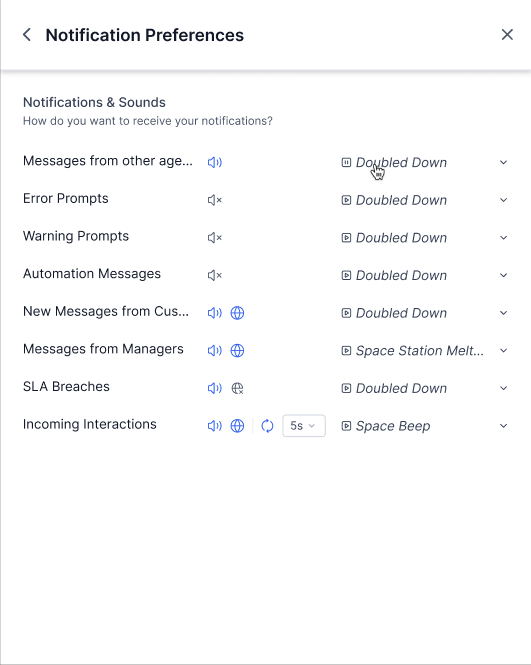
Steps to manage notifications:
- Click the Bell icon on the top right corner and click Notifications from the dropdown.

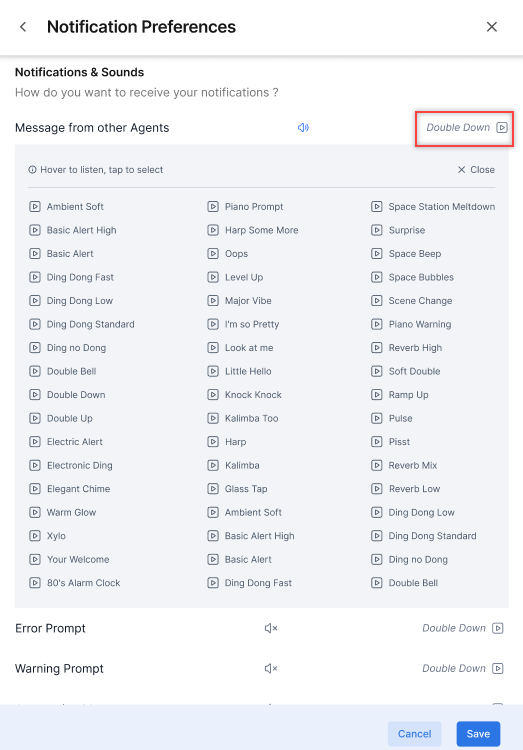
- Click the Settings icon to view the available options:

- Notifications can be managed for the following:
Repeat Notifications
Repeated notifications for incoming interactions at configurable intervals can be enabled to ensure prompt attention to incoming conversations and transfers. This helps to:
- Minimize missed interactions.
- Improve response times.
- Enhance overall customer satisfaction and SLA compliance.
Enable Repeat Notifications
Steps to enable repeat notifications for incoming interactions:
- Click the Repeat icon beside Incoming Interactions to enable it.
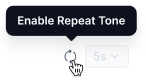
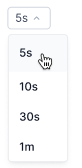
- The default timer is set to 5 seconds. Select the duration from the dropdown.
 Click Save to update the notification settings.
Clicking the Build Bot Status option displays whether the bot is active or not.

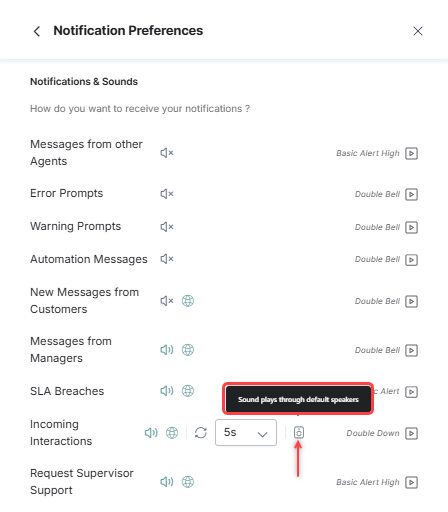
Incoming Call Notification From Speaker When Headphones Are Connected
Agents can receive incoming calls and interaction notification sounds through their system speakers or monitor, even when a headset is connected. The conversation audio continues through the headset or default system audio device, ensuring clear separation between alert sounds and ongoing communication.
This option appears only when the ‘Incoming Interactions’ permission is enabled. Learn more.
It affects notifications for voice calls, consult calls, chats, and other events under the Incoming Interactions category.
When enabled, the notification sound plays on both the system speaker and the headset.

When disabled (default), the sound follows the default audio route (usually the headset).
User Diagnostics
User diagnostics systematically assesses and analyzes network connectivity and device permissions to identify issues, optimize service delivery, and enhance user satisfaction. Using real-time monitoring, this tool helps resolve problems efficiently, improving agent performance and ensuring a seamless customer experience.
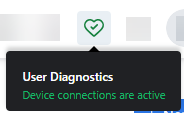
The User Diagnostics (♡) icon is at the top right corner of the SmartAssist application.
![]()
When an agent logs in to SmartAssist, the browser asks for microphone and speaker permissions. If the permissions are granted, the user diagnostics (♡) icon will appear green. Hovering over the icon displays “Device connections are active”.
If device permissions are denied, the user diagnostics (♡) icon will appear orange. A pop-up appears, prompting you to enable the settings.
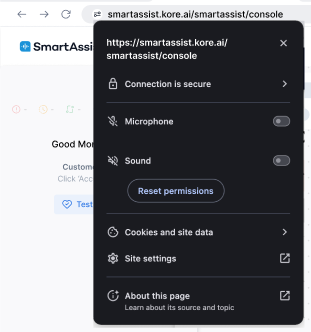
Hovering over the icon displays “Device permissions are missing”.
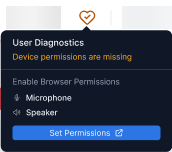
Click the Set Permissions button to configure the device permissions.

Agent Diagnostics
Clicking the User Diagnostics (♡) icon displays the Agent Diagnostics page. There are three sections on the agent diagnostics page:
- Audio Device,
- Video Device,
- Connectivity.
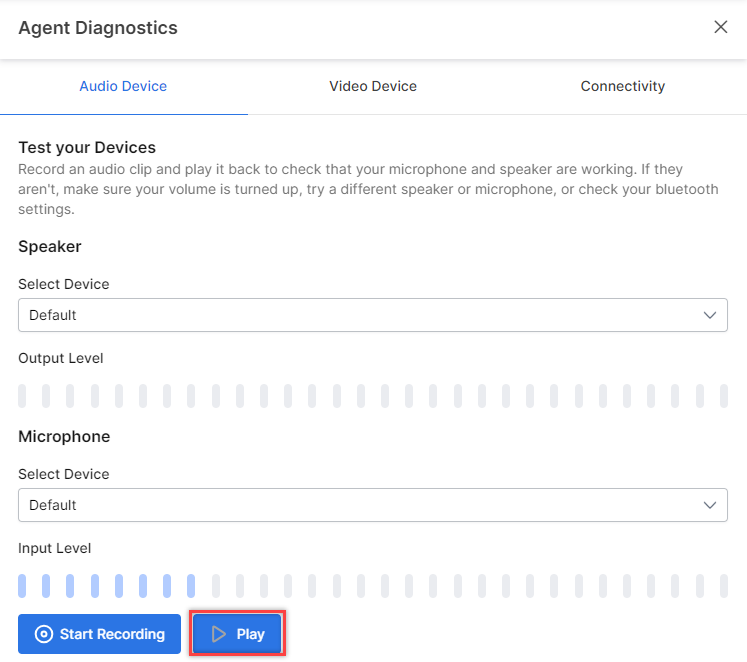
Audio Device: You can check your microphone and speaker by recording and playing an audio clip.
Steps to check your audio device:
- Select the Speaker and Microphone from the dropdowns on the Audio Device tab.
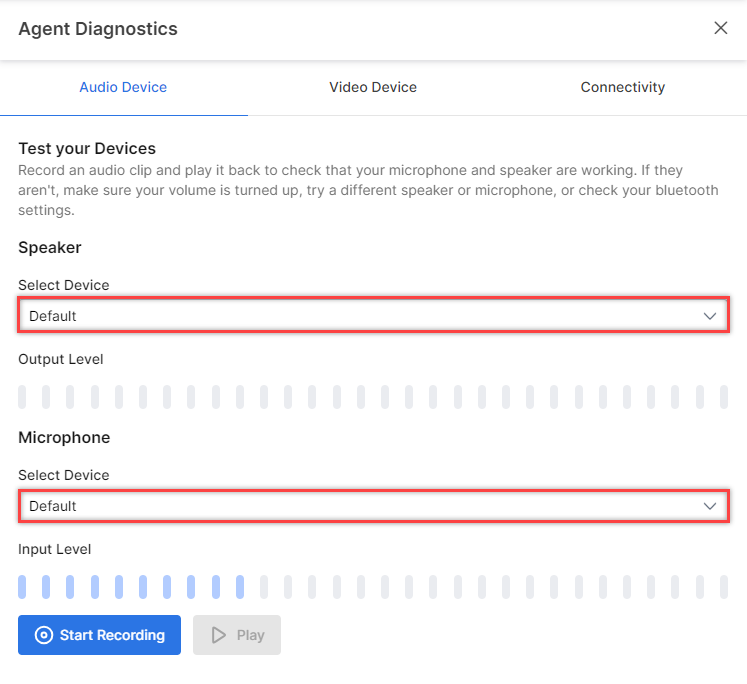
- Click Start Recording to record the audio.
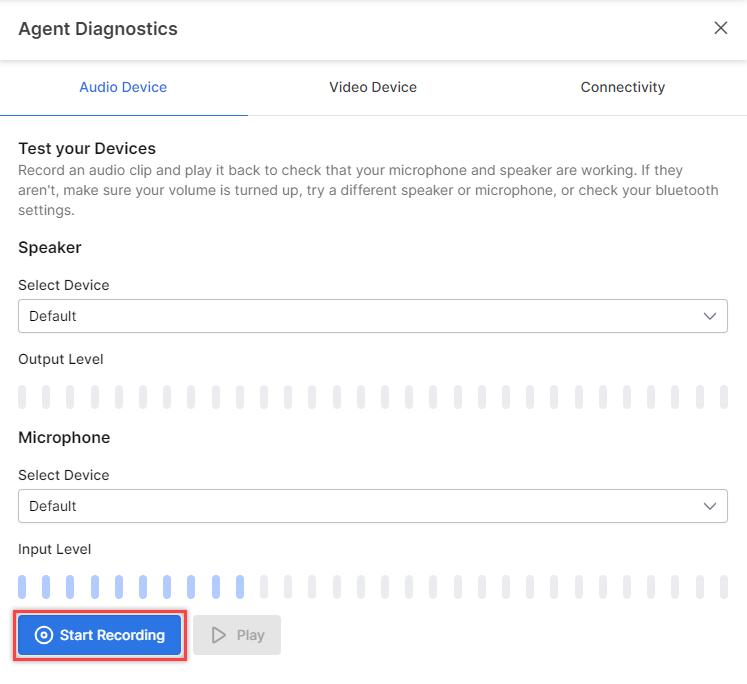
- You can record up to 12 minutes of audio. Click Stop Recording to stop the recording.
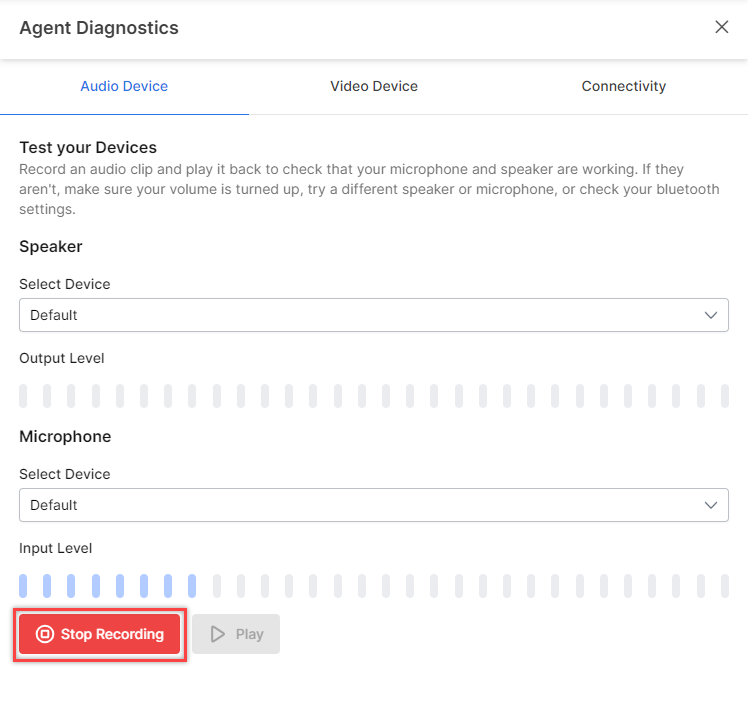
- Click Play.
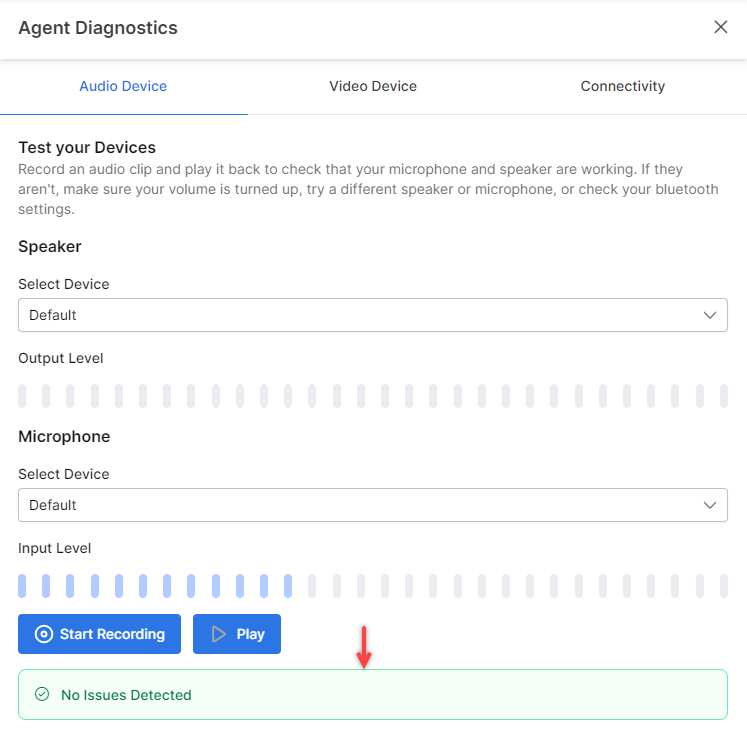
A confirmation message is displayed if no issues are detected with the audio device.
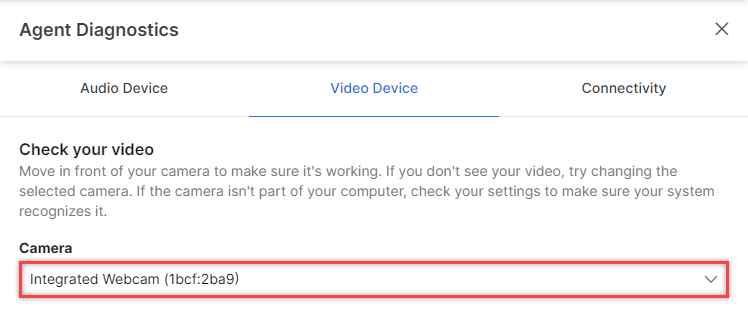
Video Device: You can check your camera by seeing if your video is visible.
Steps to check your video device:
- Select the Camera from the dropdown on the Video Device tab.
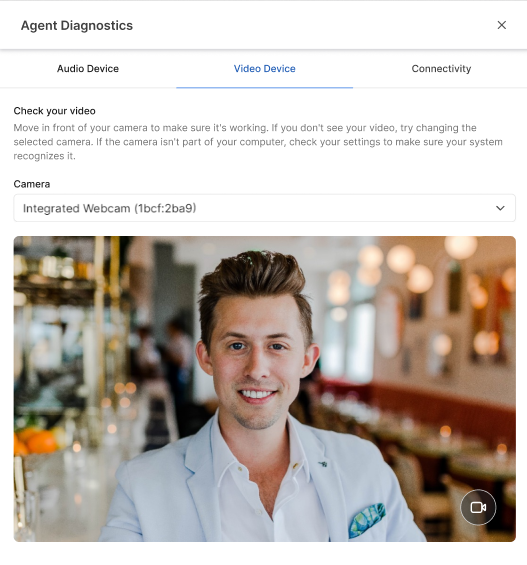
- Check if your video is visible. If yes, there are no issues with your video device/camera.
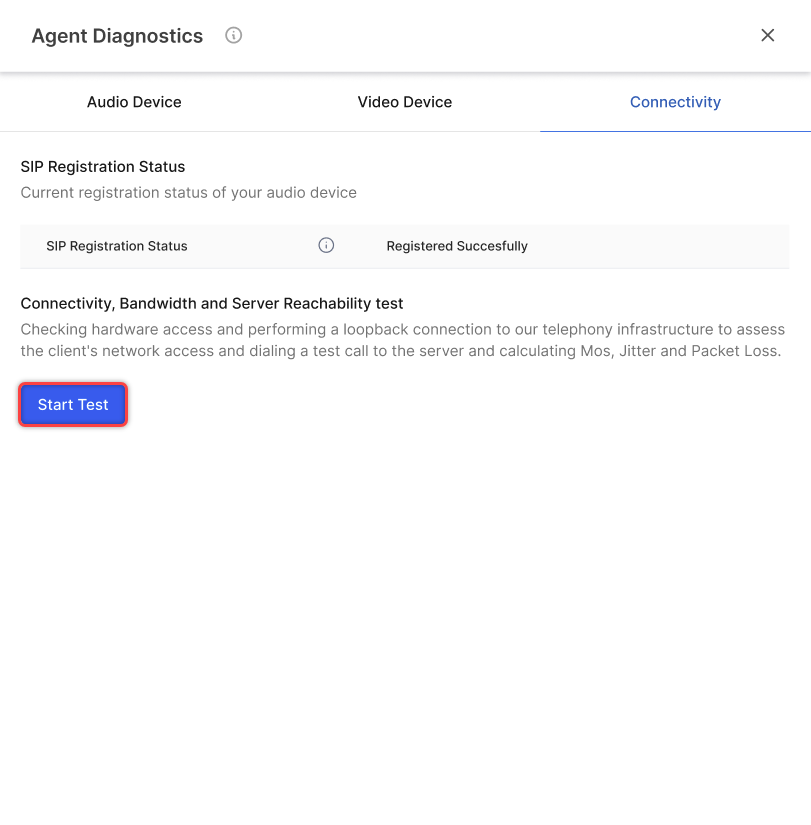
Connectivity: You can evaluate the client’s network access by checking the connectivity, bandwidth, and server reachability through a loopback connection to our telephony infrastructure.
SIP Registration Status: SIP registration connects a device (phone) to a service provider’s network, allowing the phone to place and receive calls. The status allows agents to verify the connection health and troubleshoot registration issues independently. The SIP registration is renewed periodically.
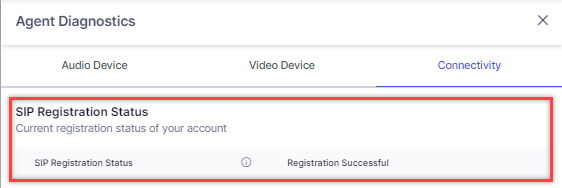
The following SIP registration statuses are possible:
| SIP Registration Status | Description | Rationale |
| Registration Successful | SIP registration is successful | The device is connected to the network, and calls can be made and received. |
| Not Registered | SIP is not registered | This can be due to connectivity issues and can be resolved by refreshing the Agent Console page or logging out and logging in on SmartAssist. |
| Error [Details] | Error in registration | This can be due to device or connectivity issues. Clicking the error message shows the error details. For example, Please verify the network connection or Reconnect device. |
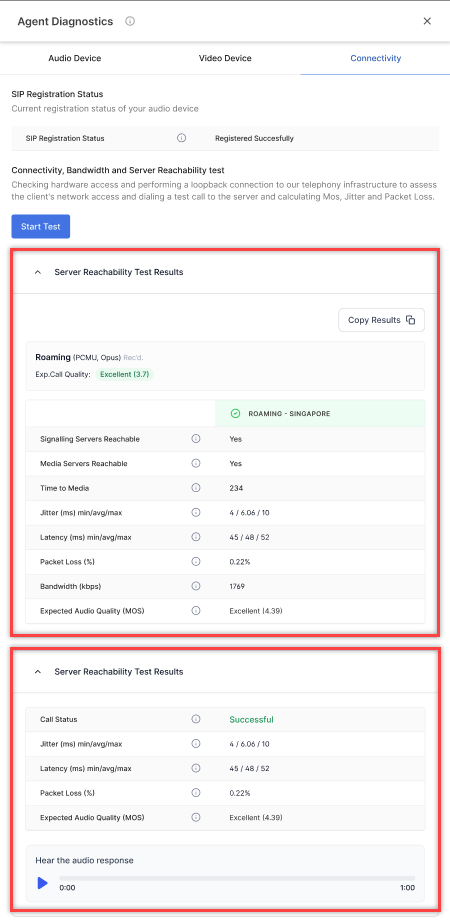
Connectivity, Bandwidth, and Server Reachability Tests: Users can run a connectivity test to verify STUN/TURN results, ensuring their network supports real-time communication. They can also initiate a test call that sends a static audio stream and returns metrics such as jitter, packet loss, and MOS, helping to assess call reachability and audio quality.
Administrators can view detailed test results to diagnose and resolve connectivity or audio issues efficiently.
- Click Start Test.
The progress is displayed.
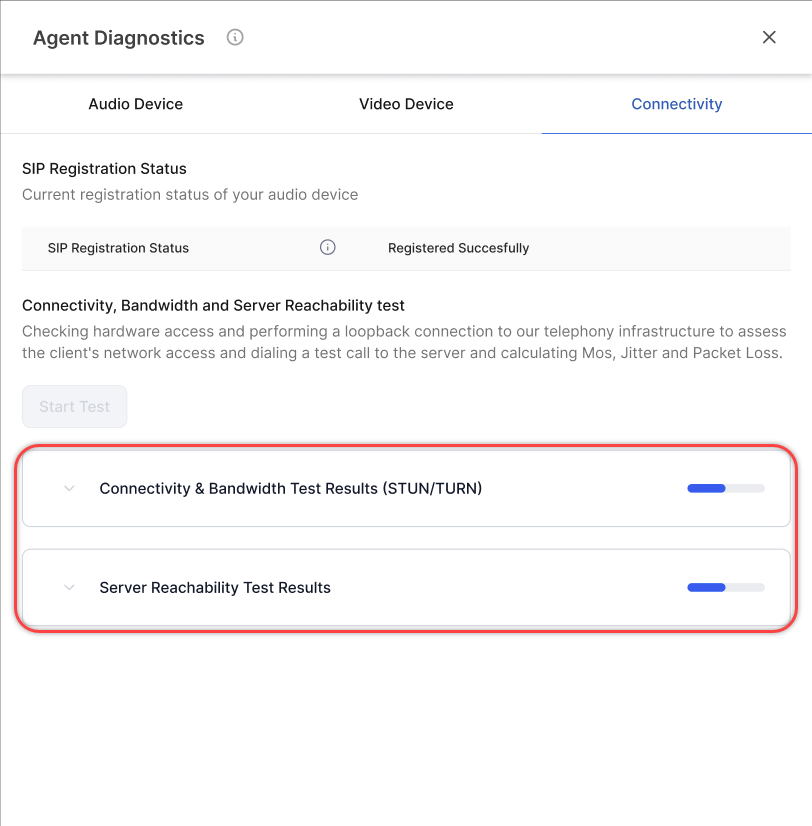
- Once the test is completed, the detailed test results are displayed. You can copy the result by clicking Copy Results.
Connection Handling
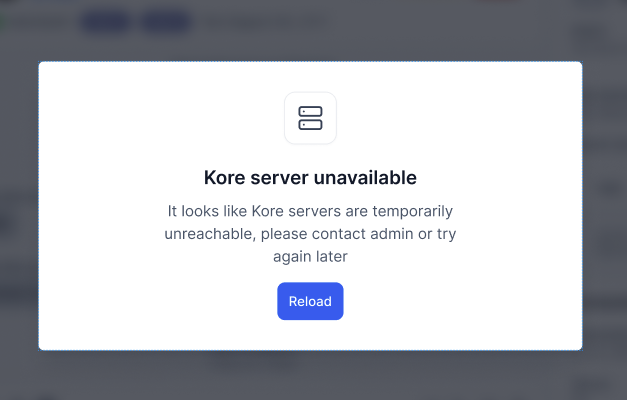
If the internet connection is lost, a message appears at the top of the agent console page.

The system automatically attempts to reconnect to the network. If it fails after several tries, a message instructs you to reload the page.
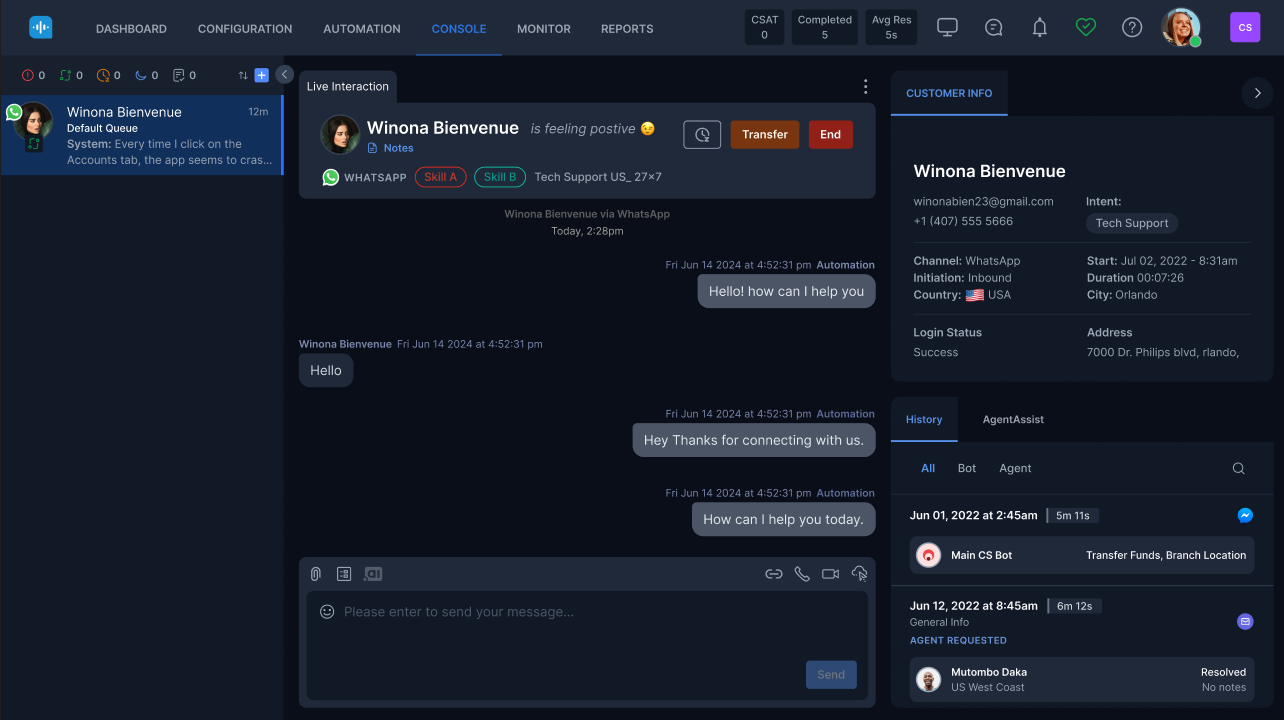
Features
The three monitoring icons, CSAT, Completed, and Average Response, provide details on the completed tasks, in-progress conversations, response time, and customer feedback.
CSAT (Customer Satisfaction) is triggered under the following conditions:
- In all digital and voice channels, both for user-side and agent-side chat termination:
- Out of Hours of Operation: CSAT is triggered when a conversation occurs outside of the designated hours of operation.
- Queue Max Timeout: CSAT is triggered when a conversation remains unaccepted or unassigned to any subsequent agents due to reaching the maximum queue timeout.

Agent Status, Profile, and Dark Mode
The Agent Profile icon is located on the top-left corner of the console. Clicking the Agent Profile icon displays a drop-down list with the following Options:
- STATUS: The STATUS icon allows agents to show customers whether they are available for the conversation or not.

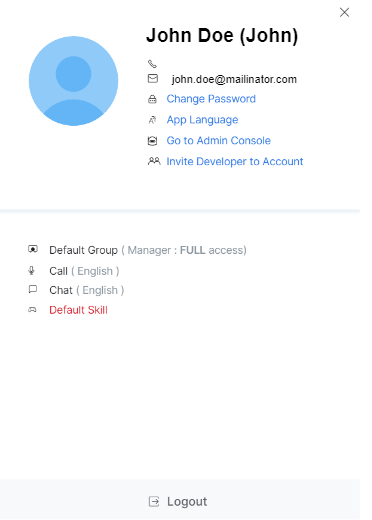
- Profile: Displays a window that allows an agent to change their login and contact details.
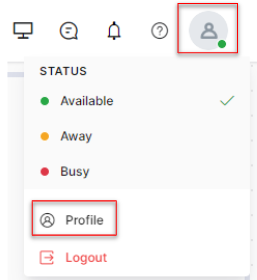
- Dark Mode: Many users find dark mode environments easier on the eyes and less straining during long working hours. The dark mode option in the agent console enhances user comfort and offers a more visually appealing experience, catering to the preferences of those who work extended hours. You can activate dark mode for the agent console by turning on the Dark Mode toggle.
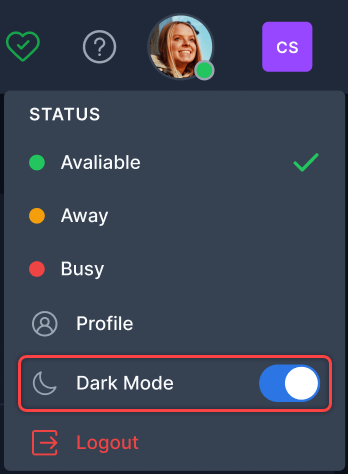
The agent console is displayed in dark mode.
- Logout: Allows an agent to exit SmartAssist.
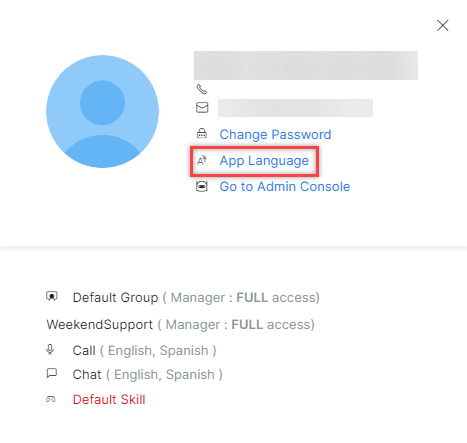
App Language
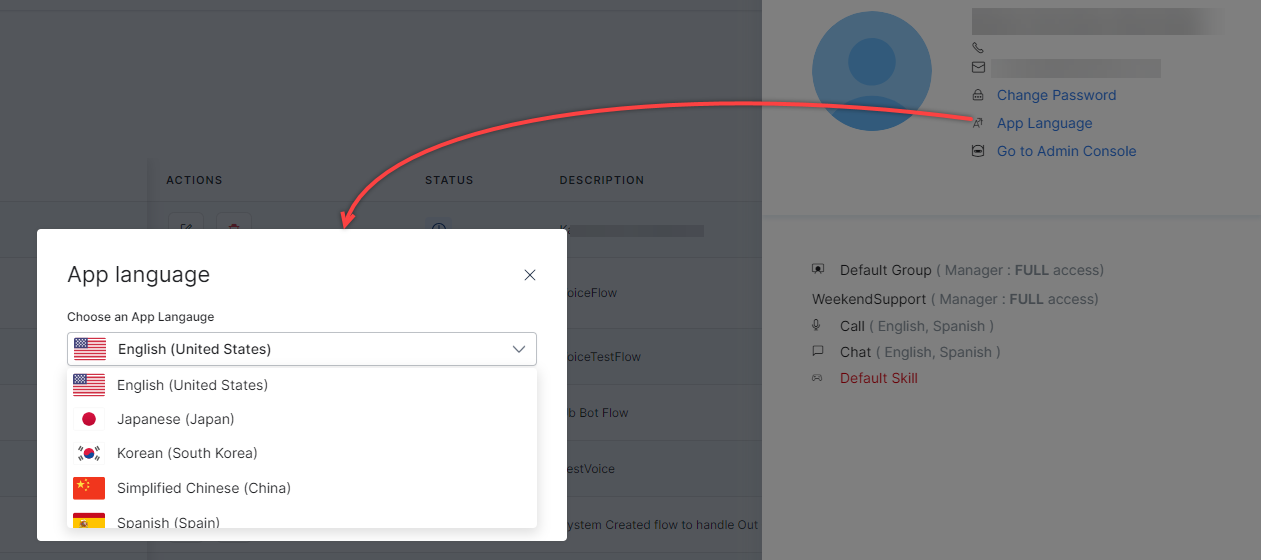
You can choose the language for the SmartAssist desktop application from the following language options:
- English (United States)
- Japanese (Japan)
- Korean (South Korea)
- Simplified Chinese (China)
- Spanish (Spain)
- French (France)
- Italian (Italy)
- German (Germany)
Steps to choose the app language:
- Click App Language.
- On the App language pop-up window, choose the language.
- Click Save.
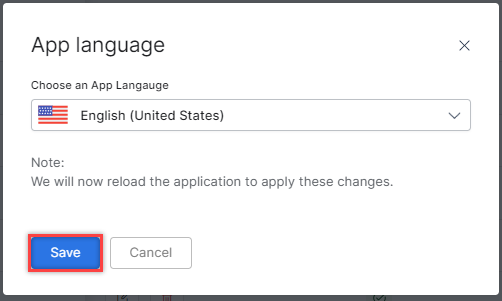
The app language is updated and a confirmation is displayed.
Add Users to Multiple Accounts
You can add all users (Agents/Supervisors/Administrators) to multiple accounts.
During Sign-in, the user can choose the account and set it as default.
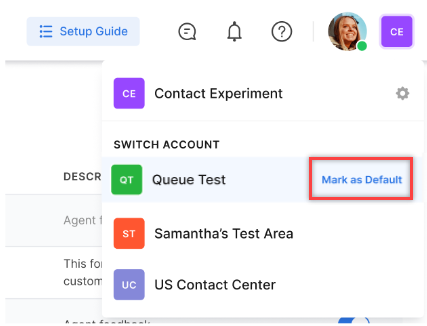
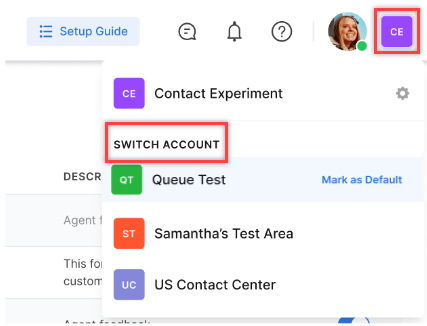
After the user has signed in, they can switch between accounts. The system displays the account name on the top right corner.
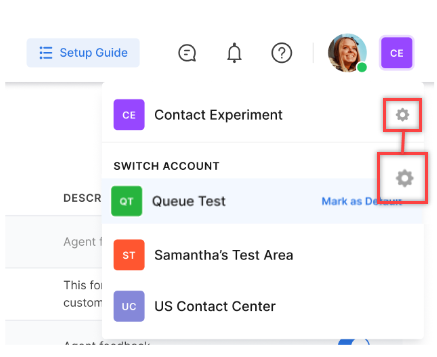
Edit Account
Steps to edit account details:
- Click the Settings icon beside the account name.
- On the Edit Account pop-up window, you can edit the following information:
- Color
- Account Name
- Initials
- Interface Language
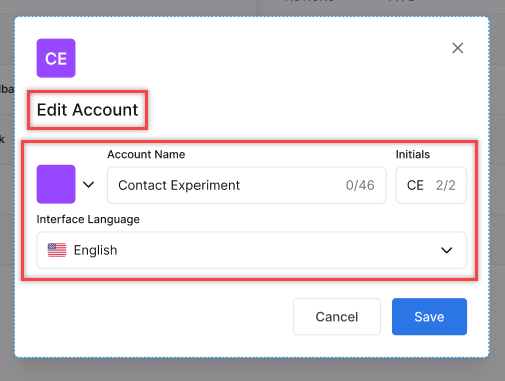
- Click Save to update the account details.

Adding New Layout
To configure the responses under a new layout for a particular conversation, follow these steps:
- Go to Console > Manage Layout > + Create New. A new layout page is displayed with the available widgets on the left-side panel.

- Drag and drop the required widgets to the right side of the layout page.
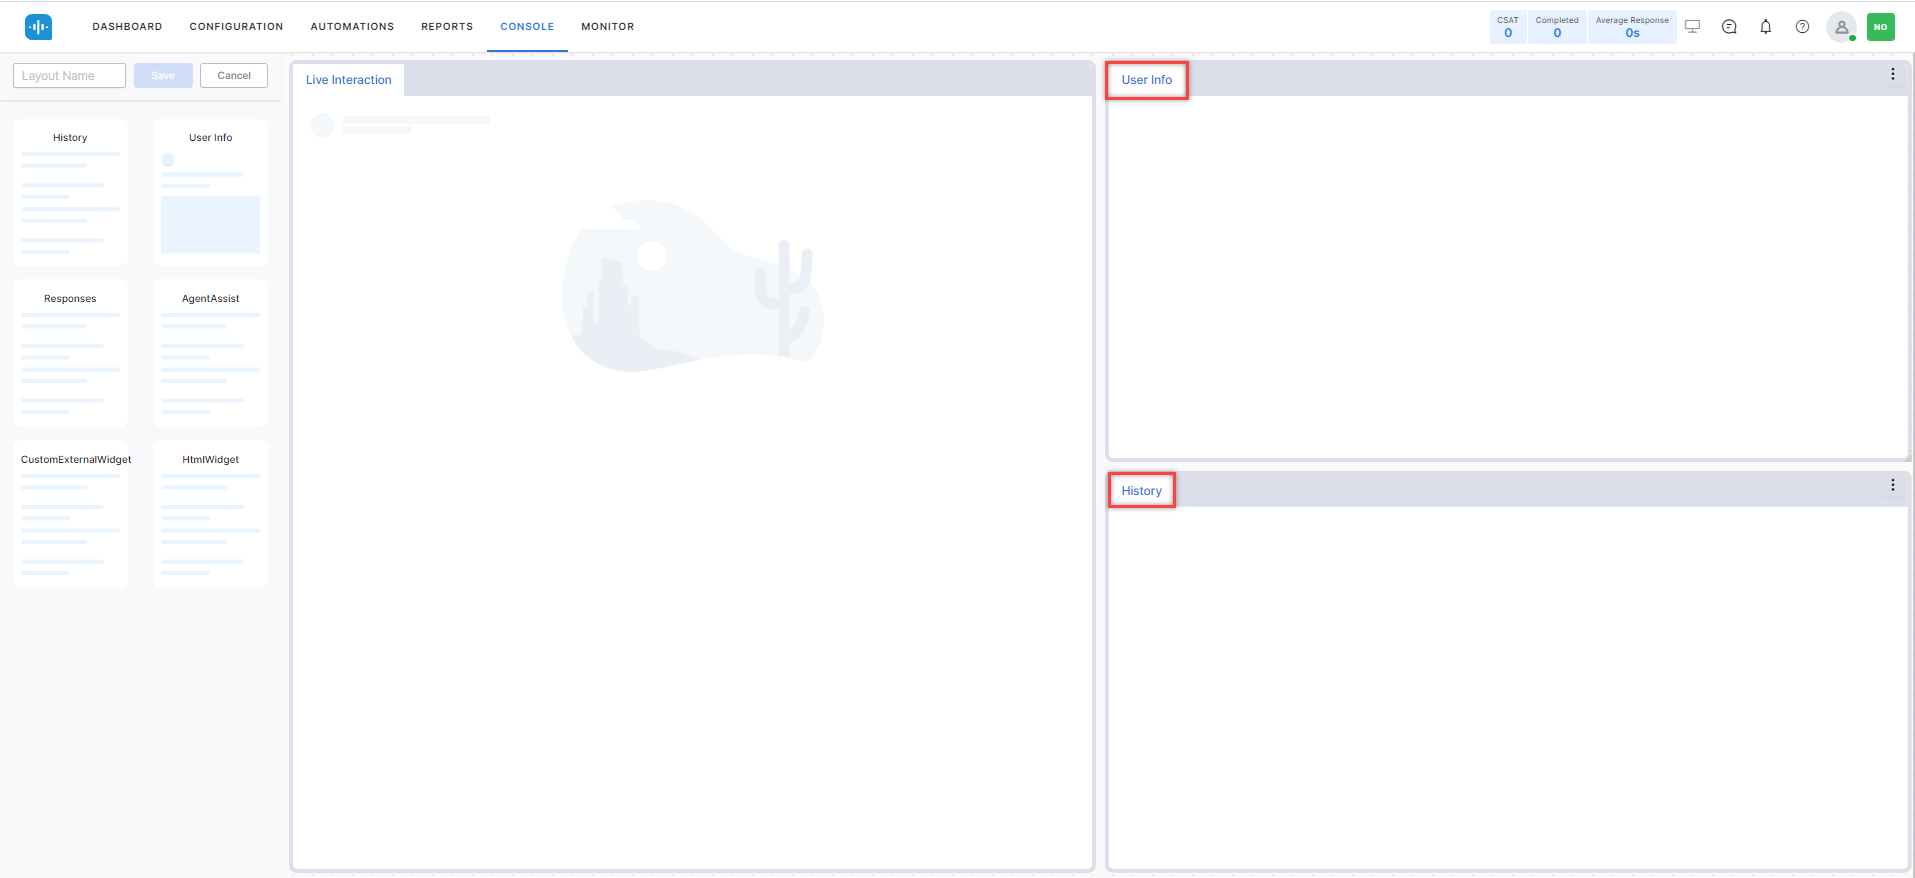
- Enter a Layout Name for the new layout and click Save.

Adding AgentAssist Widget to a Layout
The below example illustrates the process of adding the AgentAssist widget to a layout.
To migrate your existing AgentAssist v1 layout to AgentAssist v2. Refer to AgentAssist Widget FAQ.
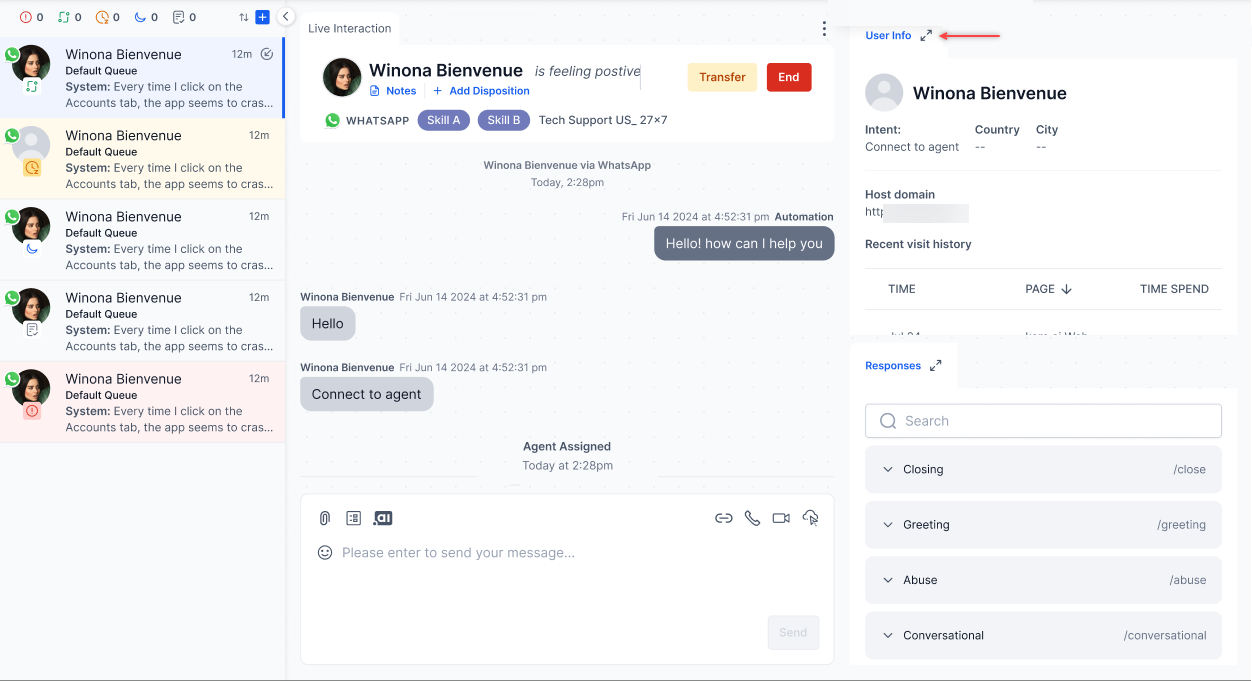
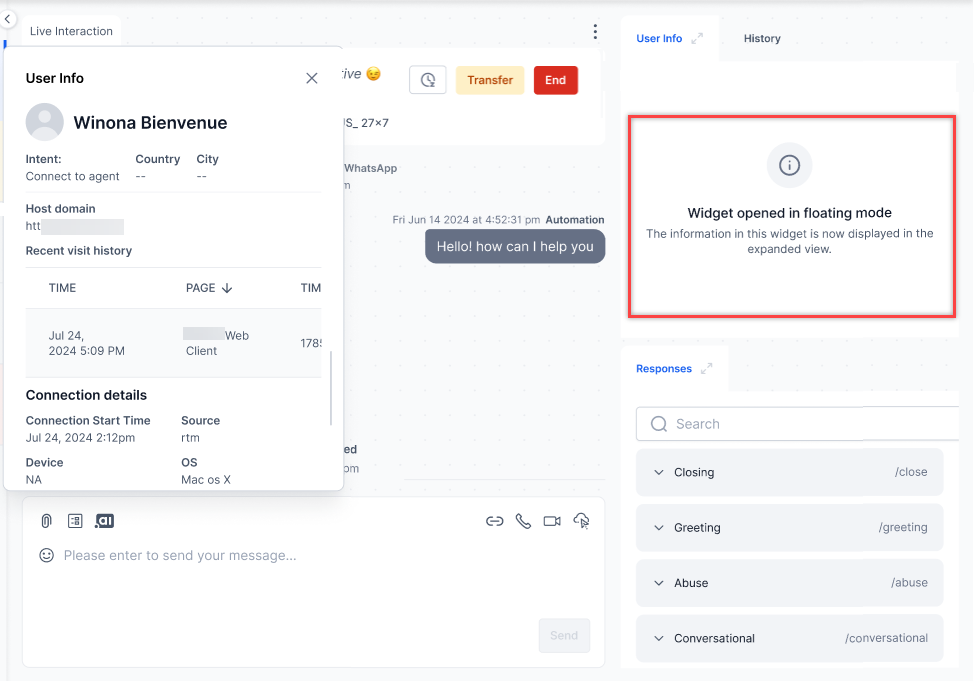
Maximize External Widgets
The Maximize Widgets enables agents to expand external widgets in the Agent Console to a larger, resizable view. This allows agents to access complete information within widgets without changing the fixed layout configured by supervisors or admins. Only external widgets display the maximize option.
Steps to maximize external widgets:
- In the Agent Console, a Maximize icon is displayed on the external widgets.
- Click the Maximize icon.
- The widget expands in an overlay view within the application interface (not a separate browser window).
- The expanded widget occupies the screen and remains resizable and draggable within console boundaries.
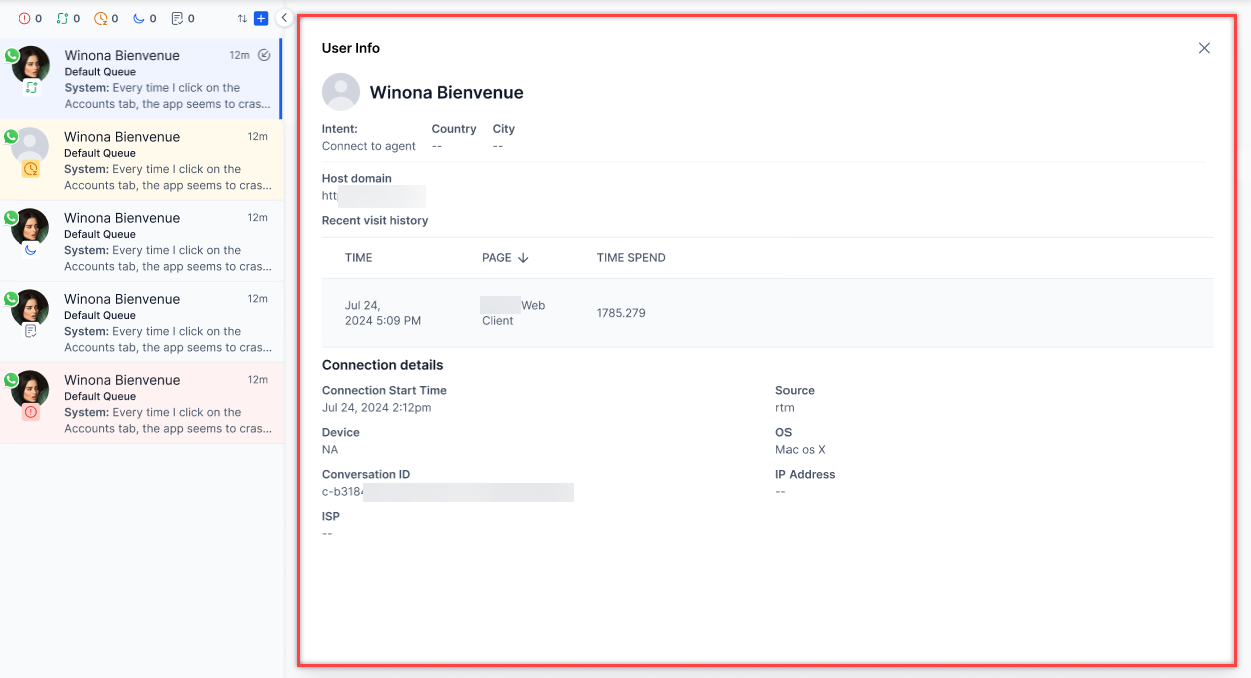
- A disclaimer appears in the original widget tab: “The information in this widget is now displayed in the expanded view.”
- Interact with the widget in the expanded view.
- Move between conversations if required.
- The maximized widget automatically refreshes and displays content relevant to the selected conversation.
- For widgets not tied to conversations, the widget remains accessible in the expanded view regardless of conversation context.
- Close or minimize the expanded widget.
-
- The widget returns to its original position and size in the layout.
- The overlay is dismissed when the agent closes or minimizes it manually.
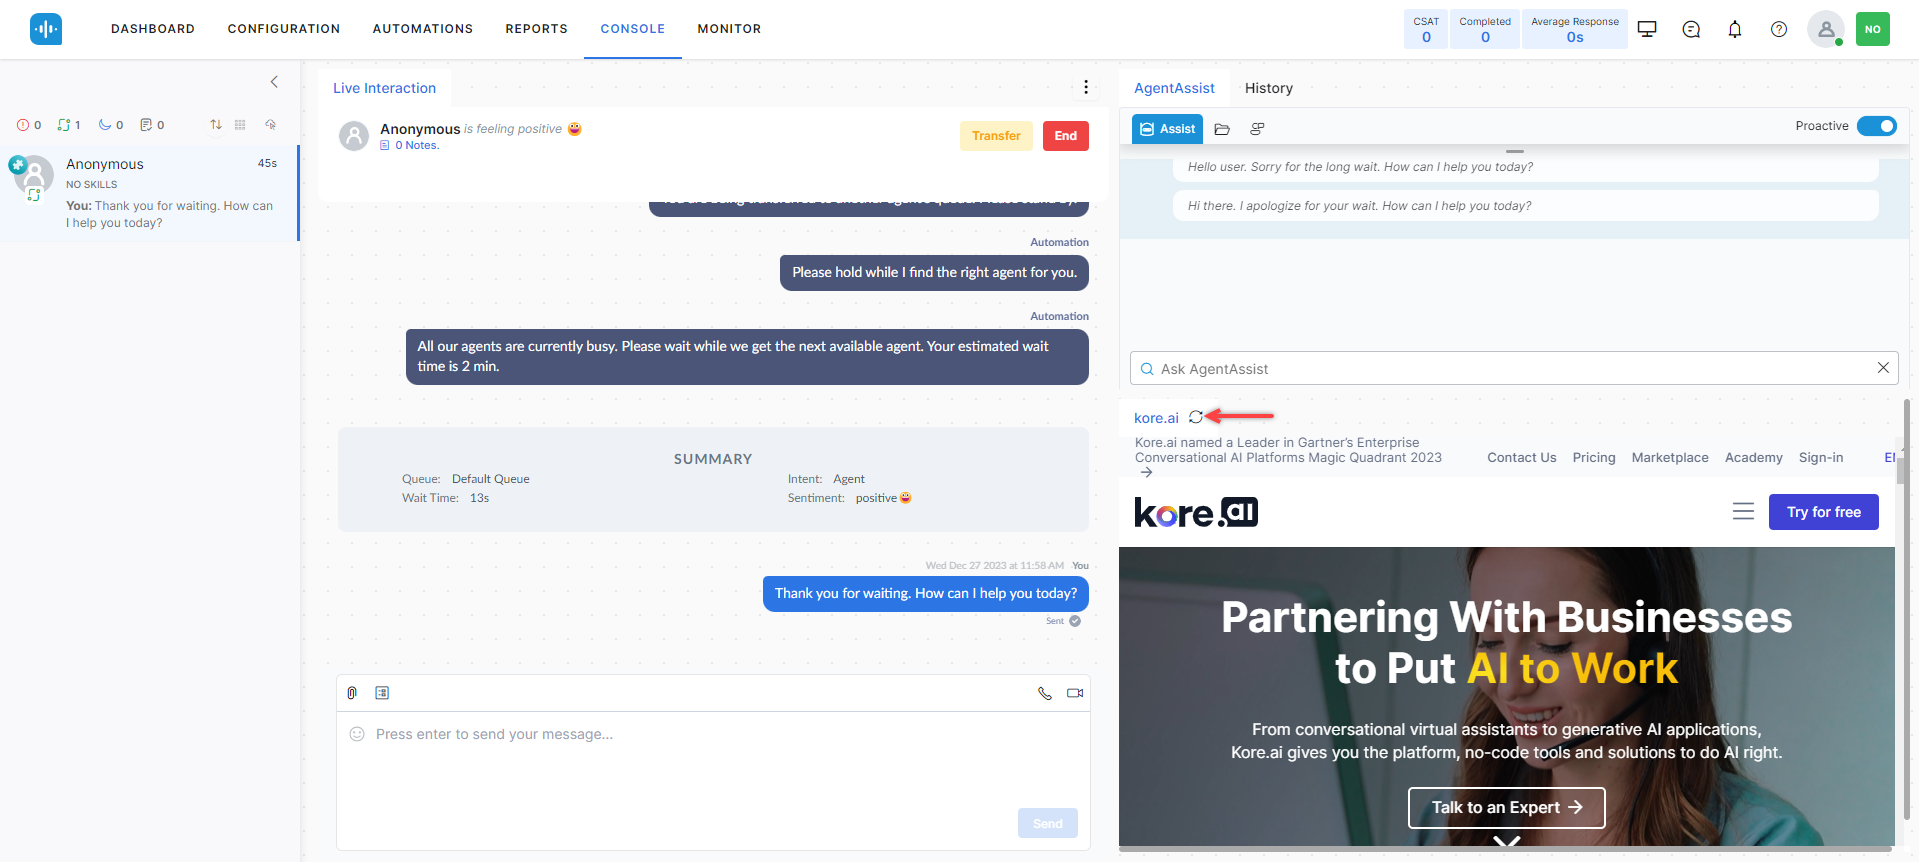
Refresh a Widget
The widget-level refresh button enables customers to refresh a widget individually, eliminating the need to refresh the entire application, and keeping widgets up-to-date with the latest information.
The refresh button is accessible only when the user is within that specific widget. Clicking this button refreshes the widget with the most recent data.
Users can still refresh widgets by refreshing the entire application.
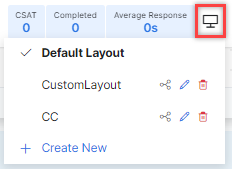
Manage Layout
You can switch, share, edit, or delete layouts to handle different conversations using the Manage Layout option.
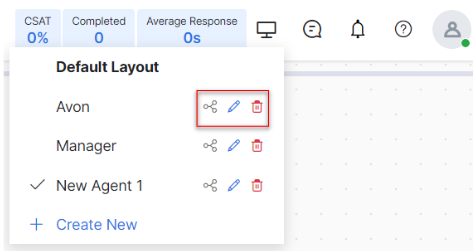
Share Layout
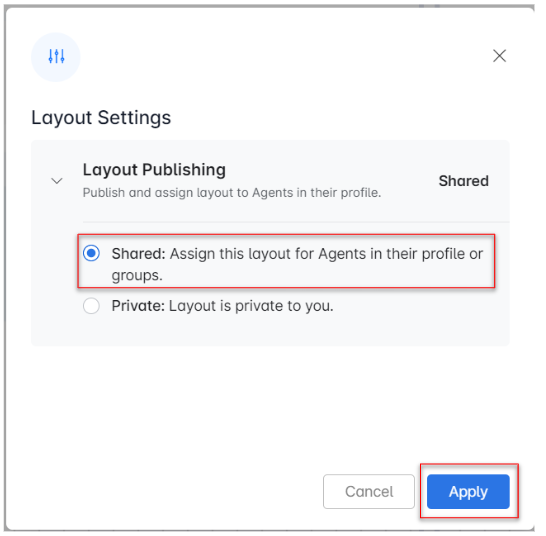
You can choose whether to keep your layout private or share it with other agent profiles or groups.
Sharing allows you to publish and assign a layout to agents in their profile or groups.
To share a layout:
- Click the Share icon corresponding to the layout you want to share.
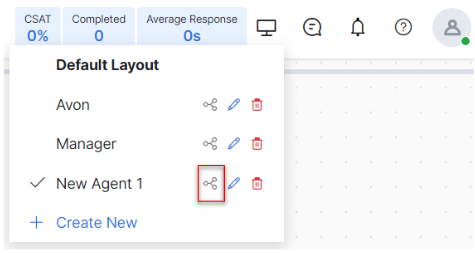
- The Layout Publishing interface is displayed. Select Shared and click Apply.
Edit Layout
The Edit option allows you to add new widgets, delete previous widgets, and/or rename an existing layout.
To edit a layout:
- Click the Edit icon corresponding to the layout you want to edit.

- Click Save after making changes.

Delete Layout
The Delete option allows you to delete a layout.
To delete a layout:
- Click the Delete icon corresponding to the layout you want to delete. A Confirmation pop-up appears.
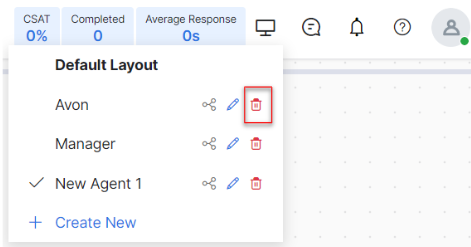
- Click Proceed to delete the layout. A success message is displayed.


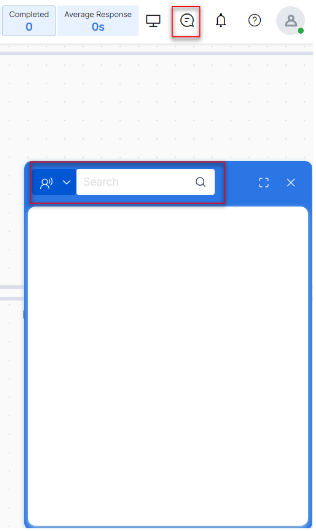
Chat
The Chat feature is used for internal communication between agents and supervisors. It provides real-time help to customers to solve product-related queries. Customers prefer live chat for quick query resolution. With live chat, you can provide customers with a method to contact you when they have questions or problems that they are unable to answer.
Clicking the Chat icon opens a new display to view the available agents, search for a particular agent, see chat history, and call the agent.
Help
The purpose of Help is to assist users in understanding and effectively using the interface by providing contextual guidance, instructions, and troubleshooting tips directly within the application.
The Help icon is located in the top right corner.
![]()
Clicking on the help icon shows the following:
- Next Steps
- Setup your contact center – Helps to add agents and assign them to groups. Configure voice and digital delivery channels.
- Automate your contact center – Helps to add Use Cases to manage user intent for interactions.
- Advanced – Helps to define simple to complex interaction flows via different channels.
- Handle live interactions – Helps to use Agent Console to work on live omnichannel customer interactions.
- Monitor the contact center operations – Helps to use monitor console to monitor queues and agents in real-time.

- Support: Contains links to the following
- Documentation
- Community
- Academy
- Contact Us
- Report Voice Issue for Current Call – When an agent faces any problem related to the agent console, they can report an issue.

Clicking Report voice issue for the current call displays a pop-up with the following information:- Select the category of the issue from the following options, and select the issue from the available options:
- Audio Clarity
- Connection Problems
- Voice Transmission
- Other Issues (Please specify below)
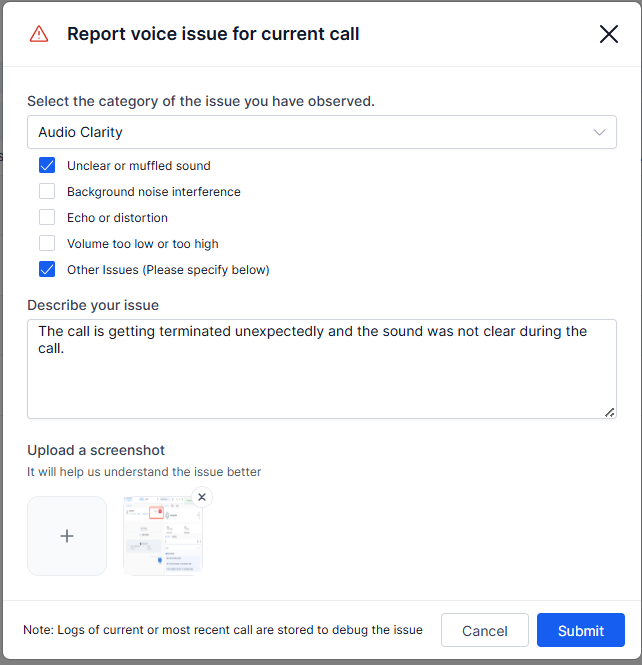
- Add a brief description of the issue and upload a screenshot.

- Click Submit. A notification appears, and a pop-up is displayed.

Click Done to close the Window, or click Download Logs to export the logs. The communications team receives a report by mail to analyze the issue.
- Select the category of the issue from the following options, and select the issue from the available options:
- Topic Guide
- Documentation – Contains in-depth documentation on the Monitor Tab.

- Documentation – Contains in-depth documentation on the Monitor Tab.