
Queues are the holding areas for digital and audio conversations waiting to be assigned to agents. The Set Queue node allows you to define and modify the Queue settings and default messages used in building the experience flow.
To configure the Set Queue node, set up the following:
General Settings
Click the General Settings icon and provide the following information:
- Enter a Custom Name by which to identify the node later.
- Select the Integration Type: Static List or Script:
- If you select the Static List, you can configure the following:
- Queue: Select the queue you want to apply to this node, the system will look for available agents from that queue. When no queue is selected, the system uses the default queue automatically.
- Priority (Optional): Set the conversation priority within the assigned queue. Priorities range from 0 to 10, where 0 is the highest priority and 10 is the lowest. The default value is 5 – Standard.
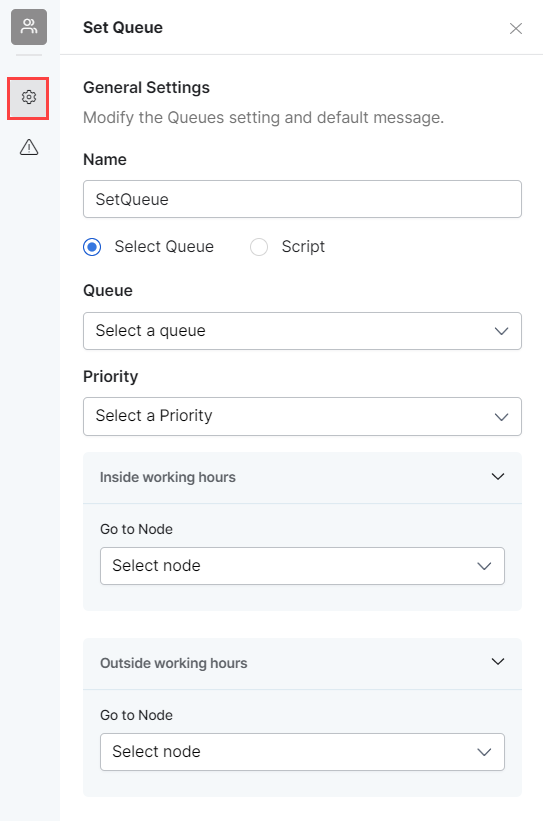
Note: With the ability to prioritize, conversations will shuffle in the queue. This means that the customer’s queue number and wait time calculations will change as their conversation priority changes. You should account for this scenario if you decide to play queue positions and wait time calculations in the waiting experience. - If you select Script, you can define the queue or conversation priority.
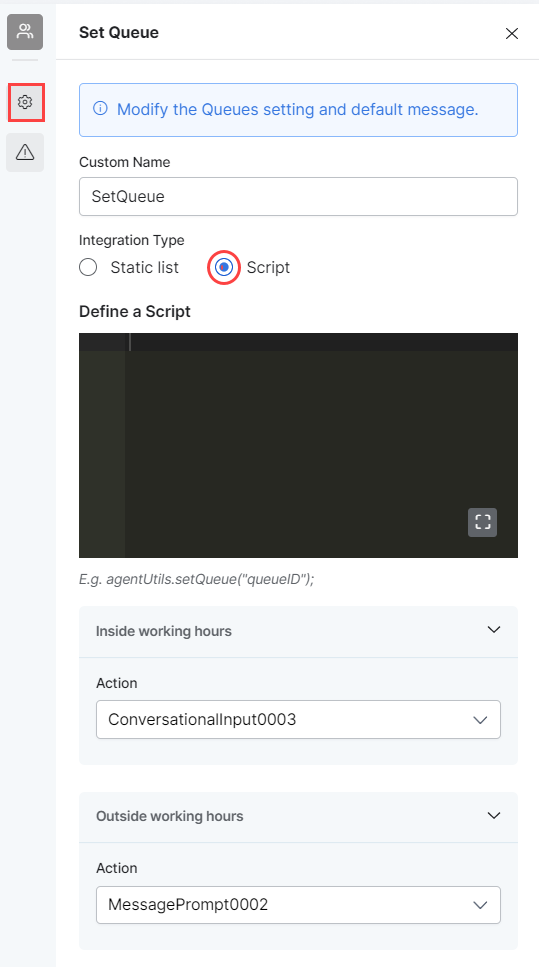
- Set the Queue as in the following example:
agentUtils.setQueue(“queueID”)Set the Conversation Priority as follows:
agentUtils.setPriority(priority<Number>)Priority should be a valid number between 0 and 10 (both are inclusive). If an Invalid priority is provided, it will be ignored, and the default Priority(5) will be set for that conversation.
Examples:agentUtils.setPriority(0); // priority of 0 (highest priority) will be set
- agentUtils.setPriority(10); // priority of 10 (Lowest Priority) will be set
- agentUtils.setPriority(7); // priority of 7 will be set.
. - In the Inside Working Hours section, select the Action that the node will perform when it executes successfully during working hours. Then, configure the node that should trigger after assigning the queue.
For example, if the queue node action is set to Check Agent Availability, the node will check for available agents based on the available working hours.
.
In the Outside Working Hours section, select the Action that the node will perform when it runs successfully outside working hours. Then, configure the node that should trigger after assigning the queue.
For example, When a call is received outside business hours, the system displays a configurable message prompt if this option is selected as the queue node action. This message notifies callers that they have reached the queue during non-operational hours.
Learn more about configuring Hours of Operation.
- Set the Queue as in the following example:
- Queue: Select the queue you want to apply to this node, the system will look for available agents from that queue. When no queue is selected, the system uses the default queue automatically.
- If you select the Static List, you can configure the following:
Error Handling
Use this section to handle system errors during customer interactions.
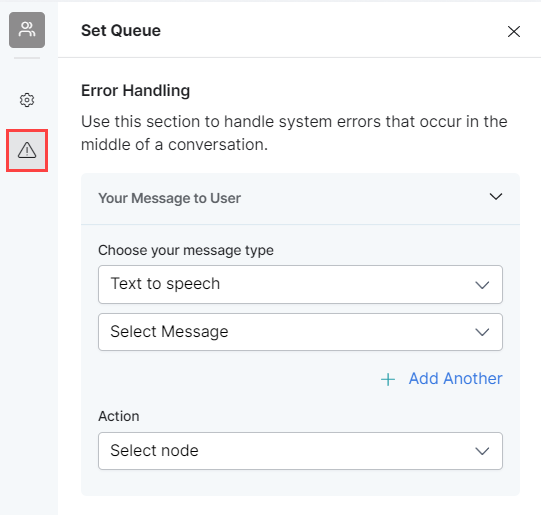
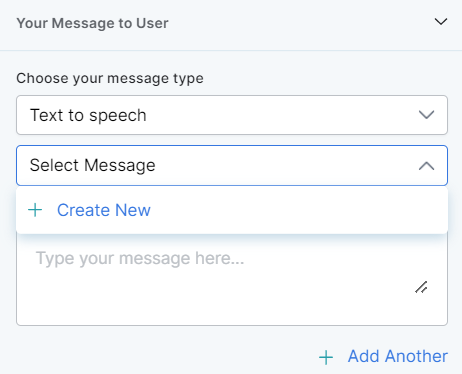
- Your Message to User: The message that will be played or displayed to the customer. Select one of the following options from under Choose your message type:
- Text to speech: This option allows you to transcribe text to speech. Type the text to be transcribed in the textbox or select an already configured message.
- Create a new prompt message to be played out for the Text to Speech message type by clicking + Create New. Enter a name for your message, type its contents and select the language.
- Define multiple message types for the prompt message to be played to the customer by clicking + Add Another. In this case, one message will be randomly selected and played during runtime.
- Text to speech: This option allows you to transcribe text to speech. Type the text to be transcribed in the textbox or select an already configured message.
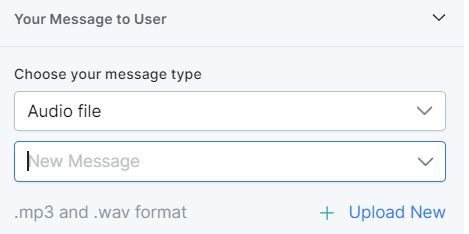
- Audio File: You can type a new message to be played to the customer in the text field or click + Upload New to upload an audio file (.mp3 or .wav format) with the message to be played.
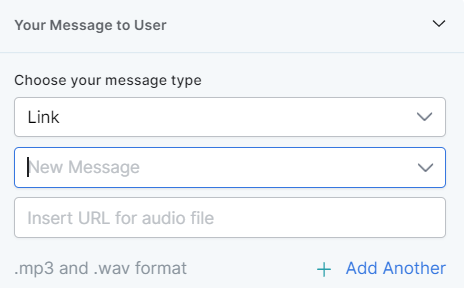
- Link: Click + Create New to add the text of the message you want to play to the customer and insert the URL of an audio file in .mp3 or .wav format. Click + Add Another to add another message URL.
- Action: Select the node to which you want to direct the error handling flow and define the system behavior. Either select a node type to create the node or identify and select an existing node.