
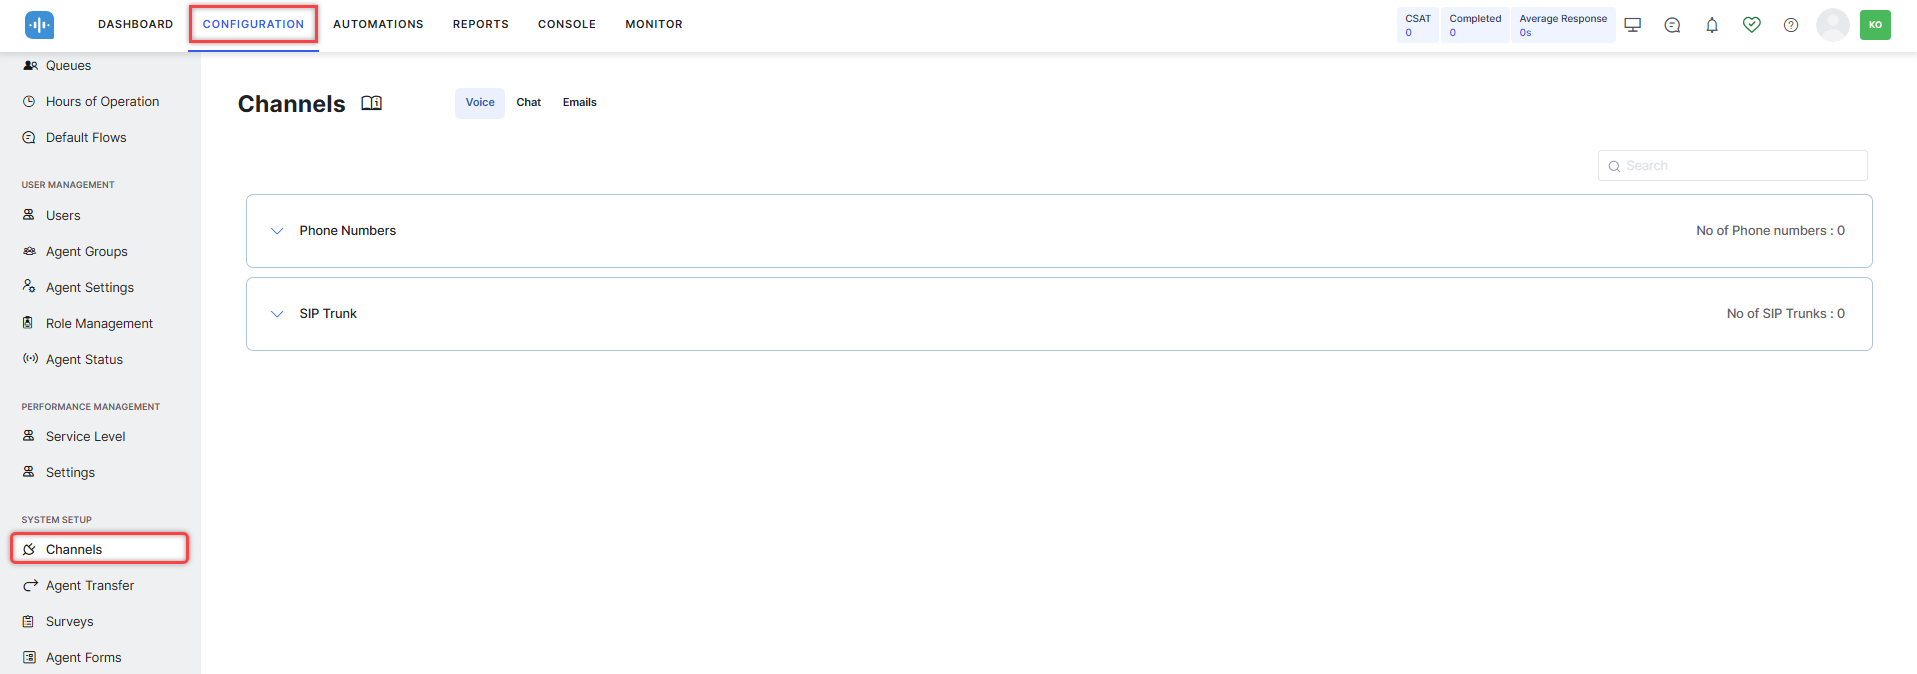
This channel helps configure how SmartAssist handles automation for inbound voice calls. By going to Configuration > System Setup > Channels > Voice, you can add phone numbers and set up SIP Trunk.
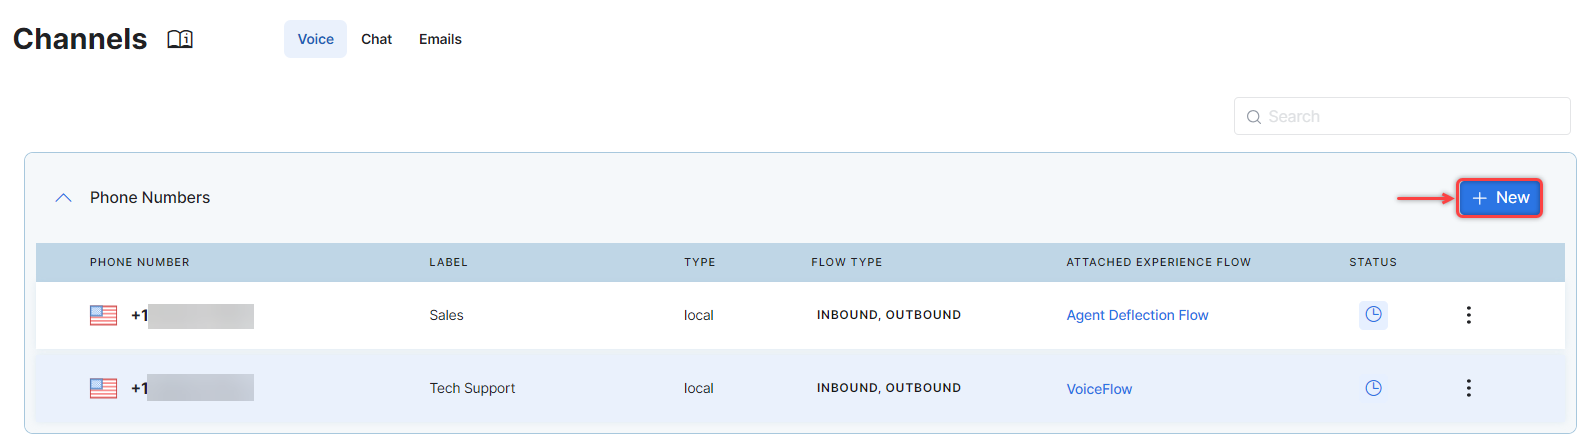
Phone Number Configurations
This option helps add, edit, or delete a local or toll-free phone number to which SmartAssist forwards incoming customer calls at a contact center.
Add or Purchase a Phone Number
To add a new phone number, follow these steps:
- In the Voice Channels section, click Phone Numbers.
- Under Phone Numbers, click New.
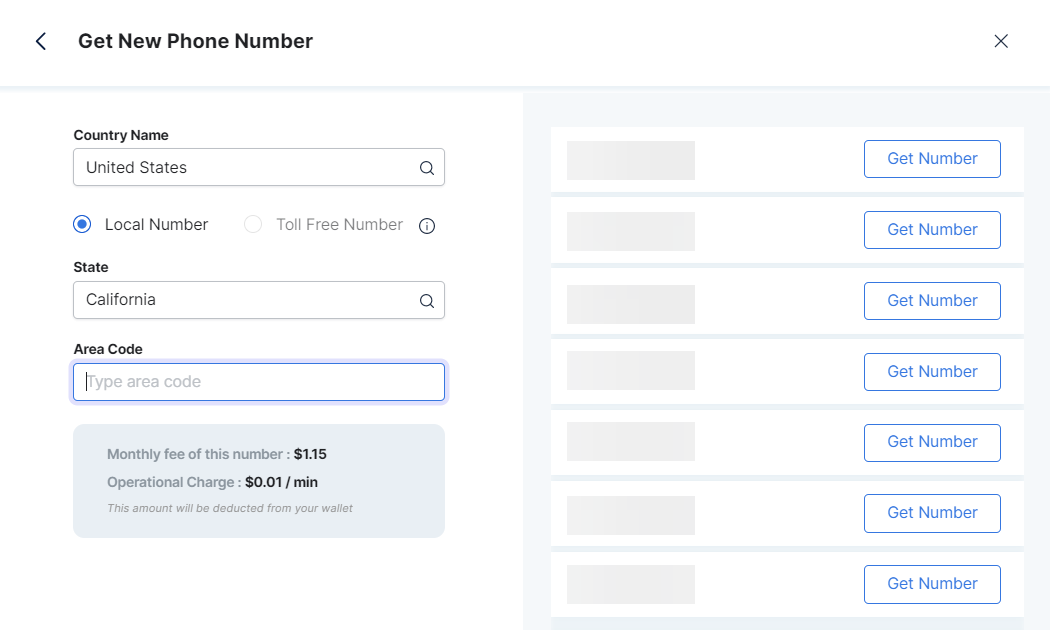
- The Call Phone Number window is displayed below. Here, you can configure a custom local or toll-free number by clicking Get New Phone Number:

- Select the Country.
- Select either the Local or Toll-Free Number option.
- Select the State.
- Enter the Area Code.
- After you configure the above fields, SmartAssist displays the monthly fee and the operational charge per minute.
- Configure an available number with the following steps:
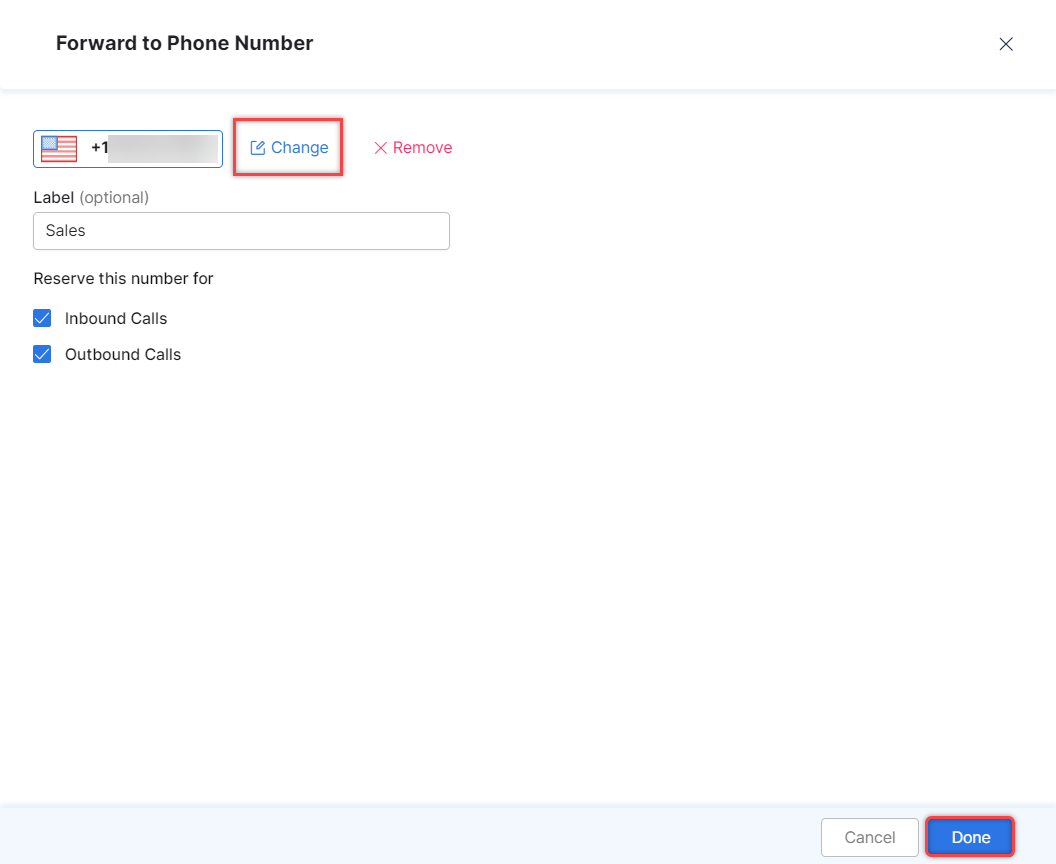
- Click the Get Number button.
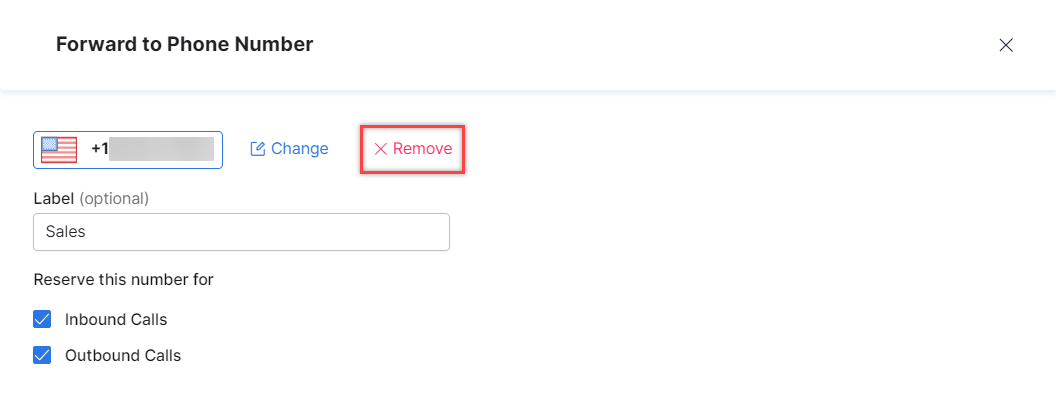
- Type a label for the phone number (optional).
- Select whether the number will be reserved for Inbound Calls, Outbound Calls, or both.
- Select the bot for outbound calls from the dropdown. AgentAssist will trigger this bot when the agent makes an outbound call with this phone number.
- Click Done. A success confirmation message is displayed, and the phone number is added.

- You can now call this number to test your Use Cases.
- When ready to go live, forward the calls you receive to this phone number or use this number as your customer support number.
Edit a Phone Number
To edit a phone number you added previously, follow these steps:
- Open the More Options menu corresponding to the phone number you want to update.
- Select Update in the menu.

- On the Forward to Phone Number page, click Change.
- Make the necessary edits on the Get New Phone Number page and click Done.
- A success confirmation message is displayed once the phone number is updated.
Delete a Phone Number
Deleting a phone number means stopping all services associated with it. Please keep in mind that if you remove a phone number and want to add it back later, you may not be able to if another user has selected it.
To delete an existing phone number, follow these steps:
- Open the More Options menu corresponding to the phone number you want to update.
- Select Delete in the menu.

- The following pop-up is displayed. Click Delete to confirm your choice.

- Alternatively, you can click Update, go to the Forward to Phone Number panel and click Remove. You will need to confirm your choice.
- A success confirmation message is displayed once the phone number is deleted.
SIP Trunk Setup
This option is useful when transferring calls to SmartAssist from a toll-free or local phone number using the Session Initiation Protocol (SIP) in your IVR system.
Under Channels > Voice > SIP Trunk, you can configure the network IPs and domains, DID number, SIP transport protocol, SIP credentials (optional), and Inbound/Outbound direction for phone numbers while the SIP URI is pre-configured.
To configure SIP Trunk, follow these steps:
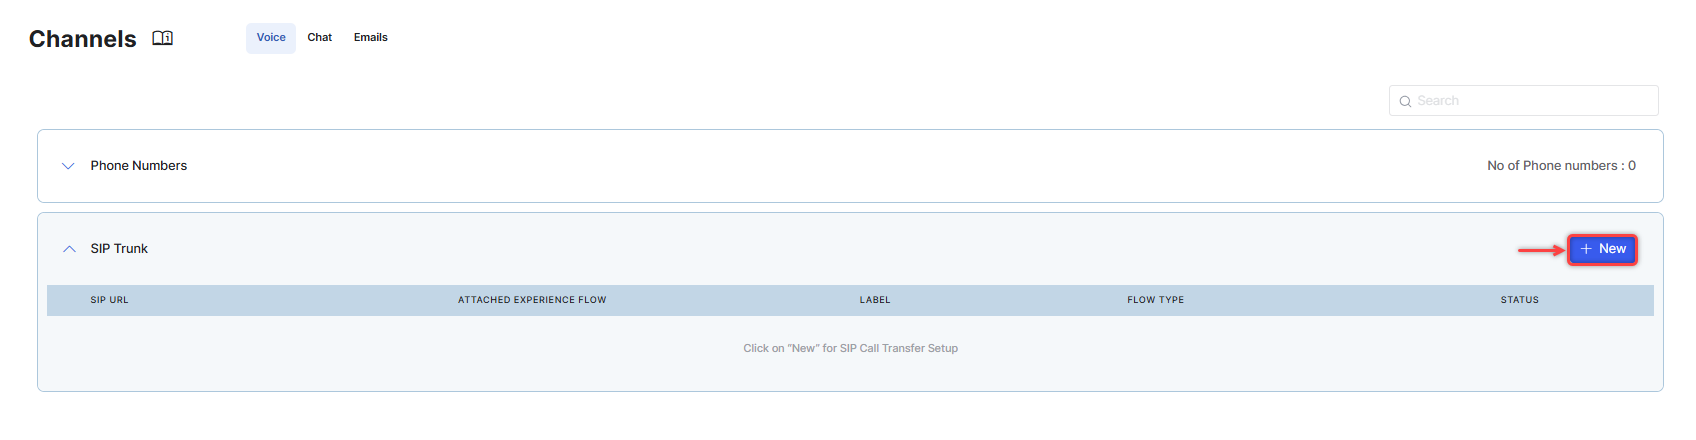
- In the Voice Channels section, select SIP Trunk.
- Click New.
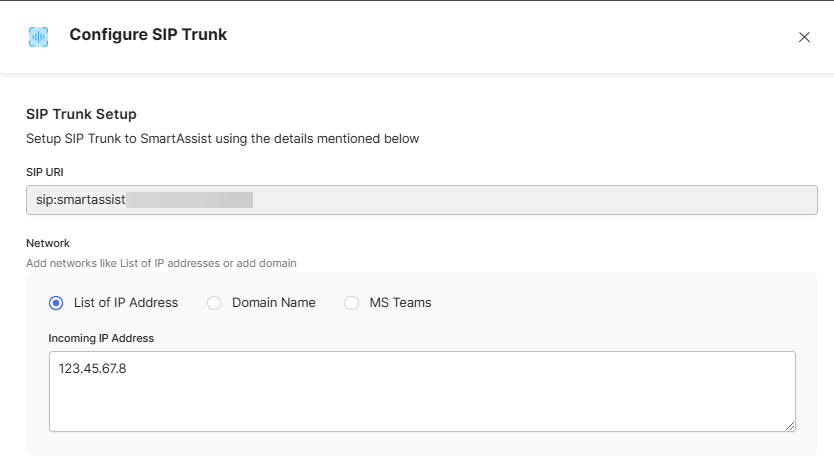
- On the Configure SIP Trunk page, configure the following:
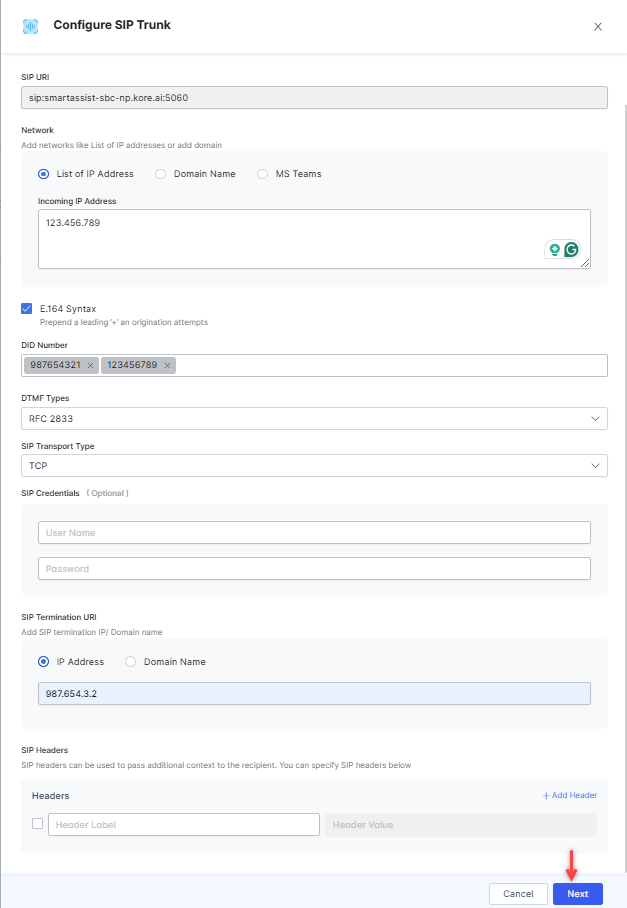
- SIP URI: This is a preconfigured field.
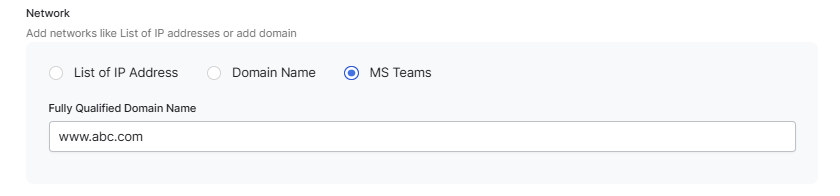
- Network: To configure the Network, you can select one of the following:
- Under List of IP Address, type the values for Incoming IP Address in the textbox.
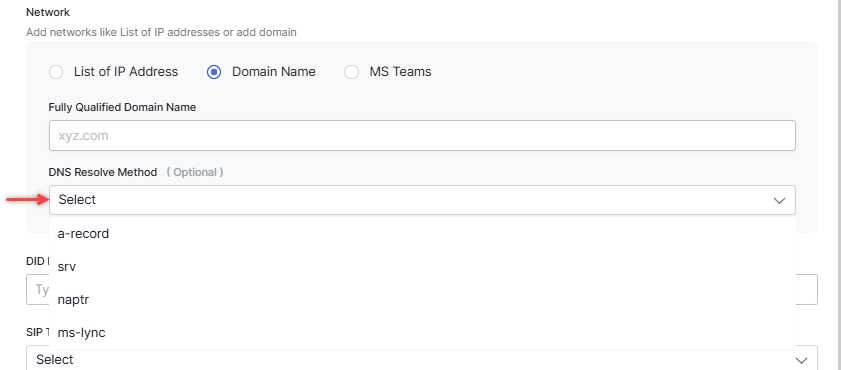
- Under Domain Name, provide the following:
- Fully Qualified Domain Name: The domain name that specifies all domain levels, including the top-level domain and the root zone.
- DNS Resolve Method (Optional): Select an option from the list to translate IP addresses to domain names for resolution when the hostname is associated with multiple IP addresses. You can choose a-record, srv, naptr, or ms-lync.
- Under MS Teams, provide a Fully Qualified Domain Name (The domain name that specifies all domain levels, including the top-level domain and the root zone).
- (Optional)The E.164 Syntax is selected by default. Selecting this option prepends a + before the DID number.

- Under List of IP Address, type the values for Incoming IP Address in the textbox.
- Under Direct Inward Dialing (DID) number, you can enable virtual phone numbers (SIP trunk numbers) that route calls to your existing telephone lines. You can configure SIP trunks by entering DID numbers using wildcard patterns (for example,
123*) to automatically handle multiple similar DIDs without listing each one individually. If two wildcard patterns are configured for different experience flows within an application, and a caller dials a number that matches both patterns, the system triggers the experience flow associated with the pattern that matches the most digits.
Example:If the DID numbers7896*and789654*are mapped to Experience Flow 1 and Experience Flow 2, and a caller dials78965478, the system triggers Experience Flow 2, as789654*matches more digits than7896*. - DTMF Type: (Optional) Select the DTMF type. RC2833 is the default selection.
- Select an option from the list for SIP Transport Type. This field will set a protocol to route SIP traffic to servers and other endpoints. The available options are TCP, UDF, and TLS.
- (Optional) Set the SIP Credentials (username and password) to access your SIP trunksetup account.
- Under SIP Termination URI, enter the IP Address/ Domain Name.
- Enter the SIP Headers. You can include all available agent data in the SIP headers, enabling customers to use only the parameters relevant to their needs. The parameters are listed as key-value pairs:
- X-AgentName: {{agentName}}
- X-AgentPhoneNumber: {{agentPhoneNumber}}
- X-AgentEmailID: {{agentEmailId}}
- X-AgentGroup: {{agentGroup}}
- X-AgentCustomID: {{agentCustomId}}
- X-AgentNickName: {{agentNickName}}
- X-QueueName: {{agentQueue}}
- X-AgentFirstName: {{agentFirstName}}
- X-AgentLastName: {{agentLastName}}
-
- Click Next.
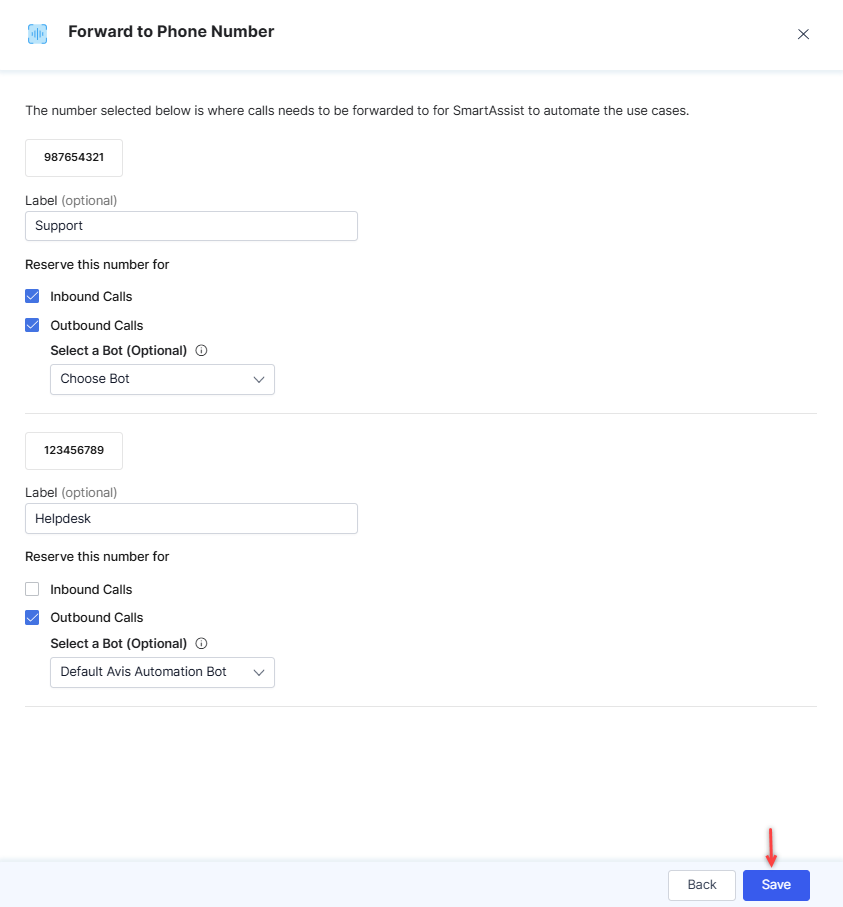
- On the Forward to Phone Number window, reserve the phone numbers for Inbound Calls, Outbound Calls, or both by selecting the appropriate options.
- Click Save.
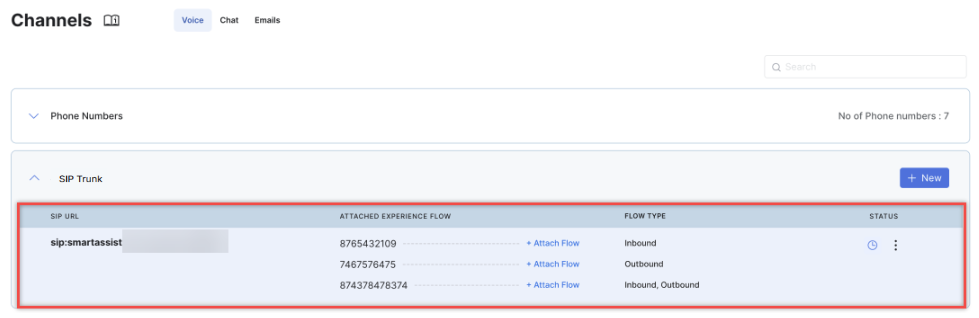
The selected information appears on the Channels page.
- Click Next.