Dispositions represent a label that agents assign to the outcome of a conversation. In SmartAssist, you can create disposition sets to organize disposition codes according to your business requirements.
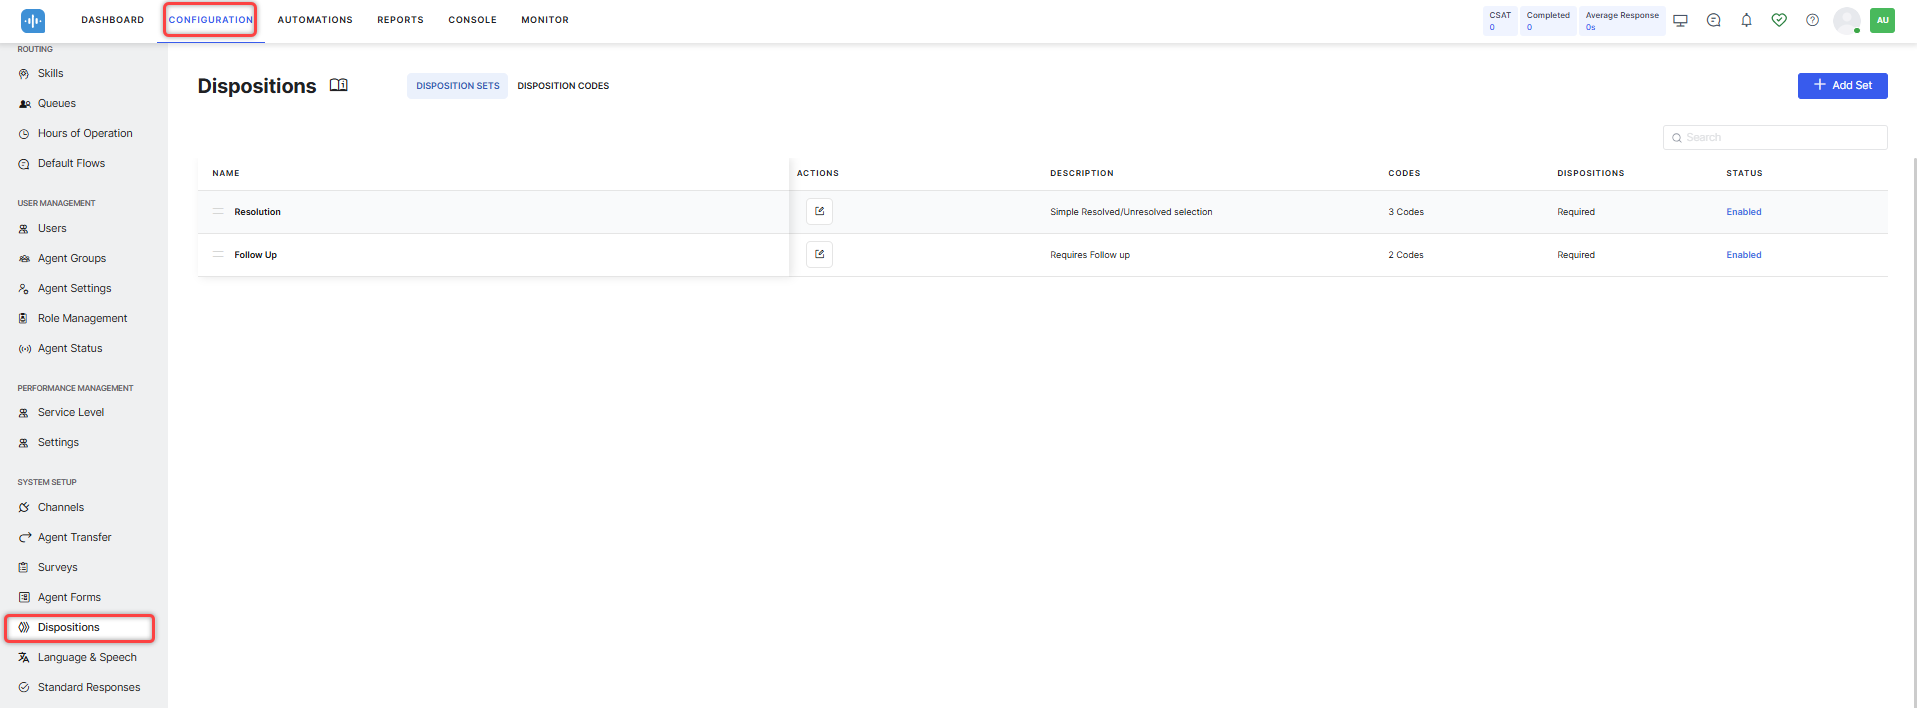
To reach this feature, go to Configuration > System Setup > Dispositions.
Disposition Sets
A Disposition Set is a group of disposition codes that you can assign to queues or agent groups to collect information at the end of a conversation. The disposition codes within a set act as fields that agents must populate when ending an interaction.
The Dispositions section opens with the Disposition Sets tab preselected.
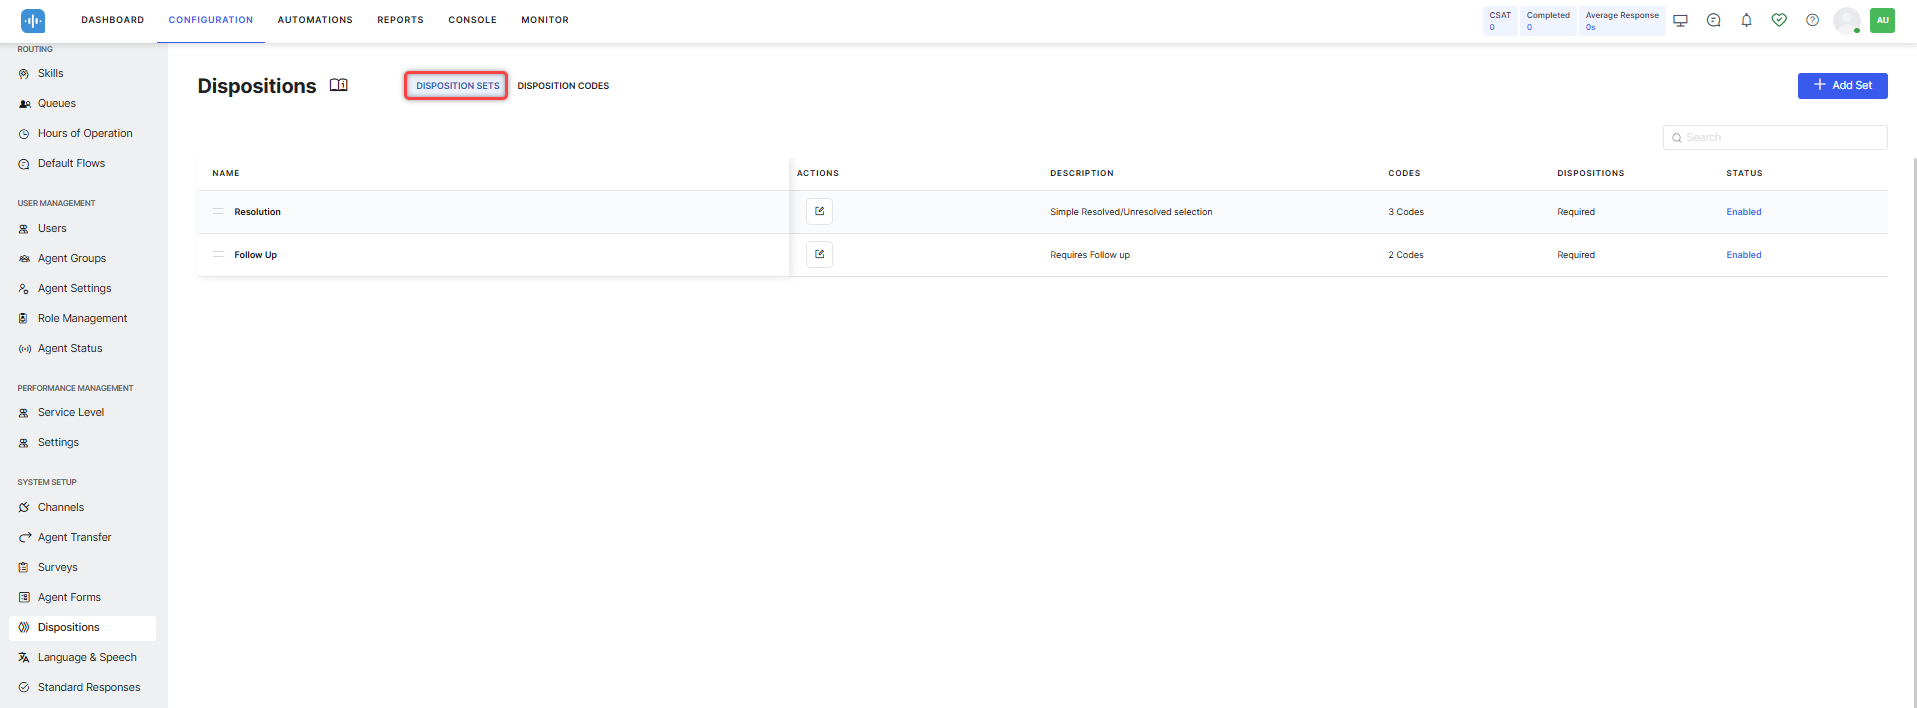
The Resolution Disposition Set comes prebuilt. Administrators can enable/disable and edit the resolution disposition set. Learn more. A resolution disposition cannot be deleted.
The default Disposition Codes for this set are Resolved, Requires Supervisor Attention, and Unresolved. If you disable the resolution disposition set or remove a conversation’s queue from the attached list, selecting a disposition from the set becomes optional when closing a conversation, if other disposition sets are created. Users can close a conversation without selecting a disposition from the set.
Section Features
Within the Disposition Sets section, you can perform the following:
- Search disposition sets,
- Add a new Set,
- Edit an existing set,
- Delete an existing custom set (all sets are custom except for Resolution, which is the default).
- Reorder sets by dragging a set and dropping it into the desired position,
- View basic Disposition Set information:
- Name: The name of the Disposition Set,
- Actions: This column lists the Edit option for custom sets,
- Description: A short description of the Disposition Set,
- Codes: Lists the number of codes contained within a set,
- Dispositions: Whether the disposition is Required/Optional,
- Status: Lists whether the set is enabled or disabled.
Add a Disposition Set
To add a new Disposition Set, follow these steps:
- Under Dispositions > Disposition Sets, click Add Set.

- In the New Disposition Set window, configure the following:
General
In the General tab, you can configure the main settings for the Disposition Set. Populate the following fields:
- Name the Disposition Set.
- Description: Enter a short description of the set.
- Display: This field lets you specify how to display the disposition code selection options. Choose between Dropdown and Button, both allowing single selection.
- Is Required: Choose whether the Disposition Set is required at the end of a conversation. You can select Yes or No. If you select Yes, agents must select a disposition code within this set when ending interactions that are part of the queues assigned to the set or if the agent is part of a group assigned to the set.
- Under the Assignment section, you can assign the Disposition Set to either queues or agent groups, as follows:
- Select Assign to Queues and the disposition set will display to all agents who are in the assigned queues. You can assign the set to all queues or selected queues. Click Add Queue to search and select one or multiple queues from a list. Queues must have been previously created before becoming available to select here. See Queues to learn more about creating them. You can delete a queue assignment using the Delete (bin) icon on the right of the entry.
- Select Assign to Agent Groups and the Disposition Set will display to all agents in the selected agent groups. The selection process is similar to the Queue selection above.
- Select Assign to Queues and the disposition set will display to all agents who are in the assigned queues. You can assign the set to all queues or selected queues. Click Add Queue to search and select one or multiple queues from a list. Queues must have been previously created before becoming available to select here. See Queues to learn more about creating them. You can delete a queue assignment using the Delete (bin) icon on the right of the entry.
Disposition Codes
On the Disposition Codes tab, you can assign codes to the Disposition Set. The code must have been previously created and enabled before becoming available to select here. See the Disposition Codes section below for more.
To assign a code:
- Click Add Code.
- Search for and select the desired code from the list of available codes.
- Turn on the toggles to send email alerts/send toast alerts.
To delete a code, click the Delete (bin) icon on the right.
To notify supervisors:
- Click the Notify tab.
- Click Add Supervisor.
- Search for and select the supervisor from the list of supervisors.
Click the Delete (bin) icon on the right to delete a supervisor.
Email/Toast Alerts
- If a disposition set contains only one disposition code with alerts enabled, the system triggers a notification when that code is tagged in a conversation with the provision to go to the interactions tab.
- When multiple disposition codes within the set have alerts enabled, a single notification will be sent, tagging one of the selected disposition codes.
Notification criteria remain the same for email and toast notifications. - A secondary notification email can be enabled. The supervisor will receive the notification in their email configured on SmartAssist.
Enable or Disable a Set
By default, new Disposition Sets are enabled. Turn off the toggle if you want to disable a Disposition Set.

Click Save when ready. Below is a short demo that shows you how to add a new Disposition Set.
Edit a Disposition Set
To edit a Disposition Set, follow these steps:
- Click the Edit icon corresponding to the set you want to edit.

- In the Edit Disposition Set window, make the required changes and click Save.
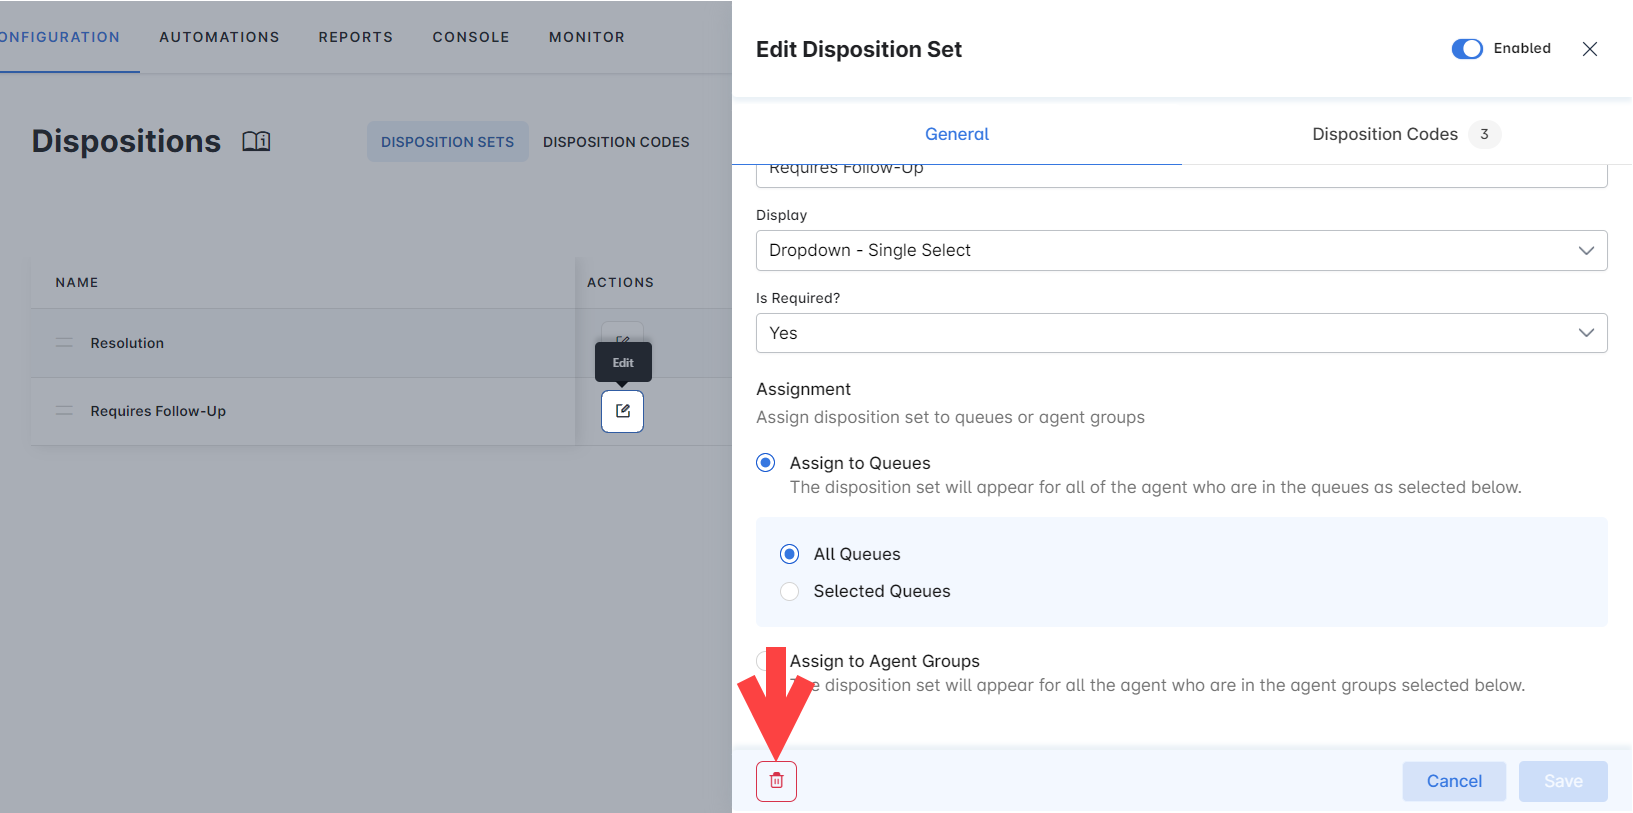
Delete a Disposition Set
To delete a Disposition Set, follow these steps:
- Click the Edit icon corresponding to the set you want to delete.
- In the Edit Disposition Set window, click the Delete (bin) button on the bottom left. You must confirm your choice.
Example Disposition Sets
Below are a couple of examples of disposition sets to help you create your own:
- Requires Follow Up, containing Disposition Codes for: Pending, Disconnected, Information Required, etc.
- Supervisor Required: containing Disposition Codes for: Requires Approval, Customer Asked for Supervisor, Complex Case, etc.
Disposition Codes
A Disposition Code is a short label assigned to the outcome of an interaction. Disposition Codes are required to build Disposition Sets and cannot be assigned to Queues or Agent Groups on their own.
Default Disposition Codes
SmartAssist provides three pre-defined disposition codes:
- Resolved: To be used for resolved requests that require no further action.
- Requires Supervisor Attention: For requests that need to be escalated to a supervisor.
- Unresolved: For requests which are closed but unresolved.
Custom Disposition Codes
SmartAssist also allows you to create custom codes and makes them available to agents once enabled and included within a Disposition Set. You can find and create Disposition Codes by going to Configuration > System Setup > Dispositions > Disposition Codes. Here, you can find a list of existing Disposition Codes and create new ones. You can also perform a name-level keyword search.
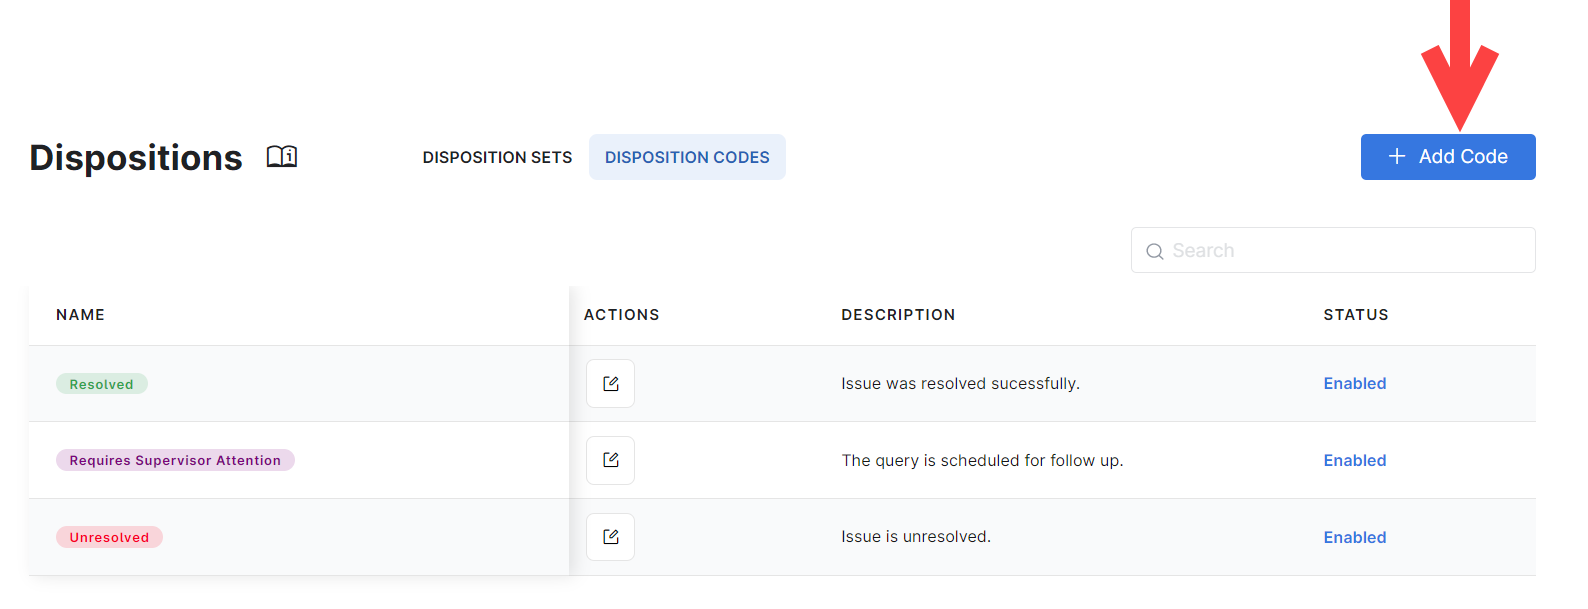
Add a Custom Disposition Code
To add a Disposition Code:
- Click + Add Code.
- A New Disposition Code page opens. Click Enable at the top right to activate the Code.
- Enter the disposition Code Name and Description.
- Assign a color and check the preview to make sure it looks good.
- Click Create.|

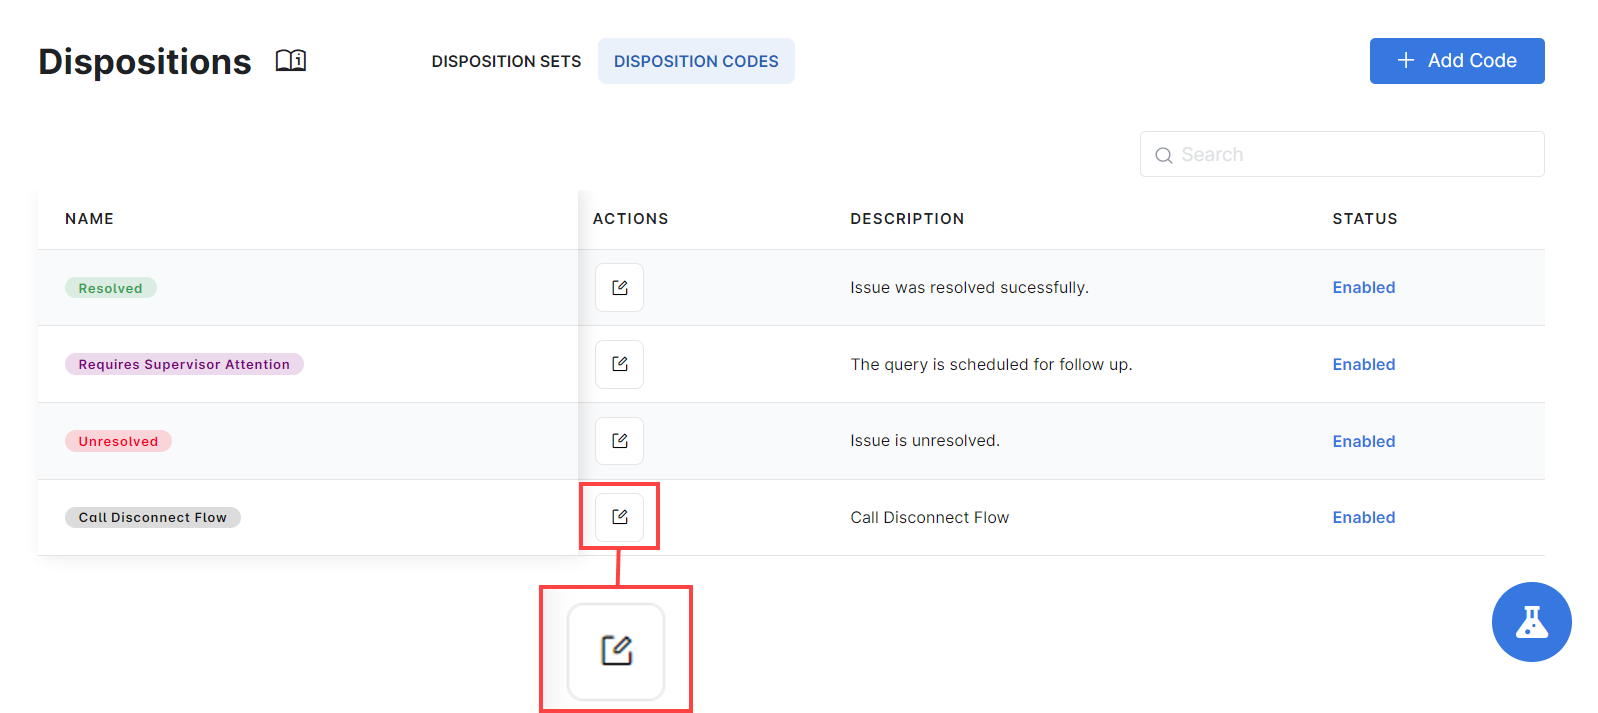
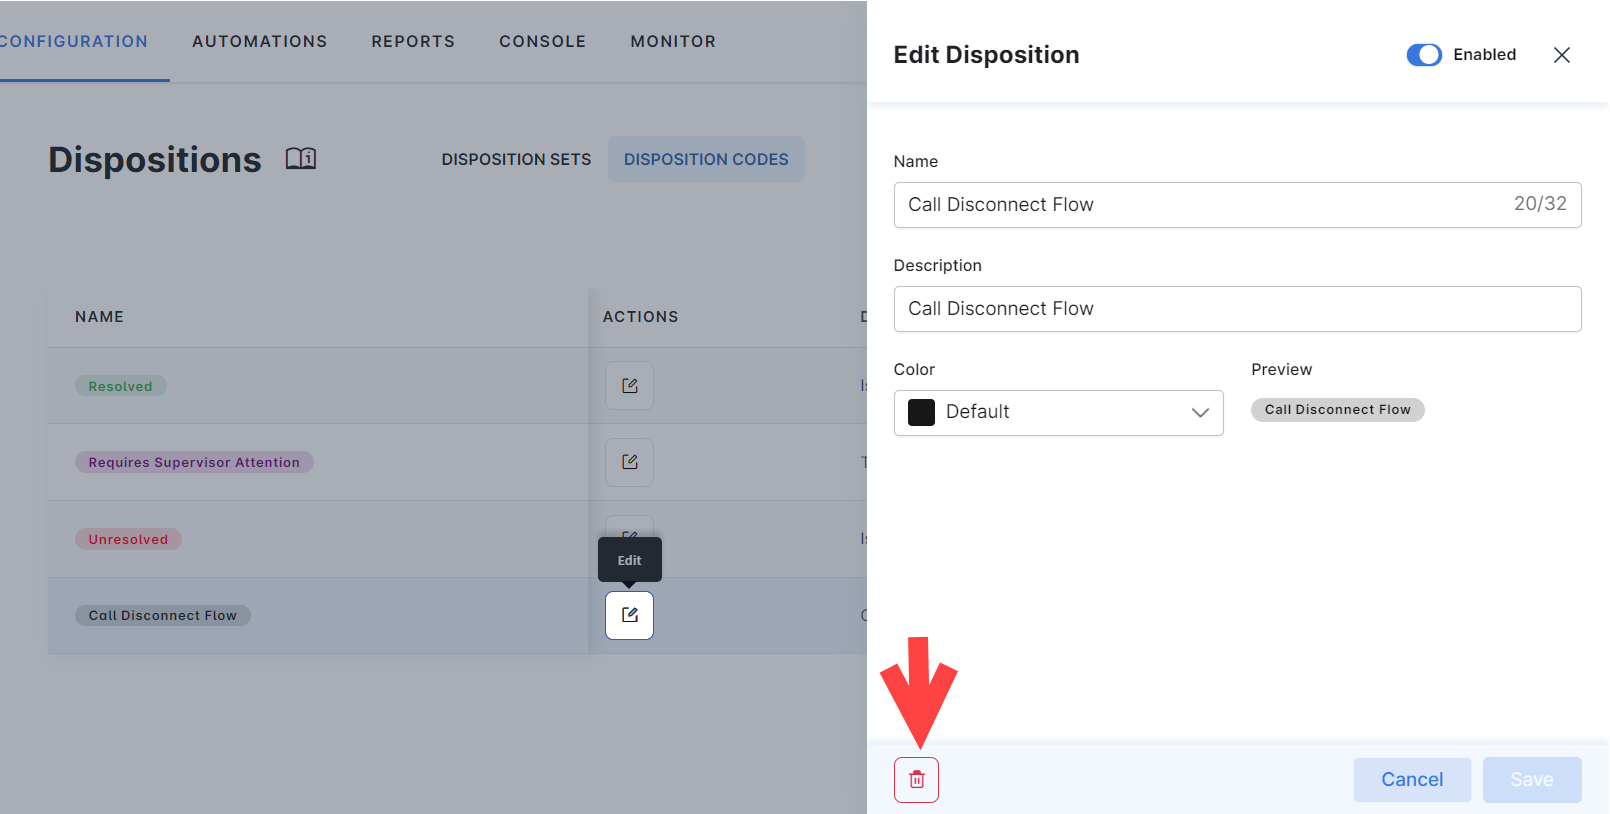
Edit a Custom Disposition Code
To edit a custom Disposition Code, follow these steps:
- Find it in the list of Disposition Codes,
- Click the Edit button under the Actions column,
- Make your changes in the Edit Disposition Code window, then Save.
Delete a Custom Disposition Code
To delete a custom Disposition Code, follow these steps:
- Find it in the list of Disposition Codes.
- Click the Delete button under the Actions column.
- Confirm your choice.
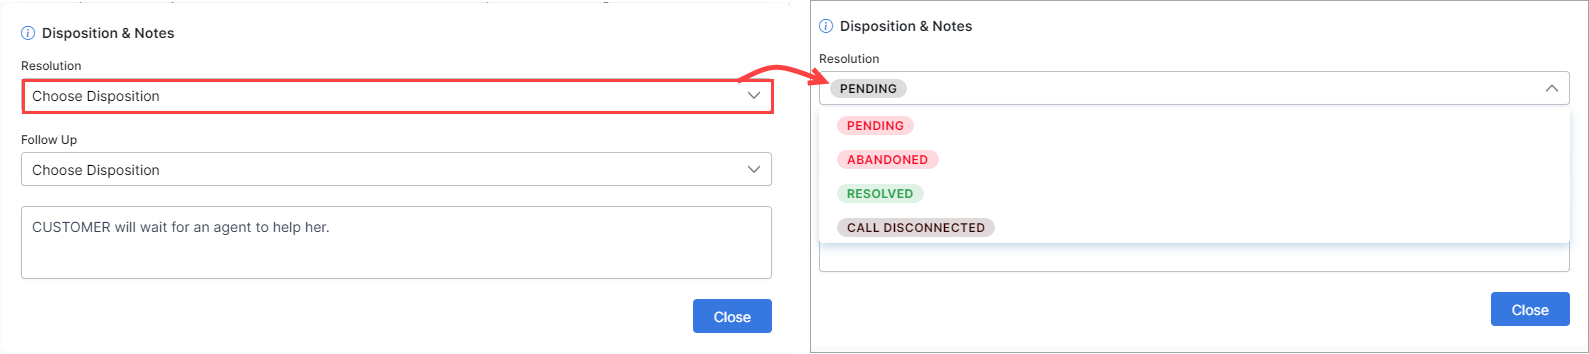
The Agent Experience with Dispositions
Dispositions are displayed once agents end a conversation within the Agent Console. No disposition code is selected by default when choosing a Disposition Set at the end of an interaction. Agents must choose a disposition code. If you have assigned more than one Disposition Set to a specific Queue or Agent Group, then corresponding agents see all sets and must select codes for all required sets.