SmartAssist reports enable you to assess the performance of your contact center. These reports ensure the alignment of agents with organizational goals and objectives and provide detailed information on calls, queues, and individual agent performance metrics such as average handle time.
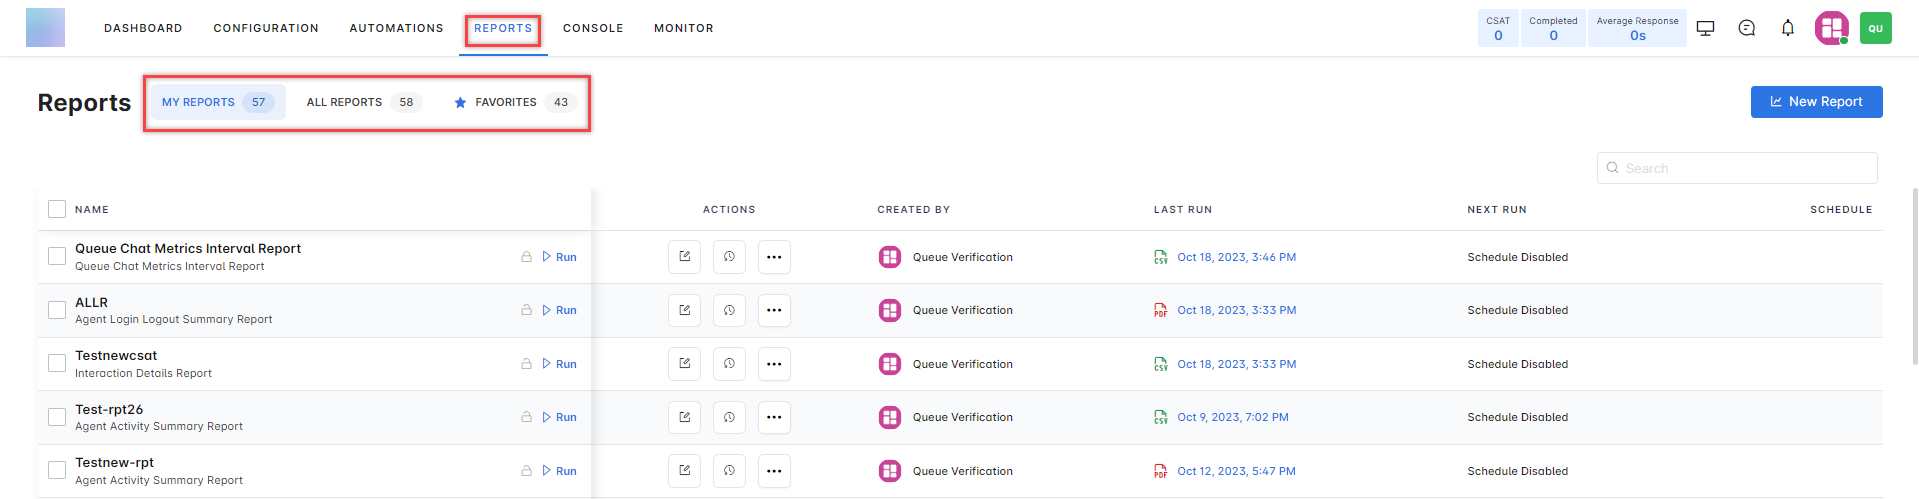
With SmartAssist, a supervisor can monitor queues, calls, daily tasks, and agent performance metrics via the REPORTS tab of the interface. To access the reports, click the REPORTS tab. A list of available reports is displayed to evaluate agent productivity, efficiency, and time saved through automation.
You can segregate the reports as follows:
MY REPORTS: Displays only the reports created by the current user.
ALL REPORTS: Displays all the reports.
FAVORITES: Displays reports created by any user and marked as favorites by the current user.
Creating a New Report
To create a new report:
- Go to SmartAssist interface, and click the Reports tab.
- Click New Report.

- A new report page opens.
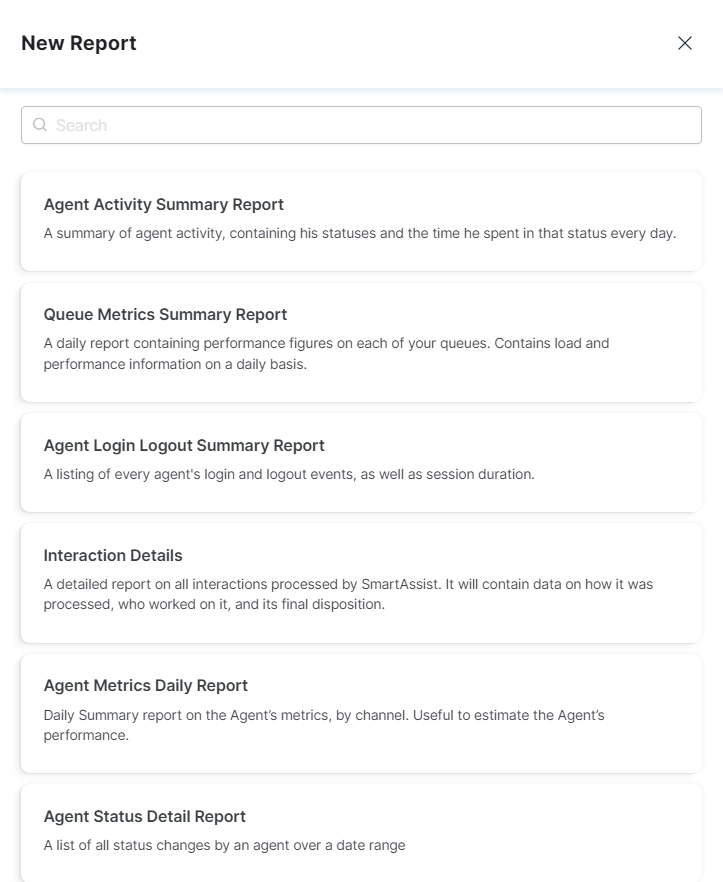
You can choose different report types from the list, for example, the Agent Activity Summary.
REPORTS Tab
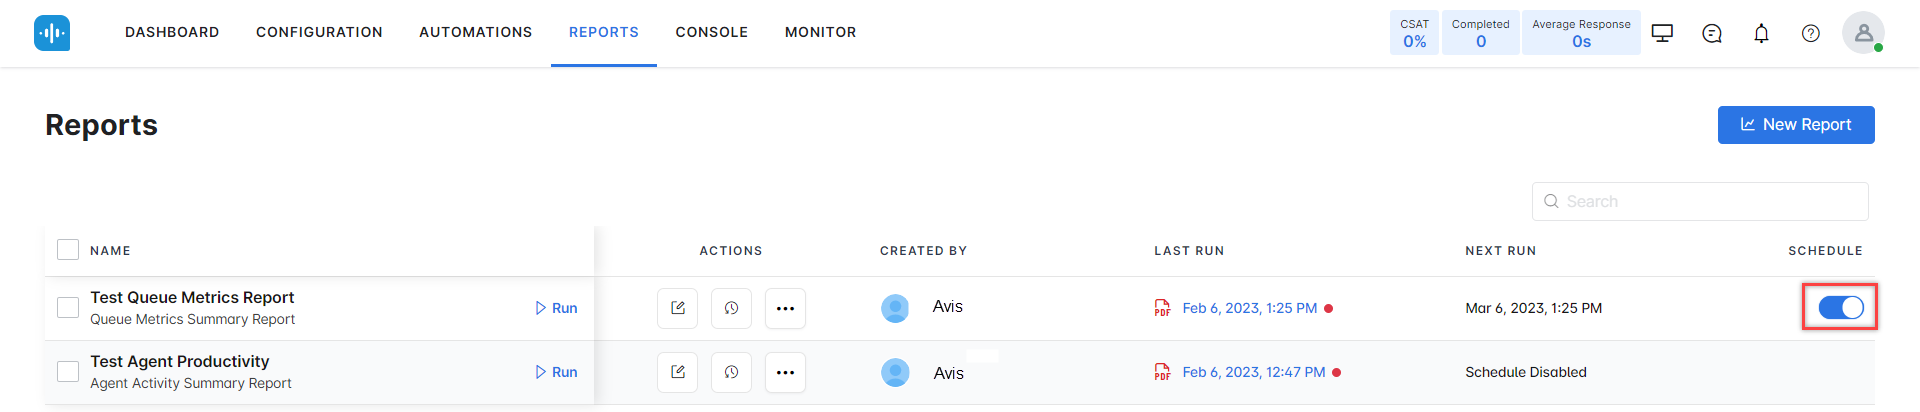
The REPORTS tab consists of a list of generated reports. You can generate an instance of a new report, download reports, edit, view, and delete reports.
Report Types
When generating a new report, you have the option to select from a list of available report types.
- Agent Activity Summary Report.
- Agent Login-logout Report.
- Interaction Details Report.
- Queue Metrics Report.
- Agent Metrics Report.
- User Status Detail Report.
- Queue Metric Summary Report.
- Agent Chat Metric Report.
By clicking the New Report button, you can choose the desired report type from the above list.
Report Functions
With SmartAssist, you can add filters, schedule report runs for specific periods and frequency, run reports on demand, modify formats and filters, and perform bulk actions on reports.
Accessibility
Accessibility is of paramount importance as it ensures that critical information is safeguarded and available only to required stakeholders.
You can restrict the accessibility of the reports as required. There are two permissions available:
- Public
- Private
By default, all reports are public. You can restrict the access to the reports by making them private.
Steps to revise the access:
- Click the (…) button under ACTIONS to revise the access for the report.
- Click Switch to Private. The access is updated.
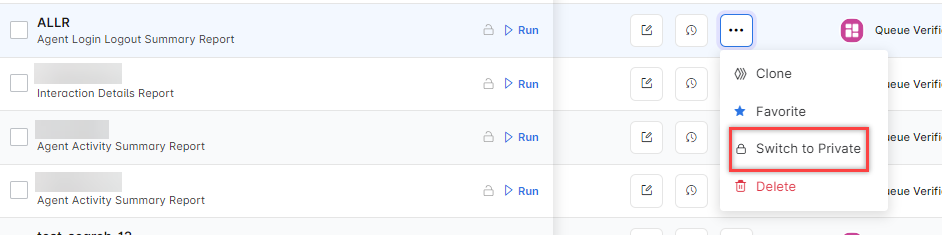
You can make the report public by following the above steps and clicking Switch to Public. The report is then accessible to everyone.
Adding Filters
SmartAssist allows you to add filters, narrow them down to a specific report, and filter the reports.
Report Generation
When generating reports, you have the choice to either Run On Demand or Schedule.
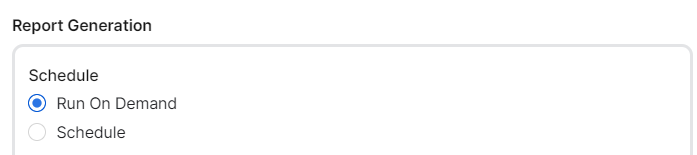
Run on Demand
When creating a new report or editing an existing report, you can schedule the report to run on demand as shown below:
- Select Run On Demand.
Schedule
When creating or editing a report, you can modify its schedule as shown below:
- Under the Report Generation section, select Schedule.
- Select the Frequency (Hourly/Daily/Weekly/Monthly/Quarterly/Yearly).
- Select the Day, Hour, and Minute.
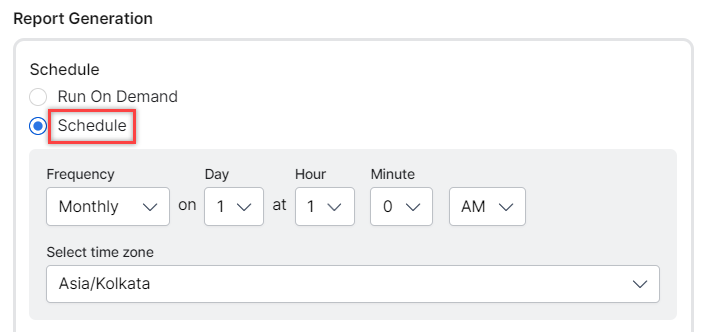
- The report generation follows the selected schedule, as shown in the below example. You can ENABLE SCHEDULE or disable the schedule for the report. This option applies only to scheduled reports.
Changing Filters and Formats
When creating a new report or editing an existing report, you can change the report’s filters and formats as shown below:
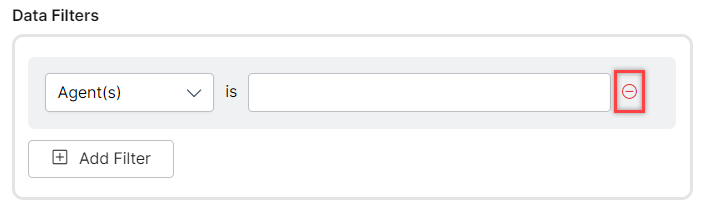
Filters: SmartAssist allows you to add data filters as needed, based on agents or agent groups.
- Click + Add Filter.

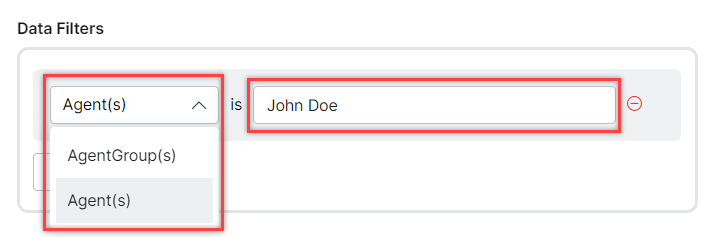
- Select AgentGroup(s).
- Select Default Group.
- Click the (-) sign to remove filters.
Formats: You have the option to choose either a PDF or CSV output format for your report.

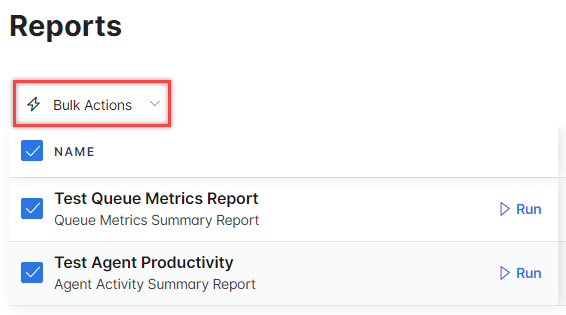
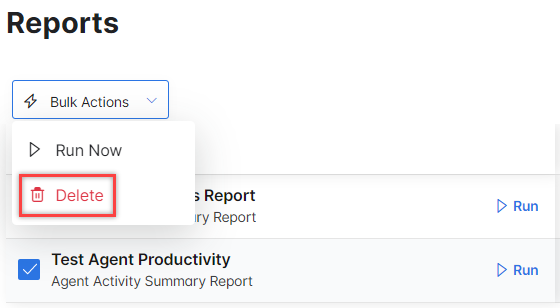
Bulk Actions
Bulk actions enable you to perform run or delete functions on multiple selected reports.
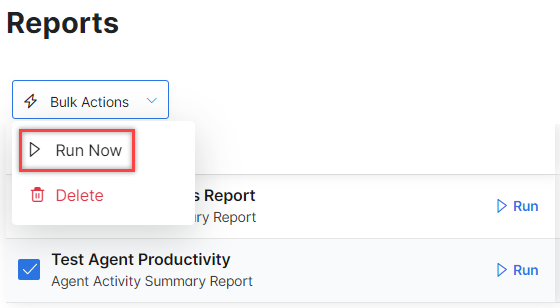
Run Now:
- Select multiple reports from the list.
- The Bulk Action menu appears on the top-left of the screen, above the list of reports.
- The bulk actions menu items are displayed. Click Run Now.
- A confirmation pop-up appears. Type RUN to confirm the action and then click Yes, Run.
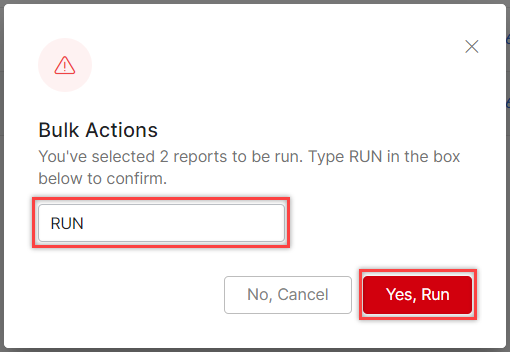
A list of reports that are run together appears.
Delete Reports:
- From the Bulk Actions menu, select Delete to remove the selected reports all at once.
- Type DELETE to confirm the action on the pop-up window and then click Yes, Delete.
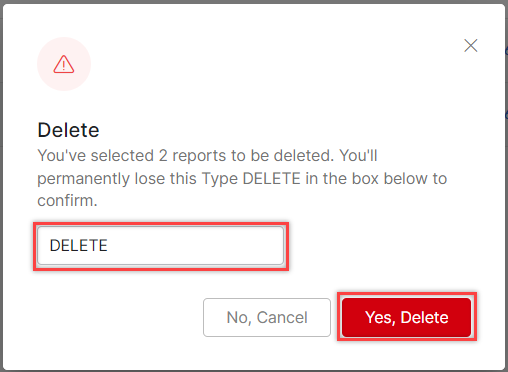
All the selected reports will be deleted.
ACTIONS
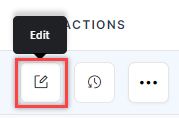
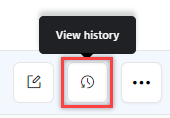
For each report, the following actions are allowed:
- Edit
- View History
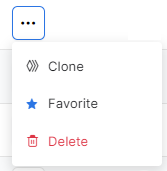
- Clone/Favorite/Unfavorite/Delete (…) Ellipsis button
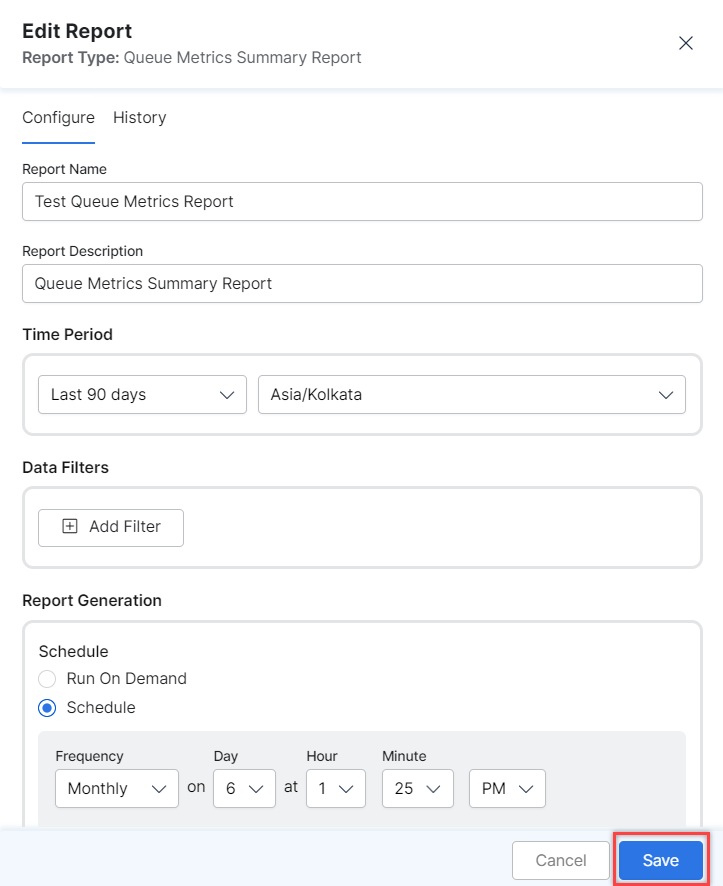
Edit
To edit a report:
- Navigate to the report and click the Edit button.
- A pop-up appears for editing the report.
- Make the necessary changes and click Save.
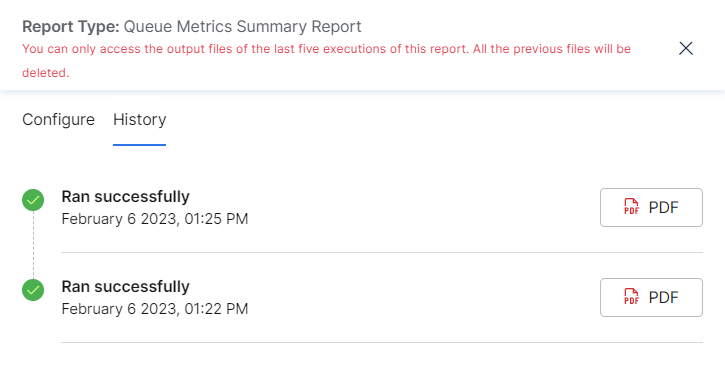
View History
To view the history of any report:
- Navigate to the report and click View History to view the last 5 runs of the reports.
- Click the PDF button to download the report in PDF format.
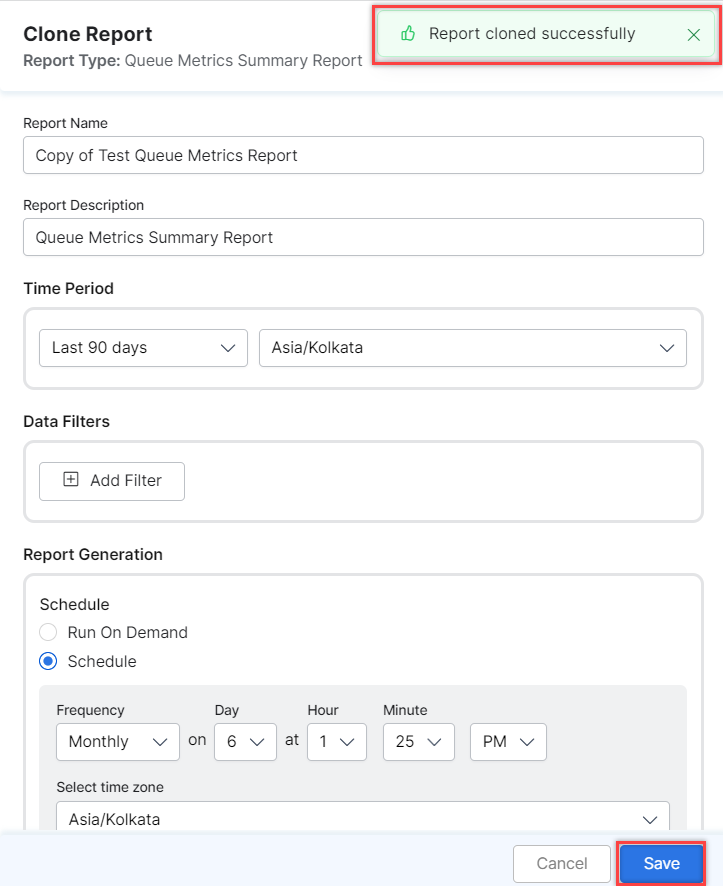
Cloning Reports
To clone a report:
- Navigate to the report and click the ellipses (…).
- Click Clone. A pop-up appears for cloning the report.
- Click Save.
Favorite/Unfavorite
To mark a report favorite/unfavorite:
- Navigate to the report and click the ellipses (…).
- Click Favorite/Unfavorite. A pop-up appears confirming the update.
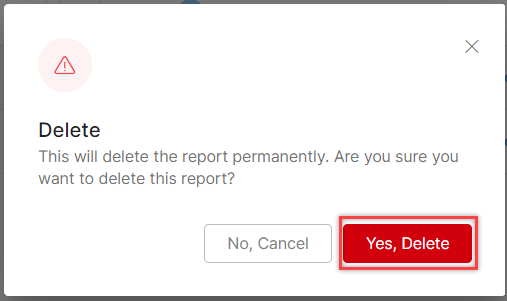
Deleting Reports
To delete a report:
- Navigate to the report and click the ellipses (…).
- Click Delete. A pop-up appears for confirming the deletion.
- Click Yes, Delete.