The IVR Digit Input node records a non-IVR menu interaction. It is used during dynamic interactions when the caller needs to provide input such as a phone number or the last four digits of their credit card to proceed. You can configure the condition for receiving the input, the action if the condition is satisfied (success flow), the timeout value in seconds for the contact’s response/input, and the error-handling use cases. You can implement this node within your Experience Flows.
To configure this node, set up the following tabs:
General Settings
Click the General Settings icon and provide the following information:
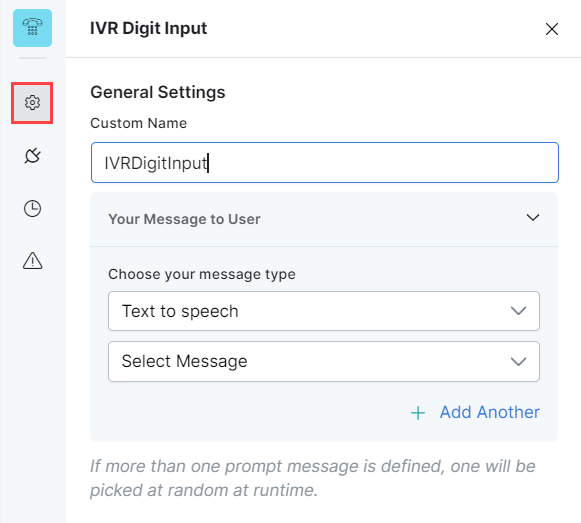
- The Custom Name: This is the name by which you will identify the node within the flow.
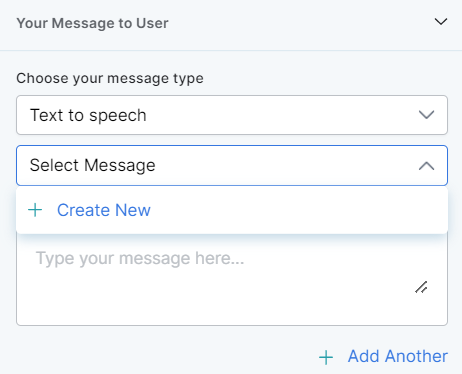
- Your Message to User: The message that will be played to the customer via the IVR. Select one of the following options from under Choose your message type:
- Text to speech: This option allows you to transcribe text to speech. Type the text to be transcribed in the textbox or select an already configured message.
- Create a new prompt message to be played out for the Text to Speech message type by clicking + Create New. Enter a name for your message, type its contents and select the language.
- Define multiple message types for the prompt message to be played to the customer by clicking + Add Another. In this case, one message will be randomly selected and played during runtime.
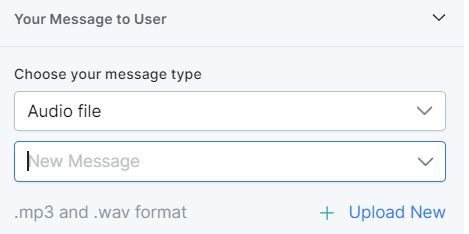
- Audio File: You can type a new message to be played to the customer in the text field or click + Upload New to upload an audio file (.mp3 or .wav format) with the message to be played.
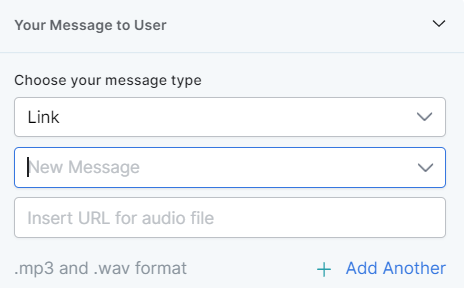
- Link: Click + Create New to add the text of the message you want to play to the customer and insert the URL of an audio file in .mp3 or .wav format. Click + Add Another to add another message URL.
- Text to speech: This option allows you to transcribe text to speech. Type the text to be transcribed in the textbox or select an already configured message.
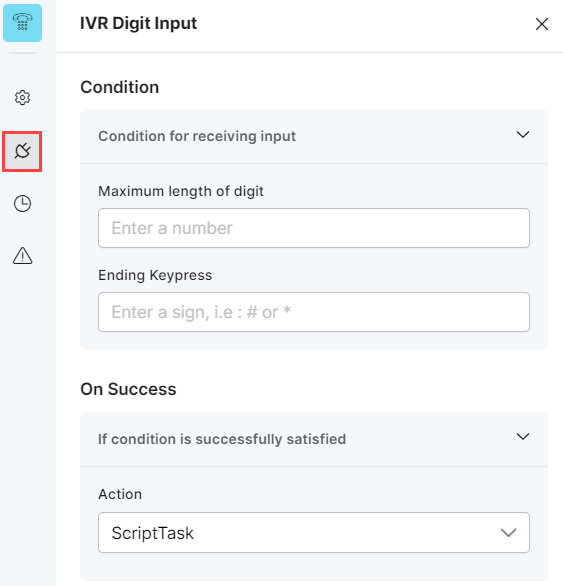
Conditions
Conditions allow you to set the parameters based on which the digit input is recorded. Click the Condition icon to define the input conditions by providing values for the following fields:
- Maximum length of digit: Define the limit for the number of digits a caller can input, after which the conditional message is played.
- Ending Keypress: Define the key to delimit or indicate the end of the caller’s input. For example, when “#” is pressed, it indicates that the caller has completed keying in their input.
- Define the On success flow by selecting a node from the Action dropdown list. The flow is directed to the selected node from the current node if the condition is satisfied.
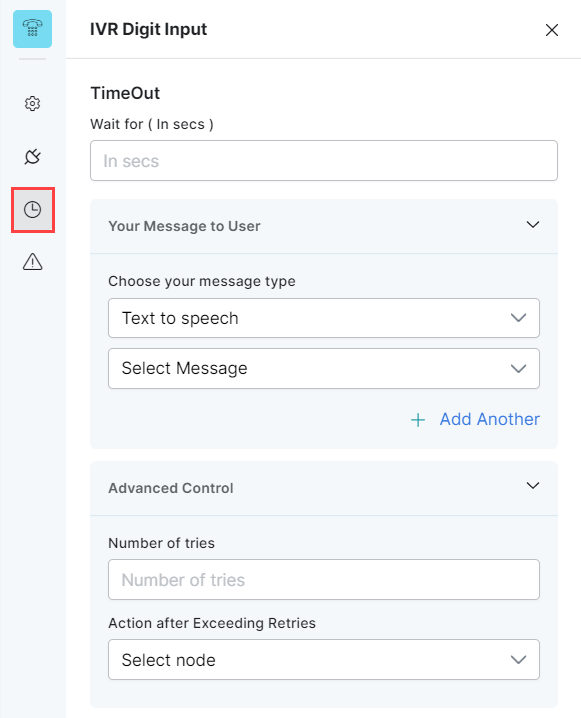
TimeOut
Set up the TimeOut flow by defining the following fields:
- Under TimeOut, type the wait time in seconds, after which a timeout event will occur.
- Your Message to User: From the Choose your message type dropdown list, select an option from Text to Speech, Link, or audio; then, type the message, upload an audio file (.mp3 and .wav formats are only supported for audio files), or provide a URL to the error message to be played to the customer when a timeout event occurs. See General Settings for details on these options.
- Under Advanced Control, configure the following:
- Number of Tries: Type the limit for the maximum number of retries allowed for a customer to key in the input.
- Action after Exceeding Retries: Select the node to direct the flow to after a timeout has occurred.
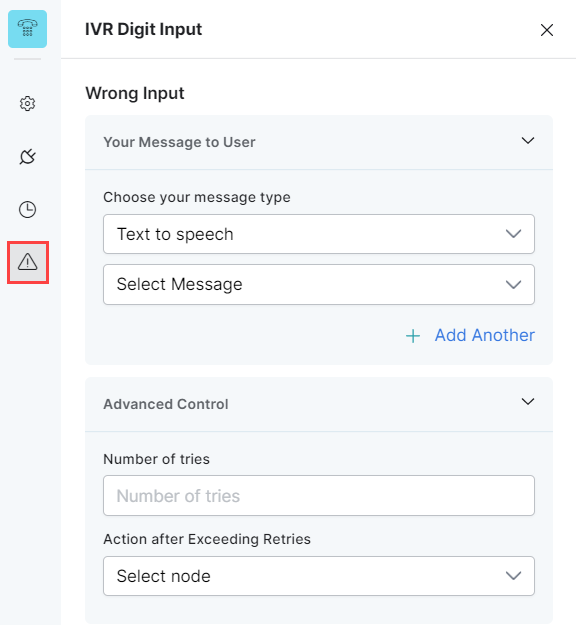
Wrong Input
This tab allows you to configure the flow when the caller provides a wrong digit input.
- Your Message to User: From the Choose your message type dropdown list, select an option from Text to Speech, Link, or audio; then, type the message, upload an audio file ( .mp3 and .wav formats are only supported for audio files), or provide a URL to the error message to be played to the customer when a timeout event occurs. See General Settings for details on these options.
- Under Advanced Control > Number of Tries, type the maximum number of retries or the allowed limit for a customer to key in the correct input.
- Under Advanced Control > Action after Exceeding Retries, select the node to direct the flow after the wrong input retries have exceeded. Either select a node type to create the node or identify and select an existing node.
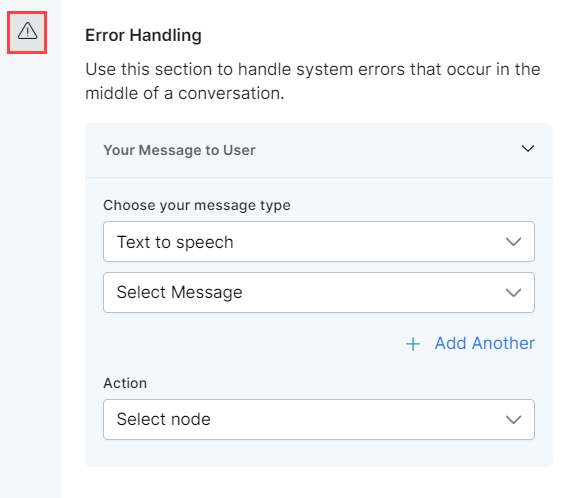
Error Handling
Error Handling is available under the Wrong Input tab. Use this section to handle system errors that occur during a call.
Define the following fields that determine how system errors will be handled during runtime:
- Your Message to User: Choose the message type from Text to Speech, Link, or audio; then, type the message, upload an audio file (mp3 and .wav formats are only supported for audio files), or provide a URL to the error message that will be played out to the caller when a system error occurs. See General Settings for a detailed explanation of these features.
- Action: Select the node to which you want to direct the error handling flow and define the system behavior. Either select a node type to create the node or identify and select an existing node.
Store Digit Input
Once the caller listens to the IVR message, they need to key in their input. This is received by SmartAssist and is stored as a variable under a script task.
The Context Variable syntax is the following:
Context.steps.<<context_node_name>>
example:
context.steps.IVRDigitInput
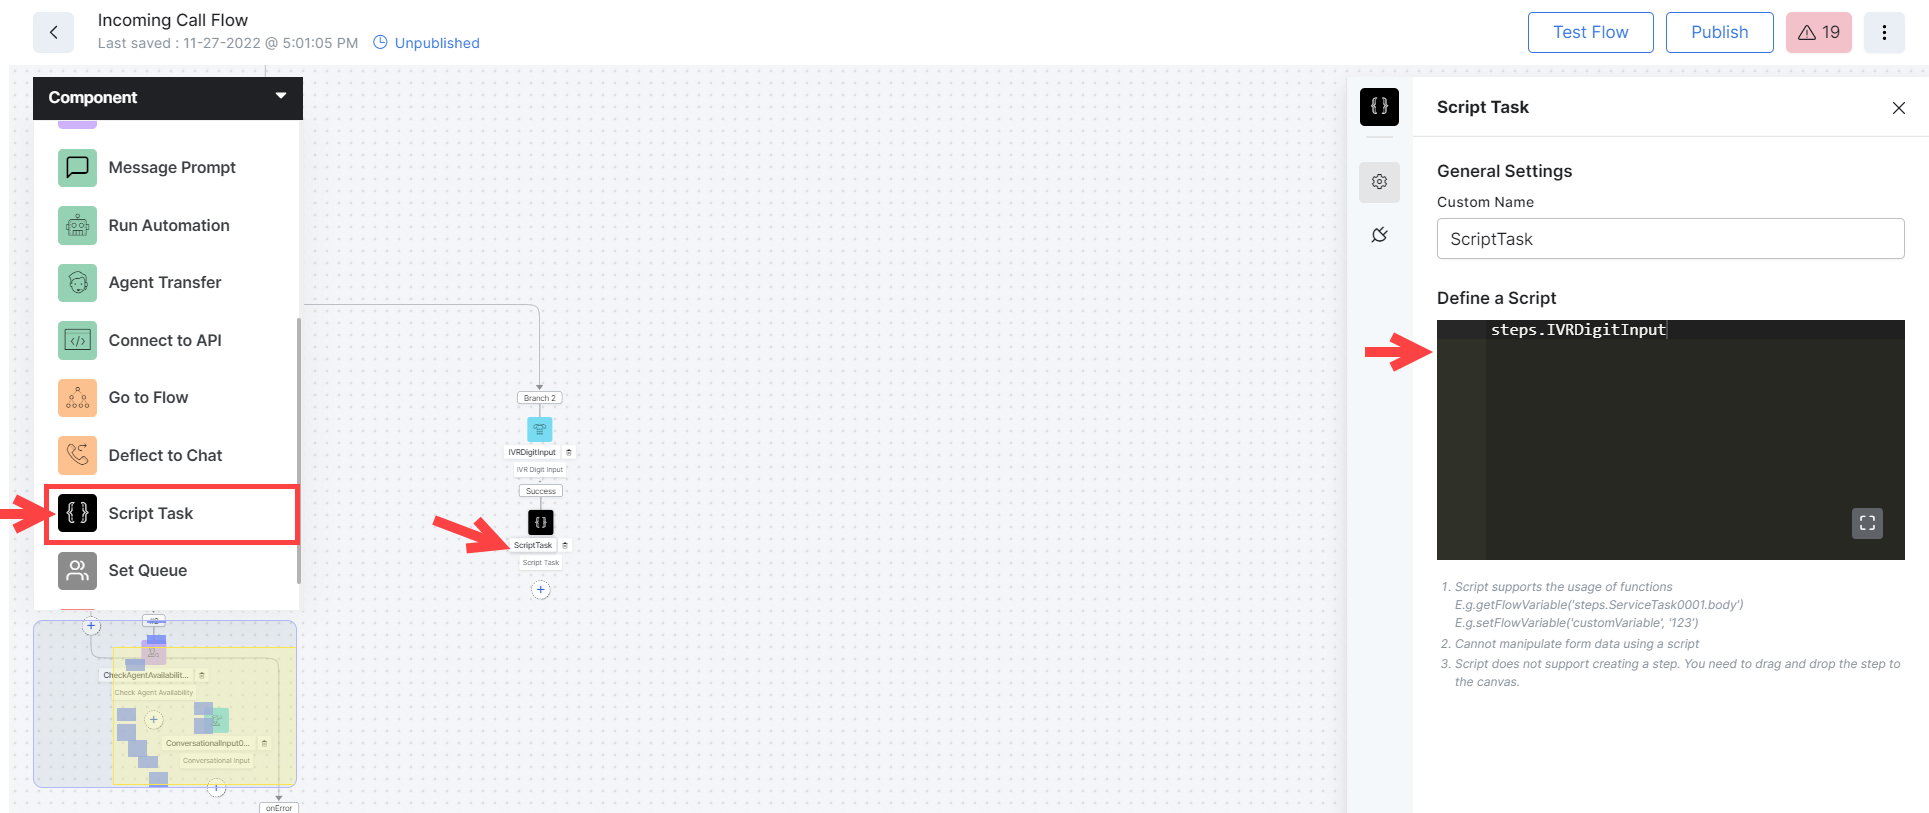
To define the script task that will store the input from this IVR Digit Input node, follow these steps:
- Under the IVR Digit Input node, add a Script Task node.
- Under General Settings > Define a script, add
steps.nodename
(For example:steps.IVRDigitInput).