
While customers wait for an agent to assist with their query via voice or chat, you can customize their Waiting Experience to maintain engagement and improve customer satisfaction.
Key Features
You can configure the Waiting Experience within SmartAssist using the following features:
- Routing rules based on agent skills.
- Message options for both voice and chat requests:
- Initial message when a request is assigned to a queue.
- Hold audio for calls,
- Periodic message delivered while contacts wait – both for calls and chats.
- Message language configuration.
- Call to chat deflection if the wait time exceeds a specified limit.
- Callback if the wait time exceeds a specified limit.
- Send a voicemail if the call wait duration exceeds a specified limit, the queue position is too long, or the estimated wait time exceeds a specified limit.
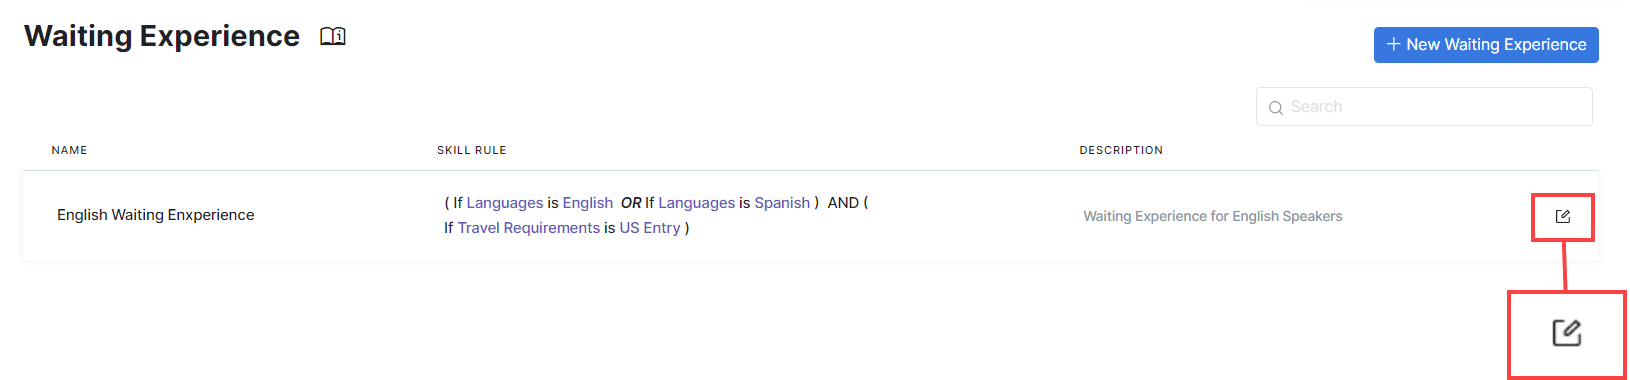
The Waiting Experience Live Board
You can find the Waiting Experience Live Board by navigating to Configuration > Waiting Experience.
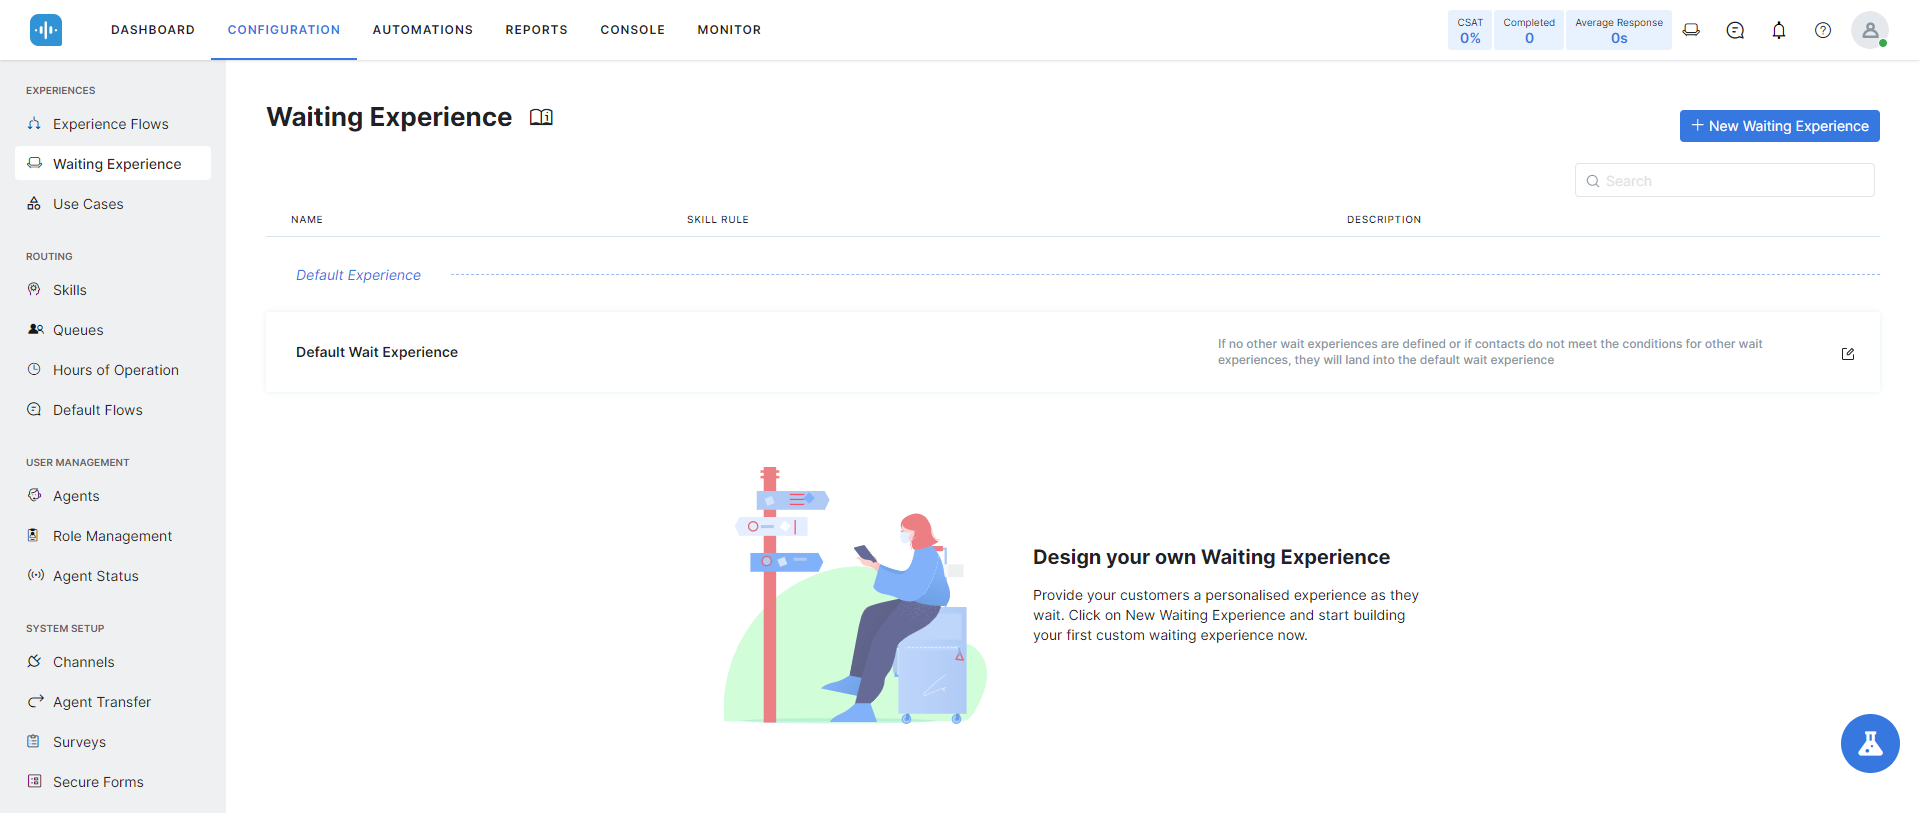
Waiting Experience Live Board features
The Waiting Experience section displays the following fields:
| Field | Description |
|---|---|
| Name | The name of the Waiting Experience entry. |
| Skill Rule | The skill rules that have been configured for the entry. The waiting experience. Conversations matching these skill rules will go through the waiting experience configured within this entry. |
| Description | The description of the Waiting Experience entry. |
| Update (Icon) | This icon lets you access the configuration area for a Waiting Experience entry, where you can update the available options. |
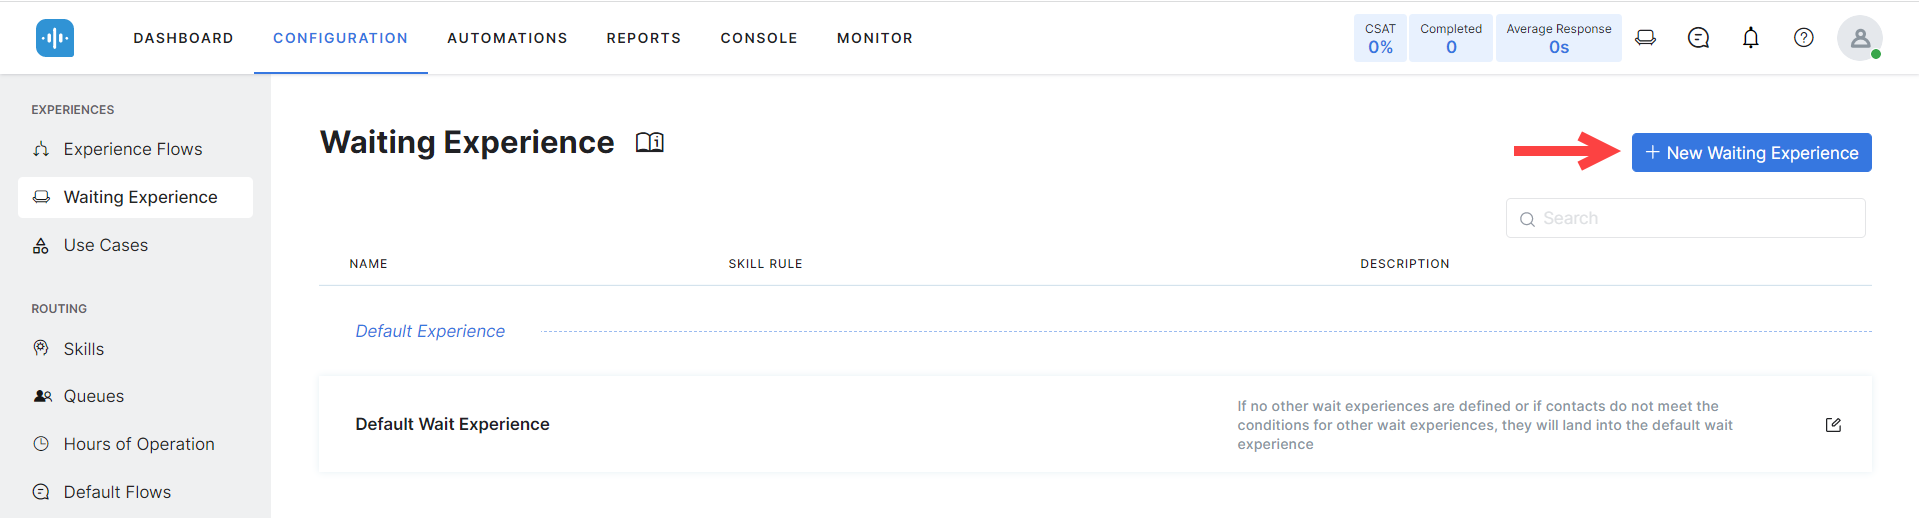
Add Waiting Experience
To add a new waiting experience entry, follow these steps:
- Navigate to Configuration > Waiting Experience.
- Click the + New Waiting Experience button.
- In the Add New Waiting Experience window, you will see three tabs:
- Configuration, where you can set up the name, description, and routing rules;
- Call Experience, where you can configure the Waiting Experience for customers who call;
- Chat Experience, where you can customize the Waiting Experience for chats.
Configuration
The Configuration section lets you set up the basics of your Waiting Experience entry.
Get started by configuring the following:
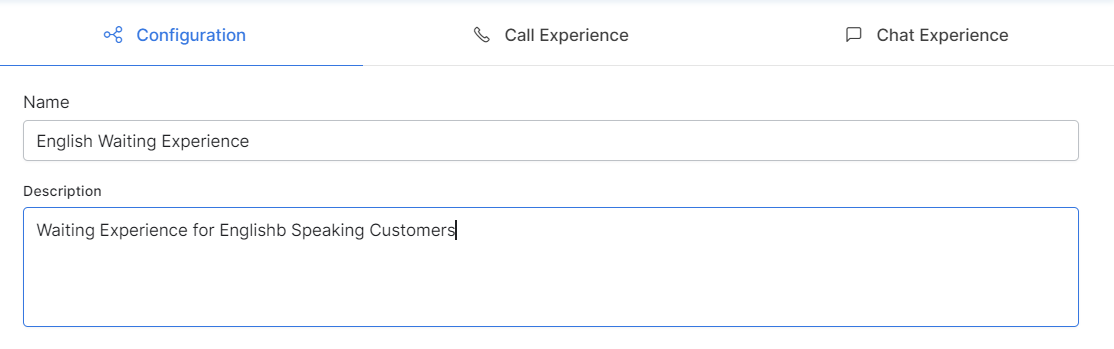
Name and Description
Provide a Name and a brief Description for the Waiting Experience entry
Routing Rules
Define the configuration rules for the Skill Group and Skill waiting queue constraints.
- Select the Skill Group, then the Skill that the Waiting Experience should match;
- Click the row-wise +Add button to add a new row to the existing Routing Rule (OR) condition and the Delete icon to delete a row;
- Configure the AND/OR conditional logic by hovering over a rule row and toggling between the tabs, as shown in the demo below;
- To configure the AND condition, click the + Add button below the OR/AND section;
- To remove a rule row, click the Delete (ⓧ) icon next to the row. To delete a rule section, click the Delete (bin) icon next to it.
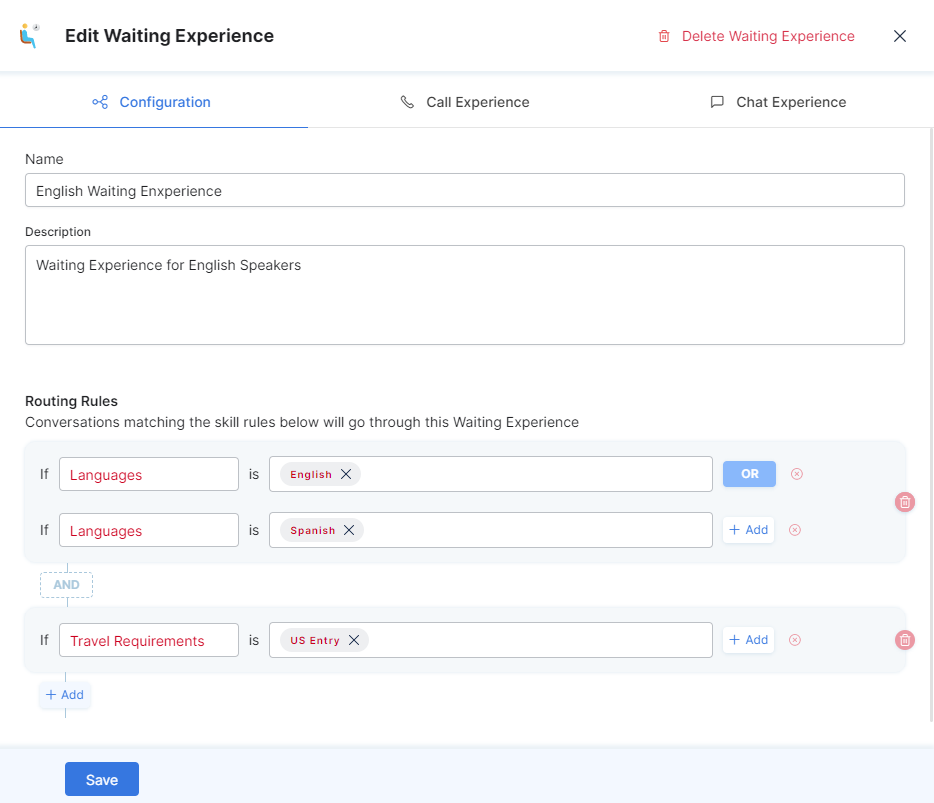
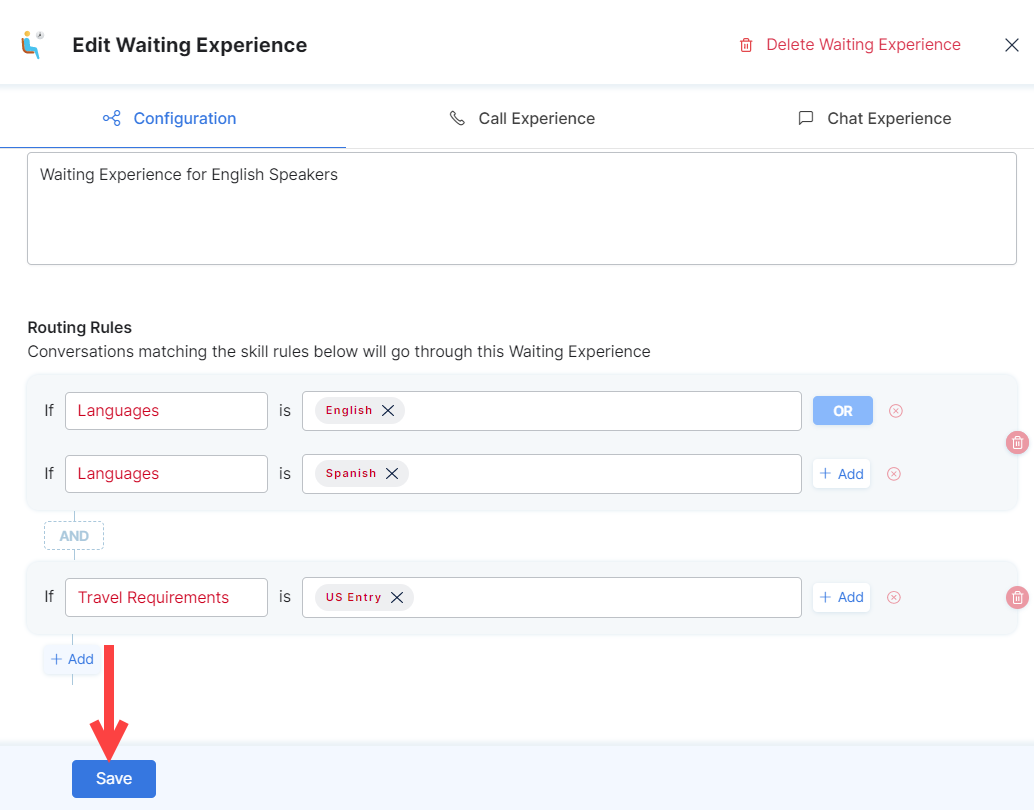
Below is an example configuration for Routing Rules:
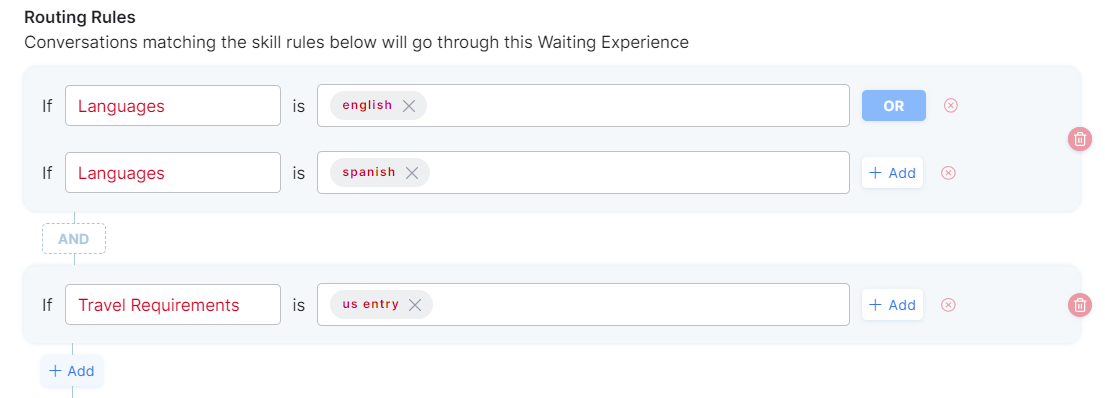
In this example, customers are mapped to a specific agent as follows:- If the skill group Languages and skill is English OR,
- If the skill group is Languages and skill is Spanish, AND,
- If the skill group is Travel Requirements and skill is US Entry.
Call Experience
To set the call waiting experience, click Call Experience for customers contacting you using the voice channel.
In the Call Experience page, configure the settings below:
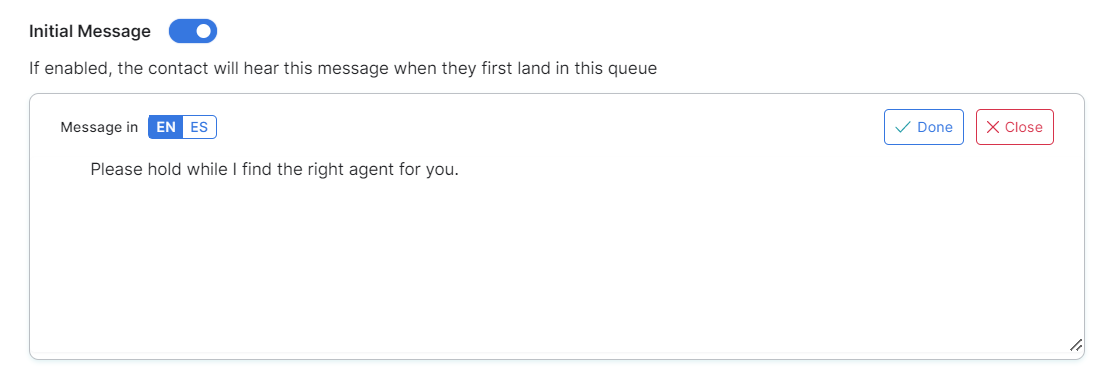
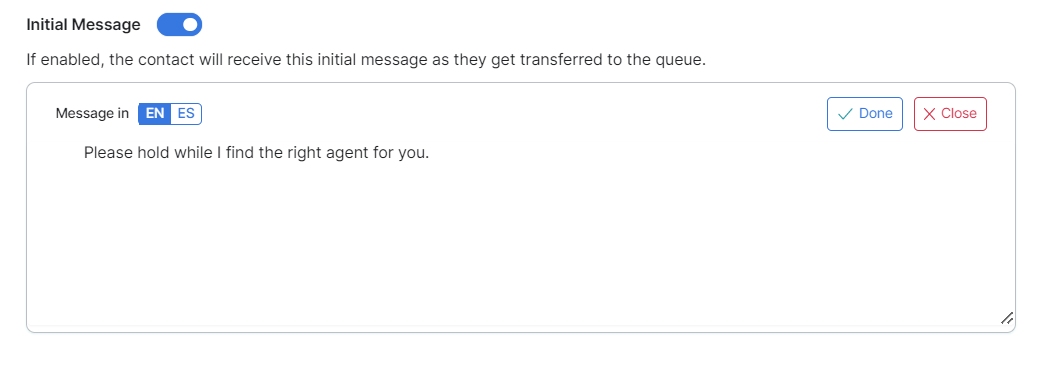
Initial Message
This message is played to the customer waiting in the queue and is enabled by default. To change the language, select the desired language tab, edit the message, and click Done.
Agent Transfers
This message is played to the customer when they are transferred to an agent or queue. Click the message to edit it, and click Done.
![]()
Hold Audio
This audio is played to the customers on hold. Select the audio you wish to play from the Hold Audio dropdown list.

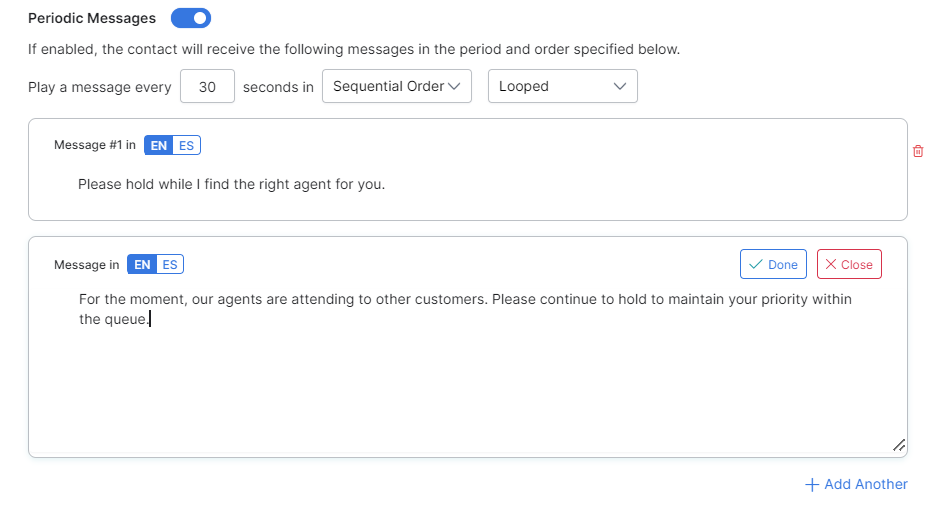
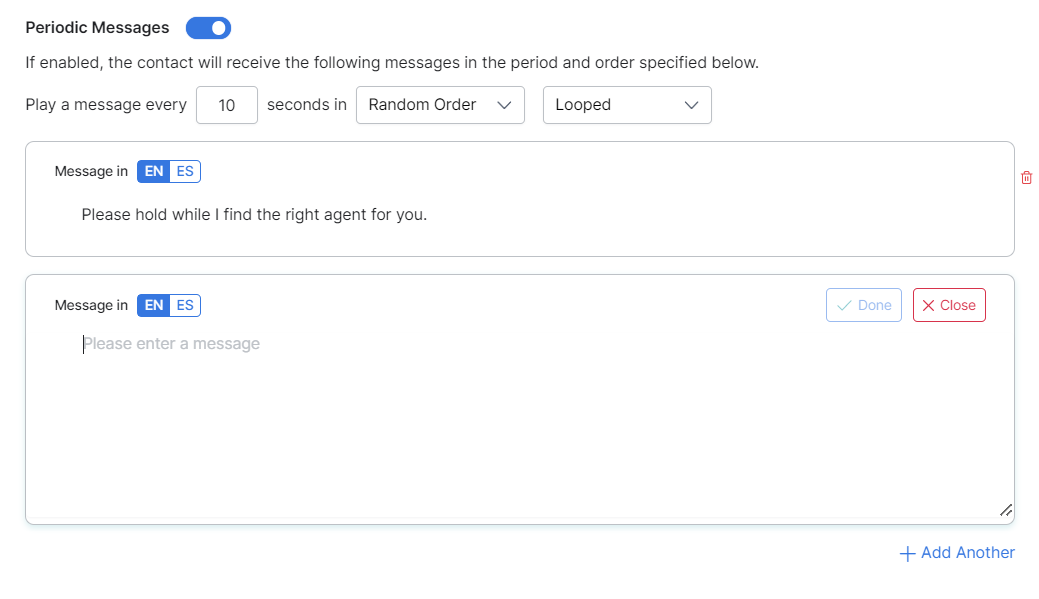
Periodic Messages
These messages are played periodically to the customers waiting in the queue or put on hold. To configure them, follow these steps:
- Set the number of seconds within which the periodic message should play;
- Set the play order as either random or sequential;
- Select the type of playback – either once or looped;
- Edit the message and change the language, as needed, by clicking one of the language options at the top of the editor. Click ✔ Done to save or click x Close to discard your changes;
- To add another message, click + Add Another;
- To delete a message, click the Delete icon next to it.
Periodic messages also enable organizations to allow their customers to view/listen to their Queue Position and Current Wait Time (EWT).
You can configure the following variables:
- Queue Wait Time: {{queue.waitTime}} min – This is shown based on the average waiting time in the queue. The calculation is refreshed every 15 mins.This can be calculated as follows:
- For each conversation, the lookback window = currentTime – 15 minutes.
- Expected Wait Time = average(acceptance_time) for all conversations in the lookback window.
- If the number of conversations in the lookback window is = 0, assume a default value of 1.
- Add 1 minute (buffer time) to each calculation in the previous step.
Example 1: When there are conversations in the lookback window.
- Determine the Lookback Window:
- Current time: 3:00 PM
- Lookback window: Current time – 15 minutes = 2:45 PM to 3:00 PM
- Gather Conversations in the Lookback Window: If we have the following conversation acceptance times in the lookback window:
- Conversation 1: 3 minutes
- Conversation 2: 5 minutes
- Conversation 3: 4 minutes
- Calculate the Average Acceptance Time:
- Total acceptance time = 3 + 5 + 4 = 12 minutes
- Number of conversations = 3
- Average acceptance time = Total acceptance time / Number of conversations = 12 minutes / 3 = 4 minutes
- Check for Zero Conversations:
- In this case, we have 3 conversations, so we don’t need to use the default value of 1.
- Add Buffer Time:
- Expected Wait Time = Average acceptance time + Buffer time
- Expected Wait Time = 4 minutes + 1 minute = 5 minutes
Queue Wait Time: 5 minutes
Example 2: When there are no conversations in the lookback window.
- Determine the Lookback Window:
- Current time: 3:00 PM
- Lookback window: Current time – 15 minutes = 2:45 PM to 3:00 PM
- Gather Conversations in the Lookback Window: This period has no conversations.
- Calculate the Average Acceptance Time:
- Number of conversations = 0
- Use default value = 1 minute
- Add Buffer Time:
- Expected Wait Time = Default value + Buffer time
- Expected Wait Time = 1 minute + 1 minute = 2 minutes
Queue Wait Time: 2 minutes
- Queue Position: {{queue.position}}
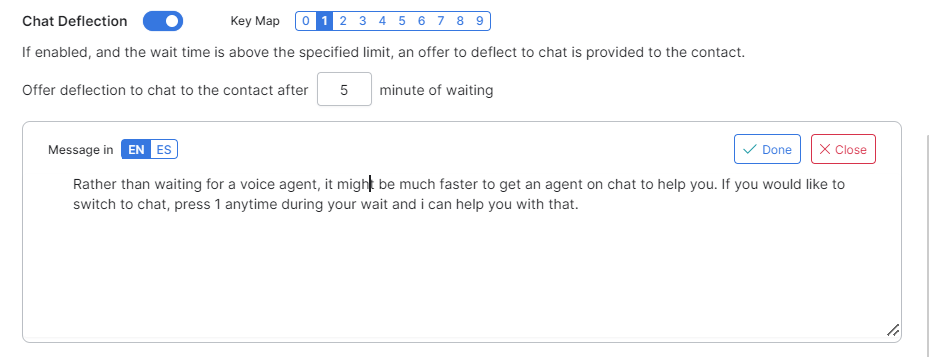
Chat Deflection
You can configure the following call to chat deflections when the wait time exceeds a set limit:
- Enable the option to activate it;
- Set the digit key that customers should press for deflection; then set the time after which the chat deflection should occur. For example, deflect from call to chat if the estimated wait time exceeds 3 minutes, and ask customers to press #7;
- Edit the chat deflection message in the textbox. Use the language tab to change languages. Click ✔ Done to save or click x Close to discard your changes.
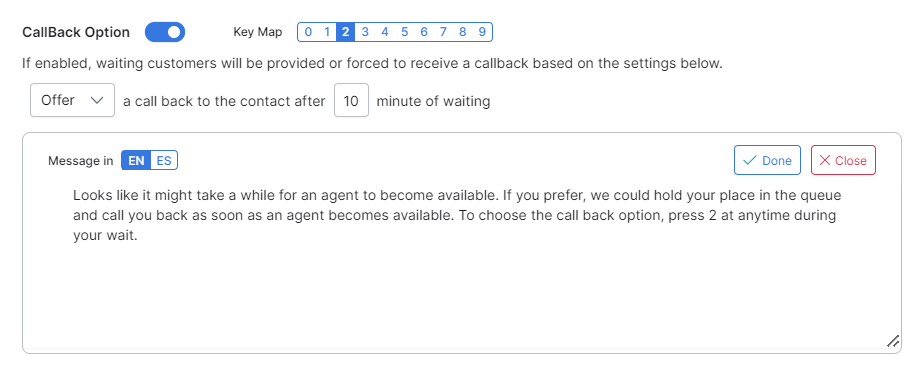
CallBack Option
If the wait time exceeds a set limit, you can offer or force a callback for waiting customers as follows:
- Enable the option to activate it;
- Set the digit key that customers should press to be redirected to the callback service. Waiting customers can either be offered or forced to receive a callback based on the settings configured here;
- Edit the chat deflection message in the textbox. Use the language tab to change languages. Click ✔ Done to save or click x Close to discard your changes.
Chat Experience
Click the Chat Experience tab to start configuring the waiting experience for customers contacting you via chat.
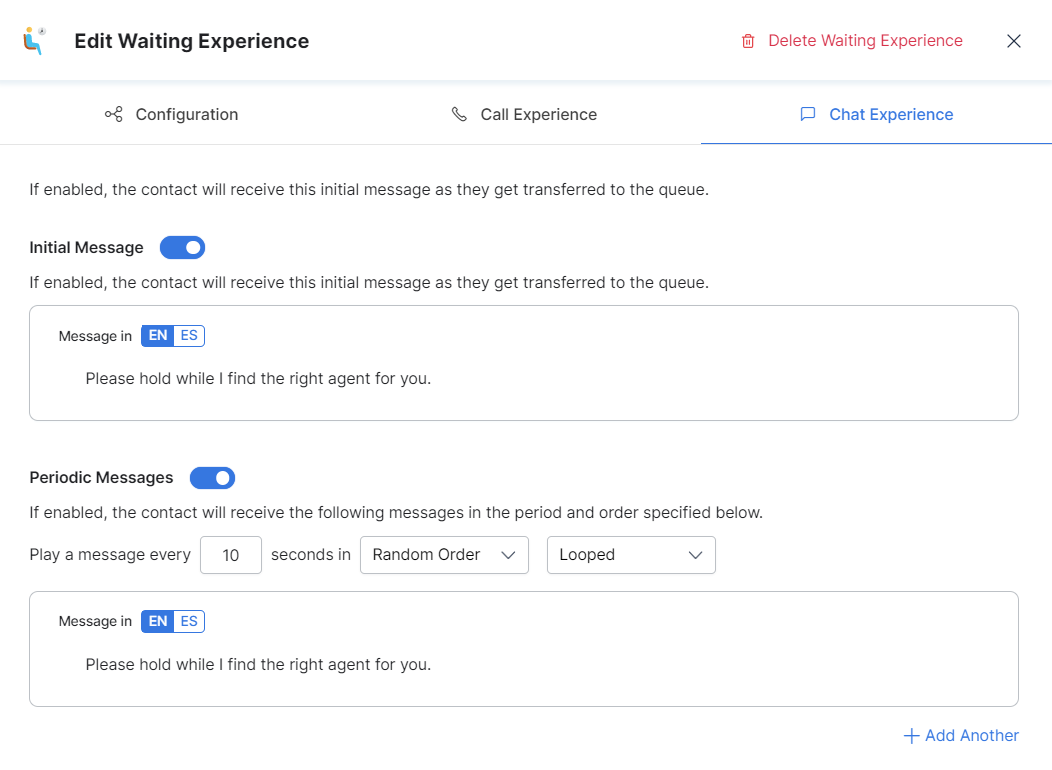
In the Chat Experience section, you can configure the following settings:
Initial Message
This message will be displayed to the contact waiting in the queue. By default, the initial message is enabled.
To edit this message text and language, type your custom message in the textbox, and then select a language. Click ✔ Done to save or click x Close to discard your changes
Agent Transfers
This message will be displayed when the customer is transferred to an agent or a queue. By default, agent transfers is enabled.
To edit this message text and language, type your custom message in the textbox, and then select a language. Click ✔ Done to save or click x Close to discard your changes.
![]()
Periodic Messages
These messages are periodically displayed to customers waiting in the chat queue. They can be configured as follows:
- Set the number of seconds within which the periodic message should display;
- Choose whether to display the messages randomly or sequentially;
- Select whether the message should display once or be looped;
- Edit the message text and change the language, as needed, by clicking one of the language options at the top of the editor. Click ✔ Done to save or click x Close to discard your changes;
- To add another message, click + Add Another;
- To delete a message, click the Delete icon next to it.
Save
Click the Save button at the bottom of the Edit Waiting Experience window to make sure that your configuration is saved. You can save all your settings by clicking in any tab.
Edit Waiting Experience
To edit Waiting Experience configurations, follow these steps:
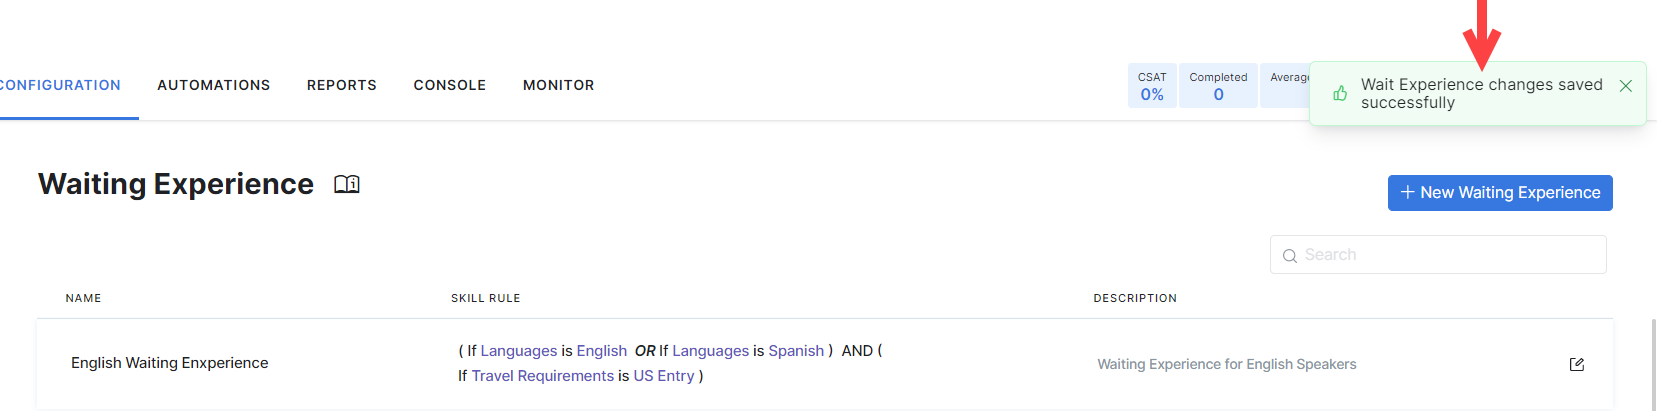
- In the Waiting Experience section, click the Edit icon for the waiting experience entry you want to edit.
- In the Edit Waiting Experience window, modify the configurations as required, and click Save.
- A success confirmation message is displayed when the Waiting Experience changes are updated.
Delete Waiting Experience
To delete a Waiting Experience entry, follow these steps:
- In the Waiting Experience section, edit the entry you want to delete;
- At the top right of the Edit Waiting Experience window, click Delete Waiting Experience.;
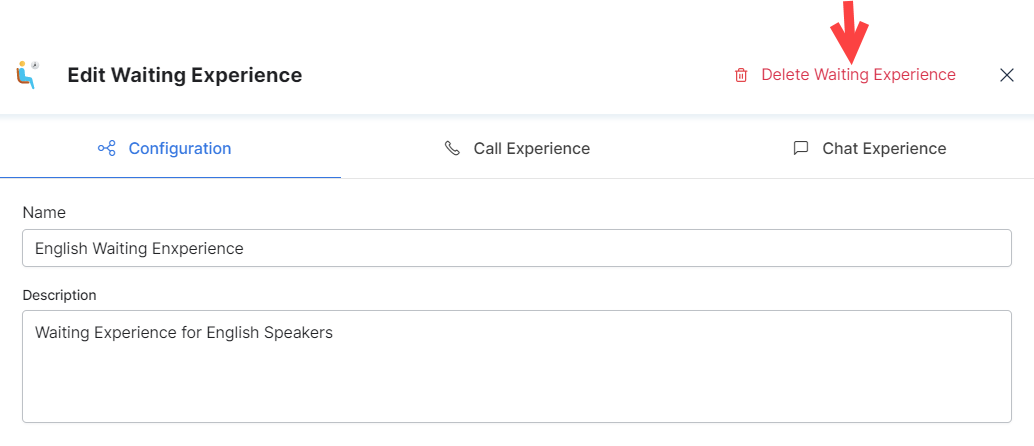
- You will be asked to confirm your choice. If you are sure that you want to delete the entry, click Yes.
Note: Deleted Waiting Experience entries cannot be restored. Please proceed with caution.