Standard Responses are predefined (“canned”) messages that agents can use to speed up their delivery of information during customer interactions: welcome messages, salutations, notifications, and more. Standard Responses are organized into groups and may be assigned to agents according to skills or agent groups.
To access this feature, go to Configuration > System Setup > Standard Responses.
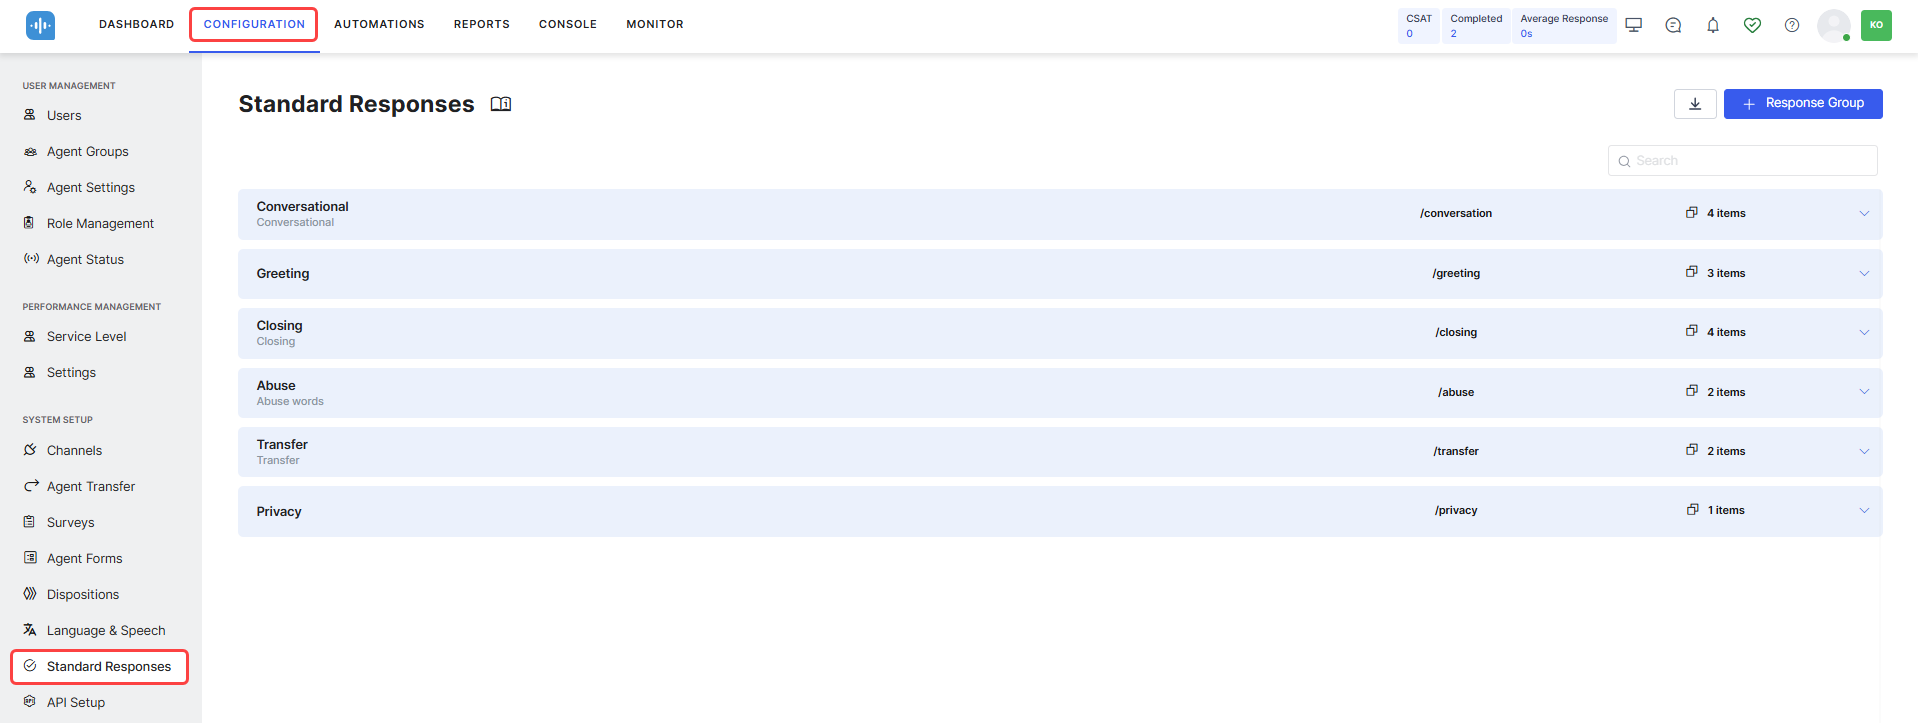
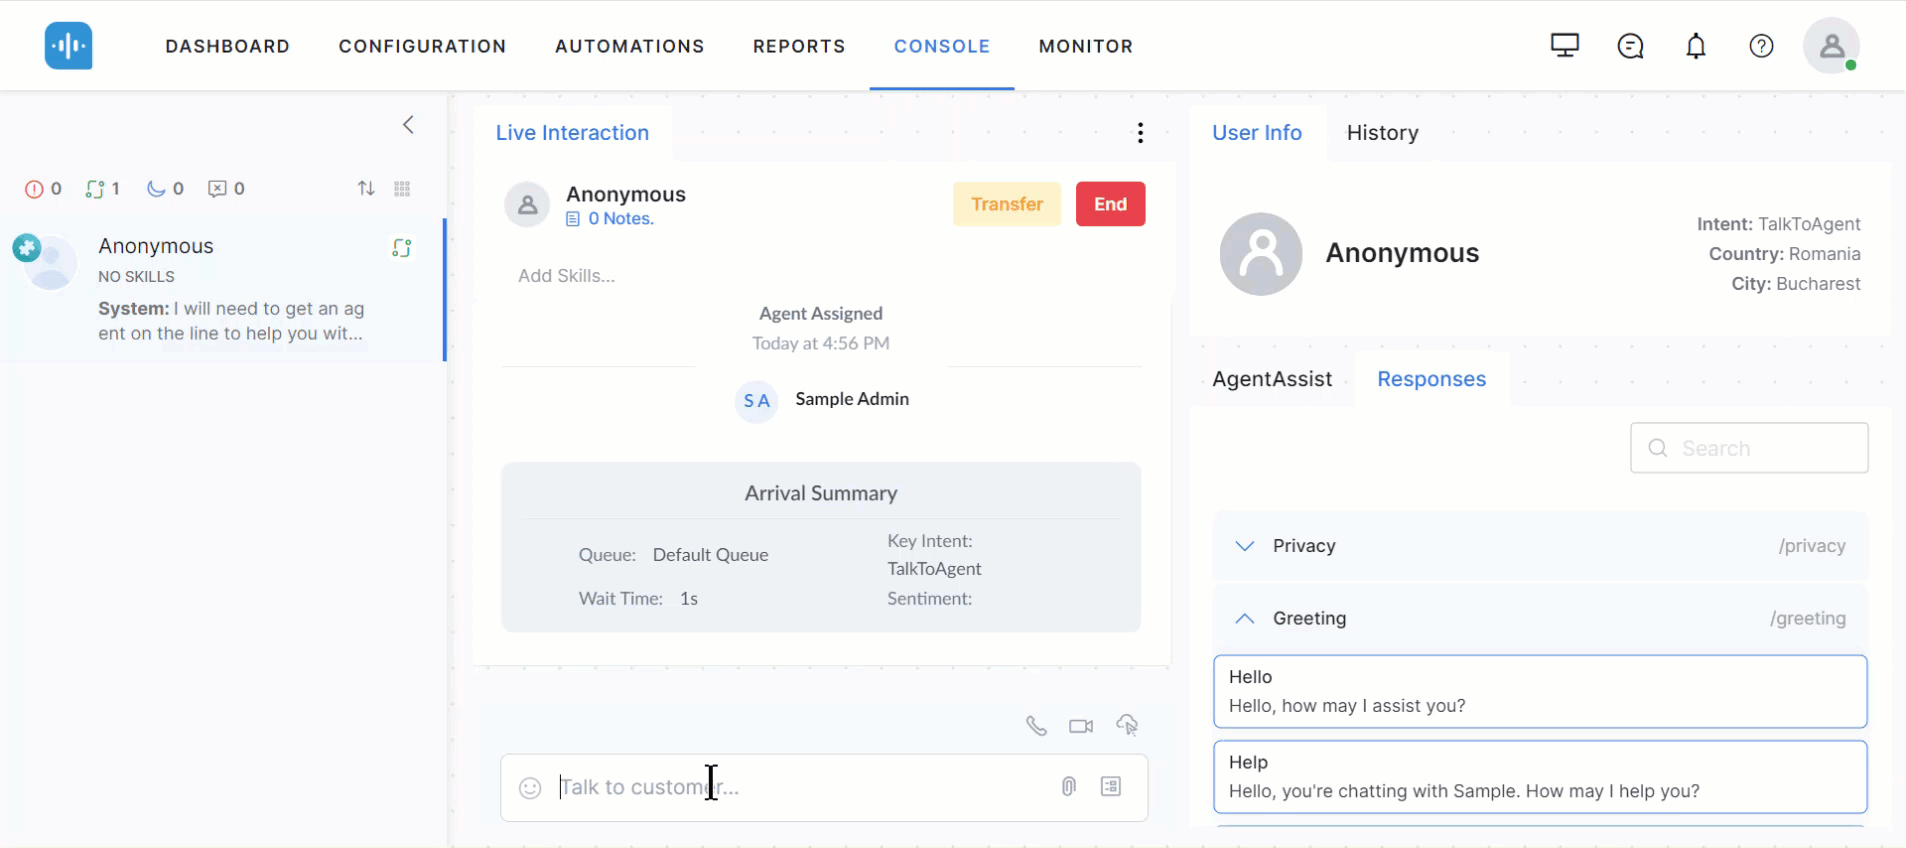
The Standard Responses Live Board
The Standard Responses section provides the following high-level features:
- Add a new Response Group.
- Name-Level Search Response Groups and Standard Responses. The search runs for groups and responses at the (name level and does not extend to the response message content.
- Browse Standard Responses and Groups by clicking the name of a group. This action opens up the group and lists the responses included within it.
Response Groups
Standard Responses are organized into Response Groups, to which agents need to be mapped for responses to be available to them in the Agent Console.
View an Existing Response Group
Click on a Response Group name to view its contents:
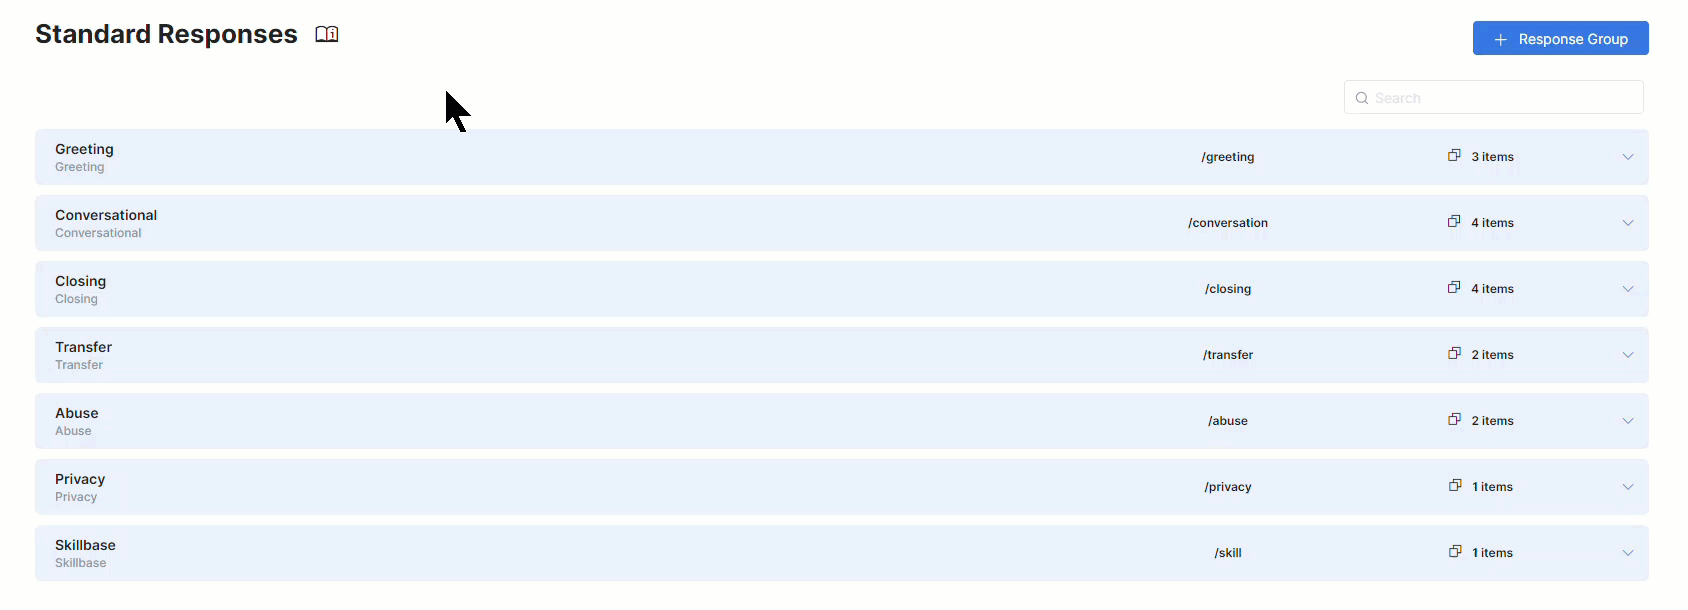
SmartAssist comes preconfigured with the following Response Groups:
- Greeting: Welcome message like Hello, How may I assist you?
- Conversational: General conversation like a follow-up on a delay, small talk, etc.
- Closing: Closing statements, feedback, request to fill up a survey, thank you, and chat again, closing the chat because of no response from the customer.
- Transfer: Interaction transfer to a manager, agent, or queue.
- Abuse: Fair (initial) and final warning levels when the customer uses abusive language.
- Privacy: Permission-based service responses that enhance conversational privacy.
Create a Response Group
To create a Response Group, follow these steps:
- Go to System Setup > Standard Responses.
- In the Standard Responses section, click + Response Group.

- In the Add New Response Group panel, provide the following details:
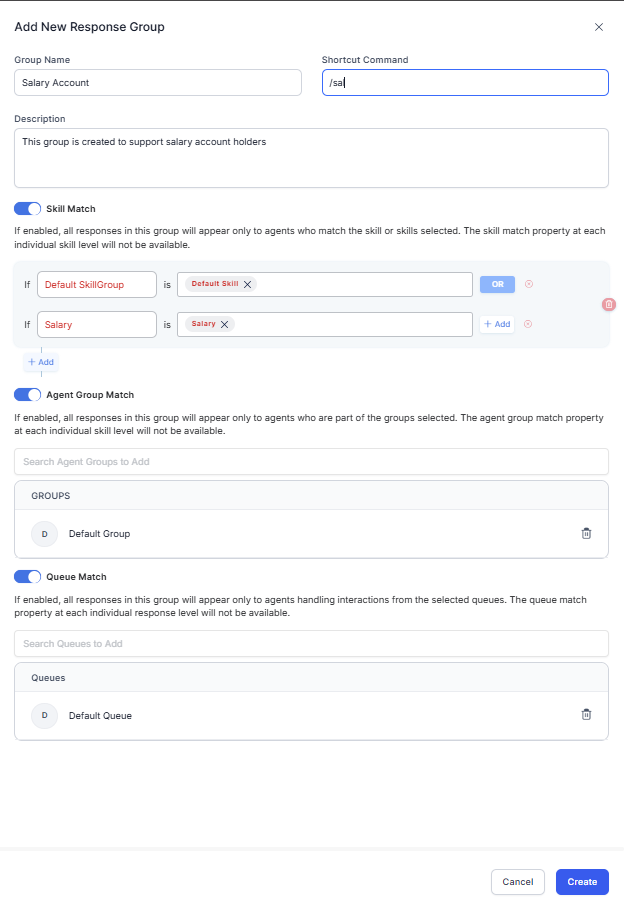
- Group Name – The name of your response group. For example, Greetings, Sales Responses, etc.
- Shortcut Command – Agents can quickly find the group of responses by typing the shortcut command in their chat response box. This action pulls up a list of available responses within the group.
- Description – A brief description of the response group.
- Skill Match – By default, this feature is disabled. While Skill Match is off at the group level, you can map skills per response. If you enable this feature, all the responses in this group will be mapped to the selected skills and made available to matching agents. Therefore, the group and its responses within it will not be made available to agents who are not assigned the mapped skills. The skill match does not take routing into account, so if an agent matches the skills but, for example, is transferred a conversation from an agent with a different skill set, they will still see the responses.
- Configure the OR/AND conditional logic by toggling between the tabs.
- To add a new AND/OR row to a condition, click the +Add button on the right.
- To delete a row for the OR condition, click the Delete (x) icon.
- To configure the AND condition, click the + Add button underneath the AND/OR section.
- You can add additional AND/OR conditions after the AND operator.
- To delete an entire AND/OR or AND condition, click the Delete (bin) icon on the right. This action removes all rows associated with that condition.
- Below is a short demo of this configuration:

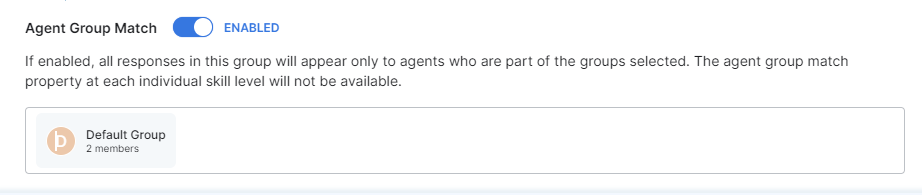
- Agent Group Match – This option is disabled by default. When enabled, all the responses in this group appear only to member agents. The agent group matching property at each skill level is not available.
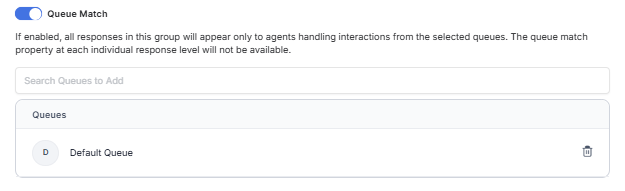
- Queue Match – When Queue Match is enabled, administrators can select one or more queues from a dropdown, and the response group becomes visible only to agents handling interactions from those queues.
- Configure the OR/AND conditional logic by toggling between the tabs.
Edit a Response Group
To update an existing response group, follow these steps:
- Under Standard Responses, click the desired response group name. This action displays a detailed view of the response group.
- Click the Edit icon next to the group name.

- Make the necessary changes in the Edit Response Group panel and click Save.
Delete a Response Group
To delete a response group, follow these steps:
- Under Standard Responses, click the desired response group name.
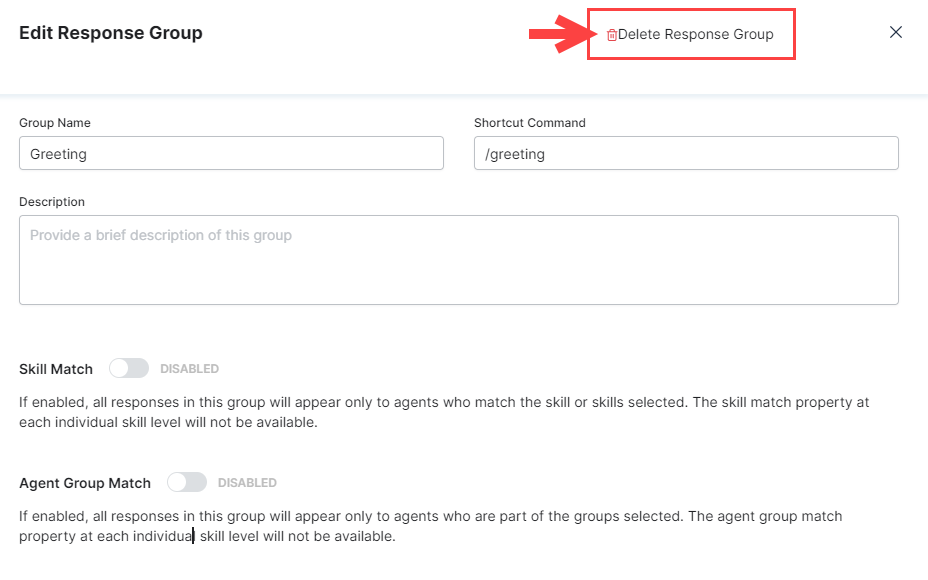
- In the detailed view panel, click the Edit icon next to the group name.
- In the Edit Response Group panel, click the Delete Response Group icon.
- Click Delete on the delete confirmation dialog. This action removes the group and the responses it contains.
Response Management
Create a Response
To create a new response within a response group, follow these steps:
- Under Standard Responses, click the desired response group entry in the list to view the mapped responses.
- Click + New Response.

- In the Add New Response panel, set the title (name) and the auto-expire values.
- Title: The name to identify the response.
- Auto Expire: Select Never if you don’t want the response to expire. Otherwise, select a Custom Date to set the end date and time from the calendar when the response automatically stops appearing.
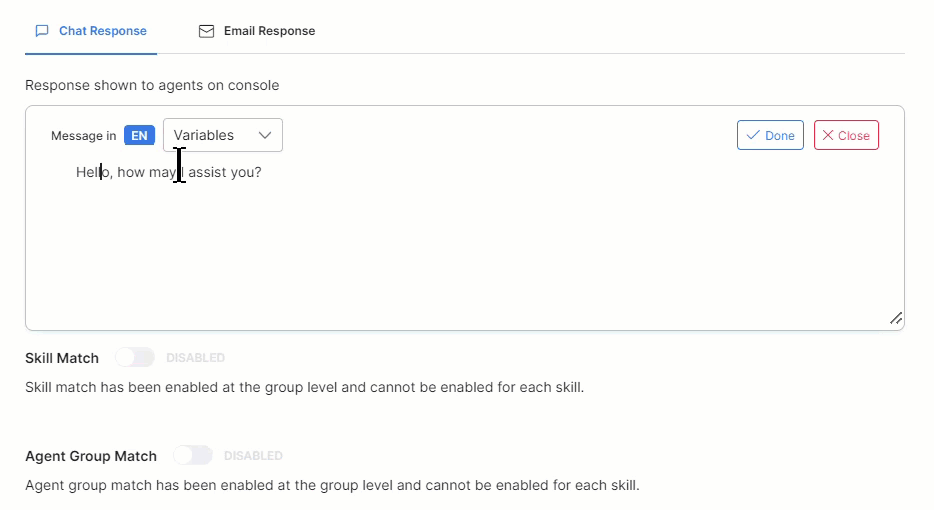
- Set the following options under Chat Response and Email Response:
- Response shown to agents: To set the response message for agents, enter the message text in the editor, select any required Variables from the list to auto-insert into the message (optional), and click Done.
- Skill Match and Agent Group Match: The agent skill or group match configured for the response group applies here and is uneditable if you have matched skills or groups to the response group. If skills, groups, or both have been left disabled at the group level, then you can set them at the response level (for email and chat). The process is the same as for the group-level skill and group match, explained above.
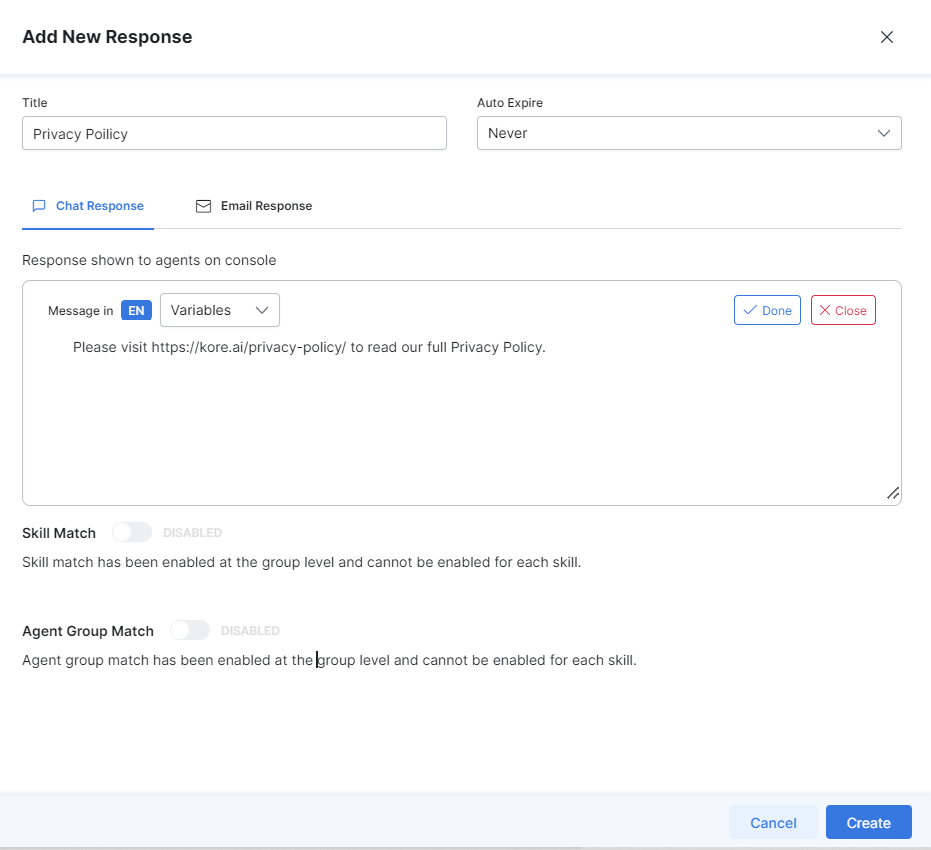
- Click Create when ready.
List of Variables within Standard Responses
You can use variables to pull customer-specific information from the context object.
The variables you can add to Standard Responses (chat and email) are the following:
-
Customer First Name, -
Customer Last Name, -
Customer Email, -
Customer Phone Number, -
Agent First Name, -
Agent Last Name, -
Agent Nick Name, -
Agent Email.
You can find this list in the message editor whenever you add or edit a Standard Response.
Edit a Response
To edit the details of an existing response, follow these steps:
- Under Standard Responses, click the desired response group name.
- Find the response you want to update, and click the corresponding Edit icon under Actions.
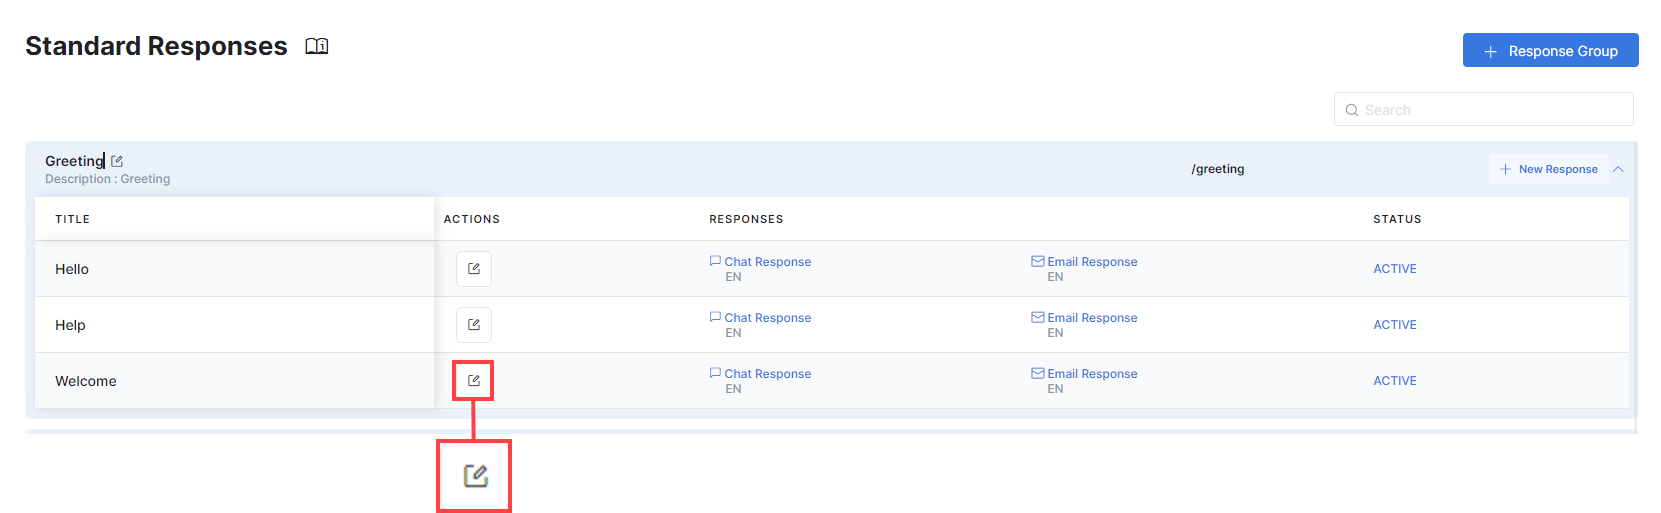
- Make the required changes in the Edit Response window, then Save.
Delete a Response
To delete a response, follow these steps:
- Under Standard Responses, click the desired response group name. This action displays an expanded view of the responses mapped to the group.
- Find the response you want to delete, then click the corresponding Edit icon under Actions.
- Click the Delete (bin) button on the bottom toolbar in the Edit Response window.

- Click Delete on the delete confirmation dialog to remove the selected response.
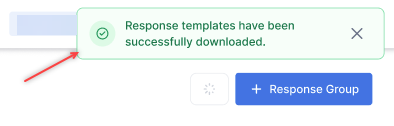
Export Standard Responses
Export standard responses functionality is a secure and efficient method to export standard responses for compliance and validation. A bulk export mechanism enables Administrators and Supervisors to export responses in bulk, eliminating manual copy-pasting. It supports compliance teams in efficient review and validation while ensuring controlled access by restricting export capabilities to authorized users.
Steps to export standard responses in bulk:
- Click Download Response Templates.
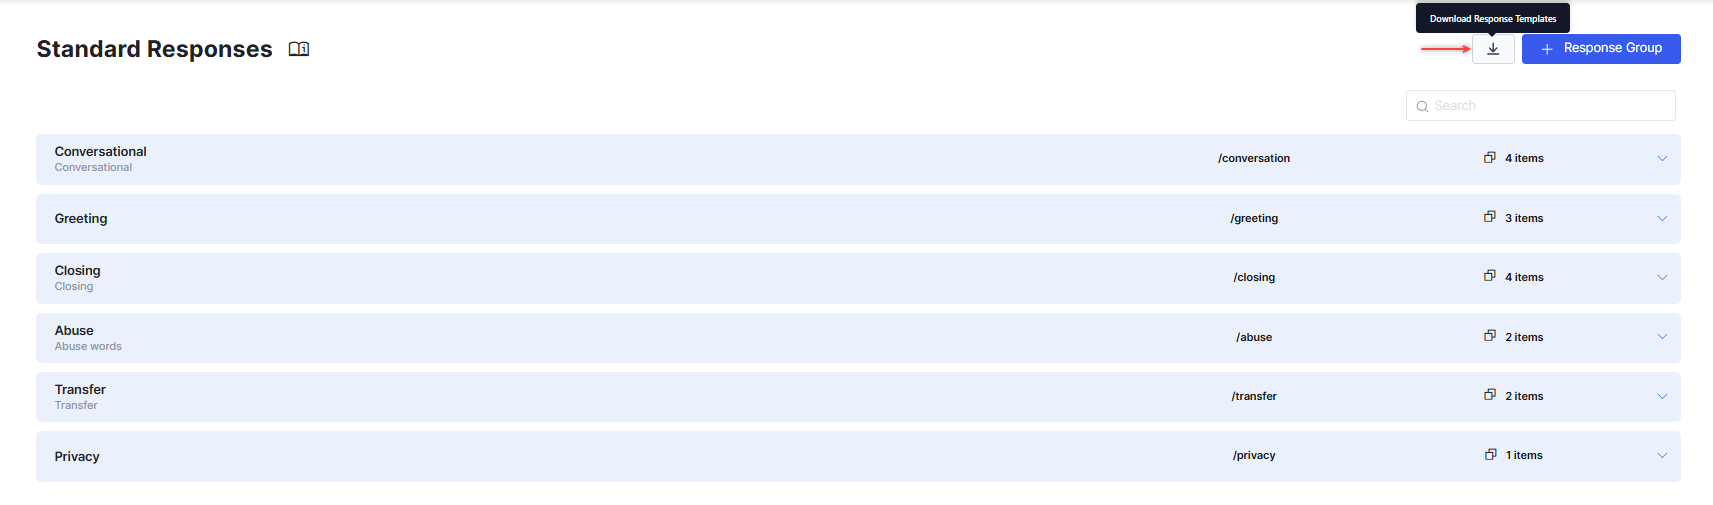
- A notification is displayed, and the response templates are downloaded as a CSV file.