
Access Interactions Tab
Interactions store the bot interactions. You can use the logs to review your bot’s performance and troubleshoot issues with conversations.
To access the Interactions tab, follow these steps:
- Go to Dashboard > Interactions.

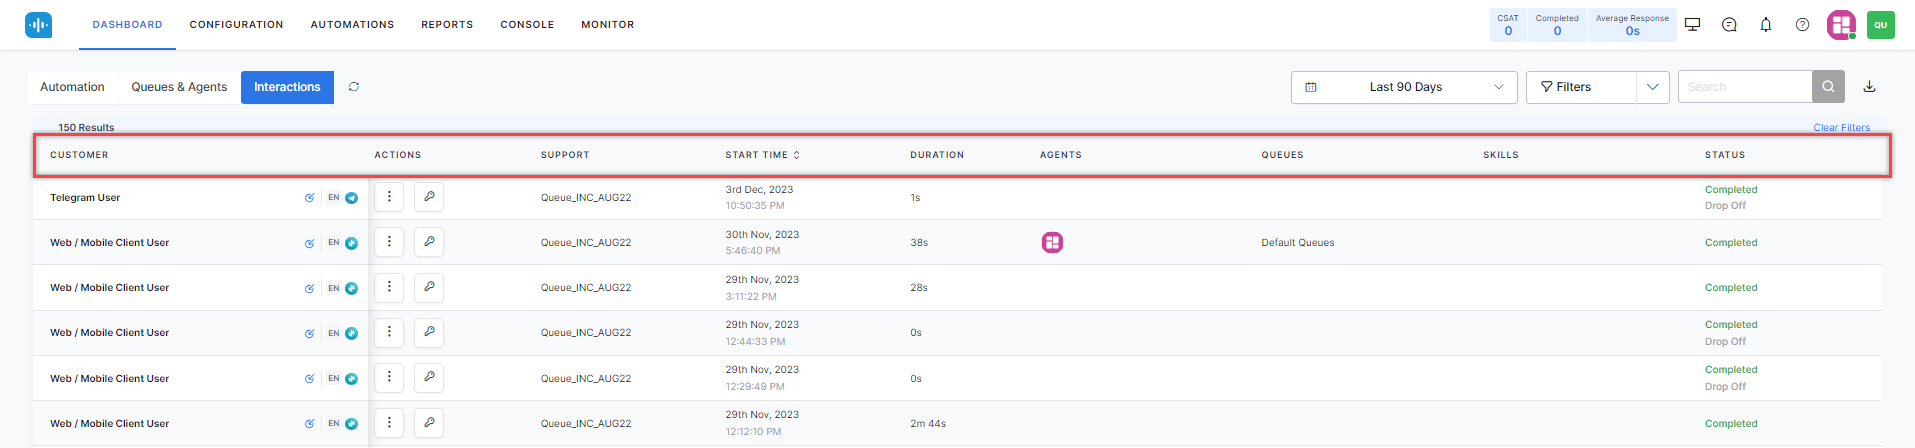
- On this page, the following details of the logs are displayed in a table:
-
-
- CUSTOMER: The contact who initiated the conversation.
- Direction (Icon): The direction of the conversation – Inbound or Outbound.
- LANGUAGE (Icon): The language of the conversation.
- CHANNEL (Icon): The Channel of the conversation – Voice, Chat, or Email.
Administrators can configure the system to hide customer Email IDs and Phone Numbers in the Interactions dashboard, Details slider, and Export file. Instead, the system displays the internal User ID. Learn more.
- CUSTOMER: The contact who initiated the conversation.
-
-
-
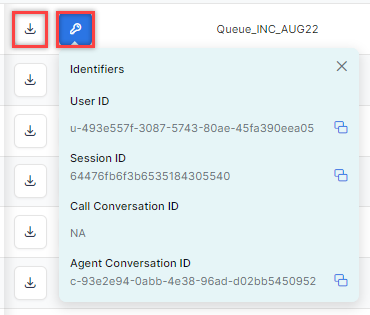
- ACTIONS: You can download recordings and transcripts, and copy the following Identifiers:
- User ID
- Session ID
- Call Conversation ID
- Agent Conversation ID
- SUPPORT: The agent who handled the conversation.
- START TIME: The date and time when the conversation was logged. This field can be rearranged to display newest to oldest or oldest to newest by clicking the arrow icon.
- DURATION: The duration of the inbound conversation.
- AGENTS: The profile pictures of the agents who handled the conversation are displayed in the order in which they participated. Hovering over the profile pictures shows the names of the agents.
- QUEUES: The last queue name is displayed with a +N for more queues. Hovering on the queues shows the order in which the conversation entered the queues.
- SKILLS: One skill is displayed with a +N for more skills. Hovering over the skills shows all skills associated with the conversation.
- STATUS: The statuses of the conversation are displayed:
- In Progress: In Progress refers to an ongoing conversation. The interactions tab immediately displays a conversation that is in progress.
- Error: Error is a disruption to an ongoing conversation, resulting in an error message. Failure of integrated systems results in errors.
- Completed (Drop Off): Completed (Drop Off) refers to a voice call where there was no response from the user, and the conversation ends.
- Completed (User Hangup): Completed (User Hangup) refers to a voice call where the user ends the conversation.
- Completed (Bot Hangup): Completed (Bot Hangup) refers to a voice call where the task is completed, and the bot ends the conversation.
- Completed: Completed refers to a chat conversation where the task is completed, and the conversation ends.
- ACTIONS: You can download recordings and transcripts, and copy the following Identifiers:
-
Supervisor Actions
Supervisors can view ongoing interactions on the Interactions tab. They can intervene as a supervisor, similar to the Monitor tab, and join, reassign, or change the queue of any interaction visible on the Interactions tab.
Steps to perform supervisor actions:
- Go to DASHBOARD > Interactions.
- Click ( ⋮ ) under ACTIONS and then click Supervisor View.

- You will be redirected to the interactions section on the MONITOR tab.

- Click the ongoing conversation. You can perform the following actions in the conversation:
- Join Conversation
- Assign
- Change Queue


Interactions Tab Refresh
The Interactions tab is refreshed when a supervisor clicks the Refresh button.

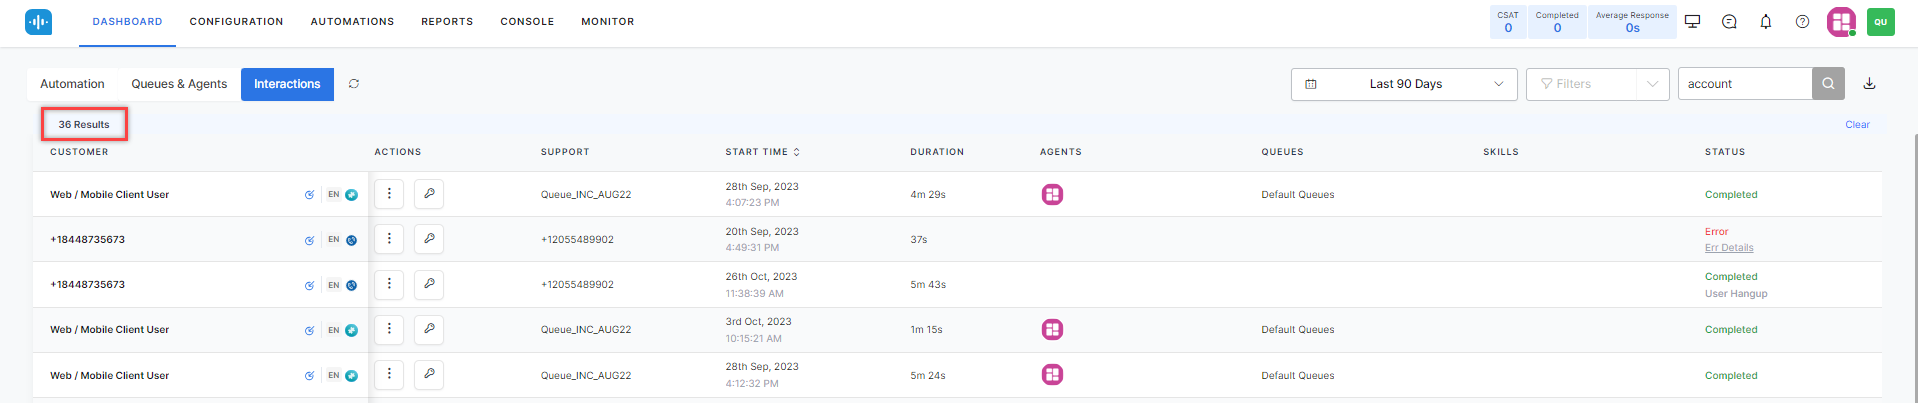
Search Interactions
You can find the search field on the top right side of the Interactions tab.
![]()
The search feature on Interactions allows supervisors to do the following:
- Search for keywords in both chats and call transcripts.
- Search the Agent and Disposition notes.
- Exclude AgentAssist Logs when searching the Transcripts.
- Search on Partial and Full Matches of Words and Phrases: The search function works for partial and complete matches of individual words and phrases.
- Complete matches receive the highest rank in the search results.
- Results that match all single words of a phrase receive the next priority.
- Results that receive the last priority are those where only a few words of a phrase match.
- The search also provides an option to sort results by timestamp. By default, search results appear in order of relevance, with the most relevant results listed first. You can click the Start Time column to sort results by timestamp in either ascending or descending order.
- Ignore common words like Articles, Pronouns, and Prepositions while matching.
How it works:
- Enter a word or phrase in the search field and click the Search icon.

- The count of search results is displayed.
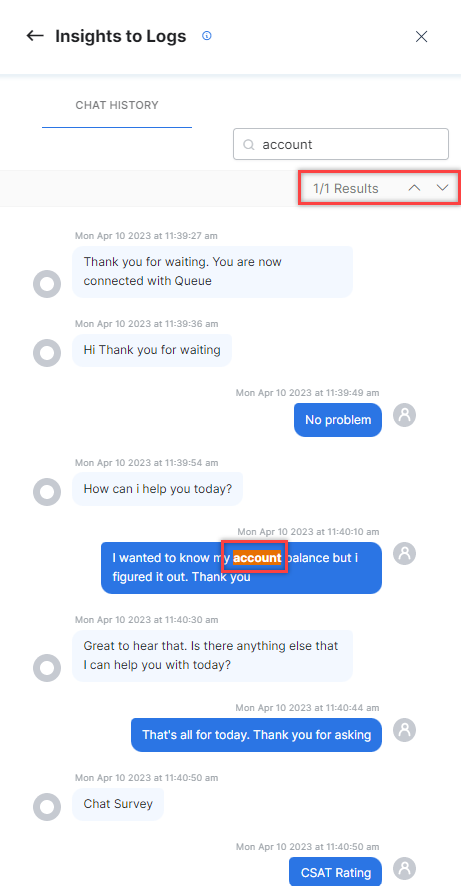
- When you click a conversation, the Insights to Logs window is displayed. Enter the word or phrase in the search field to prompt the system to search for it in the conversation.
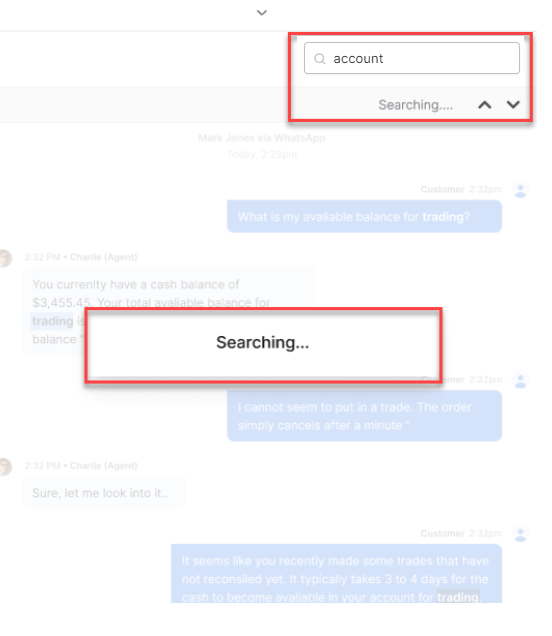
- The system displays the count of the occurrences of the word or phrase along with the highlighted results.
Export/Download Recording, Transcripts, Latency Report, and Events
The recording, transcripts, latency reports, and events can be downloaded to the local system from the dashboard.
Steps to export conversation data/transcripts:
- Select the conversations and click Export.
- Select Export Conversation Data, Export Transcripts, or Export Plain Text Transcript.
or
Select Download Chat Transcript, Download Plain Text Transcript, or Download Latency Report. These download as .csv files. - A status message is displayed at the start of the export. On completion, the file is downloaded.
Steps to Preview and Download Events:
- Select the conversations, click Export, or click the Ellipsis (⋮) icon under Actions.

- Click Preview Events.
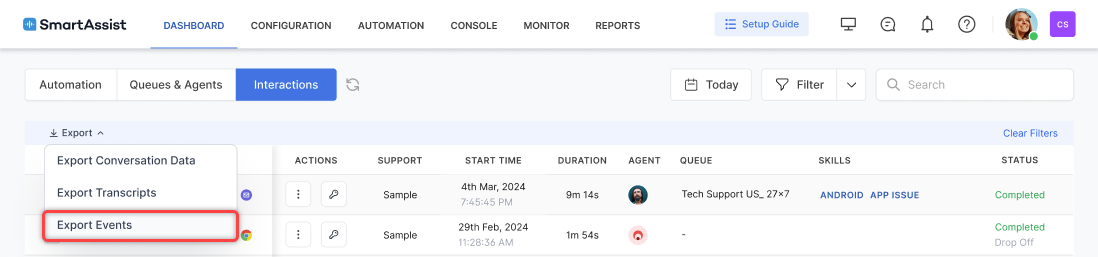
- The preview is generated. Click Download Events.
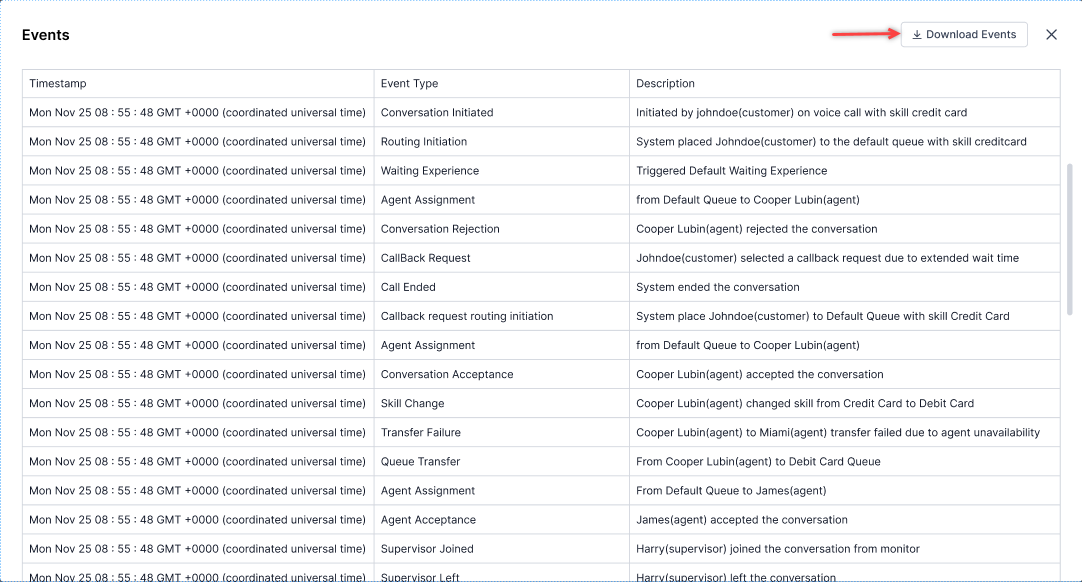
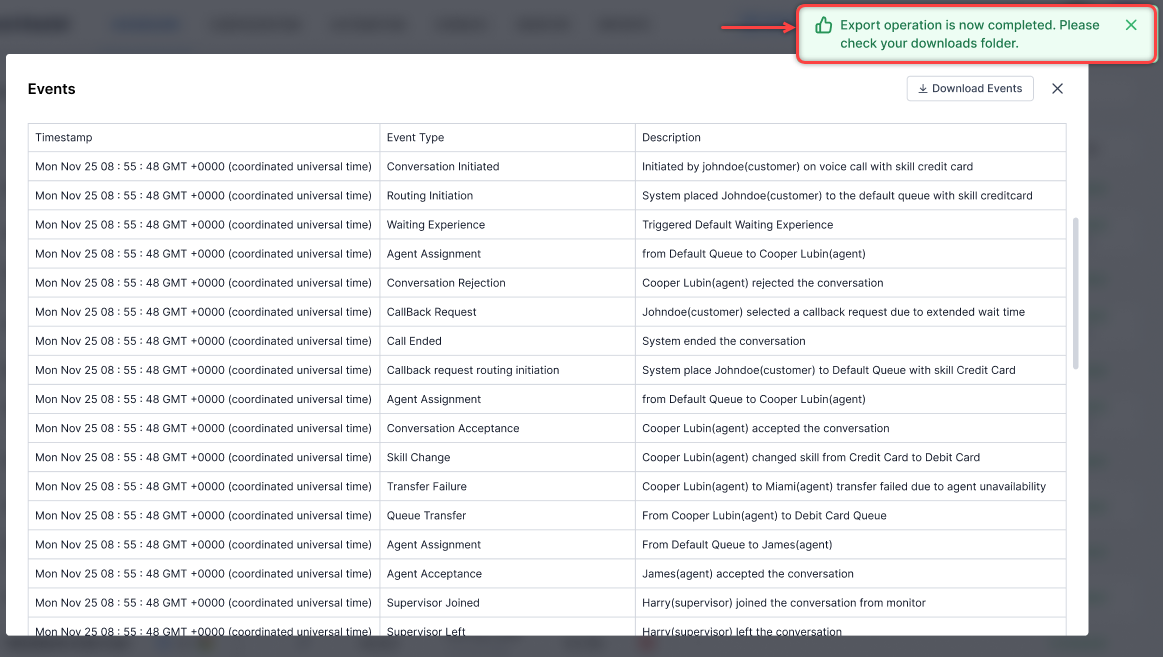
The following events and their timestamps are exported for chat and voice conversations.
- Routing Initiation
- Conversation Acceptance
- Conversation Rejection
- Conversation Transfer
- Transfer Failures
- Agent Join
- Agent Left
- Agent Consultation
- Skill Change
- Disposition Updates
- After-Call Work (ACW)
- Conversation Closure
Editing Dispositions from the Interactions Tab
Supervisors can edit or override disposition codes after a conversation ends. Agents assign dispositions during live sessions, but once the session completes, supervisors can review and revise the assigned codes directly from the Interactions Tab. This capability ensures accurate categorization of interactions and supports streamlined post-conversation workflows. Administrators can configure this functionality for specific roles. Learn more.
Key Highlights:
- Improved auditing and compliance
- Accurate reporting and resolution tracking
- Reduced dependency on agents for post-call updates
- Agents receive a notification when a supervisor updates a disposition.
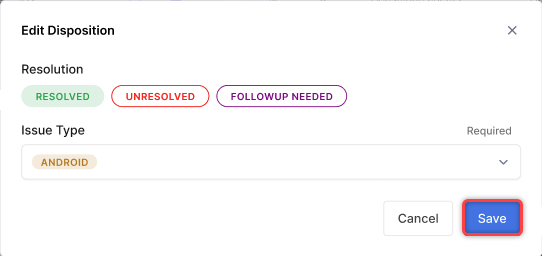
Steps to edit dispositions:
- Select a completed interaction for which the disposition has to be revised.
- Select the DETAILS tab in the Insights to Logs window.
- Click Edit Disposition.

- Make the necessary changes to the dispositions and click Save.
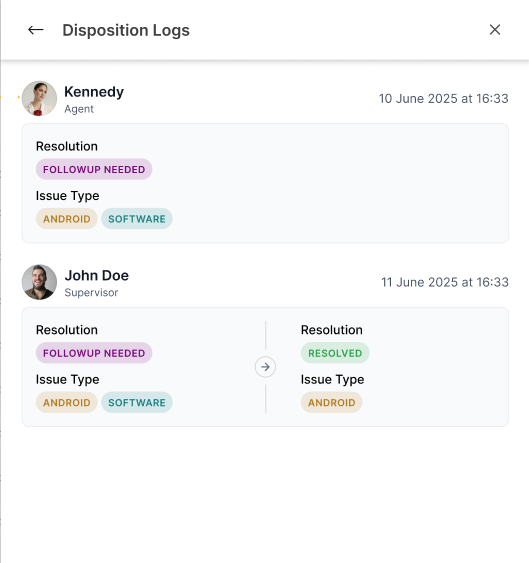
- Click View Logs.
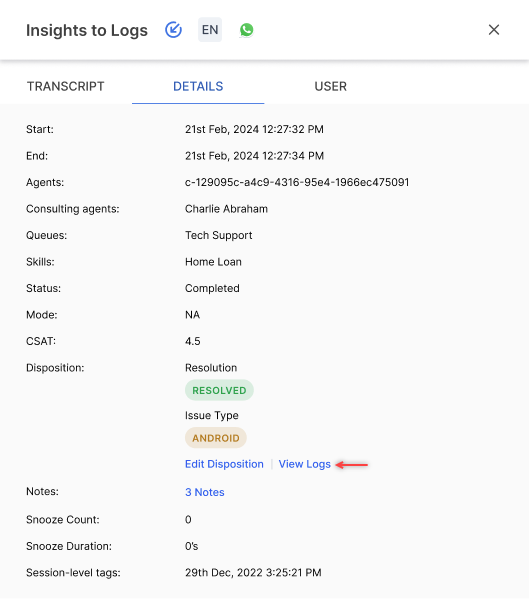
The disposition logs are displayed.
Filters
To avoid repeatedly filtering your choices, you can create and save multiple filters on the Interactions tab.
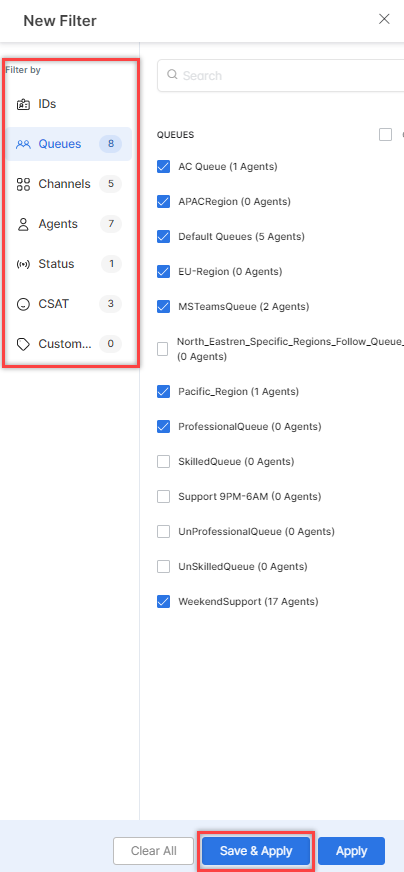
Create Filter
- Click the Filter button.

- Click New Filter.

- Select the IDs, Queues, Channels, Agents, Status, CSAT, and Custom Tags.
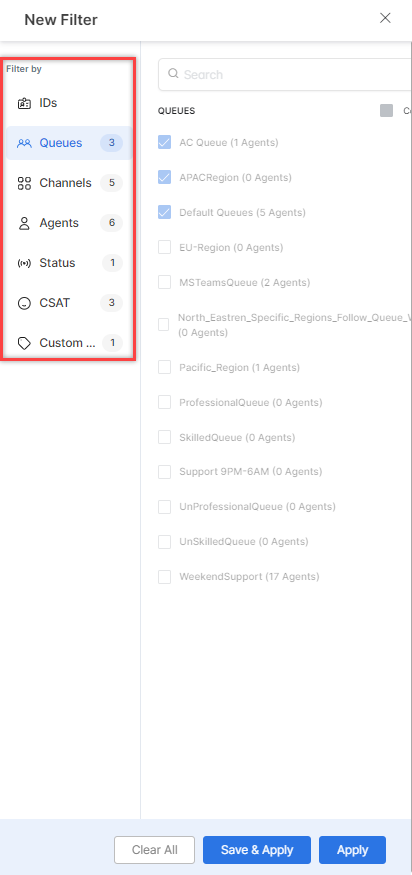
Select from the below available options:- Clear – Clears the selection.
- Save & Apply – Saves the filter, and it appears when selected.
- Apply – Applied for one instance and not saved.
- Click Save & Apply.

- On the pop-up window, enter a name for the filter and click Save & Apply.

A confirmation message is displayed, and the filter is created.
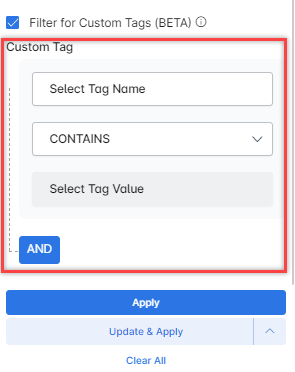
Filter for Custom Tags [Beta]
You can filter conversations using custom tags.
Steps to enable the filter:
- Click the Filter for Custom Tags (BETA) check box to enable the filters.
The following Custom Tag fields are displayed:-
- Tag name
- Predicate drop-down (CONTAINS and DOES NOT CONTAIN).
- AND button to create a new clause
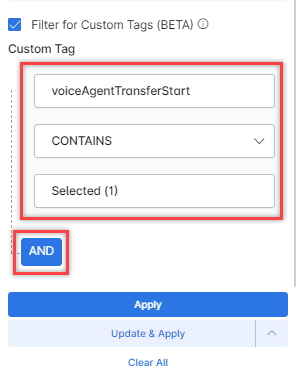
-
- Select the values for the custom tag fields and click AND to create a new clause.
- Select the values for the second clause and click Apply.
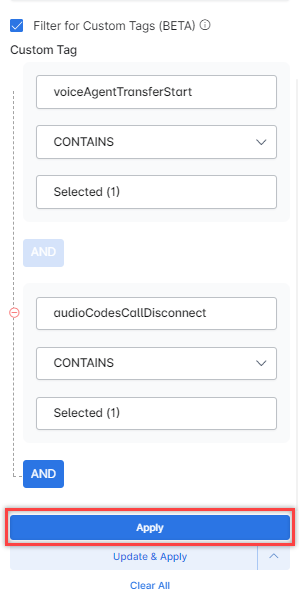
A confirmation is displayed.

Clicking the (-) button deletes a clause.
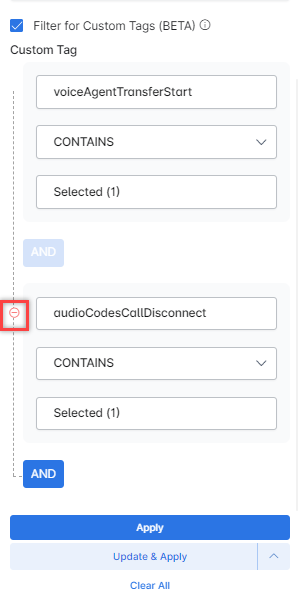
The interactions that fulfill the criteria selected in the clauses are displayed.
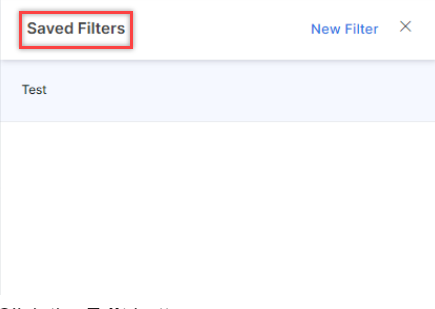
Edit Filter
Steps to edit a filter:
- Click the Filters tab. The Saved Filter name appears.
- Click the Edit button.
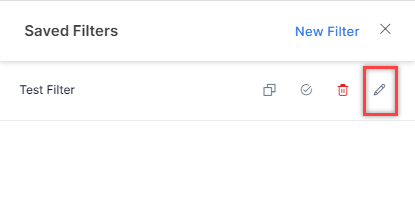
- Make the necessary changes and click Save & Apply.
A confirmation message is displayed, and the filter is updated.

Copy Filter
- Click the Duplicate button.
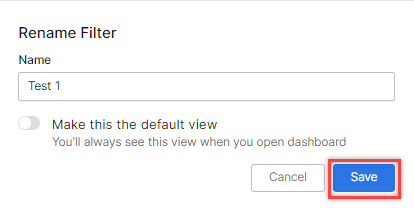
- On the Rename Filter window, enter a name for the filter and click Save.
A confirmation is displayed and a copy of the filter is created.
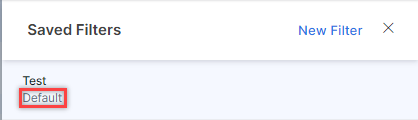
Mark as Default
- Click the Mark as Default button.
- A confirmation message is displayed and the filter is marked as default.
Delete Filter
- Click the Delete button.
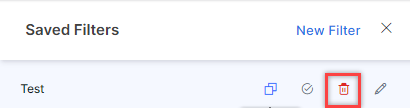
- A Delete Filter message appears. Click Delete.
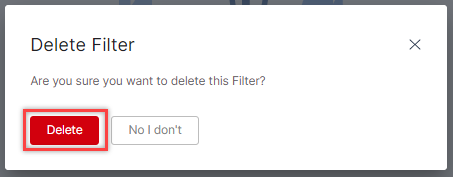
A confirmation message is displayed and the filter is deleted.

Insights to Logs
The Insights to Logs panel provides details of the conversation between the contact and the agent.
Click the interaction to view the Insights to Logs panel. The following tabs are displayed:
- TRANSCRIPT – (formerly CHAT HISTORY)
- DETAILS
- USER
- IDENTIFIERS
Icons beside the Insights to Logs header show the Direction (inbound or outbound), Language, and Channel.
![]()
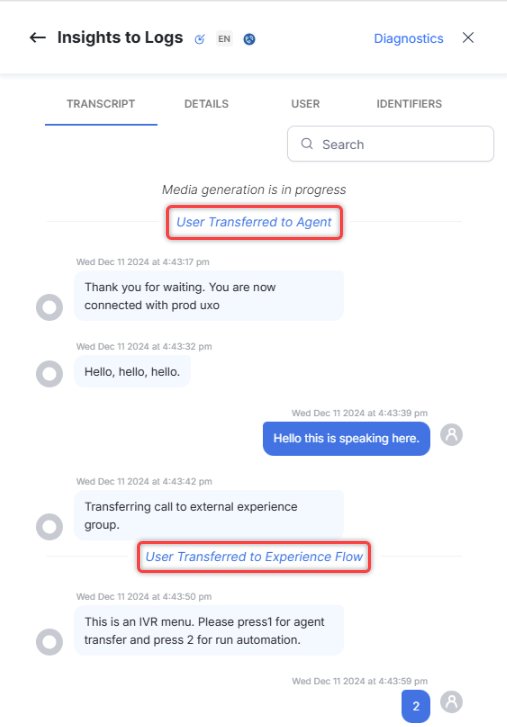
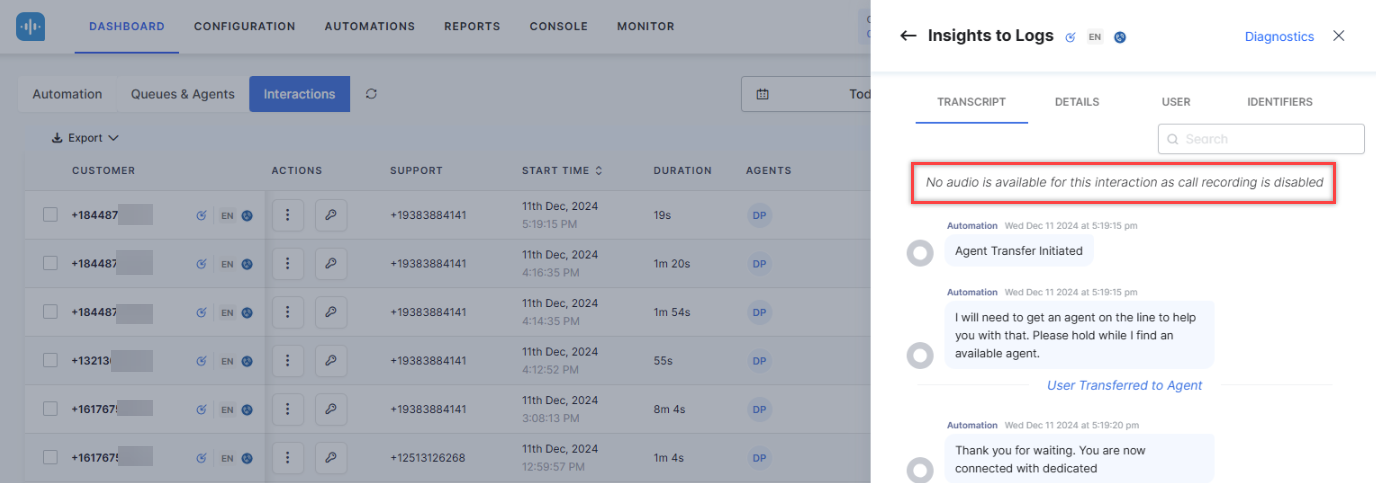
TRANSCRIPT
This tab shows the transcript of the voice conversation including whispers from the supervisor.

The transcripts tab also shows the call transfer stages:
- User transferred to Agent ( When the Automation transfers the voice call to Agent)
- User transferred to Automation (When the Agent transfers the voice call back to Automation to take feedback/payment info)
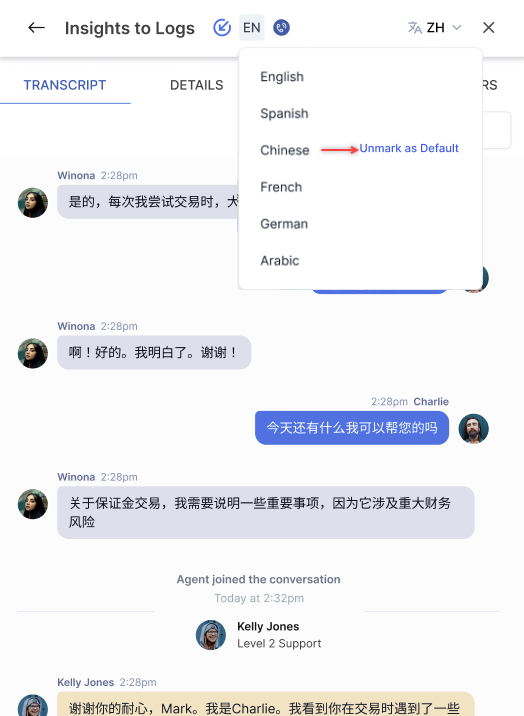
Translate Transcripts
Supervisors can review the transcripts by selecting a target language from the language dropdown menu. To enable this option, refer to Translation Configuration.
Steps to select a language for transcript translation:
- Click the Translate button on the top right corner.
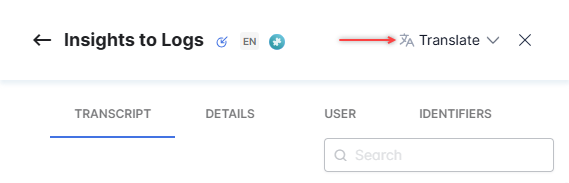
- Select the language for transcript translation and click Mark as Default.
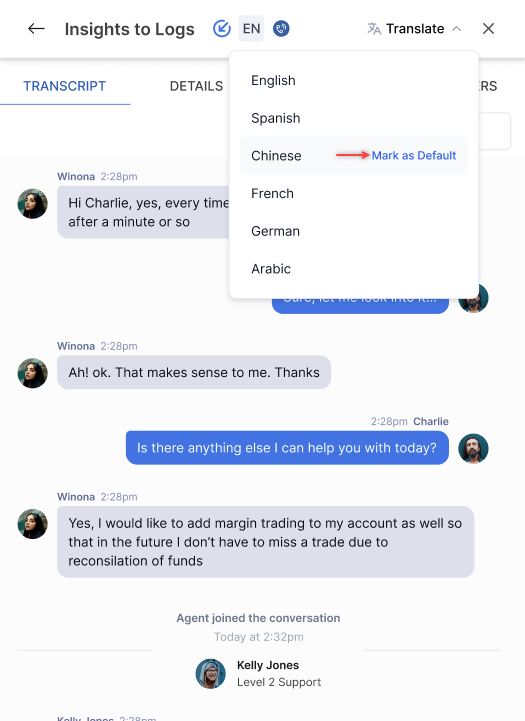
- The transcript is translated into the selected language.
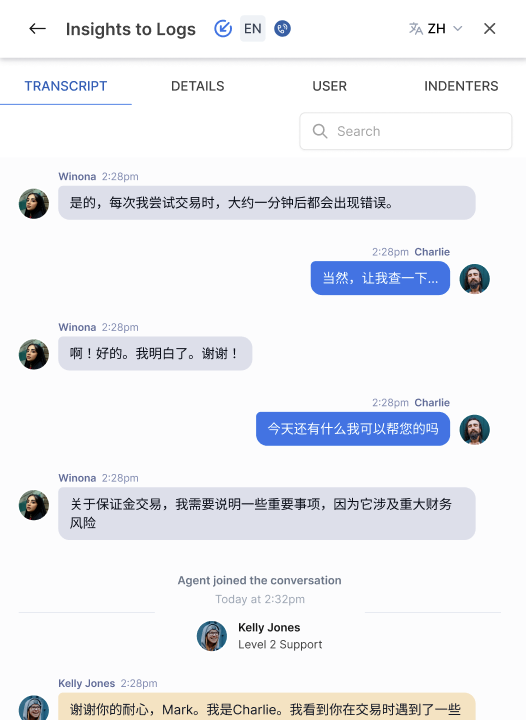
The transcripts will continue to be translated in the selected default language until manually marked as Unmark as Default.
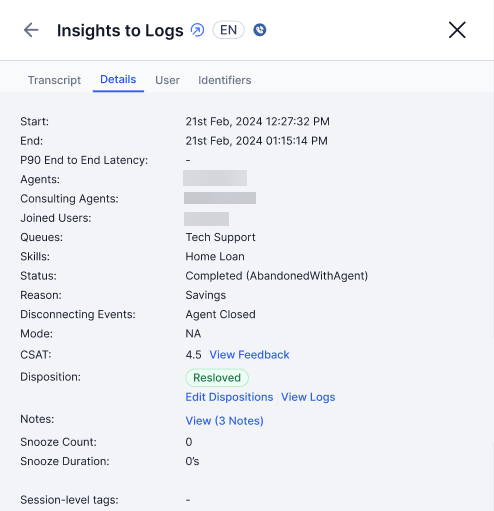
DETAILS
This tab shows the following details:
- Start: Conversation start time
- End: Conversation end time
- Agents: Name of the agent
- Consulting agents: Name of the consulting agent
- Joined Users: Names of users who joined this conversation
- Queues: The queues where the call was handled
- Skills: The assigned skills
- Status: Conversation status. For example, Completed (Closed)
- Reason: The reason for the status. Learn more.
- Disconnecting Event: The final event leading to the conversation ending
- Bot – When the bot disconnects the conversation.
- System – When SmartAssist or Platform disconnects the conversation.
- Agent – When an agent hangs up.
- Customer – When the customer hangs up.
- Mode: Mode of the conversation
- CSAT: CSAT survey score and feedback
- Disposition: Dispositions assigned
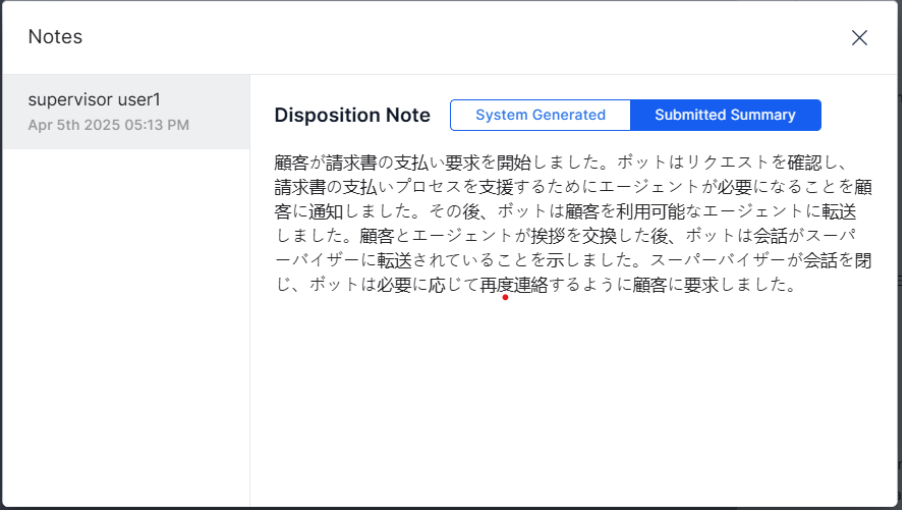
- Notes: Notes added to the conversation (view only). If the note is translated, both versions are displayed.
- Snooze Count: Number of times the conversation was snoozed
- Snooze Duration: Duration for which the conversation was snoozed
- Session-level tags: Session-level tags assigned to the conversation.
- Automation Session IDs: Unique identifiers for individual automation sessions triggered during user interactions.
- Automation Bot IDs: Unique identifiers of the automation bots involved in handling a session.
- Automation Bot Names: Readable names of the automation bots associated with the session for easier identification.
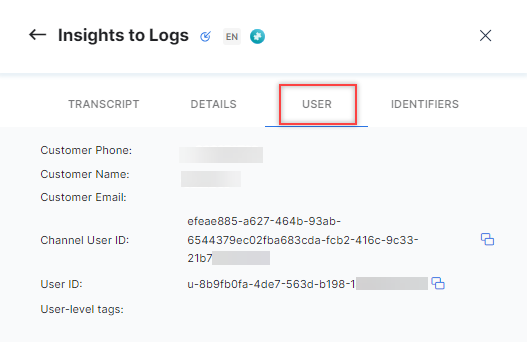
USER
This tab shows the following details:
- Customer Phone: Customer’s phone number.
- Customer Name: Customer’s name.
- Customer Email: Customer’s email address.
- Channel User ID: The user ID of the conversation channel.
- User ID: Agent’s user ID.
- User-level tags: User-level tags assigned to the conversation.
IDENTIFIERS
This tab shows the following details:
- Call ID: The call ID (for voice calls)
- Session ID: The session ID.
- Channel User ID: The user ID of the conversation channel.
- Call Conversation ID: The conversation ID (for voice calls)
- Agent Conversation ID: The agent conversation ID.
- User ID: The agent’s user ID.
Click the Copy All button to copy all the identifier details (from the details tab) like:
- Start Time
- End time
- Caller ID
- Session ID
- Channel User ID
- Call Conversation ID
- Agent Conversation ID
- User ID
- Caller
- Callee
Call Recording
The call recording feature available under TRANSCRIPTS can play past conversations between a contact and an agent and is recorded by the system. It is helpful for conversational quality analysis and auditing purposes. Learn more.
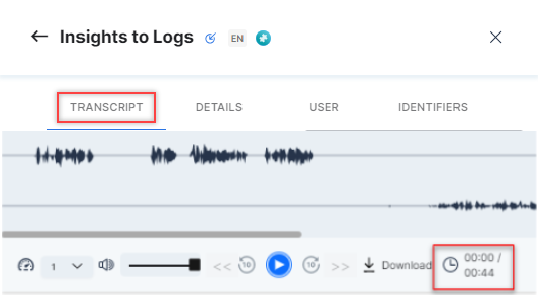
The recorded audio stream is available under TRANSCRIPTS in the Insights to Logs panel. The following recording settings can be configured:
- Play/Pause Audio: Click the Play icon to play/pause the audio waveform.
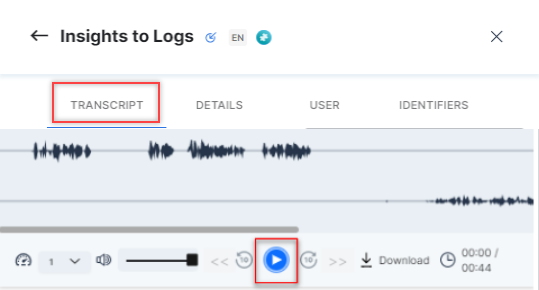
- Increase playback speed: To change the playback speed, click the speed selection drop-down, and select the speed. The values ranging from the lowest to highest speeds are as follows:

- Volume: The volume slider can be adjusted to increase or decrease the volume.
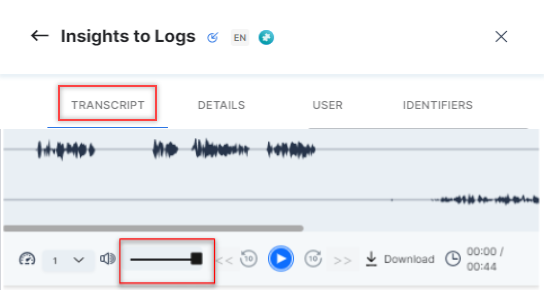
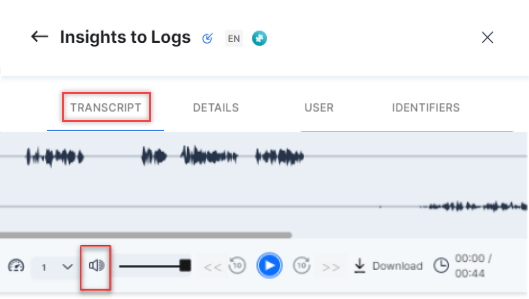
- Mute: Click the Mute button to mute the audio.
- Rewind Audio: Click the Backward button to rewind the audio by 10 seconds.
- Forward Audio: To fast forward the audio by 10 seconds, click the Forward button.

- Download: Click the Download button to download the transcript.
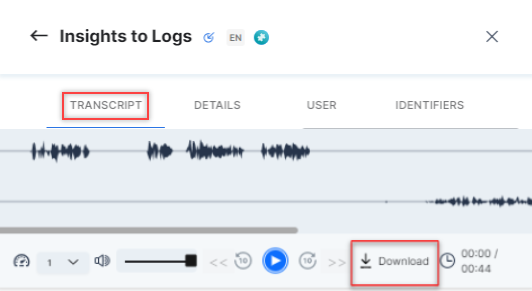
You can choose either as a single file or separate files.
- Download as a single file: If you choose this option, all the files in the conversation will be downloaded as a single file.
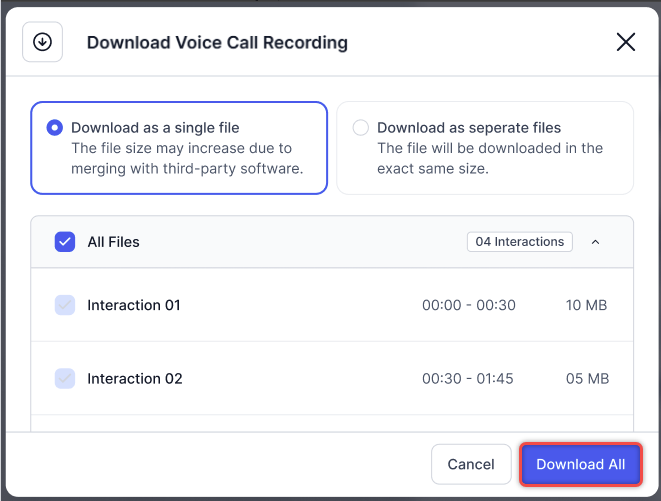
- Download as separate files: If you choose this option, you can select and download the files.
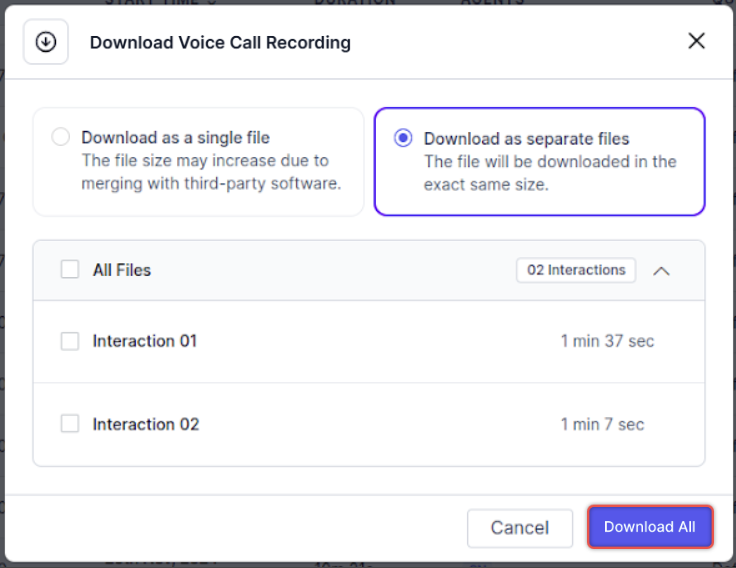
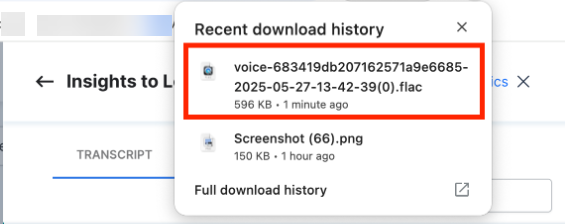
The file format of the downloaded file is .flac across all operating systems, including Windows, macOS, and Linux.
- Download as a single file: If you choose this option, all the files in the conversation will be downloaded as a single file.
- Duration: The increment and the countdown counters appear when the audio plays. The total duration of the audio is displayed before the audio plays.
You can view media files of the following formats, shared during the interaction in the transactions tab:
- Audio: MP3, WAV, AAC
- Video: MP4, AVI, MOV
- Image: JPG, PNG, GIF
A message is displayed to the user on the Transcript tab when Call Recording Control is disabled in Agent Settings.
List of recording status and messages:
| Status | Description |
| failed | Media generation failed due to a technical issue. Please contact your administrator. |
| media_unavailable | No audio recording found on the server. Please contact your administrator. |
| call_in_progress | Media unavailable while the call is in progress. Please recheck once the call has ended. |
| media_in_progress | Media generation is in progress. Please wait for a few minutes. |
| partial_download_failed | Unable to fetch the recording. Please click the button below to retry.
Note: Users can click the “Fetch Again” button up to three times. If it still fails, the message “Media generation failed due to some technical issue. Please contact your administrator.” appears. |
| partial_upload_failed | Unable to fetch the recording. Please click the button below to retry.
Note: Users can click the “Fetch Again” button up to three times. If it still fails, the message “Media generation failed due to some technical issue” appears. |
| partial_failed | Unable to fetch the recording. Please click the button below to retry.
Note: Users can click the “Fetch Again” button up to three times. If it still fails, the message “Media generation failed due to some technical issue” appears. |
| fetching_in_progress | Generating your call recording… This may take a few minutes. Please wait. |
| initial_fetch_failed | We couldn’t load the call recording. Please try again. |
| retry_failed | Still unable to fetch the recording. Please try again after 15 minutes.
Note: Do not restrict the number of times users can click the Retry button. Also, do not restrict job execution after 24 hours based on the number of retries. |
| 24hr_retry_failed | We couldn’t generate the call recording due to a technical issue. Please contact your administrator for assistance. |
Diagnostics
Diagnostics is located at the top right corner of the Insights to Logs.
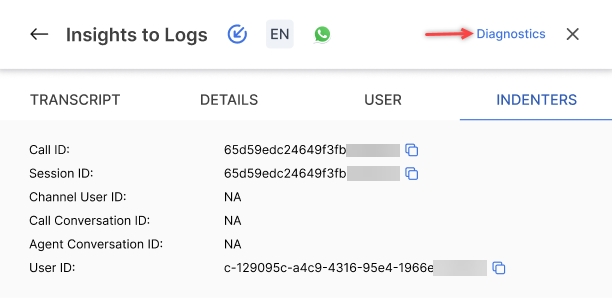
Clicking Diagnostics shows the following tabs:
Flow
The Flow tab provides a detailed timeline of call signaling and media flow between endpoints. This interface displays the sequence of SIP messages and RTCP packets exchanged during a call, allowing Agents and Supervisors to track the complete communication flow and troubleshoot connection issues.
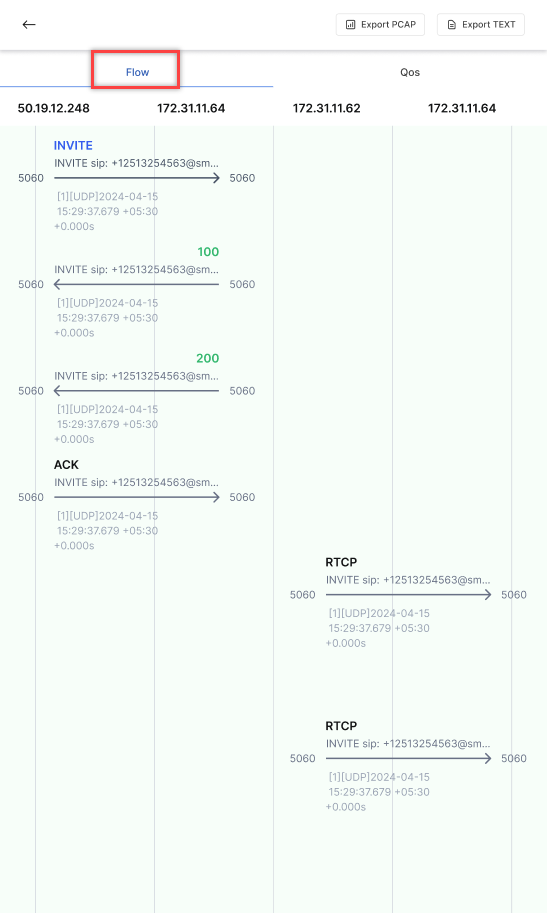
The top row displays the IP addresses of all endpoints involved in the communication.
Example:
- 50.19.12.248
- 172.31.11.64
- 172.31.11.62
- 172.31.11.64
SIP Message Flow
The interface shows SIP signaling messages exchanged between endpoints:
- INVITE
- Direction: 50.19.12.248 to 172.31.11.64
- Port: 5060 → 5060
- Details: INVITE sip: +12513254563@domain…
- Timestamp: [1][UU09]2024-04-15 15:29:37.679 +05:30 +0.000s
- 100 (Trying)
- Direction: 172.31.11.64 to 50.19.12.248
- Port: 5060 ← 5060
- Details: INVITE sip: +12513254563@domain…
- Timestamp: [1][UU09]2024-04-15 15:29:37.679 +05:30 +0.000s
- 200 (OK)
- Direction: 172.31.11.64 to 50.19.12.248
- Port: 5060 ← 5060
- Details: INVITE sip: +12513254563@domain…
- Timestamp: [1][UU09]2024-04-15 15:29:37.679 +05:30 +0.000s
- ACK
- Direction: 50.19.12.248 to 172.31.11.64
- Port: 5060 → 5060
- Details: INVITE sip: +12513254563@domain…
- Timestamp: [1][UU09]2024-04-15 15:29:37.679 +05:30 +0.000s
The interface also shows RTCP media packets exchanged between endpoints:
- RTCP (First packet)
- Direction: 172.31.11.62 to 172.31.11.64
- Port: 5060 → 5060
- Details: INVITE sip: +12513254563@domain…
- Timestamp: [1][UU09]2024-04-15 15:29:37.679 +05:30 +0.000s
- RTCP (Second packet)
- Direction: 172.31.11.62 to 172.31.11.64
- Port: 5060 → 5060
- Details: INVITE sip: +12513254563@domain…
- Timestamp: [1][UU09]2024-04-15 15:29:37.679 +05:30 +0.000s
How to Use
- Track Call Setup: Follow the initial INVITE, 100 Trying, 200 OK, and ACK sequence to verify proper call establishment.
- Analyze Response Times: Note the timestamps to identify any delays in message processing.
- Monitor Media Flow: Review RTCP packets to ensure media is flowing properly between endpoints.
- Identify Issues: Look for missing messages or unexpected responses that might indicate connection problems.
QoS (Quality of Service)
The QoS tab provides detailed network metrics for call monitoring and troubleshooting. It offers comprehensive data visualization of network performance indicators to help Agents and Supervisors analyze call quality.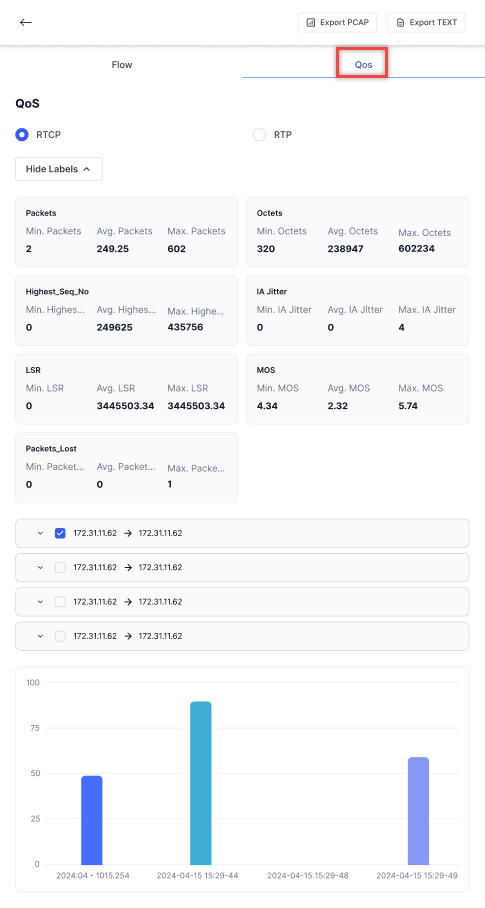
Packets
| Metric | Description |
| Min. Packets | Minimum number of packets transmitted (320) |
| Avg. Packets | Average number of packets transmitted (249.25) |
| Max. Packets | Maximum number of packets transmitted (602) |
Octets
| Metric | Description |
| Min. Octets | Minimum number of octets/bytes transmitted (238047) |
| Avg. Octets | Average number of octets/bytes transmitted (238047) |
| Max. Octets | Maximum number of octets/bytes transmitted (802234) |
Highest_Seq_No
| Metric | Description |
| Min. Highest_Seq_No | Minimum sequence number (2) |
| Avg. Highest_Seq_No | Average sequence number (249625) |
| Max. Highest_Seq_No | Maximum sequence number (435756) |
IA (Inter Arrival) Jitter
| Metric | Description |
| Min. IA Jitter | Minimum inter-arrival jitter (0) |
| Avg. IA Jitter | Average inter-arrival jitter (0) |
| Max. IA Jitter | Maximum inter-arrival jitter (4) |
LSR (Last Sender Report)
| Metric | Description |
| Min. LSR | Minimum last sender report (0) |
| Avg. LSR | Average last sender report (3445503.34) |
| Max. LSR | Maximum last sender report (3445503.34) |
MOS (Mean Opinion Score)
| Metric | Description |
| Min. MOS | Minimum Mean Opinion Score (4.34) |
| Avg. MOS | Average Mean Opinion Score (2.32) |
| Max. MOS | Maximum Mean Opinion Score (5.74) |
Packets_Lost
| Metric | Description |
| Min. Packets_Lost | Minimum number of lost packets (0) |
| Avg. Packets_Lost | Average number of lost packets (0) |
| Max. Packets_Lost | Maximum number of lost packets (1) |
The interface displays IP connection information in expandable rows, showing source and destination IP addresses (for example, 172.31.11.62 → 172.31.11.62).
The bottom bar chart visualizes call metrics over time. The x-axis shows timestamps (2024-04-15), and the y-axis represents metric values from 0 to 100.
Agents
The Agents tab provides comprehensive call information for agents and supervisors, displaying detailed metrics for all participants on a call. This enables a better understanding of interactions and assists with troubleshooting issues. The following data points are shown on this tab:
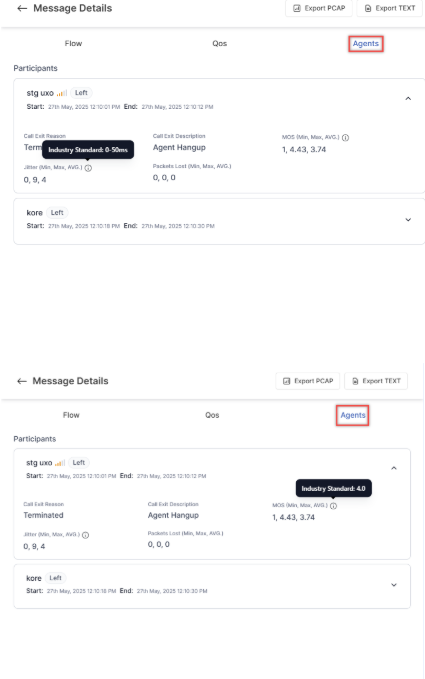
| Field Name | Description |
| Participant Name | Name identifier of the person involved in the call. External Agents are marked with an “External Agent” tag. |
| Call Status | Indicates whether the participant is currently “In-Call” or has “Left” the call. |
| Start Timestamp | Date and time when the participant joined the call. |
| End Timestamp | Date and time when the participant left the call. Displays “NA” for participants currently in the call. |
| Average MOS (Mean Operating Score) | MOScore average value represents the participant’s overall call quality. |
| Call Exit Reason | Categorized reason why the participant left the call (for example, “Disconnected”, “Transfer”, “Call Ended”). |
| Call Exit Description | Detailed explanation providing additional context about why the participant exited the call. |
| MOS (min, max, average) | Minimum, maximum, and average MOScore values measuring voice quality during the call. Hovering over the tooltip displays the industry standard value. |
| Jitter (min, max, average) | The minimum, maximum, and average jitter measurements indicate variations in packet delivery timing. Hovering over the tooltip displays the industry standard value. |
| Packets Lost (min, max, average) | The minimum, maximum, and average count of data packets that failed to reach their destination. |
Export
You can export the following reports:
- Export PCAP
- Export TEXT.
