
The Intelligent Agent Tools feature helps enrich end-user conversational experiences by integrating pre-trained OpenAI or Azure OpenAI language models in the backend. If enabled, agents can use the AI-enhanced compose text box to create customized responses to address customer inquiries, concerns, or issues.
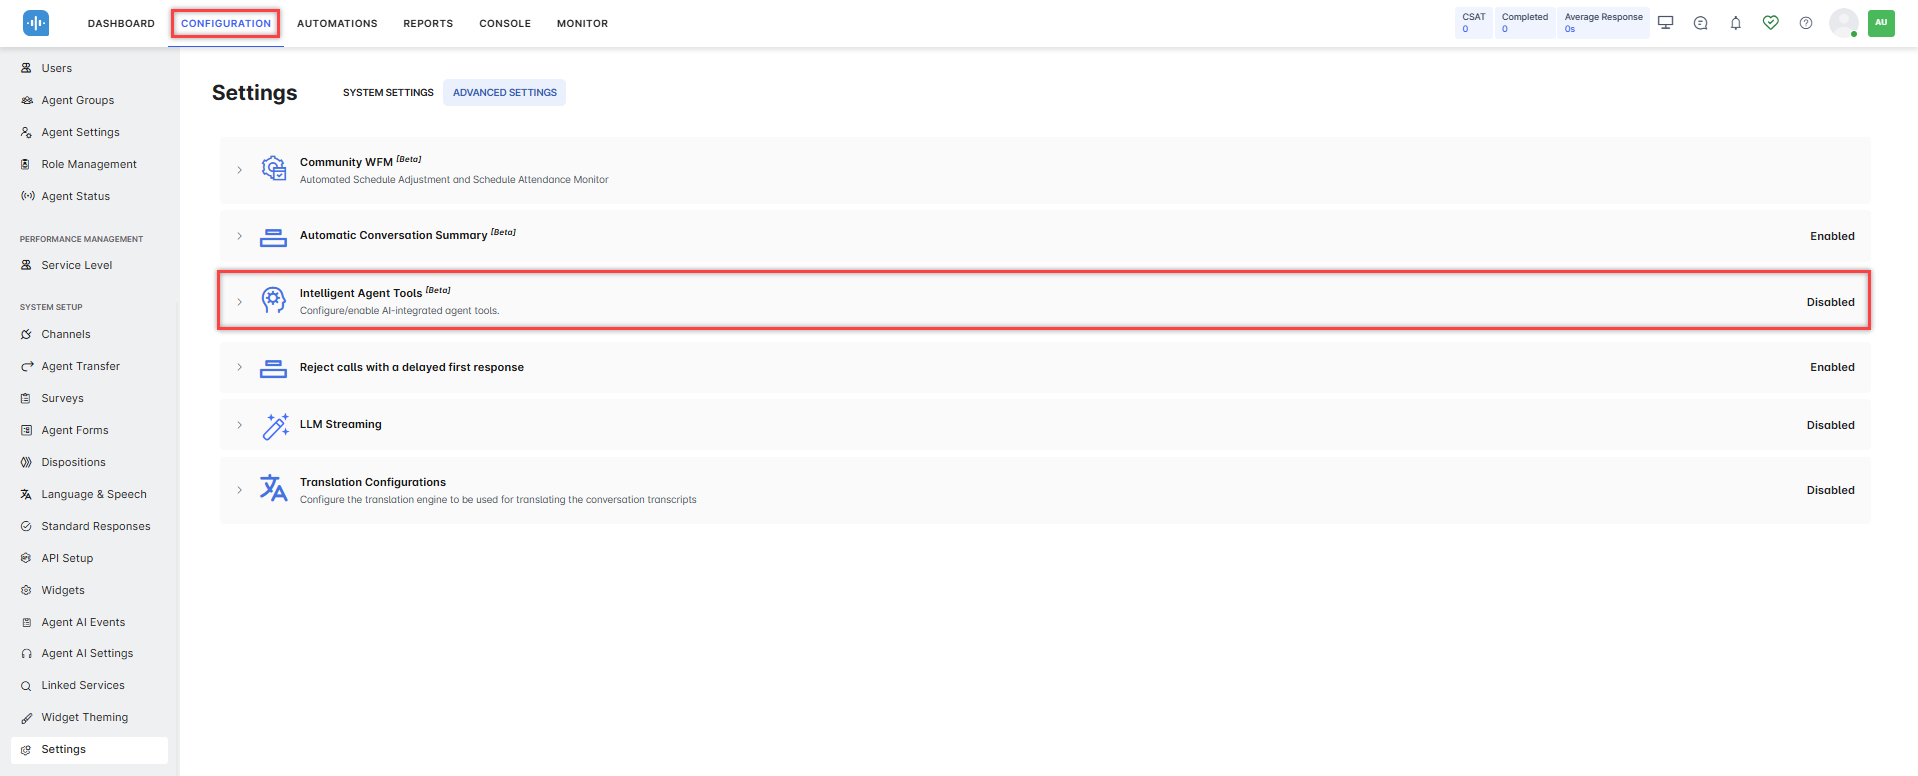
You can find Intelligent Agent Tools by going to CONFIGURATION > System Setup > Settings> Advanced Settings > Intelligent Agent Tools.
Integration setup
The Intelligent Agent Tools feature is available by integrating with OpenAI directly or via Microsoft Azure.
Enable OpenAI Integration:
Prerequisites:
Before enabling the OpenAI integration, complete the following prerequisites:
- If you already have OpenAI account credentials, then enter them. Otherwise, create a developer account in the OpenAI and note down login credentials. Use the OpenAI Documentation for more information.
- Copy the API Key of your OpenAI account and keep it for future use to enable the integration.
Steps to enable the OpenAI integration:
- Click Intelligent Agent Tools and enable the feature.

- Select the OpenAI option for integration.

- Enter the secret API Key of your OpenAI service, which you copied earlier.
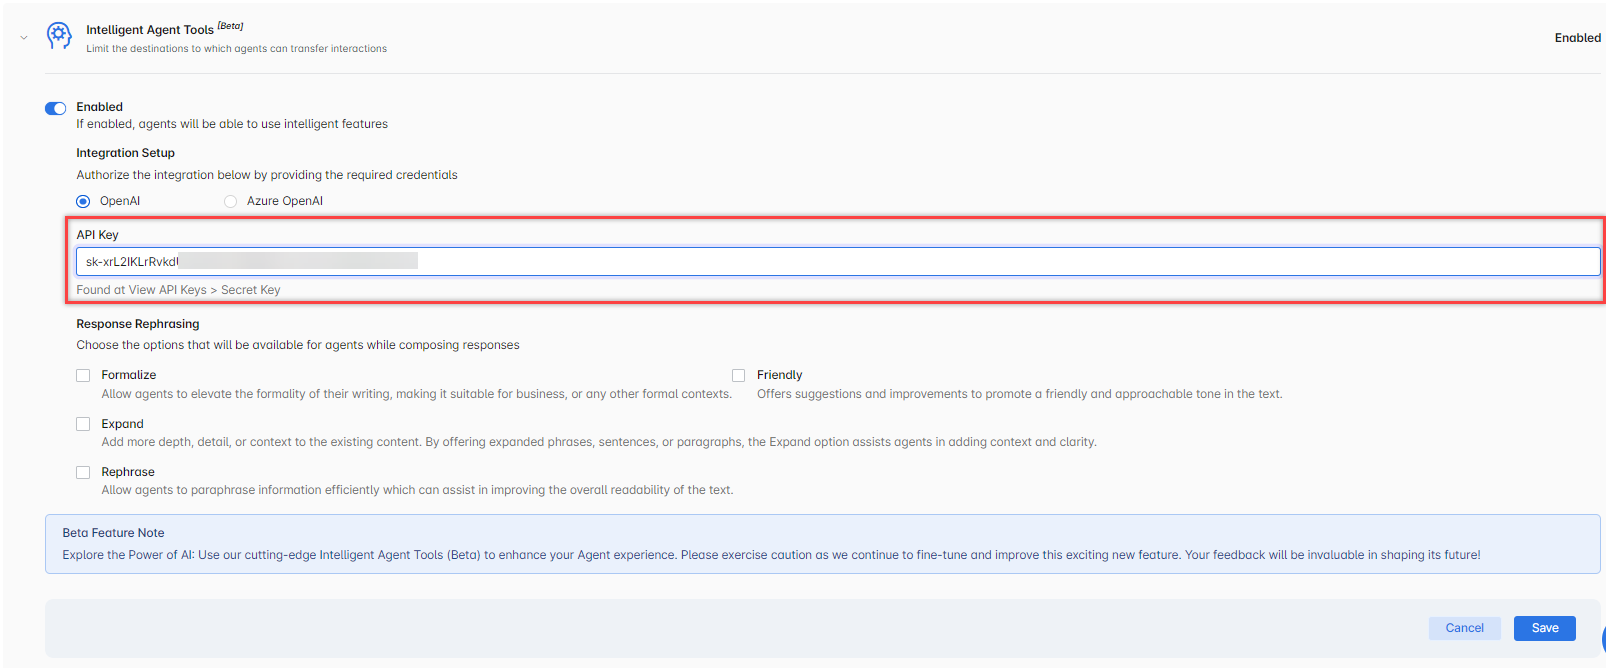
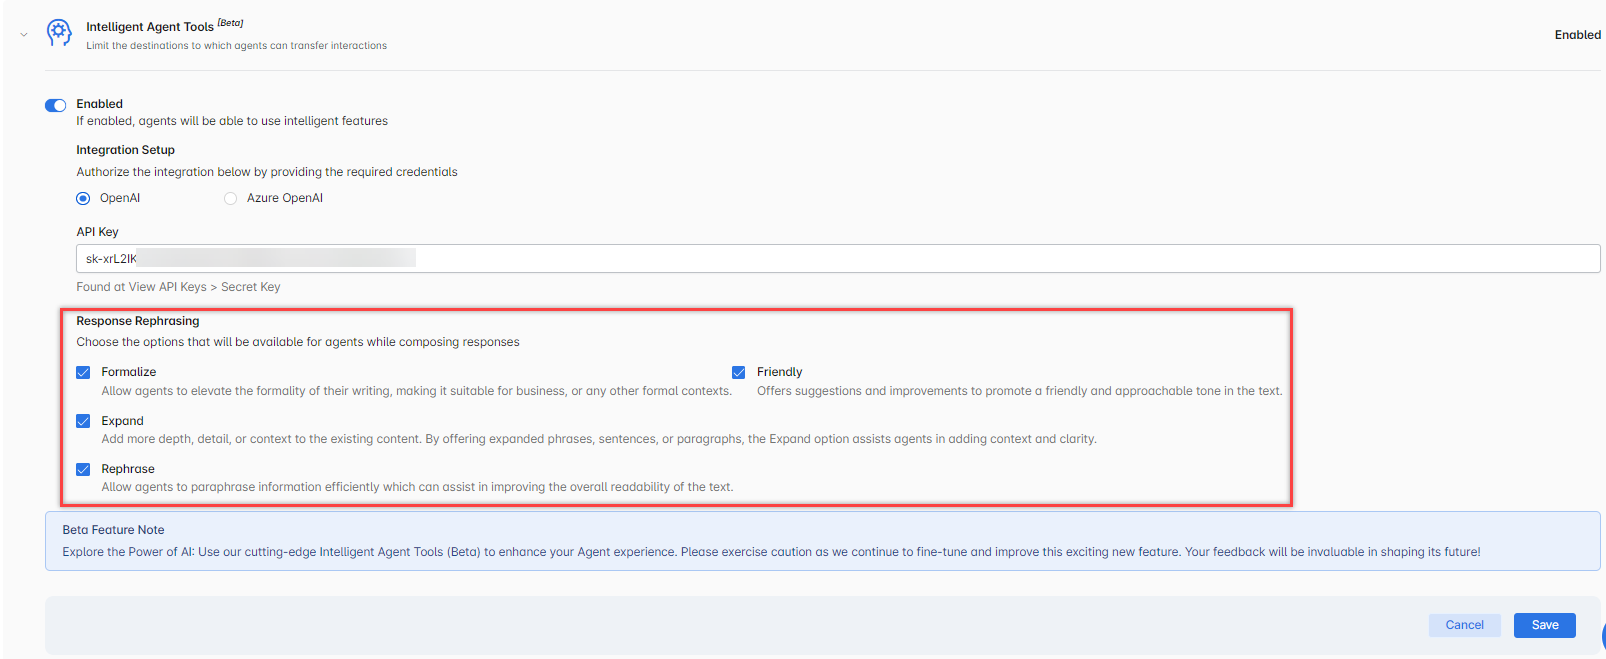
- Choose the options that will be available to the agents while composing responses.
- Click Save. A success message is displayed.
Enable Azure OpenAI Integration:
Prerequisites:
Before enabling the Azure OpenAI action, complete the following prerequisites:
- If you don’t have Azure OpenAI account credentials, create a developer account in Azure OpenAI and note down login credentials. Use the Azure OpenAI Service Documentation for more information.
- Copy the Sub Domain, Deployment ID, and API Key values and keep them for future use to enable the integration.
Steps to enable the Azure OpenAI integration:
- Click Intelligent Agent Tools and enable the feature.
- Select the Azure OpenAI option for integration.

- Enter the following details:
- Sub Domain – The domain name of the Azure OpenAI service, which you copied earlier.
- Deployment ID – The deployment ID/model name of the Azure OpenAI service, which you copied earlier.
- API Key – The secret API key of your Azure OpenAI service, which you copied earlier.

- Choose the options that will be available to the agents while composing responses.
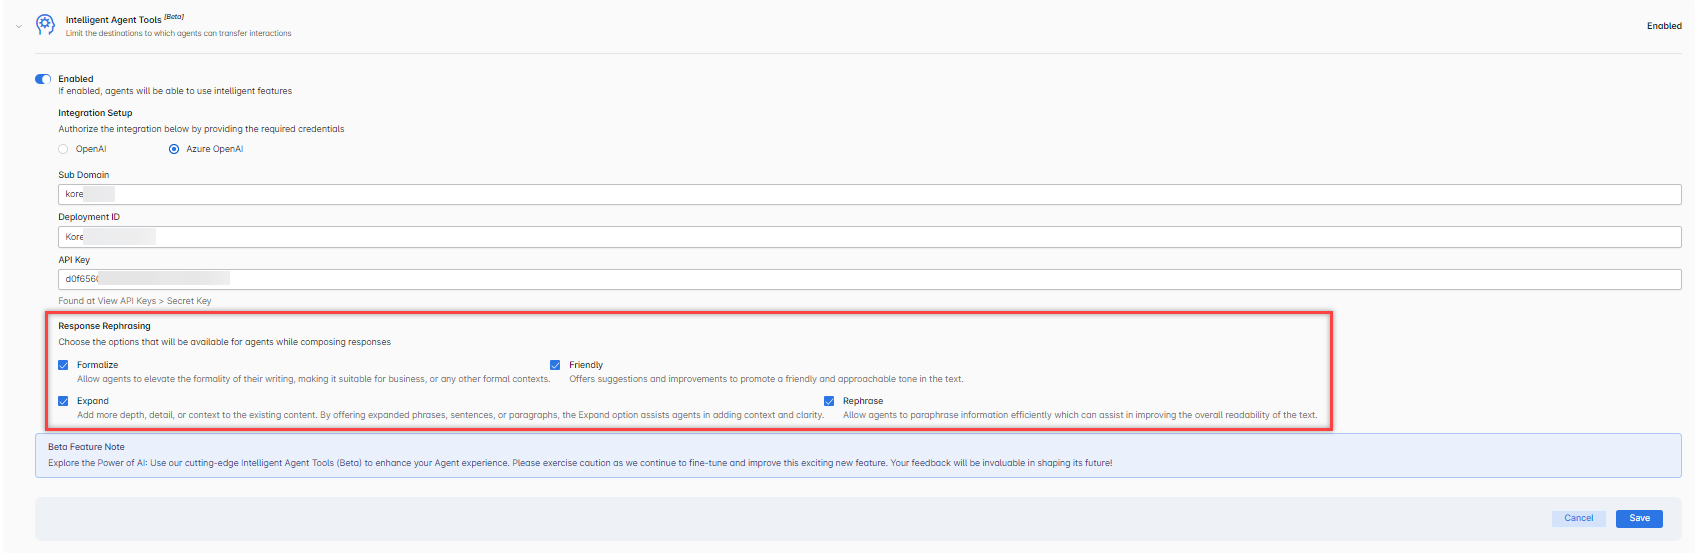
- Click Save. A success message is displayed.