
In the Language & Speech section of SmartAssist, you can configure the voice preferences to personalize the ASR Engine and the voice that plays for your text-to-speech conversions.
Steps to modify the voice preferences:
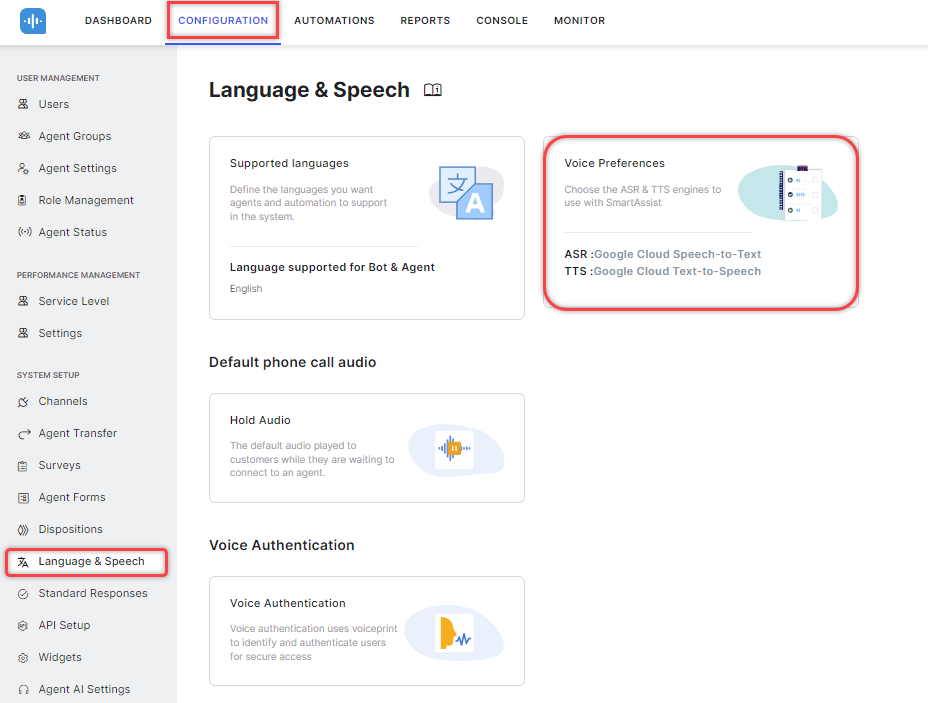
- Go to CONFIGURATION > Language & Speech > Voice Preferences.
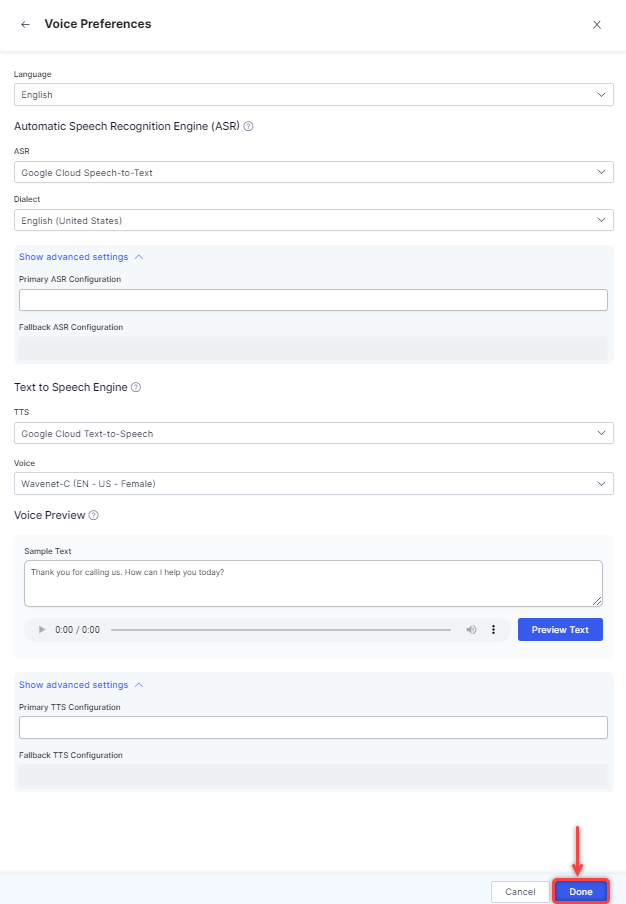
- Select the following on the Voice Preferences window:
- Language
- Automatic Speech Recognition Engine (ASR)
- ASR
You can choose between- Microsoft Azure Speech Services,
- Google Cloud Speech-to-Text,
- Amazon Transcribe.
- Dialect
- Primary ASR Configuration (Advanced Setting)
- Fallback ASR Configuration (Advanced Setting)
- ASR
- Text to Speech Engine (TTS)
- TTS
You can choose between- Microsoft Azure Speech Services,
- Google Cloud Text-to-Speech,
- AWS Amazon Polly,
- ElevenLabs,
- OpenAI TTS,
- PlayHT,
- Deepgram Text-to-speech.
- Voice
- TTS
- Voice Preview
- Sample Text: Enter Sample Text to preview your voice selection. You can play, navigate through the audio (Back/Forward), and adjust the preview volume. Clicking the More Options (⋮) button reveals options to adjust Playback Speed. Click the Play button next to any available voice to preview it. Voices are available for all TTS engines, but each engine has its voice options. Select a different Voice Language if required.
- Primary TTS Configuration (Advanced Setting)
- Fallback TTS Configuration (Advanced Setting)
- Click Done once you have completed configuring your voice preferences. The set voice, language, and dialect apply to automated customer responses that use text-to-speech.
List of Supported Dialects
The following dialects are supported:
| English (Australia) | English (Nigeria) |
| English (Canada) | English (Pakistan) |
| English (Ghana) | English (Philippines) |
| English (Hong Kong) | English (Singapore) |
| English (India) | English (South Africa) |
| English (Ireland) | English (Tanzania) |
| English (Kenya) | English (United Kingdom) |
| English (New Zealand) | English (United States) |