For a given use case flow, you can select the voice and chat agents to whom outgoing conversations are transferred. You can set up the following:
- Outgoing Voice Agent Transfer: You can select where SmartAssist should transfer the call if a voice agent is required in the experience flow.
- Outgoing Chat Agent Transfer: You can select where SmartAssist should transfer the chat if a chat agent is required in the experience flow.
To access Agent Transfer options, go to Configuration > System Setup > Agent Transfer.
Outgoing Voice Agent Transfer
This feature helps set up a dedicated number or SIP to transfer calls to a voice agent. To configure the transfer, follow these steps:
- Go to Configuration > System Setup > Agent Transfer.
- Select one of the following options:
- Call Number: Transfer the call to an external phone number.
- SIP Transfer: Define the SIP URIs to which calls should transfer.
- SmartAssist, Route all the calls to the SmartAssist Agent Console.
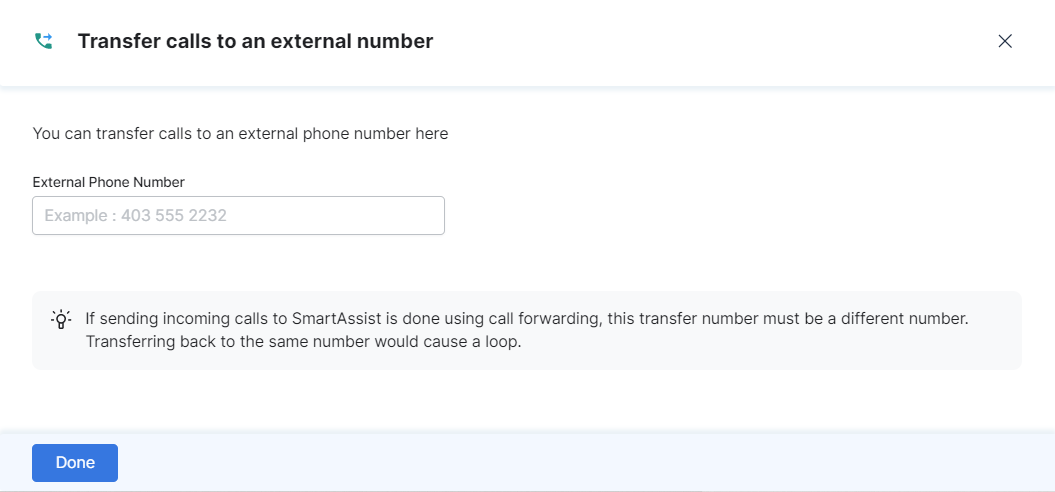
Call Number
This section lets you set a phone number to which calls are transferred. Clicking Call Number displays the Transfer calls to an external number window. In the External Phone Number field, type the number along with the country code, and click Done.
SIP Transfer Methods
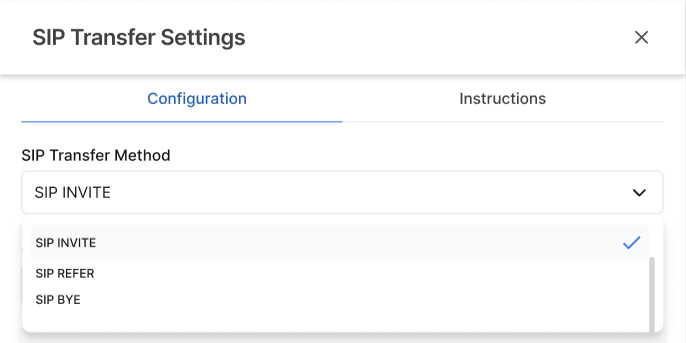
An Administrator can choose from three SIP Transfer Methods:
- SIP INVITE: Kore Gateway initiates an Agent Transfer to a third-party contact center. Kore Gateway invites the third-party contact center, sets up a conference call, and remains on the conference call.
NOTE: This option is available only for accounts configured with Kore Gateway and not available for accounts configured with AudioCodes. - SIP REFER: Kore Gateway initiates an Agent Transfer to a third-party contact center (Recipient), and the recipient (identified by the Request URI) should contact a third party using the contact information provided in the request.
- SIP BYE: Kore Gateway initiates an Agent Transfer to a third-party contact center. Kore Gateway transfers the call to the third-party contact center and exits the call. In this method, the SIP URL field does not appear.
Set up SIP Transfer
SIP Transfer lets you configure the SIP settings for call transfers. To configure this option, follow these steps:
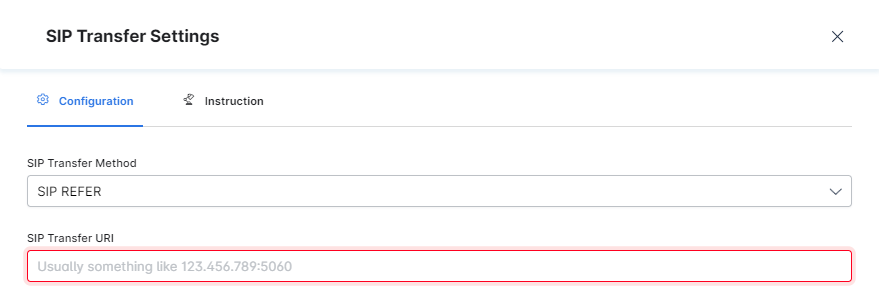
- Click the SIP Transfer tile under Agent Transfer to open the SIP Transfer Settings window, where you can configure the following:
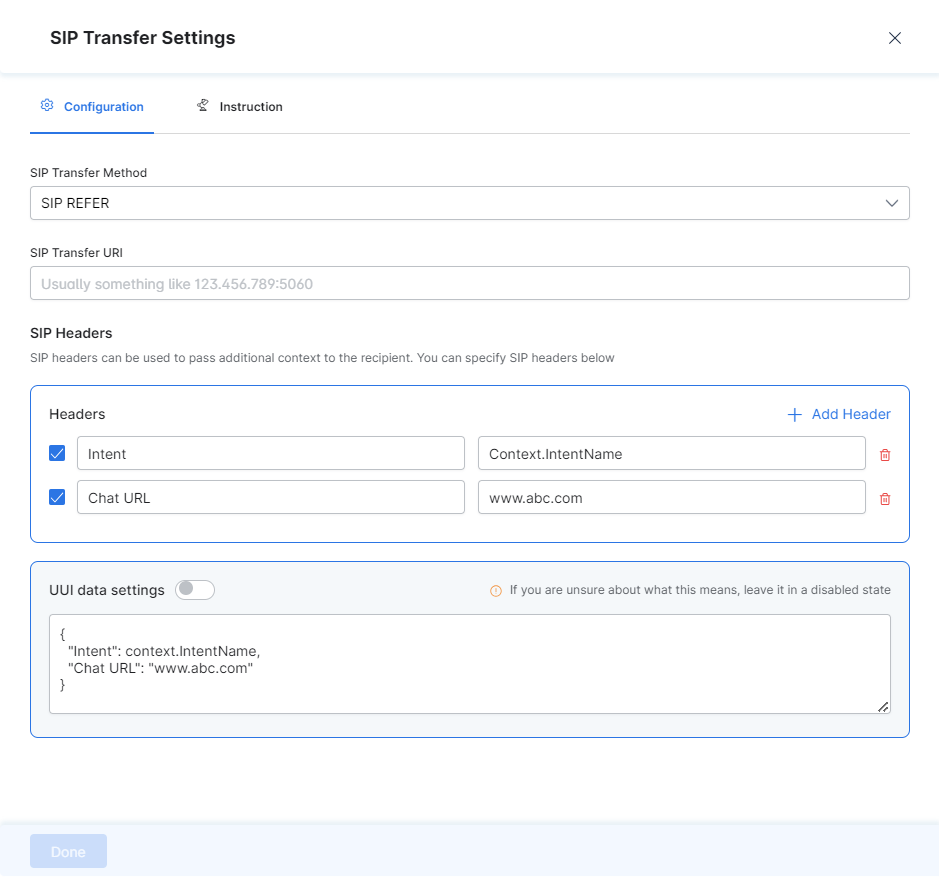
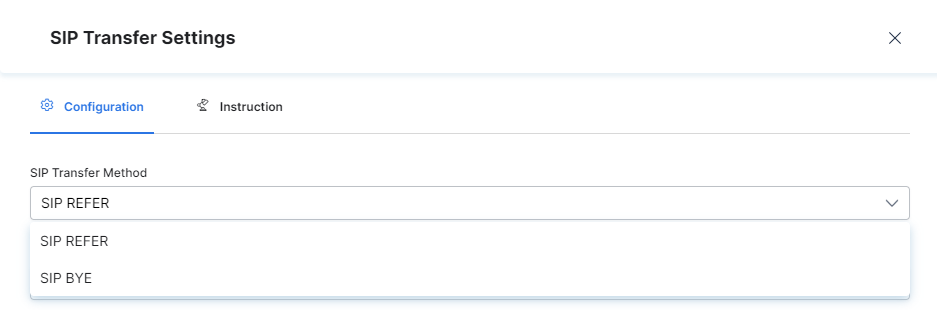
- Provide the SIP Transfer Method.
For accounts configured with Kore Gateway, you can choose one of the following:- SIP INVITE
- SIP REFER
- SIP BYE
- Provide the SIP Transfer Method.
For accounts configured with Audiocodes, you can choose one of the following:
-
-
- SIP REFER
- SIP BYE
- Provide the SIP Transfer URI.
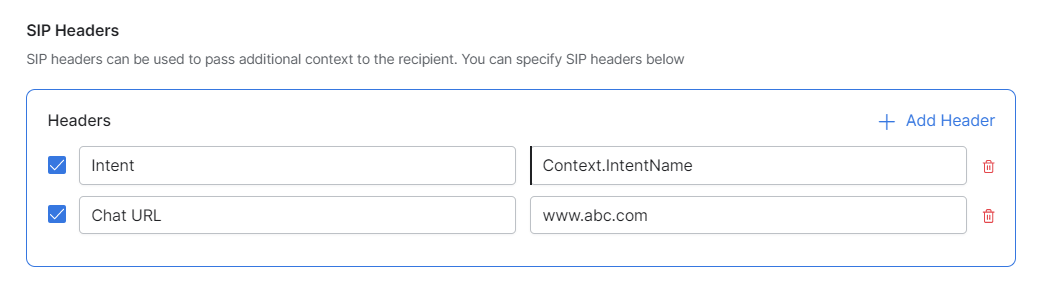
- For SIP Header Settings, provide the SIP header name and URL under Additional Context.
-
-
-
- Click Add Header to insert a new SIP Header.
- Click the Delete (bin) icon next to a header to remove it.
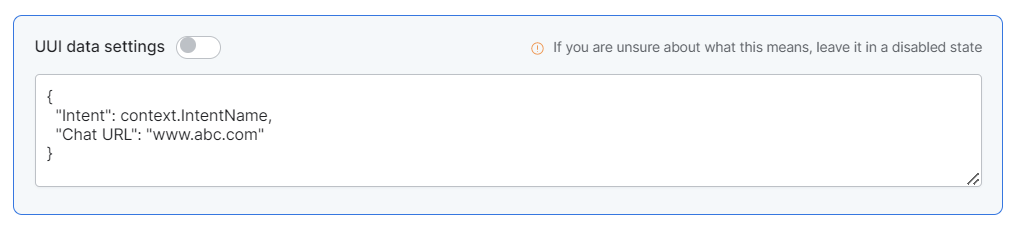
- (Optional) Enable User to User Interface to set the intent and user interface URL for SIP transfer.
- Click Done. Please wait for upto ten minutes after saving for the IPs to be whitelisted.
-
Outgoing Chat Agent Transfer
This feature helps transfer outgoing chat flows from SmartAssist to a chat agent on the selected third-party platform or a custom application.
To configure this option, follow these steps:
- Select the desired third-party service provider from the following options:
- ServiceNow
- Salesforce
- Unblu
- LivePerson
- NICE inContact
- SmartAssist
- Intercom
- HelpShift
- Genesys
- Drift
- Custom
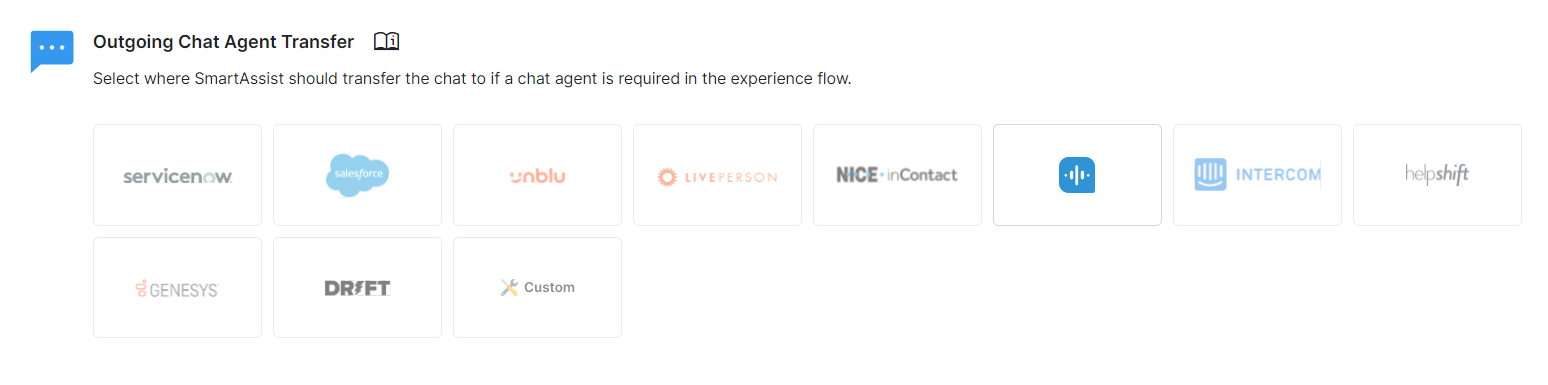
- In the Configuration window, provide the values for the given fields, and click Done.
Below are detailed instructions on how to set up agent transfer for each available service:
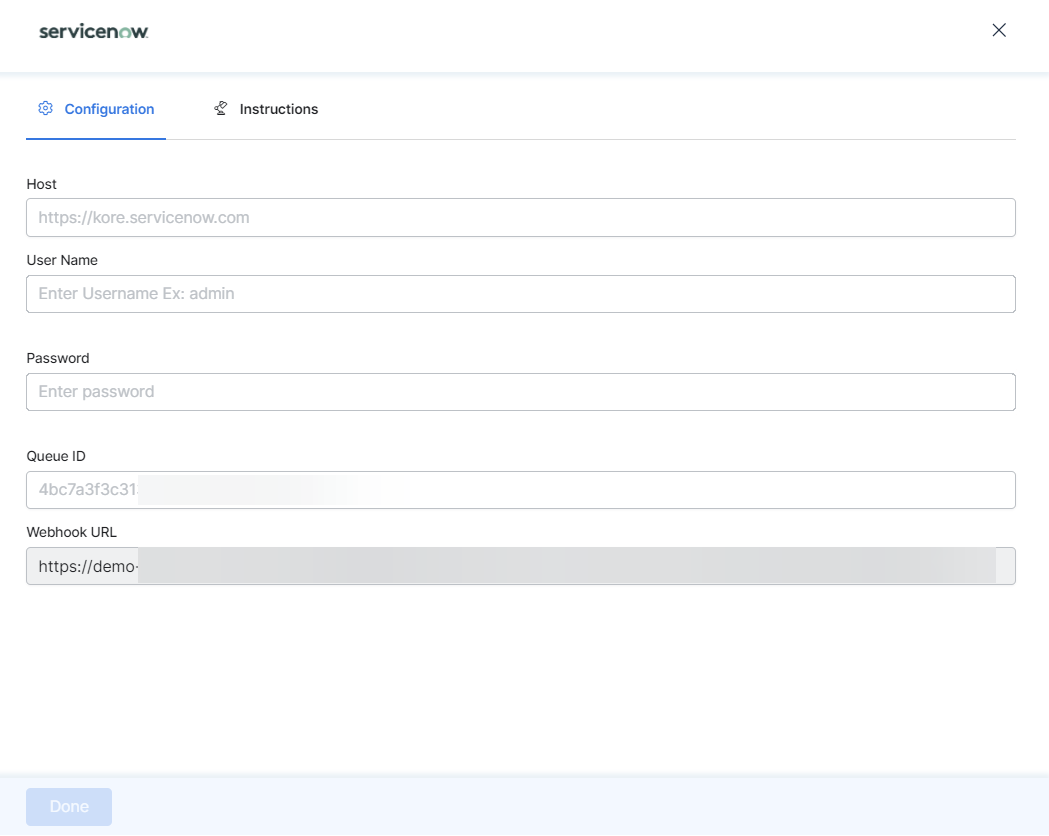
ServiceNow
- Host: The company’s URL that is hosted on ServiceNow.
- User Name: The username of your ServiceNow account.
- Password: The password of your ServiceNow account.
- Queue ID: The unique queue identification number.
- Webhook URL: The web URL for custom application function callbacks.
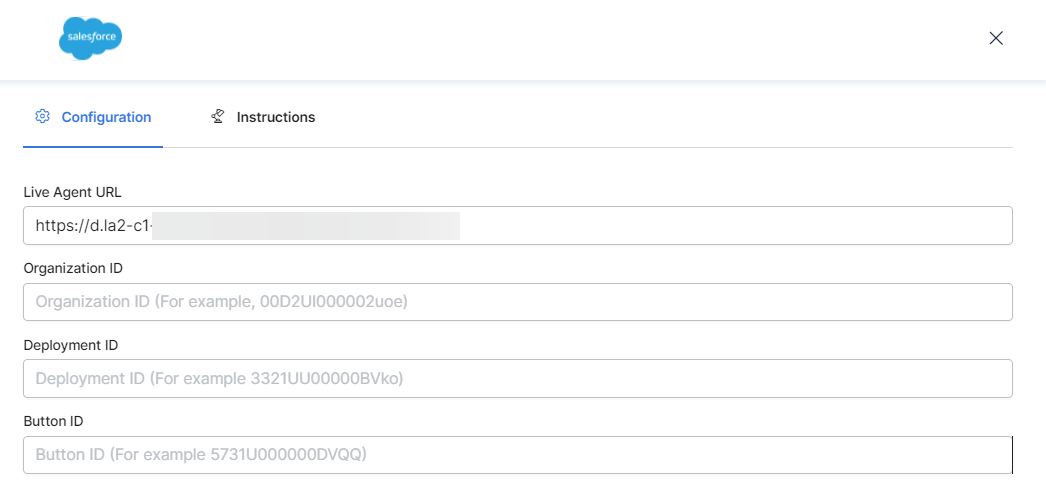
Salesforce
- Live Agent URL: Set the URL for the Live Agent service on Salesforce.
- Organization ID: The unique organization ID provided by Salesforce.
- Deployment ID: The unique Salesforce deployment ID.
- Button ID: The unique ID of the button component that helps interact with Salesforce data.
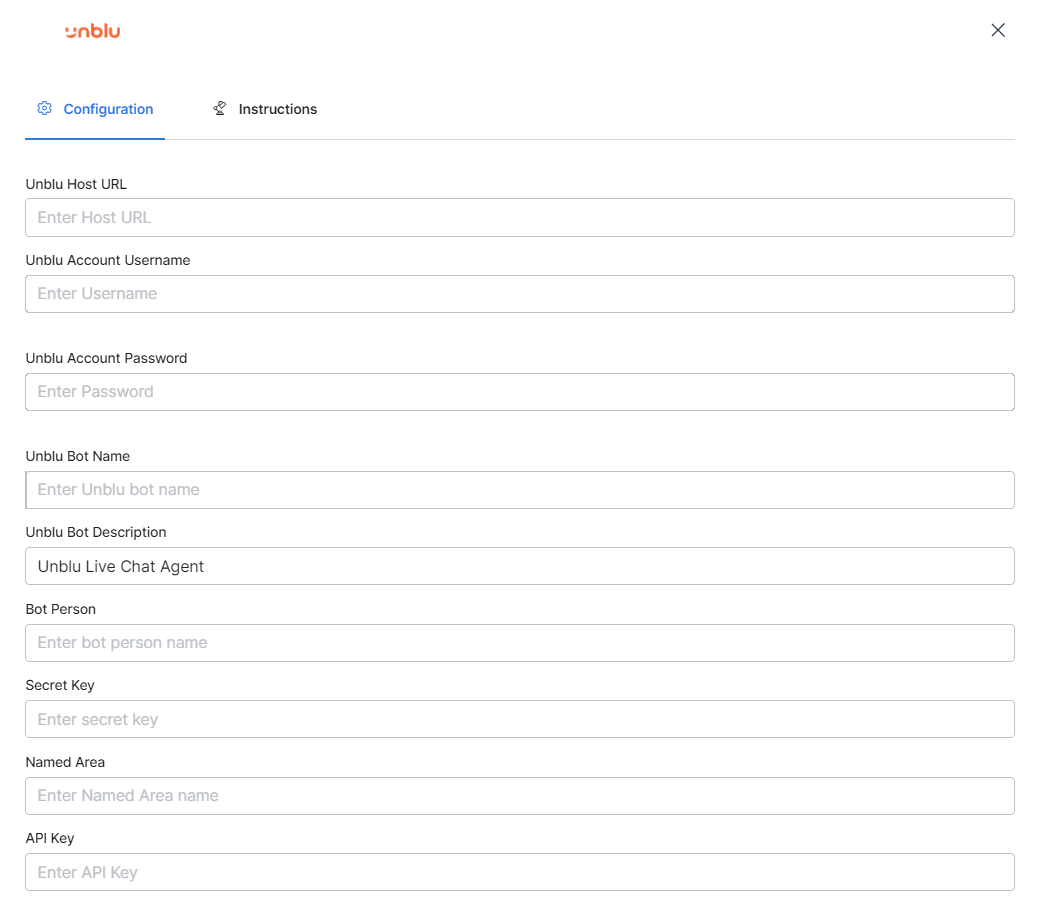
Unblu
- Unblu Host URL: The company’s URL, hosted on Unblu.
- Unblu Account Username: The username for your Unblu account.
- Unblu Account Password: Your Unblu account password.
- Unblu Bot Name: The name of your Unblu bot to which the live chat agent is mapped.
- Unblu Bot Description: A description for the Unblu bot.
- Bot Person: The name of the human agent to whom the bot redirects the chat.
- Secret Key: The secret key for authentication.
- Named Area: The name given to the Named Area feature that helps create Unblu-specific quasi-domains.
- API Key: The API key string value to identify the app or the user.
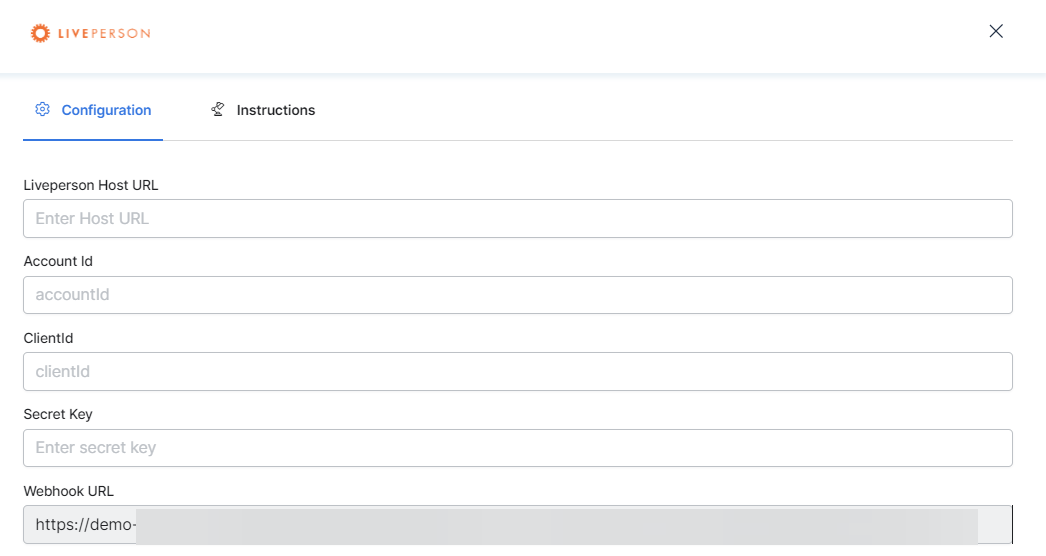
LivePerson
- Liveperson Host URL: The company’s URL hosted on LivePerson.
- Account Id: The identifier of your LivePerson account.
- ClientId: The client ID generated when the live chat agent application was created.
- Secret Key: The secret key generated when the live chat agent application was created.
- Webhook URL: The web URL for custom application function callbacks.
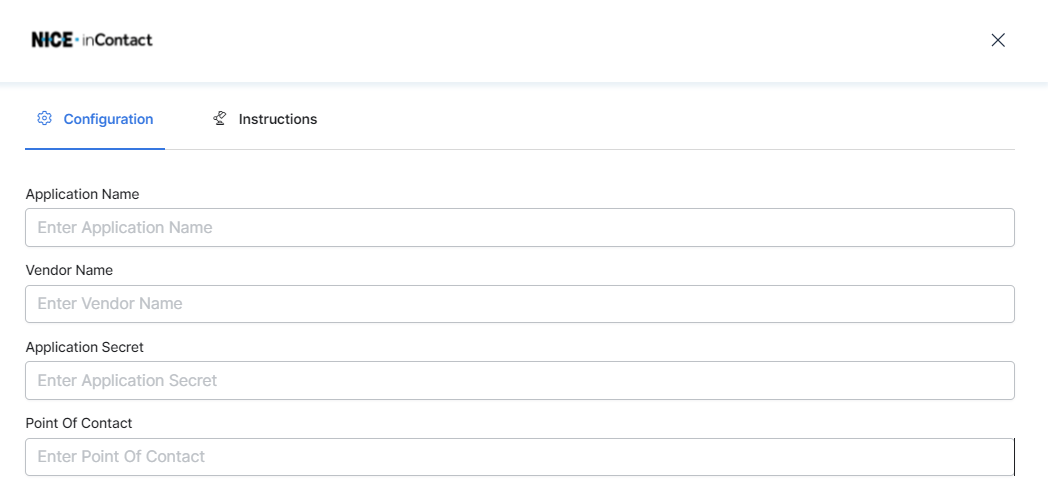
NICE inContact
- Application Name: The application name given when registering the application.
- Vendor Name: The Vendor Name given when registering the application.
- Application Secret: The client secret generated when registering the application.
- Point of Contact: The name given to the entry point that an inbound contact uses to initiate an interaction.
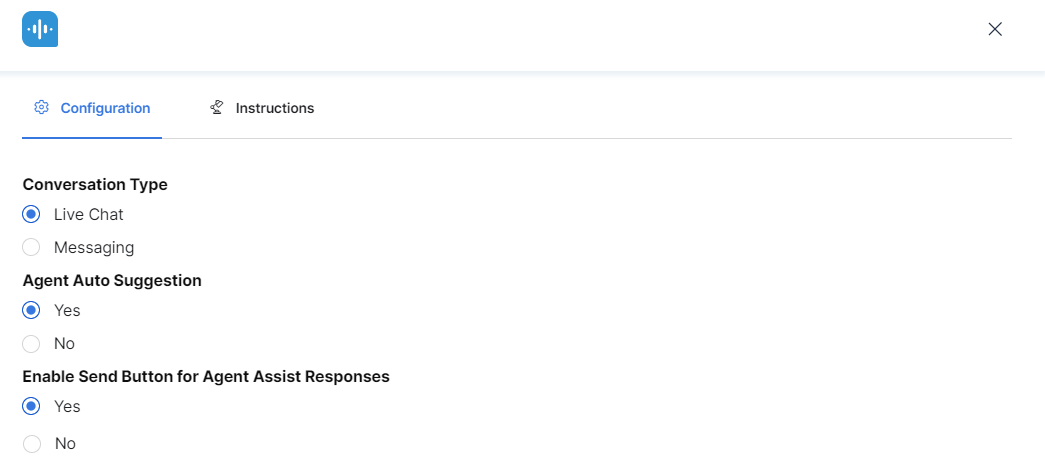
SmartAssist
- Select either Live Chat or Messaging for Conversation Type. This setting is only applicable for the Web/Mobile Client channel and is used to determine the conversation behavior when there is an agent transfer.
- Live Chat – Live Chat conversations are ‘real-time’ and are recommended when you expect unauthenticated visitors. Use this setting if the Web/Mobile channel is primarily implemented for users who will not sign into your website. Live Chat Conversations are auto-closed after 15 minutes of inactivity.
- Messaging – Messaging conversations are asynchronous. These interactions are similar to those you have over mediums like WhatsApp, Telegram, etc. You should use this mode if you have a signed-in user logging on to your website/mobile app. Messaging conversations are auto-closed after 48 hours of inactivity.
- Select either Yes or No for Agent Auto Suggestion. This setting decides if AgentAssist will be enabled for a given account by default to provide auto-suggestions of standard responses.
- Under Enable Send Button for Agent Assist Responses, select Yes or No. If set to Yes, this option displays a Send button along with each standard response provided via AgentAssist. Clicking this button will immediately send the response as-is to the customer. If No is selected, then this option will not be available. Agents can still see AgentAssist responses if Agent Auto Suggestion is set to Yes, but they can only copy the response to edit and send to customers.
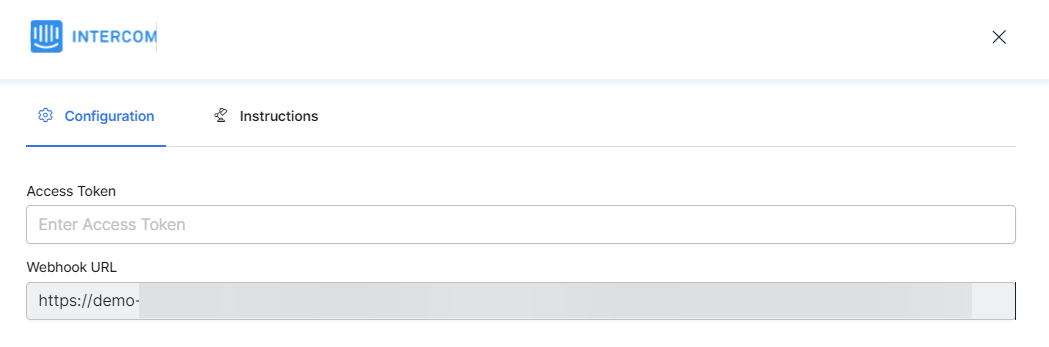
Intercom
- Access Token: The access token generated for reaching your workspace’s data via API.
- Webhook URL: The web URL for custom application function callbacks.
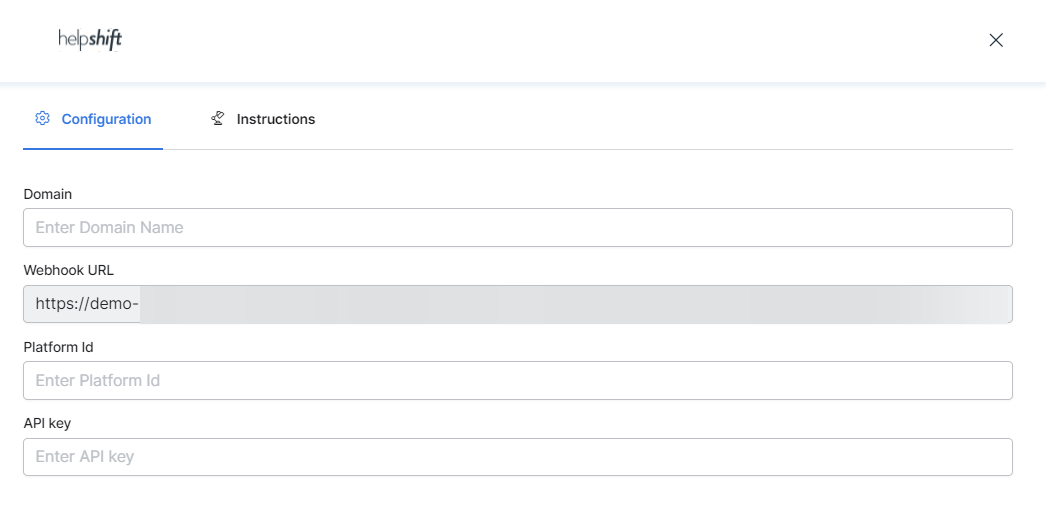
HelpShift
- Domain: The domain name to set up the HelpShift channel.
- Webhook URL: The web URL for custom application function callbacks.
- Platform Id: The platform ID to integrate with HelpShift, available under Settings.
- API Key: The default API key available in the HelpShift platform’s API section.
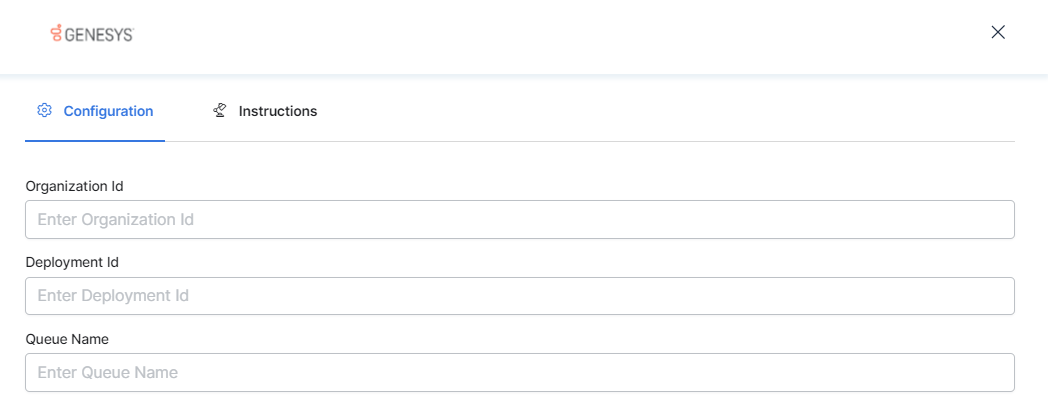
Genesys
- Organization Id: Your organization ID registered on Genesys.
- Deployment Id: The widget deployment ID available on Genesys.
- Queue Name: The name of the contact center queue.
Drift
- Drift Host URL: Your organization’s Drift account URL.
- Access Token: The non-expiring access token generated when your app is published.
- Verification Token: The verification token available under App Credentials.
- Integration Source Message: Message used at the app integration source.
- Webhook URL: The web URL for custom application function callbacks.

Custom
This option is used to configure a custom application as follows:
- Download & Install BotKit SDK from our GitHub Repo: https://github.com/Koredotcom/BotKit. See our Botkit SDK Tutorial for more information.
- Register the App: Create or register an existing app under Outgoing Chat Agent Transfer > Custom. The App provides the following for secure communications:
- BOT NAME: The value selected for App Name is auto-filled as the Bot Name.
- BOT ID: The unique Bot identifier number.
- CLIENT ID: The client ID generated when the application is created.
- CLIENT SECRET: This is a view-only value representing the application’s client secret key.
- Define the Callback URL of your application to be invoked for BotKit SDK events.
- Define the Dialog: Identify the steps in the dialog and the transition conditions to transfer to a human agent and add the Agent Webhook node in the dialog. Learn more.
- Integrate with Agent Software: Use the BotKit SDK to integrate with the agent software of your choice. Configure the toolkit to fetch bot-user conversations and mark the agent session as complete using the APIs provided by the Platform.
- Save your settings by clicking Done.
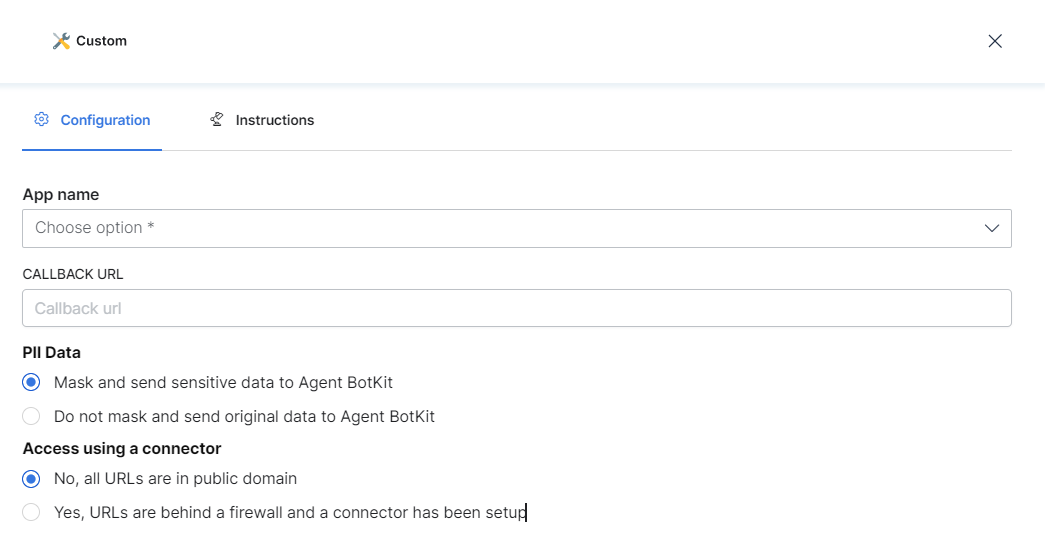
Below is a description of the fields to set up for a custom application:
- App Name: Select an application name from the list.
- Callback URL: The URL used for function callback.
- PII Data: Select one of the options:
- Mask and send sensitive data to Agent BotKit: Masks the data being transferred.
- Do not mask and send original data to Agent BotKit: Transfers data without masking.
- Access using a connector: Select one of the following options:
- No, all URLs are in the public domain.
- Yes, URLs are behind a firewall, and a connector has been set up.