
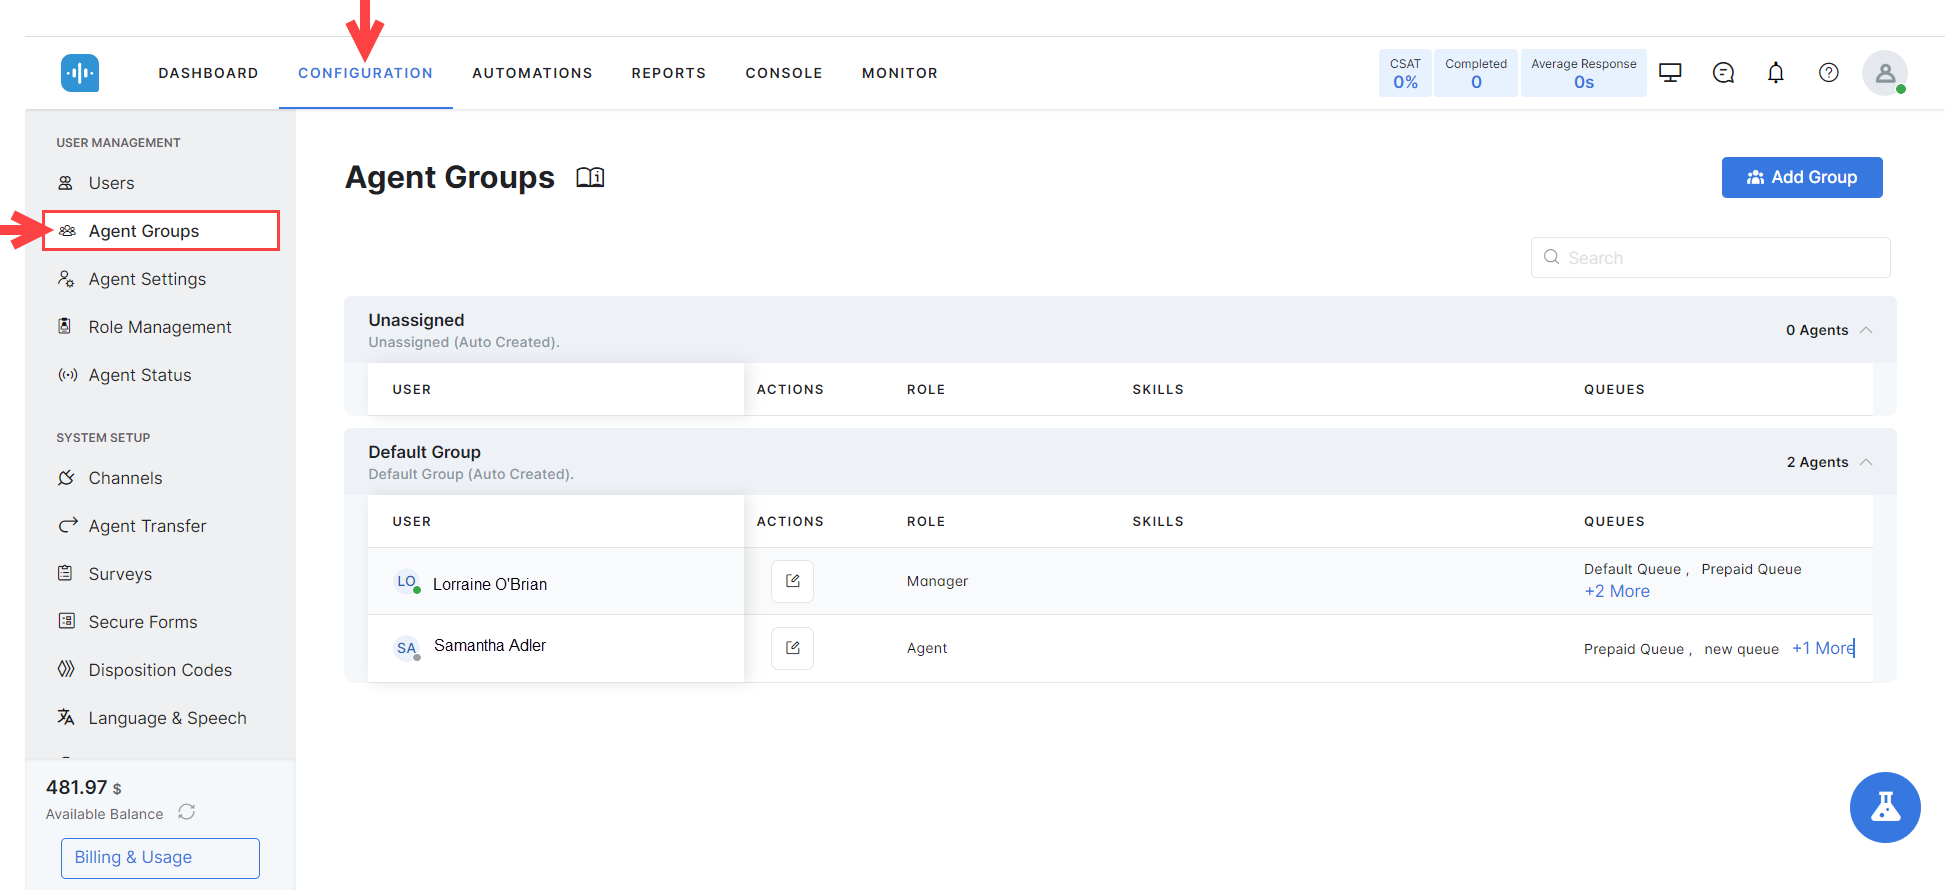
An Agent Group is a collection of agents based on skills, scopes, roles, functionalities, etc. Agents are assigned to groups to streamline customer service within SmartAssist.
To find Agent Groups, go to Configuration > User Management > Agent Groups. All groups are visible on this page by default.
Agent Group Section Features
The Agent Group section includes the following features:
- You can use the Search field to find a group by name.
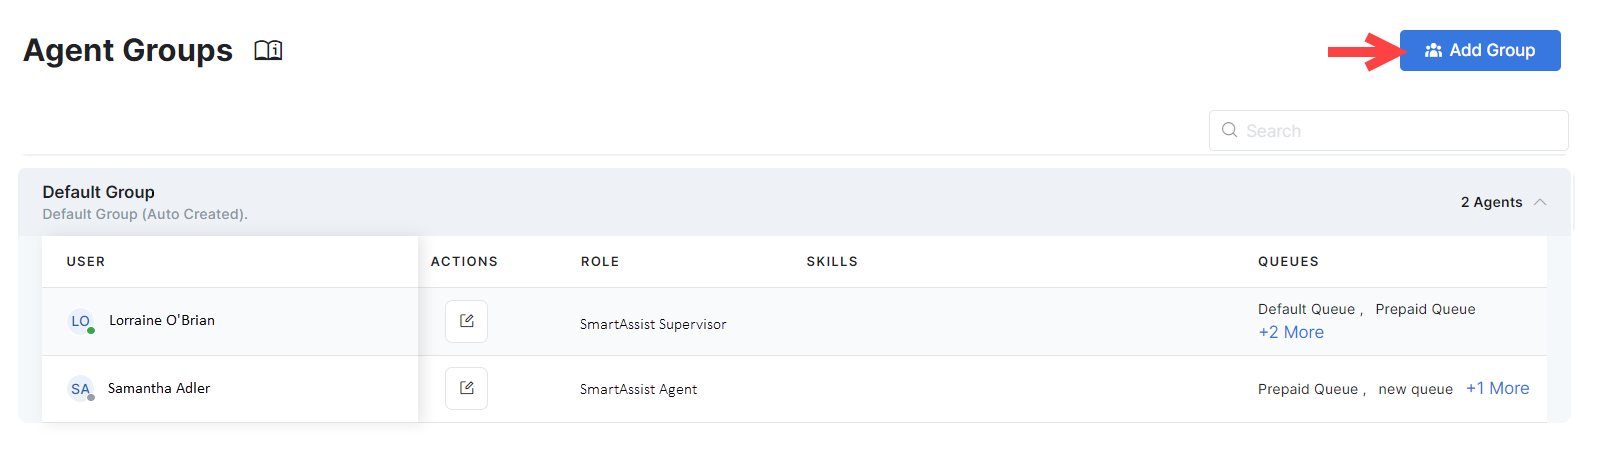
- Each group item shows the Group Name, Description, and the Number of Agents it includes.
- Clicking any group name reveals the agents who are part of it. Each agent is listed with their name, Edit Action, Role, assigned Skills, and Queues. Learn more about User Management.
Preconfigured Groups
There are two preconfigured groups available:
- Unassigned is automatically selected in the Group drop down while creating a new user. The Unassigned group is not considered for routing interactions..
- Default Group.
Create an Agent Group
To create a new agent group, follow these steps:
- On the Agent Groups page, click Add Group.
- In the New Group window, provide the input for the following fields:
- Group Name – Enter the name of the agent group.
- Description – Enter a brief description of the group.
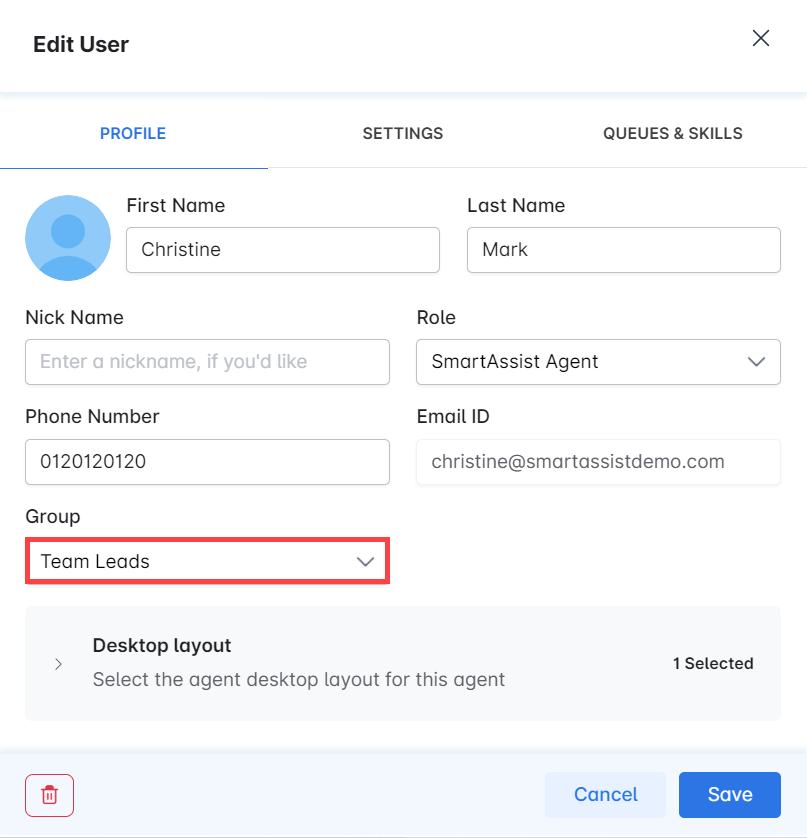
Add Agents to a Group
To add agents to a group, you either need to add a new agent to SmartAssist or edit an existing one to assign the group to them. Follow these steps to add an agent to a group:
- Go to Users and create or edit an agent.
- On the User Profile, select the desired group.
- Save the agent record.
To learn more about adding or editing agents, please see User Management.
Edit an Agent Group
To modify an agent group, follow these steps:
- On the Agent Groups page, hover over the group that you want to edit, then click the Edit icon next to the group name;
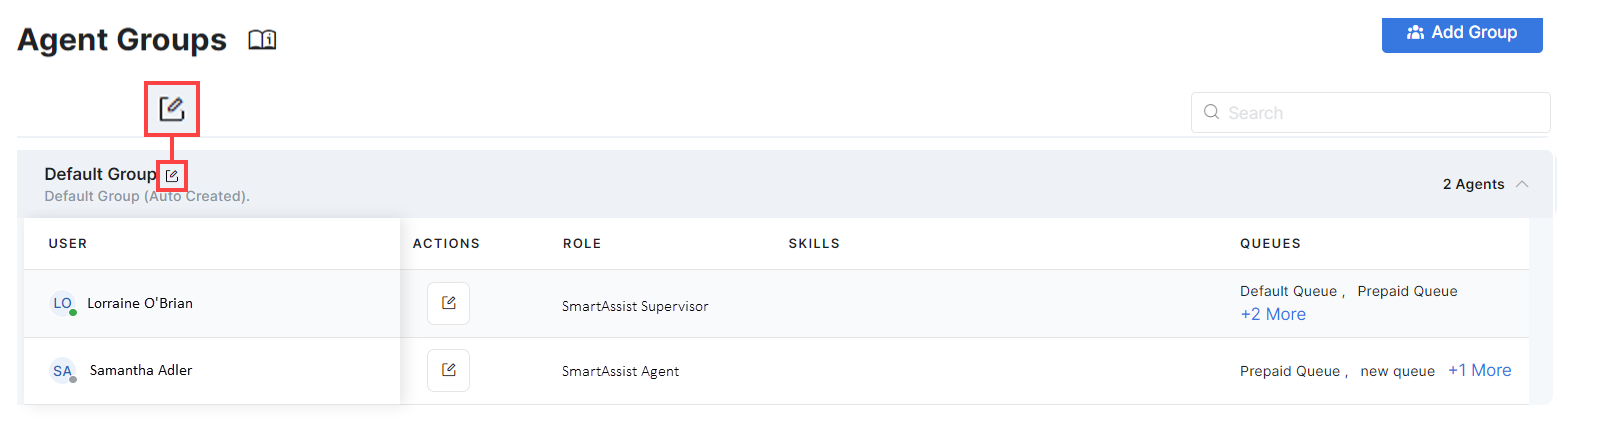
- In the Edit Group window, make the required changes;
- Click Save.
Delete an Agent Group
To delete an agent group, follow these steps:
- On the Agent Groups page, click the Edit icon next to the group you want to delete.
- In the Edit Group window, click the Delete Agent Group icon at the bottom left.

- You will be asked to confirm your choice.