
In SmartAssist, the term User refers to the agents (customer support representatives), to supervisors, and administrators with an account within SmartAssist. To serve customers, you must add users to SmartAssist and provide them with the necessary access. You can create user profiles, assign them to voice, chat, or both channels, and specific skills or queues.
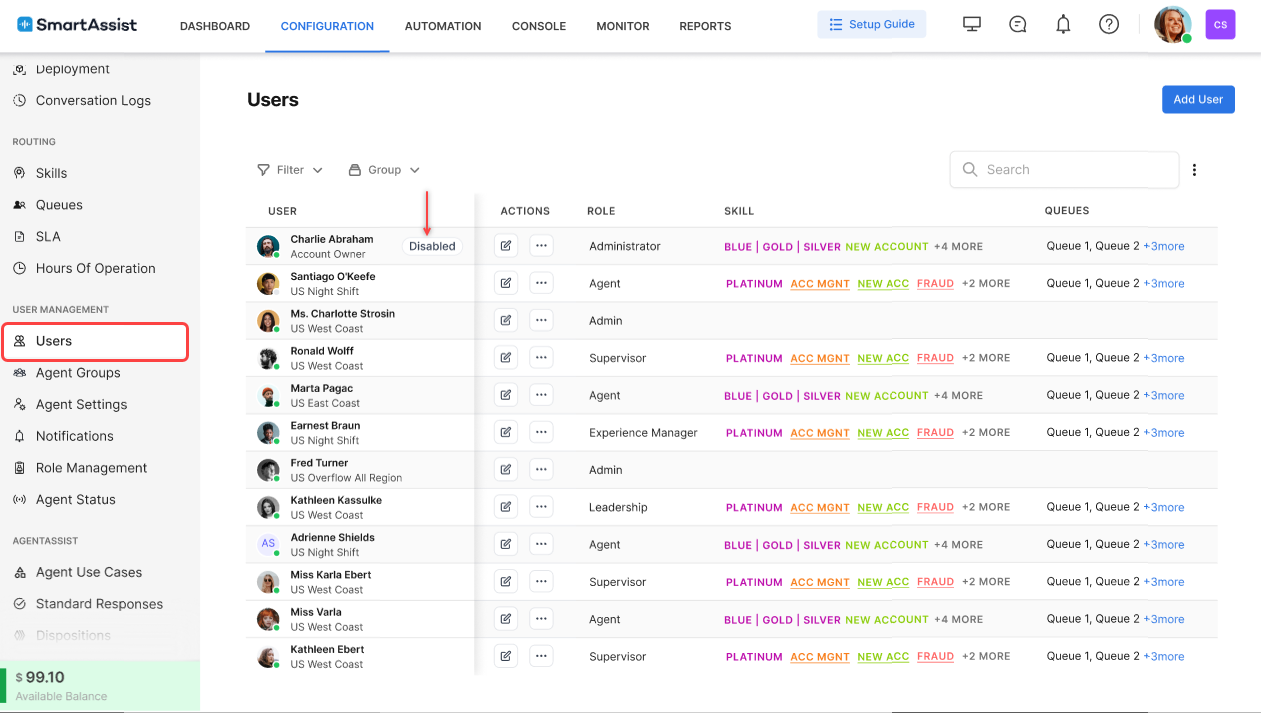
You can find the Users section by going to Configuration > User Management > Users.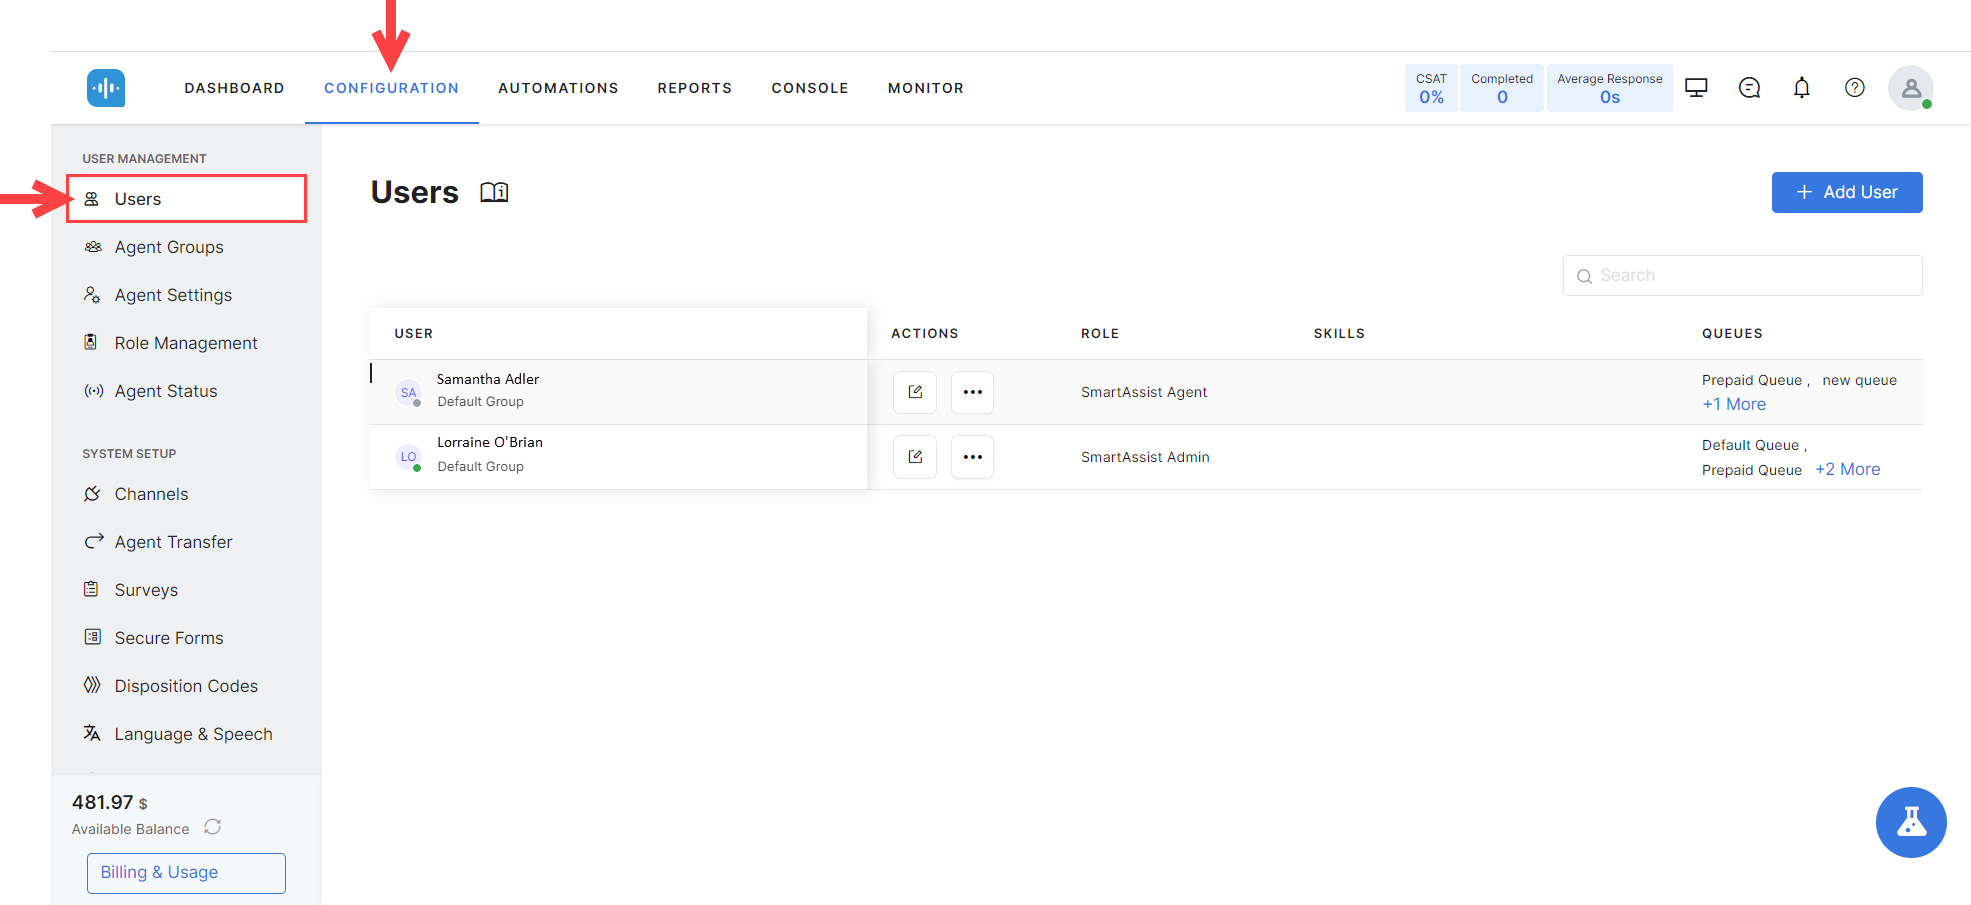
User Management Section Features
The Users section includes the features in the table below.
| Feature | Description | ||||||
|---|---|---|---|---|---|---|---|
| Search | Type in a user’s name to retrieve their record. | ||||||
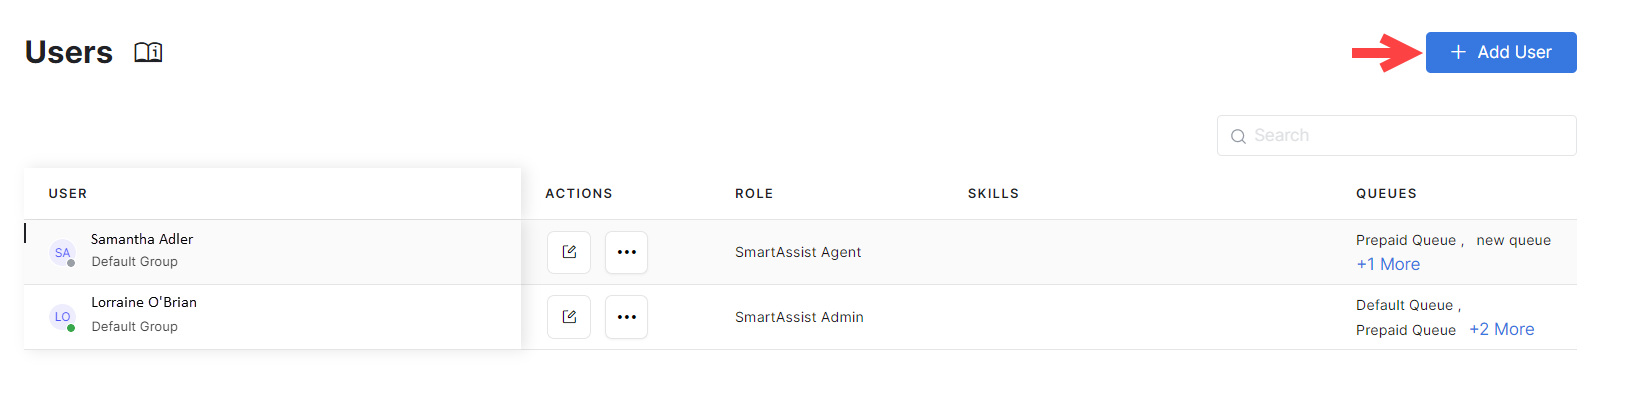
| User | This is the name of the user you are viewing, as entered within their profile. Under every user’s name, SmartAssist mentions the groups that the user is part of. | ||||||
| Actions | This field lets you perform actions on the user record:
|
||||||
| Role | Lists the role assigned to the user. | ||||||
| Skills | Lists the skills assigned to the user. |

Add a User
You can add a user to SmartAssist by following the steps below:
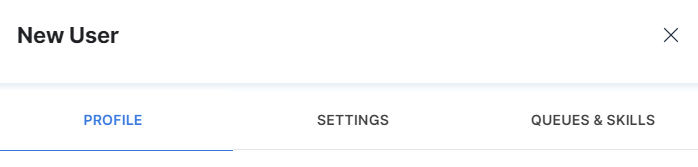
- In the Users section, click New User.
- The New User window displays. Here, you can find the following three areas to configure:
- Profile: Provide the user’s profile information. This section opens by default.
- Settings: Configure settings related to the Chat and Voice Experience.
- Queues & Skills: Assign the user to specific queues and skills.
Disabled users are displayed with a “Disabled” tag beside their name. SmartAssist permissions are disabled when a new user invite is sent by a user whose SmartAssist permission is disabled.
Profile
In the profile section, configure the following:
- (Optional) Profile Picture: Upload the user’s profile picture here.
- First Name and Last Name are mandatory fields for the user’s first and last names, respectively. Only alphanumeric characters are allowed.
- (Optional) Nick Name: This is a mandatory field for the user’s nickname in SmartAssist.
- Role: Select whether the new user should be an Agent, Supervisor, or Administrator.
- Users with “Change User Role” and permission selected as “Yes” will be able to modify the role of an existing user.
- Users with “Change User Role” and permission selected as “No” will not be able to modify the role of an existing user. See Role Management for details.
- Phone Number: This mandatory field requires a 10-digit phone number.
- Email ID: This is a mandatory field for the user’s email address.
- Group: This is a mandatory field for a new user’s organizational group. The Unassigned group is pre-selected.
- Custom ID: This optional field lets you enter a custom ID for each user. You can use this field via API while adding or editing a user.
- Desktop Layout: Choose the layout with which the user will work within the Agent Console. See Manage Layout for details.

Settings
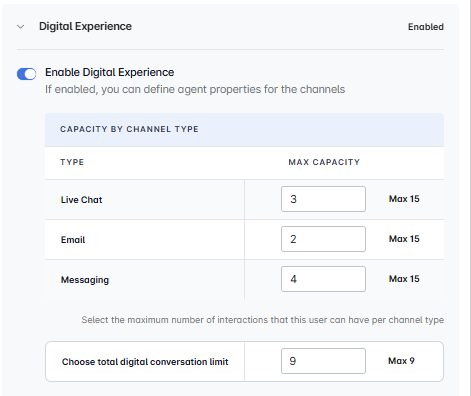
Digital Experience
This section sets the chat support features for a user, such as the capacity by channel type, language and proficiency level selections, and whether you want to allow attachments and emails within chats.
To configure digital experience, follow these steps:
- Enable or Disable the digital experience using the toggle switch.
- CAPACITY BY CHANNEL TYPE – This lets you set the maximum number of sessions an agent can handle simultaneously in a specific channel (Digital, Email, or Message). The system prioritizes the Total digital conversation limit across all channels. If an agent reaches the per-channel limit for a specific channel (Digital, Email, or Message), they will be excluded from receiving new conversations in that channel while remaining available for other channels with open slots. The total digital conversation limit should be configured within minimum and maximum limits. When an agent reaches the total digital conversation limit, they will be automatically marked as “system busy” and will not be assigned any new digital conversations until they complete ongoing conversations and free up session slots.
- Language Support – Allows you to enable or disable the languages known by the user and sets the proficiency level (Novice, Average, Good, or Expert). To add more languages, see System Setup > Languages & Speech.
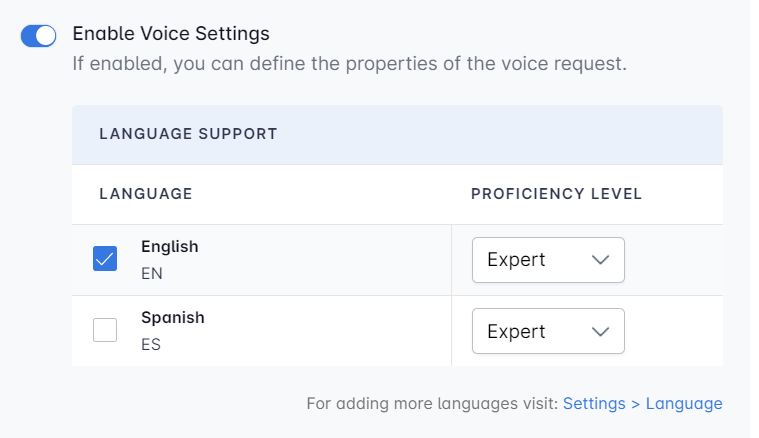
Voice Experience
This feature helps configure a user’s voice (call) experience settings.
In the Voice Experience section, the following options are available:
- Enable Voice Settings – Enabling this option adds the user to the voice channel so that they can handle incoming calls.
- Language Support – Select the language for voice support from the given options and set the language proficiency level. To add more languages, see System Setup > Languages & Speech.
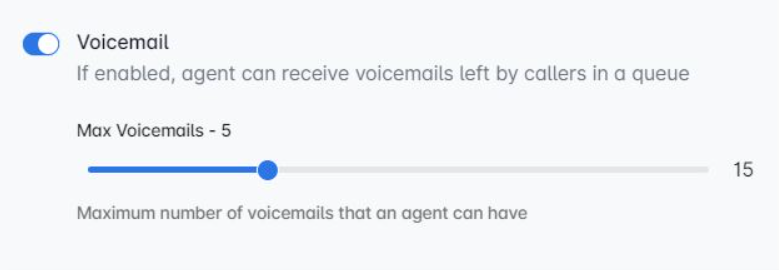
- Voicemail – Enabling this option lets the user select the maximum number of voicemails an agent can receive.
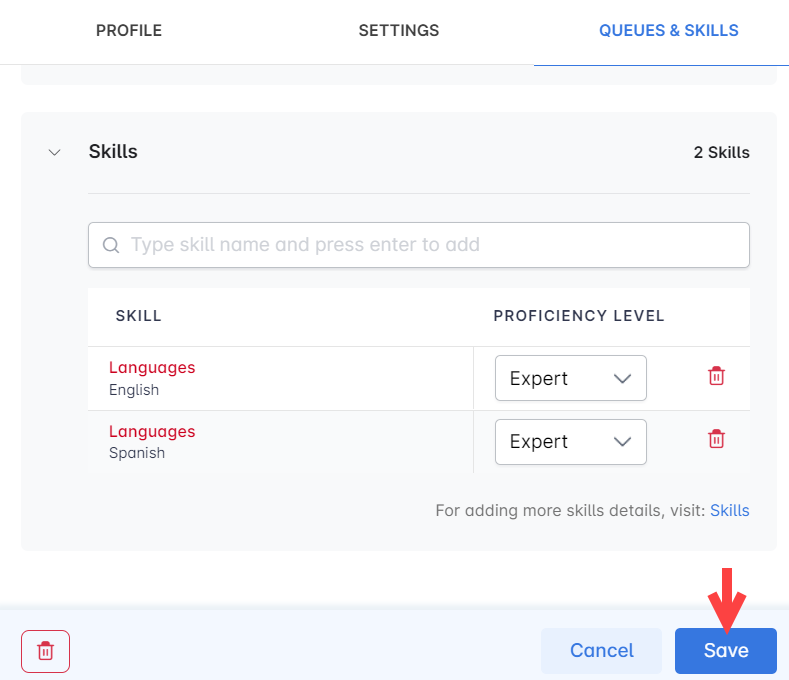
Queues & Skills
This section lets you configure the queues and skills assigned to a user.
Queues
To assign queues to a user, follow these steps:
- Type in a Queue Name in the field, then select the one you need from the list. Clicking into the Skills field shows the list of available options. The list only contains queues that are already created. To add a queue, see Routing > Queues.
- Once you select a queue, it will be added to the user’s list of assigned queues. If you have more than one queue assigned to the same user, you can select or deselect the queues to assign; and set queues as Preferred. Queues set as such will take priority over others when the user receives incoming queries.

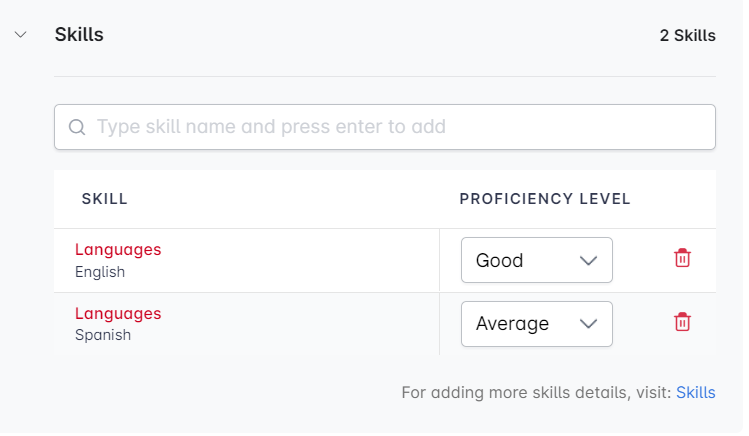
Skills
This section lets you configure the skills that the user brings to your team.
To assign skills to a user:
- Type in a skill name, and select it from the dropdown list to add it to the user’s skill list. Clicking into the Skills field shows the list of available options. The list only contains skills that are already created. To add more skills, see Routing > Skills.
- Once you select a skill, choose the proficiency level (Novice, Average, Good, or Expert).
- You can remove a skill by clicking the Delete (bin) button next to it.
Save a User
To save the user, click the Save button at the bottom of the New User window. This is available regardless of the section that you are currently navigating.
Edit a User
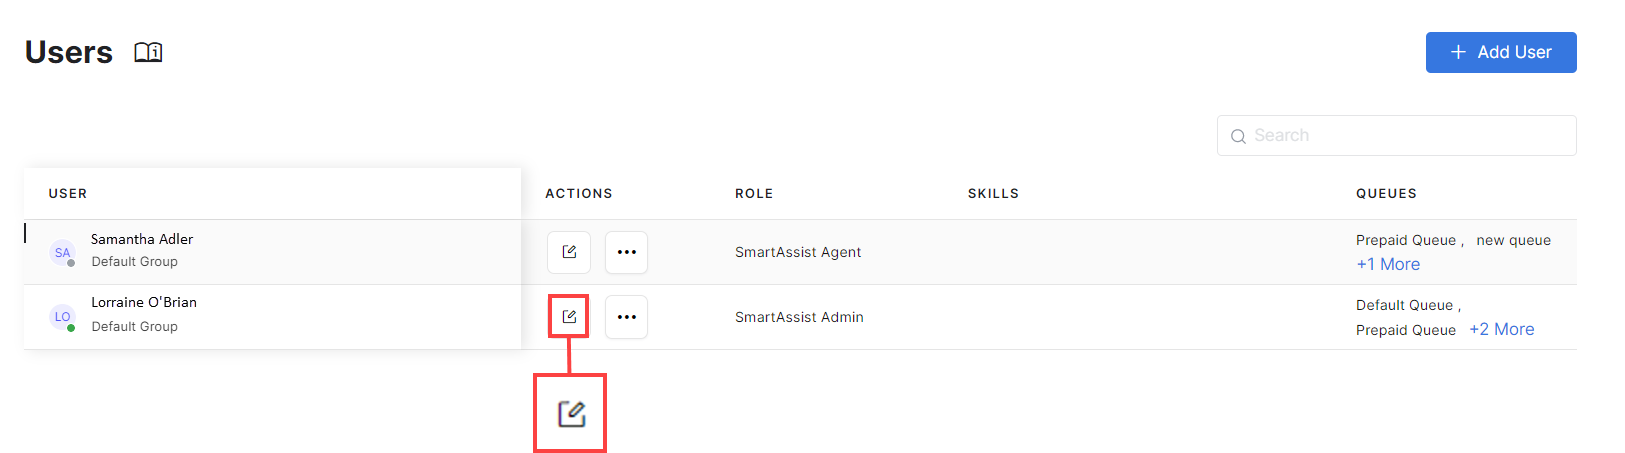
To edit a user, follow these steps:
- On the Users page, click the Edit icon corresponding to the user you want to edit.
- On the Edit User window, make the necessary edits.
- Click Save.
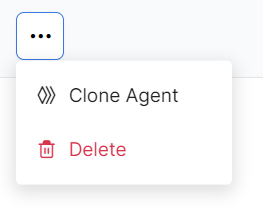
Delete a User
To delete a user, follow these steps:
- On the Users page, click the More Options icon corresponding to the user you want to delete.
- Click Delete.

Alternatively, edit the user, and on the Edit User window, click the Delete (bin) icon on the bottom left.

- You will be asked to confirm your choice.