
Introduction
This Technical Design Document (TDD) presents a comprehensive overview of integrating a Bot platform with the NICE CXOne platform using Studio Script.
This approach exclusively employs studio scripting to dispatch SIP headers, effectuate call transfer from the Bot, and seamlessly transition to NICE CXOne once the bot flow concludes, and there is no requirement to have a VAH (Virtual Agent Hub) license or the need to host a proxy for SIP Backchannel configuration.
The purpose of this document is to provide a high-level solution design for the scripting-only approach by utilizing SIP actions from the studio.
Supporting Documentation
| DOCUMENT | LINK |
|---|---|
| SIP headers | SIP headers |
| Voicebot Conversation | Voicebot Conversation |
| Signal API | Admin API (NICEincontact.com) |
Architecture Diagram
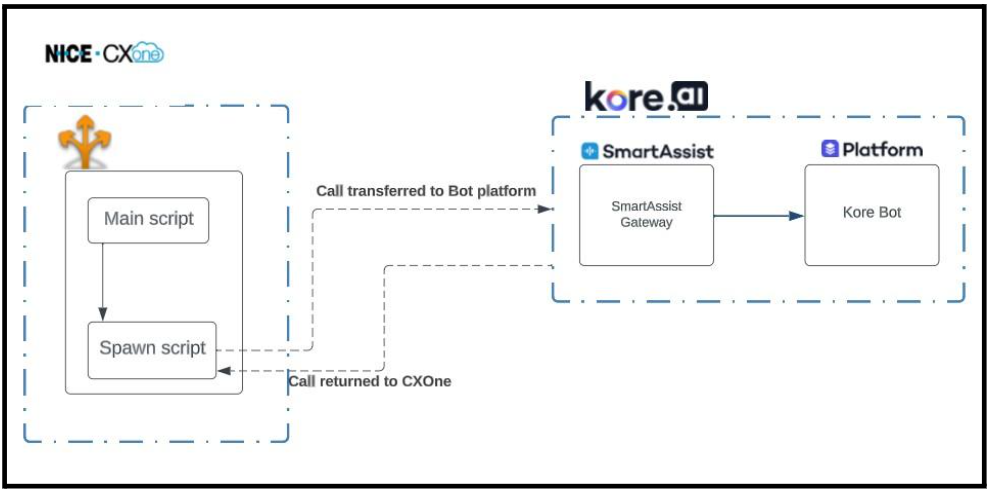
Shared Responsibilities for the Script Integration Approach
| Activity | Responsibility | |
| CXOne CUSTOMER | KORE | |
| NICE CXOne Platform | ||
| NICE SIP Trunk Configuration | NA | NA |
| DID Number Procurement | DID numbers range from NICE | – |
| Channel Specifications | ||
| ACD Configuration |
|
|
| CXOne Studio Script | Customize Main and Spawn Scripts
|
Share a sample of the main and spawn scripts. |
| Setup Authentication | Configure CXOne Authentication for accessing the CXOne Signal API from the Kore bot. | |
| Kore IVR Configuration | ||
| Set up Kore IVR | Create a SmartAssist account | |
| Set up Voice Channel | ||
| SIP Transfer Configuration | Network – Incoming IP address: NICE IP address 216.20.235.167 – Dallas 216.20.237.167 – Los AngelesDID Number: <To be Procured & Provisioned > Transport Type: TLSInbound Calls: Forward-to-PhoneNumber: <same as DID> |
SIP URI (pre-filled) |
| SIP Transfer Attach Flow | Create an Experience Flow Attach the SIP configuration to the Experience flow |
|
| Kore SmartAssist Bot Flow | Create a bot flow and read the SIP headers defined in the CXOne Studio script. | |
| Signal API to return a call to CXOne | Get CXOne Authentication in Kore Bot Trigger Signal API from Bot*- The domain in the URL should match the customer’s NICE account domain. |
|
CXOne Channel Specifications
ACD configuration includes
- Skills creation and mapping: 1 skill
- Hours Of Operation: 1
- Points of Contact: 1 (Phone)
- Campaign: 1
- Minimal functionality Voice call script: 2
Kore Bot Platform
Telephony Gateway Requisites
- DID or TFN phone number to receive the call.
- All SIP header information.
- How to configure Signal API to return control to the NICE CXone platform.
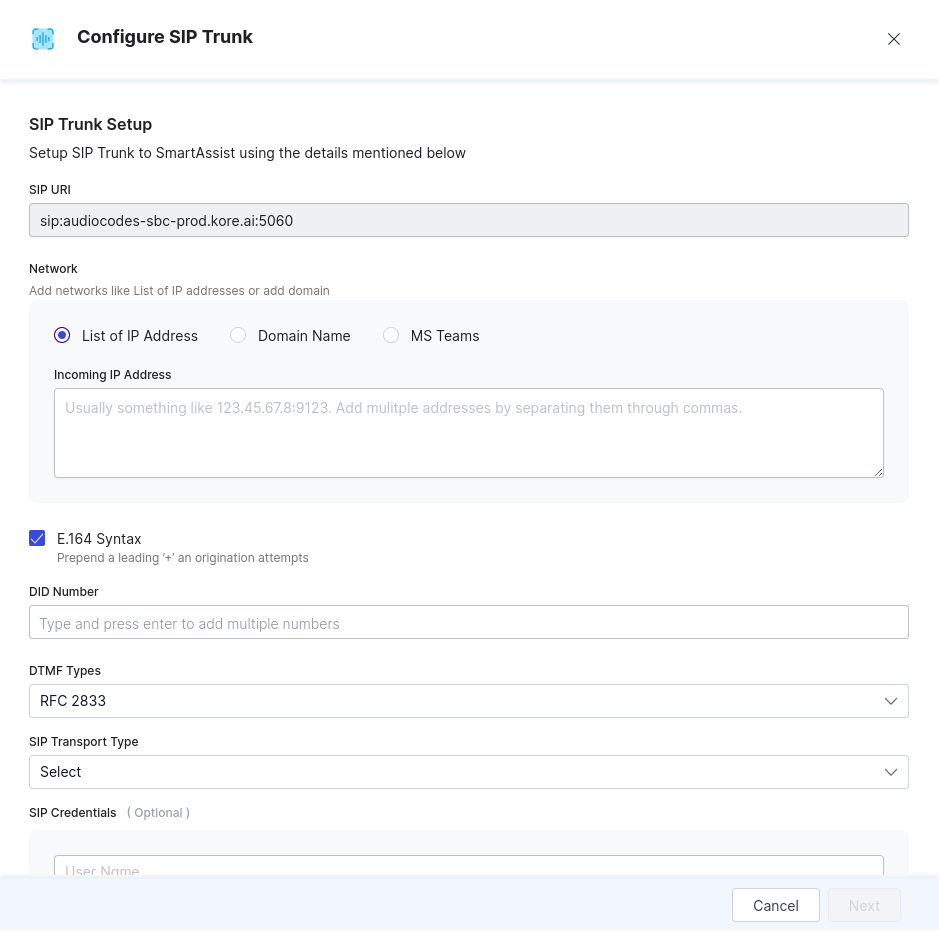
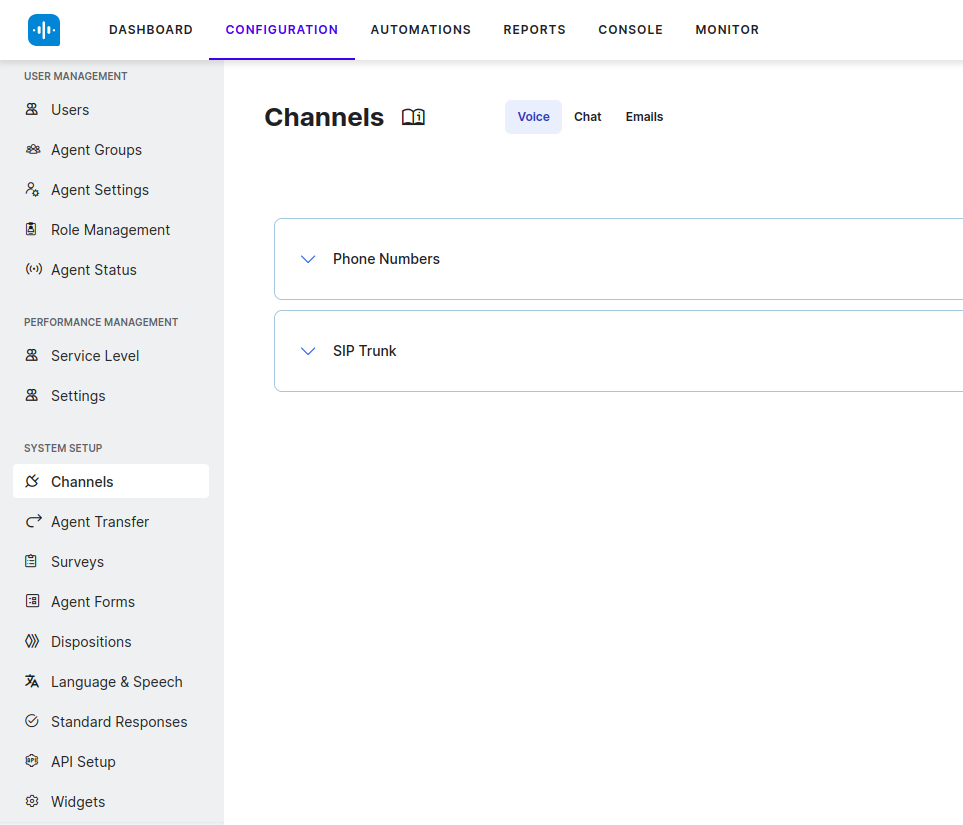
Kore SIP Trunk Configuration
- On SmartAssist, go to CONFIGURATION > SYSTEM SETUP > Channels > Voice.

- Click SIP Trunk.
- Click + New.

- Select List of IP Address.
- Enter the Incoming IP Address and DID numbers from the Kore IVR Configuration table above.
- Under SIP Transport Type, select TLS from the dropdown.
- Click Next.
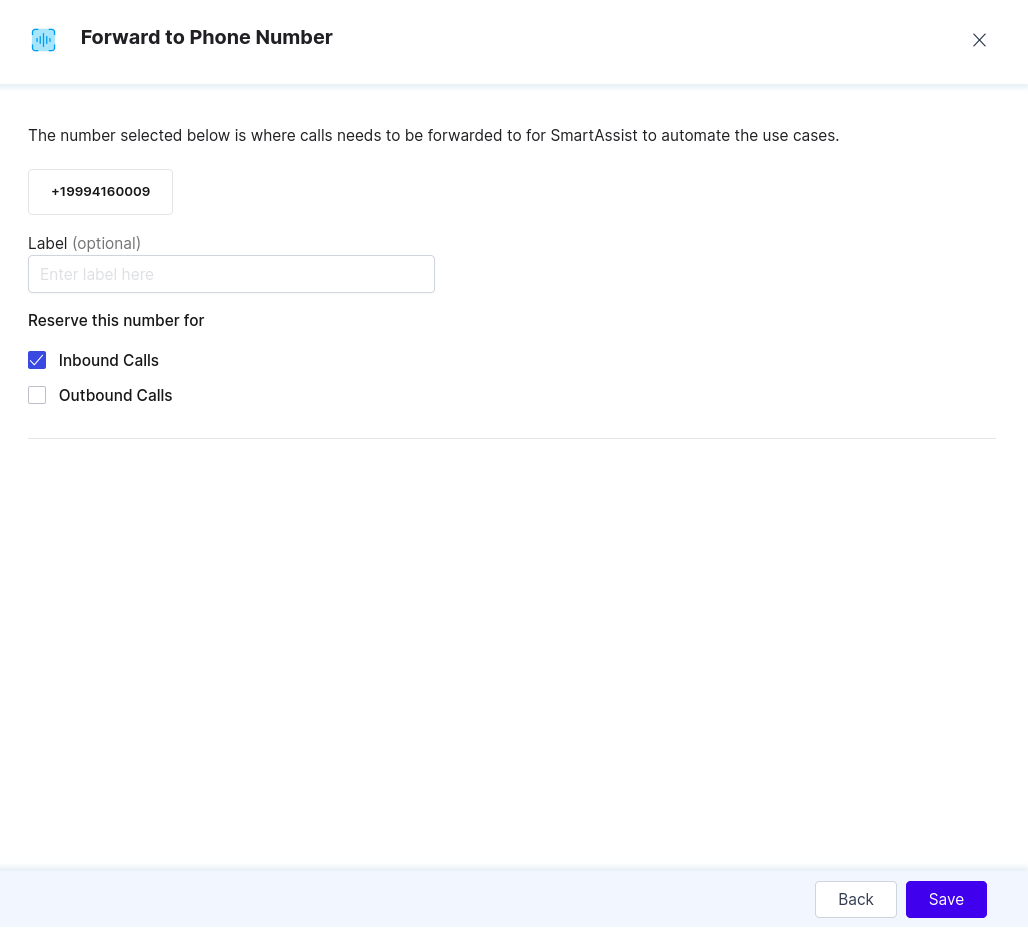
- On the Forward to Phone Number page, select Inbound Calls.
- Click Save.
- Click SIP Trunk.
- Click + Attach Flow.

- Select a default flow from the list for the created flow.
- Click Done.

Configuration in CXOne Studio
- Download the SIP Main and SIP Spawn scripts and save it locally.
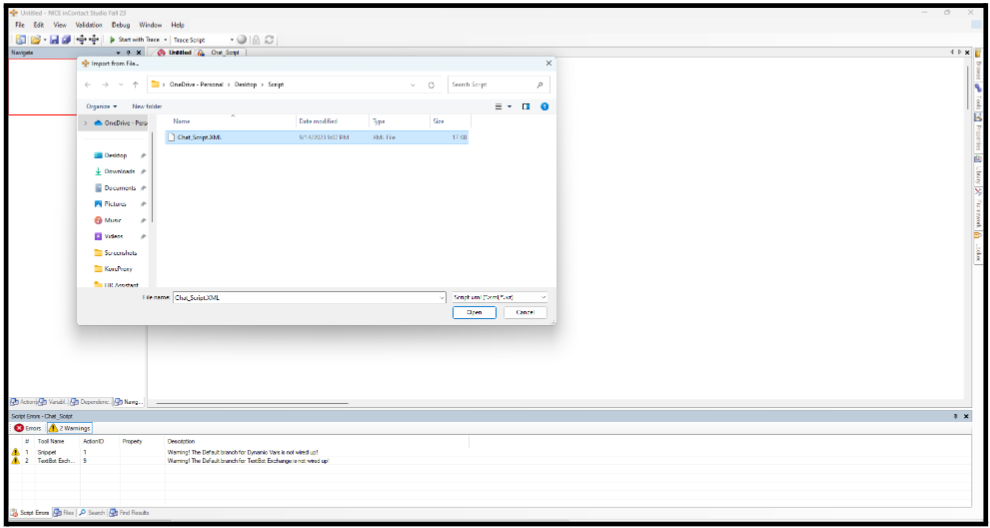
- Import the Studio Script as follows:
- Login to NICE CXOne Studio with your credentials. Learn more.
- On the File menu, select Import from File.
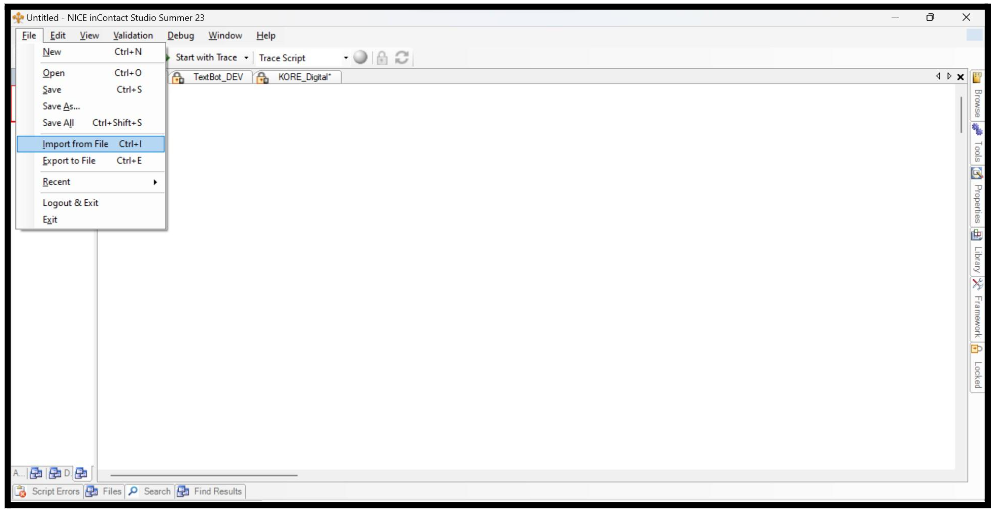
- Open the saved studio script.


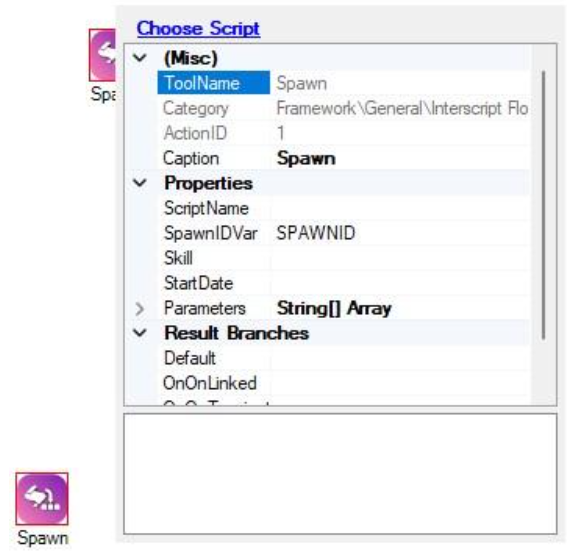
- In the SIP Main Script, select the SIP Spawn Script in the Spawn action.
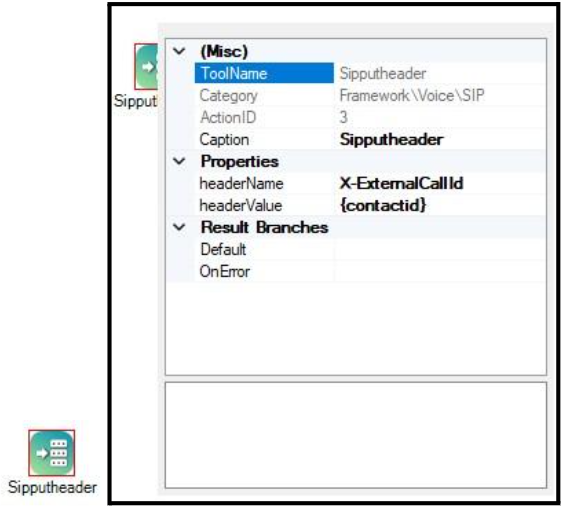
- Add SIP headers in the Sipputheader actions.
- Enter the key starting with X-* in the headerName.
- Enter the value in the headerValue.
- Add the SIP Phone number in the Placecall action.
- Provide the SIP DID number you configured in the Kore SmartAssist platform SIP Trunk in the PhoneNumber property in the Placecall action.
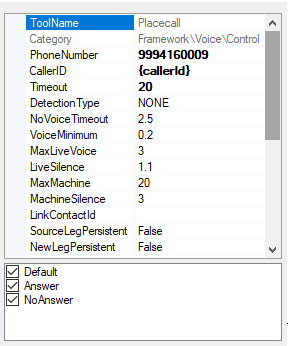

- Provide the SIP DID number you configured in the Kore SmartAssist platform SIP Trunk in the PhoneNumber property in the Placecall action.
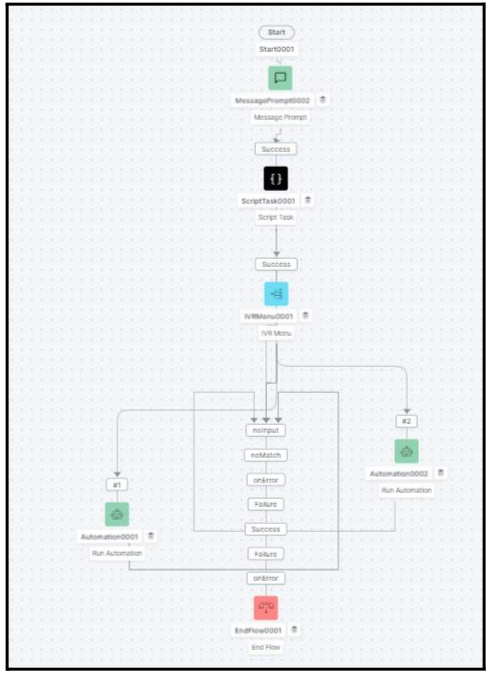
SmartAssist Configuration
- A flow should be configured with a bot on SmartAssist.
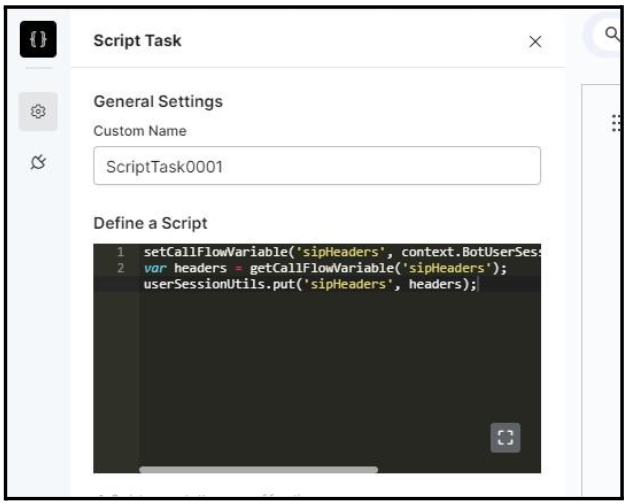
- In the Script Task window, add the following code to pass the headers to the bot before the Run Automation action.
setCallFlowVariable('sipHeaders', context.BotUserSession.channels[0].handle.sipHeaders);
var headers = getCallFlowVariable('sipHeaders');
userSessionUtils.put('sipHeaders', headers);
NICE CXone Authentication
The following parameters are required for authenticating before calling any CXOne API:
- Authentication API URL from NICE CXone.
- Access key ID.
- Access key secret.
Steps to authenticate NICE CXOne:
- Login to the NICE Cluster.
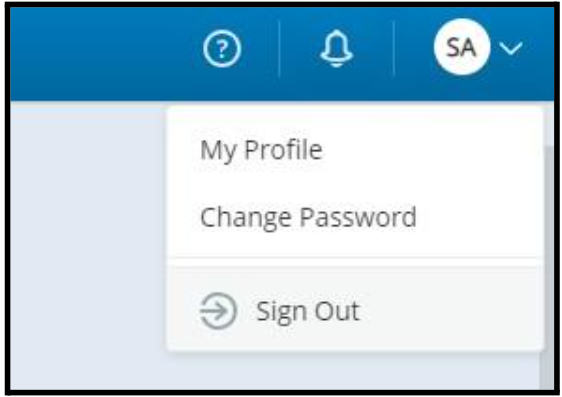
- Click your profile on the top right corner and select My Profile from the dropdown.
- Go to the ACCESS KEYS tab and Click the Add access key button.
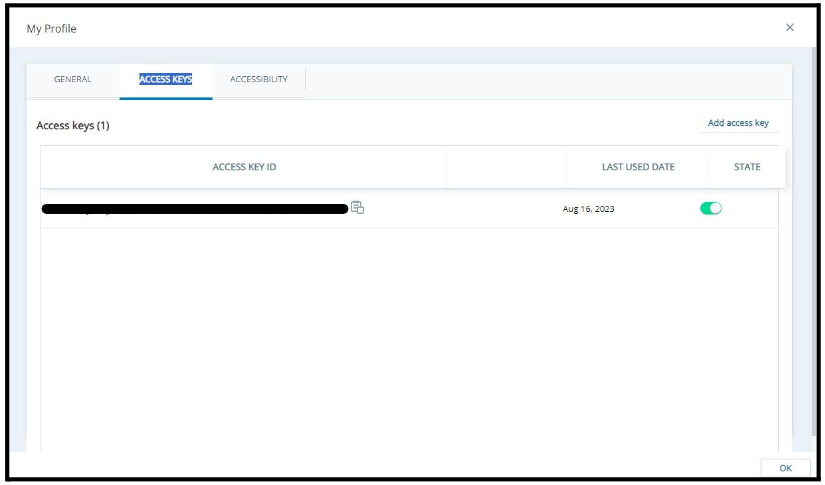
- Copy the Access Key ID and Access Key Secret. This is used to get the access token to be used by the signal API.
- The API URL for Authorization is (For different regions, the base URL will change accordingly. For example: na1.NICE-incontact.com): https://{region}.NICE-incontact.com/authentication/v1/token/access-key
- Send the following POST request body:
{ "accessKeyId":"<Your Access Key Id>", "accessKeySecret":"<Your Access Key Secret>" } - An access_token that will be used to authenticate the Signal API is returned.
Bot Configuration
- Configure a dialog task in Bot Builder to transition the request to NICE CXOne once the customer requests for agent transfer.
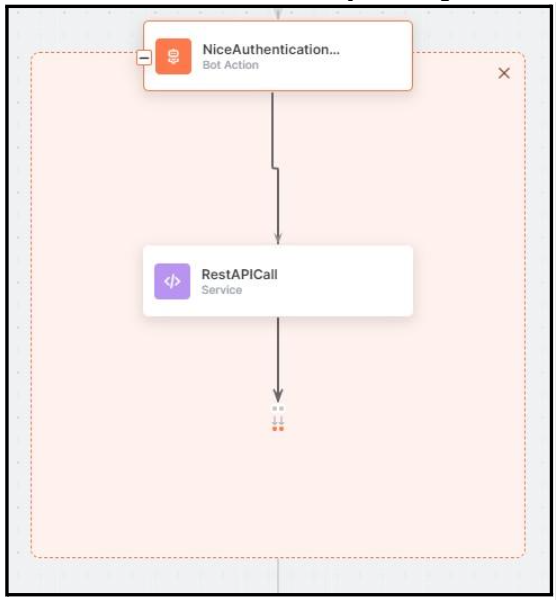
Fetch the NICE Authentication Access Token in the Bot
- Add a bot action with a Service Node in the flow to get the access_token.
- In the Service Node, select the Service Type as Custom Service and the Sub Type as REST.
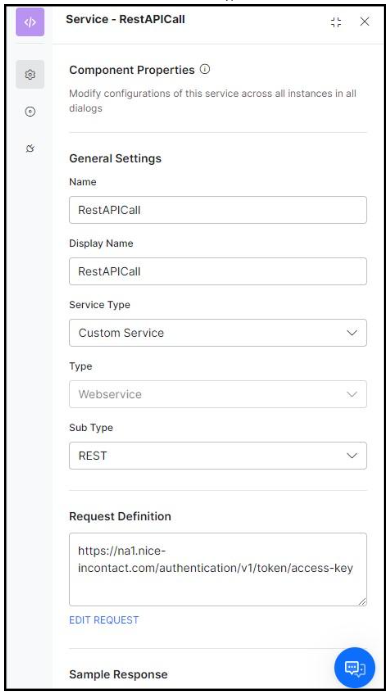
- Click EDIT REQUEST.
- Select POST in the API call method and enter the authentication URL in the requested URL field.
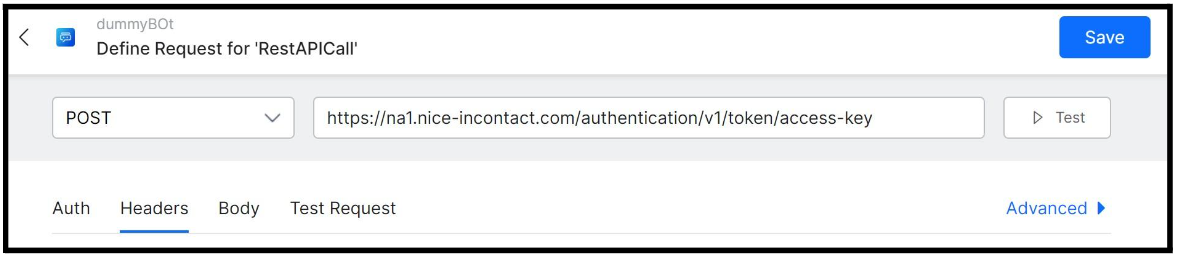
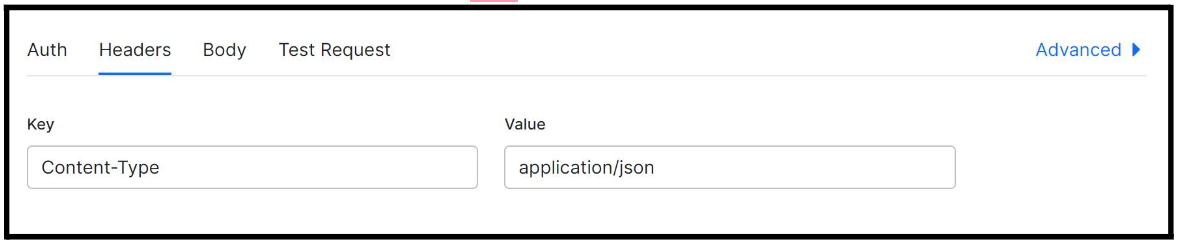
- Click the Headers tab.
- Add Content-Type in Key and application/json in Value fields.
- Click the Body tab and add the request body as follows:

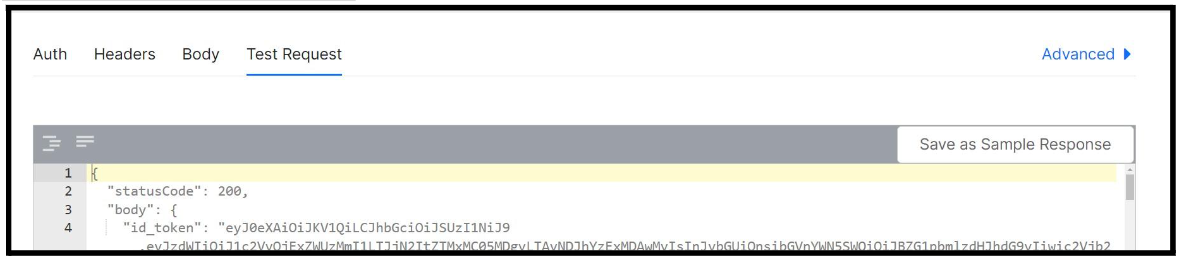
- Click Test.
- Click Save as Sample Response.

Fetch the SIP Headers in the Bot
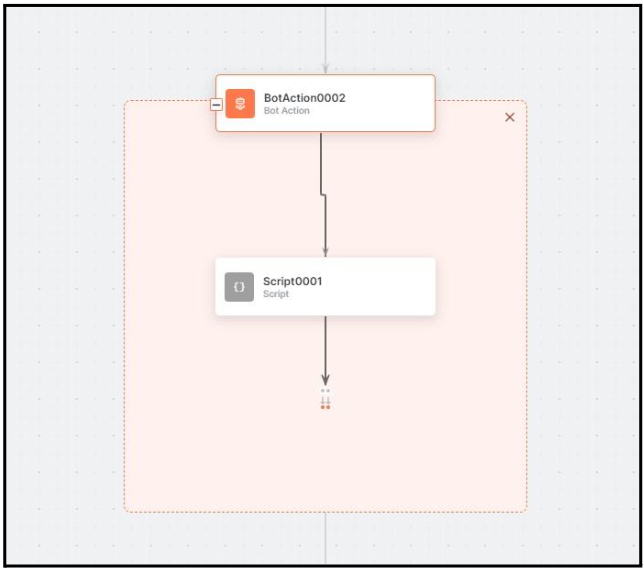
- A bot action with Script Node is used to extract the headers in a bot.
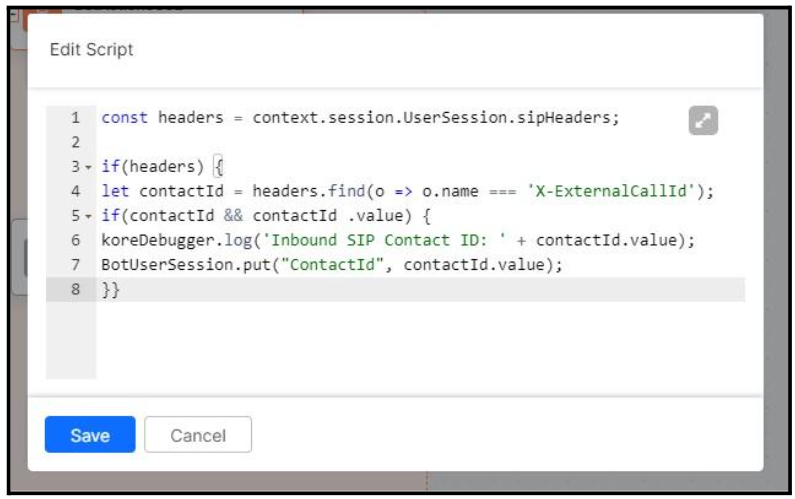
const headers = context.session.UserSession.sipHeaders;
if(headers) {
let contactId = headers.find(o => o.name === 'X-ExternalCallId');
if(contactId && contactId .value) {
koreDebugger.log('Inbound SIP Contact ID: ' + contactId.value);
BotUserSession.put("ContactId", contactId.value);
}}
Trigger the Signal API on Kore Bot
- Add a Bot action with a service node to trigger the Signal API.
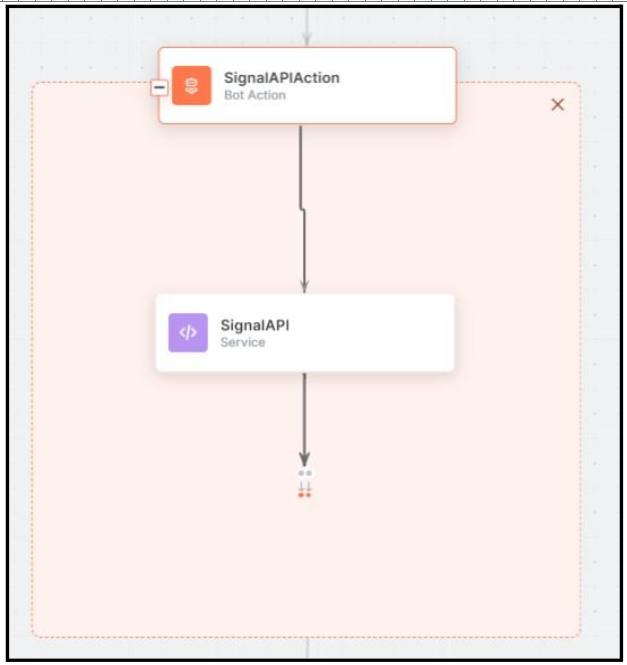
- In the Service Node, select the Service Type as Custom Service and the Sub Type as REST.
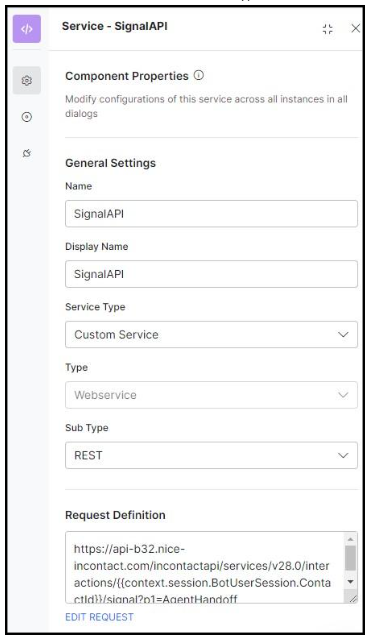
- Click Edit Request.
- Choose the API method as POST.
- Enter the Signal API URL in the requested URL field as follows (For different clusters, the base URL must be changed based on the cluster. For example: api-b32.NICE-incontact.com)
https://api-{cluster}.NICE-incontact.com/incontactapi/services/v28.0/interactions/
{{context.session.BotUserSession.ContactId}}/signal?p1=AgentHandoff
- Click the Headers tab.
- Enter “Authorization” as the Key and “Bearer {{context.RestAPICall.response.body.access_token}}” as the value.

- Click Save.