GETTING STARTED
Introduction to SmartAssist
Glossary
Minimum System and Browser Requirements
SmartAssist Lifecycle Management
SmartAssist Setup Guide
Sign Up for SmartAssist
Setup SmartAssist for Use With AgentAssist
Release Notes
Recent Updates
Previous Versions
Frequently Asked Questions (FAQ)

EXPERIENCE DESIGNERS
Flow Designer
Introduction
Create Experience Flows
Navigate the Flow Designer
Experience Flow Nodes
Introduction
Node Types
Start
IVR Menu
IVR Digit Input
Conversational Input
Split
Check Agent Availability
Check Business Hours
Message Prompt
Run Automation
Agent Transfer
Connect to API
Go to Flow
Deflect to Chat
Script Task
Set Queue
End Flow
Waiting Experience
Conversation Automation
Testing Widget
Use Cases
Overview
Questions & Answers
Conversations

ADMINISTRATORS
Account Management
Switch Account
Invite Developers to an Account
Routing
Skills
Skill Groups
Queues
Hours of Operation
Default Flows
User Management
Users
Agent Groups
Agent Settings
Role Management
Agent Status
System Setup
Channels
Voice
Chat
Email
Limitations With Accounts Using AudioCodes
Agent Transfer
Surveys
Agent Forms
Dispositions
Language & Speech
Overview
Language Management
Voice Preferences
Hold Audio
Standard Responses
Widgets
Utils
AgentAssist Settings
SearchAssist
Widget Theming (Layout Customization)
Advanced Settings
Co-Browse Settings
Community WFM (Beta)
Automatic Conversation Summary (Beta)
Intelligent Agent Tools
API Reference
API Setup
API List
Integrations
Genesys Voice Bot
Genesys + Kore Voice Automation - Manual Installation Guide
Voice Automation - Integration with Amazon Connect
Voice Automation NiceCX (CX One) - SIP Integration
Talkdesk Voice Automation
Kore Voice Automation (IVA) Integration with Zoom Contact Center (CC)
ID R&D Integration With Kore
Audit Report

AGENTS
Agent Console
Introduction
Conversation Tray
Incoming Interactions
Interacting with Customers
Additional Tools
My Dashboard

SUPERVISORS
Dashboard
Automation
Queues and Agents
Interactions
Monitor Queues, Agents, Interactions, and Service Levels
Manage Layout

BUSINESS USERS
Reports
Introduction
Reports List

Link to a Bot

SmartAssist uses the Kore.ai Virtual Assistant platform to build the smart assistant. This implies that a bot is built and configured by default using the Kore.ai Virtual Assistant platform. You need not be aware of the implementation details. But in case, you are well-versed with the virtual assistant platform and have a bot ready catering to your business needs, you can utilize that bot to build the SmartAssist application.

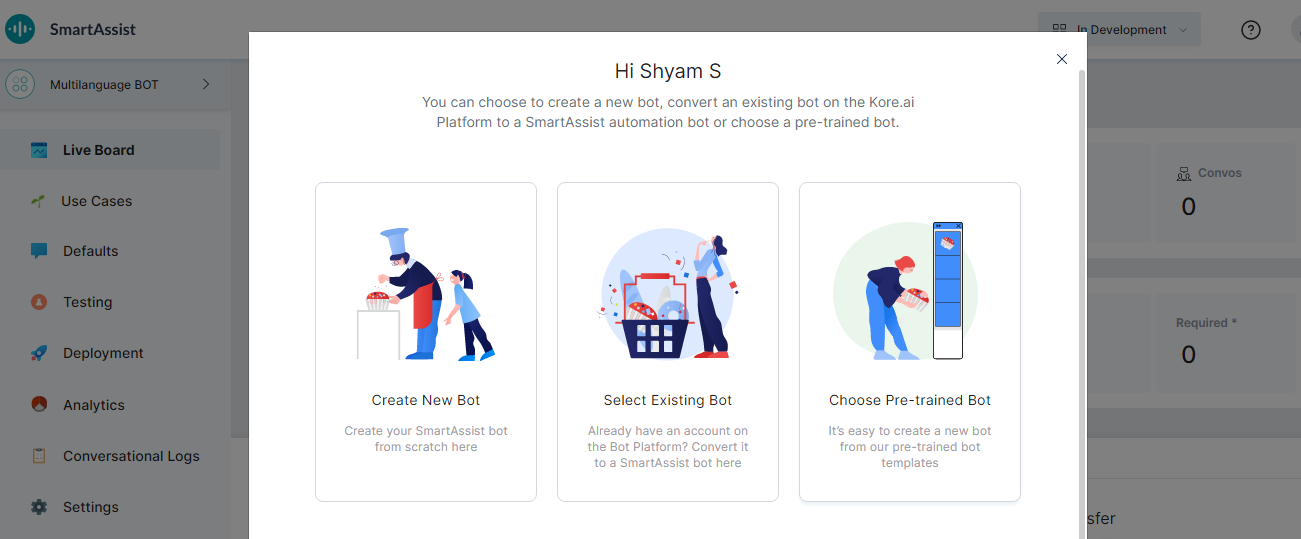
After you log in, on the Welcome dialog box, select an option:

  1. Create New Bot
  2. Select Existing Bot
  3. Choose Pre-trained Bot

Create New Bot

To create a new bot, follow the below steps:

  1. Click Create New Bot.
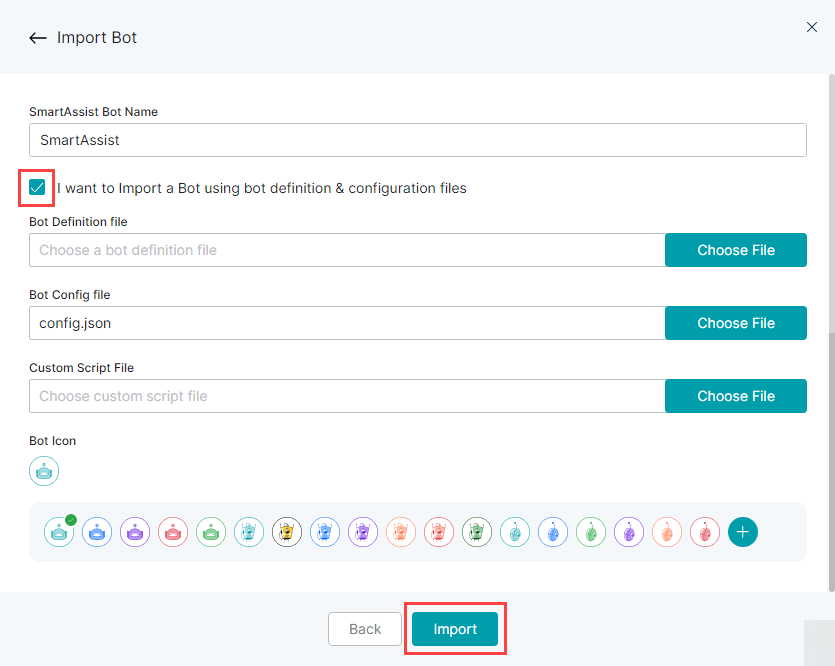
  2. On the Create a New Bot dialog box, enter a name in the SmartAssist Bot Name field.
  3. You can also import a bot using the bot definition and configuration files. To import, select the I want to Import a Bot using bot definition & configuration files checkbox.
    1. In the Bot Definition File field, click Choose File to locate and choose a file.
    2. In the Bot Config File field, click Choose File to locate and choose a configuration file.
    3. In the Custom Script File field, click Choose File to locate and choose a custom script file.
  4. Under the Bot Icon section, select a bot icon.
  5. Click Import.

Select Existing Bot

To select an existing bot, follow the below steps:

  1. Click Select Existing Bot.
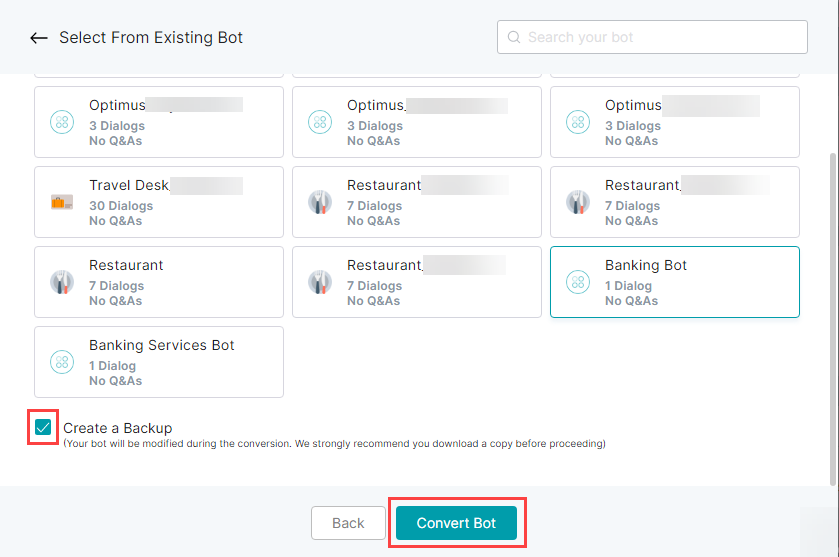
  2. On the Select from Existing Bot dialog box, select a bot.
  3. By default, Create a Backup checkbox is selected. During the bot conversion process, your bot will be modified. So it is recommended to create a backup.
  4. Click Convert Bot. A backup of your bot is created and downloaded as a zip file.
  5. On the Convert Bot dialog box, you can find the status of the bot conversion.
  6. You can also download the log file. Click Download Log File.
  7. Click Done and you can access the application.
Choose Pre-trained Bot

To select a pre-trained bot, follow the below steps:

  1. Click Choose Pre-trained Bot.
  2. On the Templates from Bot Store page, you can find the list of template bots offered and explore them based on various categories as listed below:
    1. You can filter the bots based on the following criteria:
      • Domains like customer service, HR, Healthcare, Retail, Telecom, and more.
      • Features like NLU concepts Digital Views, IVR integration, Omnichannel experience, and more.
      • Integrations like Salesforce, etc.
      • Channels for deployment like Email, Facebook Messenger, Twilio, etc.
    2. You can sort the template bots based on:
      • Number of installations
      • Recency
      • Alphabetically
  3. Hover over a template bot to preview its features like:
    1. Name, icon, and summary of the bot.
    2. Associated features, complexity, the channels of deployment, and the number of downloads.
  4. On the preview display, click Explore for more details. On the corresponding dialog box, you can find:
    1. A video that explains the bot’s features.
    2. Two sections that give:
      • Overview – This section gives a summary of the template bot and the features available in this bot.
      • Technical Specifications – This section gives a detailed overview of the technical aspects of the bot like data source, etc.
    3. On the right column, you can find:
      1. Category and complexity of the bot.
      2. The number of times the bot was downloaded.
      3. The list of channels, languages, and integrations (if any) supported.
      4. The Related Bots section for bots similar to the selected template bot.
  5. After exploring the bot, click Install to install the bot.
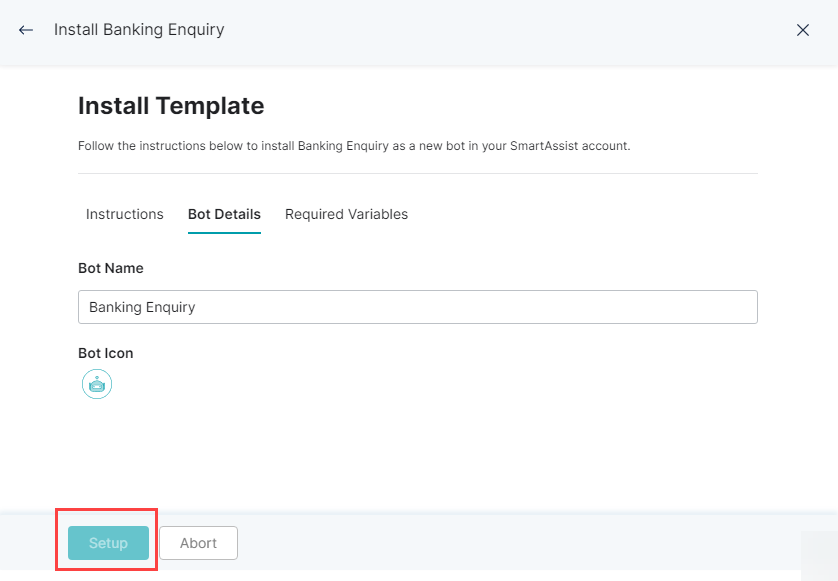
  6. On the Install Template dialog box, by default, the Instructions tab is selected. You can find the installation guide for the selected template bot at the given link.
  7. Click the Bot Details tab. Enter the Bot Name and select the Bot Icon.
  8. Click the Required Variables tab and enter the details. Details vary depending on the template bot selected.
  9. Click Setup to install the template bot or click Abort to cancel the installation.