To recharge your account, follow the below steps:
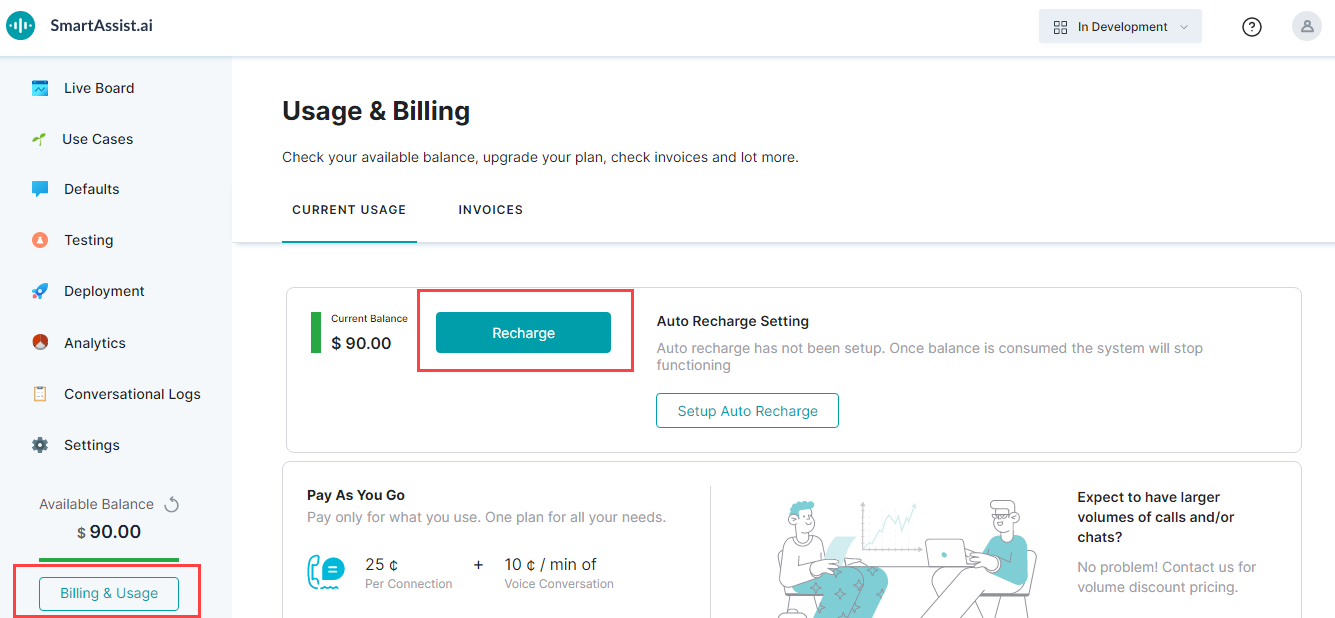
- On the left pane, click Billing & Usage.
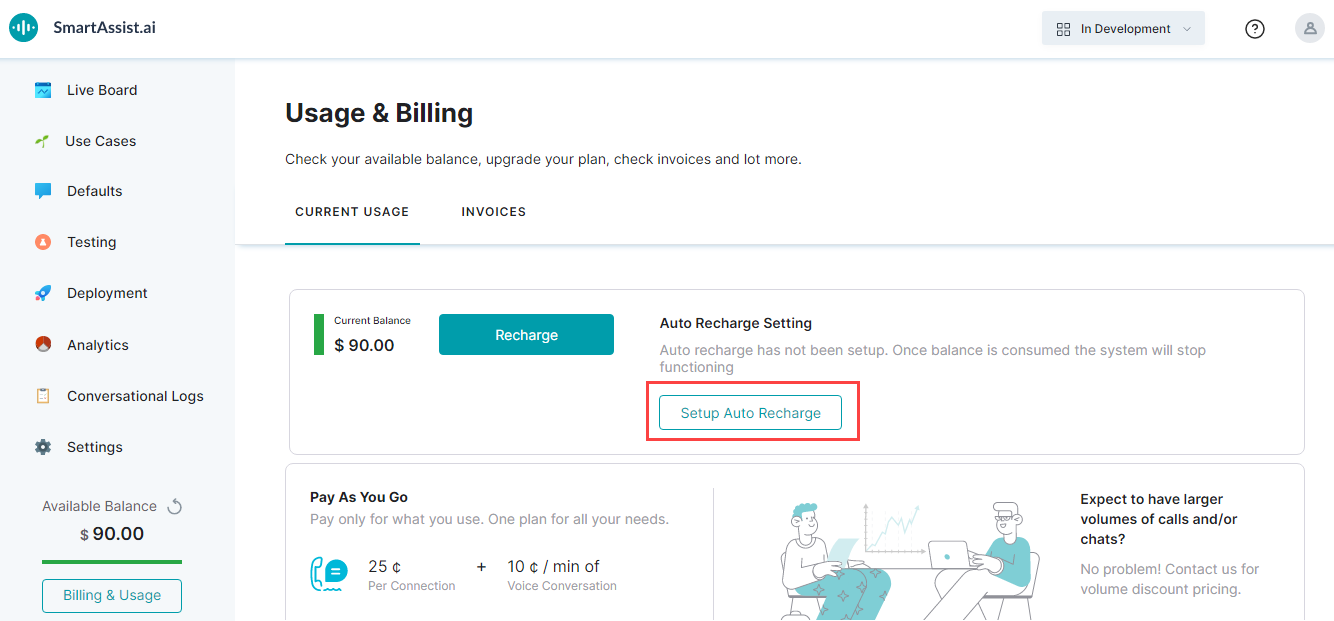
- On the Usage & Billing page, by default, the Current Usage tab is selected. You can find the current balance, recharge, and set up auto-recharge options.
- Click Recharge.
- On the Recharge window, under the Recharge Setting section, you can select the Enable Autorecharge Setting checkbox if required.
- Enter the amount in the Automatically recharge when balance falls below field.
- Enter the amount in the Recharge Amount field.
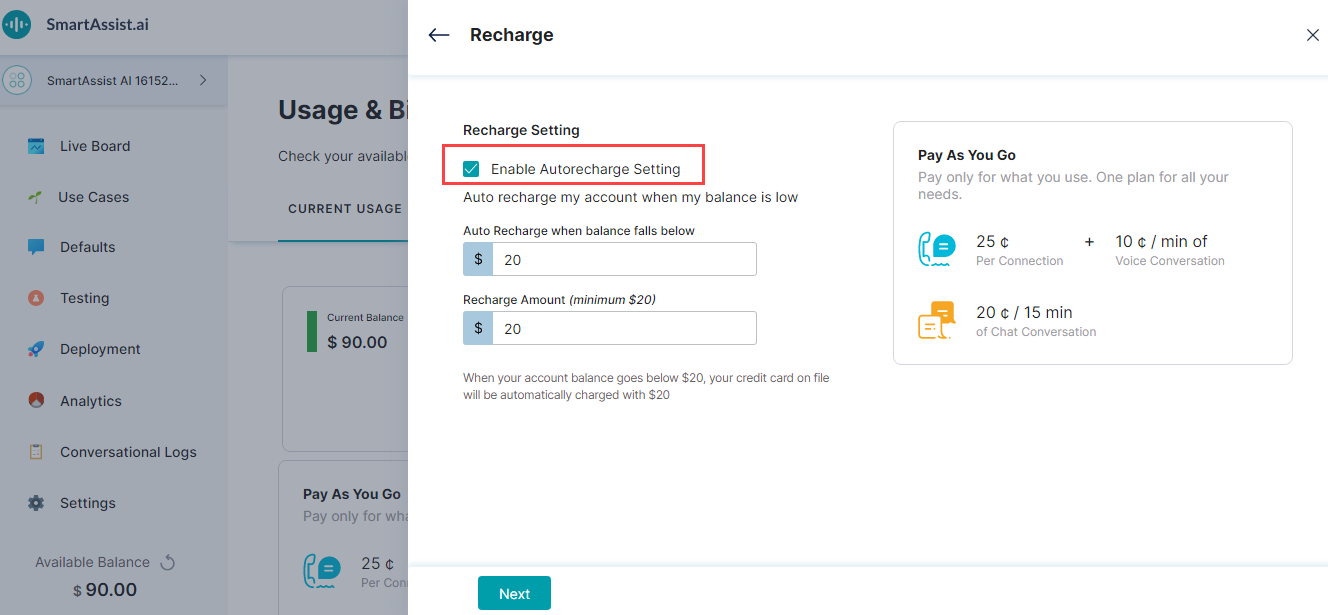
- Click Next.
- On the Payment Details window, enter the Billing Information details and Payment method.
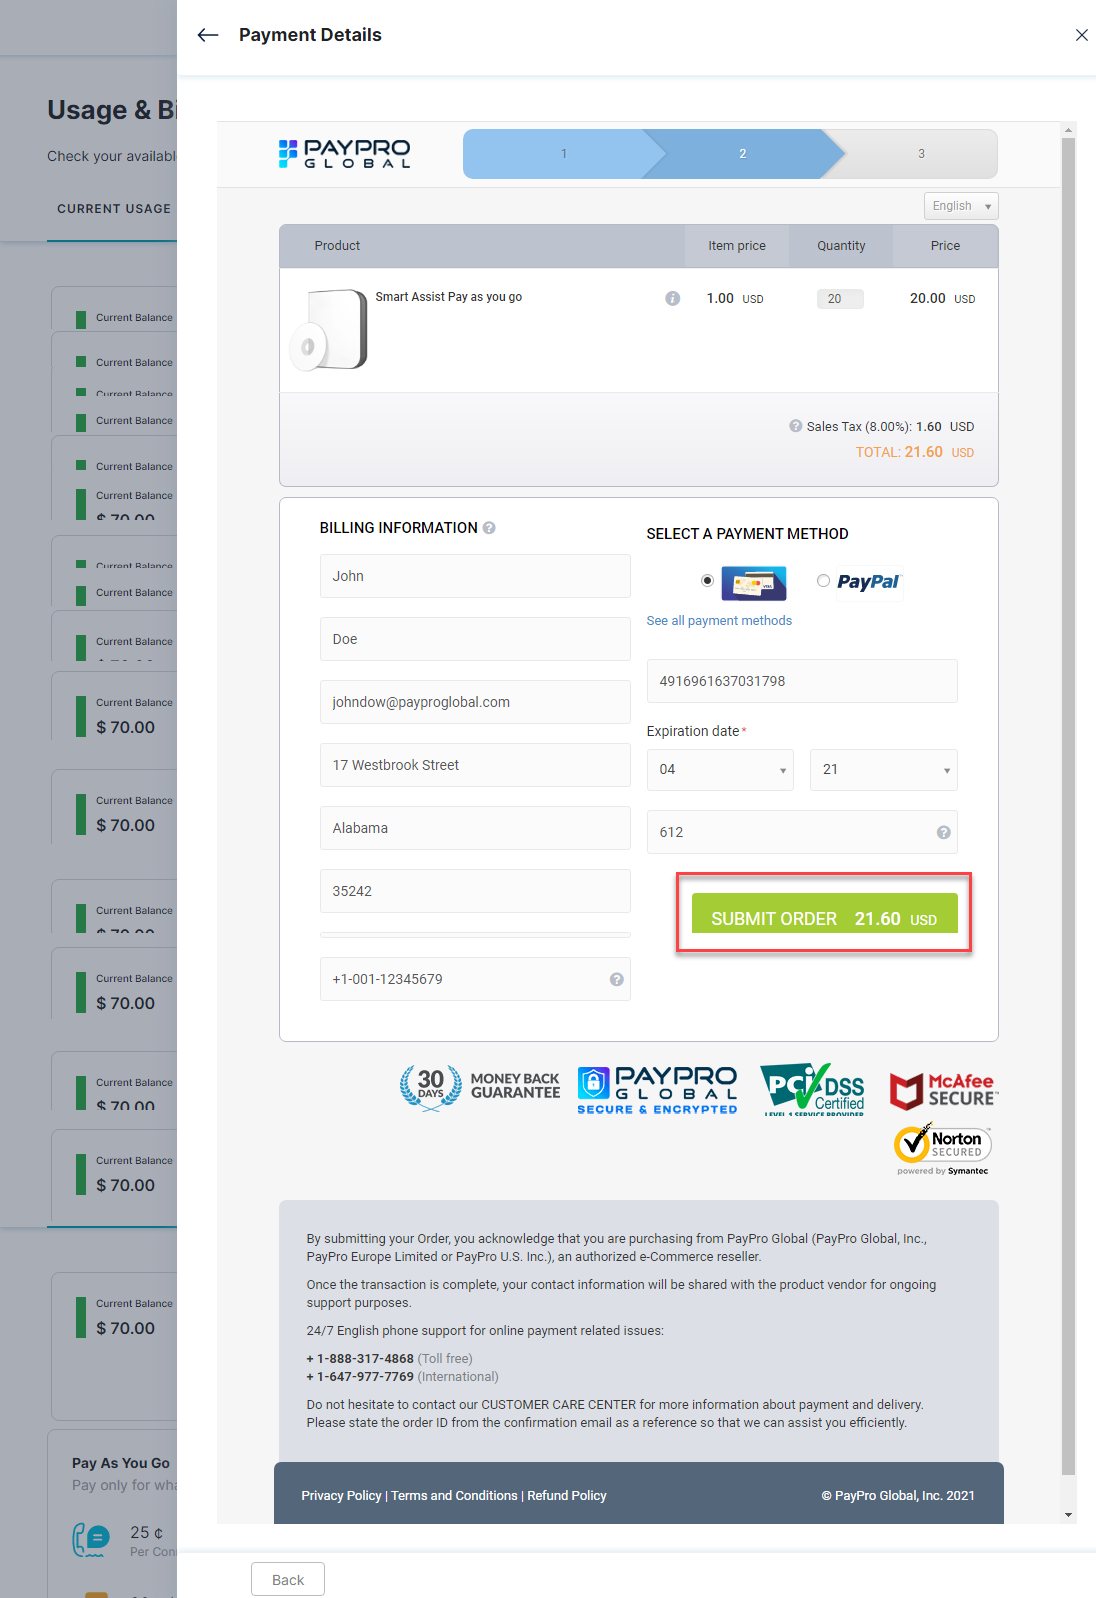
- Click Submit Order.
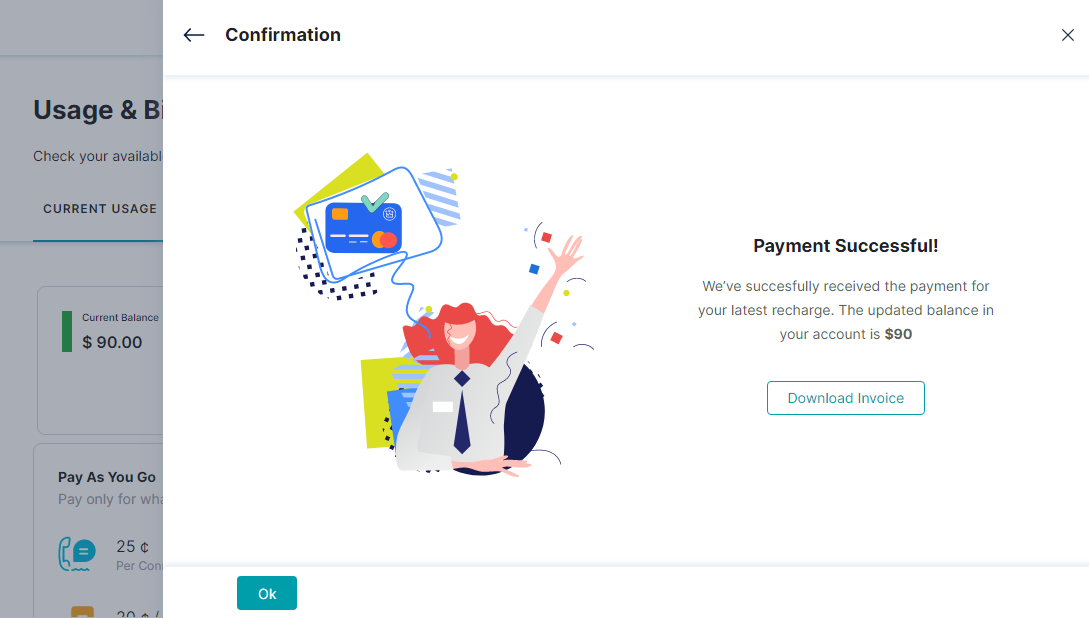
- On the Confirmation window, you can find the payment status. Click Download Invoice to download the invoice copy if required.
- Click OK.
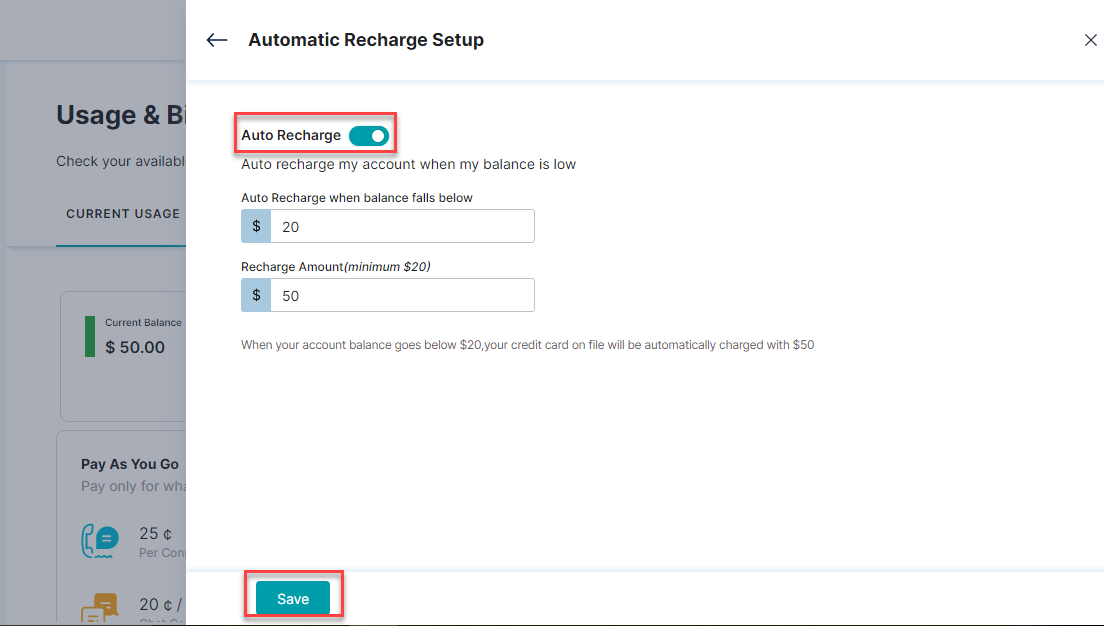
Setup Automatic Recharge
If the user had already set up the account without the automatic recharge option, the user can enable it. To set up the automatic recharge option, follow the below steps:
- On the left pane, click Billing & Usage.
- On the Usage & Billing page, by default, the Current Usage tab is selected. Under the Auto Recharge Setting section, click Setup Auto Recharge.
- On the Automatic Recharge Setup window, turn on the Automatic Recharge toggle.
- Enter the amount in the Automatically recharge when balance falls below field.
- Enter the amount in the Recharge Amount field.
- Click Save.