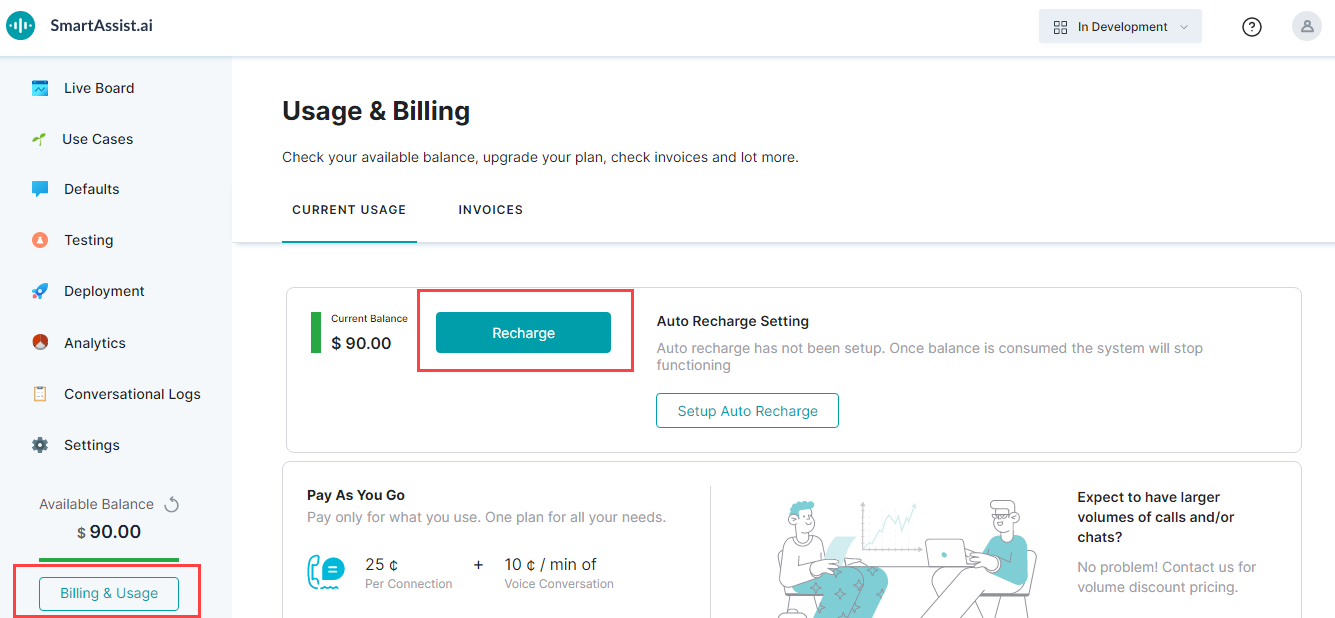
アカウントにリチャージするには、以下の手順に従います:
- 左側のペインで [請求と使用状況] をクリックします。
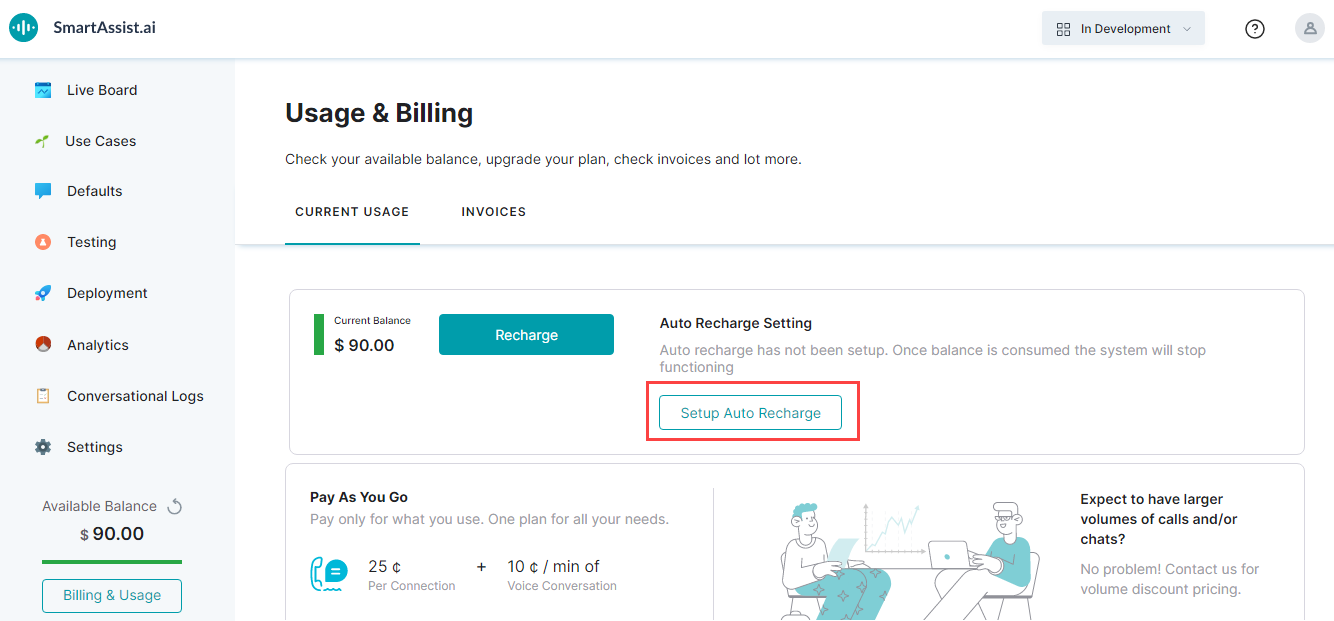
- [使用状況と請求] ページでは、デフォルトで [現在の使用状況] タブが選択されています。[現在の残高] 、[リチャージ]、[自動リチャージの設定] オプションが表示されます。
- [リチャージ] をクリックします。
- [リチャージ] ウィンドウの [リチャージ設定] セクションで、必要に応じて [自動リチャージ設定の有効化 設定] のチェックボックスを選択できます。
- [残高が下回ると自動的にリチャージ] フィールドに金額を入力します。
- [リチャージ金額] フィールドに金額を入力します。
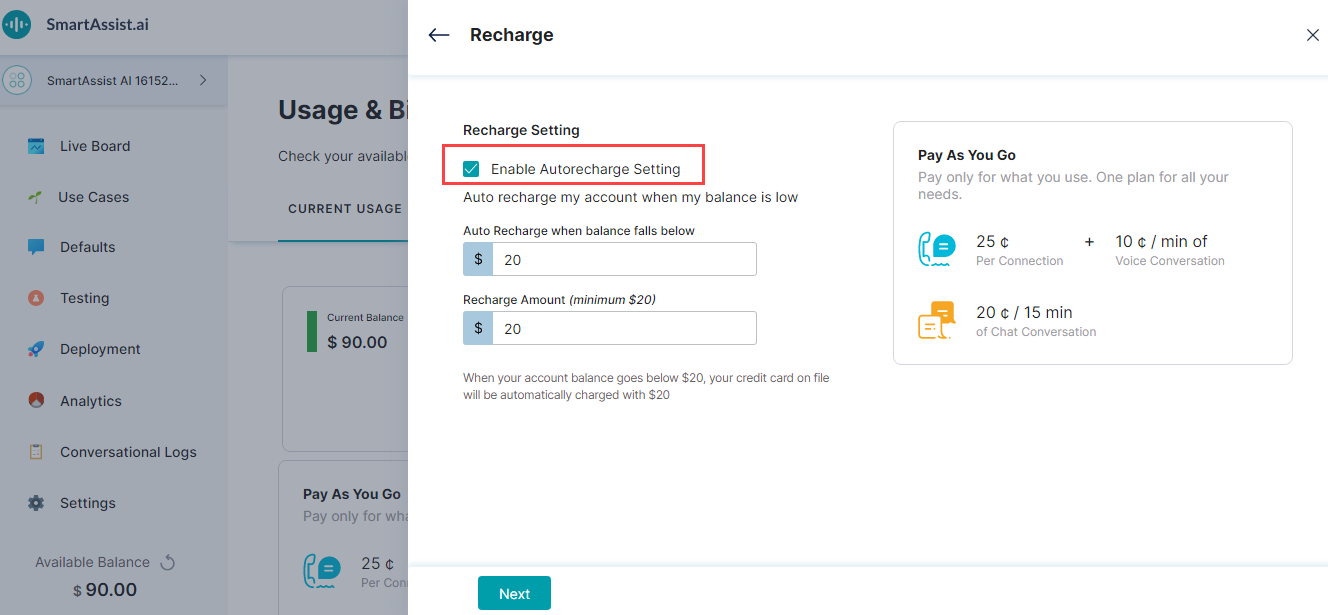
- [次へ] をクリックします。
- [お支払い情報] ウィンドウで、課金情報の詳細とお支払い方法を入力します。
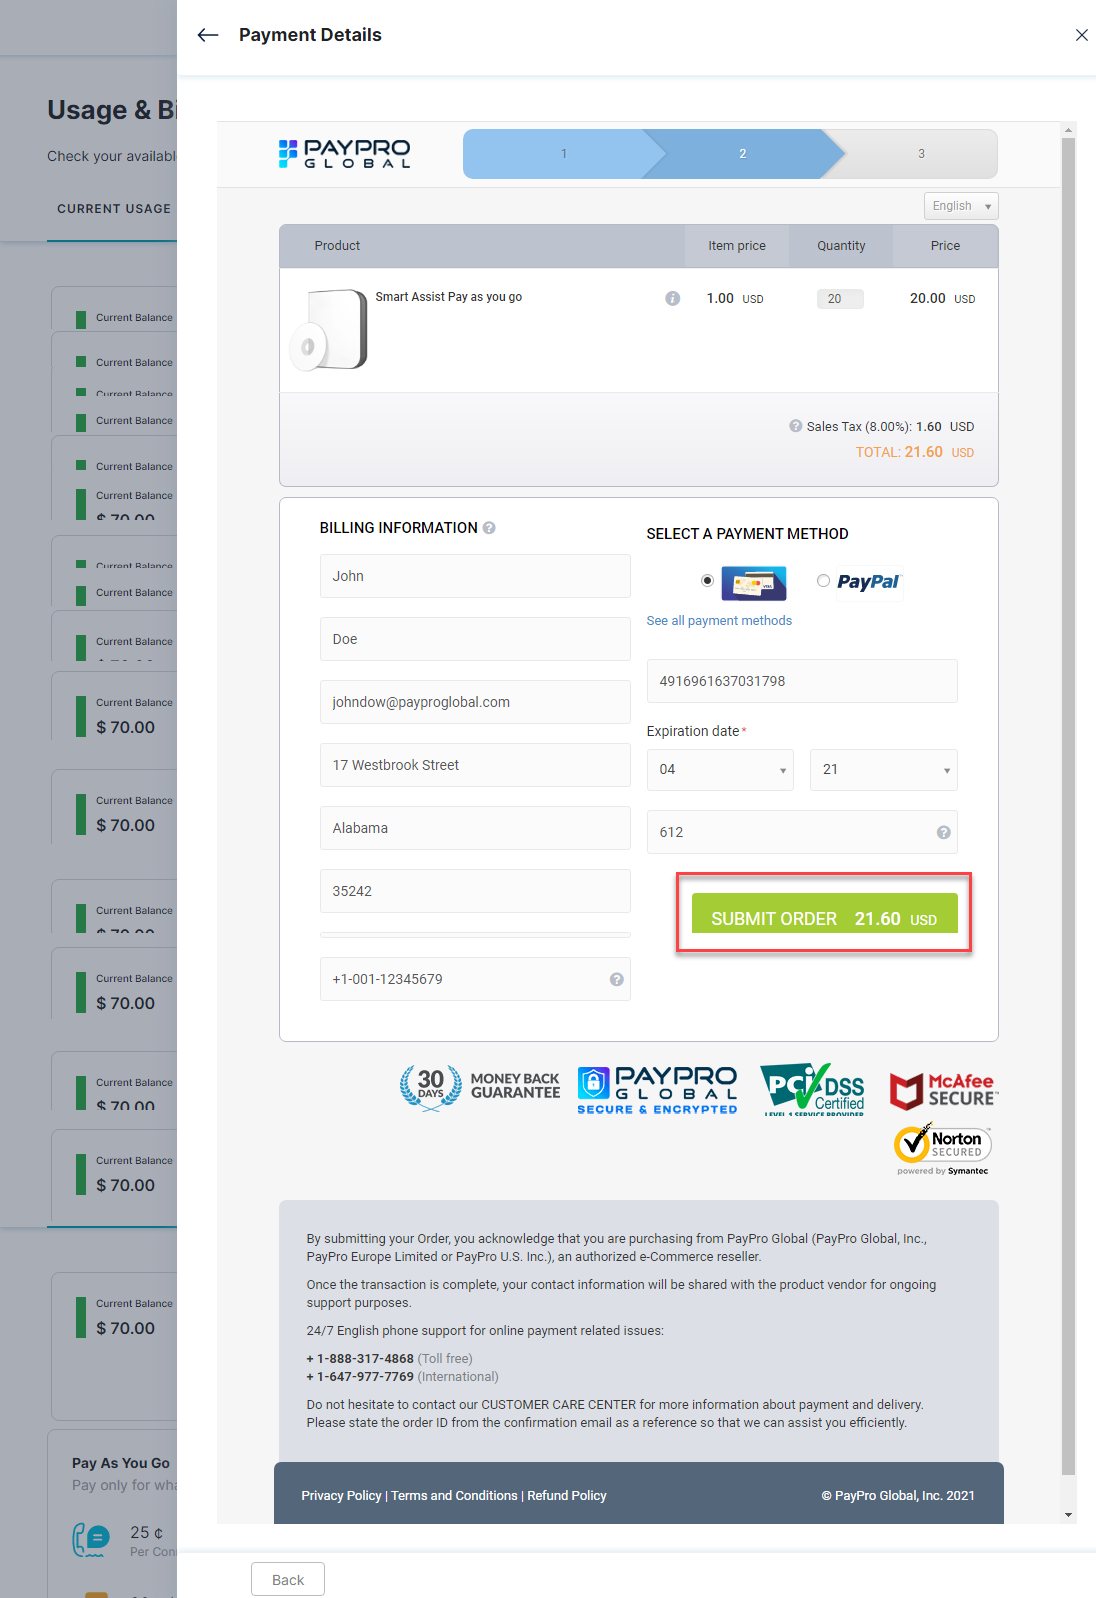
- [注文を送信] をクリックします。
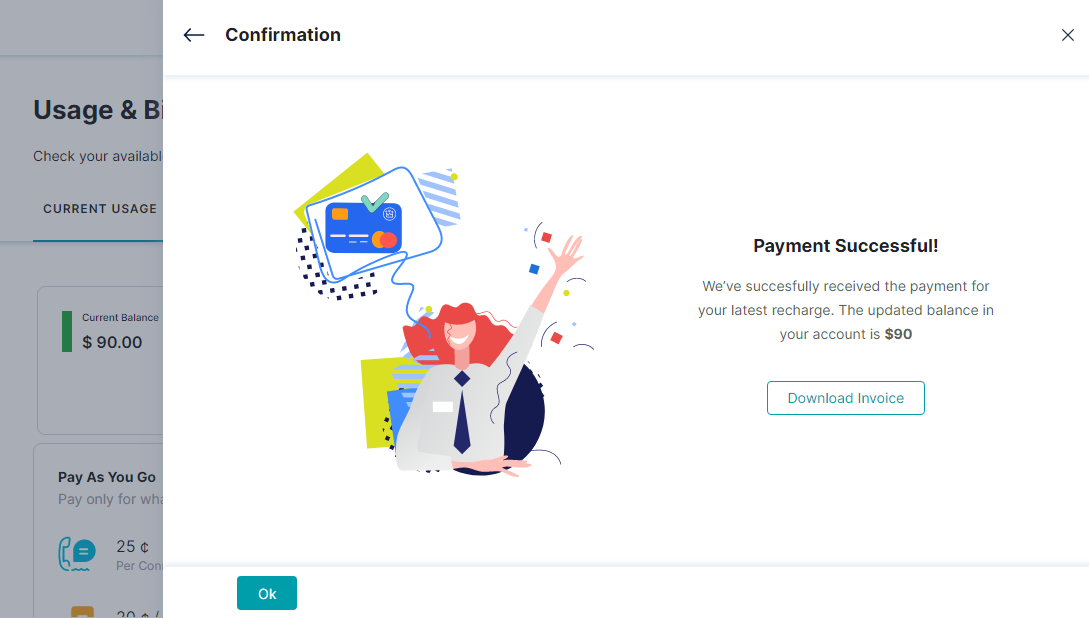
- 確認画面では、お支払い状況を確認することができます。[請求書をダウンロード] をクリックして、必要に応じて請求書のコピーをダウンロードします。
- [OK] をクリックします。
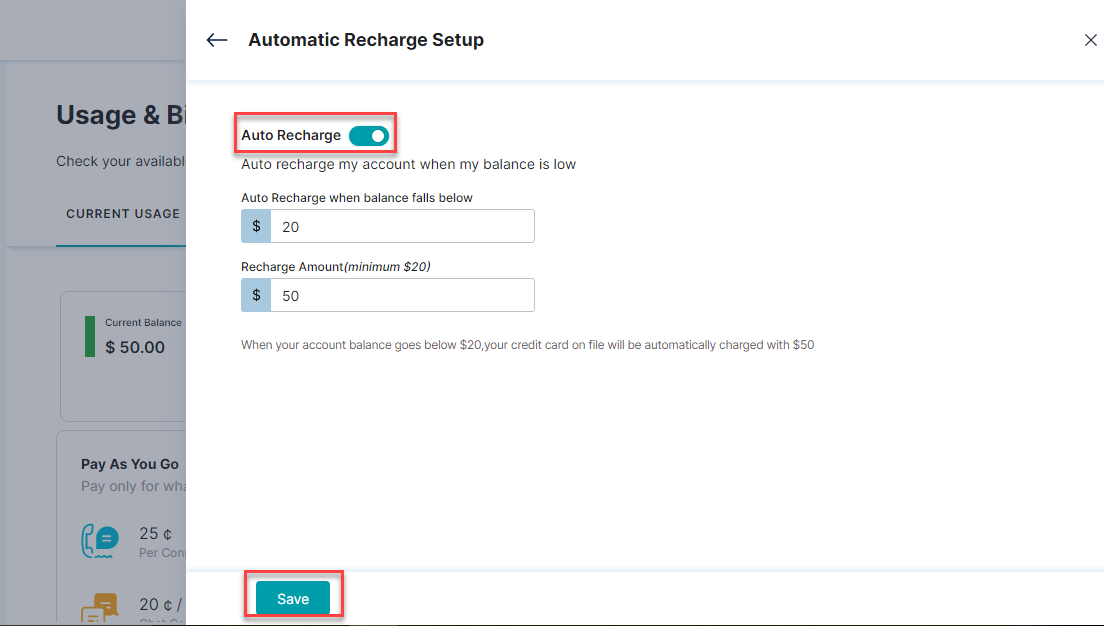
自動リチャージを設定
ユーザーが自動リチャージ オプションを有効にせずにアカウントの設定を行っていた場合、ユーザーはこのオプションを有効にできます。自動リチャージ オプションをセットアップするには、以下の手順に従います:
- 左側のペインで [請求と使用状況] をクリックします。
- [使用状況と請求] ページでは、デフォルトで [現在の使用状況] タブが選択されています。[自動リチャージ設定] セクションで、[自動リチャージを設定] をクリックします。
- [自動リチャージを設定] ウィンドウで、[自動リチャージ] のトグルをオンにします。
- [残高が下回ると自動的にリチャージ] フィールドに金額を入力します。
- [リチャージ金額] フィールドに金額を入力します。
- [保存] をクリックします。