In SmartAssist, you can configure this setting to define where the user needs to be transferred to in case of voice or chat agent transfer. With the outgoing configuration, you can perform the following:
- Outgoing Voice Agent Transfer
- Outgoing Chat Agent Transfer
Outgoing Voice Agent Transfer
To configure outgoing voice agent transfer, follow the below steps:
- On the left pane, click Settings.
- On the Settings page, by default, the Incoming Setup tab is selected. Click Outgoing Setup.
- Under the Outgoing Voice Agent Transfer section, you can select Call Number or SIP Transfer.
- Click Call Number.
- On the Call Number to Voice Agent window, enter the phone number in the Transfer to Phone Number field.
- Click Done.
- Click SIP Transfer.
- On the SIP Transfer Settings window, by default, the Configuration tab is selected. Enter the SIP Transfer URI.
- Under the SIP Header Settings section, under Additional Context, you can select:
- Intent
- Chat URL
- Click + Add Header to add a header.
- You can also enable the User to User Interface option. By default, it is disabled.
- Click the Instructions tab and follow the instructions.
- Click Done.
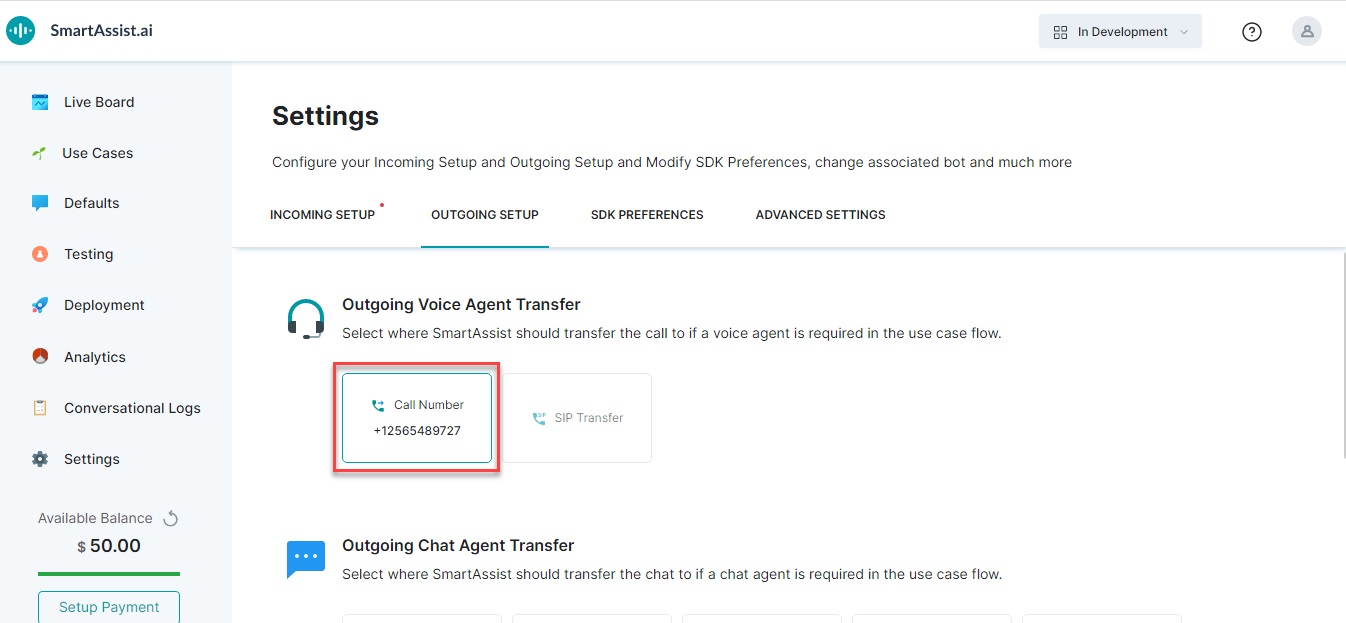
- Click Call Number.
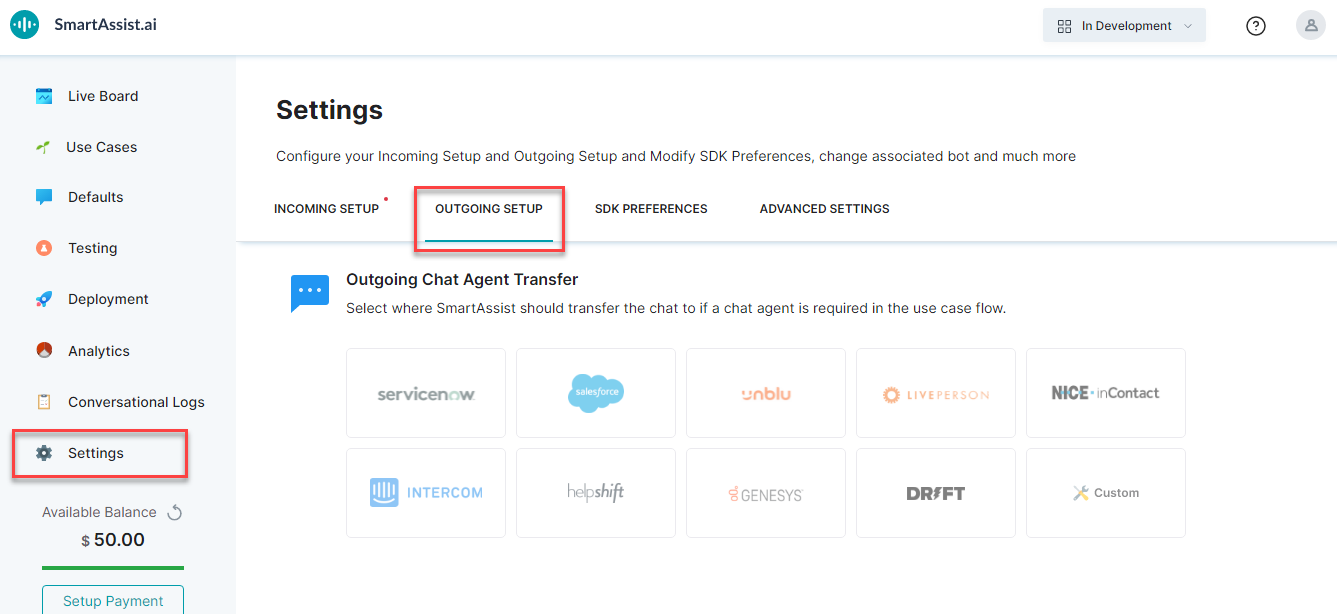
Outgoing Chat Agent Transfer
To configure outgoing chat agent transfer, follow the below steps:
- On the left pane, click Settings.
- On the Settings page, by default, the Incoming Setup tab is selected. Click Outgoing Setup.
- Under the Outgoing Chat Agent Transfer section, you can find the below options:
- ServiceNow
- Salesforce
- Unblu
- Liveperson
- Nice inContact
- Intercom
- HelpShift
- Genesys
- Drift
- Custom
- Click any of the above options. For example, ServiceNow.
- On the ServiceNow window, the Configuration tab is selected by default.
- Enter the Host (URL), Username, Password, Queue ID, and Webhook URL in the respective fields.
- Click the Instructions tab and follow the instructions.
- Click Done.
- Perform the same for all the other options.