GETTING STARTED
Introduction to SmartAssist
Glossary
SmartAssist Lifecycle Management
SmartAssist Setup Guide
Sign Up for SmartAssist
Setup SmartAssist for Use With AgentAssist
Release Notes
Recent Updates
Previous Versions
Frequently Asked Questions (FAQ)

EXPERIENCE DESIGNERS
Flow Designer
Introduction
Create Experience Flows
Navigate the Flow Designer
Experience Flow Nodes
Introduction
Node Types
IVR Menu
IVR Digit Input
Conversational Input
Split
Check Agent Availability
Check Business Hours
Message Prompt
Run Automation
Agent Transfer
Connect to API
Go to Flow
Deflect to Chat
Script Task
Set Queue
End Flow
Waiting Experience
Conversation Automation
Testing Widget
Use Cases
Overview
Questions & Answers
Conversations

ADMINISTRATORS
Account Management
Switch Account
Invite Developers to an Account
Routing
Skills
Skill Groups
Queues
Hours of Operation
Default Flows
User Management
Users
Agent Groups
Agent Settings
Role Management
Agent Status
System Setup
Channels
Voice
Chat
Email
Limitations With Accounts Using AudioCodes
Agent Transfer
Surveys
Agent Forms
Dispositions
Language & Speech
Overview
Language Management
Voice Preferences
Hold Audio
Standard Responses
Widgets
Utils
AgentAssist Settings
SearchAssist
Advanced Settings
Co-Browse Settings
Community WFM (Beta)
Automatic Conversation Summary (Beta)
Intelligent Agent Tools
API Reference
API Setup
API List
Integrations
Genesys Voice Bot
Genesys + Kore Voice Automation - Manual Installation Guide
Voice Automation - Integration with Amazon Connect
Voice Automation NiceCX (CX One) - SIP Integration
Talkdesk Voice Automation
ID R&D Integration With Kore
Audit Report

AGENTS
Agent Console
Introduction
Conversation Tray
Incoming Interactions
Interacting with Customers
Additional Tools
My Dashboard

SUPERVISORS
Dashboard
Automation
Queues and Agents
Interactions
Monitor Queues, Agents, Interactions, and Service Levels
Manage Layout

BUSINESS USERS
Reports
Introduction
Reports List

Incoming Setup

In general, to receive calls to your application, you must configure incoming call settings. In SmartAssist, this configuration is to choose how your users can reach SmartAssist.

With the incoming call setup, you can: 

  • Allow SmartAssist to set up a Phone Number that you can share with your callers.
  • Transfer calls from an existing IVR system.

Call Phone Number

In case you do not have an IVR system or do not want to use it, SmartAssist can allocate a dedicated phone number that you can provide to your users. Your users can directly reach your SmartAssist app by calling this number. SmartAssist uses Twilio to procure these phone numbers. For certain countries, Twilio requires an address before the number is used. You must provide the same during the configuration process.

To configure the Call Phone Number setup, follow the below steps:

  1. On the left pane, click Settings.
  2. On the Settings page, by default, the Incoming Setup tab is selected.
  3. Under the Incoming Calls section, click Call Phone Number.
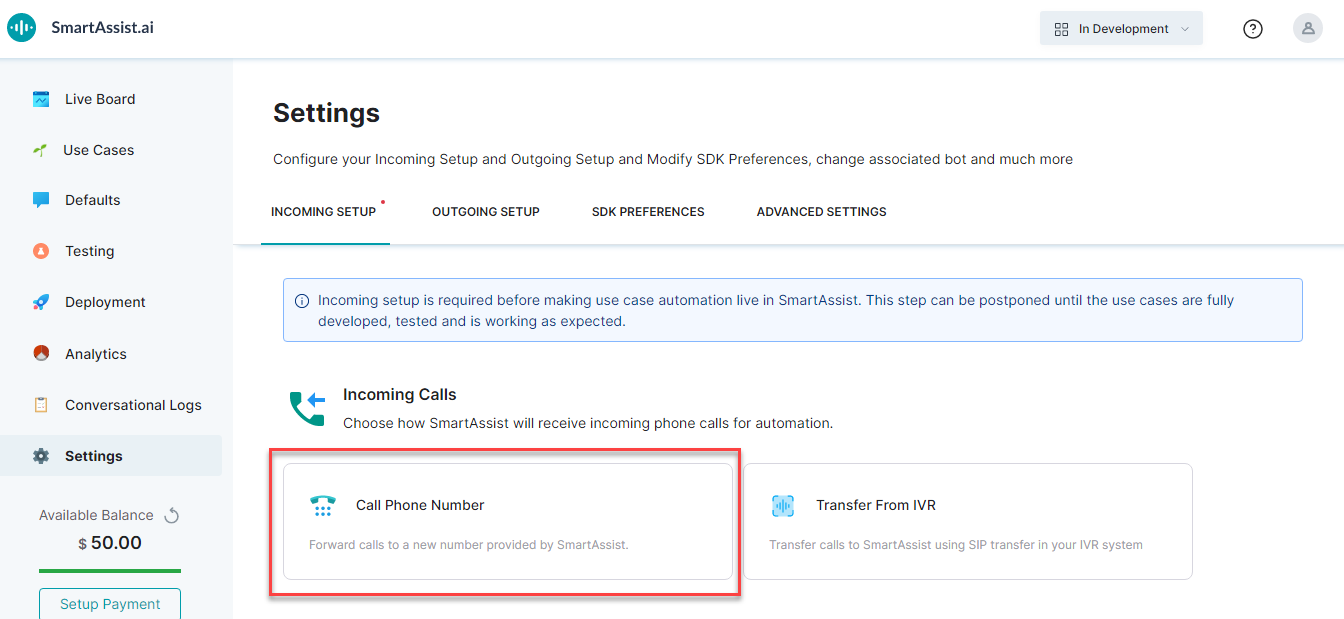
  4. On the Call Phone Number window, click Get New Phone Number.
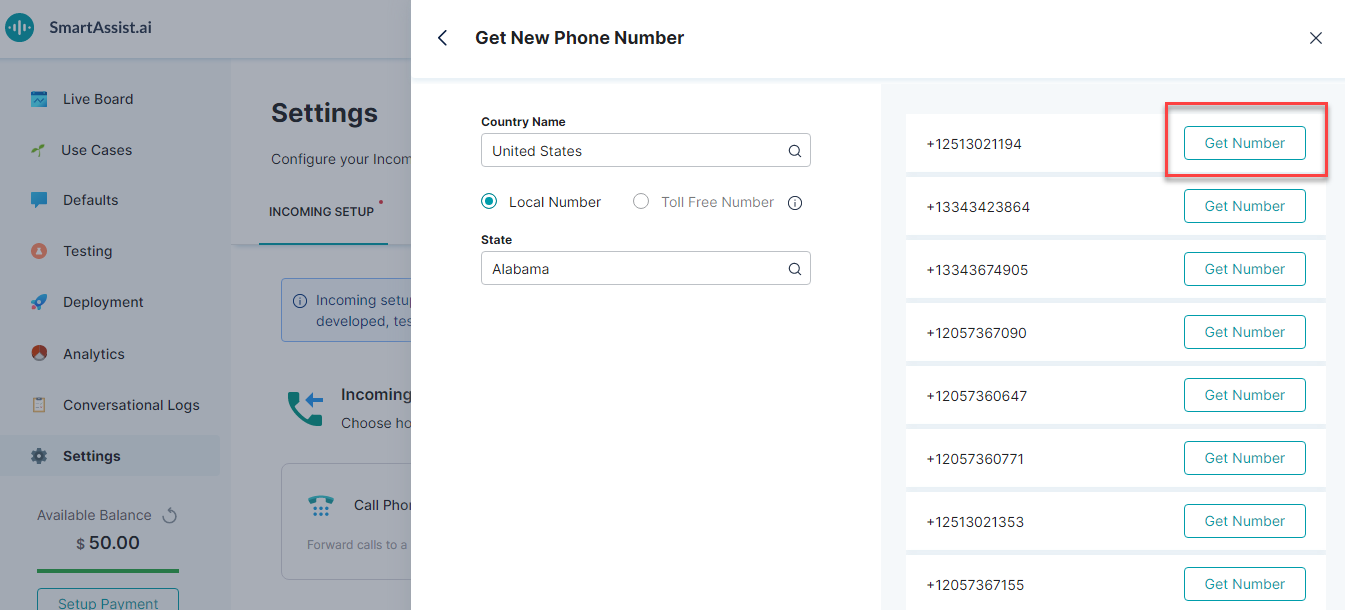
  5. On the Get New Phone Number window, search and select a country from the Country Name field. Choose a country of your preference and phone numbers from this country are displayed. Based upon your choice of country, the following options are available:
    1. For the United States of America:
      1. You can further choose between a Local Number or a Toll-free Number.
      2. Click Get Number from the list of numbers provided.
      3. For local numbers, you can choose the state of your choice from the State field and the number within that area code is listed.
    2. For other countries:
      1. Click Get Number from the list of numbers provided.
      2. You must provide a local address that is validated for various local law and regulation compliance.

You can use this number for testing purposes before going live with it.
Transfer from IVR 

Calls from your IVR system are redirected to SmartAssist through SIP sessions. This entails two basic configurations based on the network selected.

To configure this setup, follow the below steps:

  1. On the left pane, click Settings.
  2. On the Settings page, by default, the Incoming Setup tab is selected.
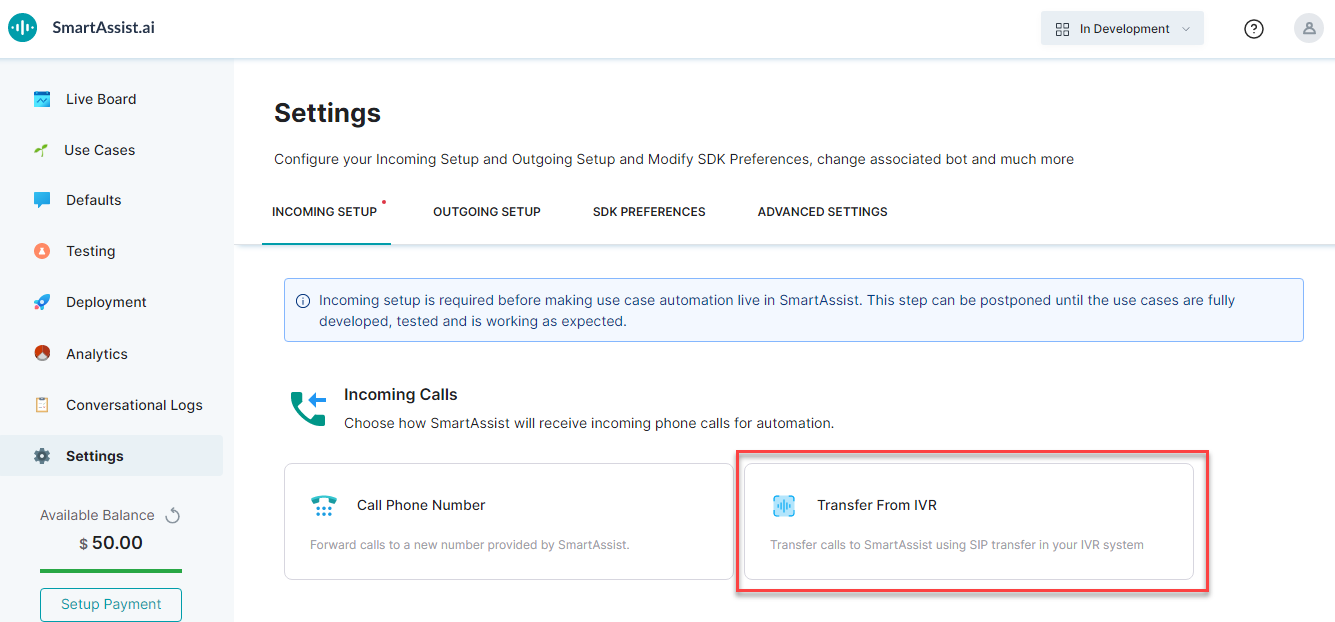
  3. Under the Incoming Calls section, click Transfer from IVR.
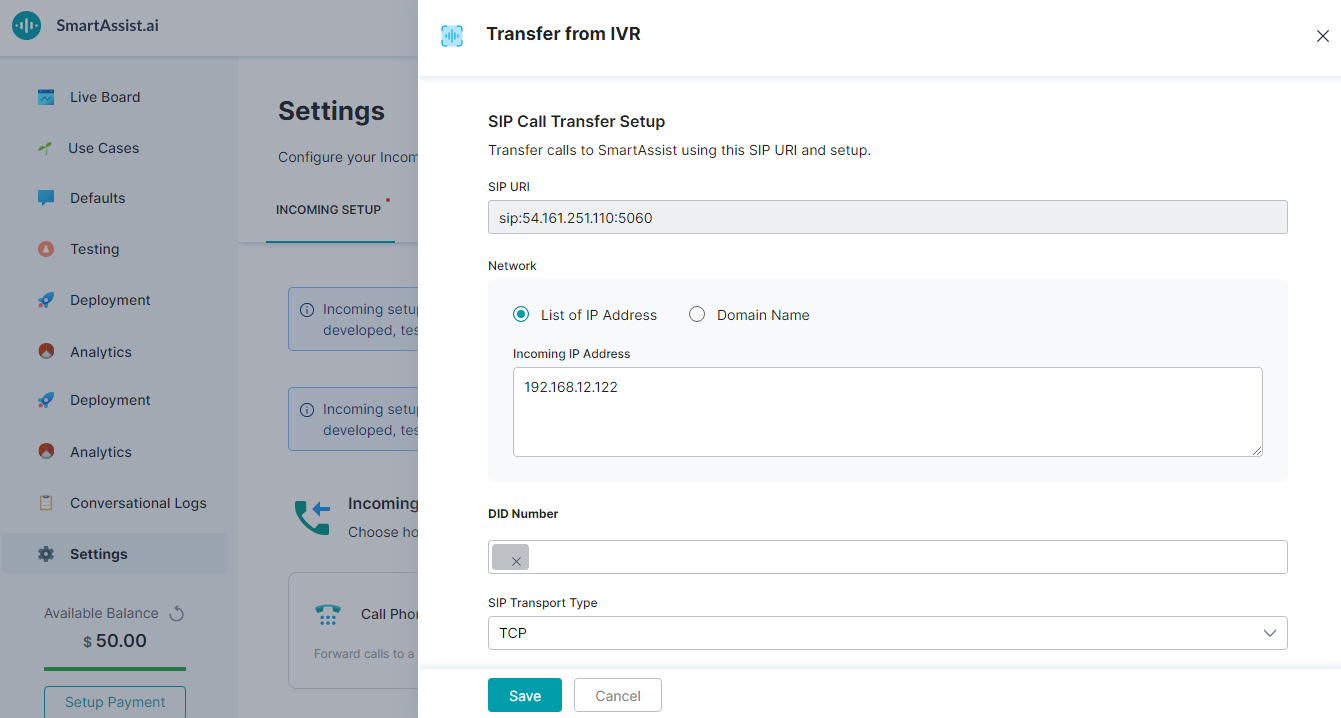
  4. On the Transfer from IVR window, in the SIP URI field, a unique SIP domain URI is generated by SmartAssist and assigned to your account. You can configure this in your IVR system so that the calls are redirected to SmartAssist.
  5. Under the Network section, you can specify a list of IP Addresses or Domain Names of the enterprise from which the calls are expected to your IVR systems. 
    1. Select List of IP Address and in the Incoming IP Address field, enter multiple comma-separated addresses.
    2. Select Domain Name and in the Fully Qualified Domain Name (FQDN) field, enter an FQDN; and select a DNS Resolve Method from the DNS Resolve Method drop-down list.
  6. In the DID Number field, enter Direct Inward Dialing (DID) numbers.
  7. From the SIP Transport Type drop-down list, select:
    • TCP
    • UDP
    • TLS
  8. Under the SIP Credentials section, you can enter the Username and Password. (optional)
  9. Click Save.