
Section 1: Introduction
Voice AI Agents help automate your customer service and reduce live contacts, making your team more efficient. The process involves routing the user audio through various components to enable speech-to-text conversion, identification of user intents, generation of responses, and synthesis of speech for playback to the user.
Different types of integrations (High-Level)
- SIP (Session Initiation Protocol)
- Description: Enables voice communication over IP networks.
- Usage: Used for call routing and transferring calls between the voice AI Agent and human agents.
- Example third-party applications
- Genesys
- Amazon Connect
- Nice CXone
- Zoom Contact Center
- Web Socket
- Description: Facilitates real-time audio streaming over WSS.
- Usage: Used for real-time, two-way communication between a client (like a web browser) and a server.
- Example third-party applications
- Talkdesk: Audio streaming is the primary component for enabling voice automation. It involves streaming Talkdesk audio to the Voice Stream URL over WSS using Conversation Orchestrator.
High-Level Integration Architecture
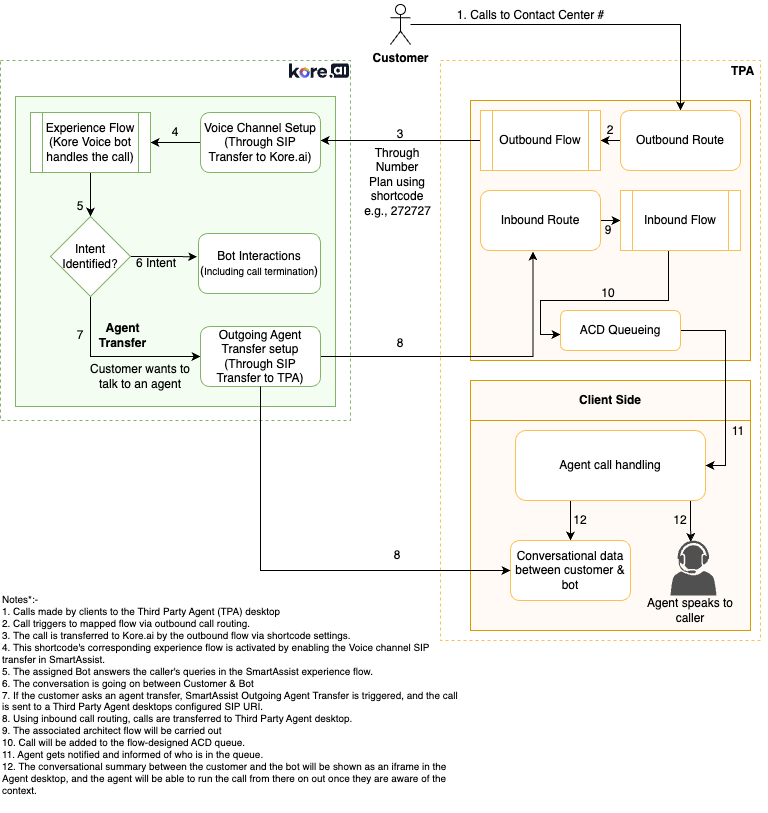
Run Time Flow (Generic)
- Here’s a general overview of how a voice AI Agent interacts with the third-party contact center
- Customer initiates contact through a third-party contact center.
- The call is routed to Kore’s voice AI Agent and respective Experience flow triggers
- Voice AI Agent handles the interaction, and if needed, transfers the call to a human agent (using the Agent Transfer Node within the Kore platform)
- Admins can define SIP headers to provide the necessary information and for proper routing in the contact center.
- The agent receives the customer interaction and responds to them using the third-party contact center’s communication features.
Initial Research
- Initial Research
- Get a contact from the third-party Contact Center for integration.
- Research and understand the third-party Contact Center integration process.
Conduct a PoC (Proof of Concept) using sandbox details.
Prerequisites
- Before you begin the installation, perform the following tasks:
- Install Kore XO Platform and SmartAssist instances.
- An Enterprise Plan is preferred for production usage as it provides the necessary resources, tools, and support to ensure a successful and efficient implementation of a voice AI Agent.
- Develop and configure well-designed experience flows
- Get admin account access to the third-party agent desktop and configure Kore’s SIP Trunk details and whitelist IP addresses.
- For Genesys: Get the Genesys PureCloud environment, with administrative access sufficient to install Premium Applications. By leveraging the full capabilities of the PureCloud platform with administrative access, you can optimize and enhance your contact center operations, improving customer engagement and support.
- For Amazon Connect: Create an account in Amazon Connect with full access and
- AWS Lambda – Execute and Create Permissions
- Amazon Lex – Full Access
- Get a Phone number from the preferred third-party agent desktop
- Get a working knowledge of the configuration of SIP integrations between telephony systems.
- Install Kore XO Platform and SmartAssist instances.
Section 2: Changes on the Voice Gateway side
- Step 1: Installation Steps for SmartAssist
- Log in to SmartAssist > Configurations > System Setup > Channels. Refer to Sign up for SmartAssist.
- Configure SIP Trunk settings. Learn more.
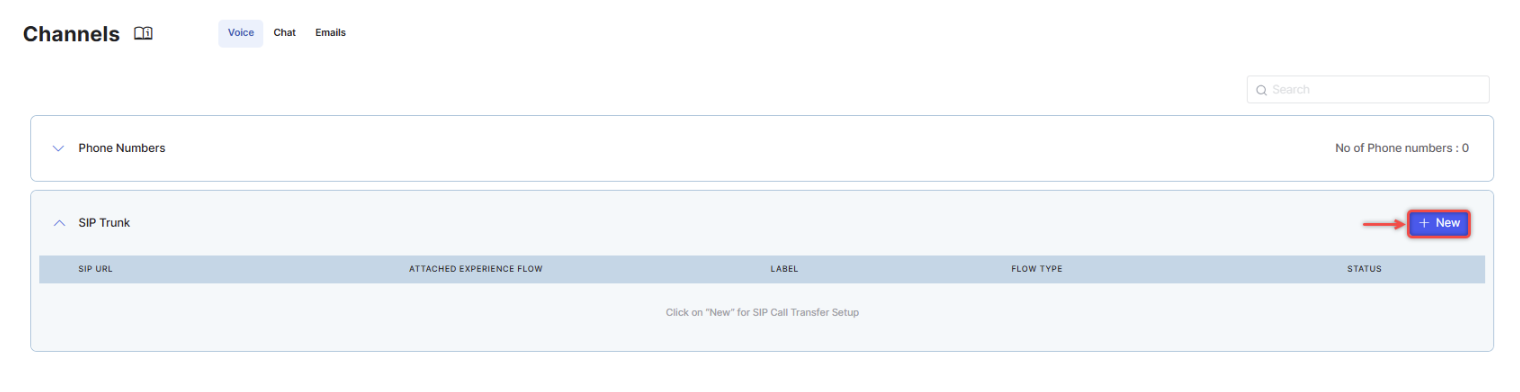
- Step 2: SIP Trunk Setup
- The following screen appears, listing Phone Numbers and SIP Transfer options on the page.
- Click New.
- When transferring control of the customer call from a third-party contact center to Kore’s IVA, Kore needs to whitelist the specified IP addresses or domain names to ensure that only authenticated networks can connect. You have two options to select in the Network section for this:
- Enter IP Addresses: Select the List of IP Addresses option and add the IP addresses from Zoom.
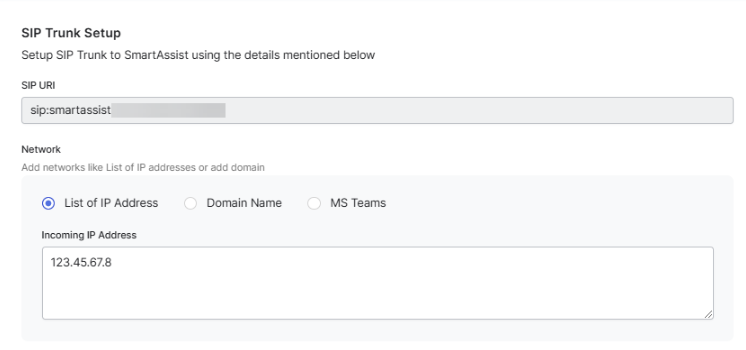
- Enter domain names and select the appropriate configuration: Select the Domain Name option and follow the steps below
- Enter IP Addresses: Select the List of IP Addresses option and add the IP addresses from Zoom.
- Add the Domain name from the third-party Contact Center in the Fully Qualified Domain Name field.
- Select srv from the DNS Resolve Method (Optional) list.
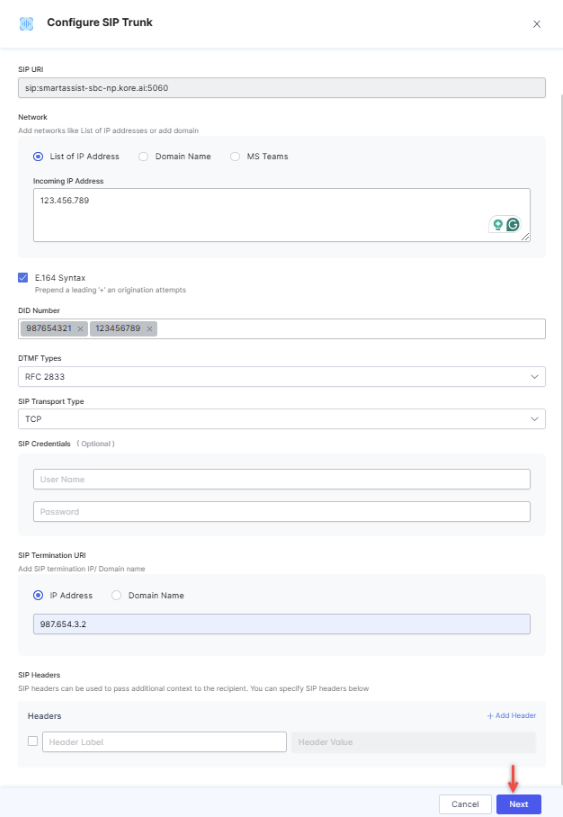
- Add the DID Number. (Note that this phone number is used to identify the AI Agent and flow for a call received from a third-party contact Center on Kore.)
- Select TLS from the SIP Transport Type list.
- Select Pad Crypto.
- Click Next.
- Select Inbound Calls and Outbound Calls.
- Click Save.

- Click Attach Flow and attach the flow created in step 1. For help, refer to Attach a Flow.
- Step 3: Create Experience Flows
- Navigate to Configurations > Experience Flows.
- Click + New Flow.

- Create a Voice Flow pointed to the Kore.ai XO Platform automation you wish to use. Refer to Create Experience Flows.
- Add a Conversational Input node.
- Go to Configuration.
- Select your Automation AI Agent from the list.
- In the Start node, select your SIP Transfer setup as indicated by the DID number to be used with this Experience Flow.
- Step 4: Agent Transfer Configuration (from SmartAssist to third-party Contact Center)
- Navigate to Configurations > System Setup > Agent Transfer.
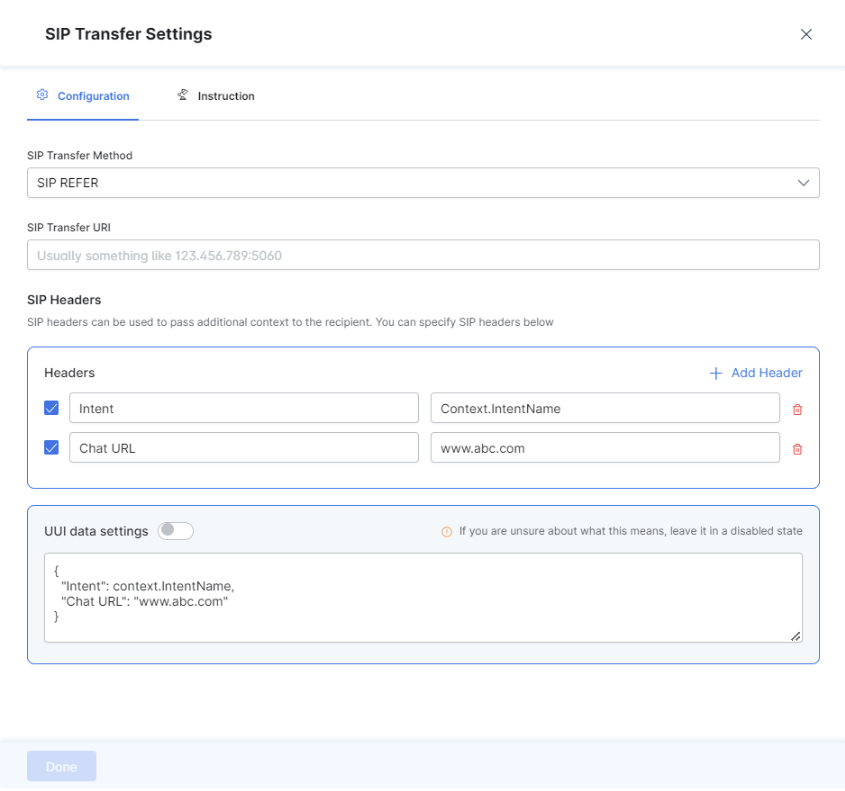
- In Outgoing Voice Agent Transfer, select the SIP Transfer option.
- If we are transferring the call to an Agent who is using Genesys PureCloud
- Set the SIP Transfer URI to a valid phone number connected to an inbound call flow.
- The format should be similar to sip:+{phone-number}@{your-trunk-name}.byoc.mypurecloud.com.
- The phone number used here is a DID number that is only configured for routing inside Genesys Cloud CX, not a publicly available phone number. For example, it can be something like “+12223334444”.
- Set the SIP Transfer URI to a valid phone number connected to an inbound call flow.
- Configure SIP Headers to pass back to Genesys PureCloud.
- Click Done.
Section 3: Changes on the Third-Party Application Side
- We currently support integration with the following 3rd-party agent desktops:
- Genesys
- Amazon Connect
- Talkdesk
- Nice CXone
- Zoom Contact Center
- Step 1: Purchase a Phone Number. Learn more.
- Step 2: Set Up Provider-Specific Configurations in the Third-Party Application.