Introduction
This document outlines the step-by-step process for handing over a call initiated from SmartAssist to Genesys Cloud CX, with Agent AI pre-installed on the Genesys desktop.
Prerequisite
- SmartAssist, Automation AI, and Agent AI accounts with administrator access.
- Genesys Cloud CX account with admin role.
- Familiarity with creating an Architect flow in Genesys.
- Familiarity with creating an External trunk in Genesys.
SmartAssist Configuration for Automation
1. Create/Import App into Automation AI
- Log in to the SmartAssist portal.
- Go to the Automations tab.
- Click +Add Bot.
- After adding the bot, publish the bot to enable the Smart Assist channel.
2. Purchase a Phone Number
- In the Configuration tab, under the Channels > Voice > Phone Numbers.
- Click +New to purchase a phone number.
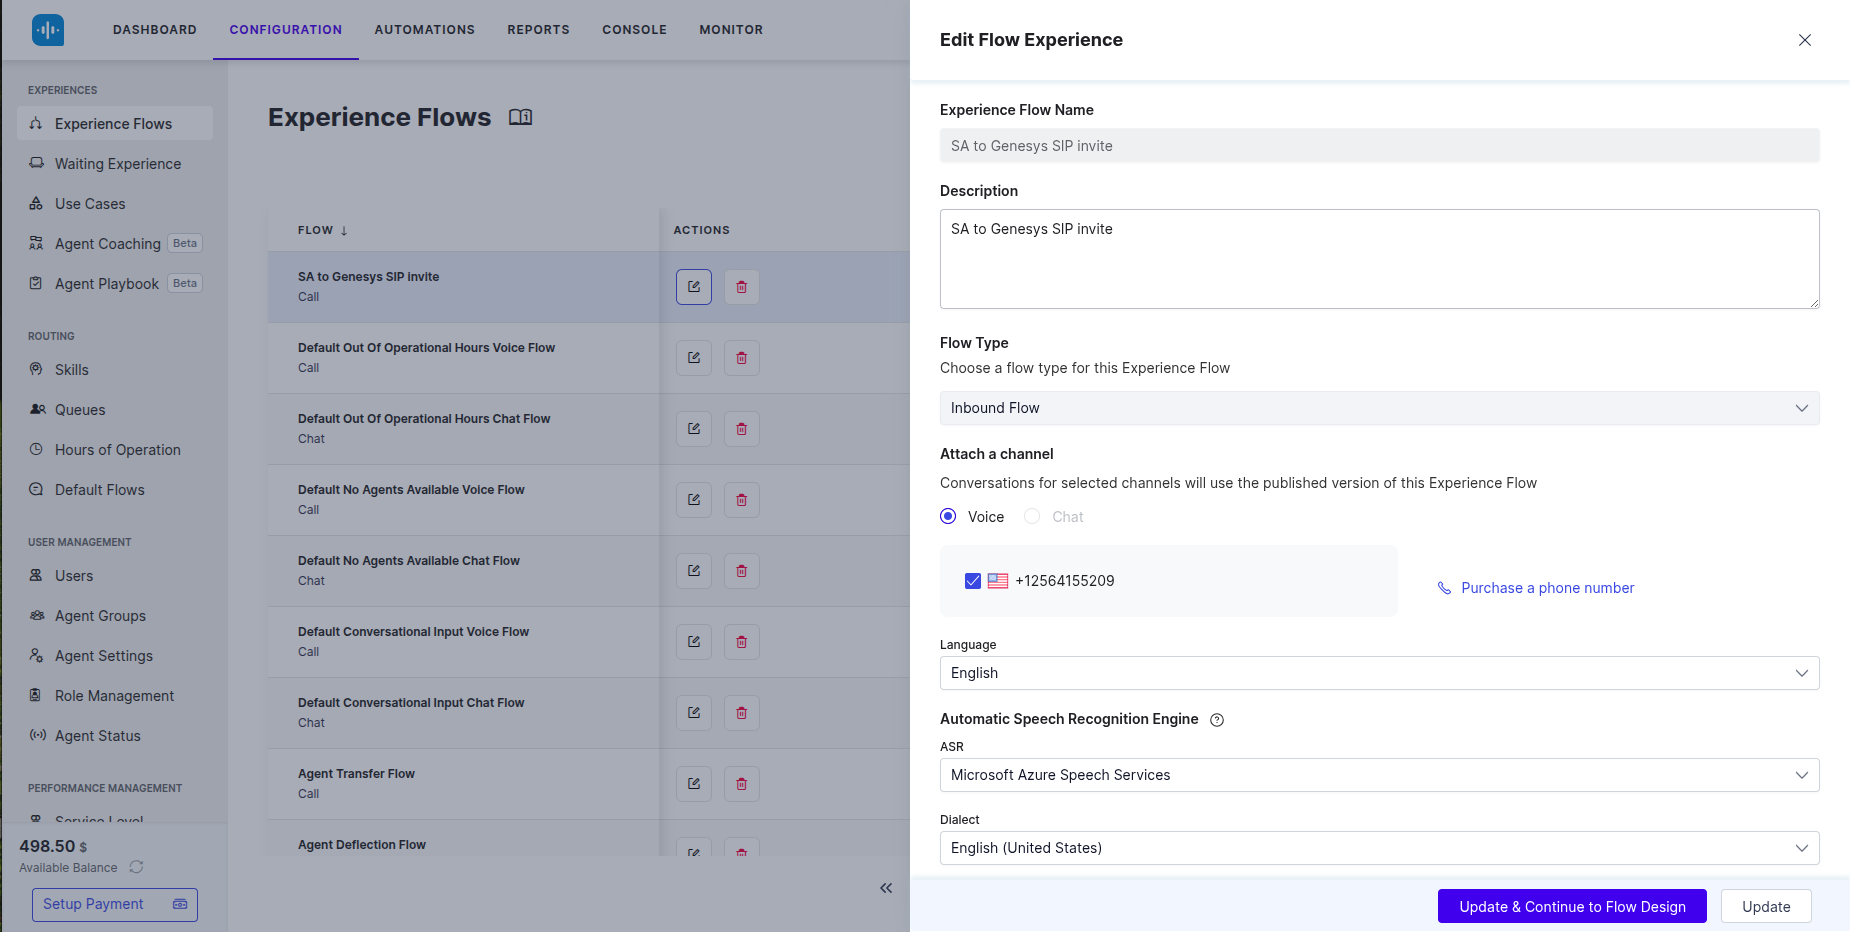
- This phone number should be attached to an Experience flow.
3. Create Experience Flow in SmartAssist
- Create a new flow in Smartassist by clicking +New Flow.
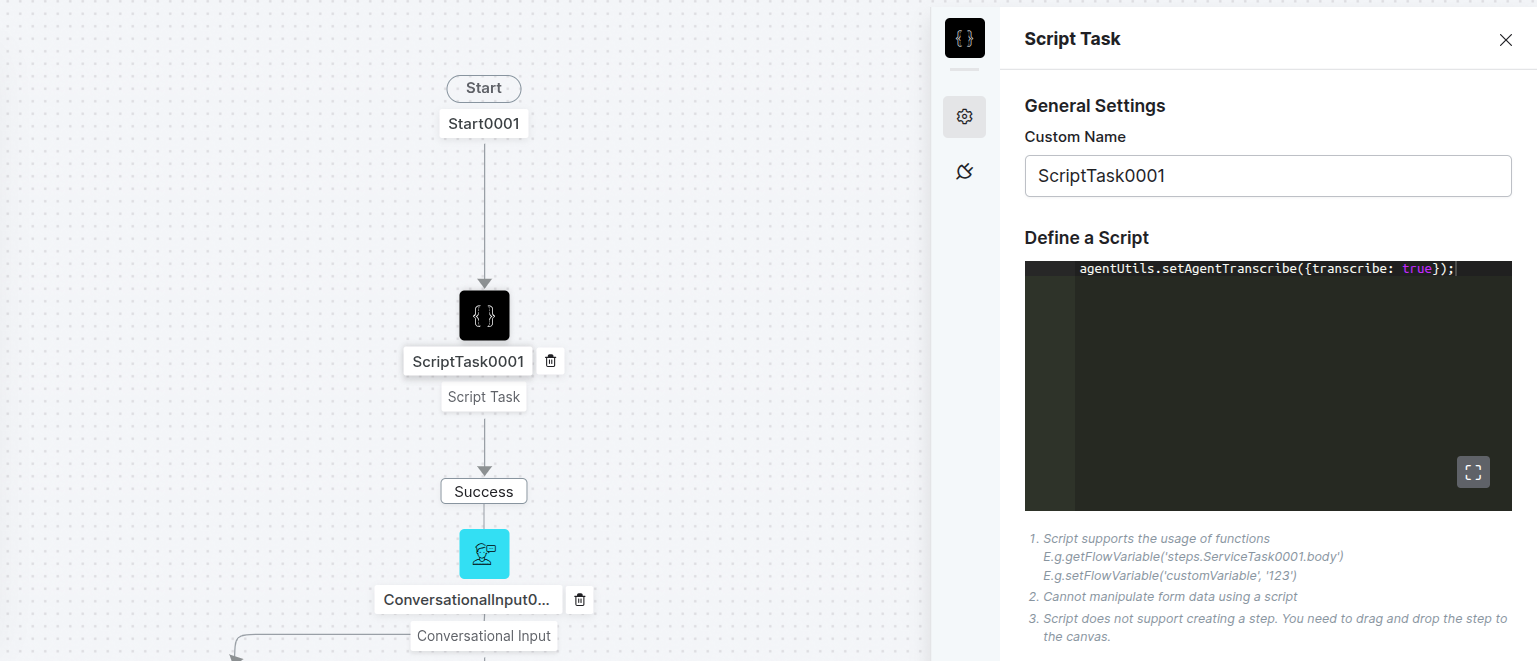
- In the experience flow, add a script node & add the following code:
agentUtils.setAgentTranscribe({transcribe:true});
- You can add a conversation input or a Run Automation node for configuring the Bot for the automation.
- You can add an Agent Transfer node in the experience flow for handing over the call to Genesys agents.
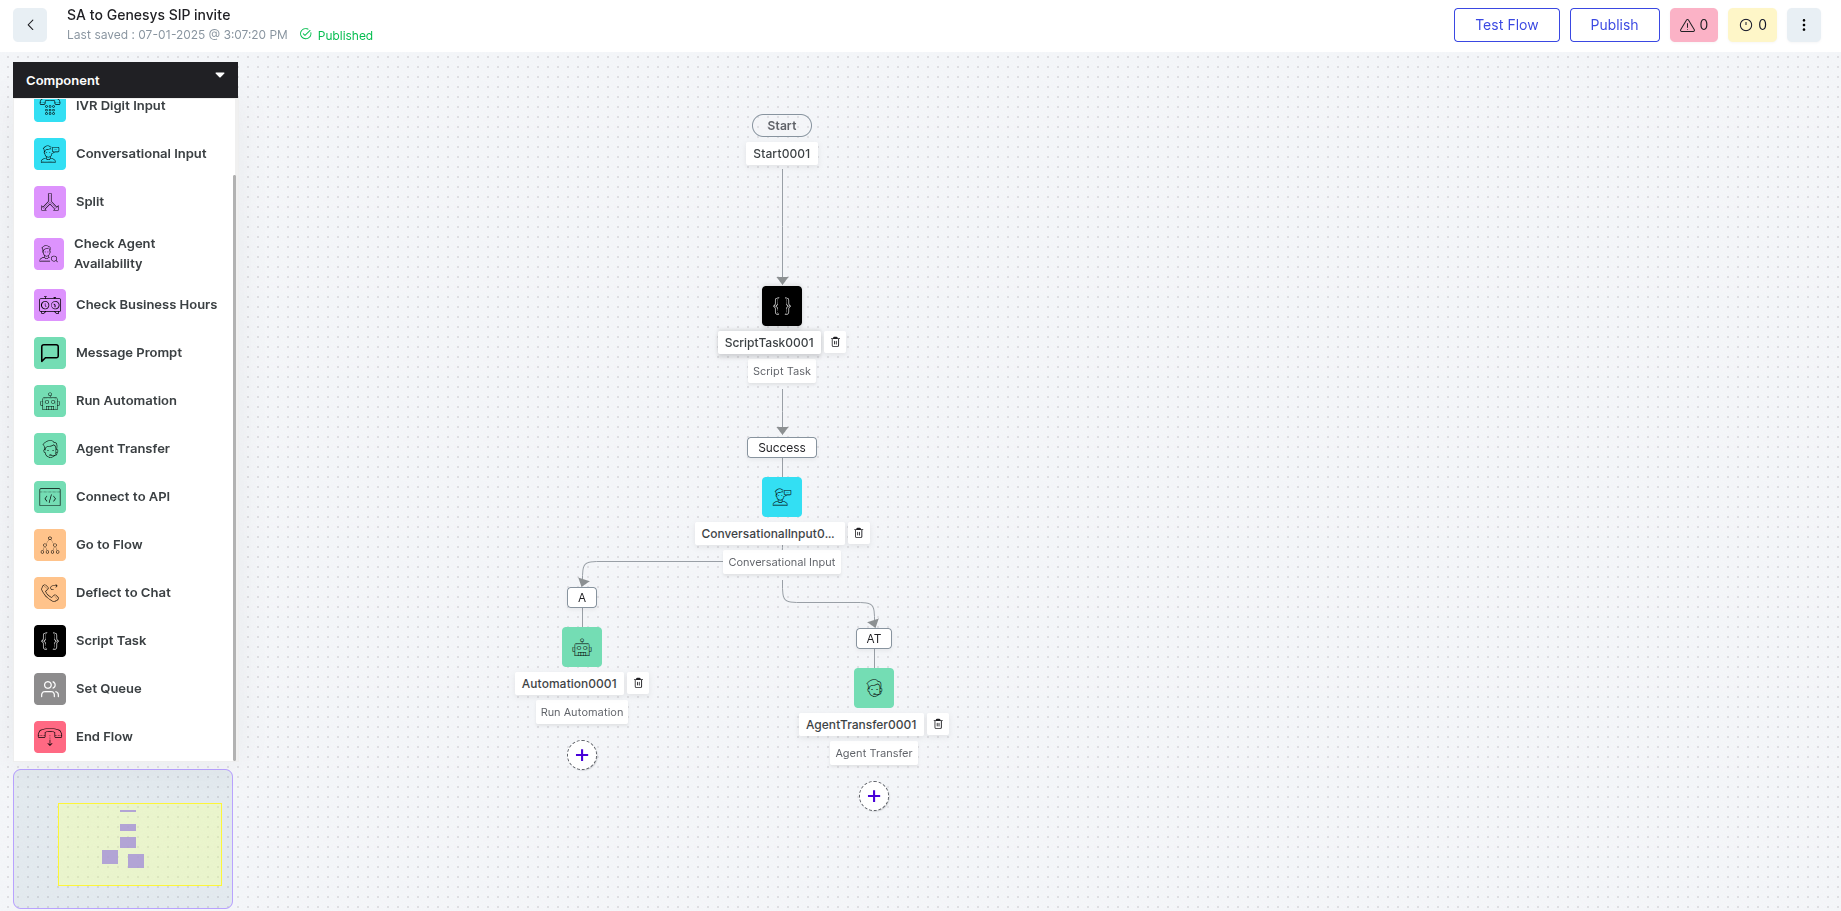
- Publish the flow.
- Use Test Flow to check if the call is getting connected to the right flow.
4. Configure the Agent Transfer
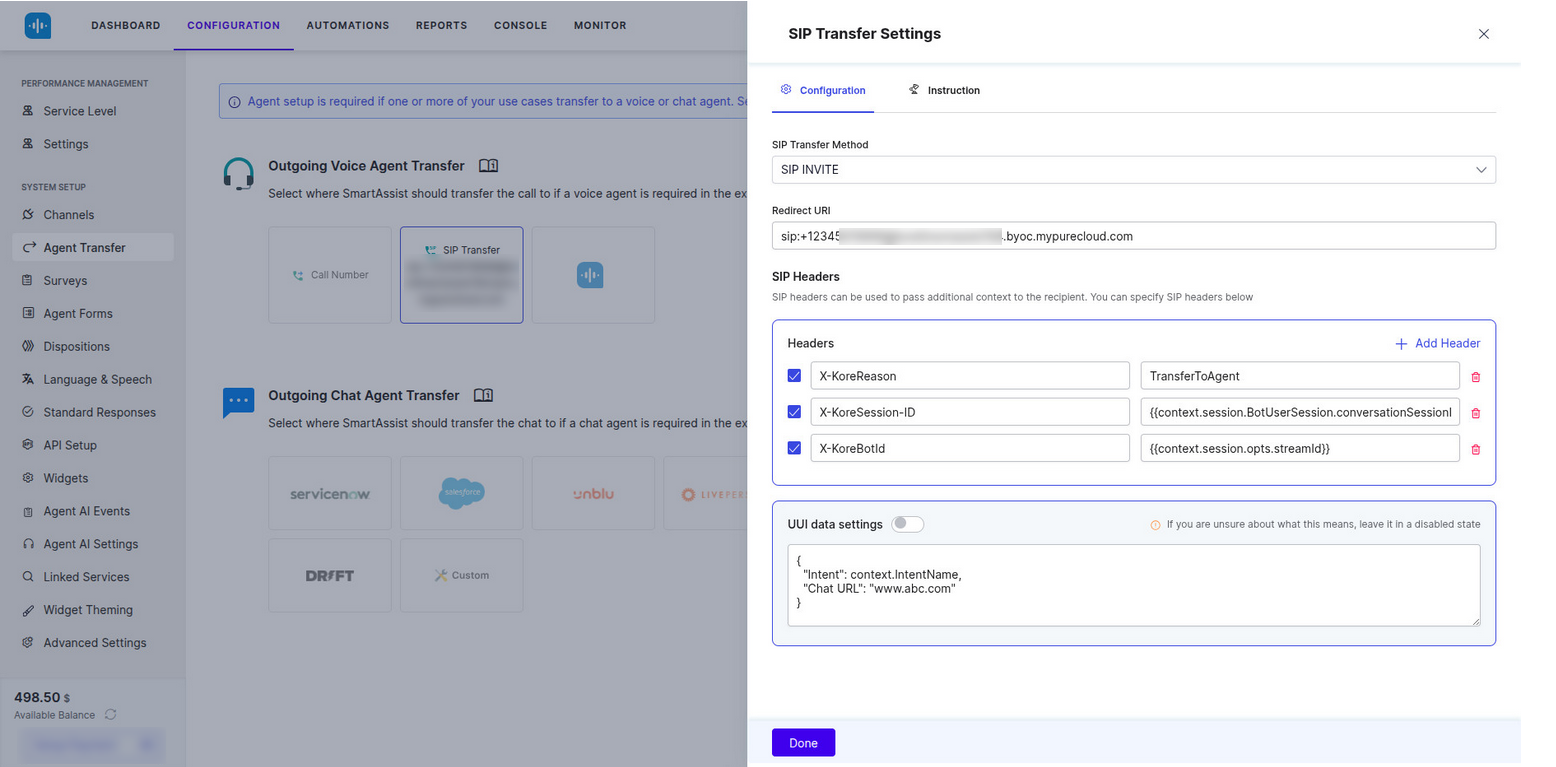
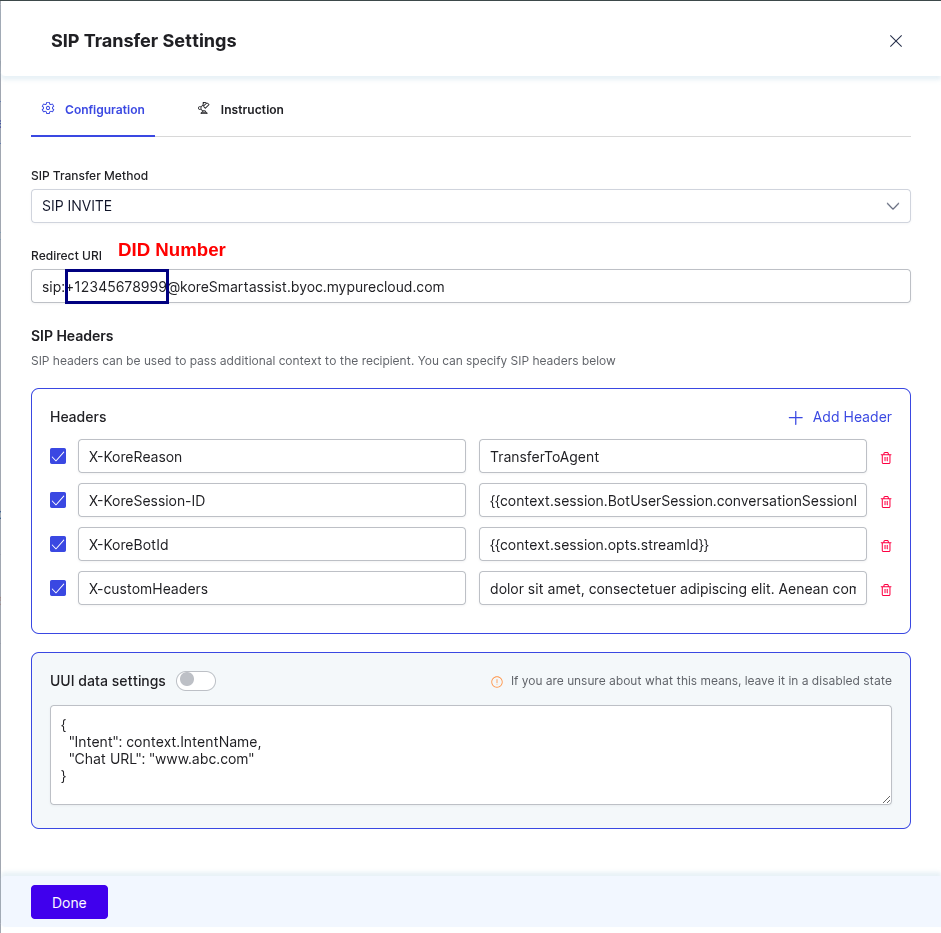
Navigate to the Configuration tab, scroll to the Agent Transfer section on the left side under SYSTEM SETUP.
Choose SIP Transfer.
SIP Transfer Method : SIP INVITE
Redirect URI:
In the following format
sip:+12345678999@koreSmartassist.byoc.mypurecloud.com
Where,
+12345678999 is a DID number created in Genesys.
koreSmartassist.byoc.mypurecloud.com – FQDN method of Genesys external trunk
Genesys Side Configuration for Agent Transfer
Inbound (Kore.ai to Genesys)
Step 1 – Queue
If you haven’t created an Agent Queue to route live agent transfers, create one and add the necessary members.
Step 2 – Architect Flow
Create an Inbound Call Flow
In this section, you must create a new Inbound Call Flow that is used to transfer the inbound calls received by Genesys from SmartAssist.
- Sign in to Genesys Cloud.
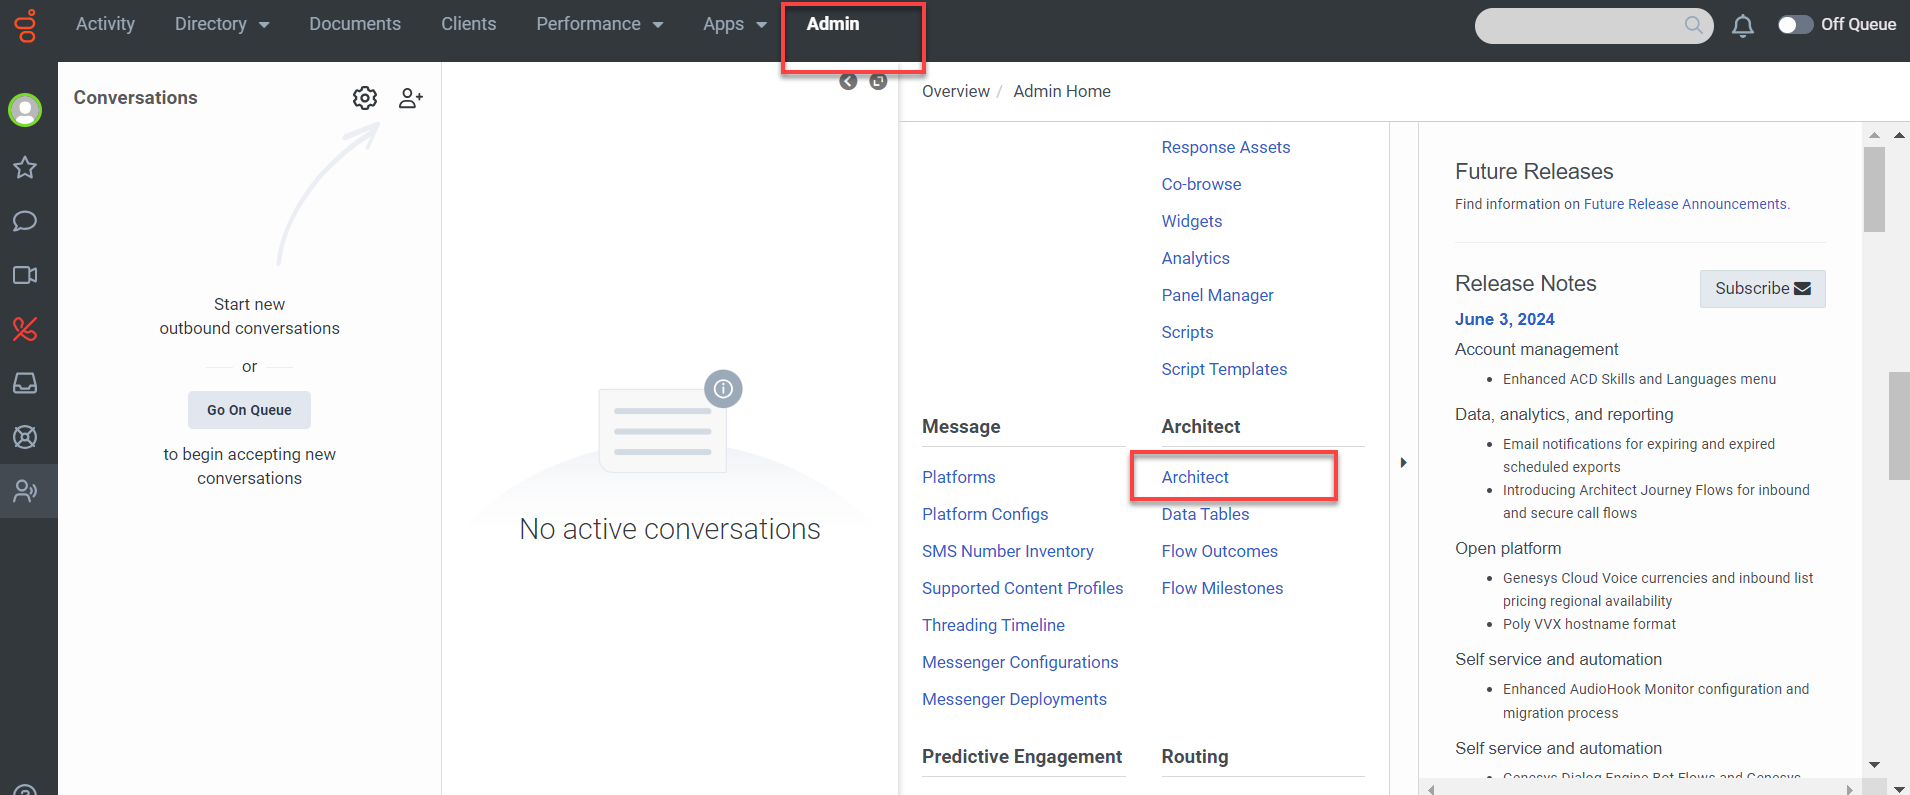
- Click Admin > Architect.
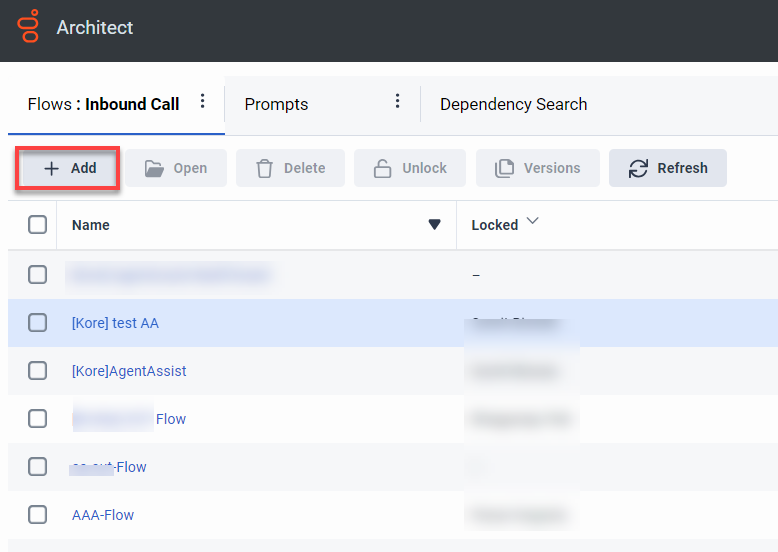
- Click + Add to add a new call flow.
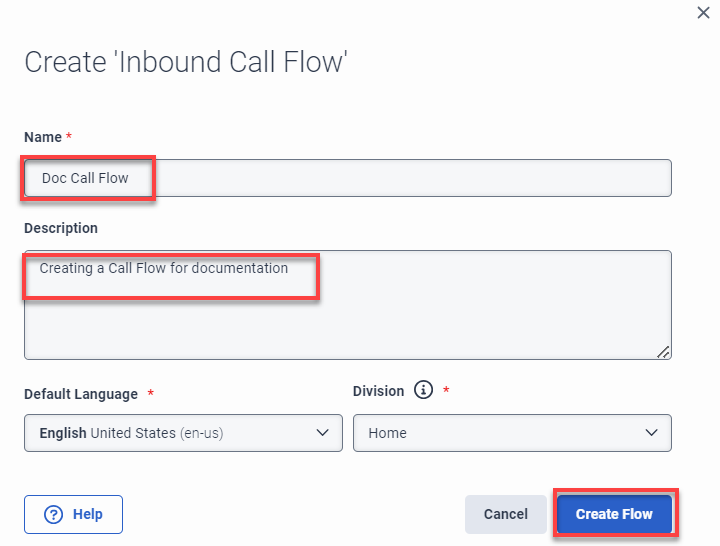
- Enter a name and a description in the Name and Description fields.
- Click Create Flow.
- You can create the flow (Add tasks) in the Main Menu or create a Reusable Task and mark this task as “set this as the starting task” from the three-dot menu in the top right corner.
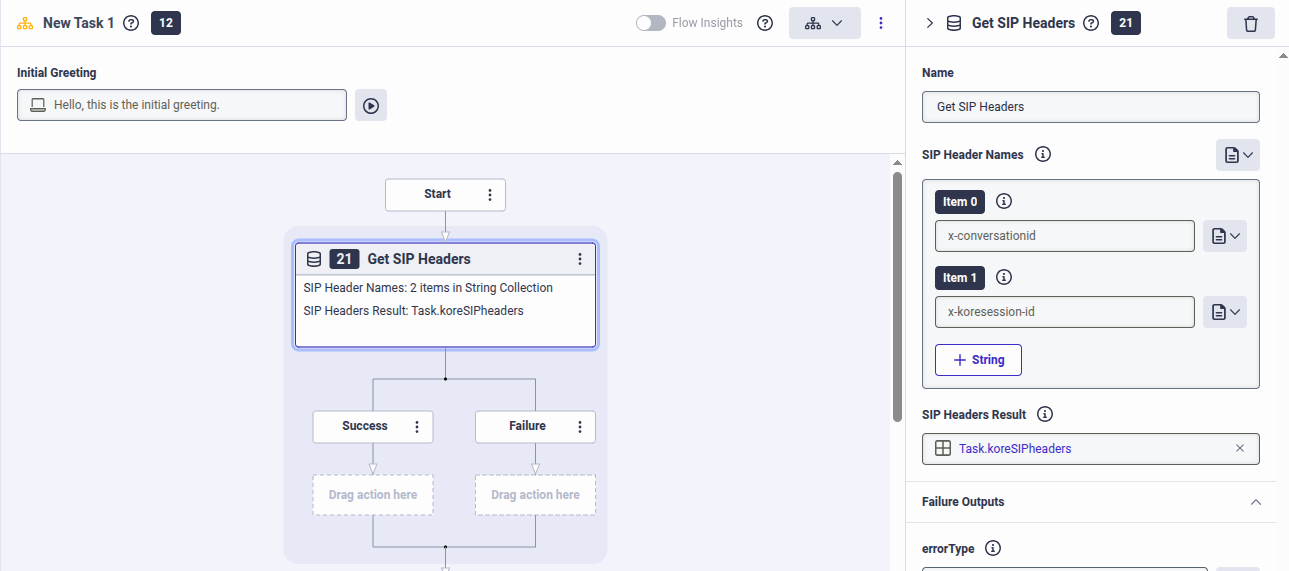
- After the Start node, add a Get SIP Headers node in the architect flow.
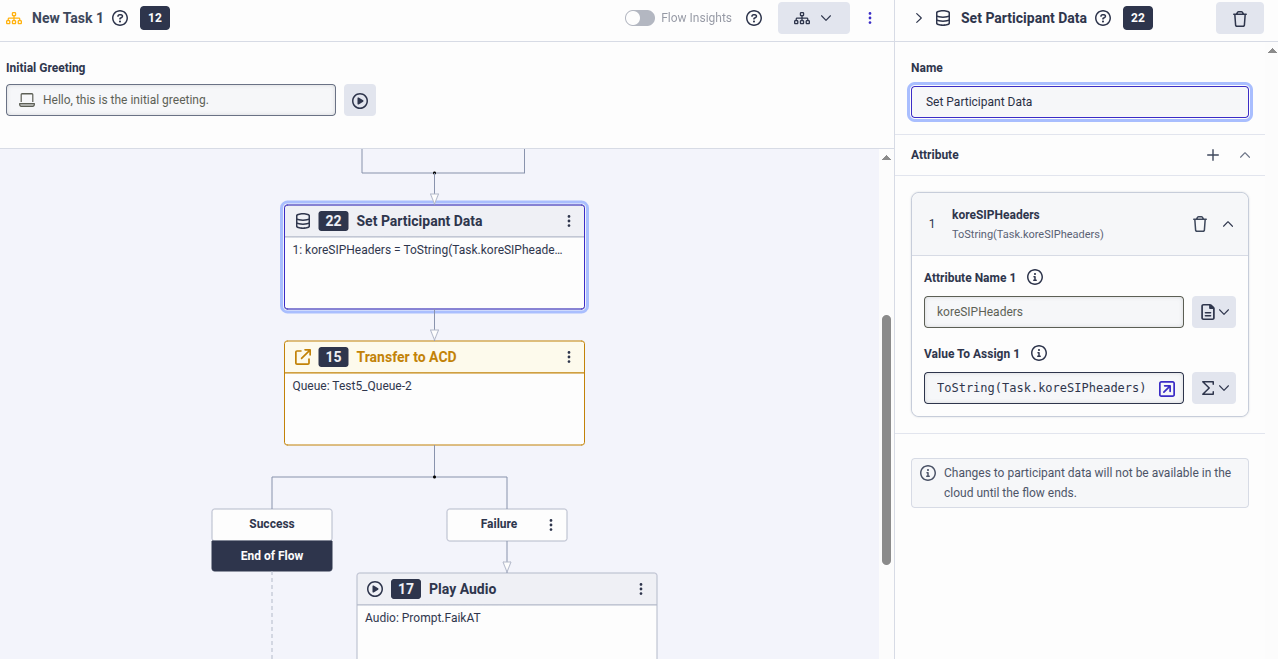
- The immediate next node should be a Set Participant Data node in the architect flow.
- Add at least one Transfer to the ACD node and point it to the Queue you want to use for agents.
Step 3 – DID Numbers
You need a DID Number that is internally routable inside Genesys.
DID Ranges
Create a new single-number DID range (keep start and end as the same number) that is not a typical external number. For example, +12223334444.

For the Service Provider, use Internal and add a comment on what the range is used for.
DID Assignments
Assign the number you created to the Call Route from Step 4.
Assignee Type: Call Flow
DID Number: Your number
Step 4 – Call Route
- Go to Admin > Call Routing.

- Click the add button to create a new call route.

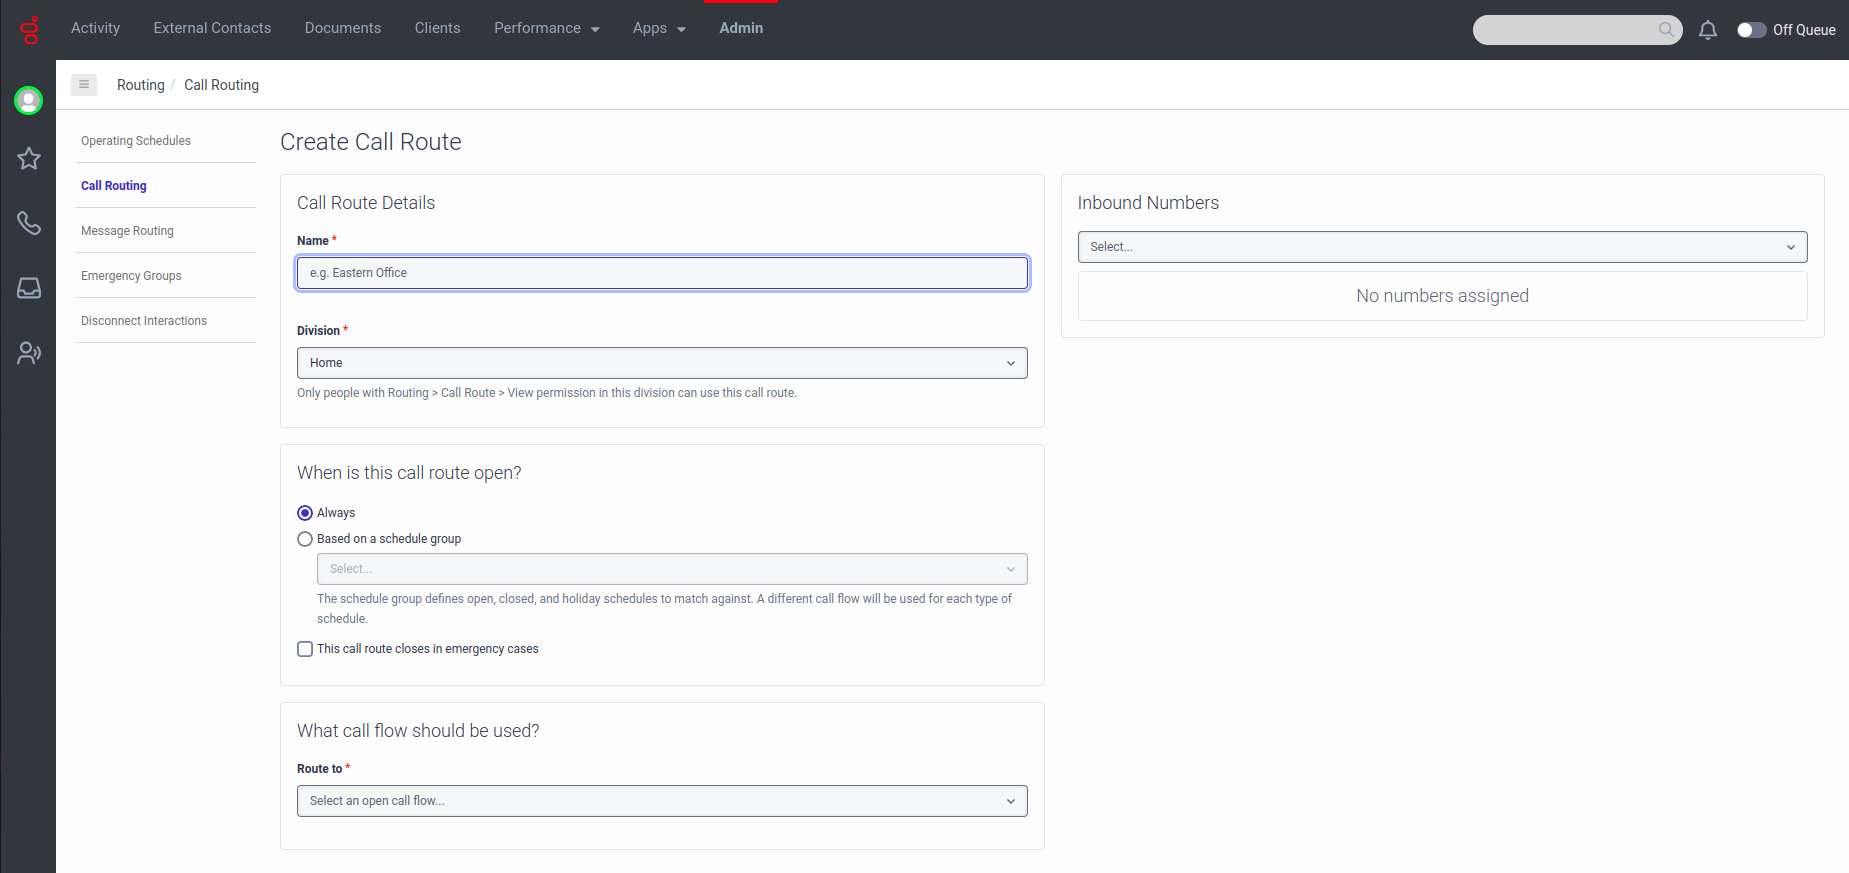
- Set up a call route to map the DID Number created in Step 2 to the call flow created in Step 3.
Step 5 – Trunk
Configure a trunk that connects the Kore.ai session border controller (SBC) for your region. To configure a trunk, use the following steps:
-
- Sign in to Genesys Cloud using your Kore credentials.
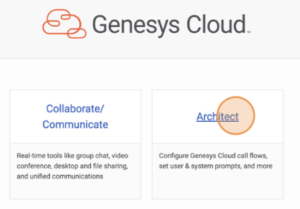
- Select Architect.
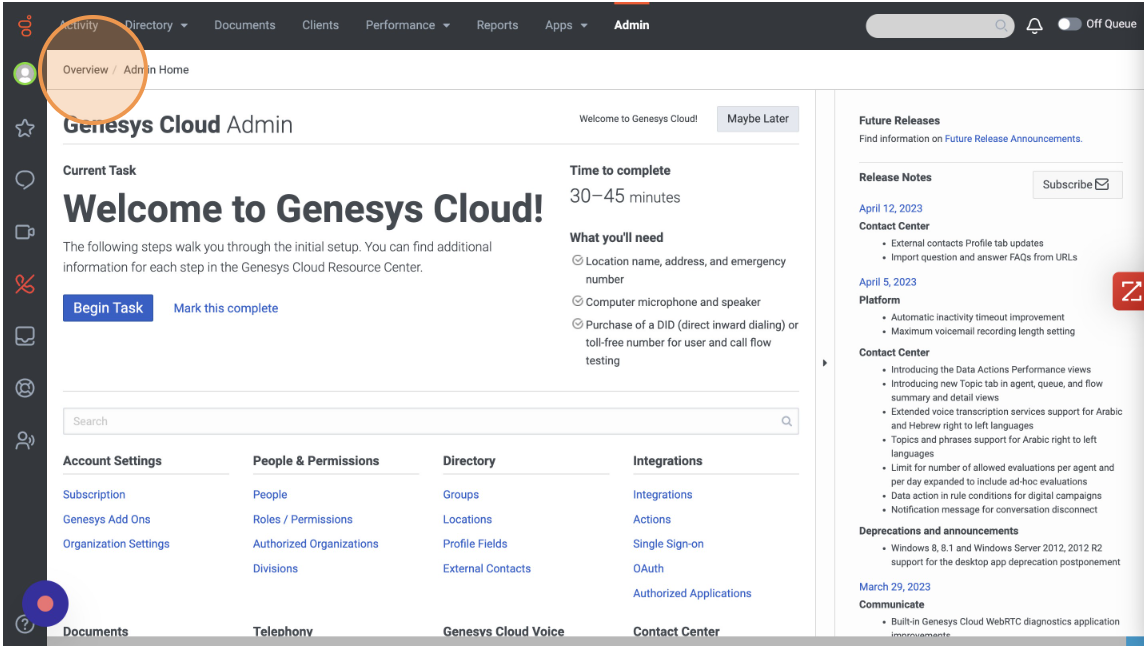
- Click Admin to open the Admin console.
- Either search with External Trunks or click Telephony > External Trunks.
- Click + Create New.
- Give External Trunk Name.
- Type should be BYOC Carrier.
- Select Generic BYOC Carrier as subtype.

- Select the Number Plan Site.

- Give a unique name for the Inbound SIP Termination Identifier.
- You will be able to see the Inbound Request-URI Reference.

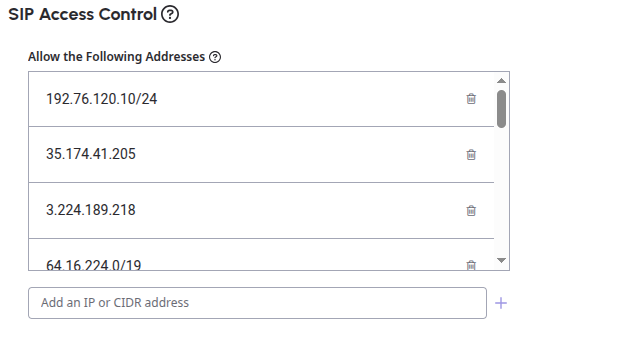
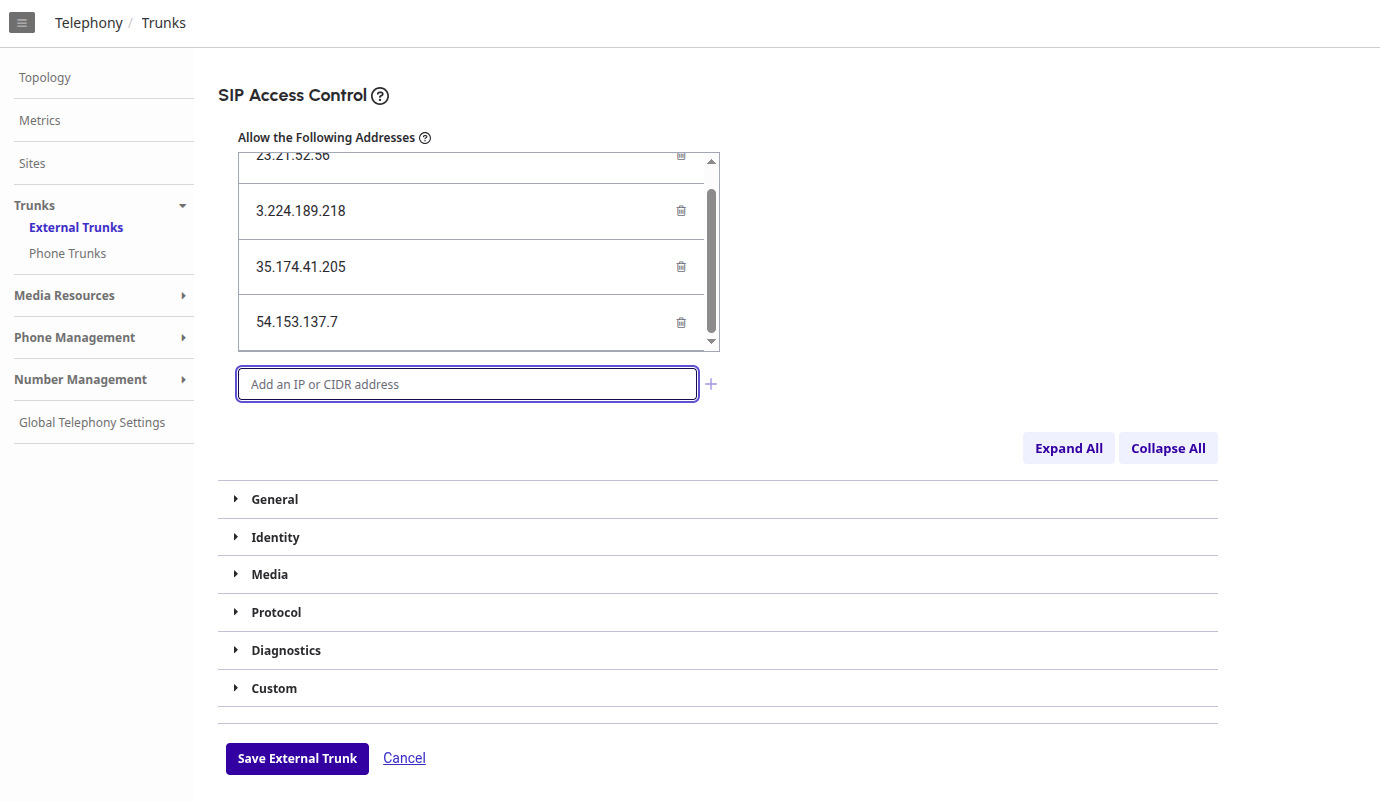
- Scroll down and under the SIP Access Control & add the Smartassist prod voice gateway IPs. This IP address will be different based on the regions.
- Click on Media & expand it, and there you need to scroll down a bit to enable Recording. Also, enable all the Optional Recording. Select the Codec as Opus, whatever suits best for you & also click on the Dual Channel checkbox.

- In the Protocol section, expand it and enable the Conversation Headers.

- Click Save External Trunk.
Agent AI integration
1. Add the Bot
Use the same automation bot that was used in the SmartAssist for the automation. So, for that, you can
- Log in to Agent AI.
- Then go to the Automation tab.
- Click on Add Bot.
- Attach a bot from the Library.
- Select the bot, click Convert Bot.
2. Follow the Documentation for Agent AI Integration with Genesys
Follow steps 1-4 in the following documentation for the Agent AI integration.
Points to be noted:
-
- In the above link, in step 4, while adding the Agent AI bot credential, make sure to add the details of the bot added in the previous step.
- In step 4, add a new field in the Genesys datatable with the following details:
Name: isSipInviteTransferFromKore
Data Type: String
Value: True - No need to configure AudioHook, nor is there any need to enable AudioHook monitor at the queue level.
- No need to add the “is Audiohook Enabled” field in the data table
Test Your Integration
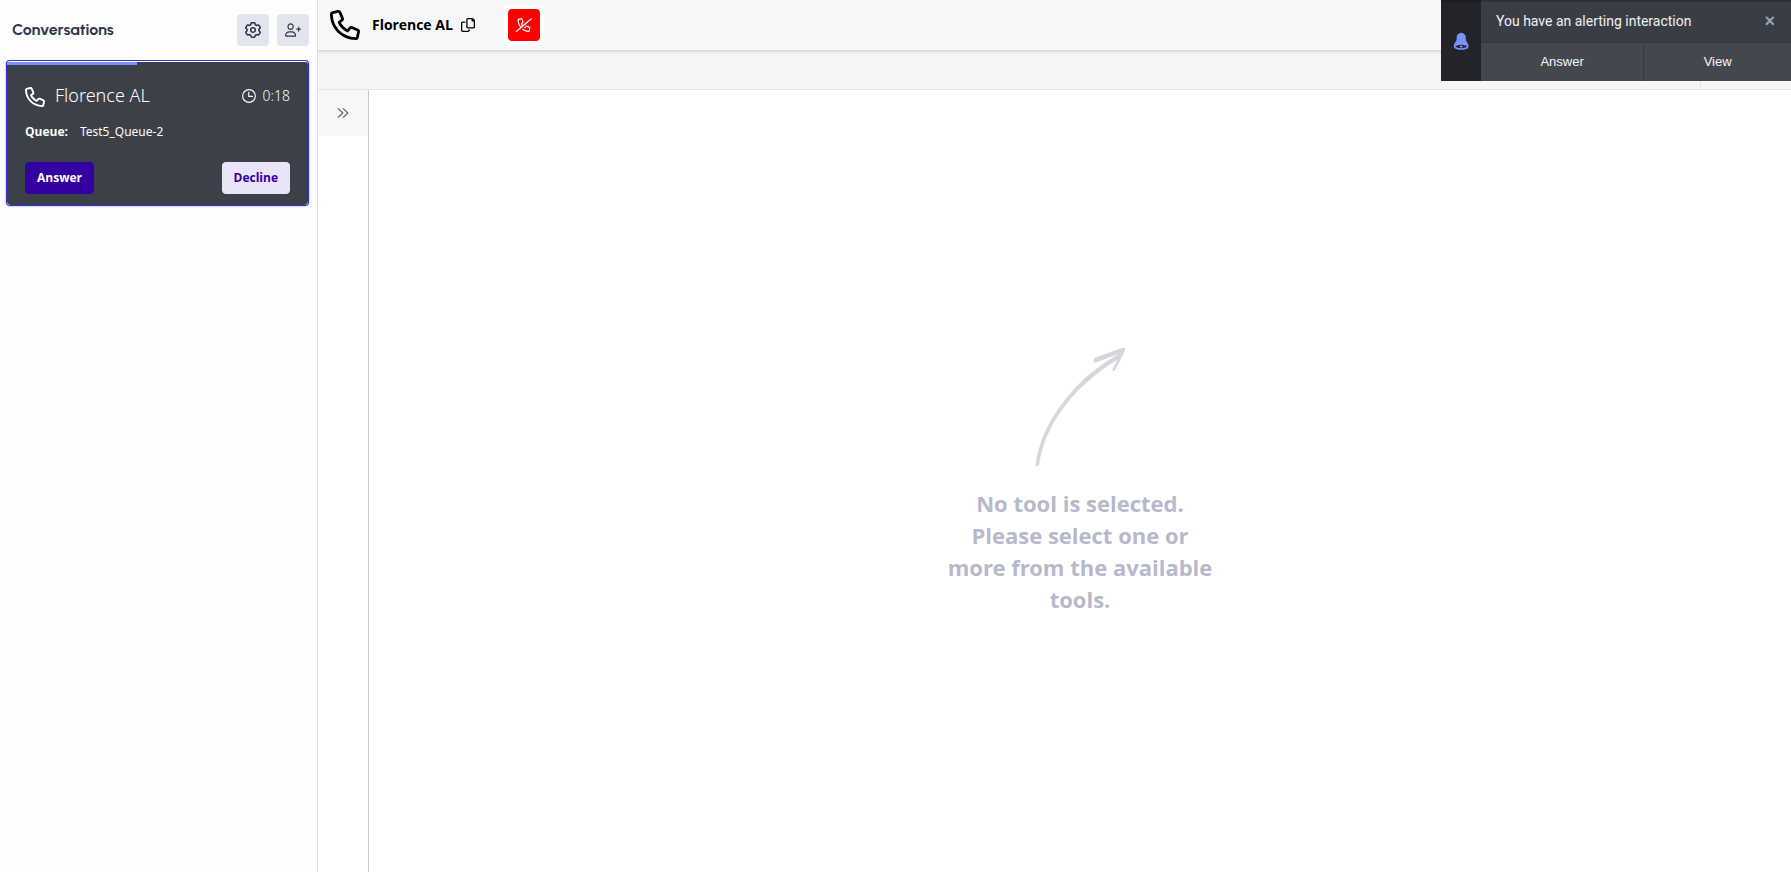
Make a call to the SmartAssist Number, purchased as part of the previous steps. After a successful Agent transfer of the call from SmartAssist to Genesys, the signed-in Genesys agent can accept incoming calls.
- Accept the call in Genesys by clicking the Answer button.
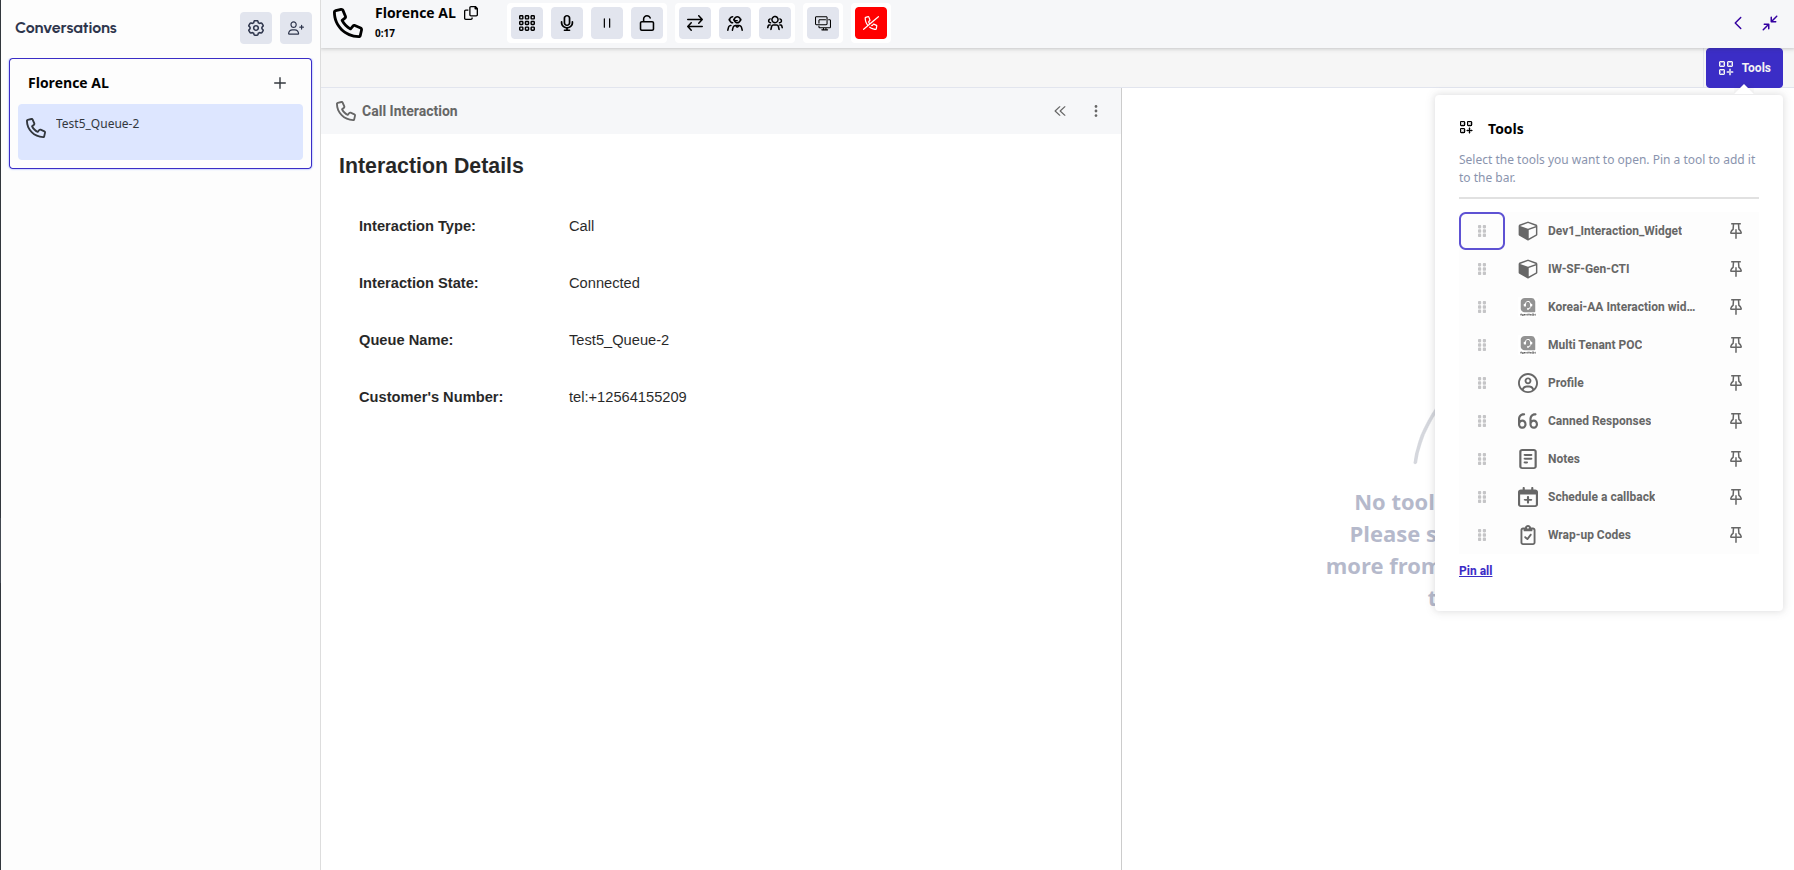
- Once the call is accepted, you can click on the available Tools & from there you can select the interaction widget, which you configured in the earlier steps.
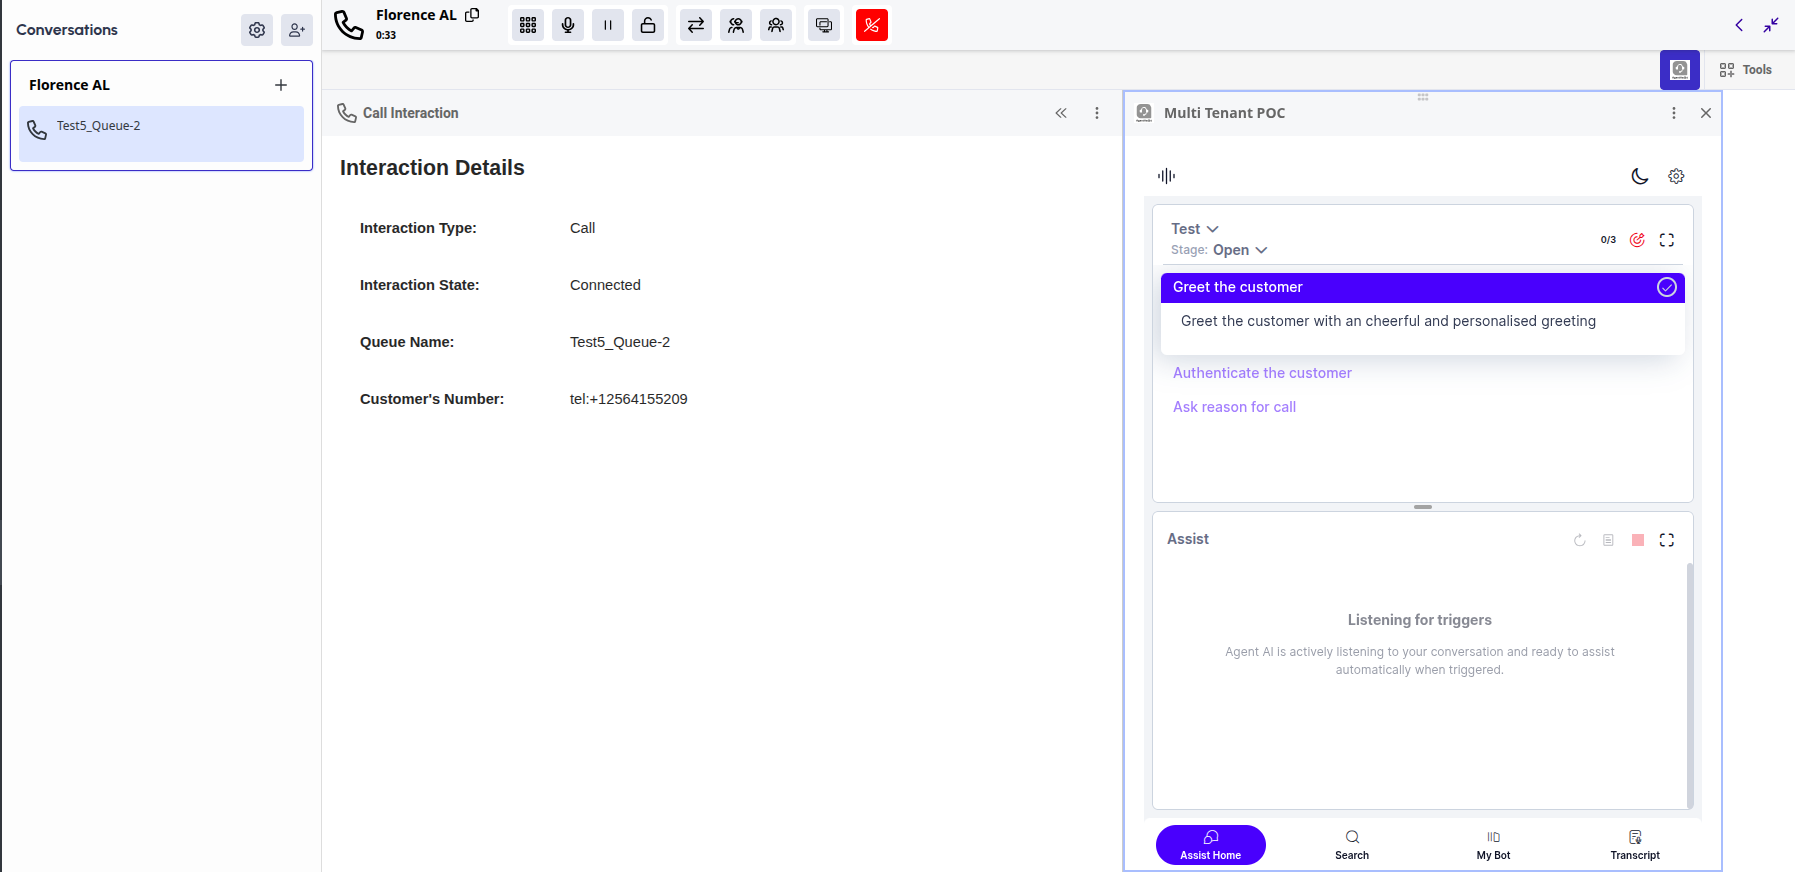
- Once you click the Interaction widget, you will see the Agent AI widget loading on the right side of the Genesys Agent desktop.
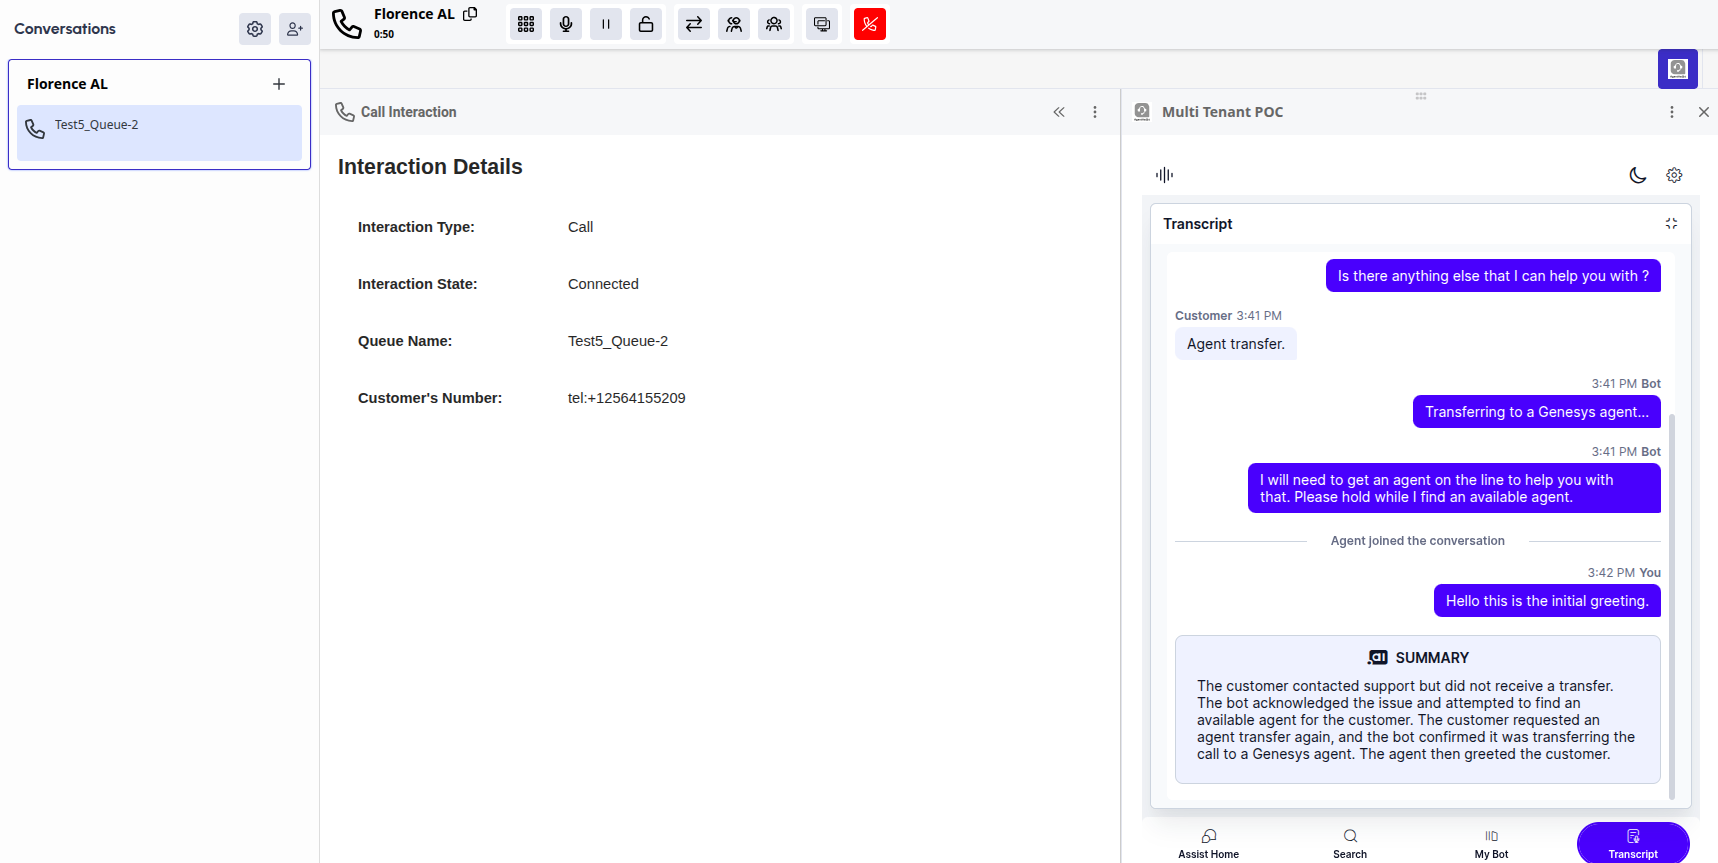
- If you switch to the Agent AI Transcript tab, you will see the user-bot history that happened between the user and the automation bot & also see a summary of the same. Also, all the real-time transcripts between the live agent and the user will be captured in the transcript tab.
Check the Interaction Details in SmartAssist
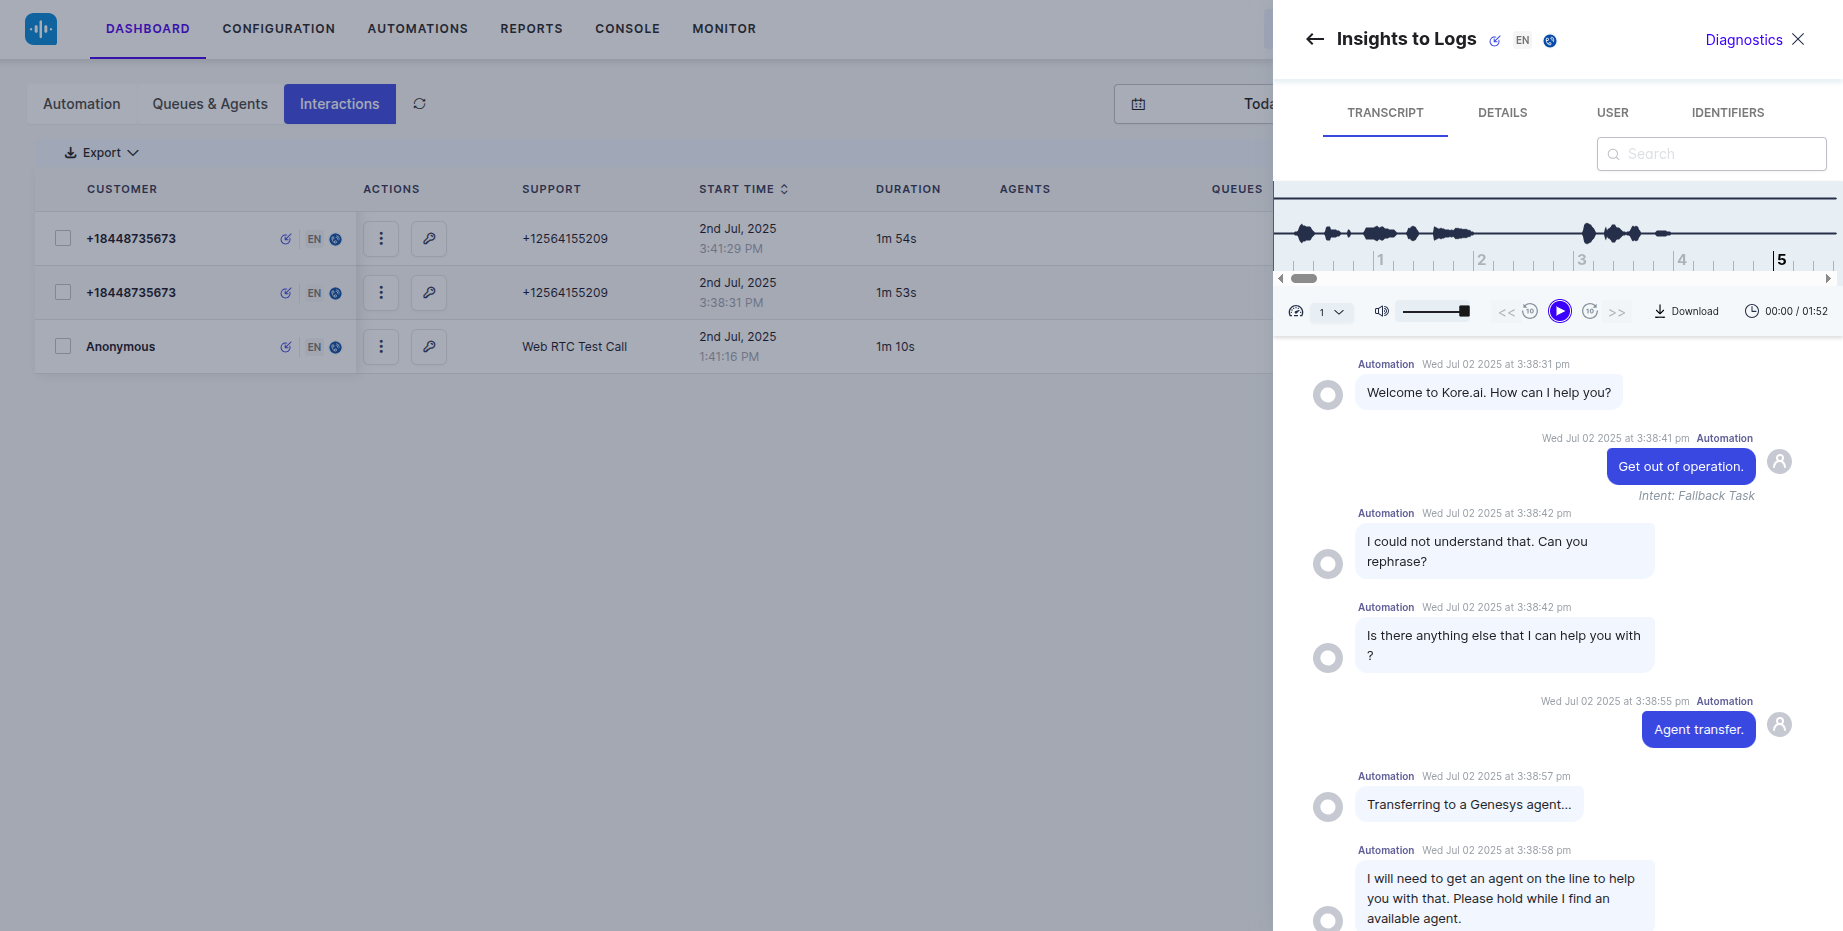
You can view all interaction details between the user and bot during the call and the conversation between the user and live agent after agent transfer in the SmartAssist dashboard:
