Introduction
This document describes the steps to set up SmartAssist/XO Contact Center in a basic scenario to use with AgentAI.
The following resources help us understand how SmartAssist/XO Contact Center works.
- SmartAssist Life Cycle Management document explains how the individual pieces fit together.
- SmartAssist Setup Guide document explains how a generic SmartAssist setup can be done. Since this example is only needed for setting up a basic handoff to agents (to try out Agent AI), readers should set up a basic Experience Flow that does a handoff to agents.
Getting Started
Steps needed to set up AgentAI for use in chat:
Prerequisite
An existing XO bot that can be used for AgentAI’s next-based action/dialog tasks. This bot should also have an intent(s) that lead to an agent transfer. This is not a hard pre-requisite but only the Coaching Engine & Playbook features will be usable without a pre-built bot.
Setup
Before we begin setup, it is important to note that every new SmartAssist account consists of a set of pre-built settings and a basic automation bot.
Importing the bot
The bot mentioned in the prerequisites section can be imported by going to Automations > Add Bot > Create a bot from scratch > I want to Import a Bot using bot definition & configuration files.
Enabling Use Cases for AgentAI
-
- Once the bot is imported, go to Configuration > Use Cases.
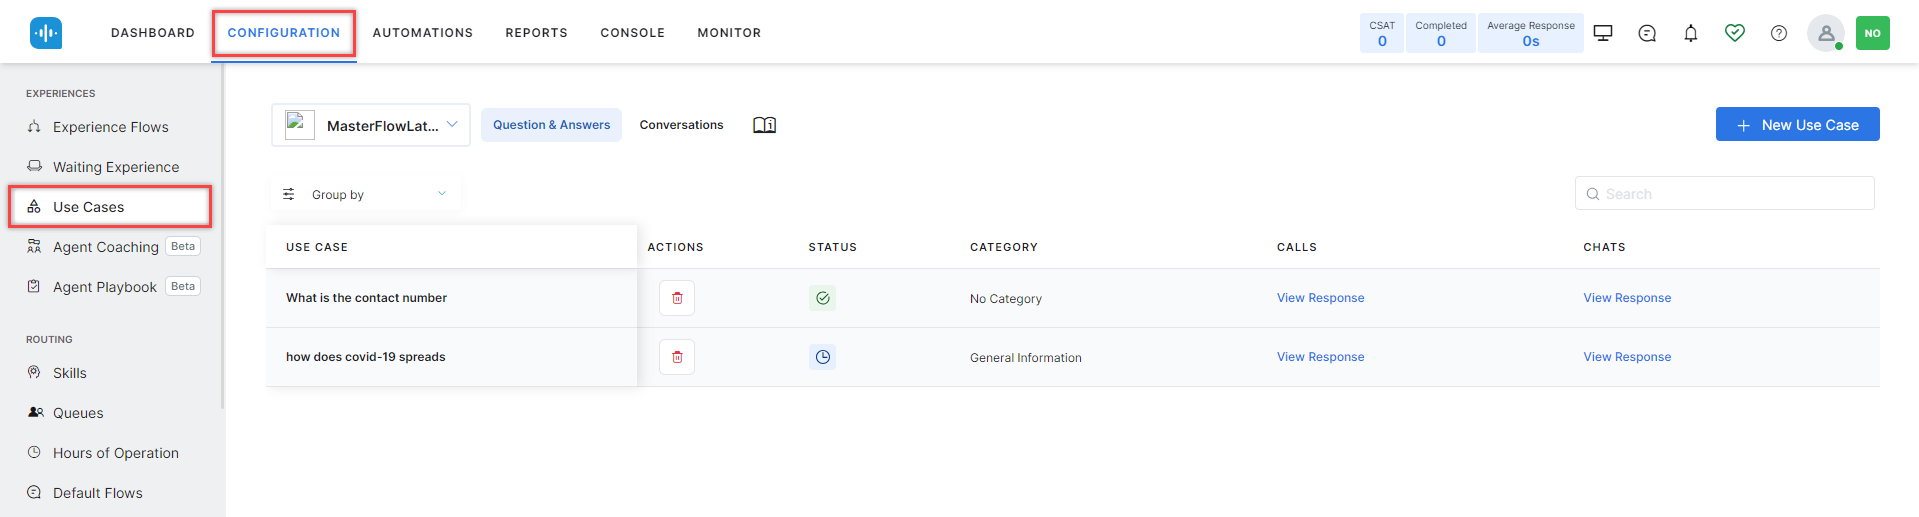
- Enable AgentAssist Use Case under each Use Case you want to use in AgentAI.
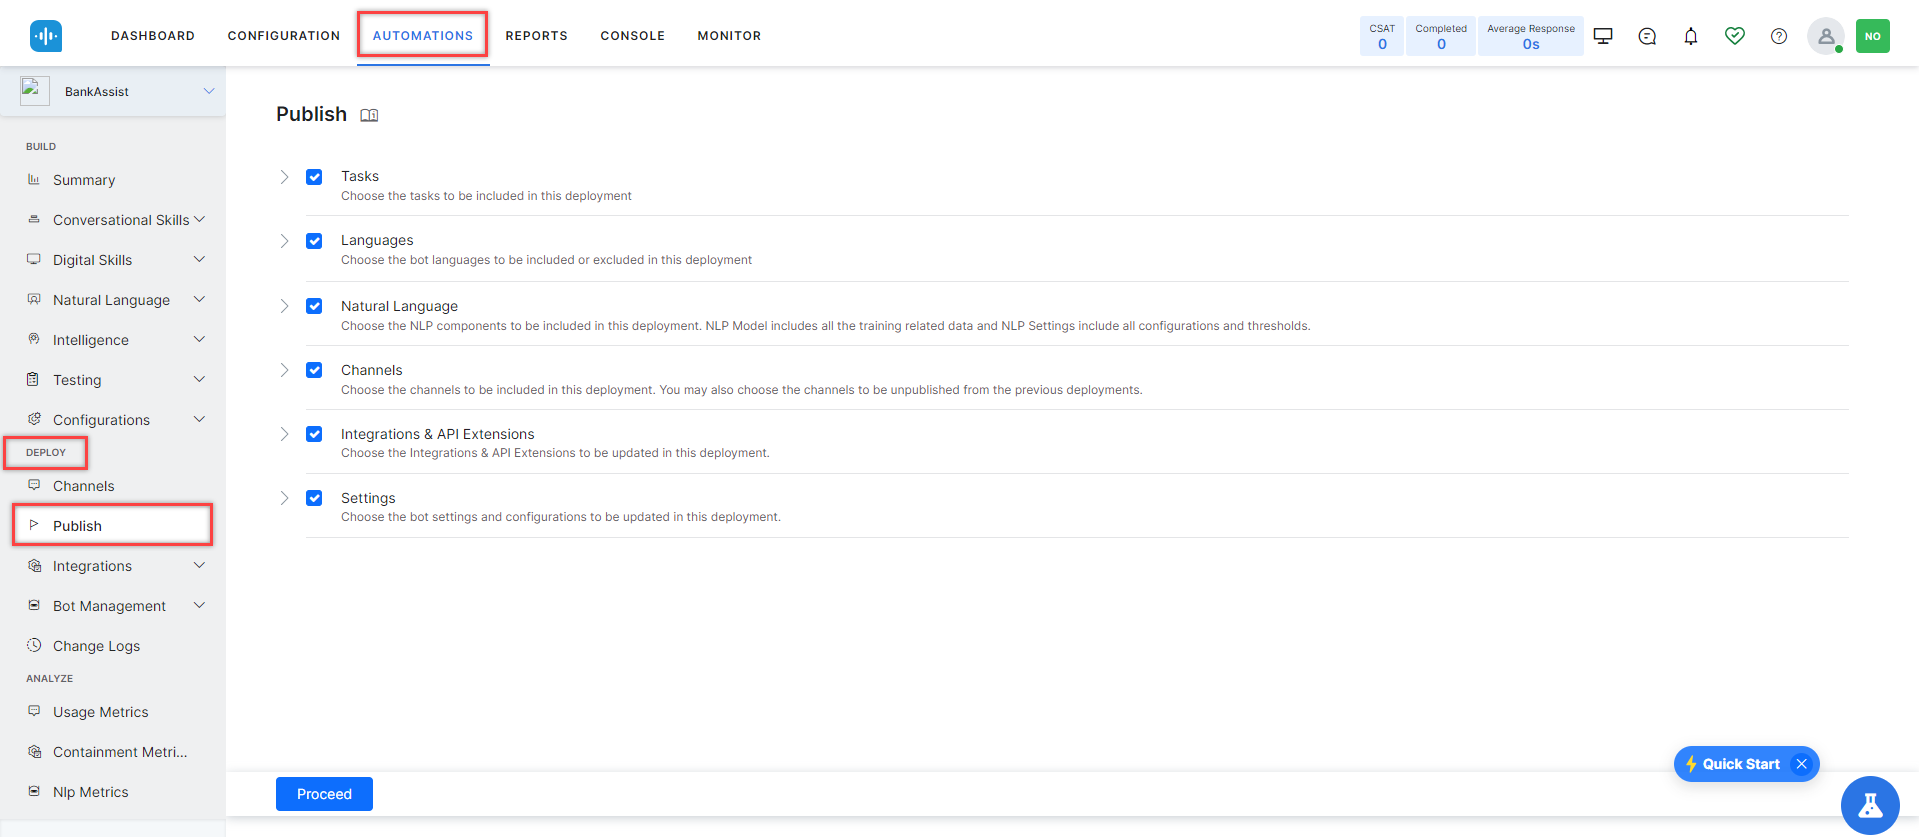
- Publish this bot by logging into the Bot Builder or through Automation > Open the bot > Deploy > Publish.
- Once the bot is imported, go to Configuration > Use Cases.
Experience Flows
- Create a new chat-based inbound experience flow with the following setup:
- Start node.
- Conversational Input Node (attach the bot mentioned in prerequisites or use the prebuilt SmartAssist default automation bot).
- Add 2 exits to the Conversational Input Node:
- Automation > This should be connected to the Run Automation Node.
- Agent Transfer > This should be connected to an Agent Transfer node. If needed, an AgentAI welcome task can be configured under AgentAssist settings.
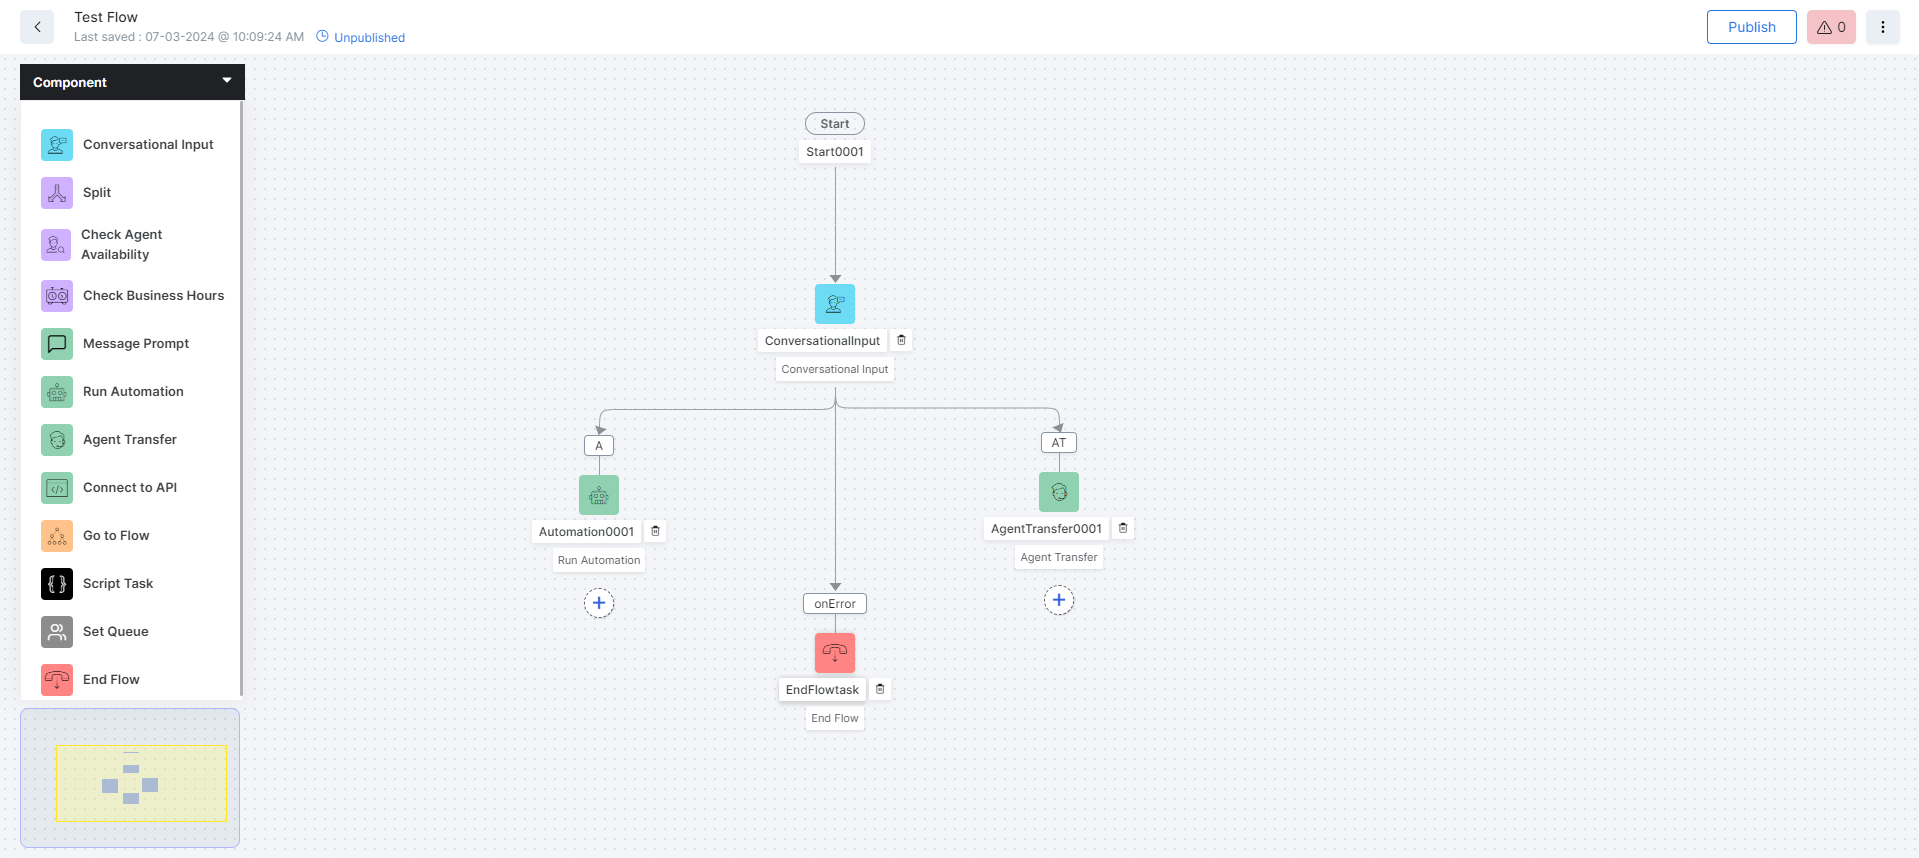
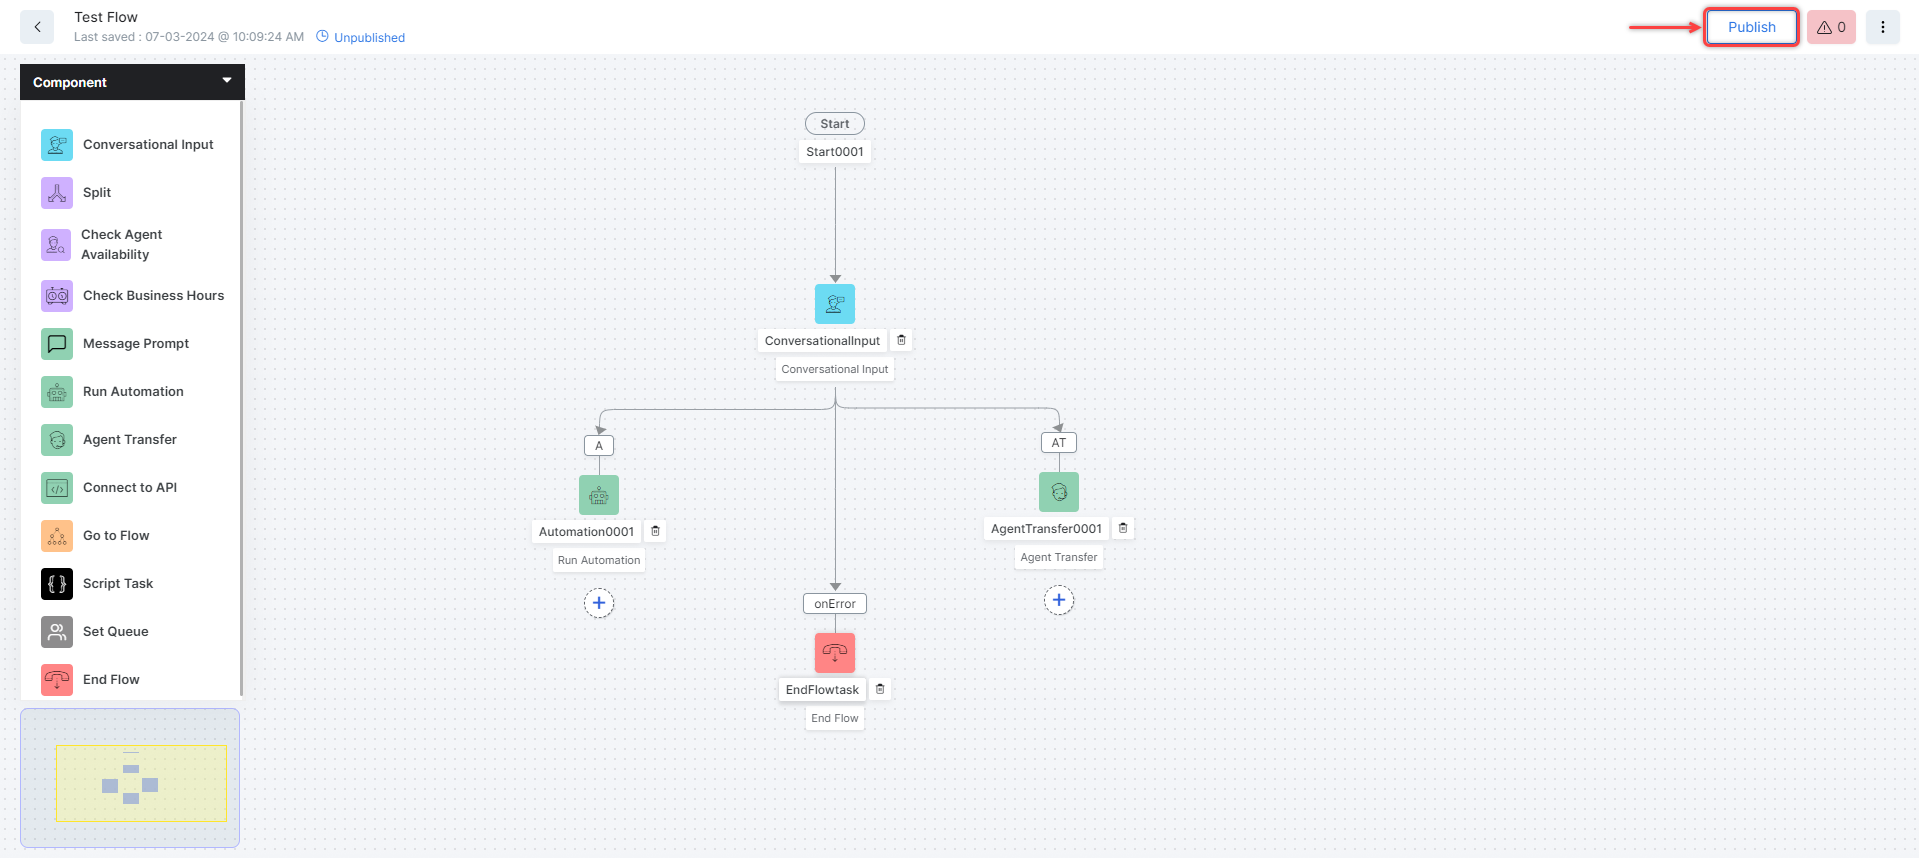
- Publish the flow. Ensure the flow is attached to the “Web/Mobile Client” channel.
Agents
Add agents under the Users section. Ensure that all agents added have been enabled for chat & voice (and have 1 or more than one slot assigned to them). Learn more.
These steps need to be completed in addition to the AgentAI setup Learn more.
Testing the Setup
- Login as an agent on the Agent Console.
- Go to Configuration > Channels > Chat > Web/Mobile Client. Click the redirect button beside the URL mentioned under Web Client details to initiate a test conversation, requesting an agent through the defined utterances for your test bot. If you use the default automation bot you can just say “I want to talk to an agent”
- If the setup is correctly done, you should receive a test conversation on your agent window.