Agent AI now enables channel-specific widget customization, letting users modify the widget’s layout as required. As you customize the widget, you can preview the changes on the right half of the page.
Steps to customize the widget’s layout
- Sign in to SmartAssist.
- Go to Configuration > System Setup > Widget Theming.
- Click to select a Channel – Chat, Voice, or Email.
- Select a language in the language dropdown list.
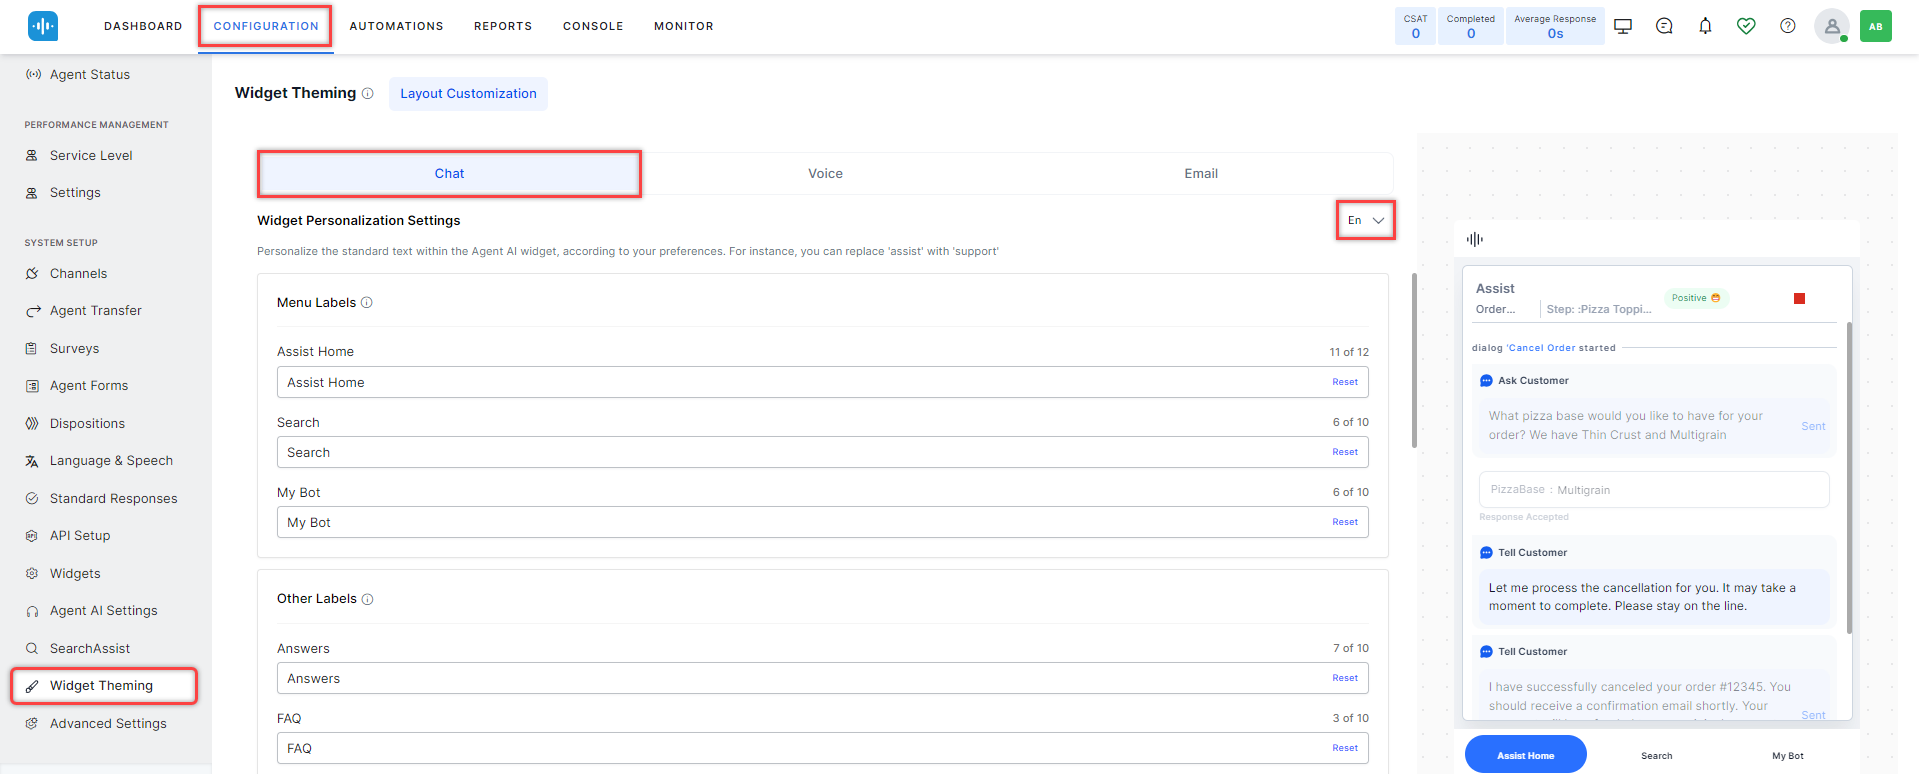
- Customize the layout as required:
- Menu Labels
- Other Labels
- Dialog Task Labels
- Assist Message Type
- Visibility Controls for Sent/Copied Messages
- Widget Menu Layout
- Assist Action Menu Layout
Menu Labels
In this section, you can customize all the widget menu names. The standard menu names are Assist Home, Search, My Bot, and Transcript (for Voice channels). As you modify the menu names on the left side of the page, you can preview your changes on the right side. In the following screenshot, Assist Home has been modified to My Assist:
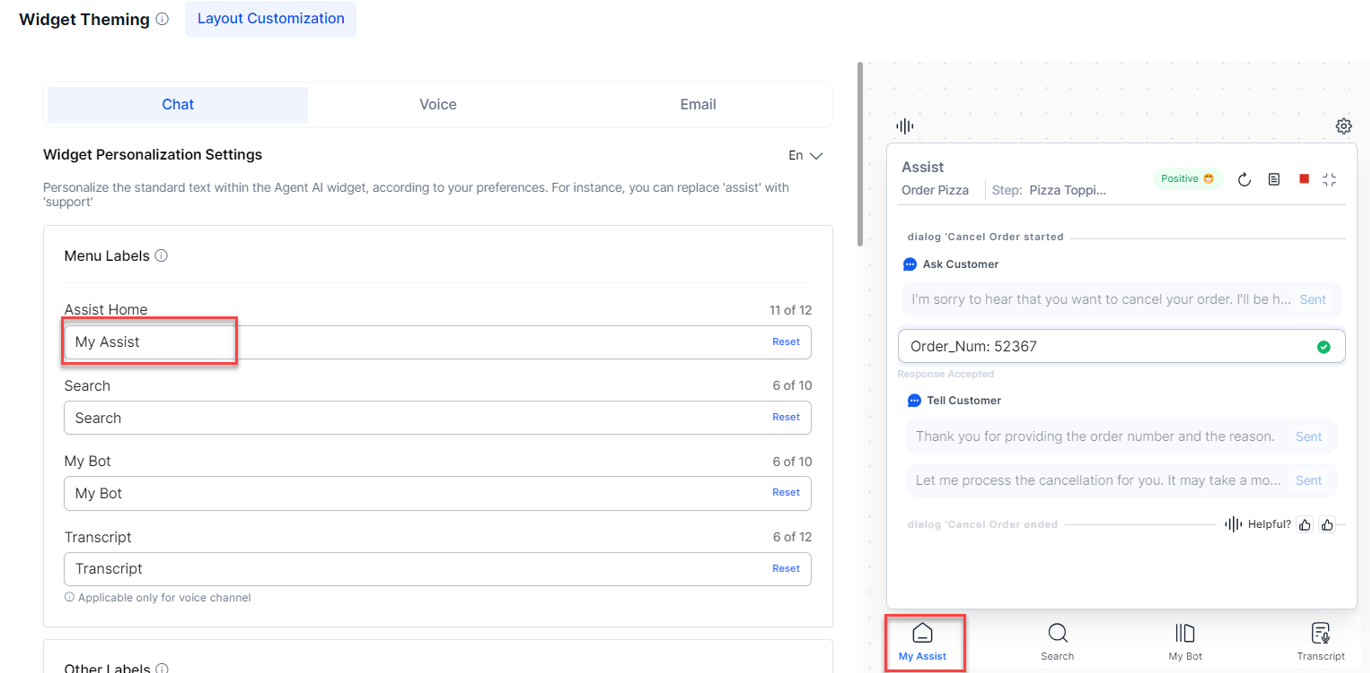
Similarly, you can modify the other menu names, such as Search, My Bot, and Transcript (for Voice channels), as required. Note that the Assist Home menu has a limit of 12 characters, and the other menus have a limit of 10 characters only. Click Reset to return to the default menu name.
Other Labels
This section lets you customize the labels related to dialog tasks. You can’t preview the changes as the dialog task runs in the background. In the following screenshot, the Answers label has been renamed as Articles:
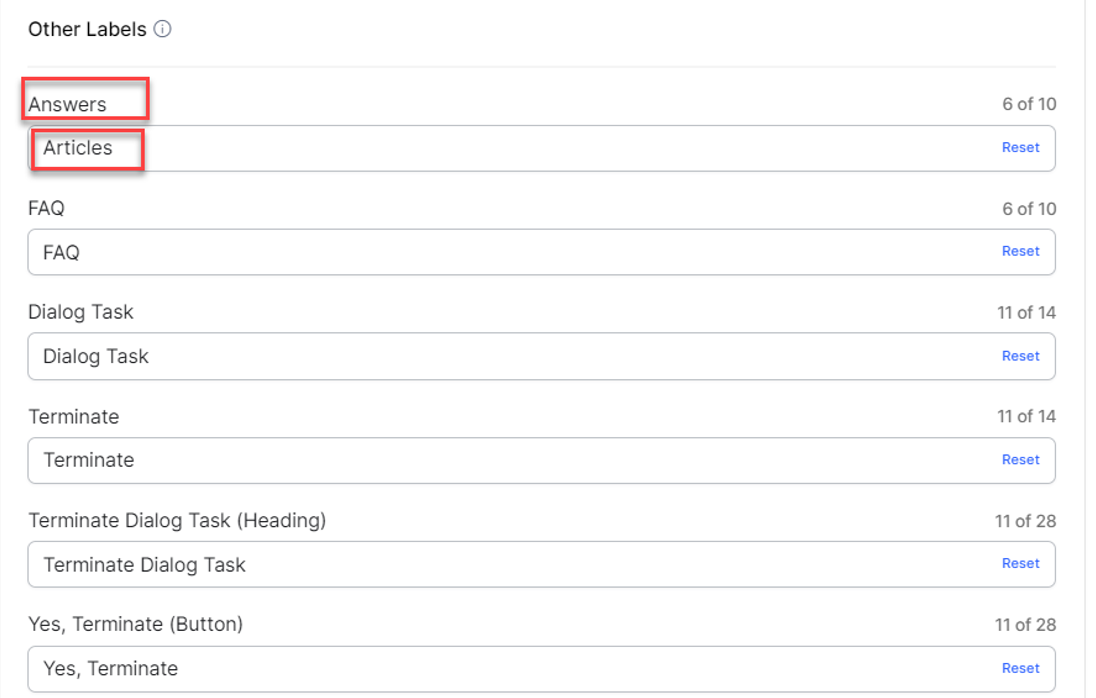
Similarly, you can modify the other labels like FAQ, Dialog Task, Terminate, Terminate Dialog Task (Heading), and Yes, Terminate (Button). Note that the Answers and FAQ labels have a limit of 10 characters, Dialog Task and Terminate have 14, and Terminate Dialog Task (Heading) and Yes, Terminate (Button) have 28. Click Reset to go back to the default label name.
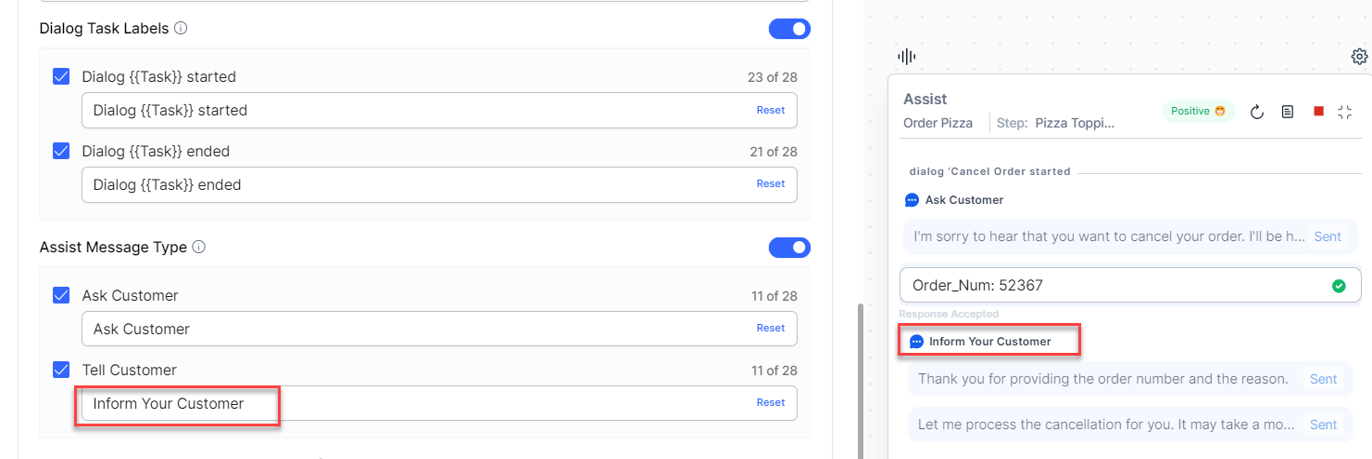
Dialog Task Labels
Here, you can customize the dialog task timeline, display, and labels. You can use {{Task}} as a placeholder for dynamic dialog names. You can disable this entire section by using the “toggle” button at the top and enable or disable either or both the labels (Dialog Started and Dialog Ended). In the following screenshot, Dialog {{Task}} started label has been renamed to Dialog {{Task}} began.

Note that both the Dialog {{Task}} started and Dialog {{Task}} ended labels have a limit of 28 characters each. Click Reset to go back to the default label names.
Assist Message Type
Here, you can customize the Assist message type displays and labels. You can disable this entire section by using the “toggle” button at the top, or enable or disable either or both the Ask Customer or Tell Customer labels. In the following screenshot, the Tell Customer label has been renamed as Inform Your Customer.
Visibility Controls for Sent/Copied Messages
This lets you control the opacity (visibility) of the Sent and Copied messages’ backgrounds. You can view the opacity percentage and preview the messages’ background visibility. By default, the opacity percentage is set to 50%.
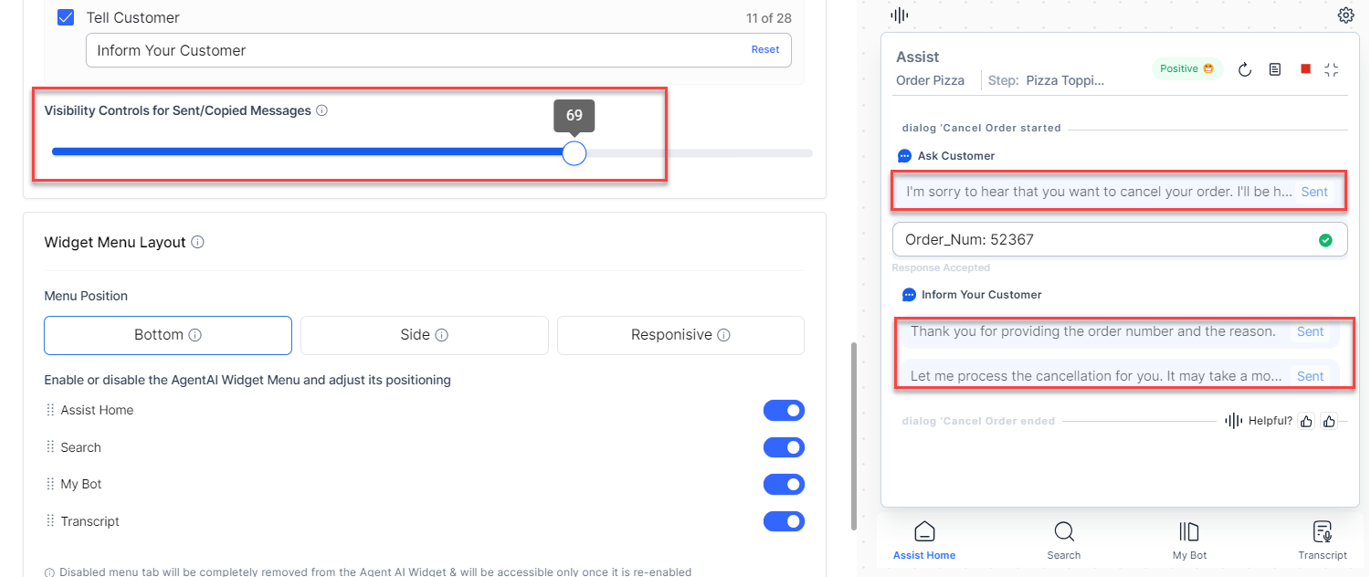
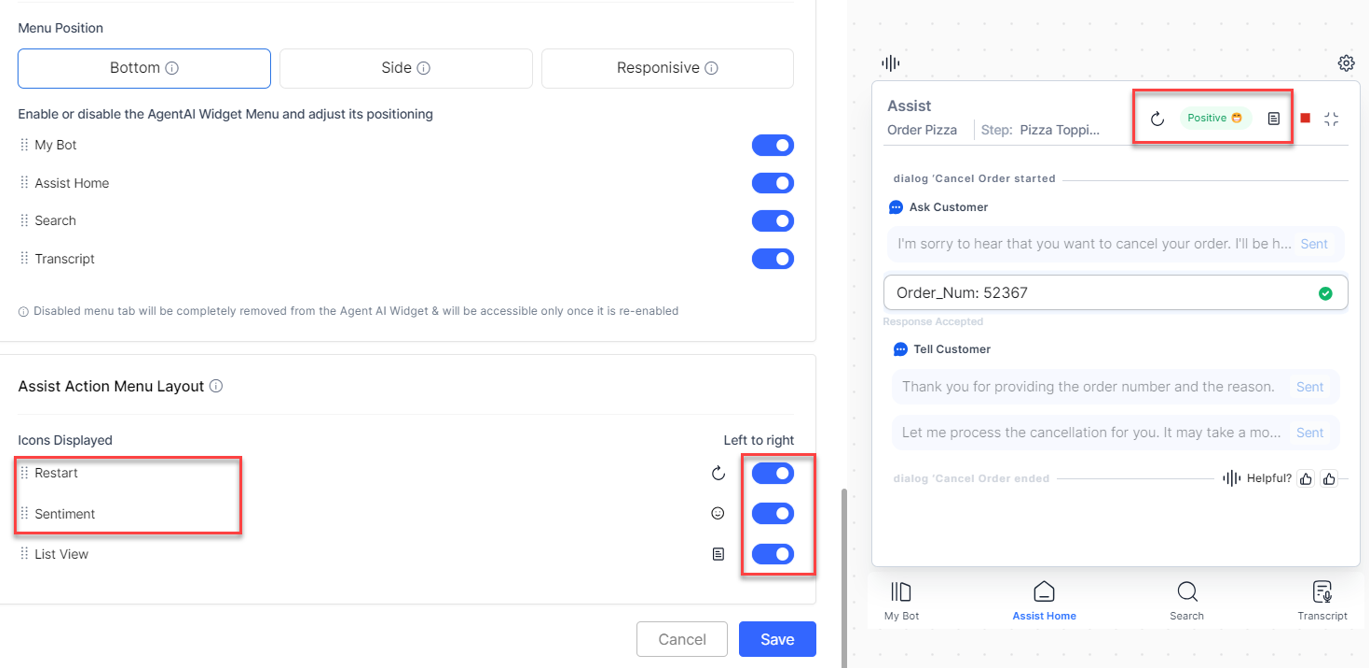
Widget Menu Layout
This section lets you enable or disable the Agent AI widget menus – Assist Home, Search, My Bot, and Transcript (for the Voice channel). You can position the menus at the bottom or the side by clicking the Bottom or Side options at the top, or shuffle the menus with the drag-and-drop action. To automatically position the menus based on the pixel level, select the Responsive option. If the pixel size is less than 600, the menus move to the bottom, and for more than 600, the menus move to the left. The following screenshot shows a disabled Search menu, Side positioning of the enabled menus, and the shuffled Assist Home menu with the My Bot menu:
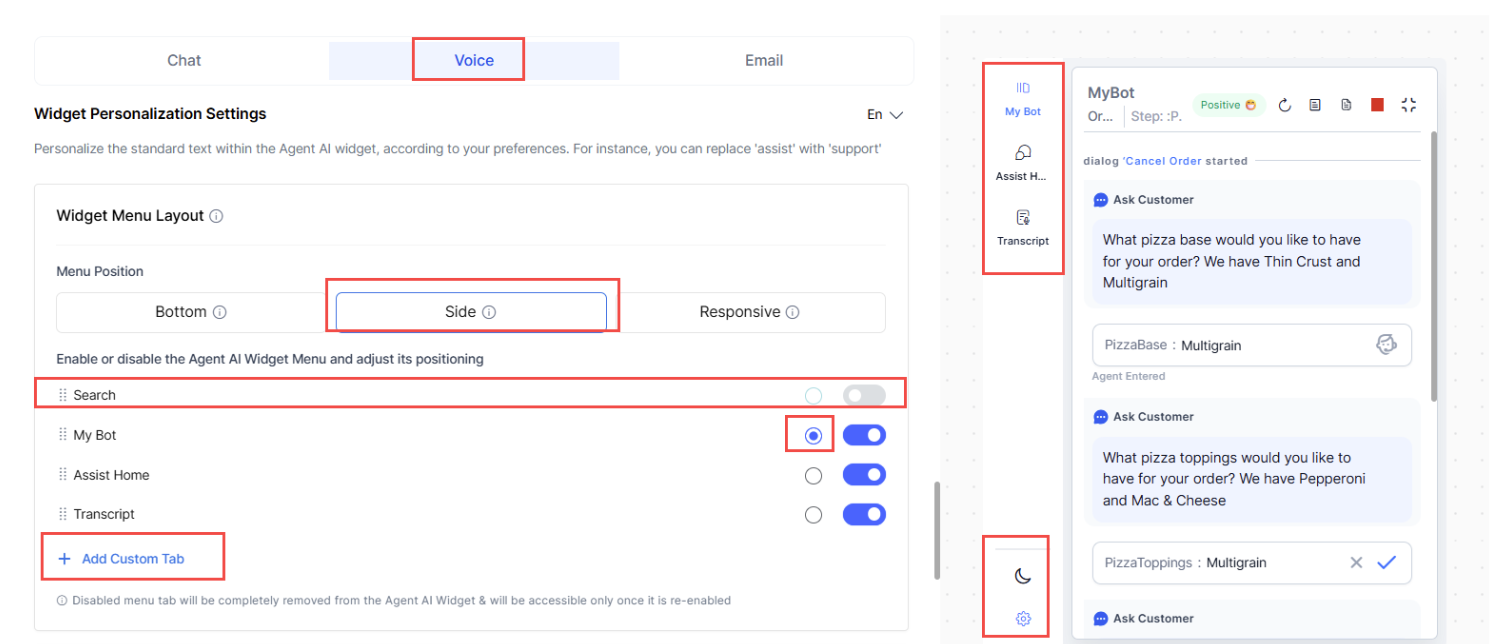
The disabled menus do not appear on the widget unless you enable them again.
Assist Action Menu Layout
This section lets you enable, disable, and customize the placement of the action buttons in the Assist tab. You can use the toggle to enable or disable the buttons and the drag-and-drop action to shuffle their position. The following screenshot shows all enabled action buttons with the Restart button position shuffled with the Sentiment button: