Overview
The wallboard is a powerful tool for monitoring and analyzing data. It provides a comprehensive view of center operations and performance metrics across all queues as trends develop throughout the day.
Create a Wallboard
Steps to create a wallboard:
- Go to CONFIGURATION > SYSTEM SETUP > Wallboards.
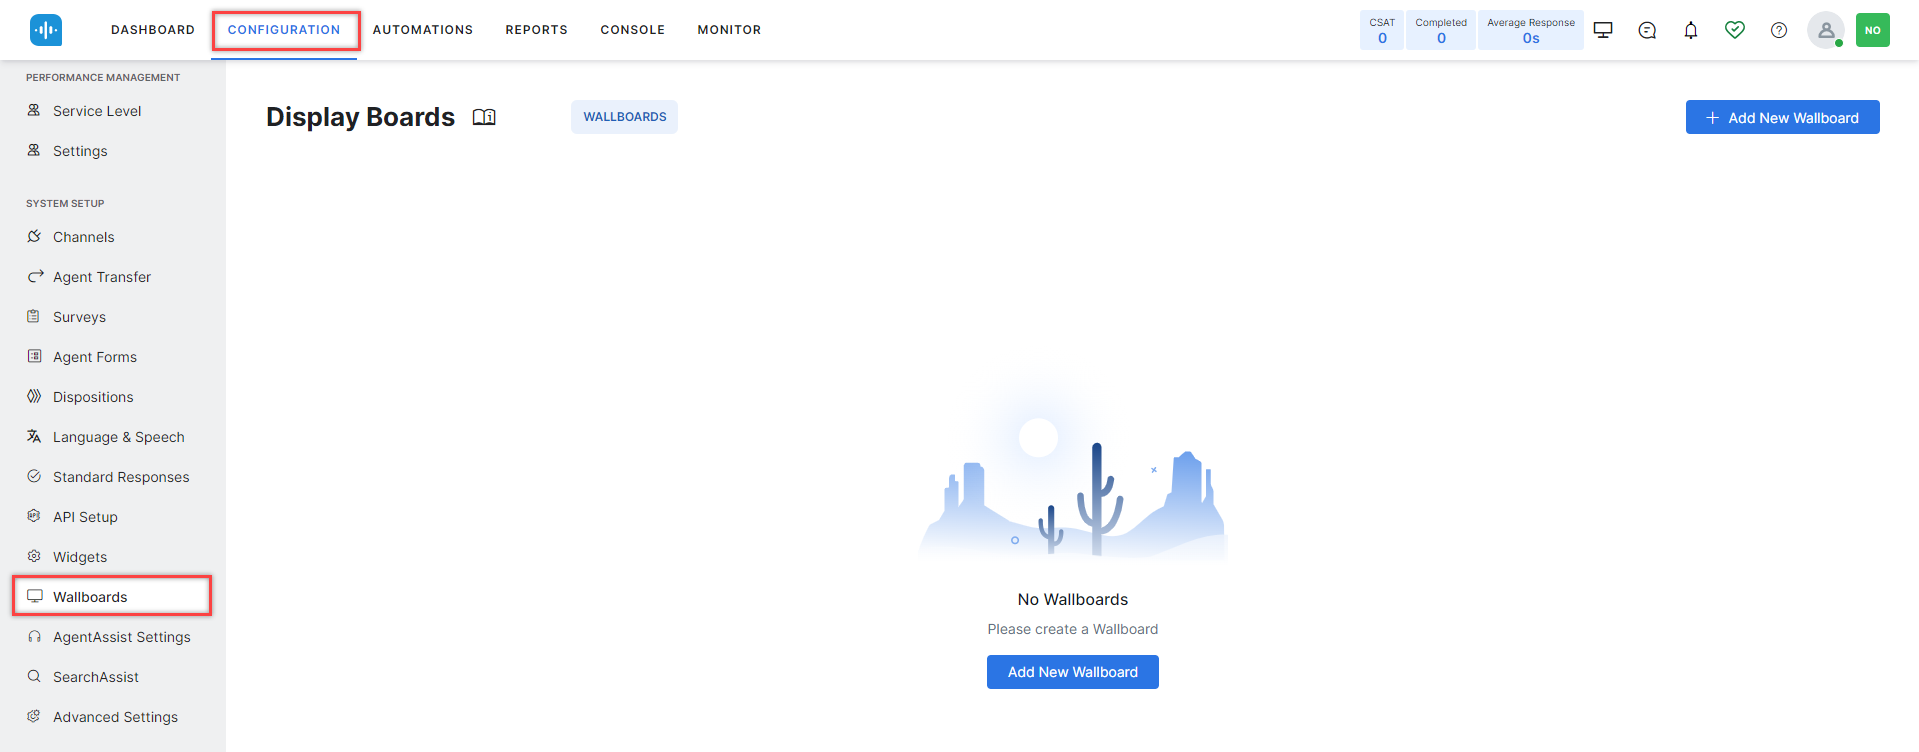
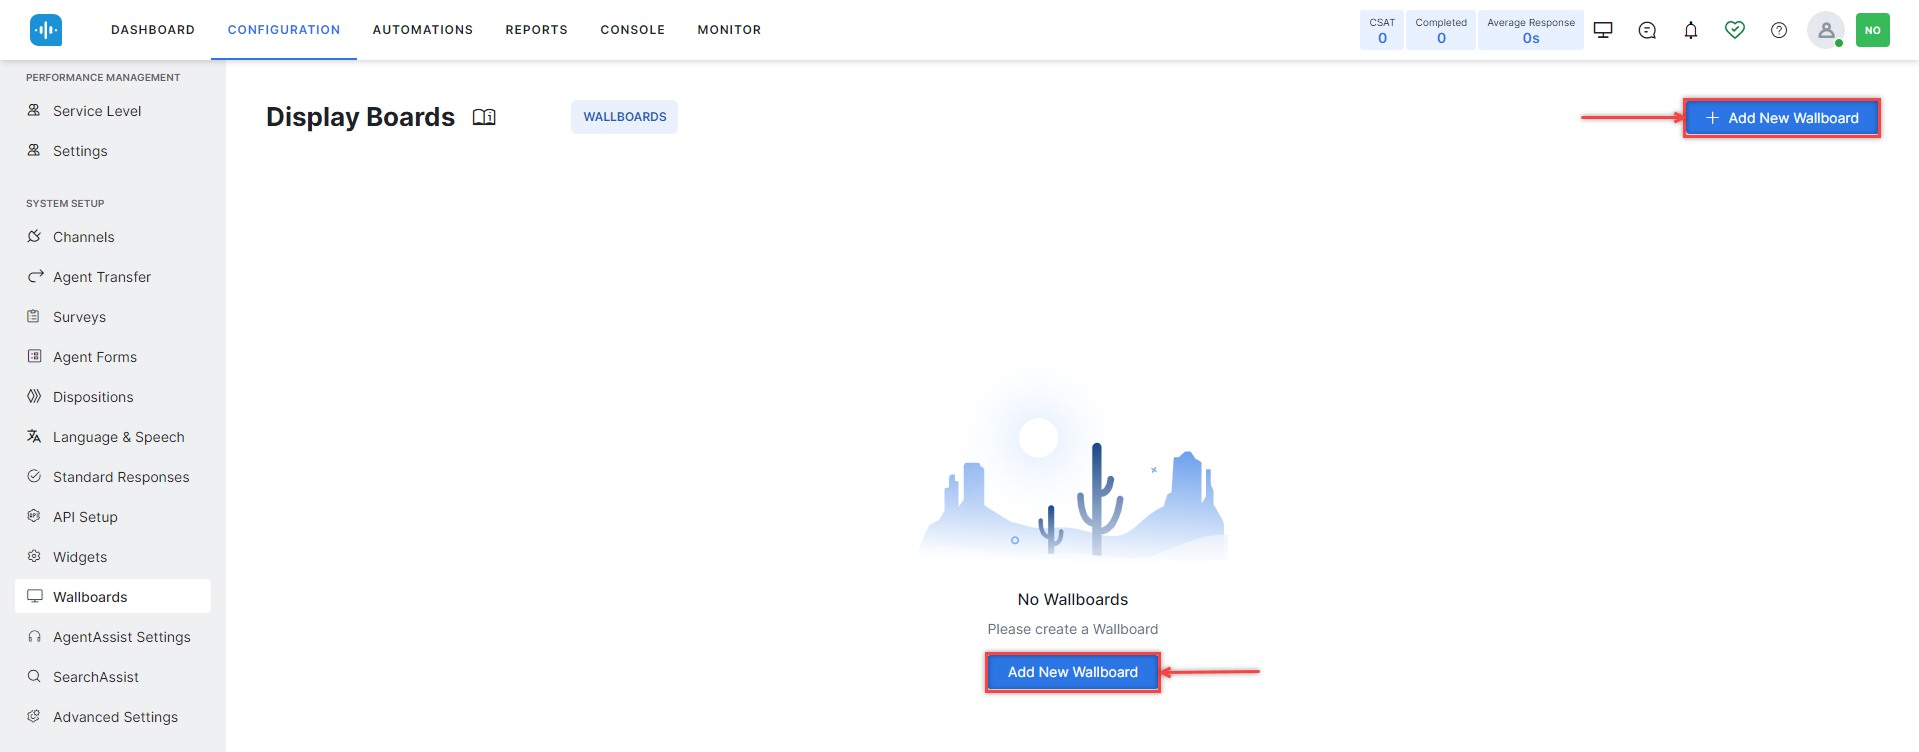
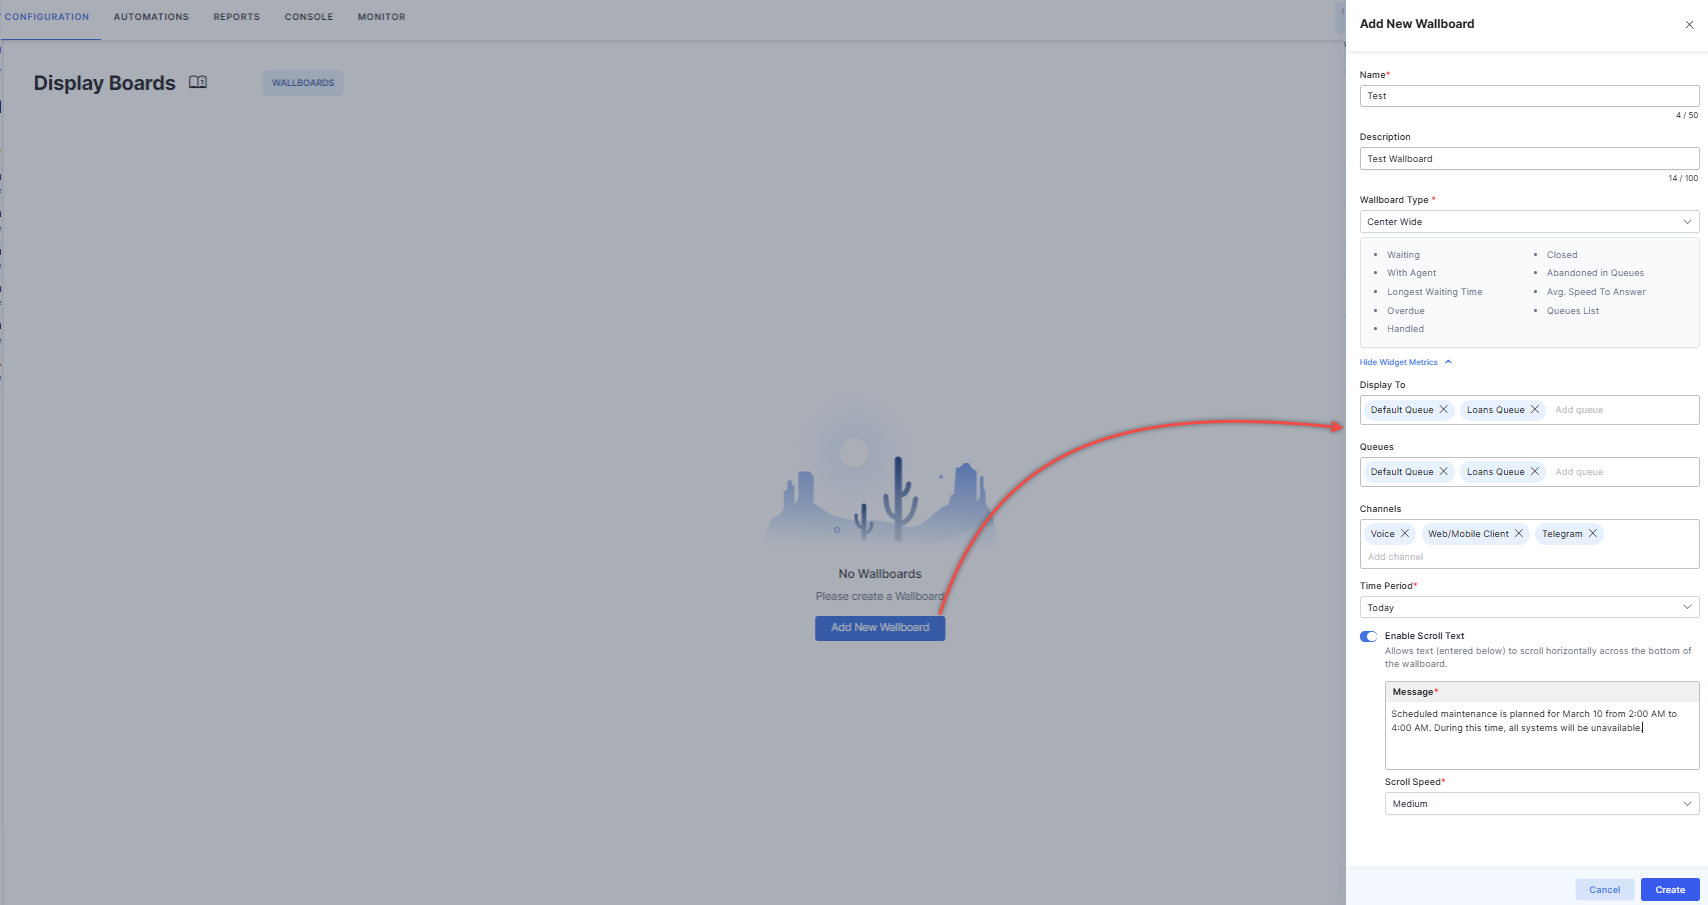
- Click +Add New Wallboard. The Add New Wallboard dialog box is displayed.
- Enter the following details to create the wallboard:
- Name: Enter the name of the wallboard.
- Wallboard Description (optional): Enter the description of the wallboard.
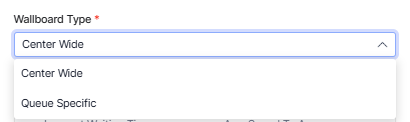
- Wallboard Type: Center Wide (default), Queue Specific.
Center Wide
- Display to: Select the queues to which the data will be shown.
- Queues: Select the queues from which the data will be shown. If you do not select any queues, all queues will be selected by default.
- Channels: Select the channels for which the data will be shown. If you do not select any channels, all channels will be selected by default.
- Time Period: Select the duration to display data from the dropdown options.
- Last 15 minutes,
- Last 30 minutes,
- Last 1 hour,
- Last 2 hours,
- Last 8 hours,
- Last 12 hours,
- Today.
- Enable Scroll Text (Optional): Turn on the Enable Scroll Text toggle to add text that scrolls horizontally at the bottom of the wallboard page. Enter the text in the Message dialog box and select the Scroll Speed from the following options:
- Slow,
- Medium,
- Fast.
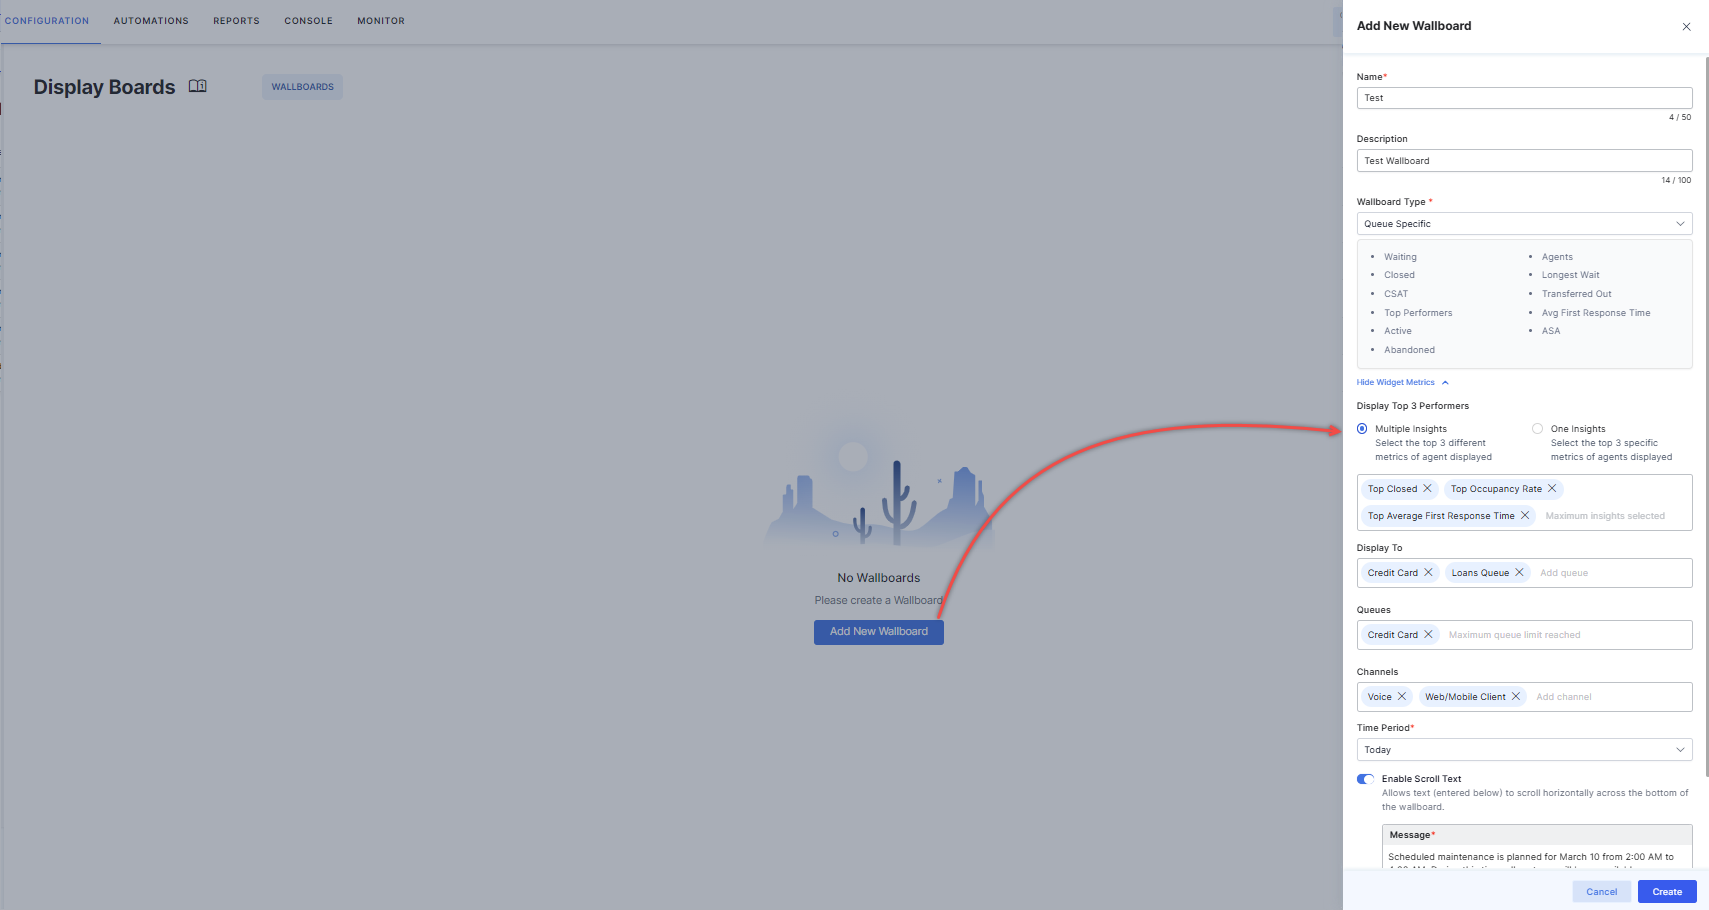
Queue Specific
- Display Top 3 Performers: Select an option and choose the top three insights from the available categories.

|
Multiple Insights
Select the top 3 different metrics of agents displayed |
One Insight
Select the top 3 specific metrics of agents displayed |
|
Insights |
|
| Top Closed
Agents with highest number of closed conversations |
Top Closed |
| Top Answered
Agents with highest number of answered conversations |
Top Answered |
| Top CSAT
Agents with highest customer satisfaction rating |
Top CSAT |
| Top Occupancy Rate
Agents with higher occupancy rate |
Top Occupancy Rate |
| Top Average First Response Time
Agents with best first response time |
Top Average First Response Time |
- Display to: Select the queues to which the data will be shown.
- Queues: Select the queue from which the data will be shown.
Note: Only one queue can be selected. - Channels: Select the channels for which the data will be shown. If you do not select any channels, all channels will be selected by default.
- Time Period: Select the duration to display data from the dropdown options.
- Last 15 minutes,
- Last 30 minutes,
- Last 1 hour,
- Last 2 hours,
- Last 8 hours,
- Last 12 hours,
- Today.
- Enable Scroll Text (Optional): Turn on the Enable Scroll Text toggle to add text that scrolls horizontally at the bottom of the wallboard page. Enter the text in the Message dialog box and select the Scroll Speed from the following options:
- Slow,
- Medium,
- Fast.
- Click Create. A confirmation message is displayed and the wallboard is created.
[/us_message]Note: The Wallboard type cannot be changed once the wallboard is created. [/us_message]
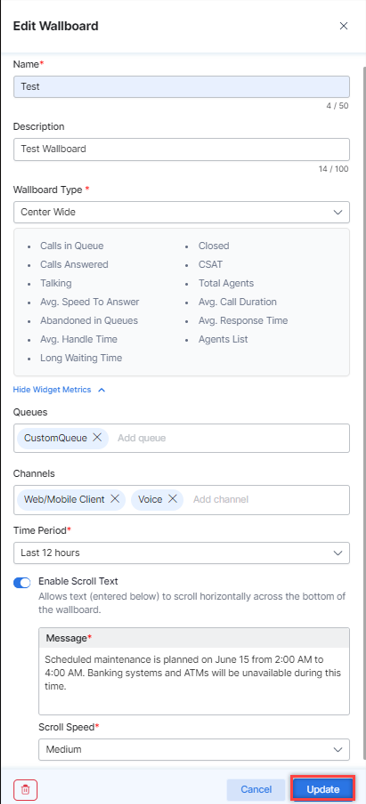
Edit a Wallboard
Steps to edit a wallboard:
- Click the Edit button under Actions.

- Make the required changes and click Update.
Delete a Wallboard
Steps to delete a wallboard:
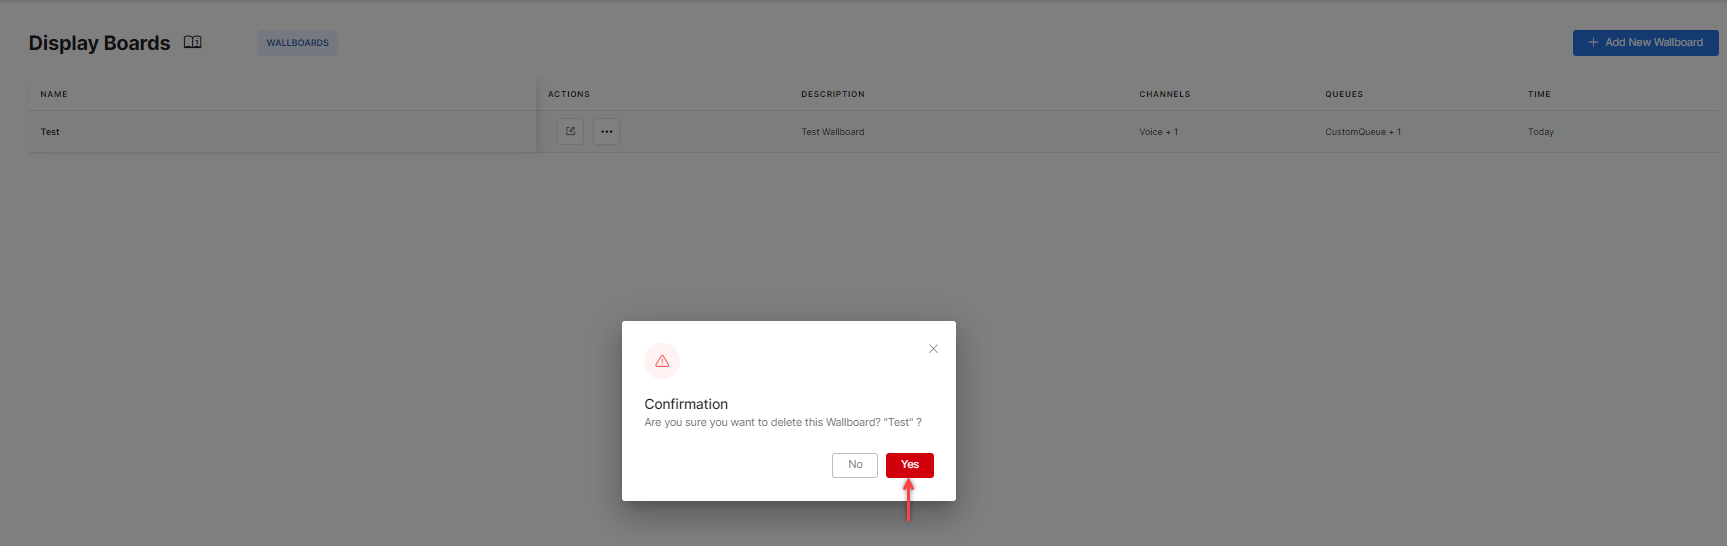
- Click (…) and click the Delete (bin) icon.

- A confirmation window is displayed. Click Yes to confirm.