
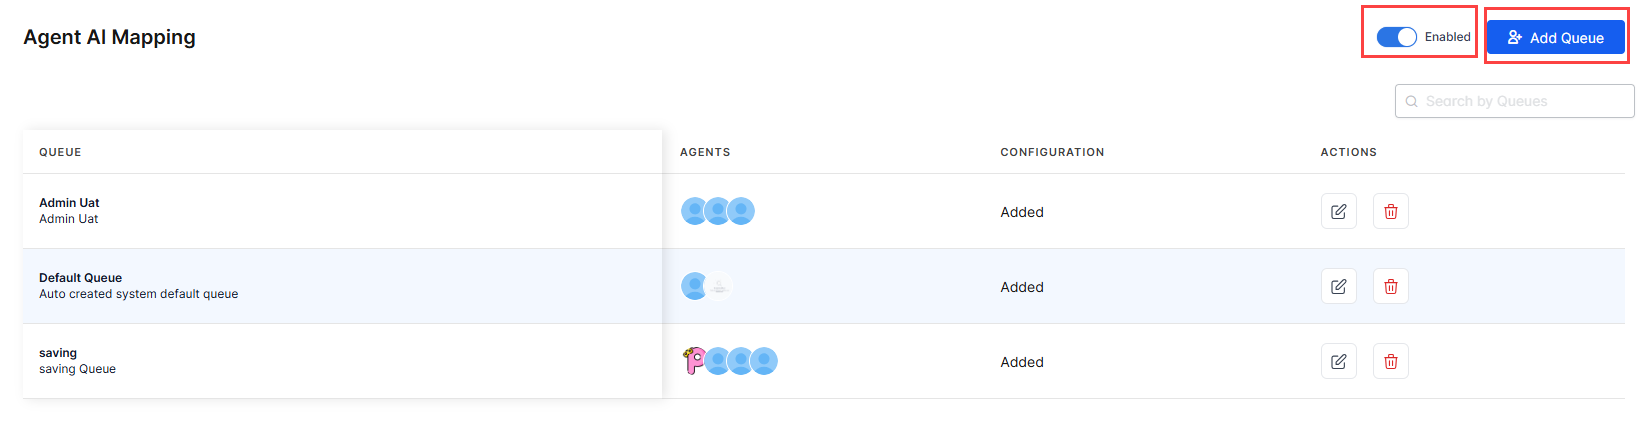
The Agent AI Mapping feature lets administrators assign dialog tasks to specific queues. This controls which dialog tasks agents see in the Proactive mode (Assist tab) and in the Library during runtime, including transfer scenarios. At runtime, agents see only the dialog tasks assigned to their queue, ensuring a streamlined and focused experience.
Note: This feature is available only to SmartAssist users at this time.
Add or Delete a Queue Configuration
The Agent AI Mapping section displays queues and agent information created in SmartAssist (Configuration > Routing > Queues). This section describes how to add and delete queue configurations.
To configure dialogs to queues:
- Sign in to SmartAssist.
- Go to Configuration > System Setup > Agent AI Mapping.
- Use the Agent AI Mapping toggle to enable it, if disabled.
- Click Add Queue.
- Select the queue/queues you want to add. Note that previously added queues do not appear in the selection list, unless they are deleted from the Agent AI mapping dashboard.
- To select all available queues, click the global checkbox beside the Queues header.
- To search for an available queue, enter the queue name in the search box.
- Click Add selected.
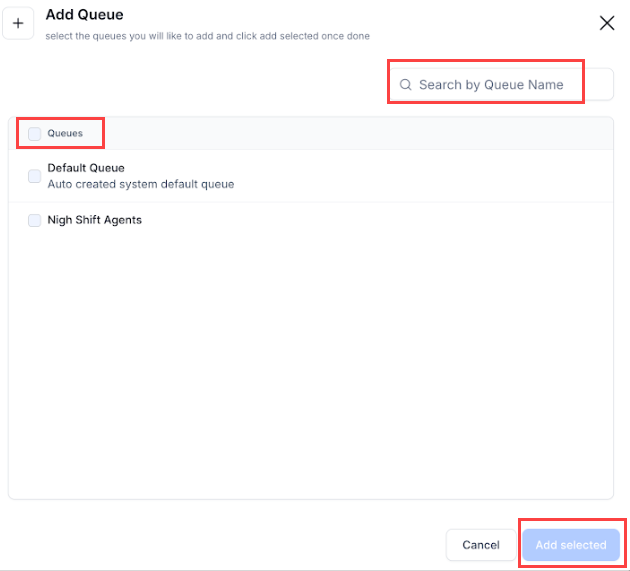
- The newly added queue/queues appear in the list, with a warning message prompting to complete the configuration for them. Only the configured queues are available to agents at runtime.

Note: Agents assigned to a queue during its creation appear by default, and the agent-to-queue assignment is controlled through SmartAssist. For more information, see this section.
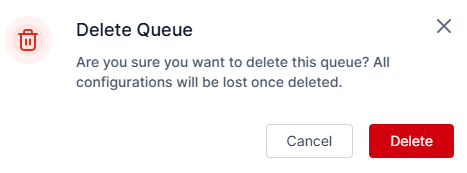
To delete a queue, click the “delete” button against it, and then click Delete on the confirmation message:
Assign Bots, Channels, Languages, and Dialog Tasks
This section describes the process of assigning bots, channels, languages, and dialog tasks to a queue. To do that:
- Click the “edit” button against the newly added queue.
- Perform the following tasks:
- Click to select a channel—Chat, Voice, or Email.
- Select a language from the language list. The language selected during queue creation appears by default, but you can change it, if required.
- Select a bot from the Bot list.
- Select one of the following options:
- Select Allow Dialog Tasks, if you want selected dialog tasks to appear at runtime.
- Select Don’t Allow Dialog Tasks, if you don’t want dialog tasks to appear at runtime.
- If you select Allow Dialog Tasks, proceed with the following:
- Select the dialog tasks available for the bot.
- Click Select All, to select all available dialog tasks. The number of selected dialog tasks appear next to the Dialog Task section.
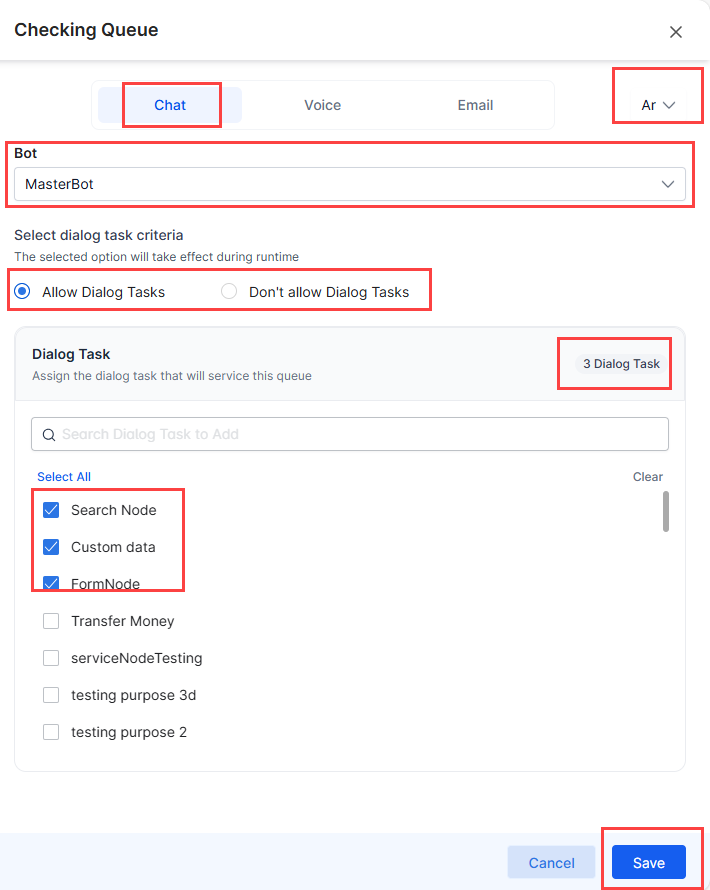
- Click Save.
Edit Queue Configuration
This section describes the process of editing an available queue configuration. To do that:
- Click the “edit” button against a queue you want to modify.
- Select a bot from the Bot list.
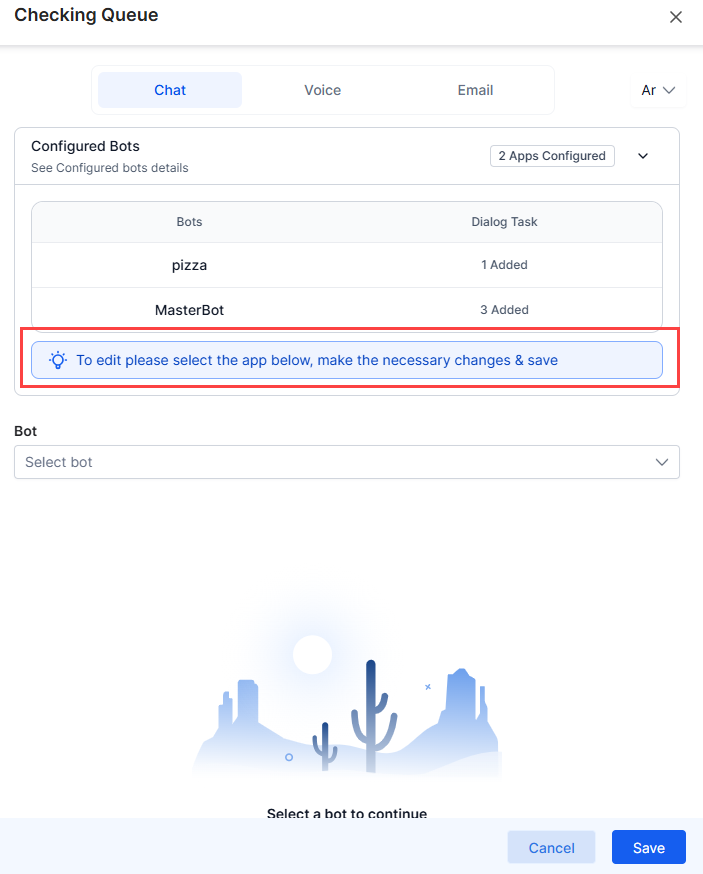
- Make the necessary changes, and then click Save.