GETTING STARTED
Introduction to SmartAssist
Glossary
Minimum System and Browser Requirements
SmartAssist Lifecycle Management
SmartAssist Setup Guide
Sign Up for SmartAssist
Setup SmartAssist for Use With AgentAssist
Release Notes
Recent Updates
Previous Versions
Frequently Asked Questions (FAQ)

EXPERIENCE DESIGNERS
Flow Designer
Introduction
Create Experience Flows
Navigate the Flow Designer
Experience Flow Nodes
Introduction
Node Types
Start
IVR Menu
IVR Digit Input
Conversational Input
Split
Check Agent Availability
Check Business Hours
Message Prompt
Run Automation
Agent Transfer
Connect to API
Go to Flow
Deflect to Chat
Script Task
Set Queue
End Flow
Waiting Experience
Conversation Automation
Testing Widget
Use Cases
Overview
Questions & Answers
Conversations

ADMINISTRATORS
Account Management
Switch Account
Invite Developers to an Account
Routing
SmartAssist Routing
Skills
Skill Groups
Queues
Hours of Operation
Default Flows
User Management
Users
Agent Groups
Agent Settings
Role Management
Agent Status
System Setup
Channels
Voice
Chat
Email
Limitations With Accounts Using AudioCodes
Agent Transfer
Surveys
Agent Forms
Dispositions
Language & Speech
Overview
Language Management
Voice Preferences
Hold Audio
Standard Responses
Widgets
Utils
AgentAssist Settings
SearchAssist
Widget Theming (Layout Customization)
Advanced Settings
Co-Browse Settings
Community WFM (Beta)
Automatic Conversation Summary (Beta)
Intelligent Agent Tools
Reject Calls With a Delayed First Response
API Reference
API Setup
Rate Limits
API List
Integrations
Genesys Voice Bot
Genesys + Kore Voice Automation - Manual Installation Guide
Voice Automation - Integration with Amazon Connect
Voice Automation NiceCX (CX One) - SIP Integration
Talkdesk Voice Automation
Kore Voice Automation (IVA) Integration with Zoom Contact Center (CC)
ID R&D Integration With Kore
Audit Report

AGENTS
Agent Console
Introduction
Conversation Tray
Incoming Interactions
Interacting with Customers
Additional Tools
My Dashboard

SUPERVISORS
Dashboard
Automation
Queues and Agents
Interactions
Monitor Queues, Agents, Interactions, and Service Levels
Manage Layout

BUSINESS USERS
Reports
Introduction
Reports List

Voice

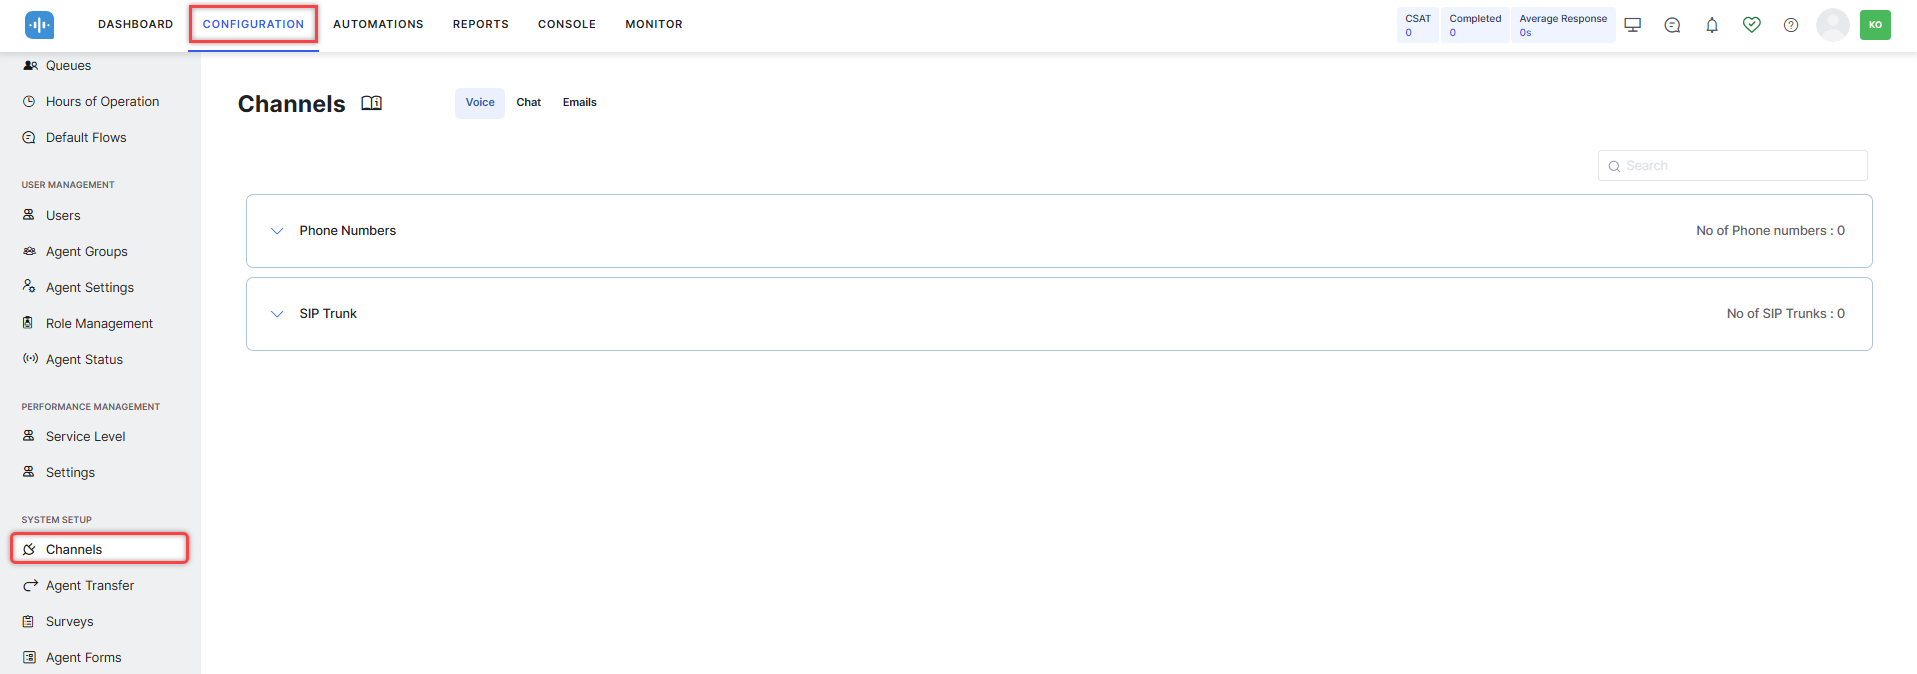
This channel helps configure how SmartAssist handles automation for inbound voice calls. By going to Configuration > System Setup > Channels > Voice, you can add phone numbers and set up SIP Transfer.

Phone Number Configurations

This option helps add, edit, or delete a local or toll-free phone number to which SmartAssist forwards incoming customer calls at a contact center.

Add or Purchase a Phone Number

To add a new phone number, follow these steps:

  1. In the Voice Channels section, click Phone Numbers.
  2. Under Phone Numbers, click New.

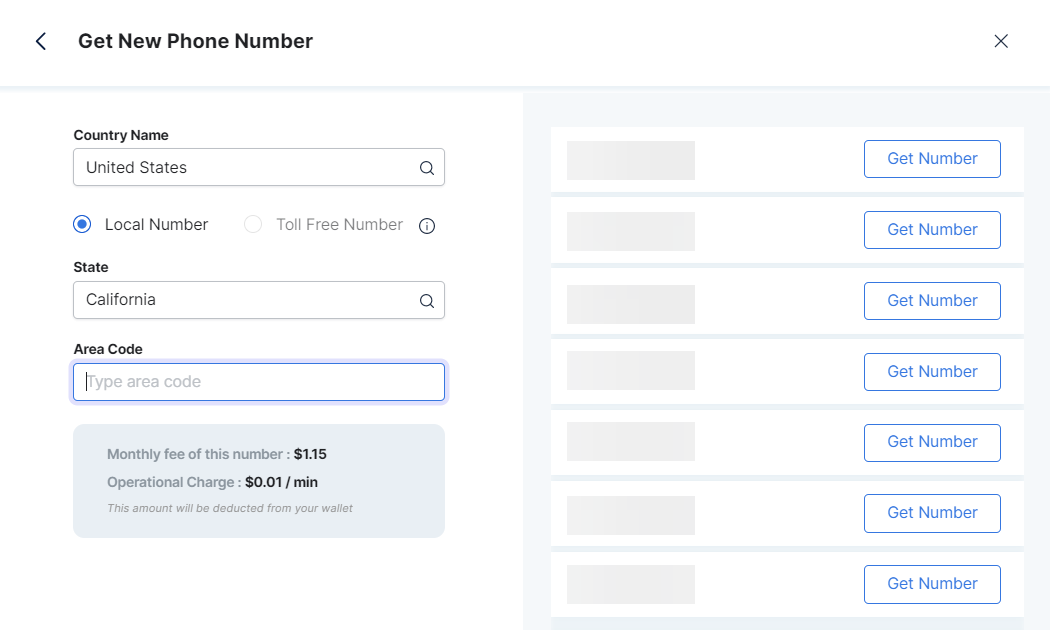
  3. The Call Phone Number window is displayed below. Here, you can configure a custom local or toll-free number by clicking Get New Phone Number:
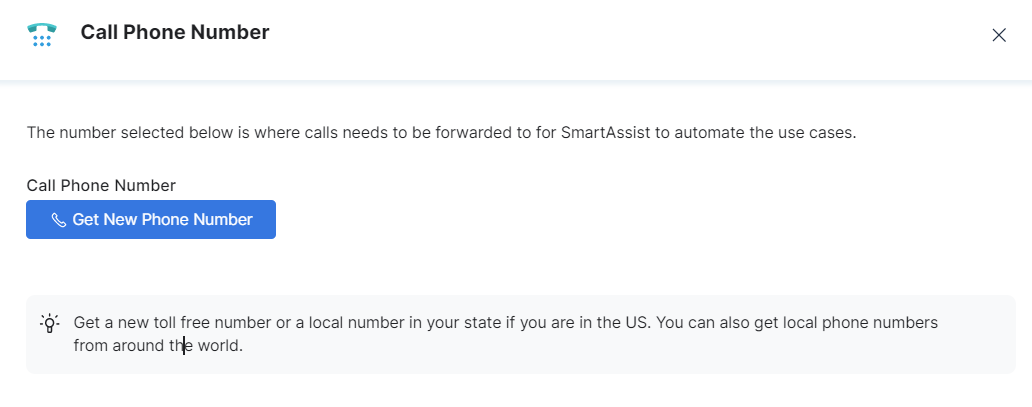
    1. Select the Country.
    2. Select either the Local or Toll-Free Number option.
    3. Select the State.
    4. Enter the Area Code.
    5. After you configure the above fields, SmartAssist displays the monthly fee and the operational charge per minute.

  4. Configure an available number with the following steps:
    1. Click the Get Number button.
    2. Type a label for the phone number (optional).
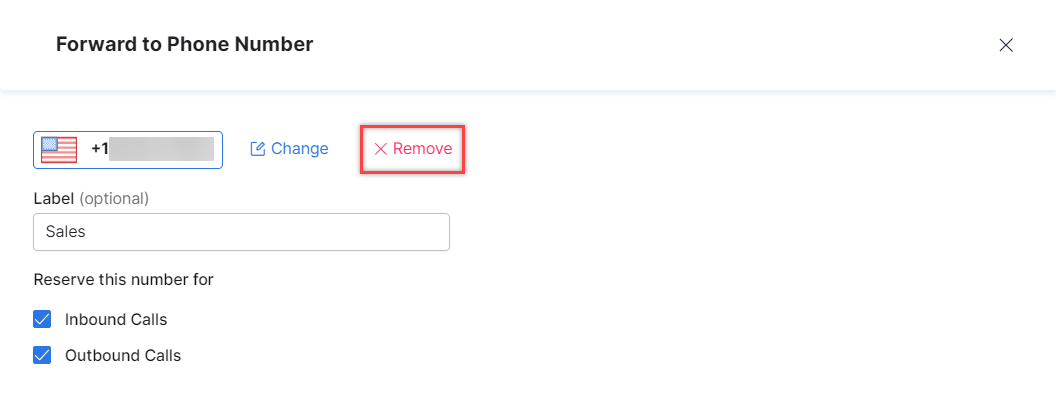
    3. Select whether the number will be reserved for Inbound Calls, Outbound Calls, or both on the Forward to Phone Number page and click Done.
    4. A success confirmation message is displayed, and the phone number is added.
    5. You can now call this number to test your Use Cases.
    6. When ready to go live, forward the calls you receive to this phone number or use this number as your customer support number.

Edit a Phone Number

To edit a phone number you added previously, follow these steps:

  1. Open the More Options menu corresponding to the phone number you want to update. 
  2. Select Update in the menu.

  3. On the Forward to Phone Number page, click Change.
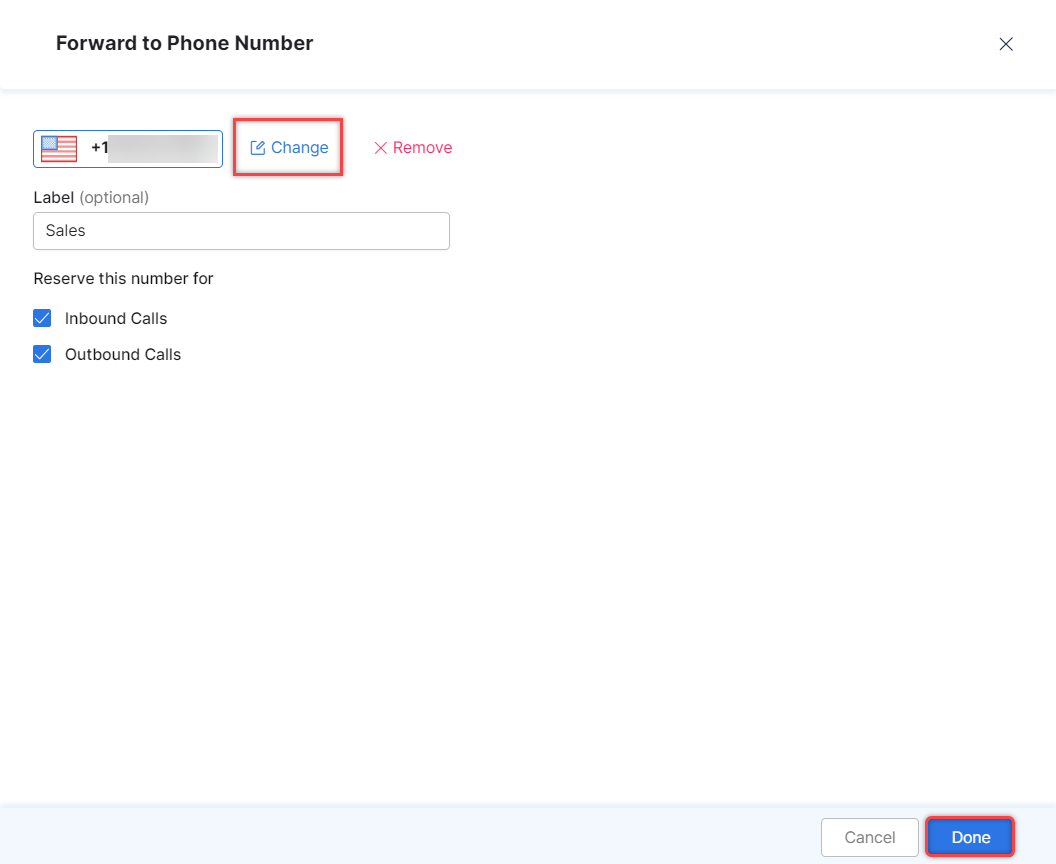
  4. Make the necessary edits on the Get New Phone Number page and click Done.
  5. A success confirmation message is displayed once the phone number is updated.

Delete a Phone Number

Deleting a phone number means stopping all services associated with it. Please keep in mind that if you remove a phone number and want to add it back later, you may not be able to if another user has selected it.

To delete an existing phone number, follow these steps:

  1. Open the More Options menu corresponding to the phone number you want to update. 
  2. Select Delete in the menu.
  3. The following pop-up is displayed. Click Delete to confirm your choice.
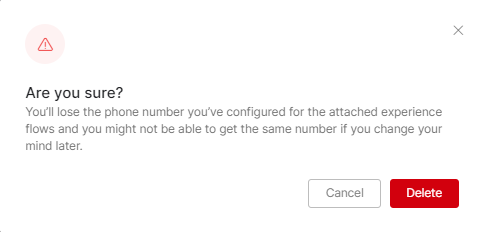
  4. Alternatively, you can click Update, go to the Forward to Phone Number panel and click Remove. You will need to confirm your choice.
  5. A success confirmation message is displayed once the phone number is deleted.

SIP Transfer Setup

This option is useful when transferring calls to SmartAssist from a toll-free or local phone number using the Session Initiation Protocol (SIP) in your IVR system.

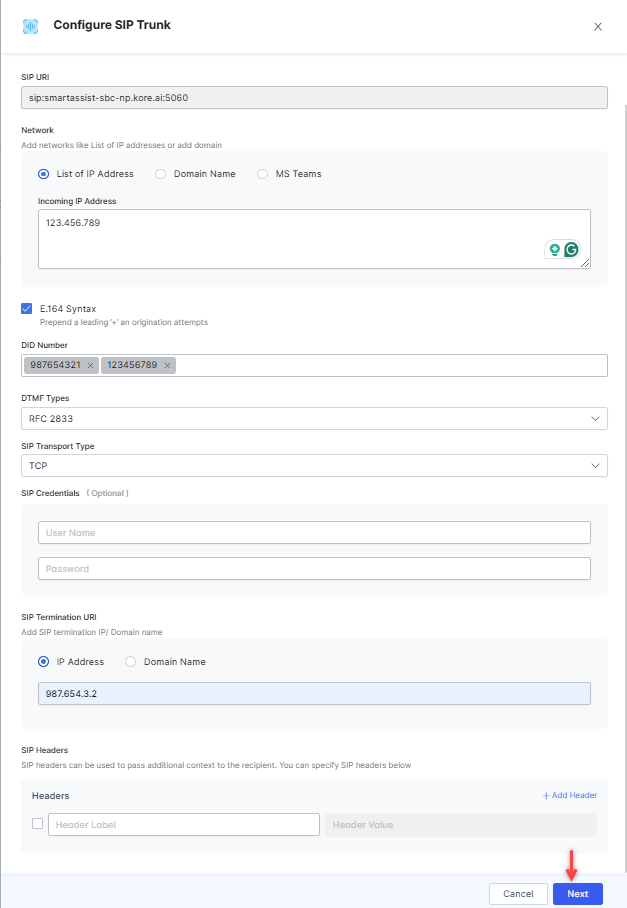
Under Channels > Voice > SIP Transfer, you can configure the network IPs and domains, DID number, SIP transport protocol, SIP credentials (optional), and Inbound/Outbound direction for phone numbers while the SIP URI is pre-configured.

To configure SIP Transfer, follow these steps:

  1. In the Voice Channels section, select SIP Transfer.
  2. Click New.
  3. On the Transfer from IVR page, configure the following: 
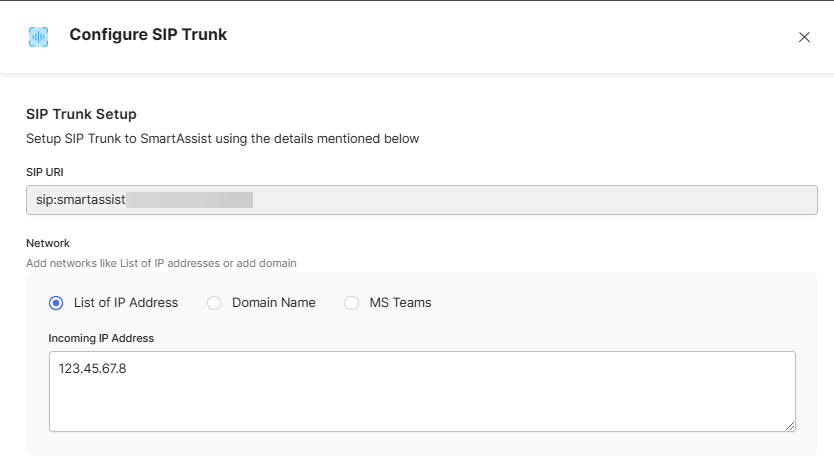
    1. SIP URI: This is a preconfigured field.
    2. Network: To configure the Network, you can select one of the following:
      • Under List of IP Address, type the values for Incoming IP Address in the textbox.
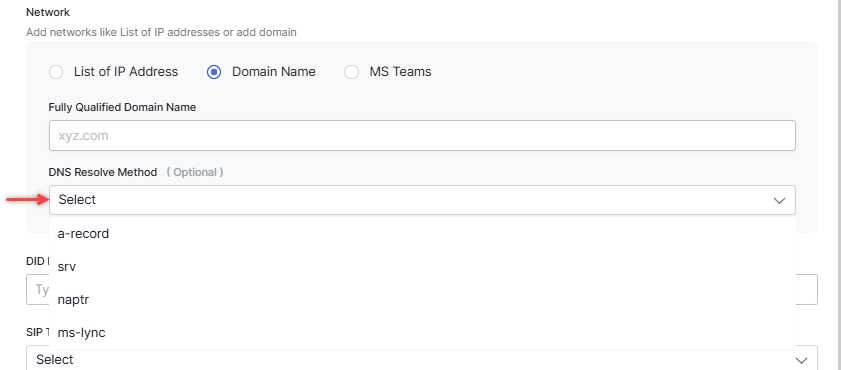
      • Under Domain Name, provide the following:
        • Fully Qualified Domain Name: The domain name that specifies all domain levels, including the top-level domain and the root zone.
        • DNS Resolve Method (Optional): Select an option from the list to translate IP addresses to domain names for resolution when the hostname is associated with multiple IP addresses. You can choose A-record, SRV, NAPTR, or MS -SYNC.

    3. Under Direct Inward Dialing (DID) number, you can enable virtual phone numbers (also known as SIP trunk numbers) from which calls will be routed to the existing telephone lines.
    4. Select an option from the list for SIP Transport Type. This field will set a protocol to route SIP traffic to servers and other endpoints. The available options are TCP, UDF, and TLS.
    5. (Optional) Set the SIP Credentials (username and password) to access your SIP transfer setup account.
    6. Under SIP Termination URI, enter the IP Address/ Domain Name.
    7. Click Next.

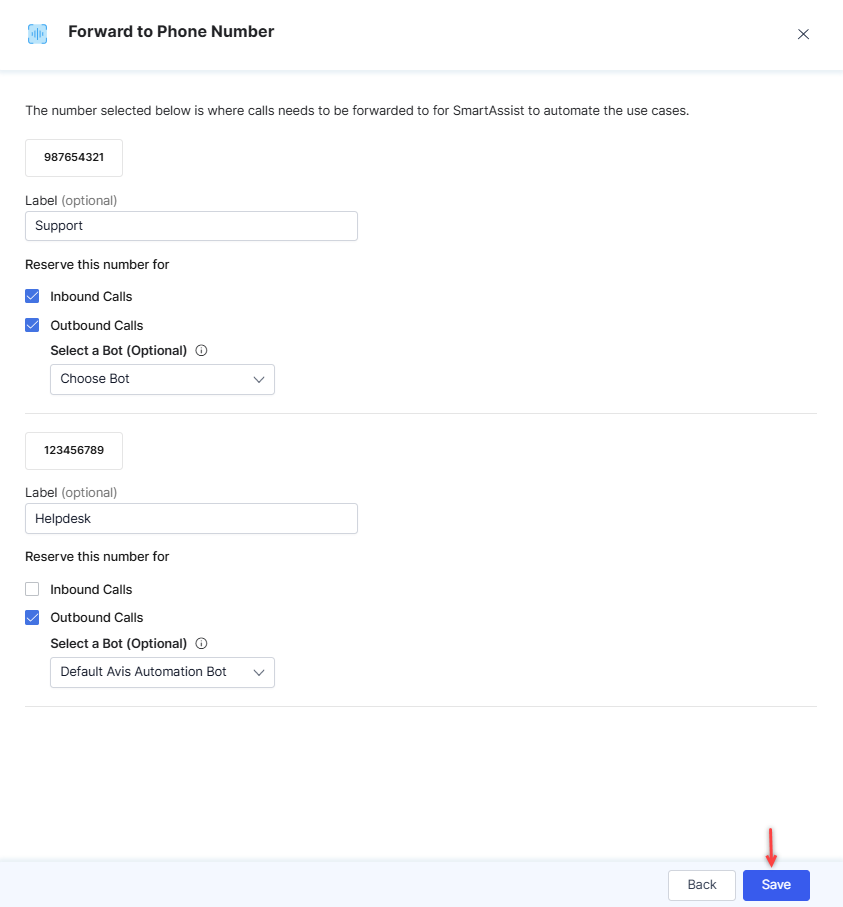
    8. On the Forward to Phone Number window, reserve the phone numbers for Inbound Calls, Outbound Calls, or both by selecting the appropriate options.
    9. Click Save.


      The selected information appears on the Channels page.

Related Links