Every business has specific requirements and strategies to handle user searches. SearchAssist enables you to define business rules to fine-tune and personalize the search results based on your business needs. The rules can be defined by utilizing the context information available to SearchAssist or by utilizing NLP techniques to analyze and understand the data more effectively.
Using NLP rules, you can train SearchAssist to return specific results to the users for a specific type of query. These types of rules are based on Entity annotation, which involves identifying different types of entities in the user queries and tagging them. This allows SearchAssist to learn about the type of entities and return results specific to the identified entities only. For instance, if a user requests a list of perfumes from the brand XYZ and an NLP rule is set to recognize the product and brand names from the query, SearchAssist will only display the results containing information about perfumes from the specific XYZ brand. Since the rule helps SearchAssist identify the entities from the user query, if the user changes the product name and brand name but the query format remains the same, the results will be specific as per the brand in the query. For example, if the user queries for the list of hair sprays from brand ABC, the results will contain only the list of hair sprays from brand ABC.
Add an NLP Rule
To add a new NLP rule, go to the Indices tab and select Business Rules under Search Configuration. The page shows Contextual Rules and NLP Rules under two different tabs.
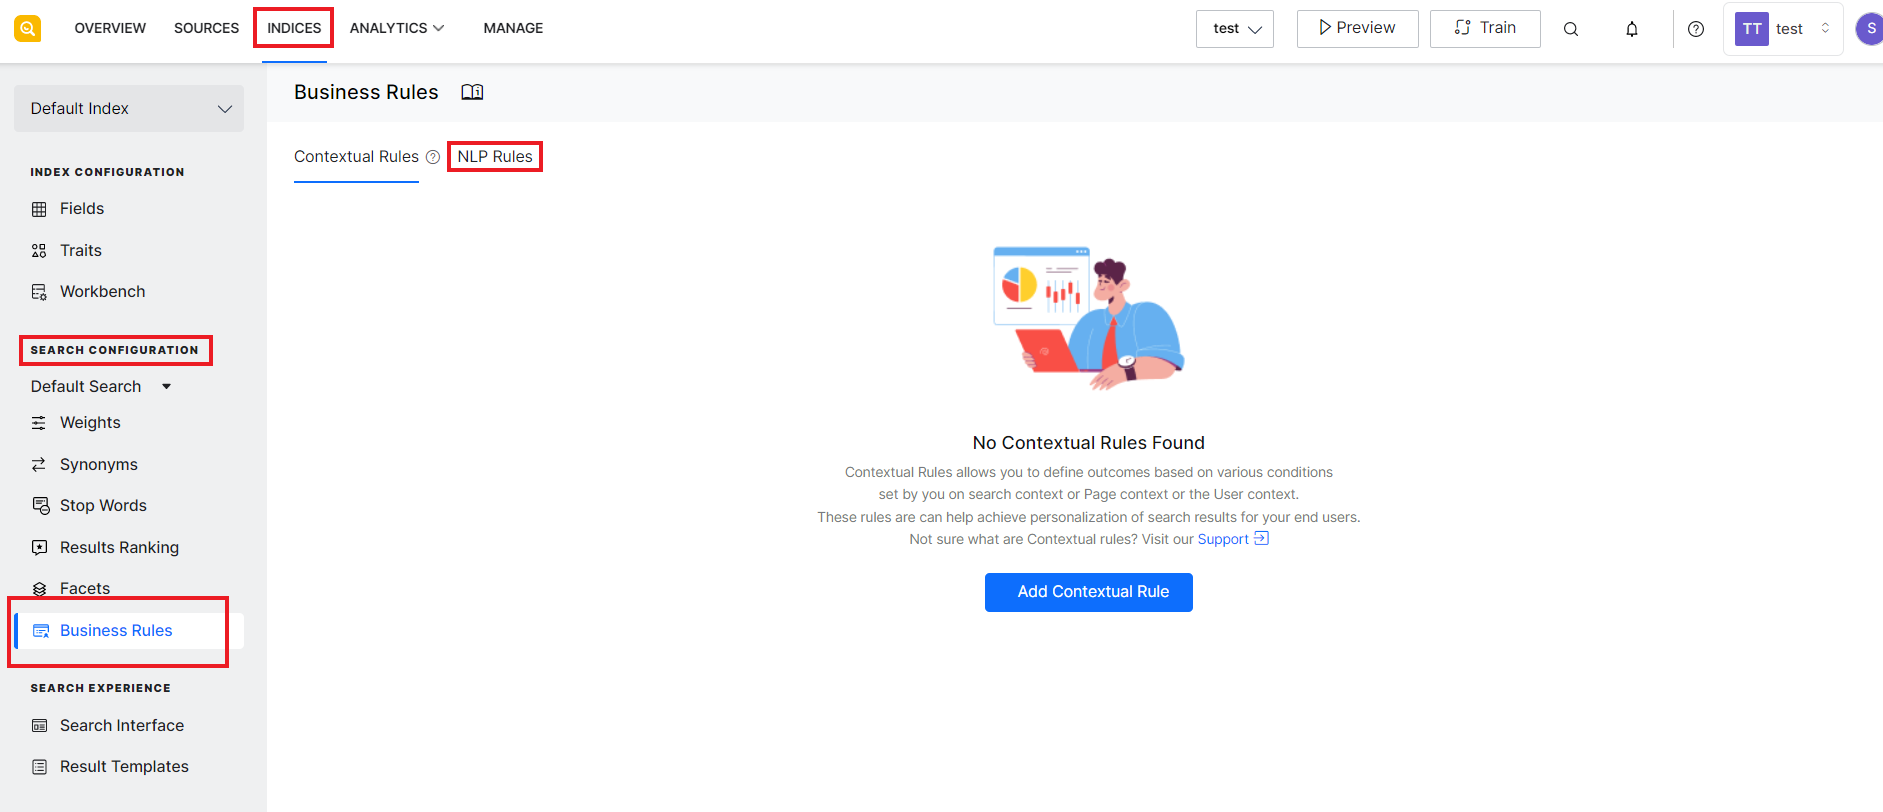
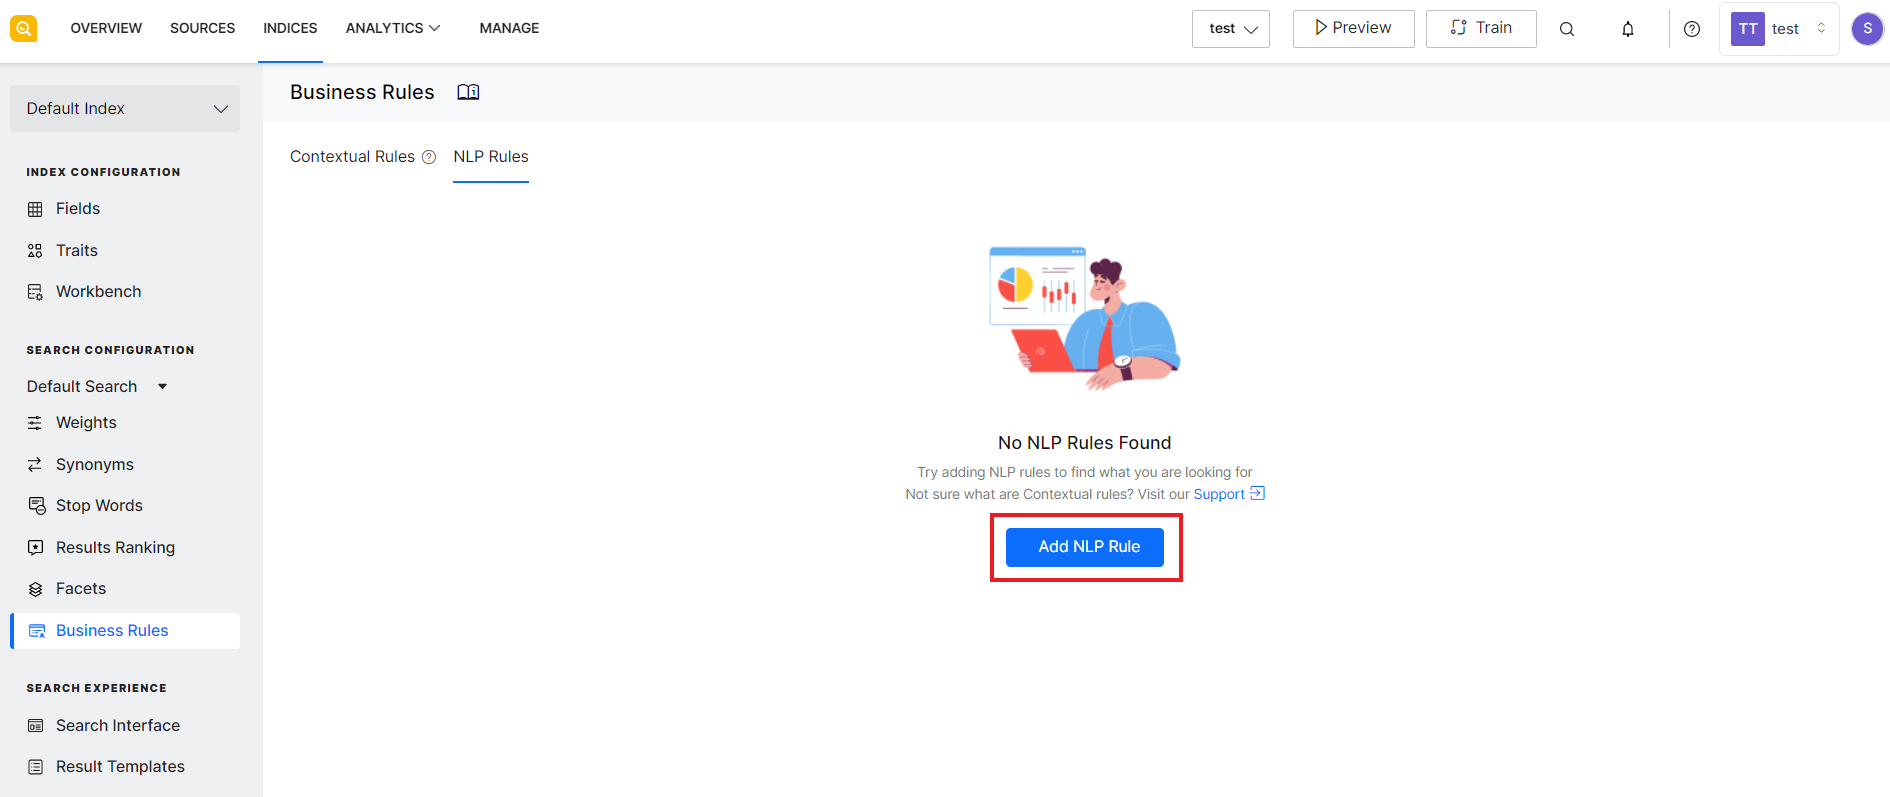
Go to the NLP Rules tab. This will list all the existing NLP rules. If this is the first time you are working with NLP Rules, click Add NLP Rule button.
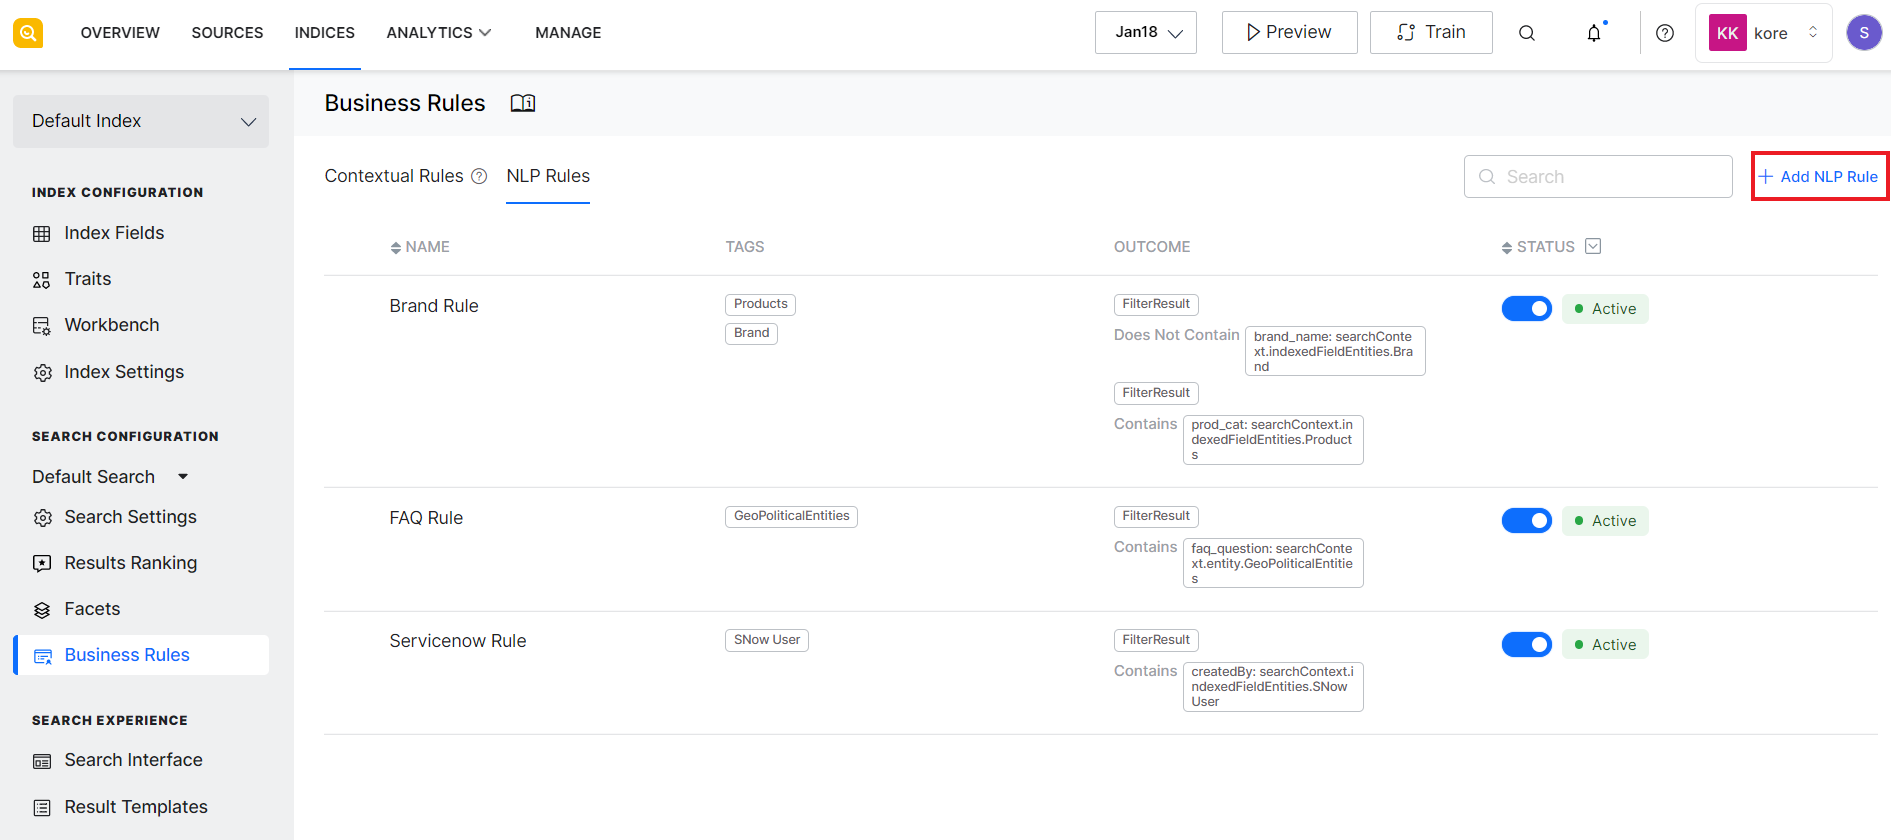
If you already have a list of NLP rules, use the Add NLP rule button on the top right of the page to add a new rule.
An NLP rule defines the condition at which the rule triggers and the outcome or the effect it has on the search results. Add rule widget has two sections: Condition and Outcome. The condition specifies the trigger point of the rule. The outcome defines the actions to be taken when the condition of the rule is met.
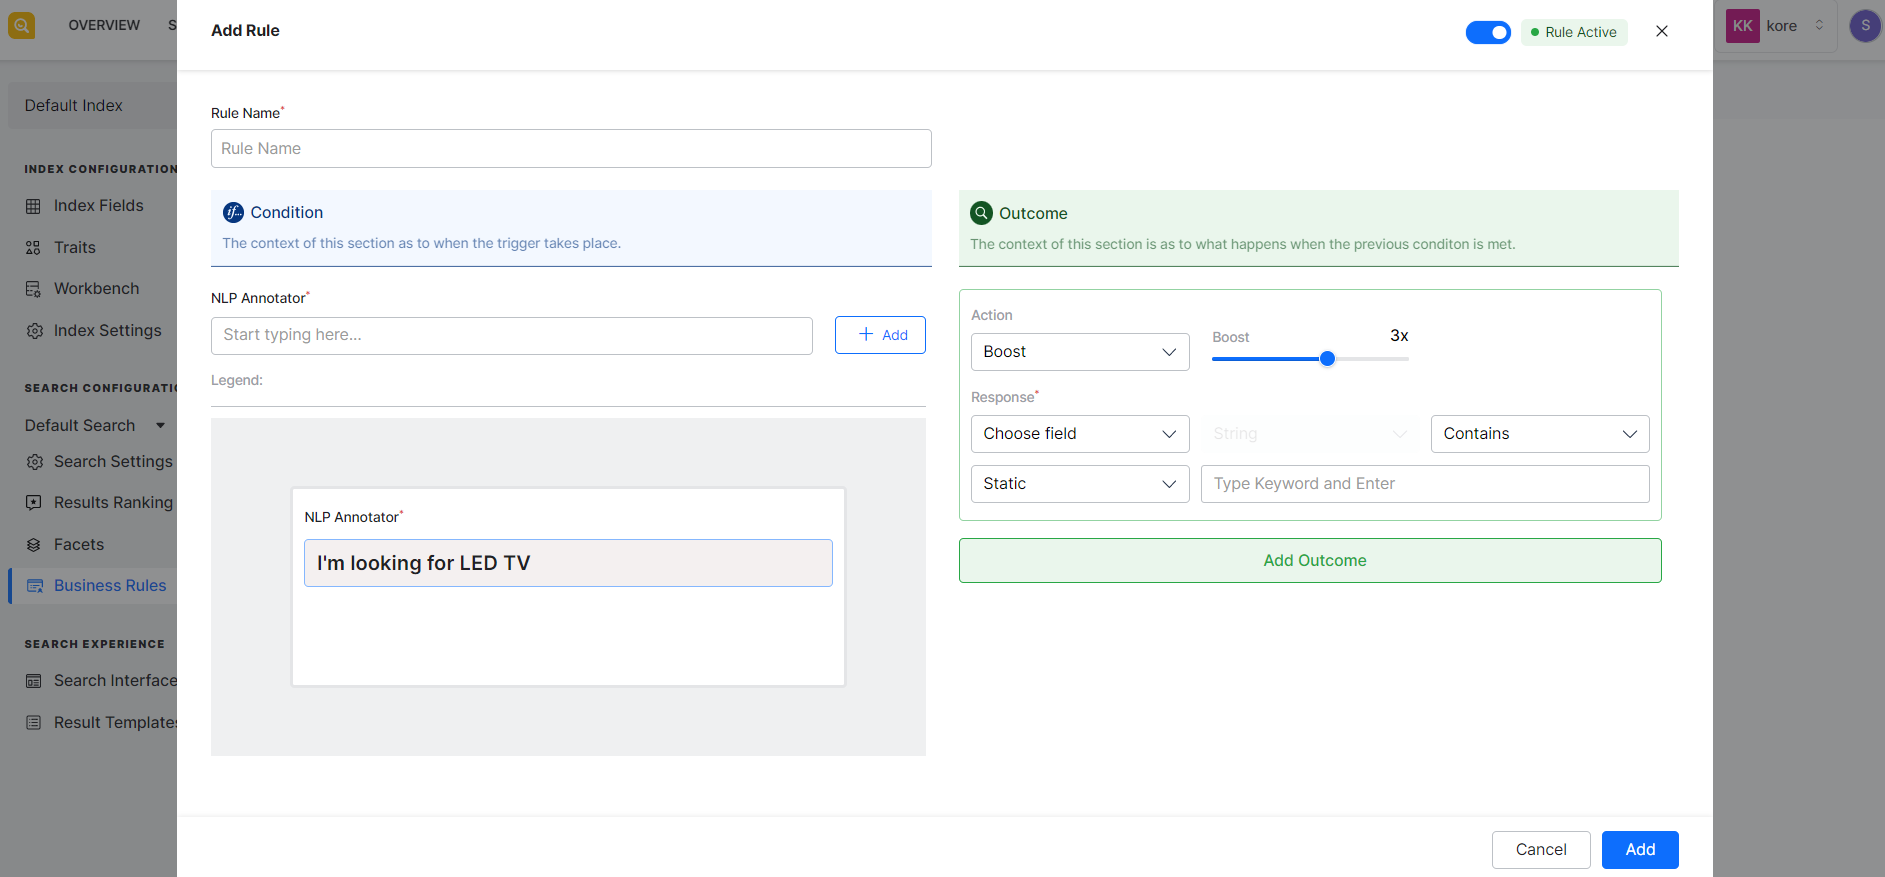
Under the condition section, add a query as expected in the user queries and annotate entities in the query. To do so, type the user query in the NLP annotator. Highlight the entity in the query (double-click or select the word) and select the entity type or tag from the list of entities defined.
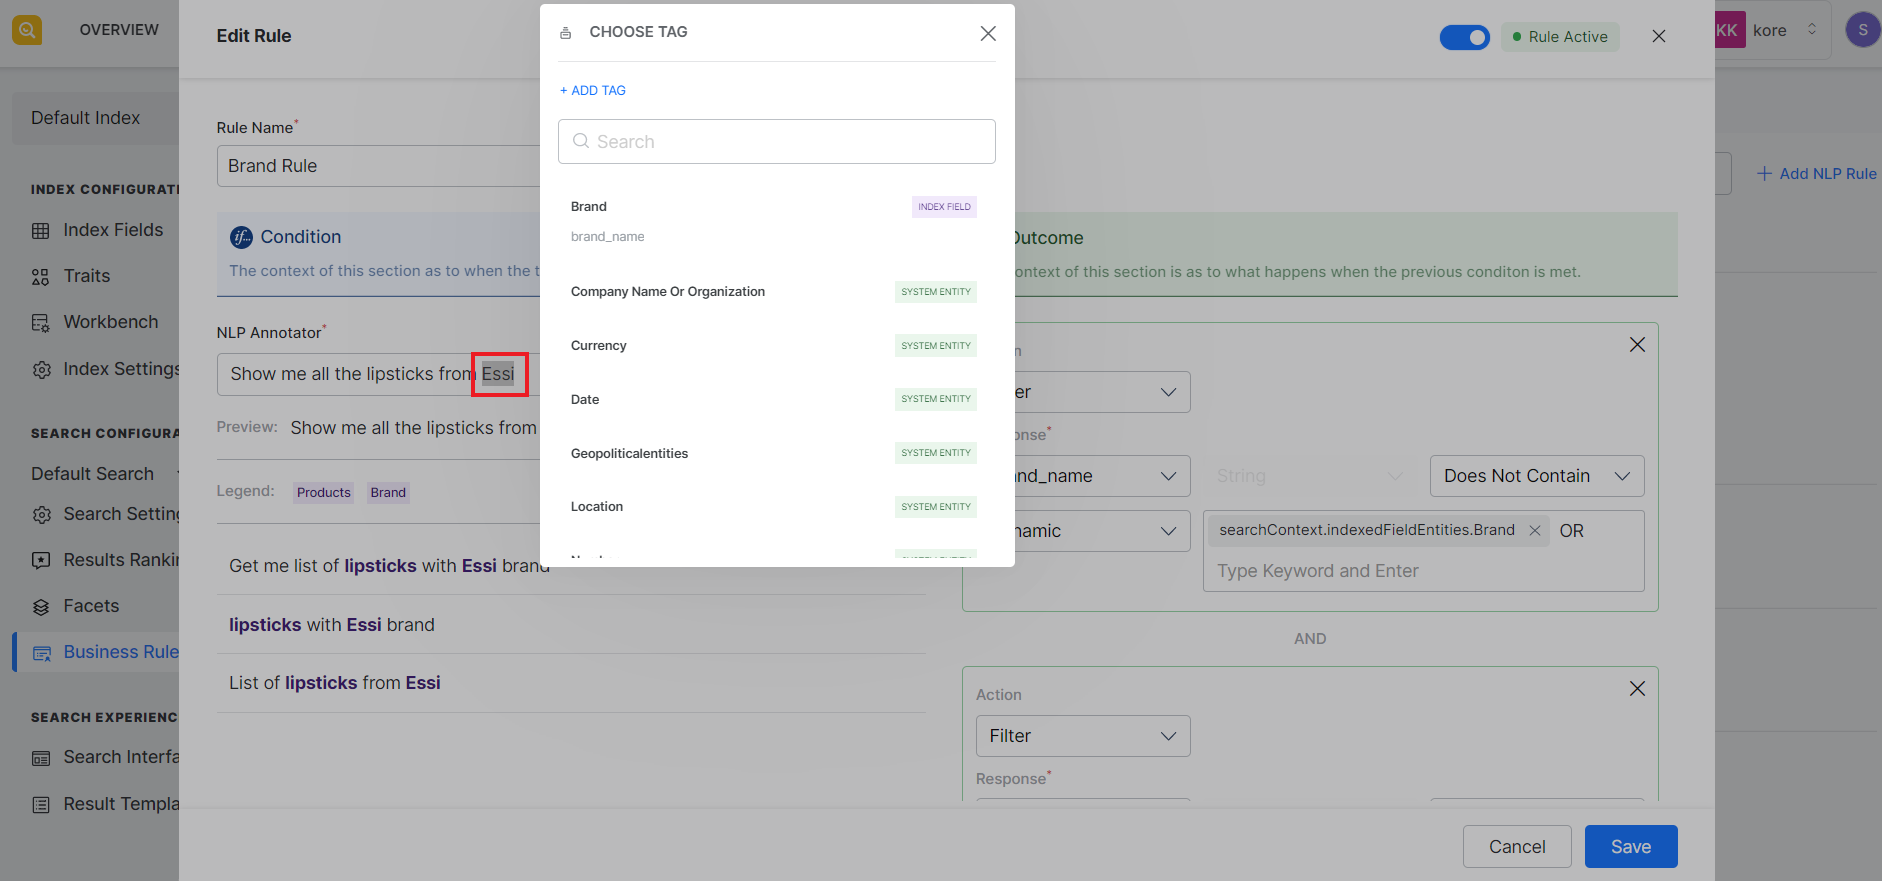
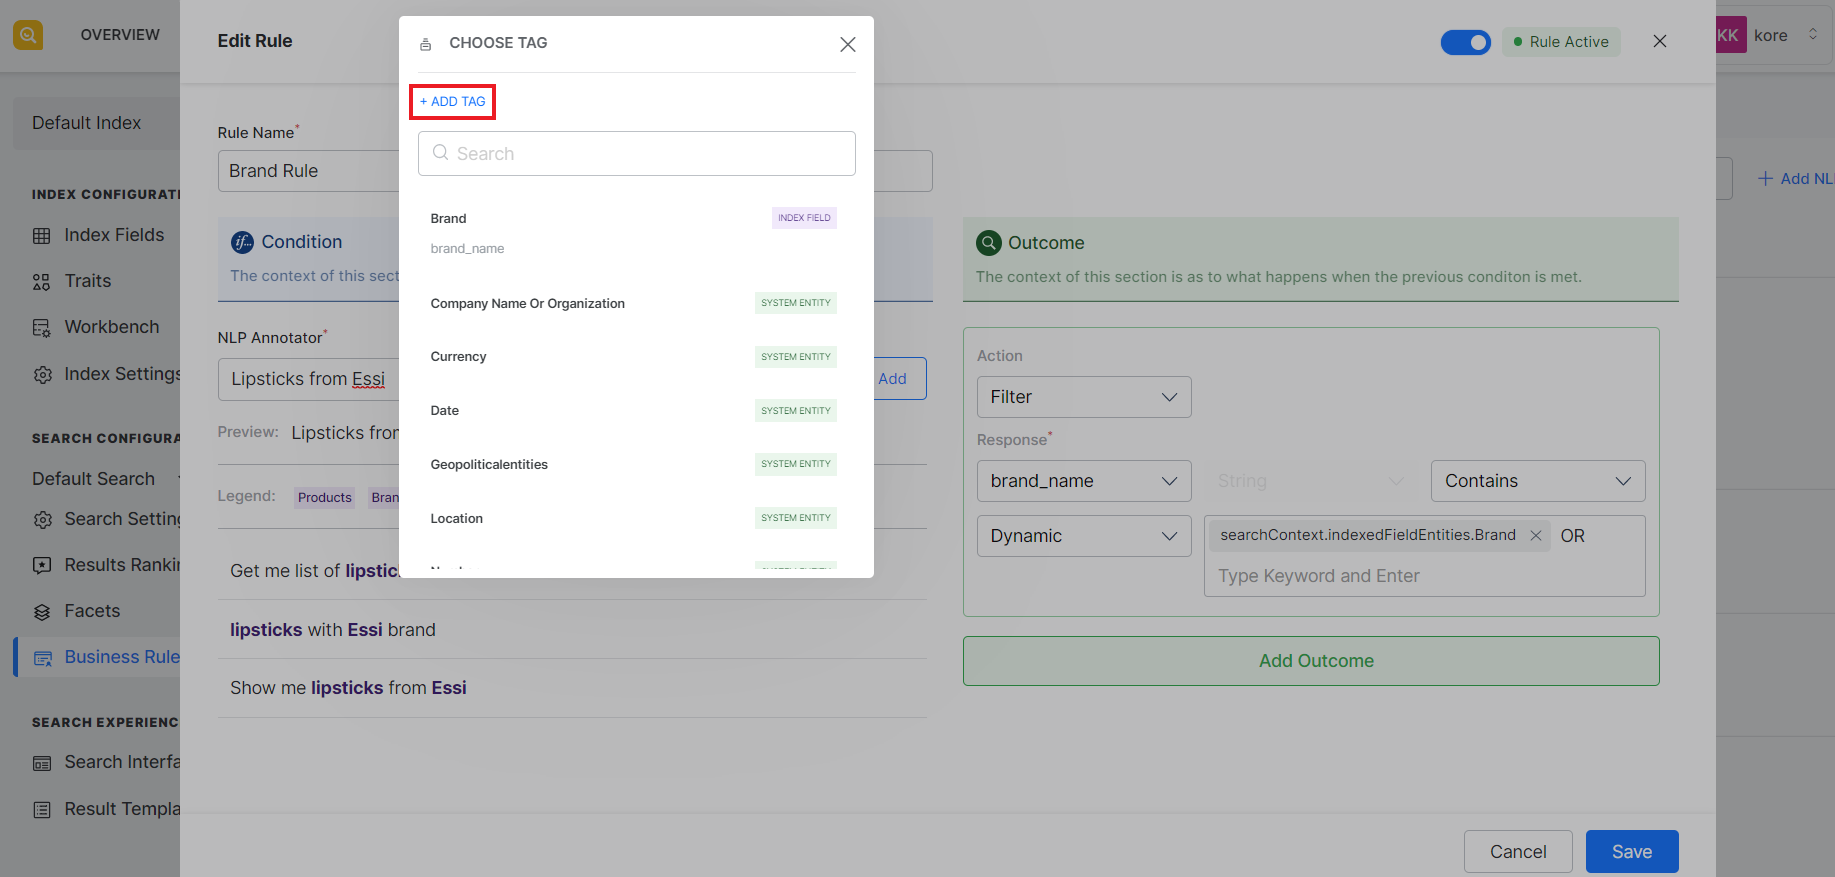
By default, all the system entities are listed. Click Add tag button to add a new tag. You can add tags or entities using the indexed fields or define custom entities to be used.
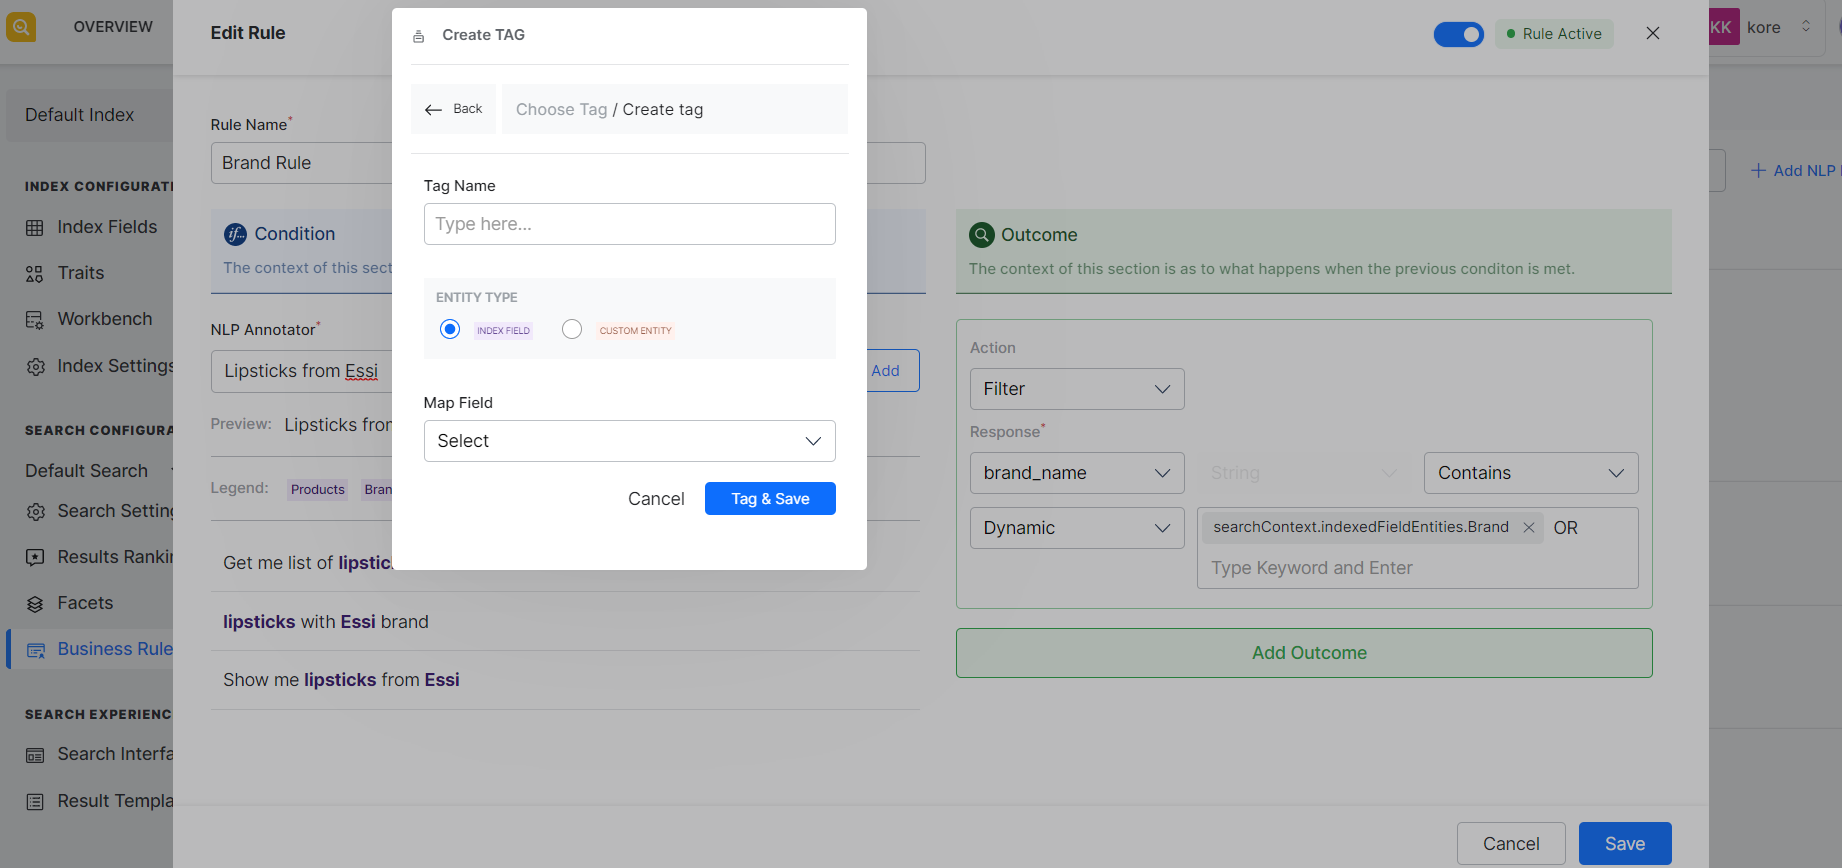
To define a new entity based on indexed fields, enter a name for the new tag, set the Entity type as index field, and map it to the field. Similarly, to add a custom entity, set the Entity type to Custom and add a name for the tag. Finally, click Tag & Save.
Identify all the entities from the query one by one. The selected entity types will be listed as Legends and the annotated entities in the query will be highlighted and shown under Preview.
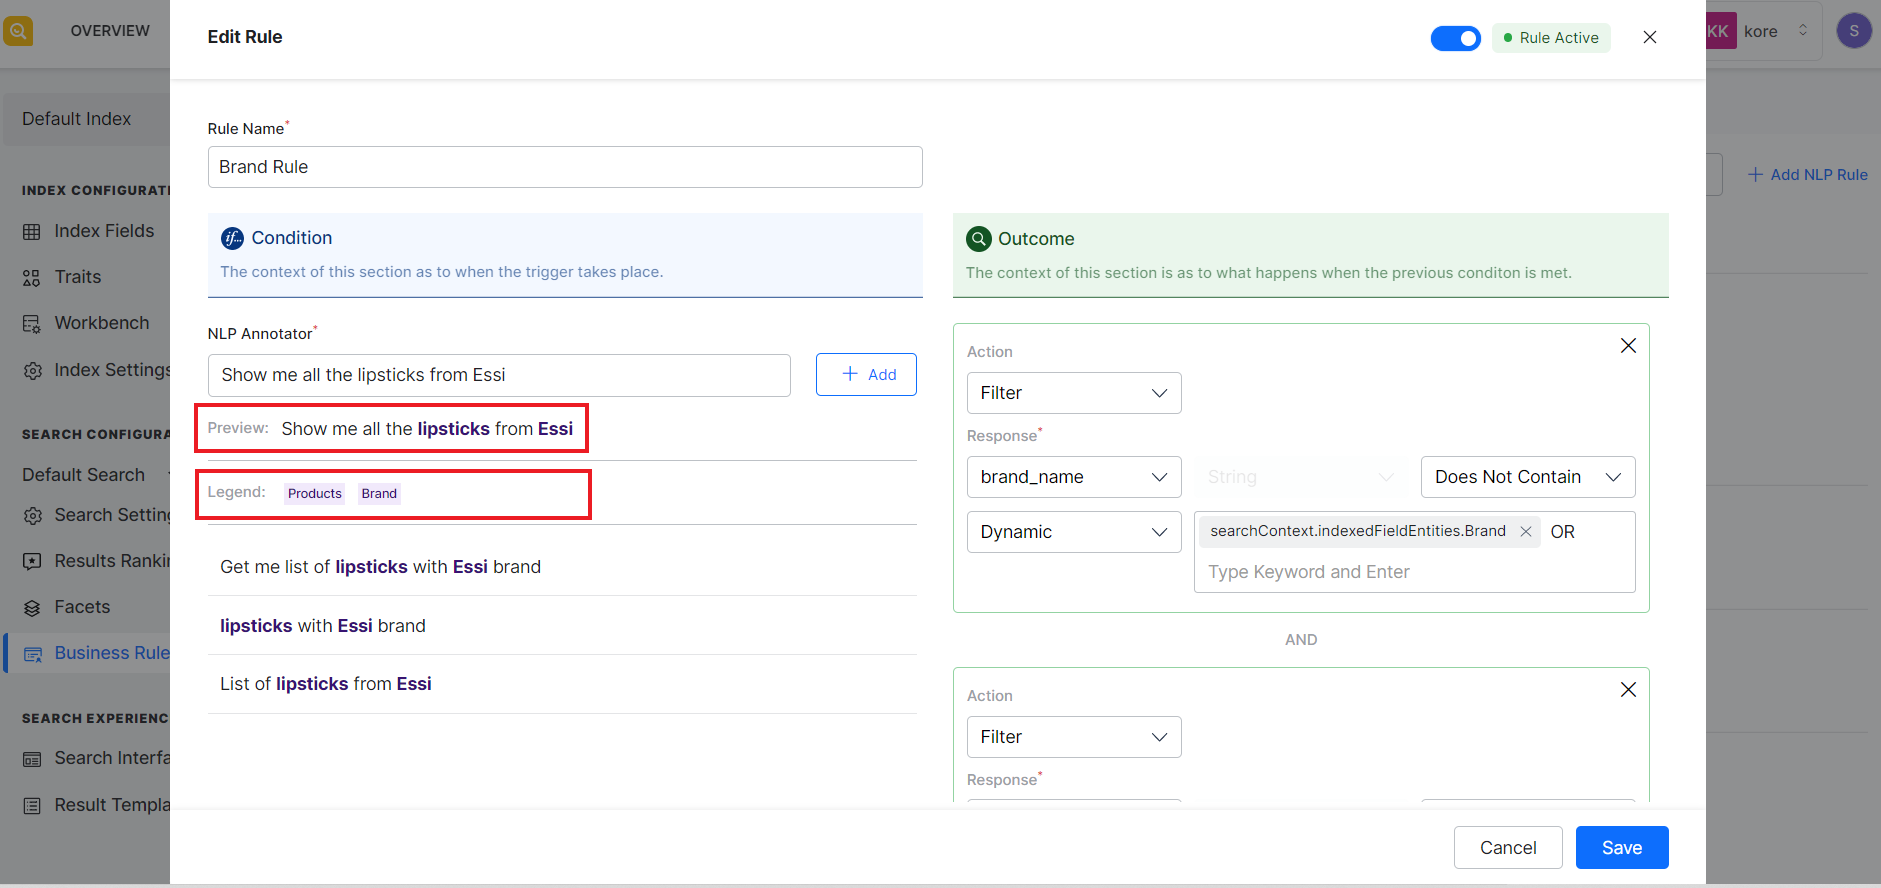
Once all the entities are identified from the query, click the Add button. This will then show the query at the bottom of the page. You can add variations of the query and follow the same steps of entity annotation as shown in the example below. These variations will be used to train SearchAssist to respond to all the different variations of the query in the same fashion.
Note that the number and type of entities in all the variations of the queries defined in a rule should be the same. Also, it is recommended to add a minimum of two and ideally four or more queries in a rule. More the number of queries defined in the rule, the better the training for the application.
The next step is to define the outcomes in case the conditions specified in the previous step are triggered. Choose the actions you wish to take and the response you want to give to the users for the specified conditions or queries.
The Action field can take the following values:
| Field | Description |
| Boost | Prioritize the search results by the boost factor. |
| Lower | De-prioritize the search results by the lower factor. |
| Hide | Hide the response from the search results |
| Filter | Filter the search results as per the response |
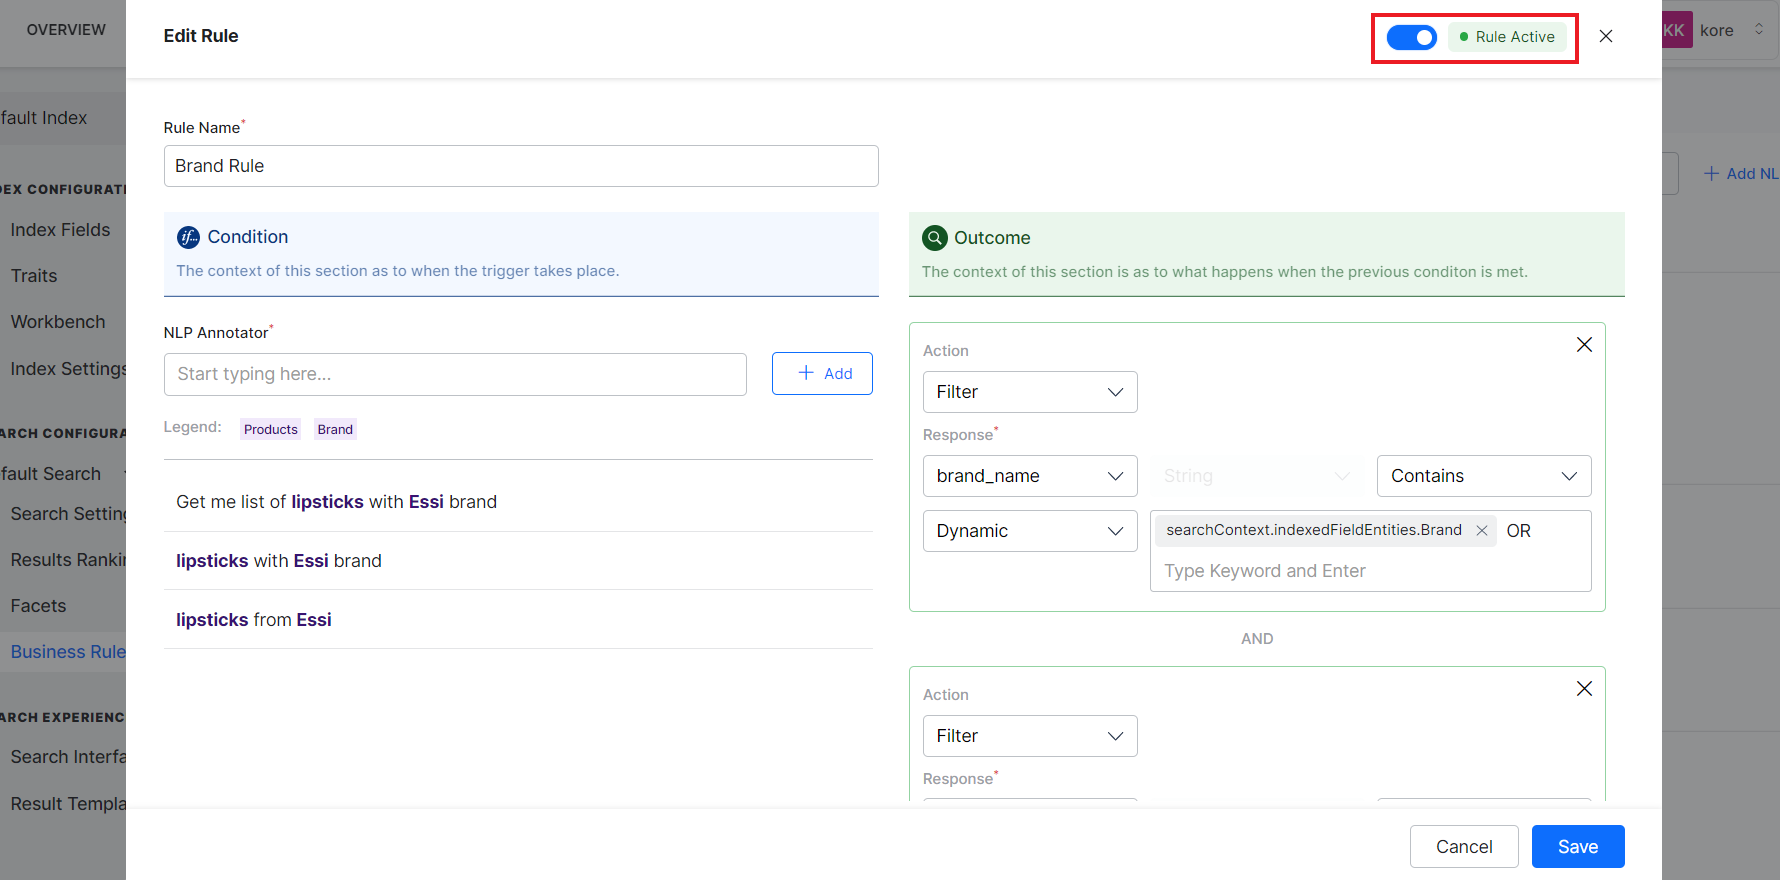
Use the response section to describe the criteria to be used to select results displayed to the user. Select the field on which you want to apply the action chosen above. Then, specify the condition and a value of the field that will be used to identify the records to be displayed in the results. The value can be set to a static value or can be mapped to a dynamic value. For instance, continuing the above example, if we want to filter search results and only show the entries of lipsticks from the brand Essi, set the fields as shown below.
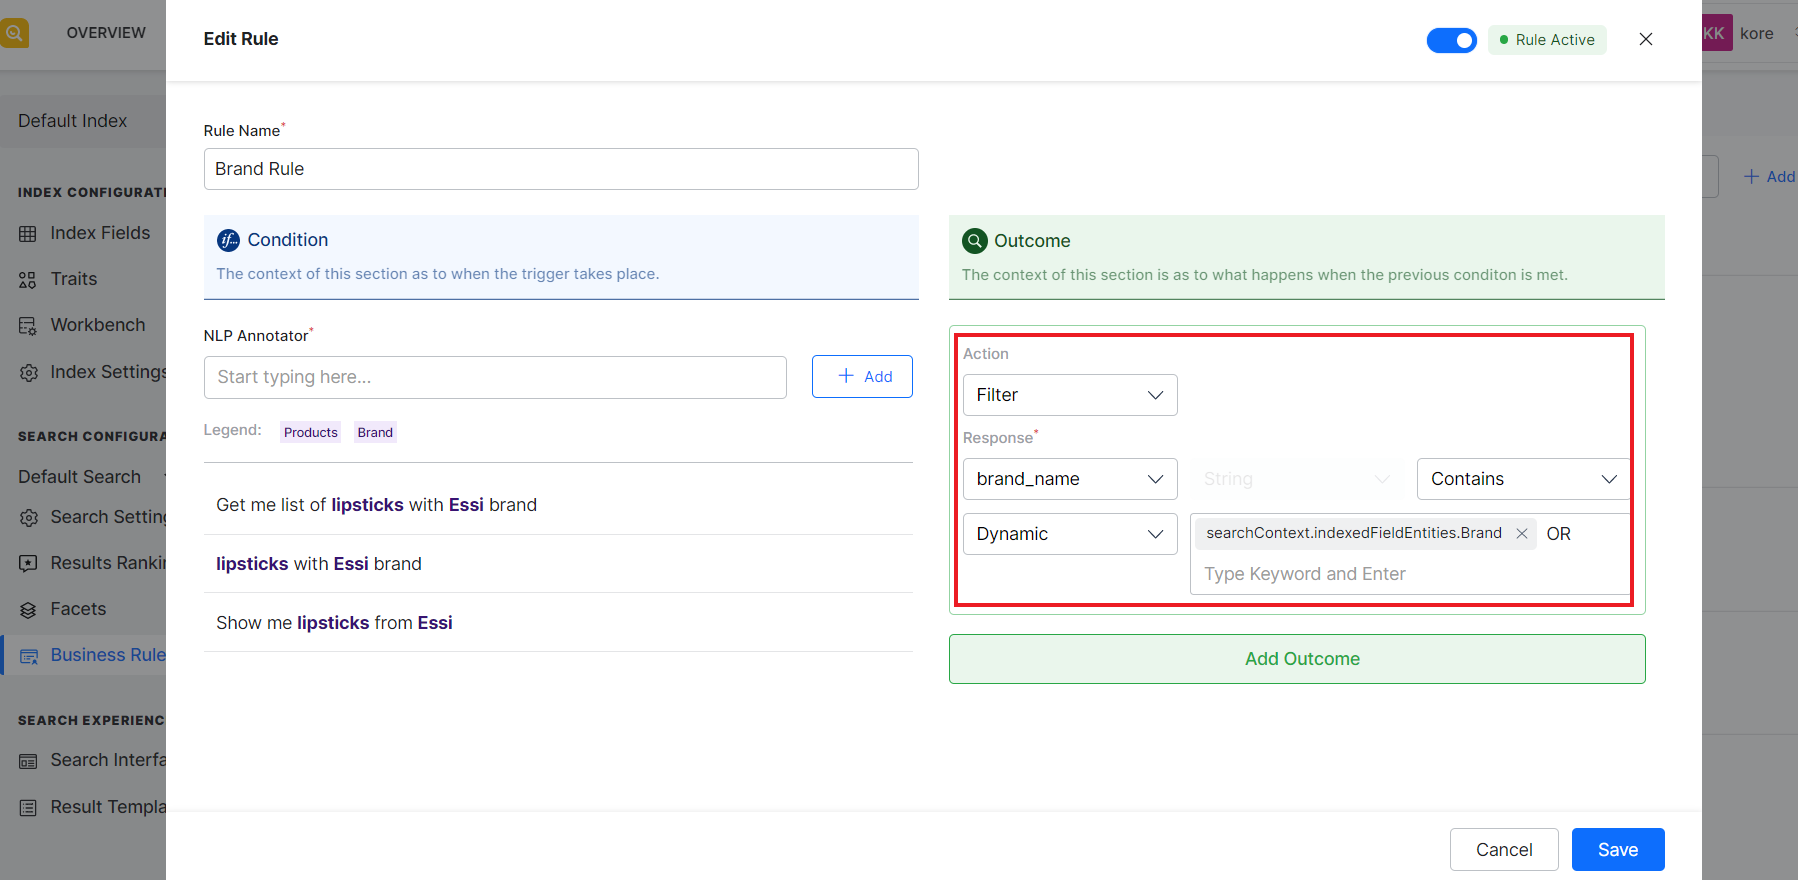
This rule implies that filter and show only search results where brand_name entity (tagged in the previous step) contains a field of type brand.
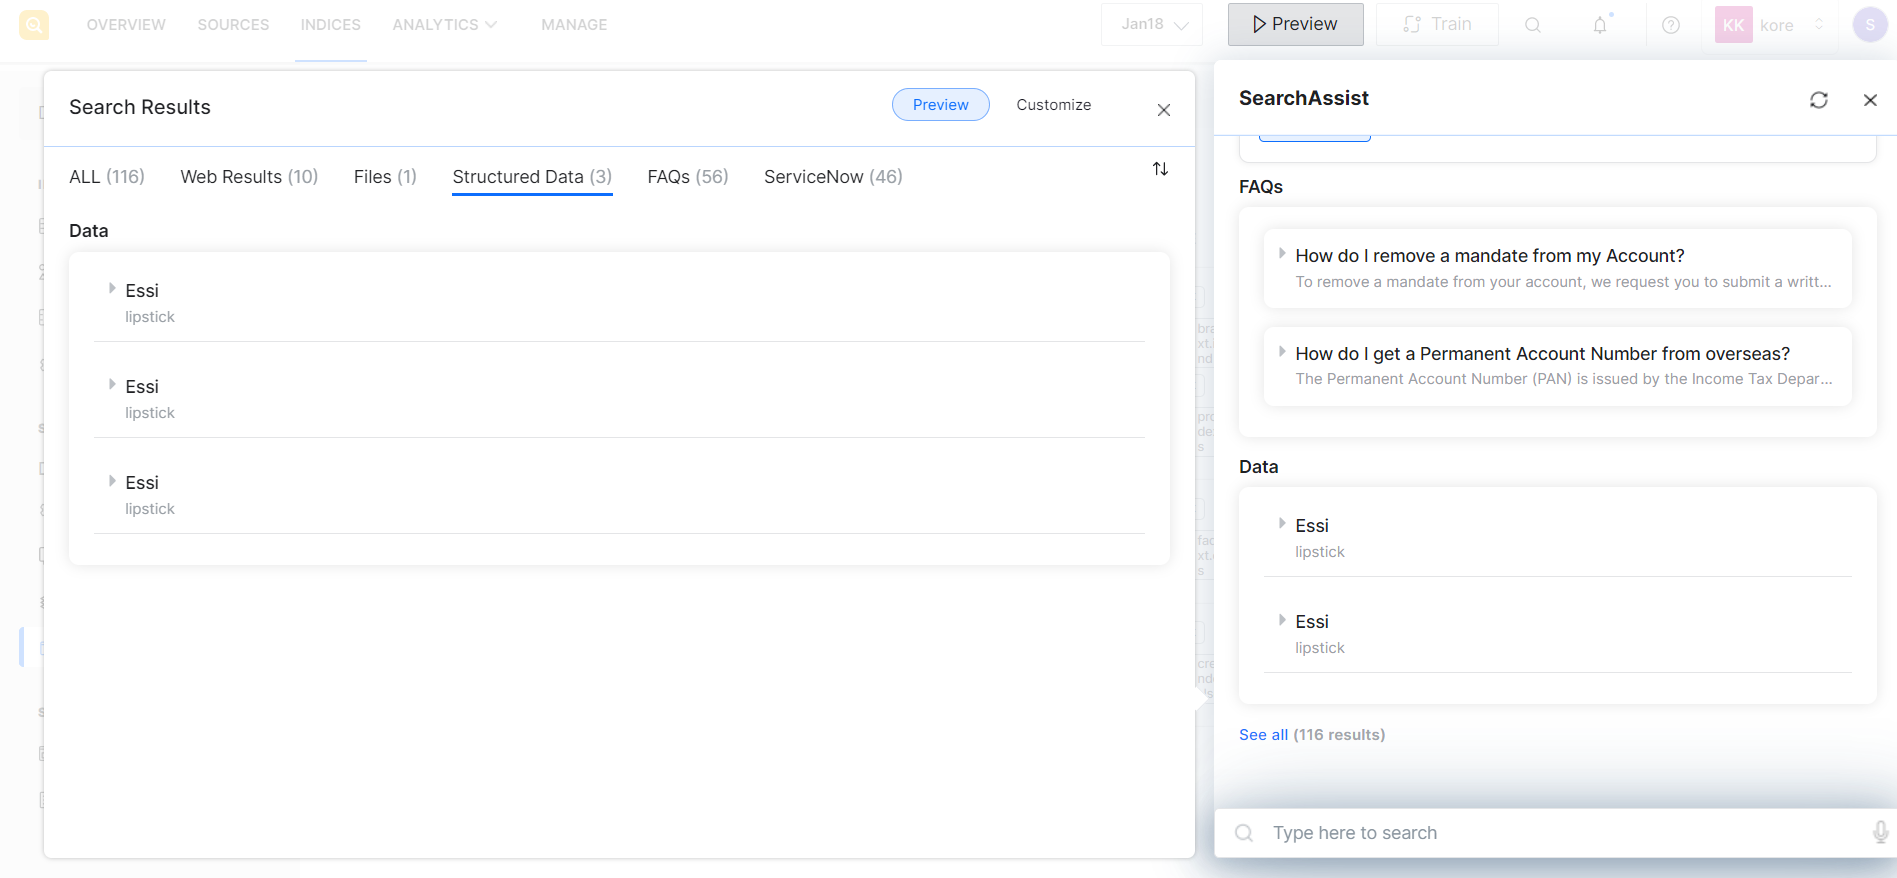
Similarly, If a user queries, “ Lipsticks from Essi”, the results would be filtered to only display the specific product ‘lipstick’ from a specific brand ‘Essi’.
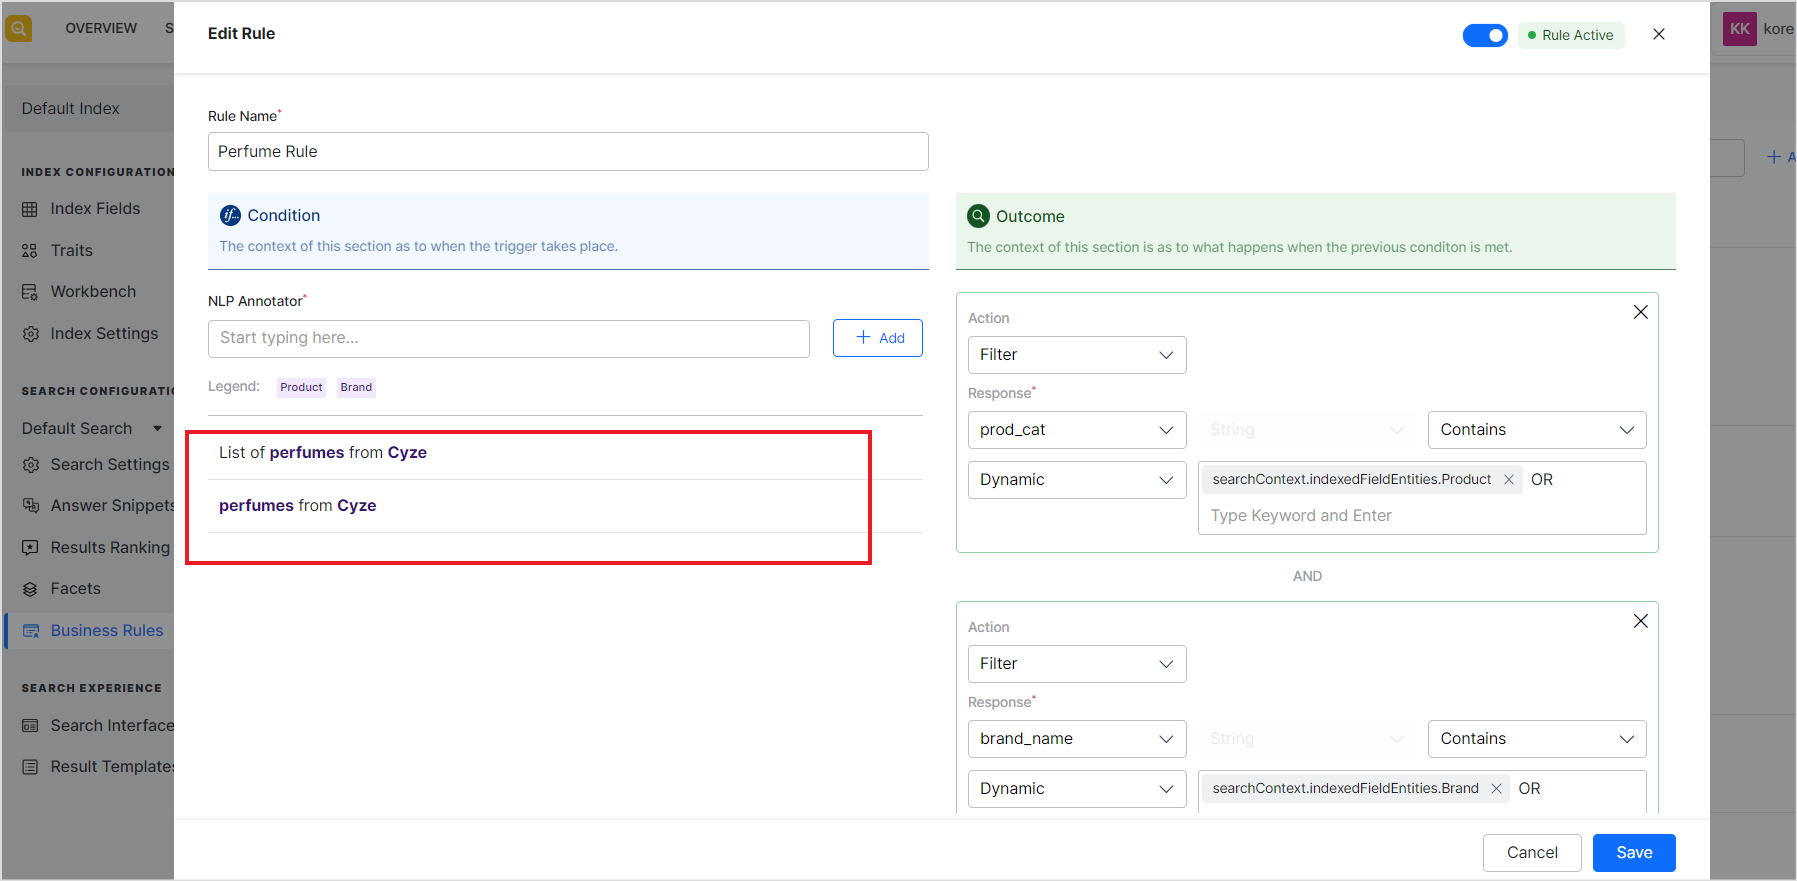
The NLP rule, once defined, is a generic rule which works in the same way for all the user queries with a similar format as defined in the variations. The entity values can vary. For example, if the user searches “ Perfumes from Cyze”, the NLP rule would be triggered and the search results would be as shown below.

You can add one or more outcomes for the defined condition. If two or more outcomes are added, a logical AND operation is performed between the outcomes and the results fulfilling both will be displayed.
Modify the status of an NLP Rule
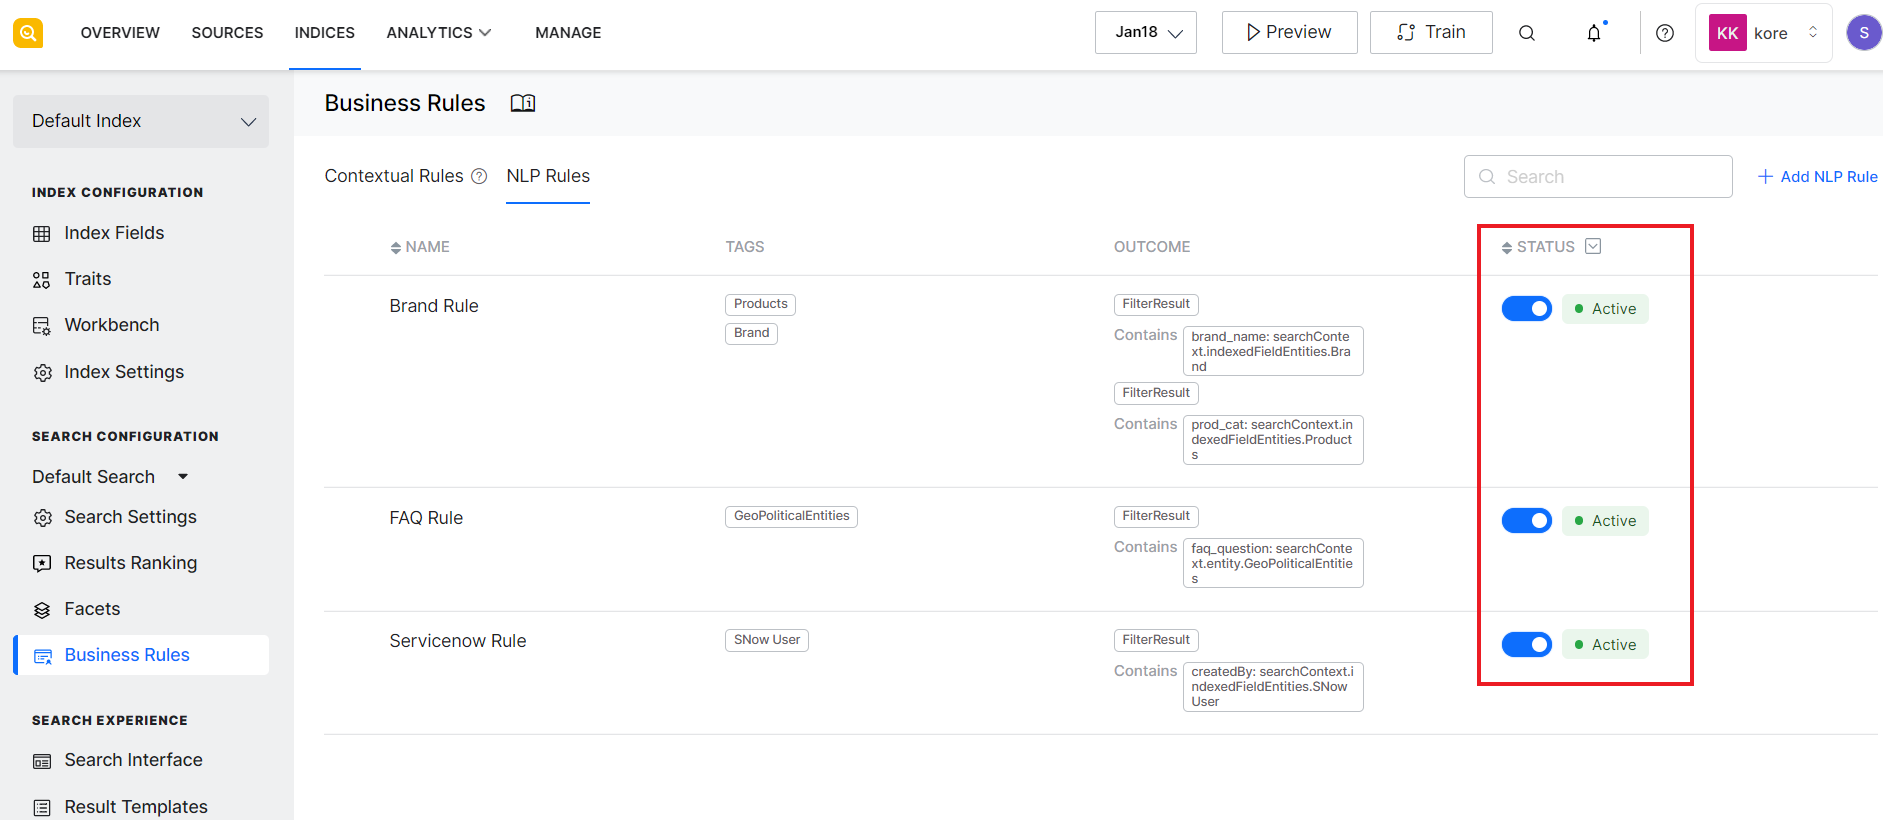
After defining a rule, you need to activate it to put it into effect in the search results. Similarly, you can temporarily deactivate it to not affect the search results. To change the status of the rule, go to the list of NLP rules and use the slider button to change the status.
Alternatively, go to the edit page for the rule and use the slider button at the top to change the status of the rule.
Edit NLP Rule
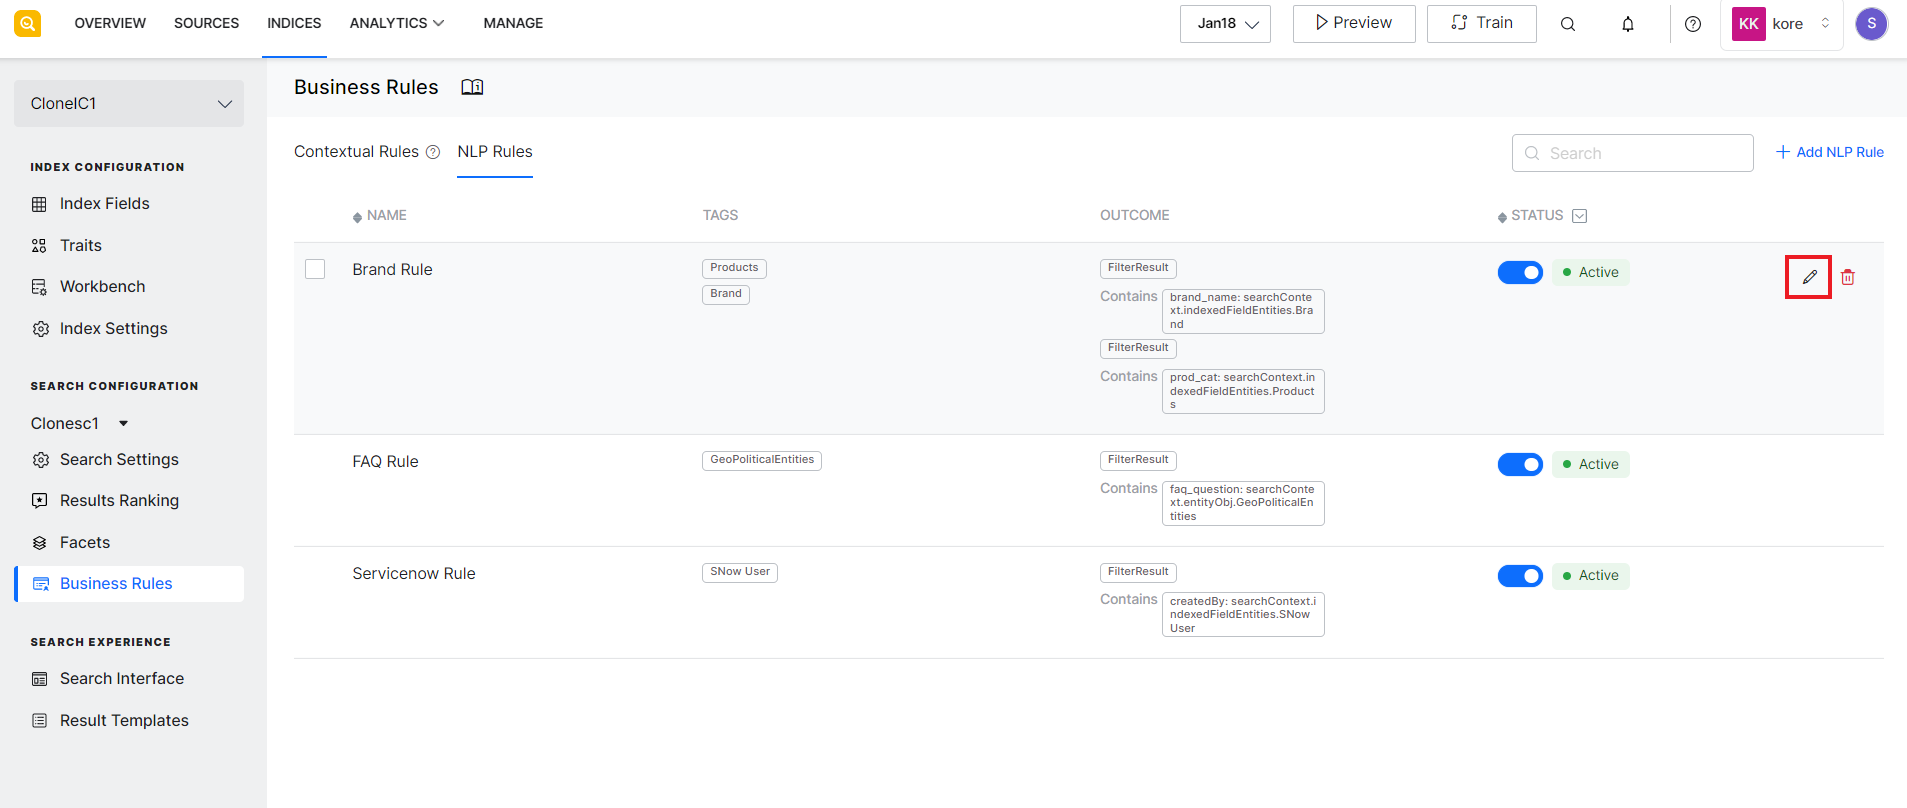
To edit an existing rule, go to the list of rules under Business Rules and use the edit icon against the rule to be edited. You can modify all the fields in the rule as a new rule.
Delete NLP Rule
To delete an existing rule, go to the list of NLP rules and use the delete icon against the rule to be deleted.
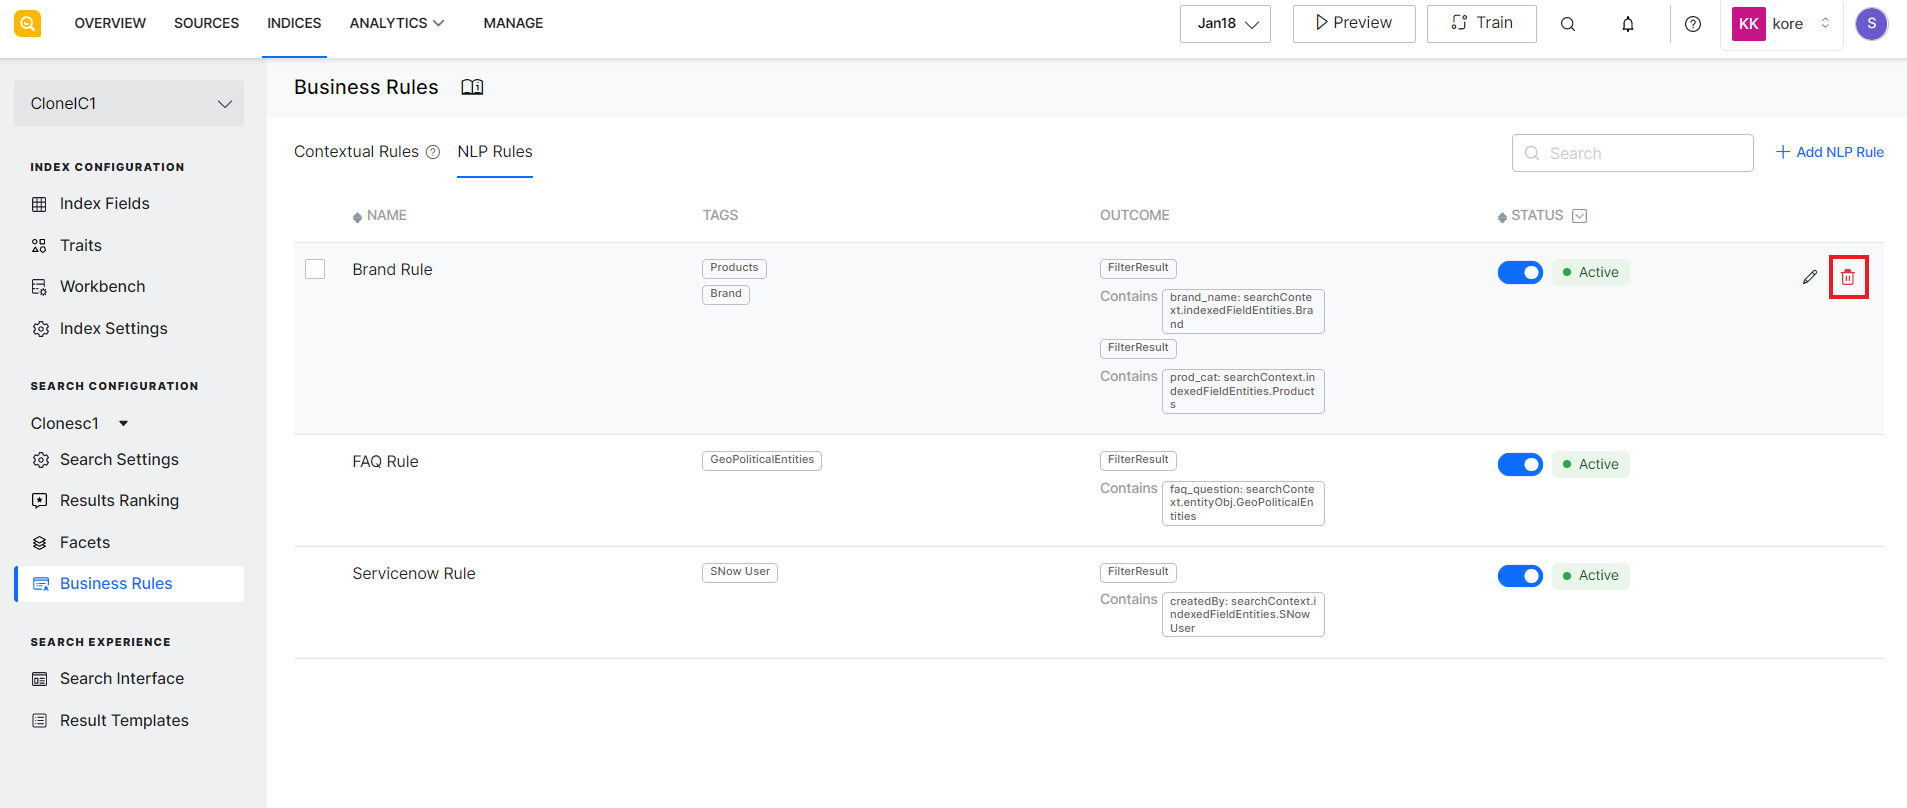
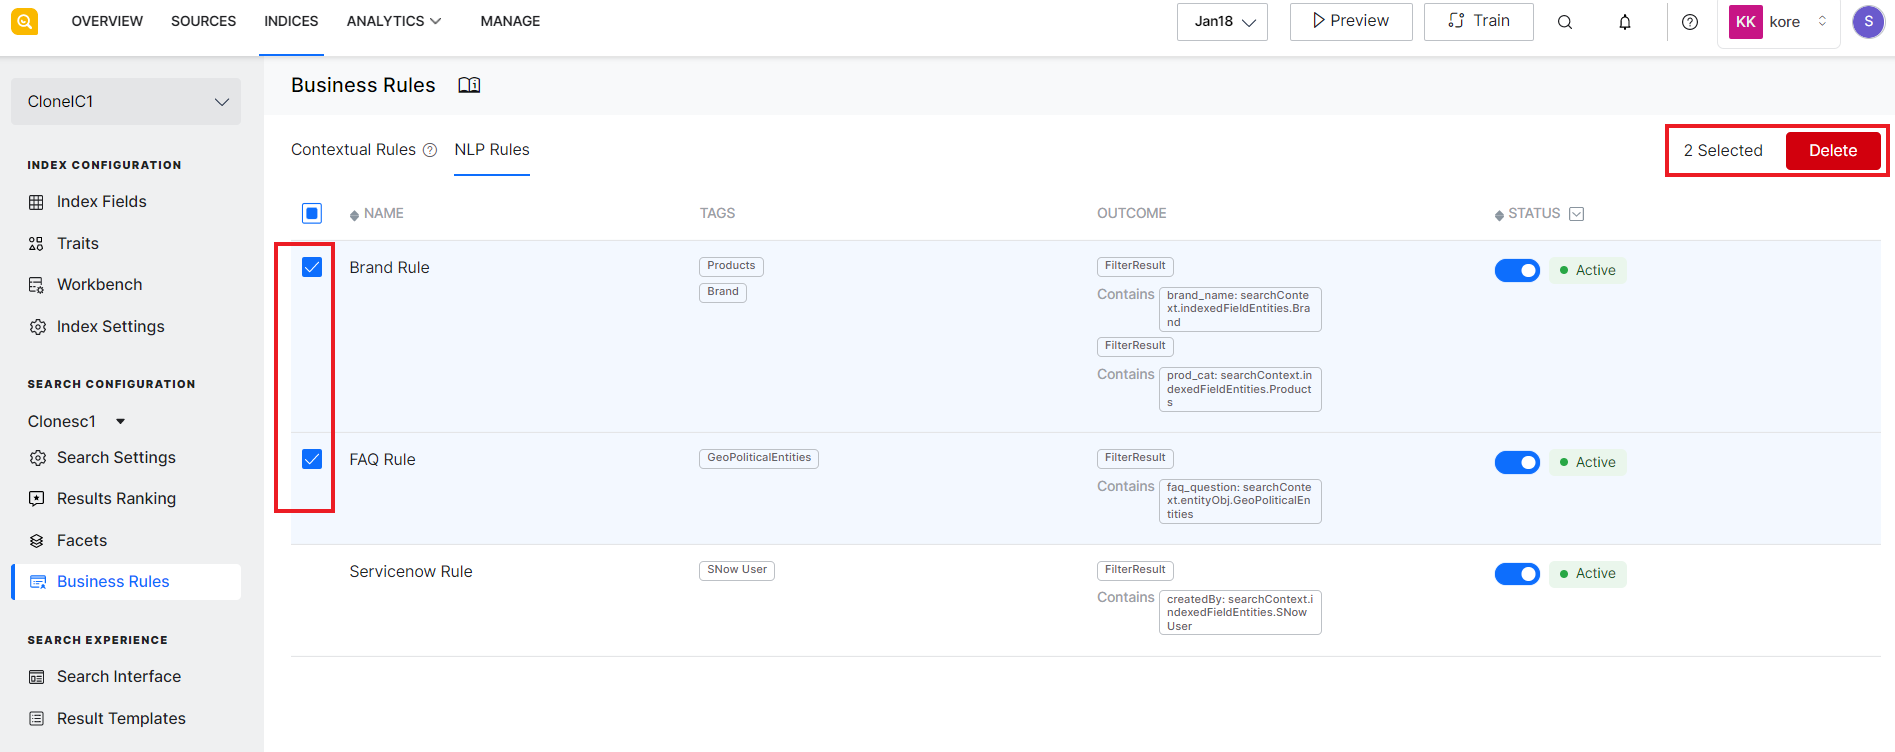
To delete multiple rules at once, select the rules to be deleted and click the Delete button on the top right corner of the page.