
In order to meet specific business needs or adhere to specific company policies, you may have custom metadata that you want to use to filter or personalize the response to search queries. SearchAssist offers you a special field to accomplish the same.
There is a special field,’meta_data’, available across all data sources that can be used to store your custom metadata and can be used to filter, customize, and personalize results.
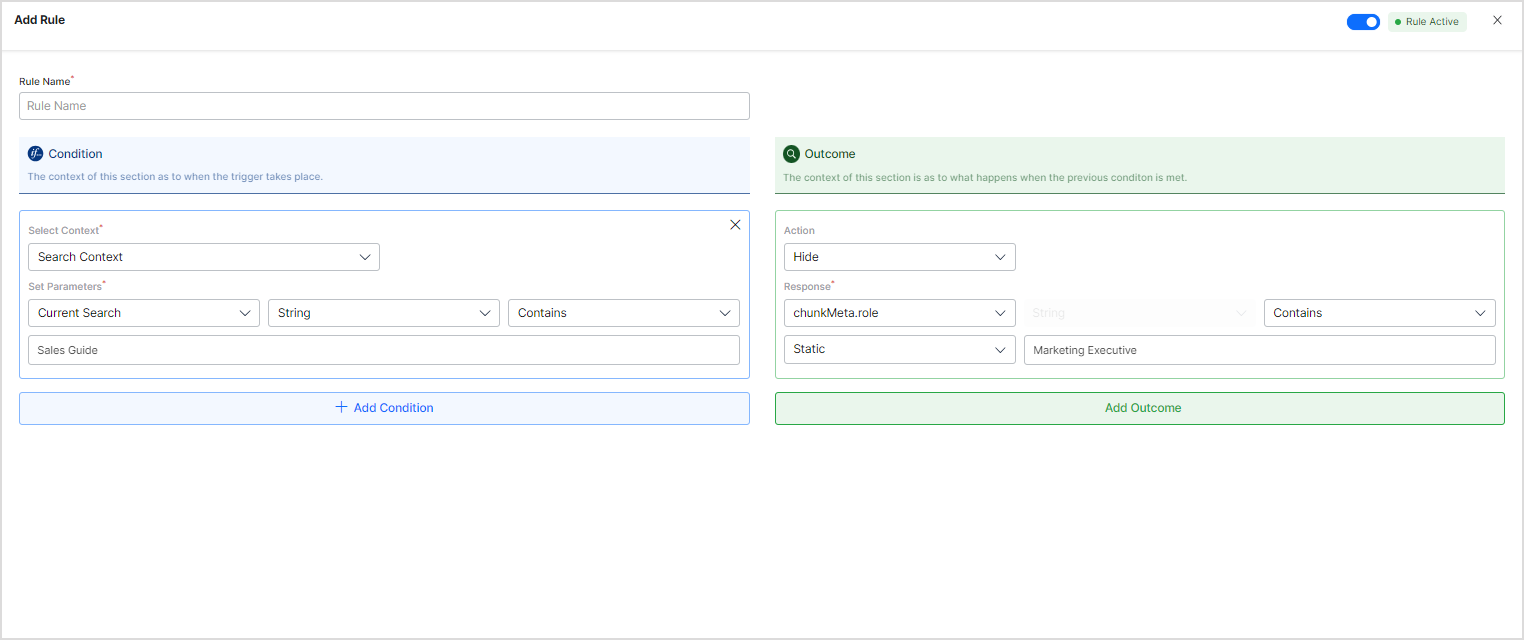
Assume you have a set of documents, some catering to the needs of your marketing executives and others for your sales folks, and you have to tailor the results displayed to the users as per their roles. By using the meta_data field, you can easily accomplish that. For each document or record, add the role information as meta_data and then use business rules or public APIs to filter data based on this field.
Implementation
The application uses custom metadata from documents and stores them in the Answer Index and Search Index in different formats. This data can then be used for conditional filtering or personalization of results.
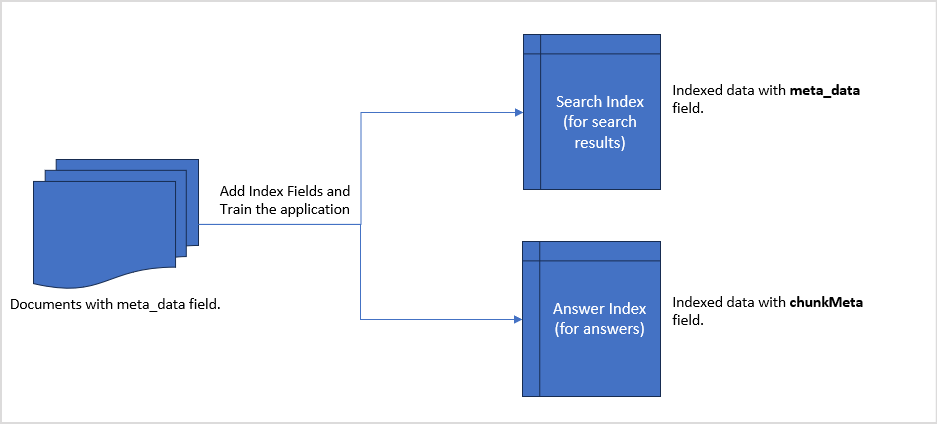
Follow the steps listed below to use meta_field and implement business rules using it. 
1. Adding the custom data in the meta_data field
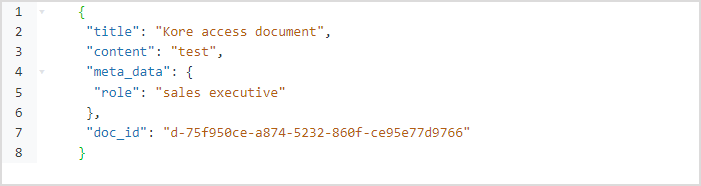
Add the desired information specific to your requirement or use case as meta_data in the ingested data. For the above example, this is the role information associated with each document or record.
You can add this information in the following ways:
- You can either manually add this field to the data at the source itself, like when ingesting structured data, or insert this additional field along with other fields.
- You can use Workbench to preprocess your input before it is used to generate answers or search results. Depending on the nature of the information to be added to the
meta_datafield, you can use the Custom Script stage or any other Field Mapping stage to accomplish this.
2. Adding Index Fields
To enable writing business rules using any of the data that is available in meta_data fields, you need to add the fields as Index fields and mark them as searchable.
For Answers (if Answer Snippets are enabled), define Index fields in the format: chunkMeta.<custom-field-name>, if custom-field-name is the metadata field stored in meta_data.
Similarly, for Search Results, define Index fields in the format: meta_data.<custom-field-name>, where custom-field-name is the metadata field stored in meta_data.
For the above example, go to the Index fields page under the Indices tab and add the following two index fields:
chunkMeta.role– to be used in configuring a business rule for Answers
meta_data.role– to be used in configuring a business rule for Search results
This will allow you to use these fields for filtering results.
3. Training the application
Once the application is trained with this data, the fields sent within ‘meta_data’ will be accessible as meta_data.<fieldname>‘ in the Search Index and as ‘chunkMeta.<fieldname>‘ in the Answer Index, if Answer Snippets are enabled.
For instance, role information can be accessed using 'meta_data.role' for search results and 'chunkMeta.role' for Answers. To verify this, you can go to the Chunk Browser, open the corresponding chunk, and go to the JSON view. You will see the chunkMeta field like this: 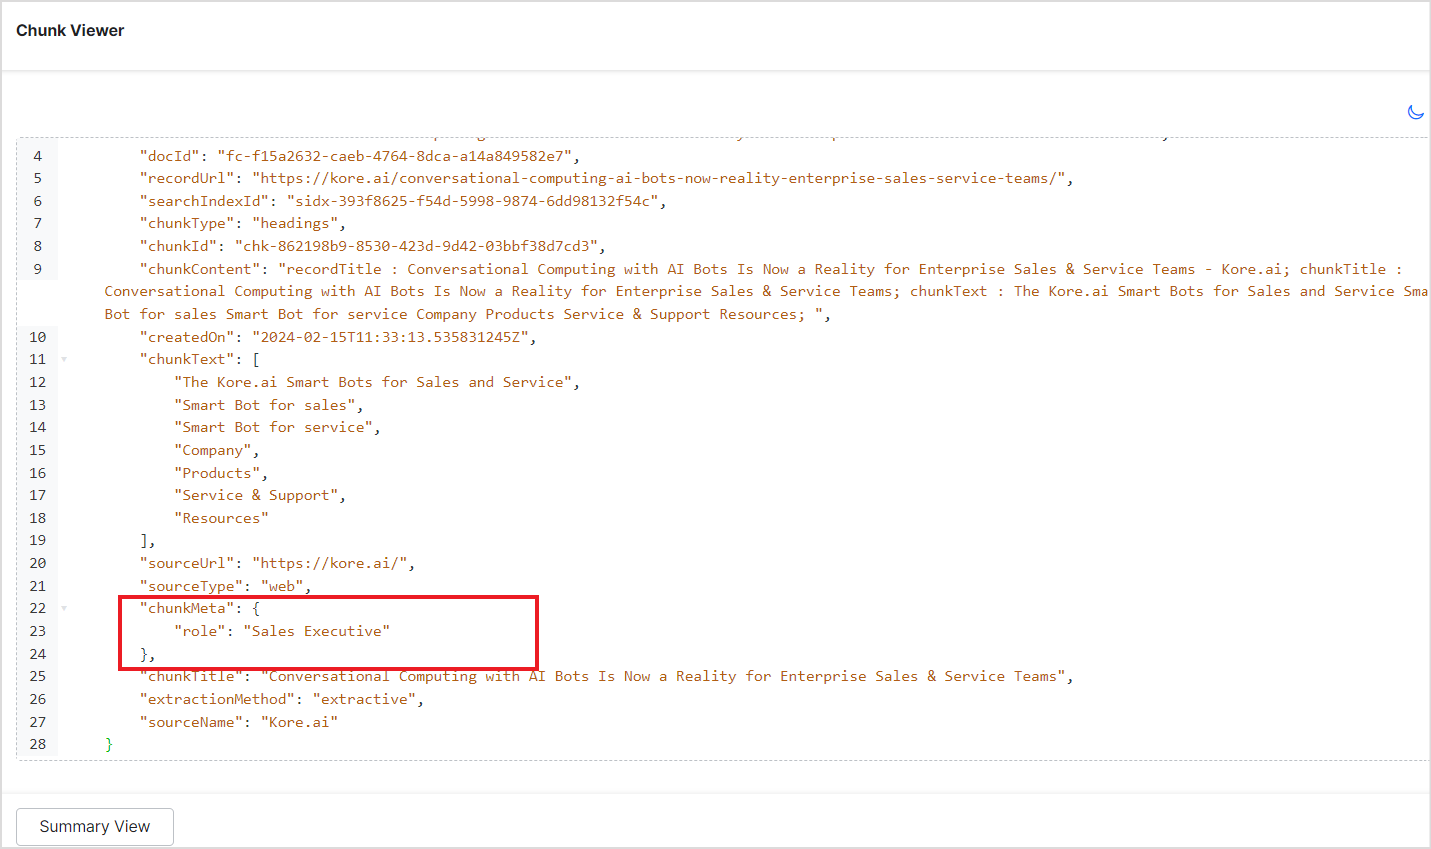
4. Filtering Data based on metadata
With the defined Index Fields in place, you can now use this information to filter your data and tailor it to your needs. You can use either of the following ways to implement filtering:
4.1 Implement Business Rules.
Continuing the previous example, you could add the following two business rules to your application to achieve the desired outcome.
- When the query is for marketing documents, hide documents where the role is set to ‘sales executive’.
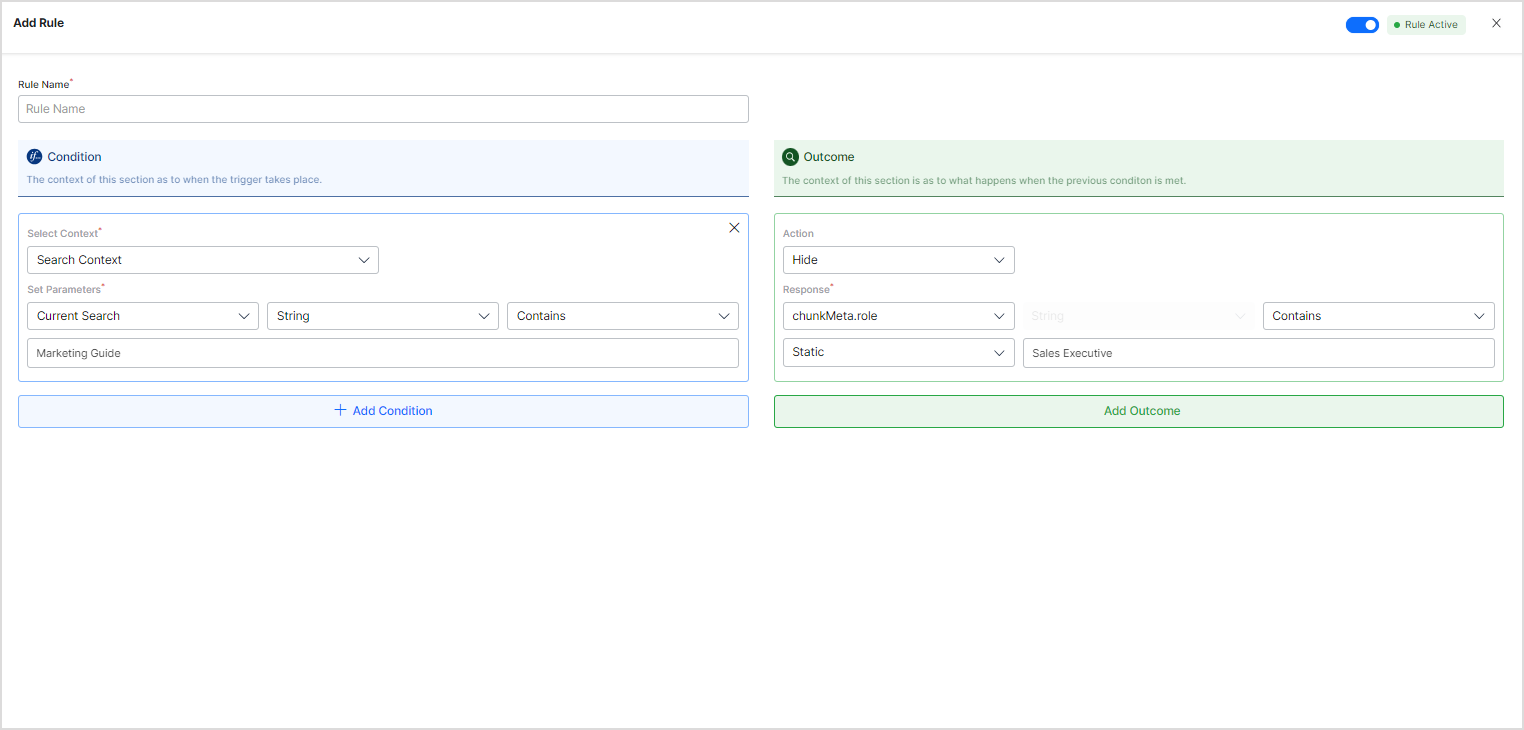
- Similarly, when the query is for sales documents, hide documents where the role is set to ‘marketing executive’.
4.2 Implement result filtering using AdvancedSearch Public API
AdvancedSearch Public API allows you to fetch search results and answers generated corresponding to the input query and the meta filters sent in the request body. You can use the Index Fields defined for the meta_data parameters in the metaFilters condition sent as the request body to the API.
Continuing the above example, to fetch search results and answers where the role is set to ‘Sales Executive’ only, you can design the payload like this:
{
  "query": "Sales Analysis of the year 2023",
  "maxNumOfResults": 2,
  "queryType": "relevanceWithMetaFilter",
  "metaFilters": [
    {
      "condition": "OR",
      "rules": [
        {
          "fieldName": "chunkMeta.role",
          "fieldValue": [
            "Sales Executive"
          ],
          "operator": "contains"
        },
        {
          "fieldName": "meta_data.role",
          "fieldValue": [
            "Sales Executive"
          ],
          "operator": "contains"
        }
      ]
    }
  ]
}