
SearchAssist offers seamless integration with various content sources and repositories, including but not limited to ServiceNow, Microsoft SharePoint, Atlassian’s Confluence, and IBM Domino, through the Connectors.
Connectors facilitate the extraction and search of data from diverse third-party applications, CRM systems, web databases, and cloud-based platforms. SearchAssist can be configured to connect to multiple systems at the same time using a connector for each third-party application allowing you to set up a centralized and efficient data retrieval and indexing process.
Understanding Connectors
Connectors enable SearchAssist to establish a connection with the third-party application. At the time of the initial configuration of the connector, you can provide the configuration details of your application along with the authentication information. Using this configuration information, the connector establishes a connection with the application and fetches the data for further processing and indexing.
Features
- SearchAssist maintains the access privileges for a user as per the privileges assigned to the user in the third-party application to ensure the security and integrity of the content.
- During each synchronization cycle of the connector, SearchAssist only retrieves newly added or modified data from the application, determined by the timestamp of changes. If data has previously been indexed in the SearchAssist application and remains unchanged, it is not retrieved again.
- SearchAssist enables data from connectors to be used for both Search Results and for generating Answers. Refer to this to learn more about the content types and formats supported for Answers.
By default, SearchAssist provides connectors for most of the commonly used applications. For any specific integration requirements, please contact us.
Connector Directory
| Connector | Type of Repository | Content Support | Content Filtering | RACL Support | ||
| Search Results | Generative Answers | Extractive Answers | ||||
| Azure Storage | Cloud | Files managed by Azure Storage in the formats: .doc, .docx, .ppt, .pptx,.pdf, .txt, .OneNote | .txt, .pdf, .rtf, .msword, .doc, .docx, .ppt, .pptx | No | No | |
| Confluence Cloud | Cloud | Only manually created Knowledge articles in Confluence. | Knowledge Articles | Knowledge Articles | Yes | Yes |
| Confluence Server | On-prem | Knowledge Articles
Attachments in the following formats are also supported.
|
Knowledge Articles
Attachments in the following formats are also supported.
|
Knowledge Articles
Attachments in the following formats are also supported.
|
Yes | No |
| DotCMS | Cloud | No | No | |||
| Dropbox | Cloud | .doc, .docx, .ppt, .pptx,.pdf, .txt, .OneNote | .doc, .docx, .ppt, .pptx, .pdf, .txt, .html | .pdf, .html | No | No |
| Google Drive | Cloud | .doc, .docx, .ppt, .pptx,.pdf, .txt, .OneNote | .doc, .docx, .ppt, .pptx, .pdf, .txt, .html | Not Supported | Yes | Yes |
| Oracle Knowledge | Cloud | Knowledge articles | Knowledge articles | Knowledge articles | No | No |
| Salesforce | Cloud | Knowledge articles managed by Salesforce. | Knowledge articles managed by Salesforce. | Not Supported | Yes | No |
| ServiceNow | Cloud | knowledge articles managed by ServiceNow | knowledge articles managed by ServiceNow. | knowledge articles managed by ServiceNow. | Yes | Yes |
| SharePoint | Cloud | .doc, .docx, .ppt, .pptx, .pdf, .txt, .OneNote. | pages/articles (.aspx), .doc, .docx, .ppt, .pptx, .html, .xhtml, .txt, .pdf | .pdf, pages/articles(.aspx), .html, .xhtml. | Yes | Yes |
| Zendesk | Cloud | Zendesk knowledge base articles | Zendesk knowledge base articles | Zendesk knowledge base articles | No | No |
Managing Connectors
Adding a content source using Connector
To add a connector, go to the Connectors under the Sources tab. Select the application for which the connector is to be configured.
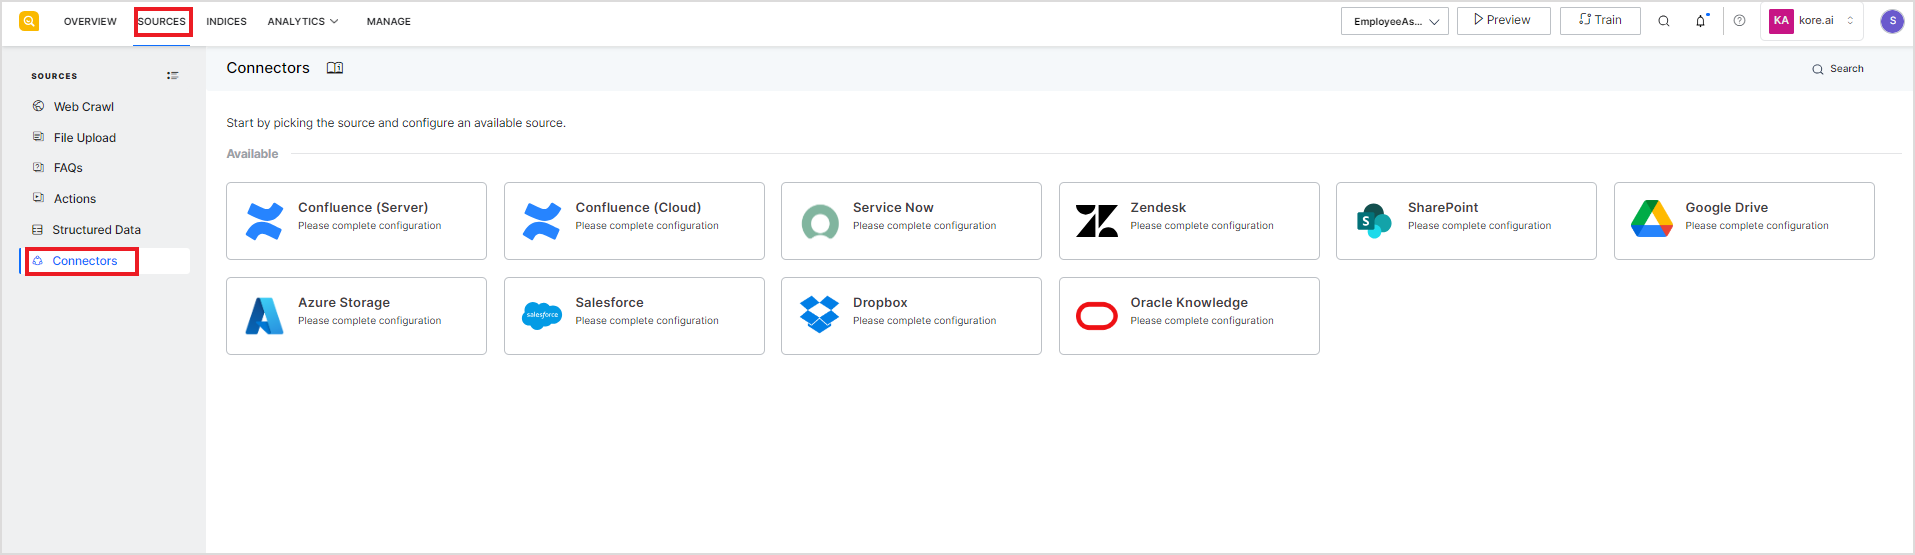
This will take you through a series of steps in a wizard to configure the connection details for the third-party source of content. The configuration properties may vary depending on the source. Refer to the respective connector guide for specific details.
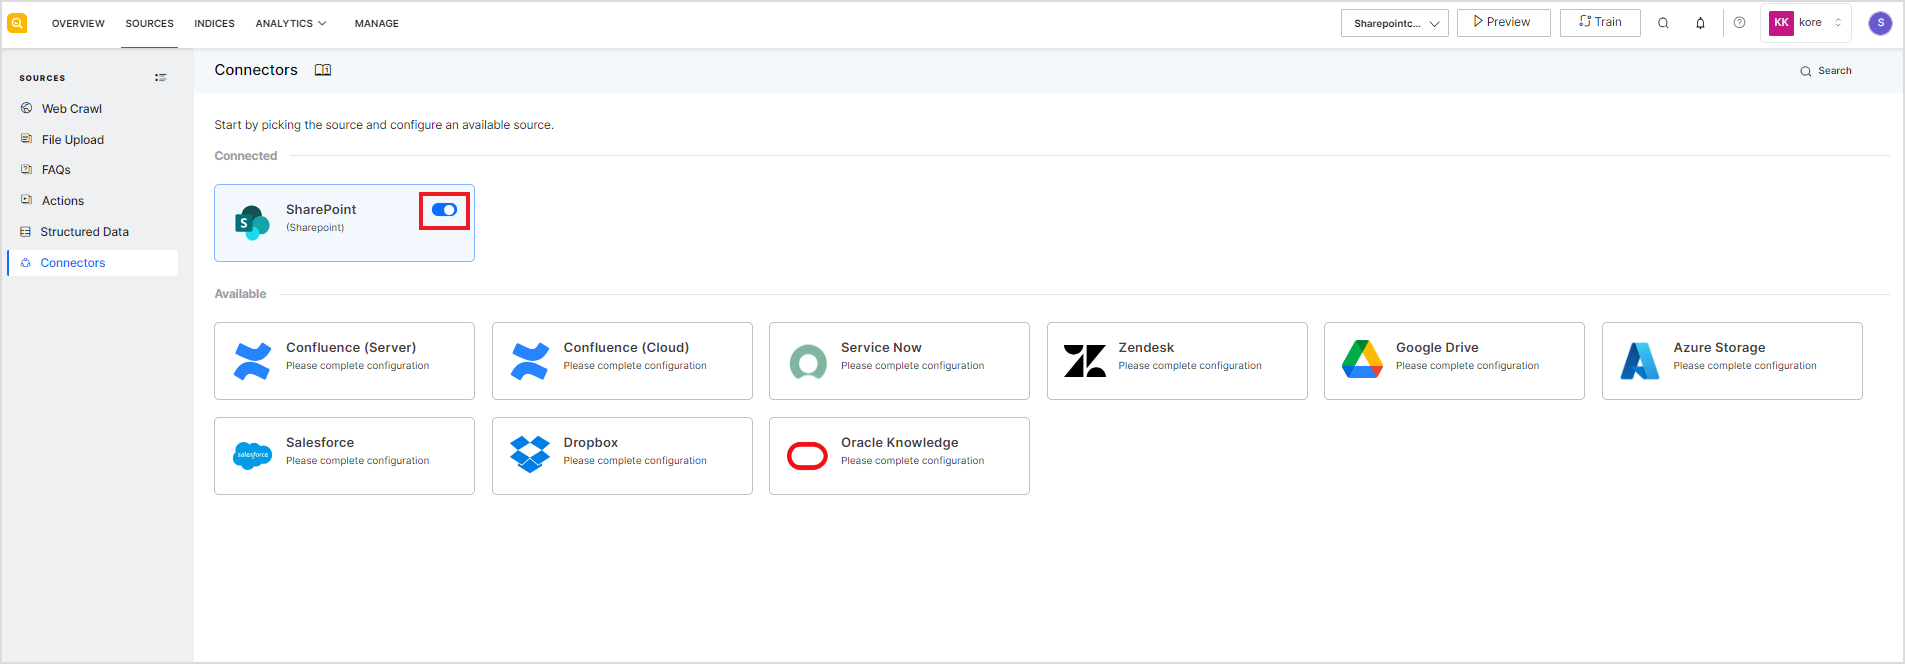
Enabling/Disabling Connectors
After the connector is configured and the source is connected, you can enable or disable the connection temporarily. When a connector is disabled, sync operation is temporarily disabled. This may be useful for testing, particularly when there is more than one connector configured with your SearchAssist application.
To do so, use the toggle button against the connector as shown below.
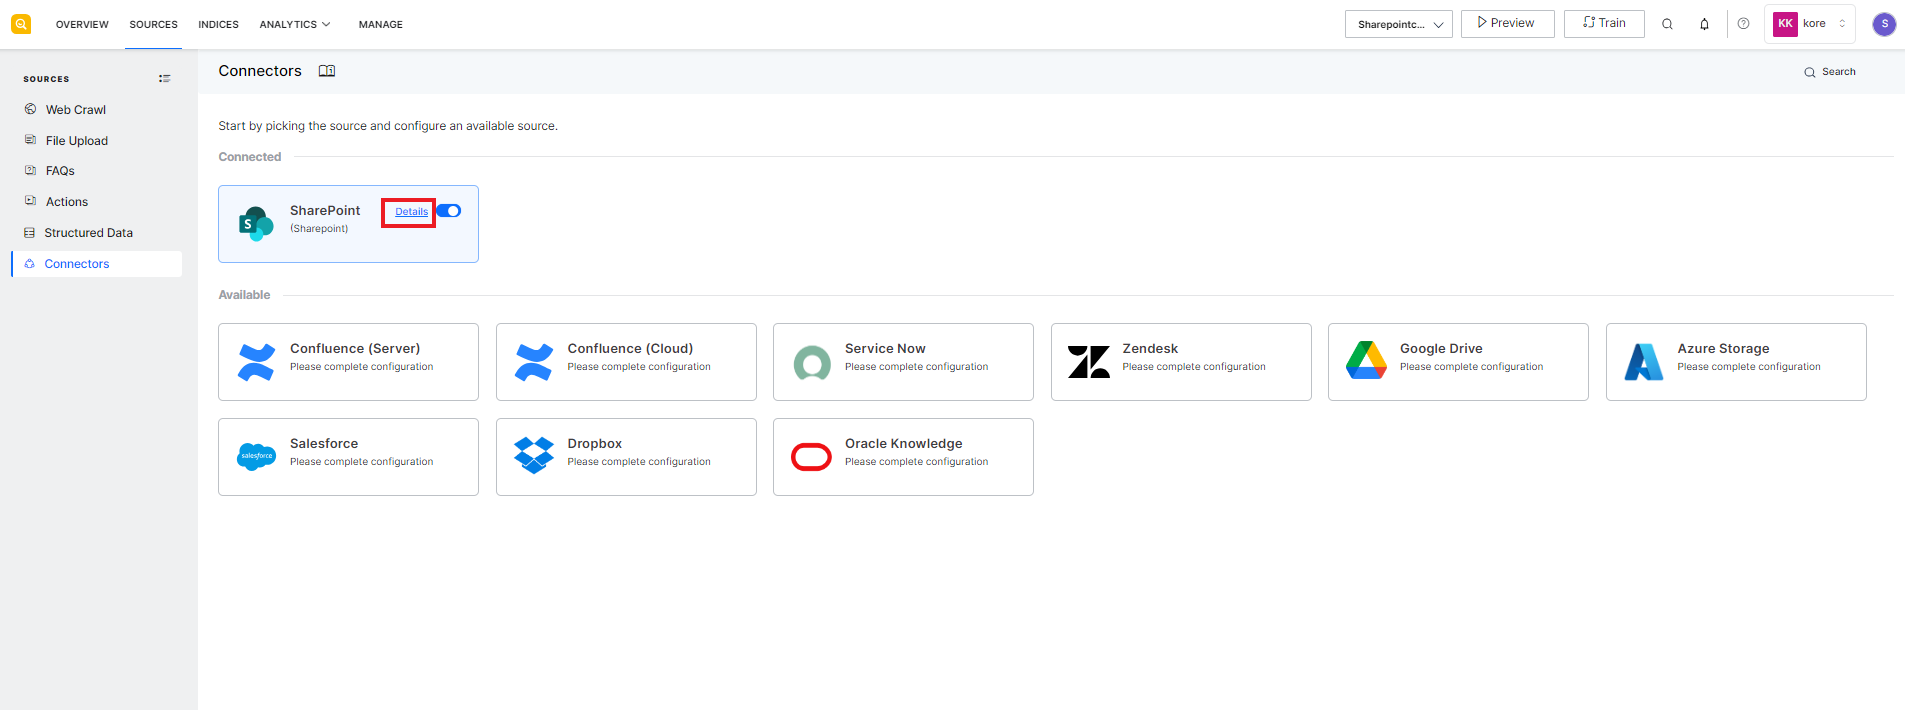
View and Edit Connector Details
To view or edit the connector configuration i.e. connection settings, sync schedule, etc., click the details link against the name of the connector. The details page shows the config details of the connector under different tabs.
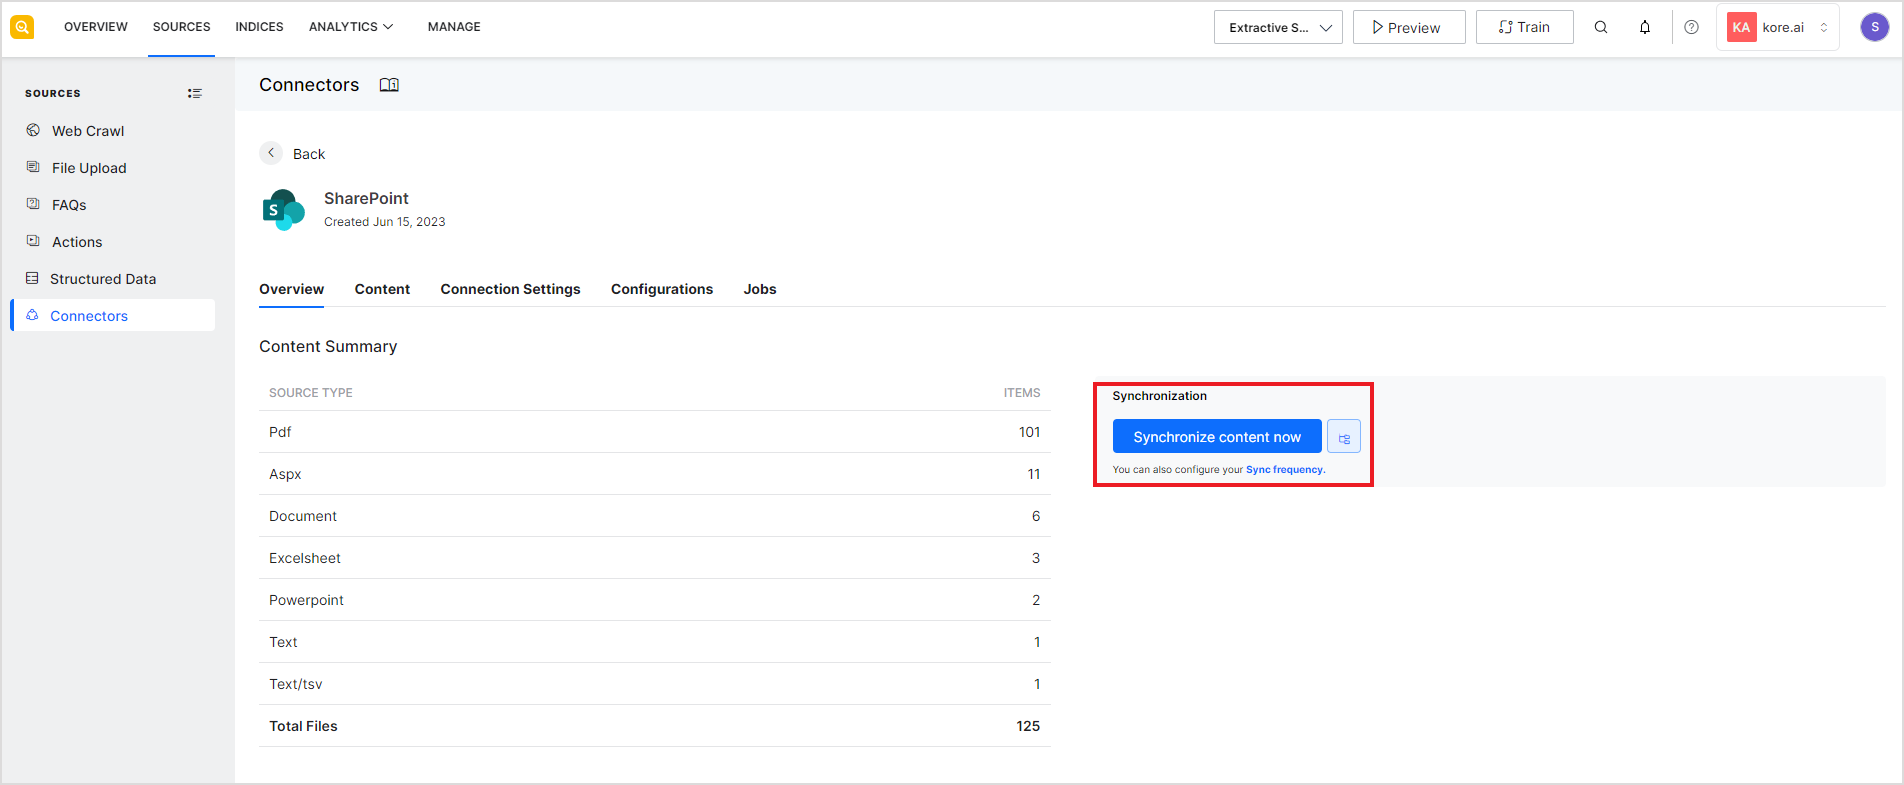
Overview
This page gives an overview of the content fetched from the source. It also allows you to initiate a synchronization job for the content. Synchronization enables SearchAssist to access newly added content on the third-party application.
Content
The Content tab lists all the content crawled from the connector source along with their URL and timestamp of the last update. These logs are organized into tabs that categorize files as successfully ingested, failed, or skipped.
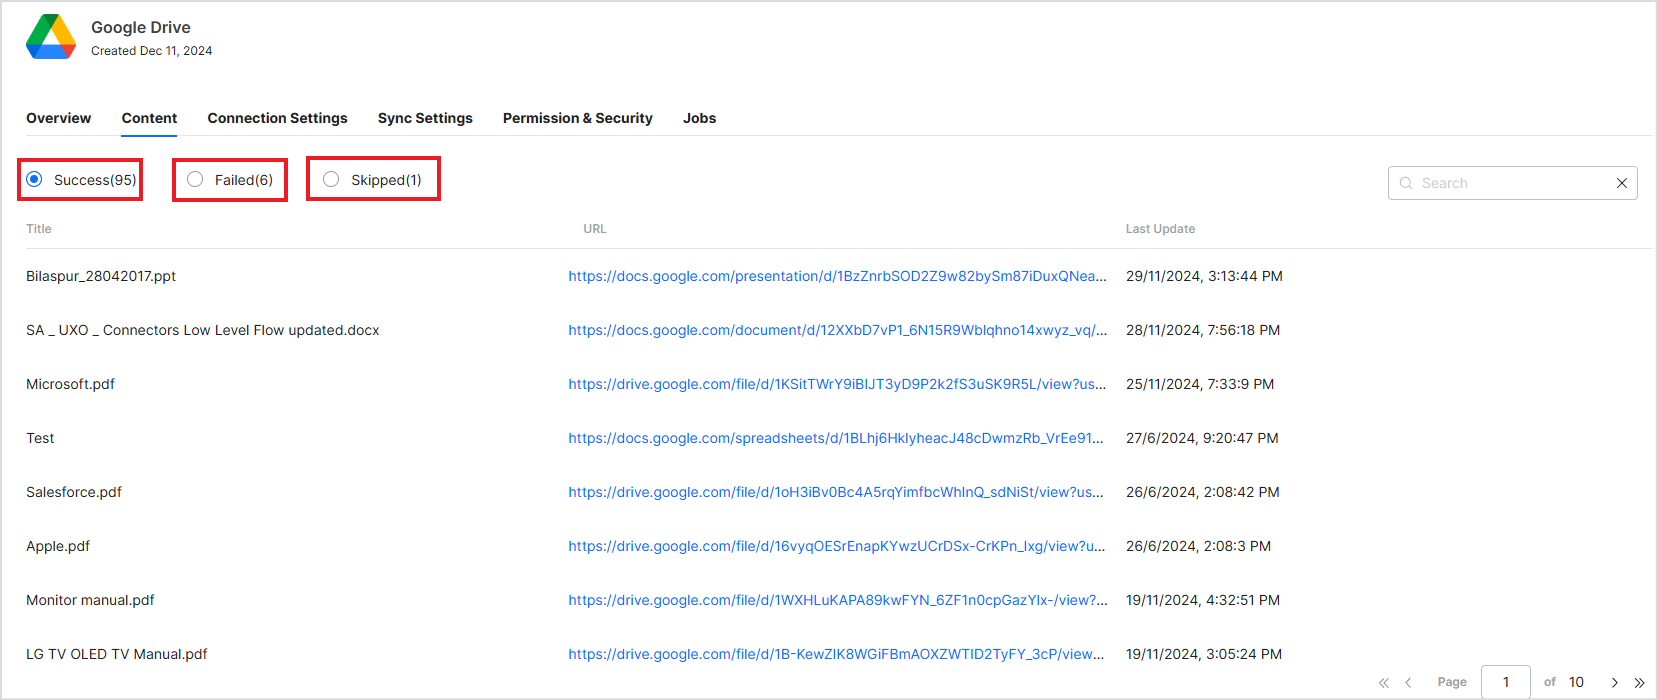
For the files that SearchAssist failed to ingest, listed under Failed, the error code is also shown, indicating the potential reason for failure.
Currently, logs are only available for files. For articles and other content types, logs are not available. In that case, only the successfully ingested content is listed under the Content tab.
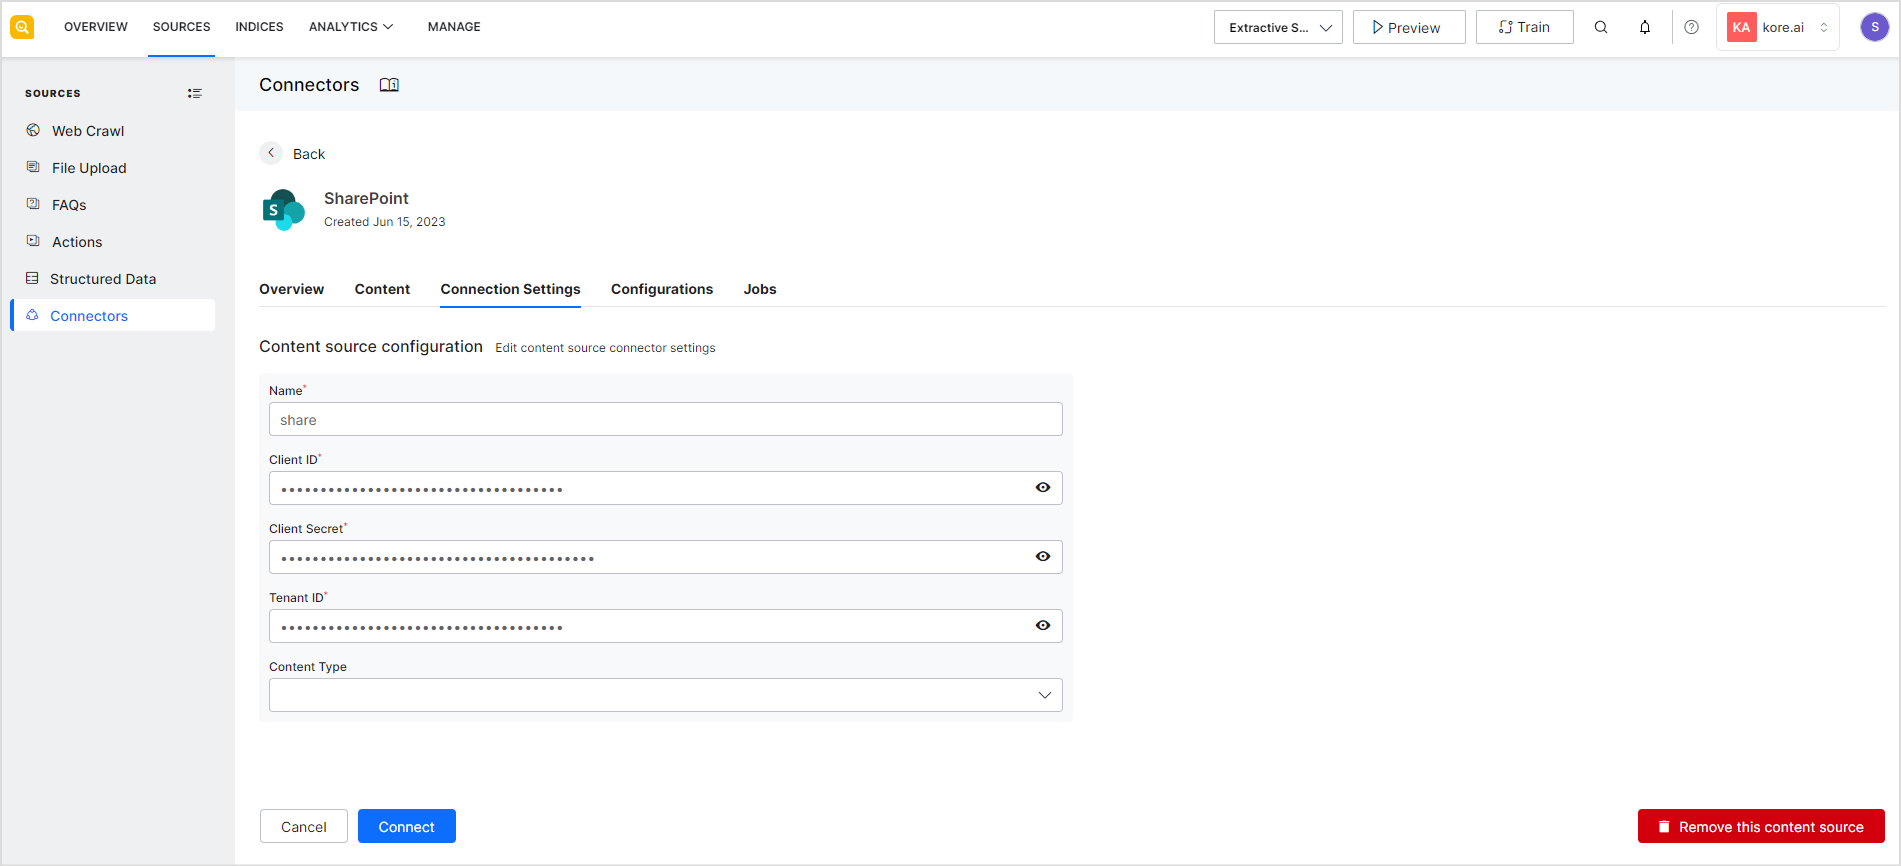
Connection Settings
This tab has the authentication details required to connect to the source. If you edit the connection settings, click the Connect button again for the new connection. The connection settings vary across connectors. For details on the different settings, refer to the application-specific connector configuration guides.
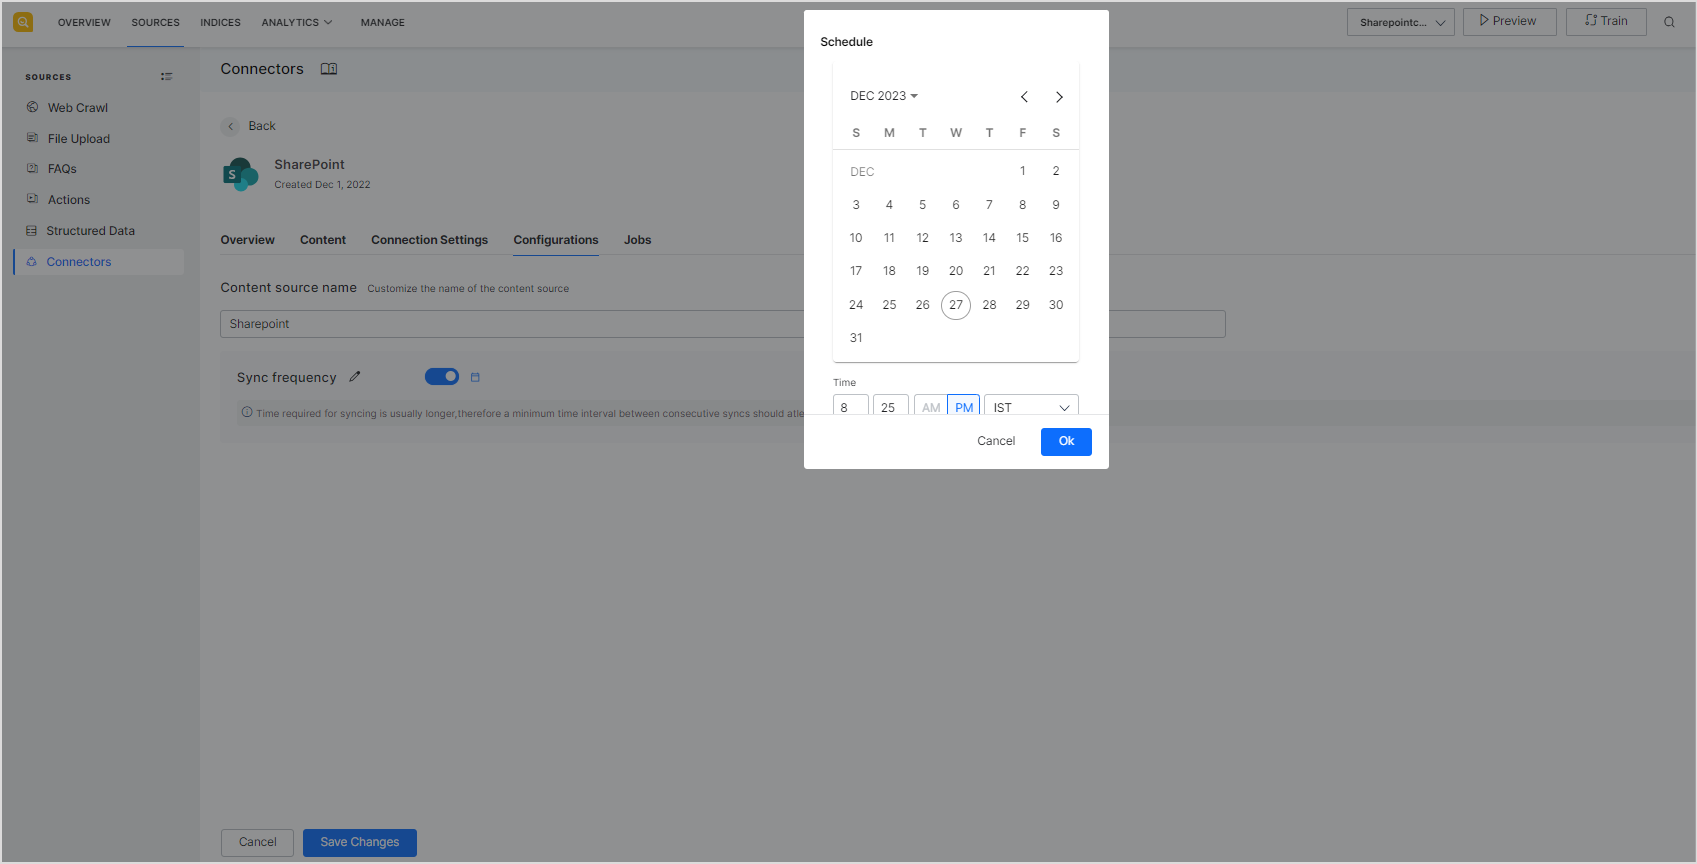
Configuration
The configuration tab can be used to edit the name of the content source or change the frequency of synching with the content source. Note that the time required to complete the synchronization of content between the source and SearchAssist depends on the amount of data to be synchronized. It may take longer when the data is more. Hence, it is suggested to set the frequency of sync accordingly.
Jobs
This tab lists the synchronization-related tasks initiated by SearchAssist on the connector. 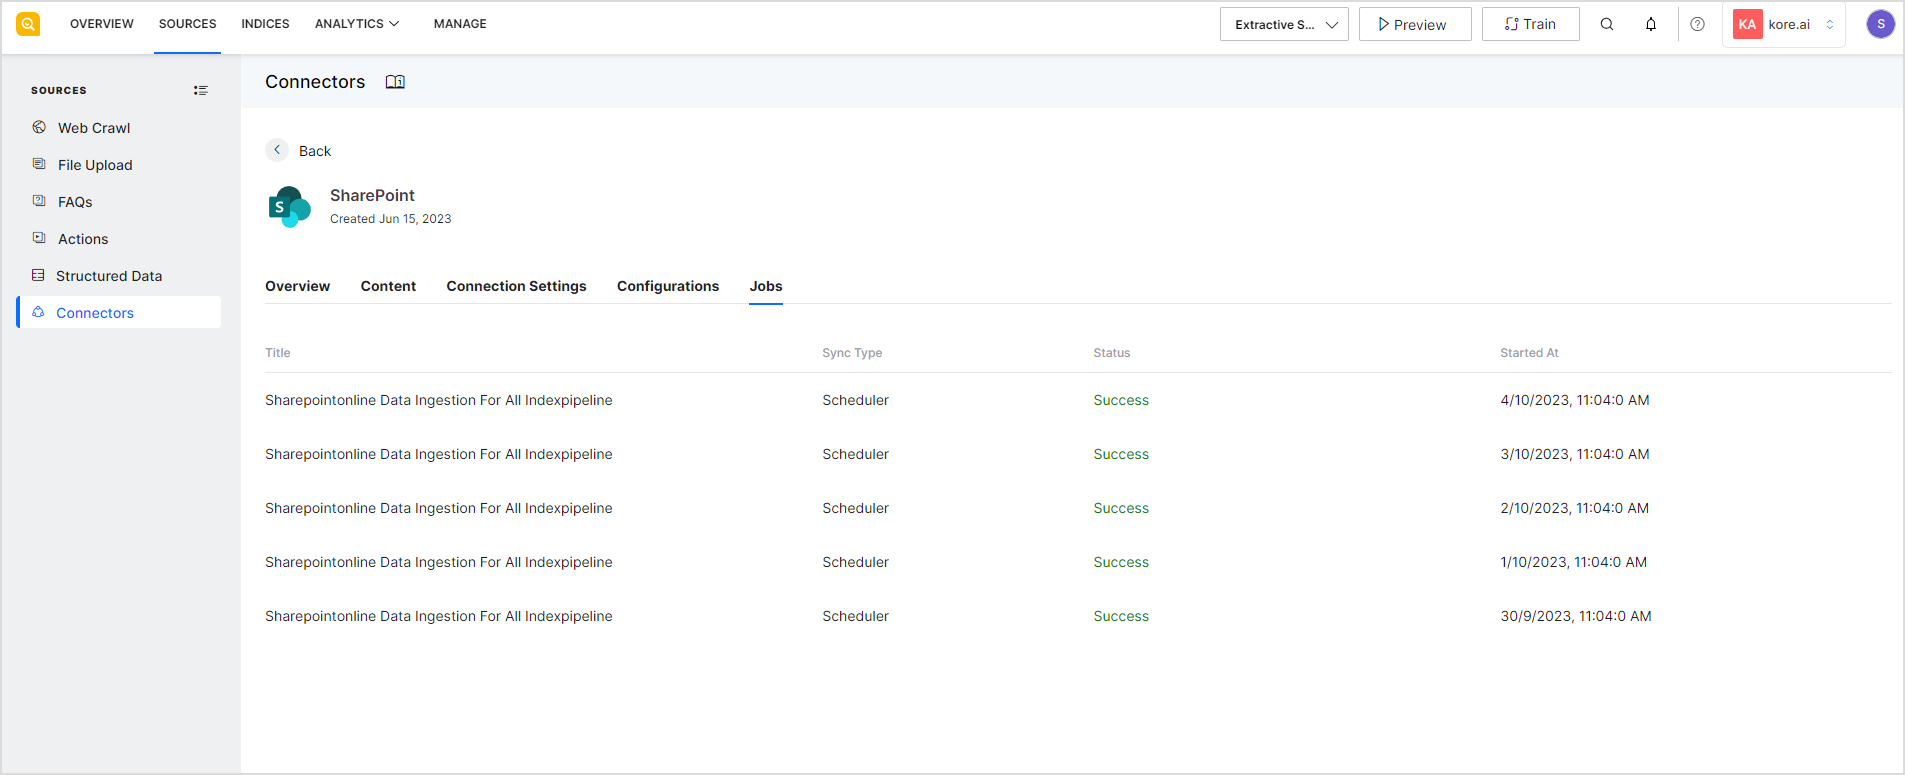
Removing the content source integrated using Connector
To permanently remove a content source and corresponding connector from SearchAssist, go to the Connection Settings of the connector and click the Remove this content source button at the bottom right corner of the page. This will also delete the data in SearchAssist indexed from the content source. 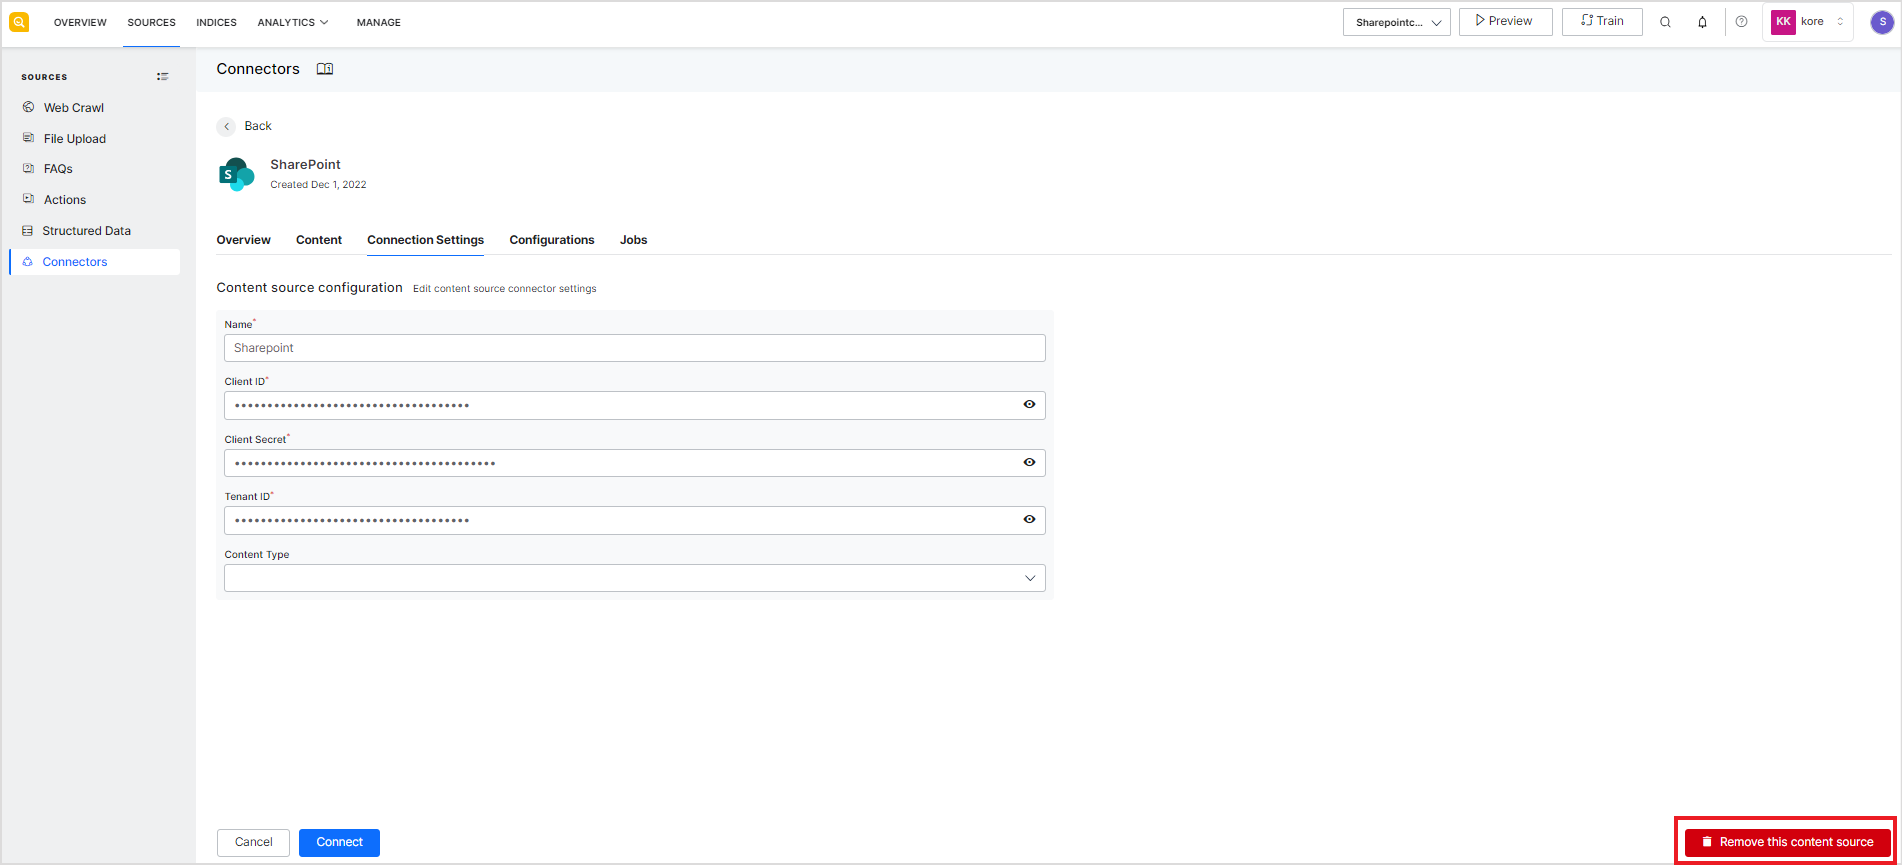
Indexing and Managing Content ingested using Connectors
SearchAssist creates standard default index fields to extract data from the connectors. To facilitate indexing and search on the content ingested via the connectors, fine-tune the search settings for these index fields. The following steps are necessary for the content to surface in the search results:
- Modify the weights assigned to the fields as per your business requirements, so that the relevant content can be displayed in the results.
- Map the field names in the results template so that they are included in the results layout view.
- Add the connector source name in the facets configuration so that it is reflected in the results describing the source of the result.
- Train the SearchAssist application.