
The SearchAssist web SDK is a tool for developers to add the capabilities of the SearchAssist application to their web applications. It is a client-side library that makes it easy for third-party web applications to access and use the features of SearchAssist.
Step 1: Configure Channel and credentials
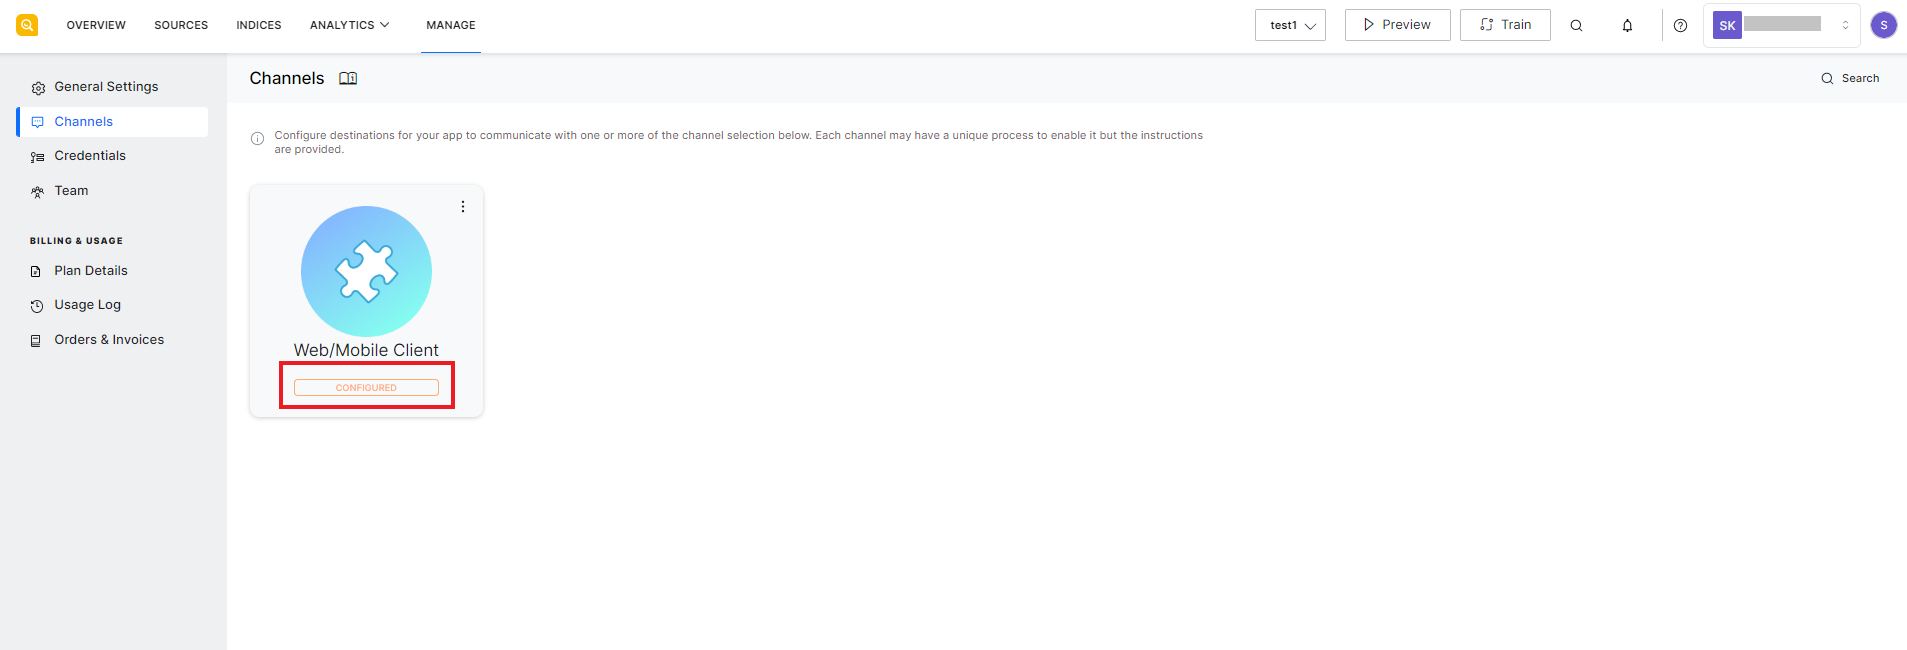
Go to your SearchAssist instance and register an existing or a new credential with the app. The SDK will use this to authenticate its requests with the SearchAssist app. To do so, go to the Channels page under the Manage tab and click Continue.
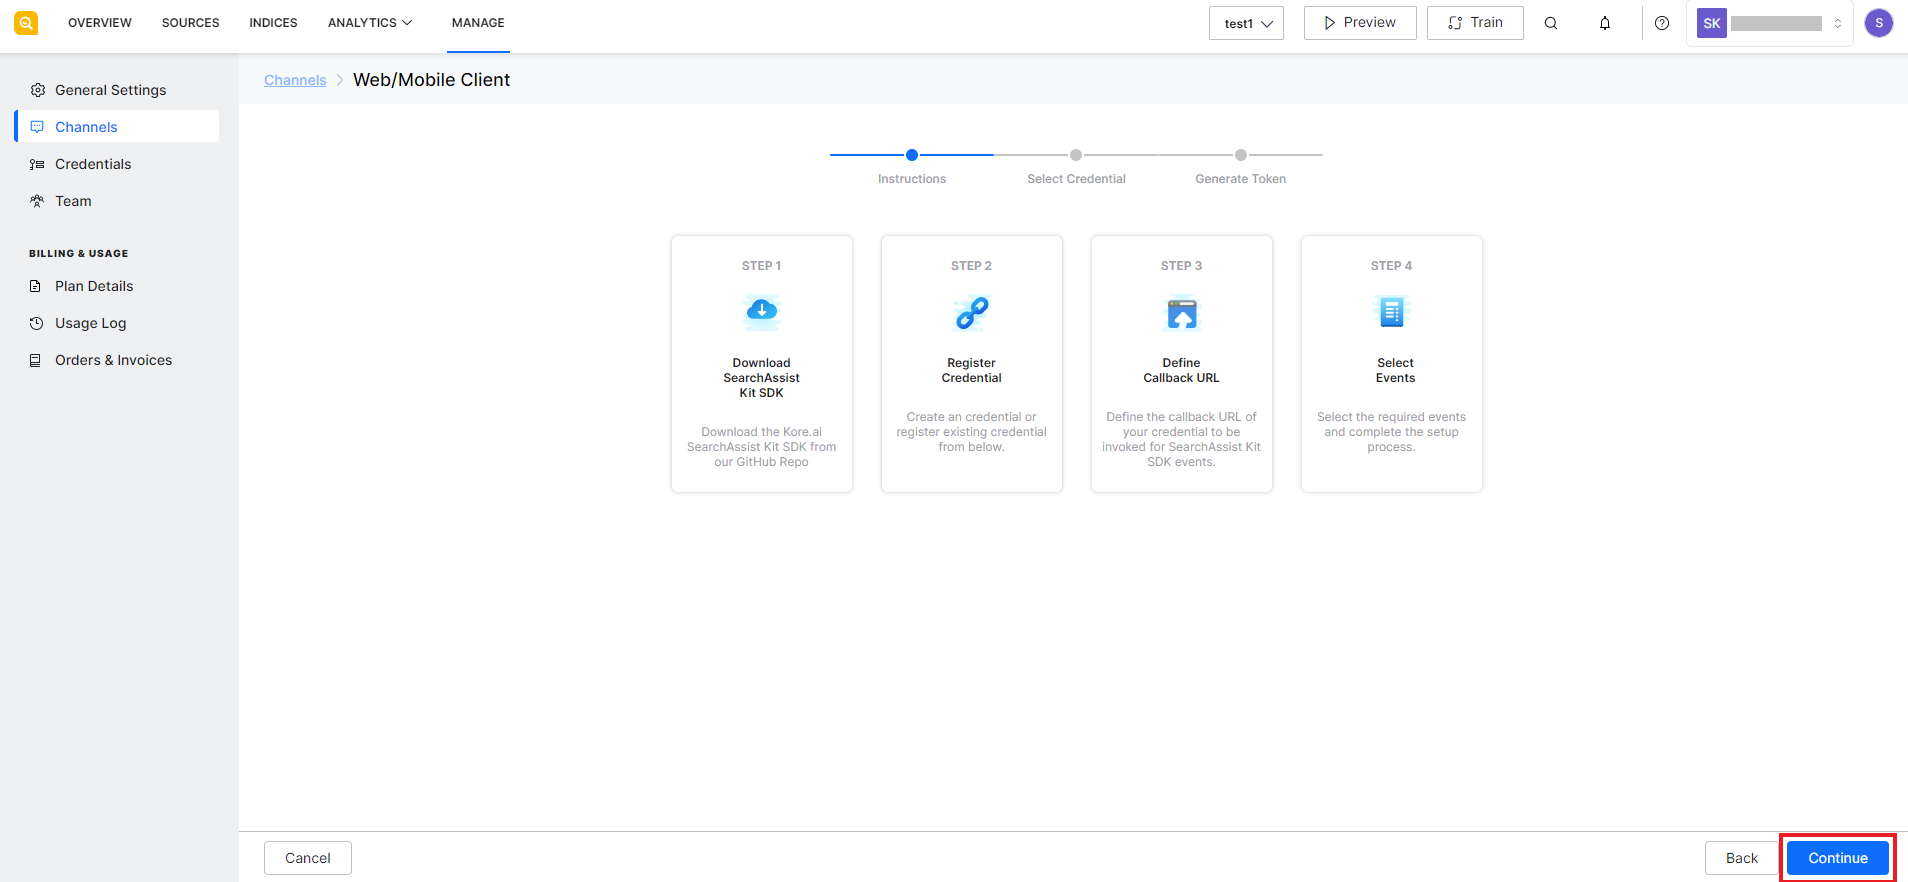
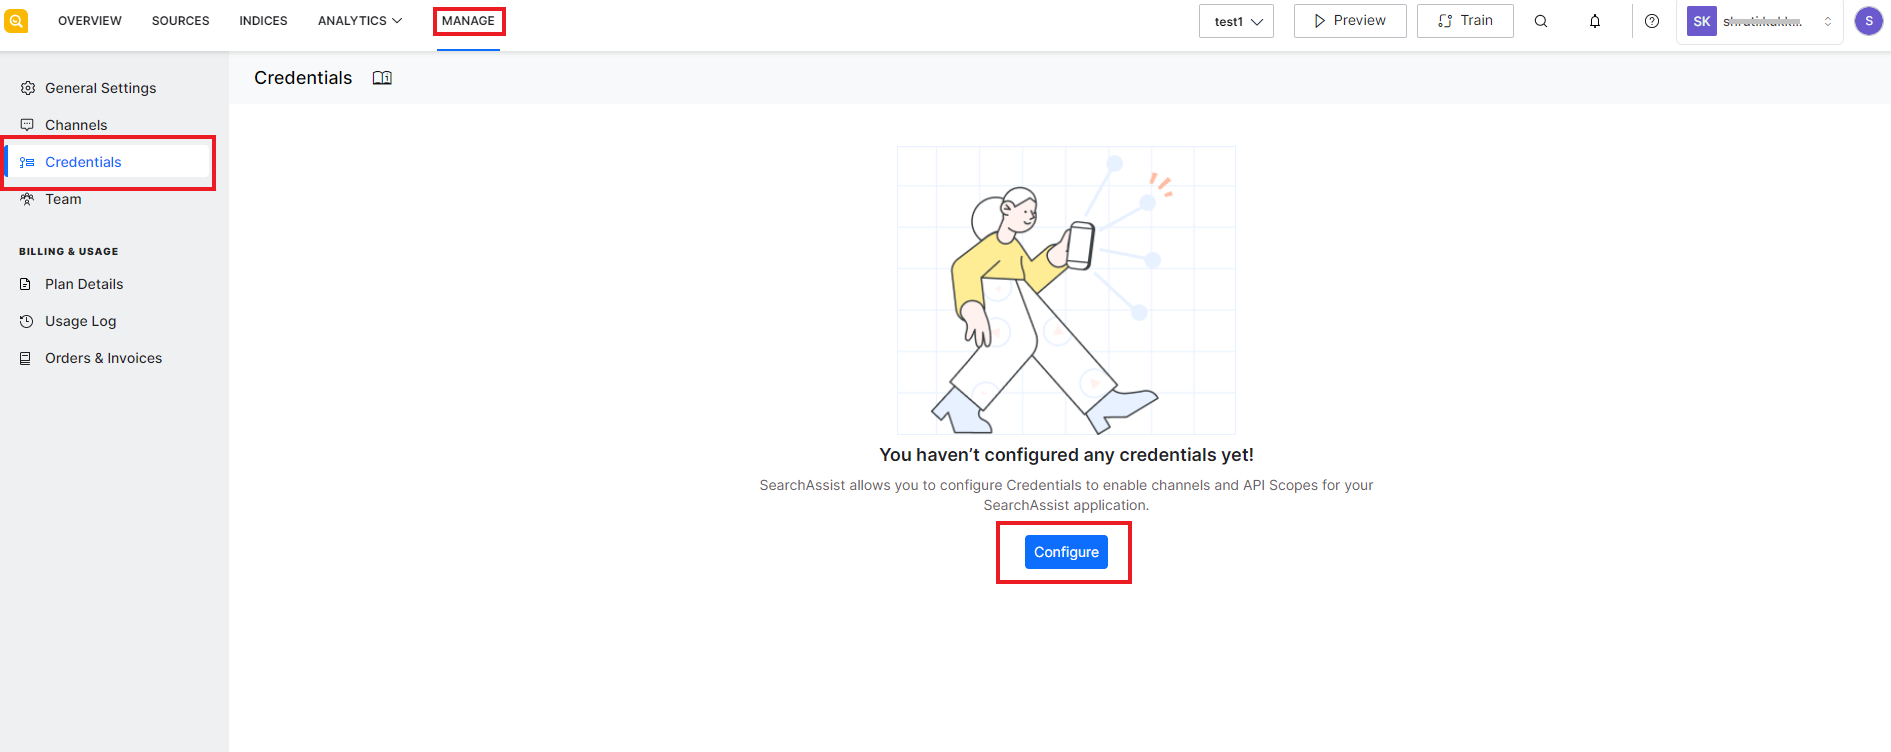
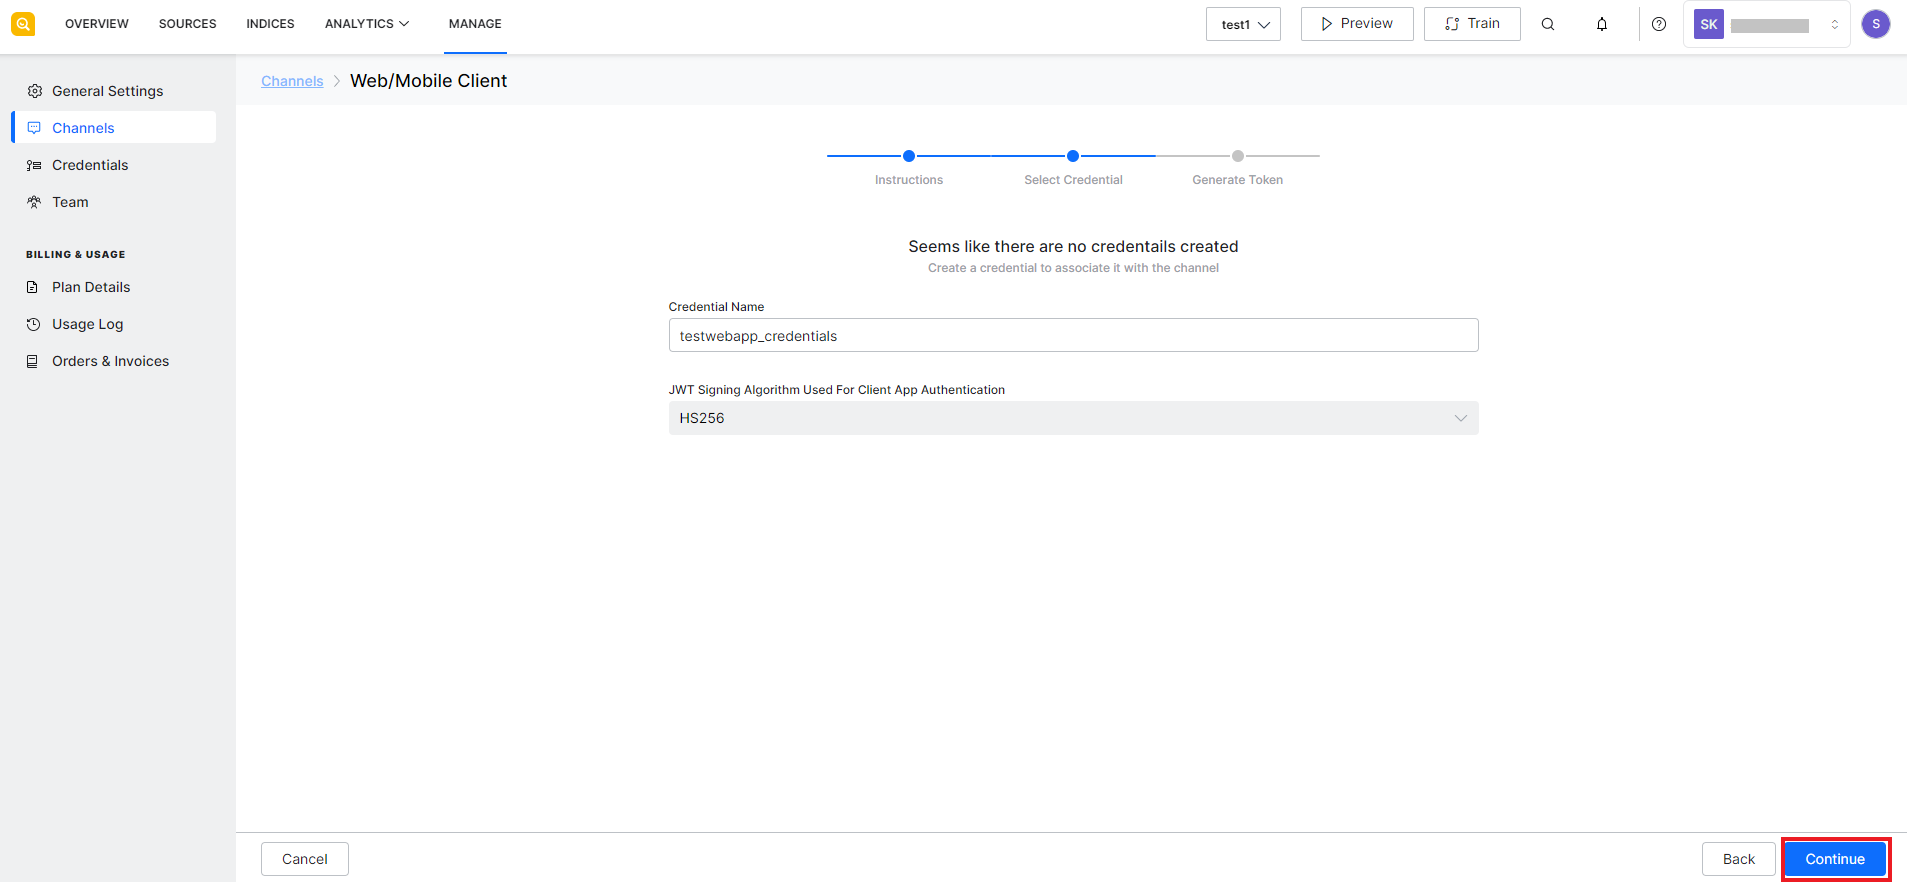
If there are no existing credentials to select from, generate new credentials else select from the existing ones and click Continue. You can also create new credentials from the Credentials page under the Manage tab. If there are no credentials already created, click the Configure button to create new credentials.
Add a new credential and assign the appropriate API scope. For more information on configuring credentials and assigning scope, refer to this.
This will generate the tokens required for the web app to communicate with the SearchAssist application. Click Save to enable the channel.
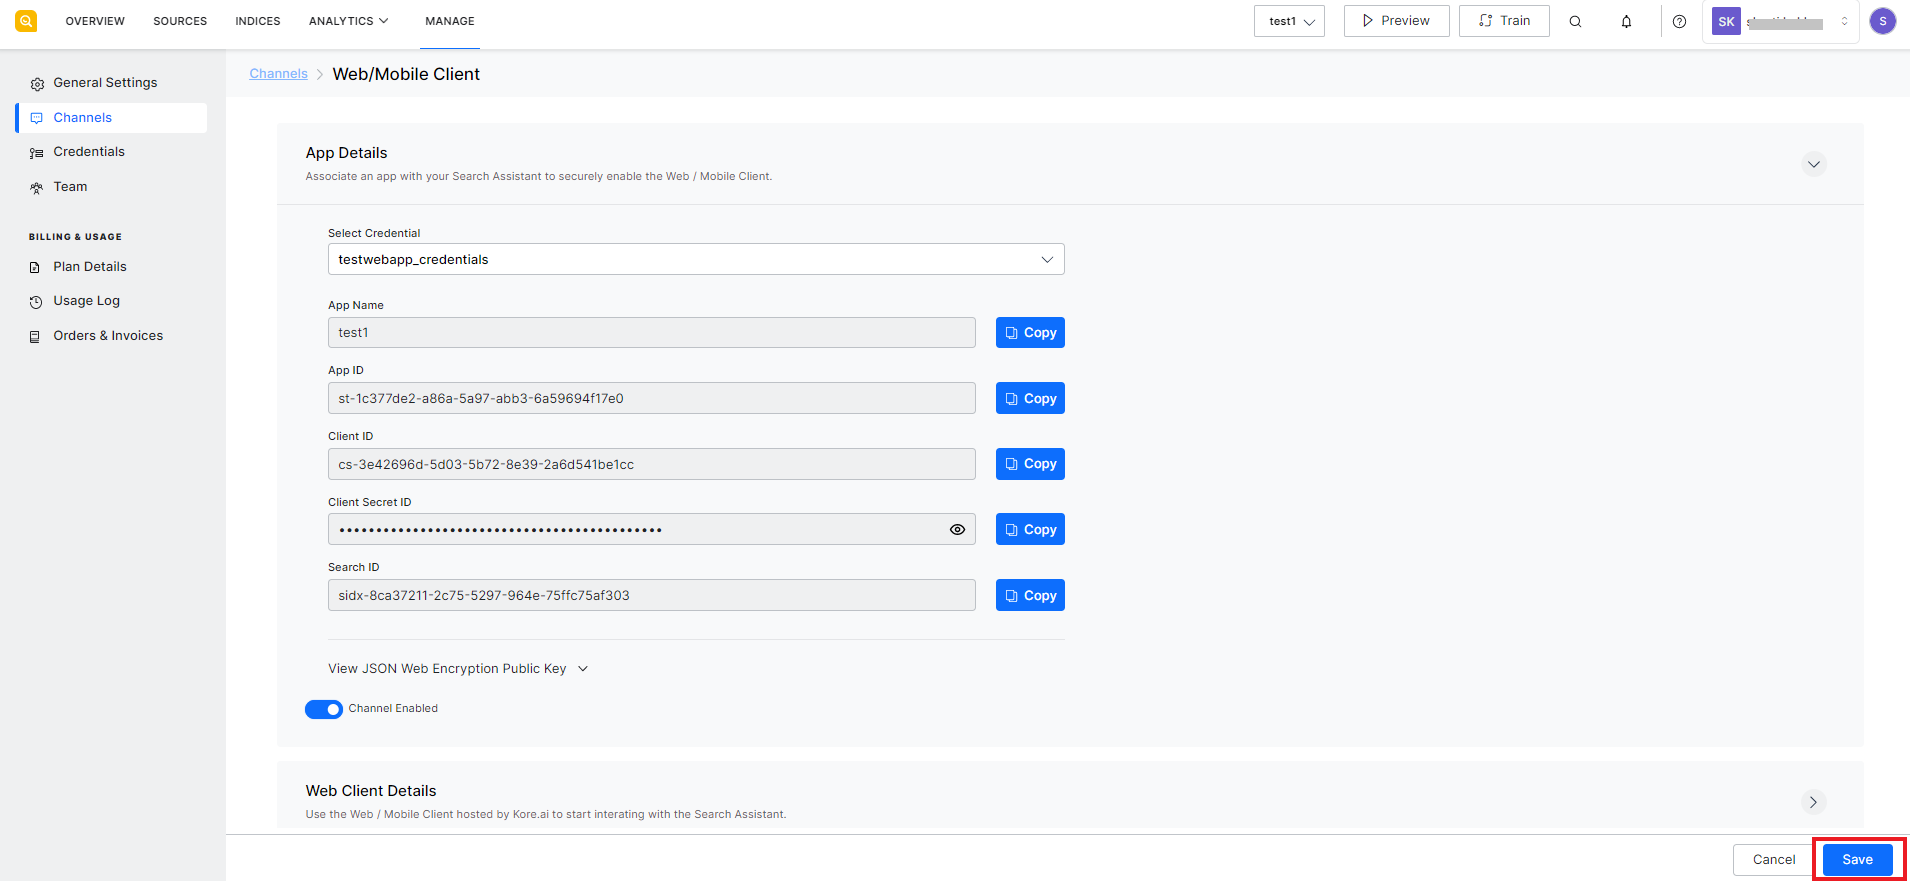
Once the credentials are configured and the channel is enabled, you will see the channel marked as CONFIGURED.
Step 2: Set up the SDK
The next step is to set up the SDK. There are two ways to use the SearchAssist SDK:
Option 1: Use the hosted SDK.
Add a reference to the hosted SearchAssist web SDK directly to your HTML code and load the SearchAssist library as required in your code. Follow the steps listed below to embed the library in your application.
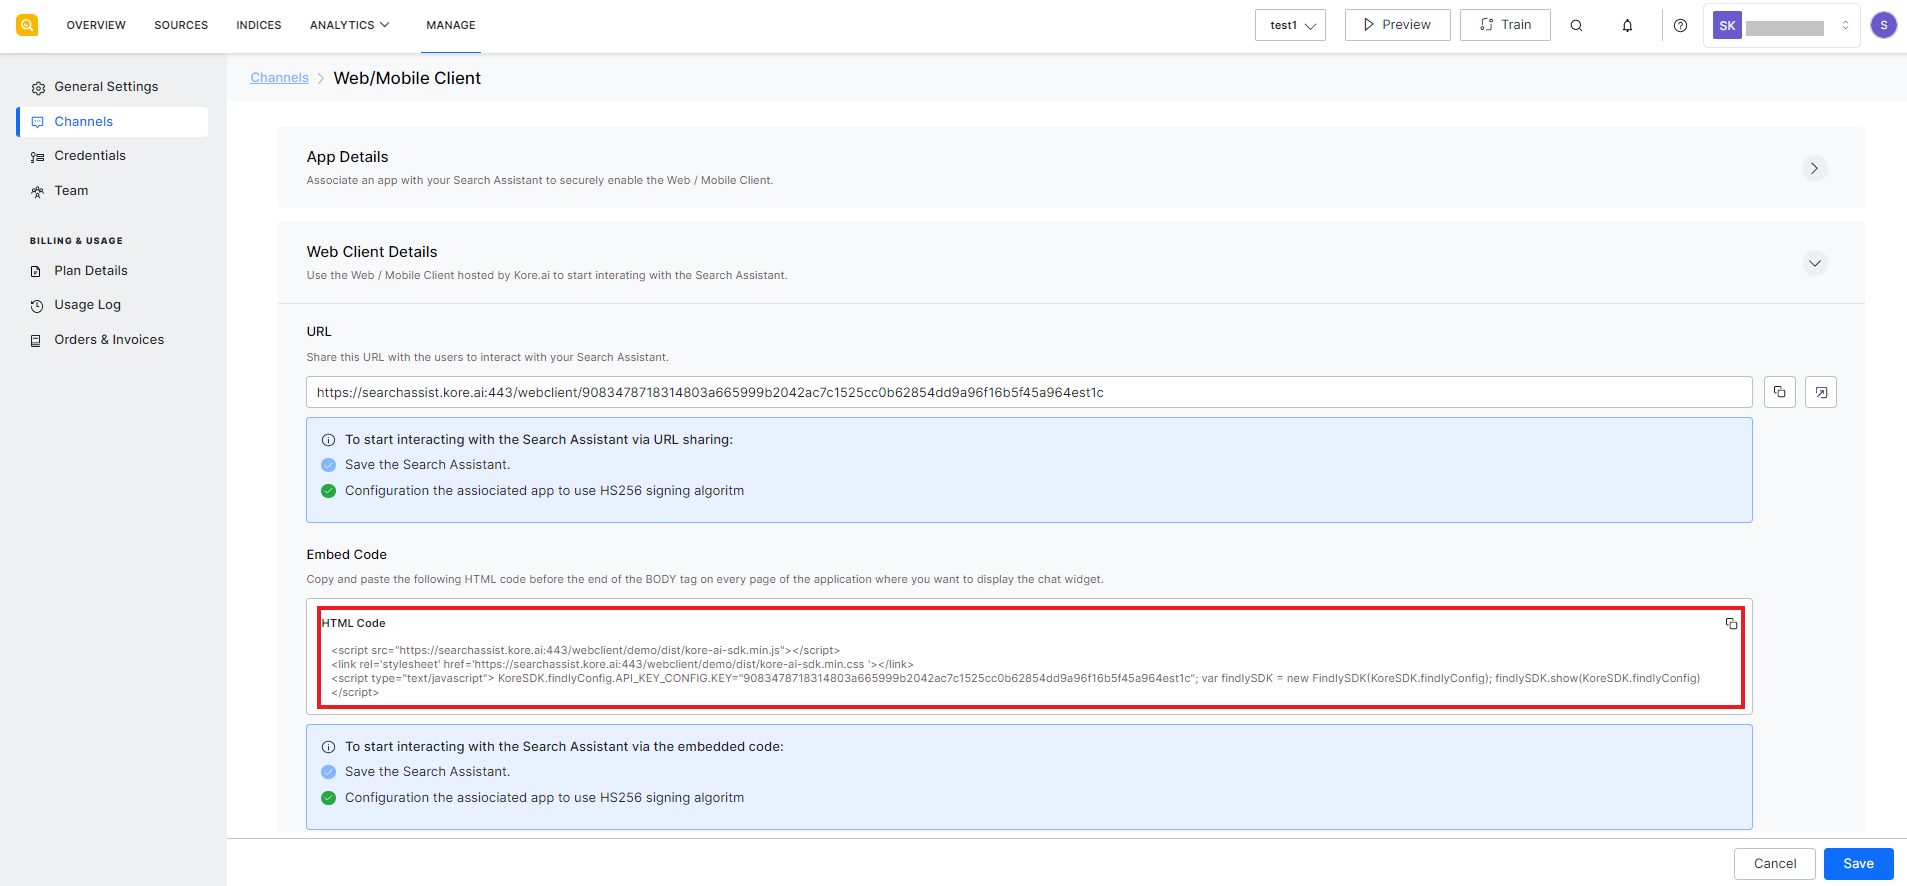
Step 1: Embed Code
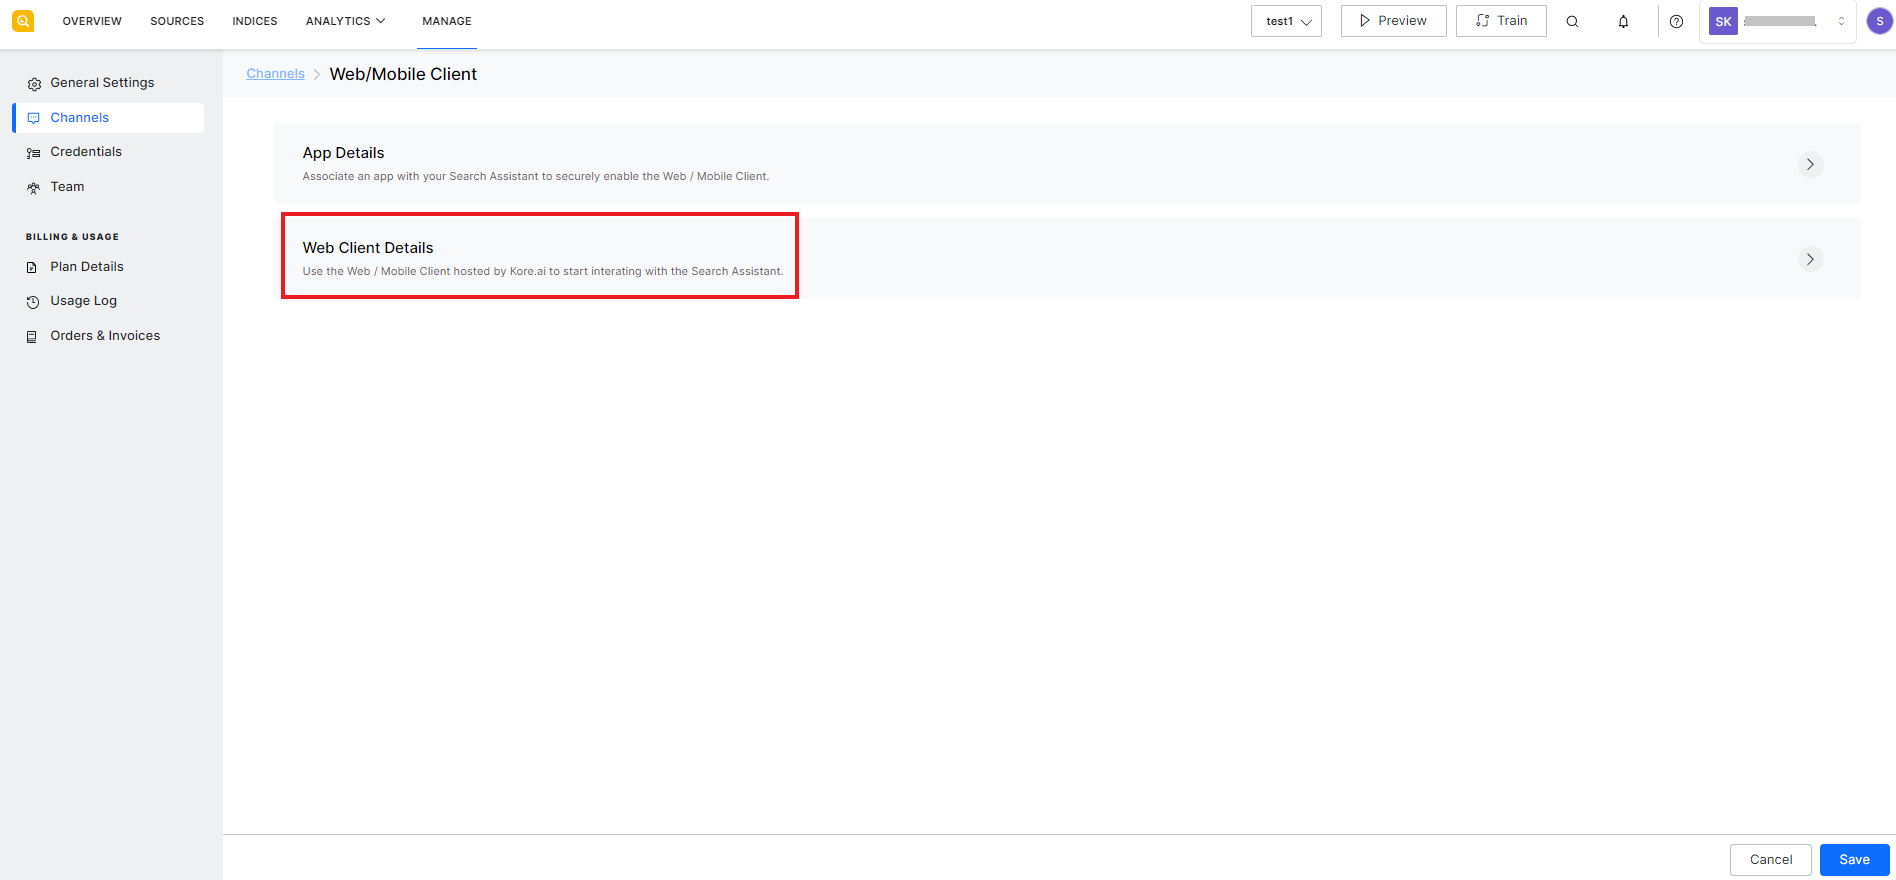
Go to the WebClient details for the configured channel.
Copy the HTML code shown under the Embed code section on the page and paste it before the end of the BODY tag on every page of the application where you want to display the chat widget.
Step 2: Whitelist the domain
Add your application domain to the list of whitelisted domains. Click Add Domain button to add your domain and Save.

This will allow your web application to interact with the SearchAssist application.
Option 2: Download the SDK locally
Alternatively, if you wish to customize the templates and host the libraries locally, you can download the SDK and makes changes to the code. The following steps are required for the SDK to run locally and interact with the SearchAssist instance.
Step 1: Download the SDK.
Download the latest SDK version from here. It is in zip format. Extract the zip file to a local folder.
Step 2: Make changes to the SDK code.
- Go to the findly.config.ts file under src/components/search/config.
- Edit the file to make the following changes and Save.
- Set botOptionsFindly.koreAPIUrl to point to your SearchAssist instance as shown below.
| botOptionsFindly.koreAPIUrl = “https://searchassist-qa.kore.ai/searchassistapi/”; |
-
- Set botOptionsFindly.baseAPIServer to point to your SearchAssist Instance as shown.
| botOptionsFindly.baseAPIServer = “https://searchassist-qa.kore.ai”; |
-
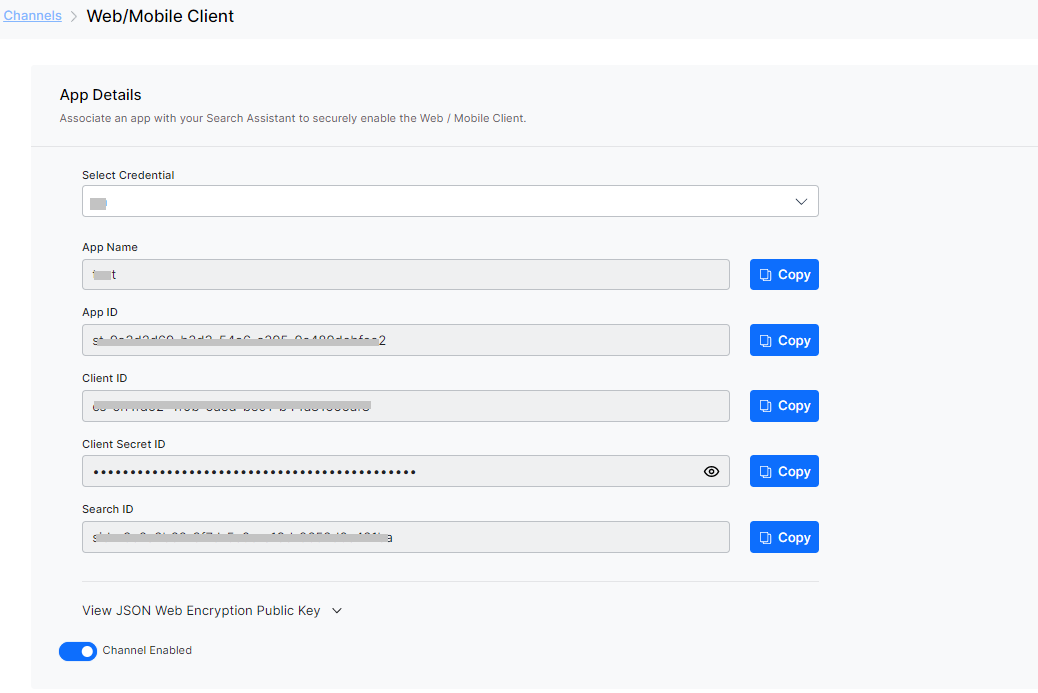
- Refer to the App Details on SearchAssist application and enter the credential information to the following fields:
| botOptionsFindly.botInfo = { chatBot: “<App Name from App Details>“, taskBotId: “<App Id from App Details>”, }; botOptionsFindly.clientId = “<Client Id from App Details>”; botOptionsFindly.clientSecret = “<Client Secret Id from App Details>”; botOptionsFindly.searchIndexID = “<Search Id from App Details>”; |
-
- Modify the Socket connection URL
Step 3: Host and run the SDK
You can host the SDK using the Node.js platform. Following are the steps to host and run the SDK using Node.
- Download and Install Node.
- Open the terminal and go to the path where the SDK is downloaded.
- Run the following command to install the packages required to run the SDK locally.
| npm install |
- Run the local server using the command:
| npm run serve |
This will automatically generate the links where the SDK is hosted. By default, the URLs will be
Search: http://localhost:9000/examples/esm/search/
Points to Note:
- In order to test the sdk locally, If there is any CORS error observed when you directly open the URL in a browser, run SDK in chromium or chrome browser with security disability mode to allow the Cross-Origin Resource Sharing (CORS). To set the mode, go to the command prompt and run the following command. For that open windows, run the command, and paste chrome.exe–disable-web-security–user-data-dir=c:\my-chrome-data\data
This will open the browser in security disabled mode.