
Organizations usually have web pages which a user can query, such as product information or process knowledge pages. You can leverage these pages by mapping your SearchAssist app to the content.
SearchAssist enables you to ingest content through web crawling. For example, consider a banking website. Its pages contain information that can answer most user queries. SearchAssist can crawl the bank’s website and index all the content. When a user submits a query, the SearchAssist app retrieves and displays the correct content.
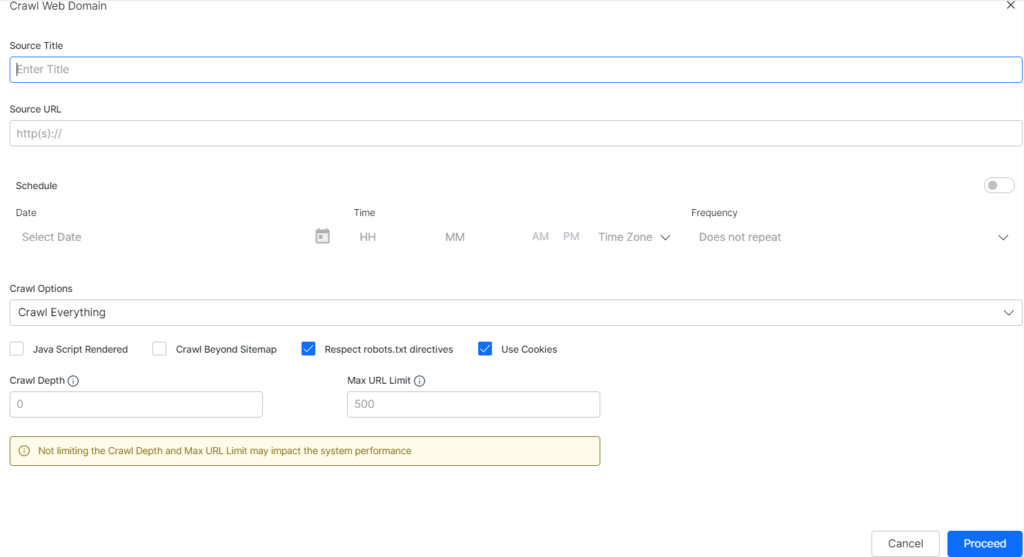
To maintain an up-to-date index, schedule automated web crawl sessions (e.g. time and frequency) as required. After you customize crawl settings, click Proceed at the bottom of the page.
Adding Content by Web Crawling
- Follow these steps to crawl web domains:
- Log in to SearchAssist.
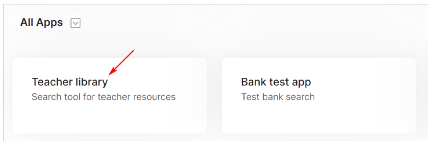
- Go to the All Apps heading.
- Select the correct SearchAssist app.
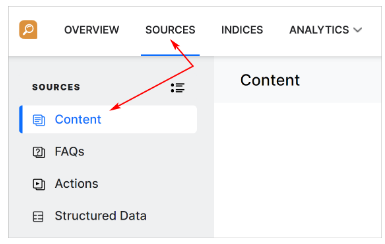
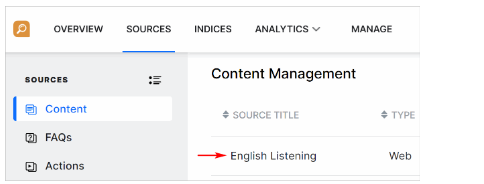
- Click the Sources menu tab.
- In the left pane, click Content.
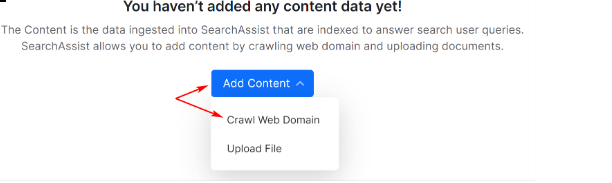
- Click the +Add Content drop-down menu and select Crawl Web Domain. (Or click the + Add Content button in the top right corner of the page.)
- On the Crawl Web Domain page, fill in the Source Title and Description fields.
- Enter the domain address in the Source URL field.

Scheduling Crawls
Activate this optional feature to schedule regular crawls on your site. This feature is well-suited for organizations that regularly publish new website content and want to keep their search index up to date.
Note: If you do not schedule auto-crawls, you need to manually launch new crawls to keep the index up to date.
- Click the toggle switch to the ON position. The default setting is OFF.
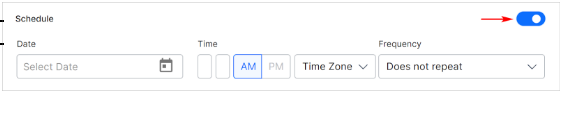
- Click the Select Date field.
- Set the day and date of the first crawl on the calendar.
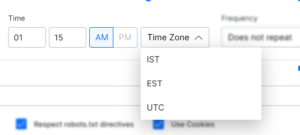
- Enter the time to launch crawl. (use 24-times)
- Click the Time Zone field and select an option. SearchAssist currently supports three time zones: IST, EST, and UTC.
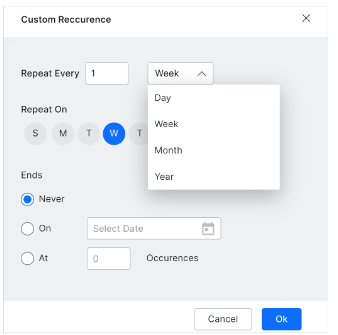
- Click the Frequency field.
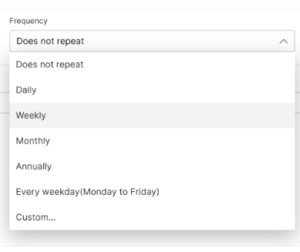
- Select an option.

Select the Custom option if you want granular control over index updates and then click Ok.
- Set the frequency of crawls (e.g. 1 time a week).
- Choose a specific day of the week.
- Choose when to end the crawls. The default setting is no end (Never). You can stop future crawls by selecting a specific date (choose On) or after SearchAssist records a set number of crawl occurrences (choose At).
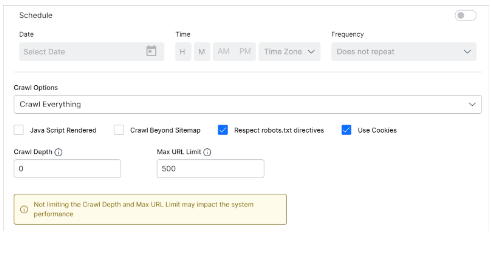
Setting Crawl Options
Click the Crawls options field to change the default setting (Crawl Everything). The options are:
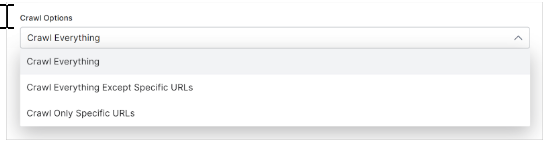
- Crawl Everything: Crawl all URLs that belong to the domain.
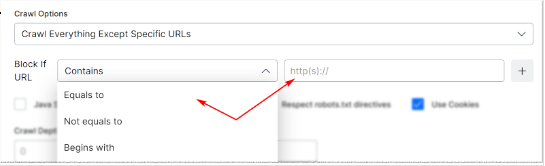
- Crawl Everything Except Specific URLs: Create rules to stop the crawl from indexing specific URLs.
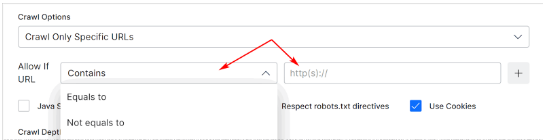
- Crawl Only Specific URLs: Use rules to crawl specific URLs.
Apply Crawl Settings
Customize Crawl Settings.
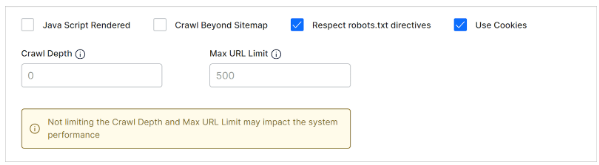
- Java Script-Rendered
Check this box to crawl content rendered through JS code. The default setting is unchecked.SearchAssist crawls website pages if JavaScript is enabled for those pages. Leave the Java Script-rendered box unchecked if you want to ignore those pages.
- Crawl Beyond Sitemap
Check the box to crawl web pages beyond the URLs in the sitemap file of the target website. The default setting is unchecked, which limits the crawl to site map content. - Respect Robots.txt Directives
This feature forces crawlers to honor any directives in the robots.txt file for the web domain. The default setting is a checked box. - Use Cookies
The default setting is a checked box, which means SearchAssist crawls web pages that require cookie acceptance. Uncheck the box to ignore web pages that require cookie acceptance. - Crawl Depth
Most commercial or enterprise websites contain multiple levels of hierarchy created by pages and subpages. The homepage is at the top of the site page hierarchy (level 0). Inner pages to the homepage create deeper layers of nested levels. Crawl depth specifies how deep into those nested levels the crawler should reach. You can set the maximum depth allowed to crawl. The value 0 indicates no limit. - Max URL Limit
Set the maximum number of URLs to crawl. The value 0 indicates no limit.
Launching A Web Crawl
After customizing the crawl options, click Proceed.
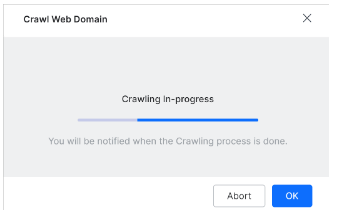
- The first step is to validate the URL. If successful, SearchAssist displays a success pop-up window. Click Crawl to launch to start indexing now or Close to launch the crawl at another time.

The crawl takes time to complete. Click Ok to close the window and wait for the crawl to complete.
- To cancel the crawl, click the Abort button.
Editing Crawl Settings
You can edit, update, or remove the crawler settings.
- Click the Sources menu tab.
- Click Content in the left pane.
- Click the crawl you want to edit.
- On the next page, click the Configuration menu tab.
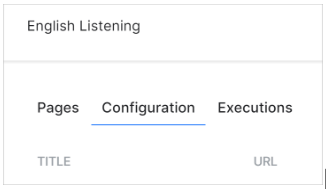
- Scroll down to the bottom of the page.
- Edit schedule and crawl settings as required.
- Click Save.
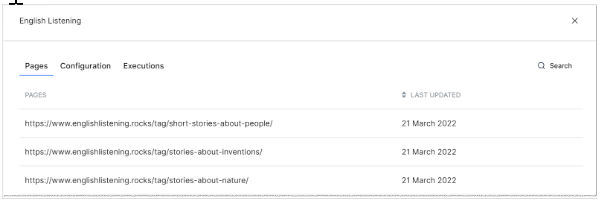
Checking The Results
When the crawl completes, SearchAssist changes the status to Success.

To review the URLs in the file:
- Click anywhere on the crawl row.
- Scroll through the list or use the Search tool to find a specific URL.
- Click the X icon to close the window.
Next Steps
Now that you have successfully crawled one or more websites, you can add more content (e.g. documents, FAQs). After that, you are ready to index the content.
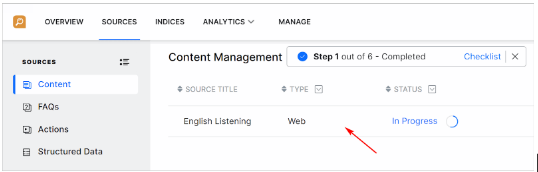
Returning To An Unfinished Crawl
If you are unable to complete a crawl in one session, it is possible to re-start a crawl.
- Log in to SearchAssist.
- Go to the All Apps heading.
- Select a SearchAssist app.
- Click the Sources menu tab.
- In the left pane, click Content.
- Click the unfinished crawl in the large pane. SearchAssist starts the crawl and changes the status to In Progress.
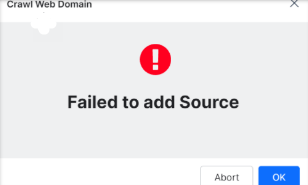
Web Crawling Error Messages
Most web crawls fail for one of two reasons.
- Invalid URL URL validation fails because of connectivity issues or bad spelling. Check the URL address and click Retry or Edit Configuration to change the URL.
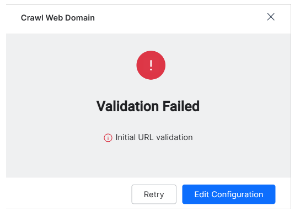
- Fails after starting successful URL Validation for the given website and during web crawling.
Note: If you are attempting to crawl the same website without turning on the Frequent Scheduling toggle, a duplication warning message pops up that reads “web crawling cannot be duplicated” instead try using the Crawl by schedule.