
Organizations build websites that provide detailed information about their products and services but have numerous pages and links. Finding a certain piece of information on the website can be tedious and time-consuming. If, however, the content of the websites is indexed, the data and information can appear in the search results for the user. SearchAssist enables you to ingest web content through web crawling at regular intervals to perform efficient data searches.
For example, if a banking website has comprehensive information about its offerings and can be utilized to address the users’ questions, SearchAssist can use this data to locate the most pertinent responses to users’ questions without requiring users to scroll through the pages of the website.
SearchAssist also allows you to set the time and frequency of crawling for a given domain. This guarantees that the search always provides the most recent results.
Add a new web source
To add a web source for content for the first time to your application, go to the Sources tab and click Web Crawl. 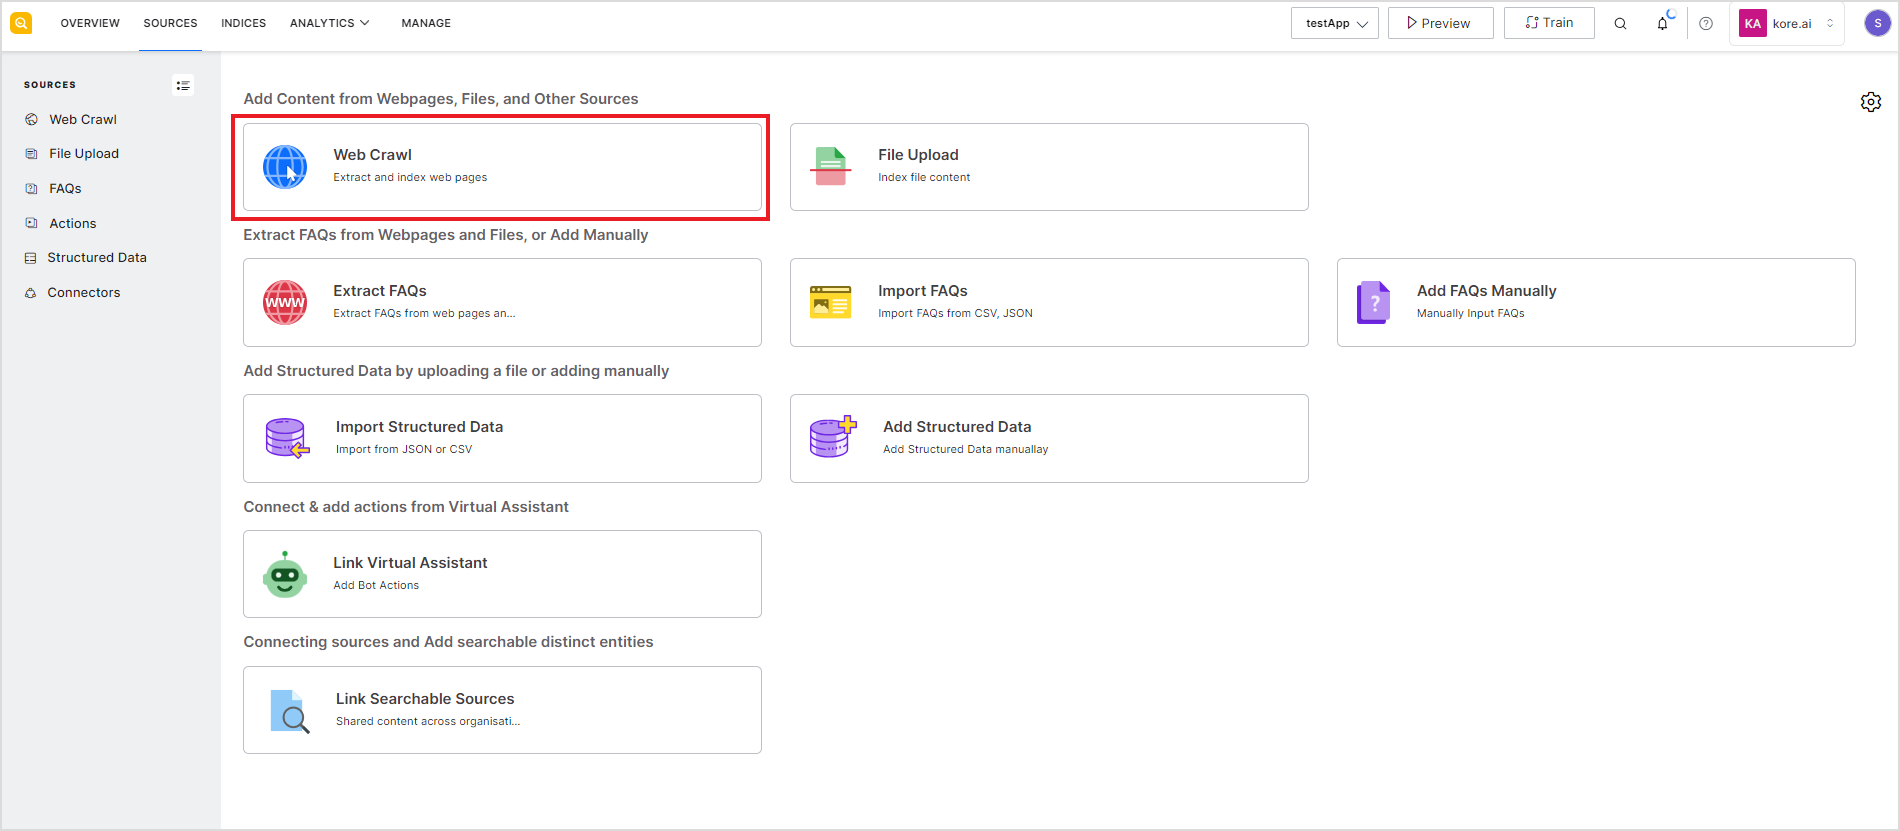
Alternatively, go to the Web Crawl page under the Sources tab, and click the Web Crawl button to configure a new web domain for crawling.
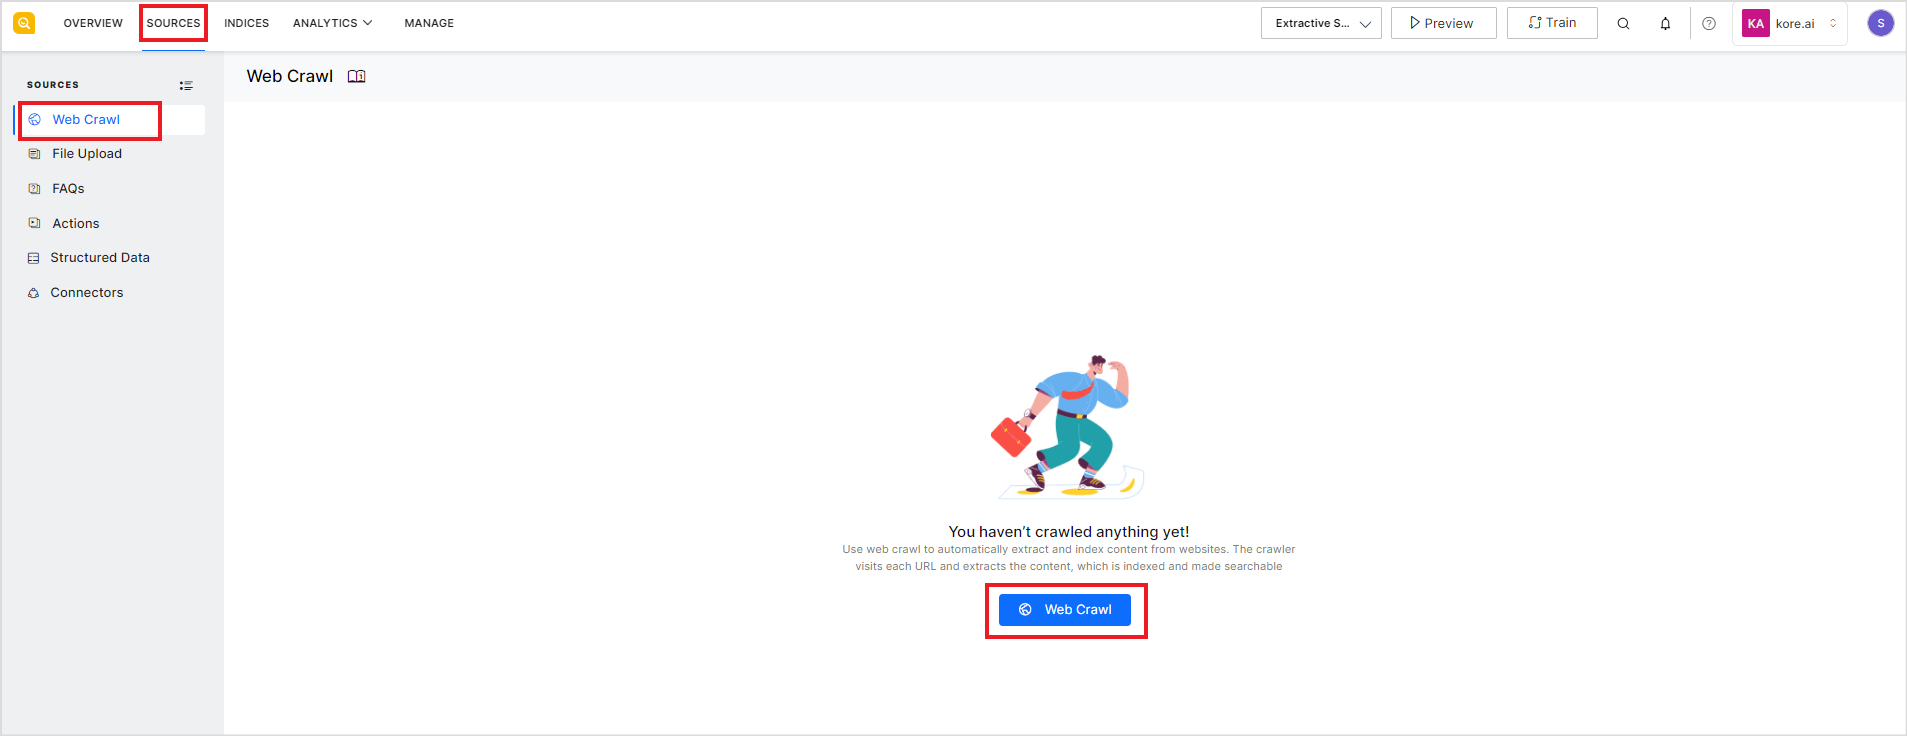
If there are some domains added as sources, you will see the list of existing domains on this page. To add a new web domain as a source, click the Web Crawl button on the top right of the page.

Enter the following details of the web domain to be crawled and indexed.
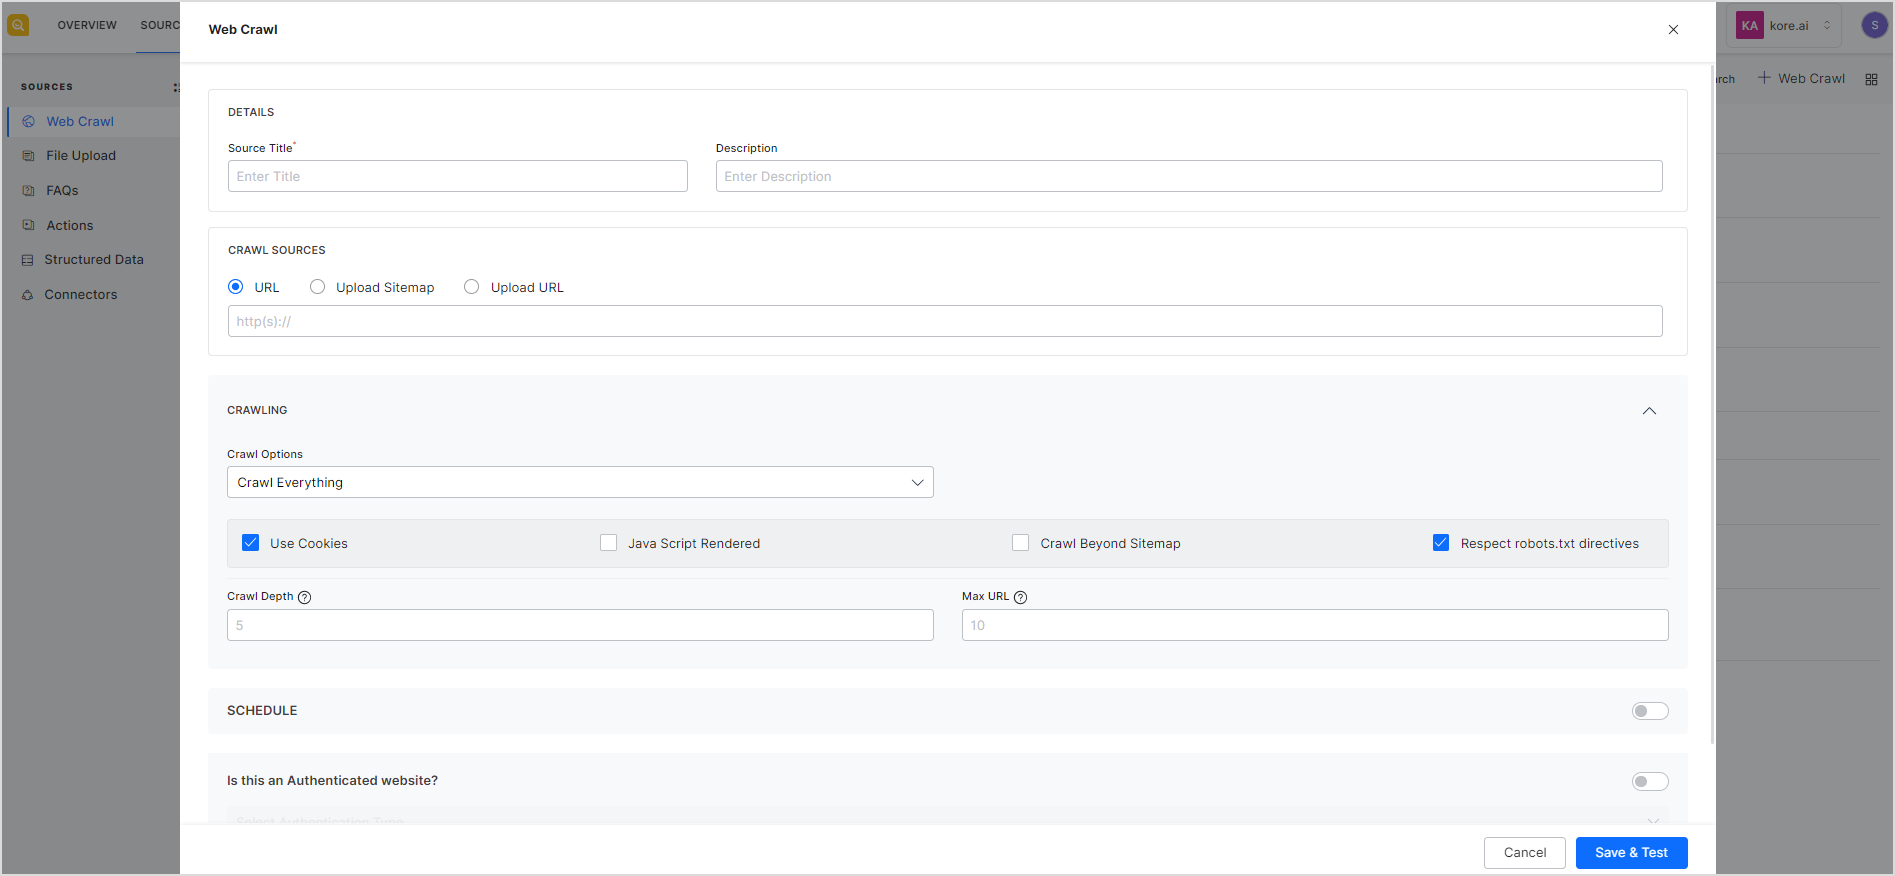 Source Title – Name to be given to the source
Description – Description of the source domain to be crawled. This field can contain any information about the source like the kind of information that can be fetched from the source, etc.
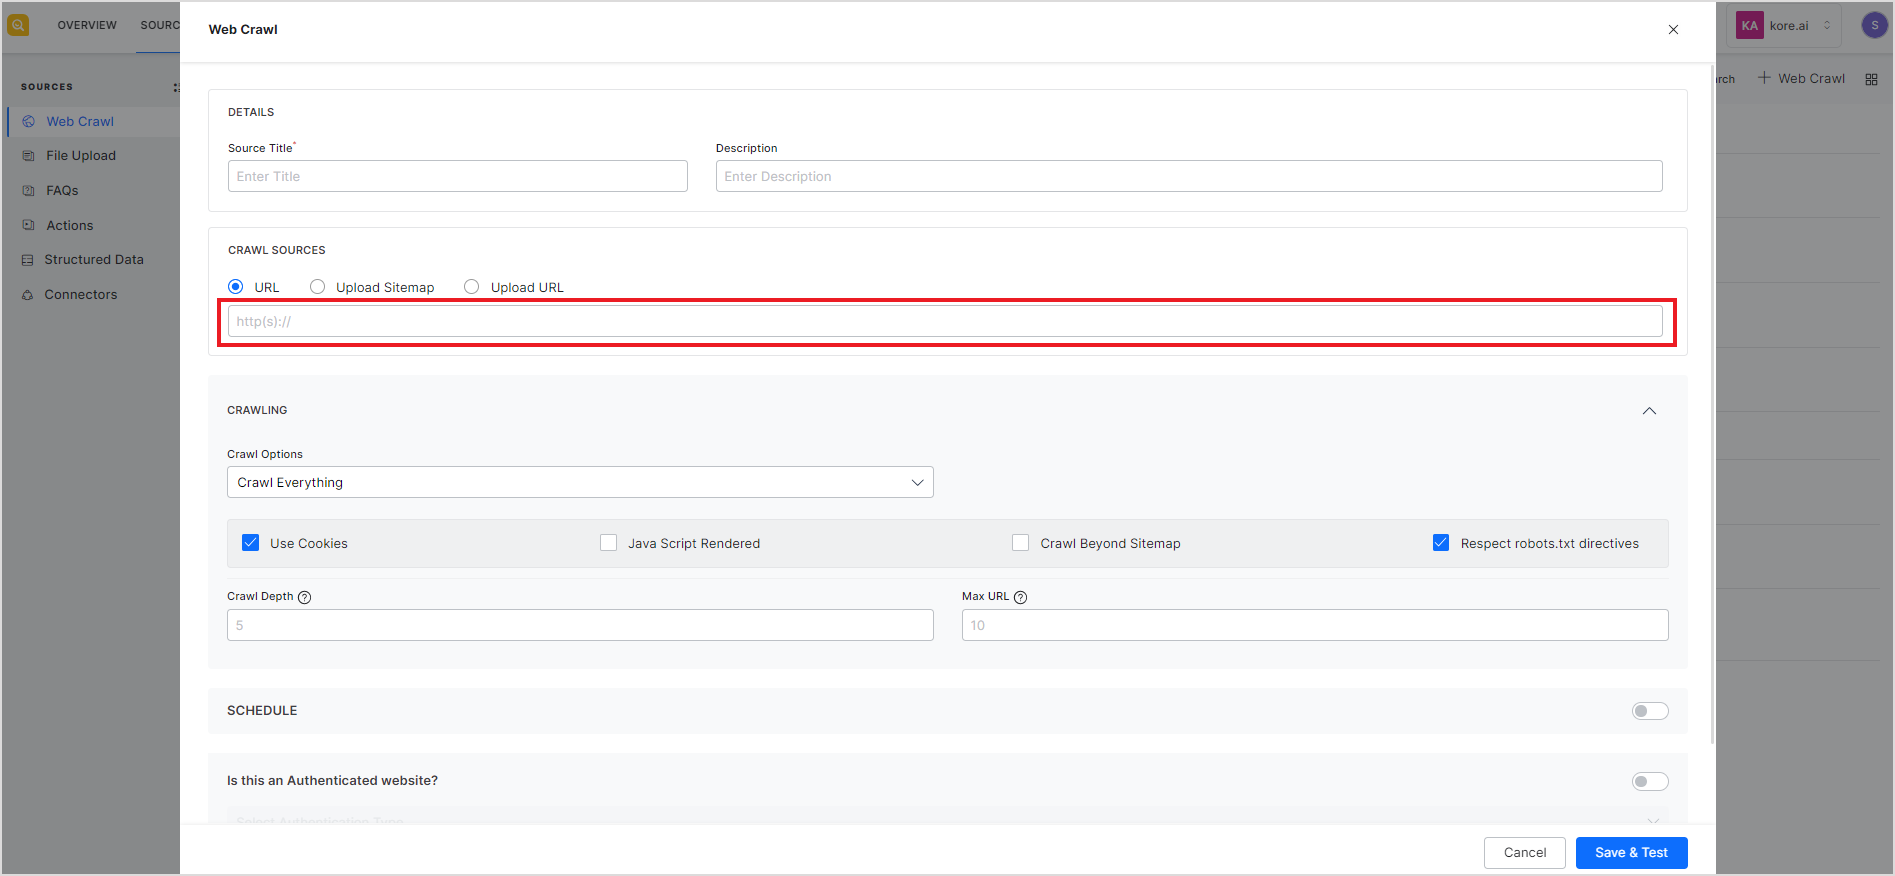
Crawl Sources – SearchAssist offers three ways to add a source for crawling:
- URL – Provide the URL of the web domain to be crawled. This is the starting URL from where the crawler starts discovering web pages depending upon other crawl configurations like crawl depth and max URL limit.
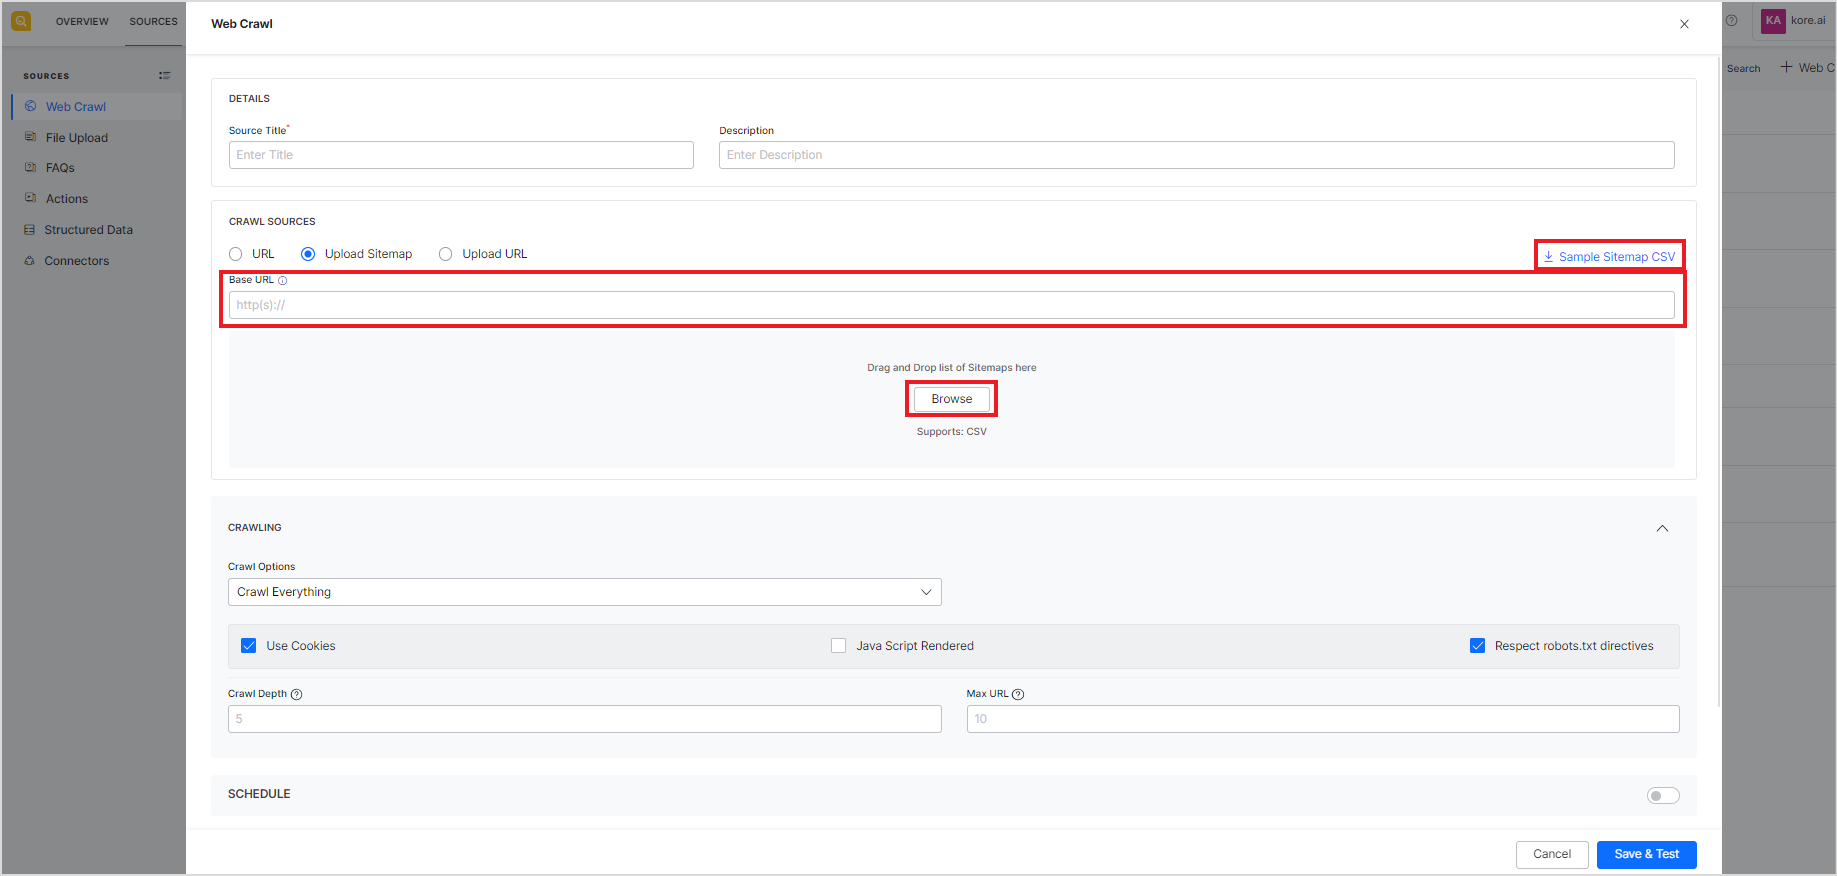
- Upload Sitemap – Provide a list of sitemaps in the form of a CSV file and a Base URL. The base URL is used to validate the URLs in the sitemaps. It crawls through all the web pages, listed in each sitemap in the CSV file, for which the URL matches the Base URL. If, however, a URL in the sitemap does not match the base URL, the crawler skips that URL and does not crawl it. You can use the sample sitemap CSV to learn the format of the CSV file to be used.
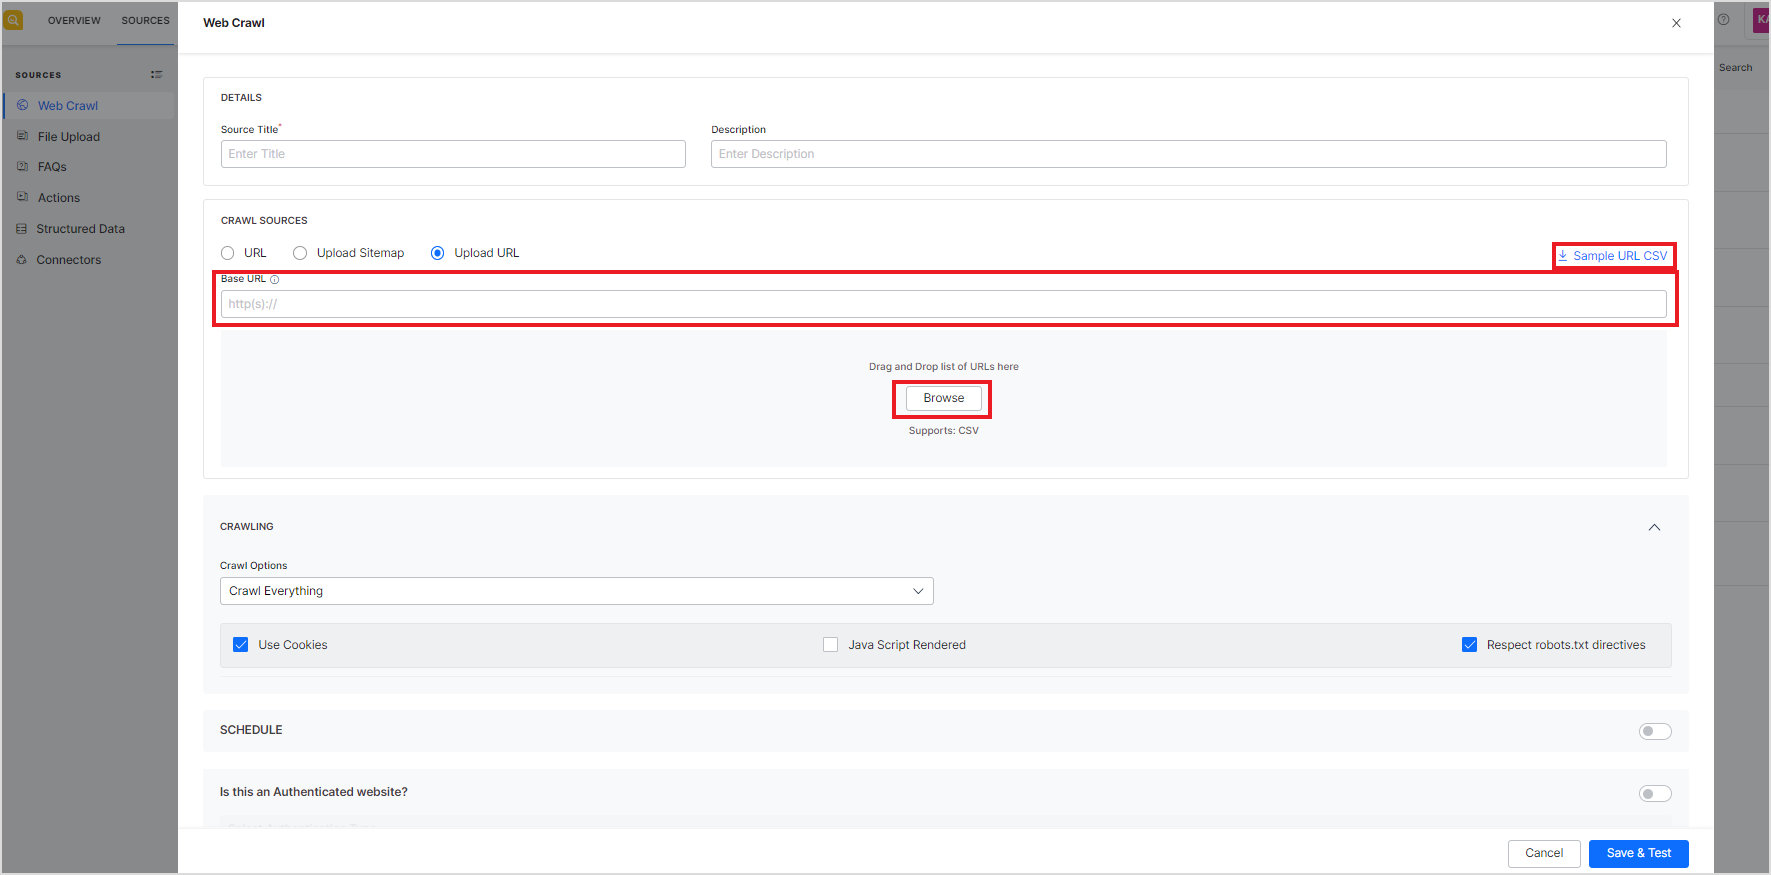
- Upload URL – Provide a list of URLs to crawl in the form of a CSV file and a base URL. The base URL is used to validate the URLs in the CSV file. In this case, the crawler goes through all the pages listed in the CSV file that match the Base URL. The URLs that match the base URL are crawled and those that do not match are skipped. The crawl options are used to further refine the URLs to crawl. In this case, crawl depth and max URL crawl options are not required. Use the Sample URL CSV to learn about the format of the CSV file.
Crawling – Crawling configuration for the source.
Crawl Options – This field can be used to further refine the web pages to crawl from the given crawl source. You can choose to crawl and index all the URLs in the crawl source or you can allow or block specific URLs to be crawled. This configuration can be used to avoid crawling unnecessary web pages from the source, thereby, optimizing indexing for efficient searches. The field can take one of the following values:
- Crawl everything – Use this option when all the URLs in the domain are to be crawled. By default, when a new domain is added, this option is used and all the URLs in the domain are used.
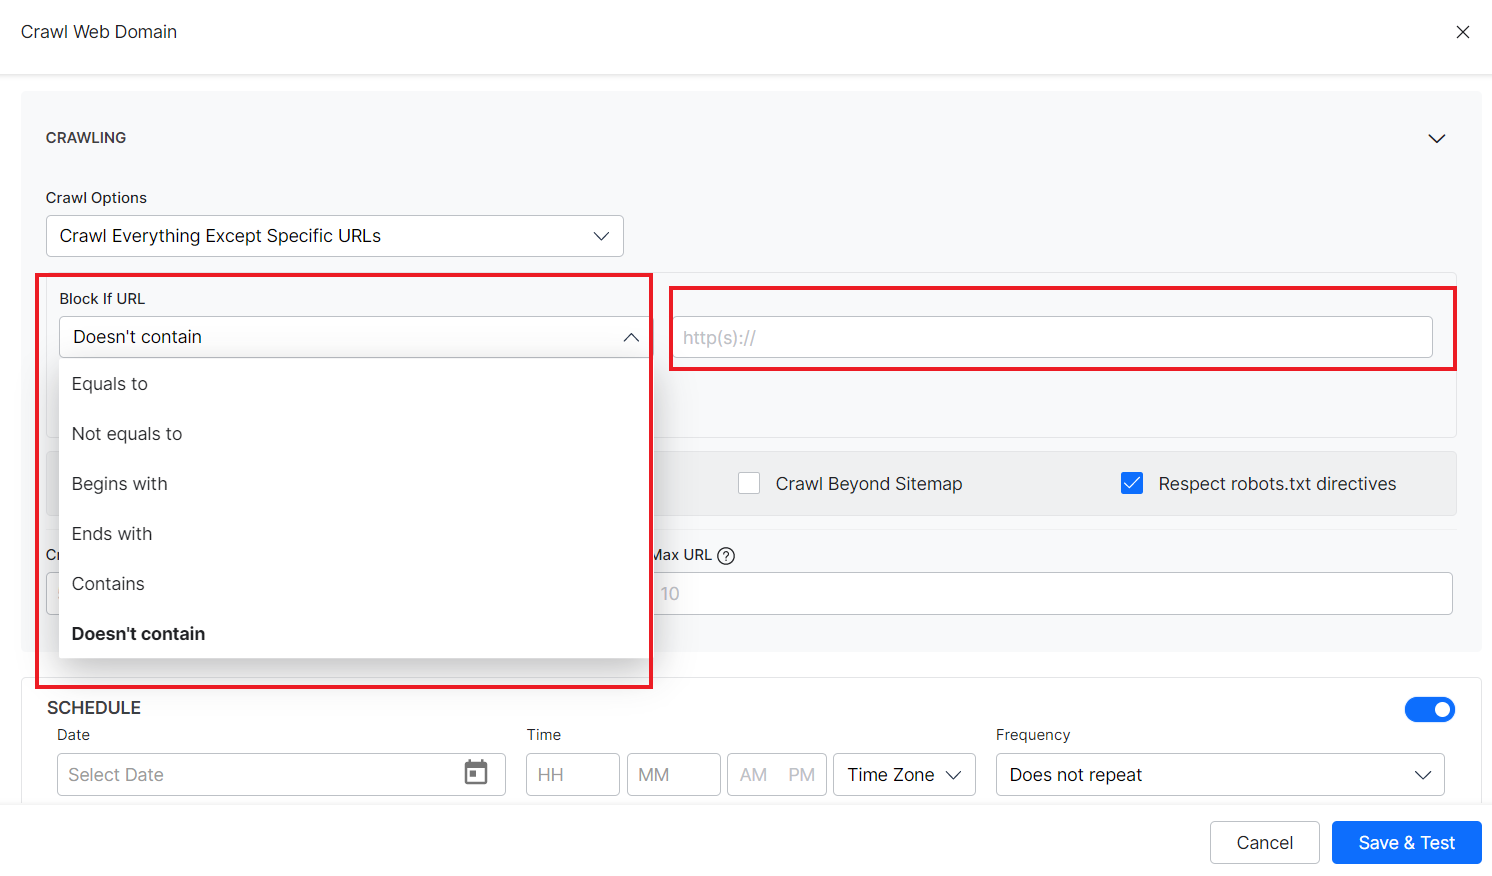
- Crawl everything except specific URLs – Use this option when all the URLs except the blocked URLs are to be crawled. You can add rules to identify the blocked URLs like block if URL contains or doesn’t contain a specific term or if the URL is equal to a specific URL, as shown below. Select the condition from the drop-down list and specify its values in the text box on the right.
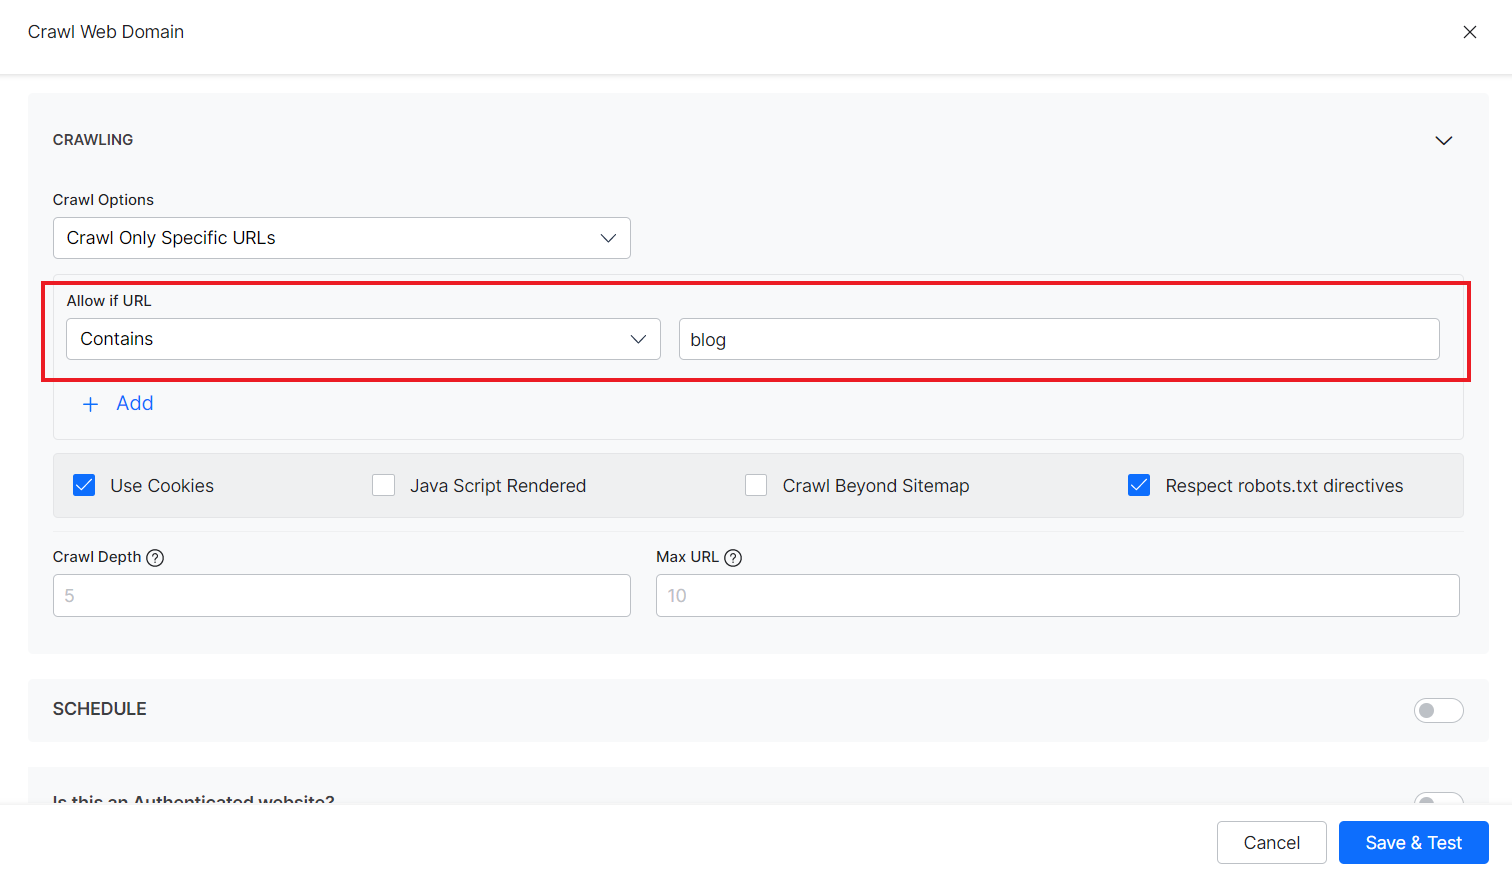
- Crawl only specific URLs – Use this option when only selected URLs that satisfy a given condition are to be crawled. For example, if only the blog section is to be crawled, you can set the rule as Allow if URL contains “blog”.
You can use any of the following types of conditions to choose the URLs:
- Equals to: when the URL exactly matches the given value.
- Not equal to: when the URL does not match the given value.
- Contains: when a given string is found in the URL.
- Does not contain: When a given string value is not found in the URL.
- Begins with: when a given string is found at the beginning of the URL.
- Ends with: when a given string is found at the end of the URL.
You can add any number of rules to selectively choose the URLs from the web domain in the above two options.

Use Cookies – Check the field if you want to crawl web pages that required cookies acceptance. If the field is unchecked, the web pages which require cookie acceptance will be ignored.
JavaScript Rendered – Enable this option if you want to crawl content that is rendered through JavaScript code. This feature proves beneficial for web pages that heavily rely on JavaScript for rendering, as it ensures essential data rendered by these scripts is included in the crawl.
Crawl Beyond Sitemap – Sitemap is a file that provides information about the important pages and files on the website. Check this field if you want to crawl URLs beyond those listed in the sitemap. If this is unchecked, only the URLs defined in the sitemap are crawled.
Respect robots.txt directives – Robots.txt file contains information about the URLs that the crawler can access on the website. This field, when checked, forces the crawler to honor any directives in the robots.txt file for the web domain.
Crawl depth – Each website contains multiple levels of the hierarchy of pages and subpages. The source URL is considered to be at the top of the hierarchy and other pages linked to the source URL create nested layers. Crawl depth refers to the maximum number of nested levels that the crawler should go to. Set to 0 to indicate no limit. If no value is provided for the field, the default crawl depth is set to 5.
Max URL Limit – This field refers to the maximum number of URLs to crawl. Set to 0 to indicate no limit. If no value is provided, this field uses the default value of 10.
Schedule – Enable this field to schedule the crawling at a particular date and time. You can also set a frequency to recrawl the web domain at regular intervals.
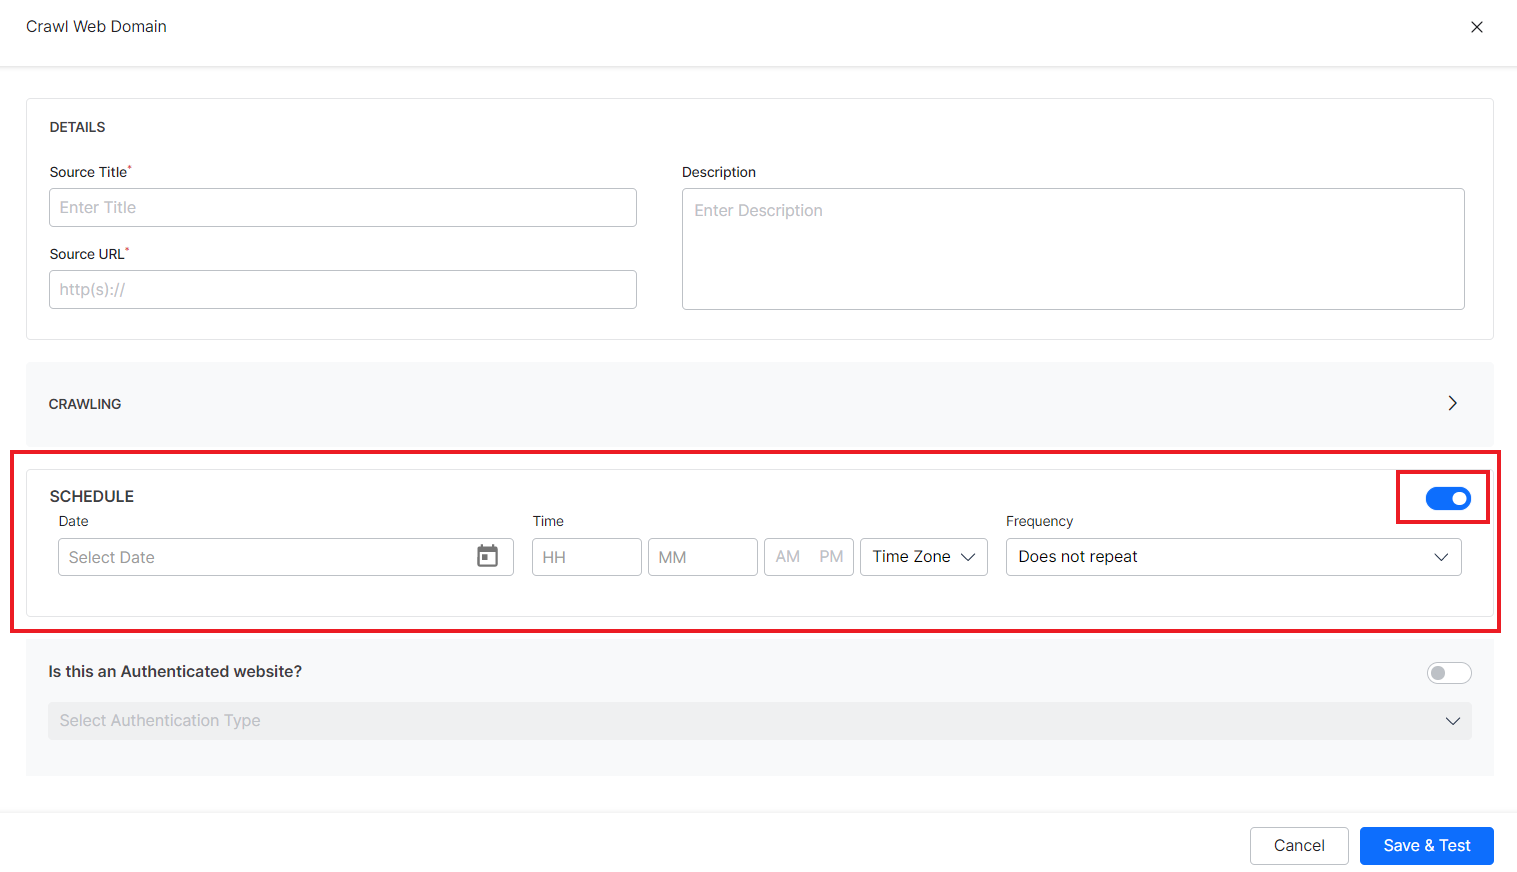 To set a schedule, enter your preferred values for the following fields:
Date: The date at which you want to schedule the first crawl of the web domain.
Time: The time at which you want to schedule the first crawling of the web domain. Specify the hours and mins in a 12-hour format along with the timezone.
Frequency: Website information often changes and to provide up-to-date information to your users, you may want to regularly crawl the web domains. Use this field to specify the frequency at which you want to recrawl the website. If you want to crawl it only once, set it to ‘Does not repeat’. You can choose daily, weekly, monthly, annual, or custom values for this field.
Is this an Authenticated website? – Enable this field if the source website is protected by a type of authentication mechanism. If the website requires authentication, provide relevant information to access the website depending upon the authentication method.
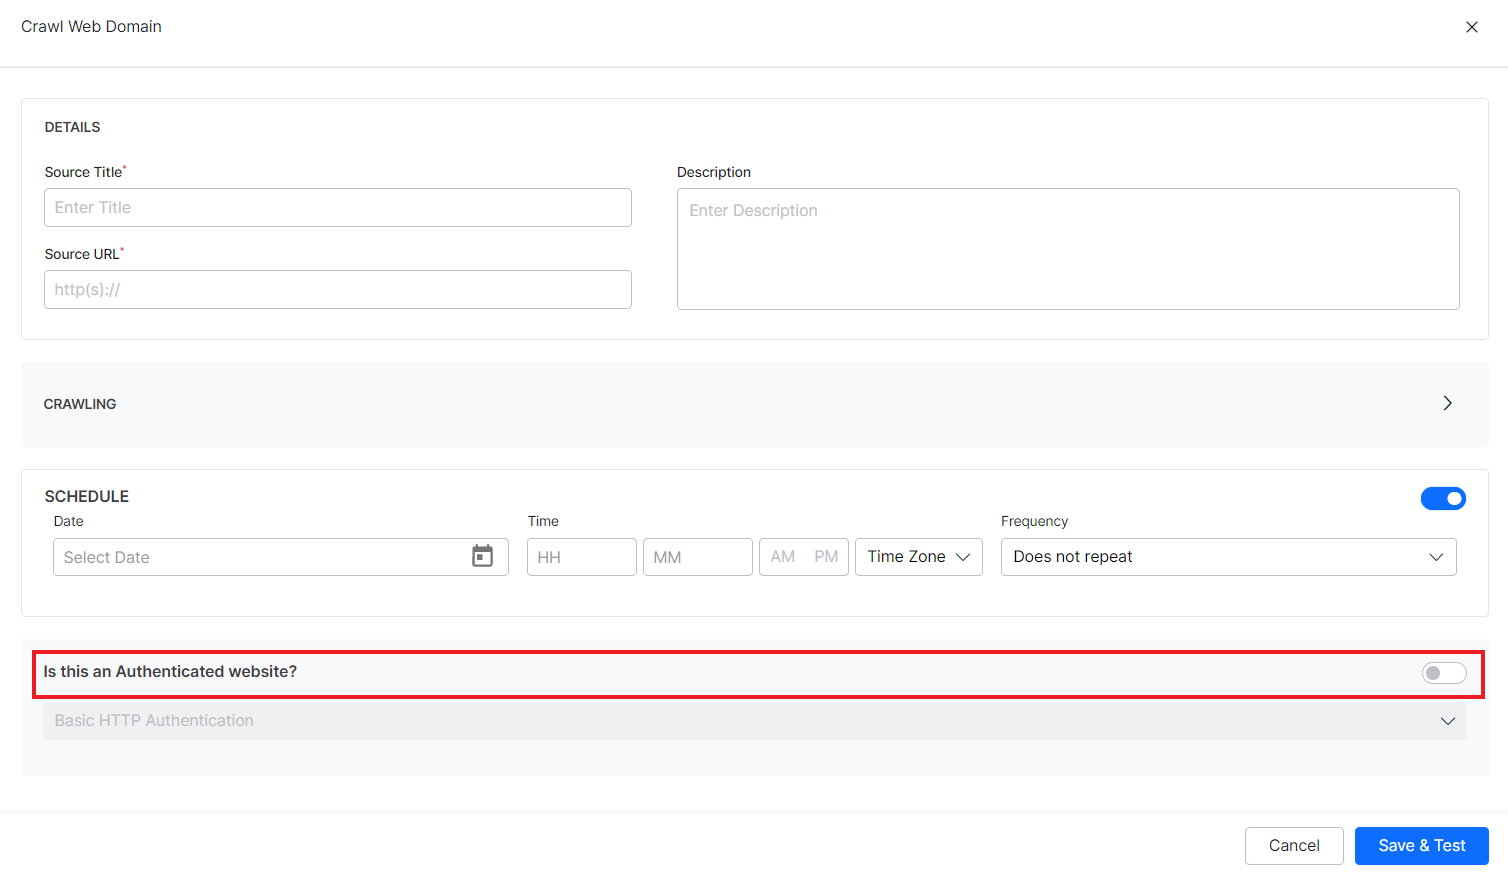
We support the two types of authentication – Basic Authentication and Form-based Authentication. Both are simple authentication schemes built into the HTTP protocol that are used to protect web resources. Although both mechanisms use a username and password to authenticate the client, the difference is in the way both are implemented. Basic Authentication uses an HTTP header to provide the username and password when making a request to the server. Whereas Form-based authentication uses standard HTML form fields to pass the username and password values to the server via a POST request. Depending on the authentication mechanism supported by the web domain, choose the authentication method from the drop-down menu.
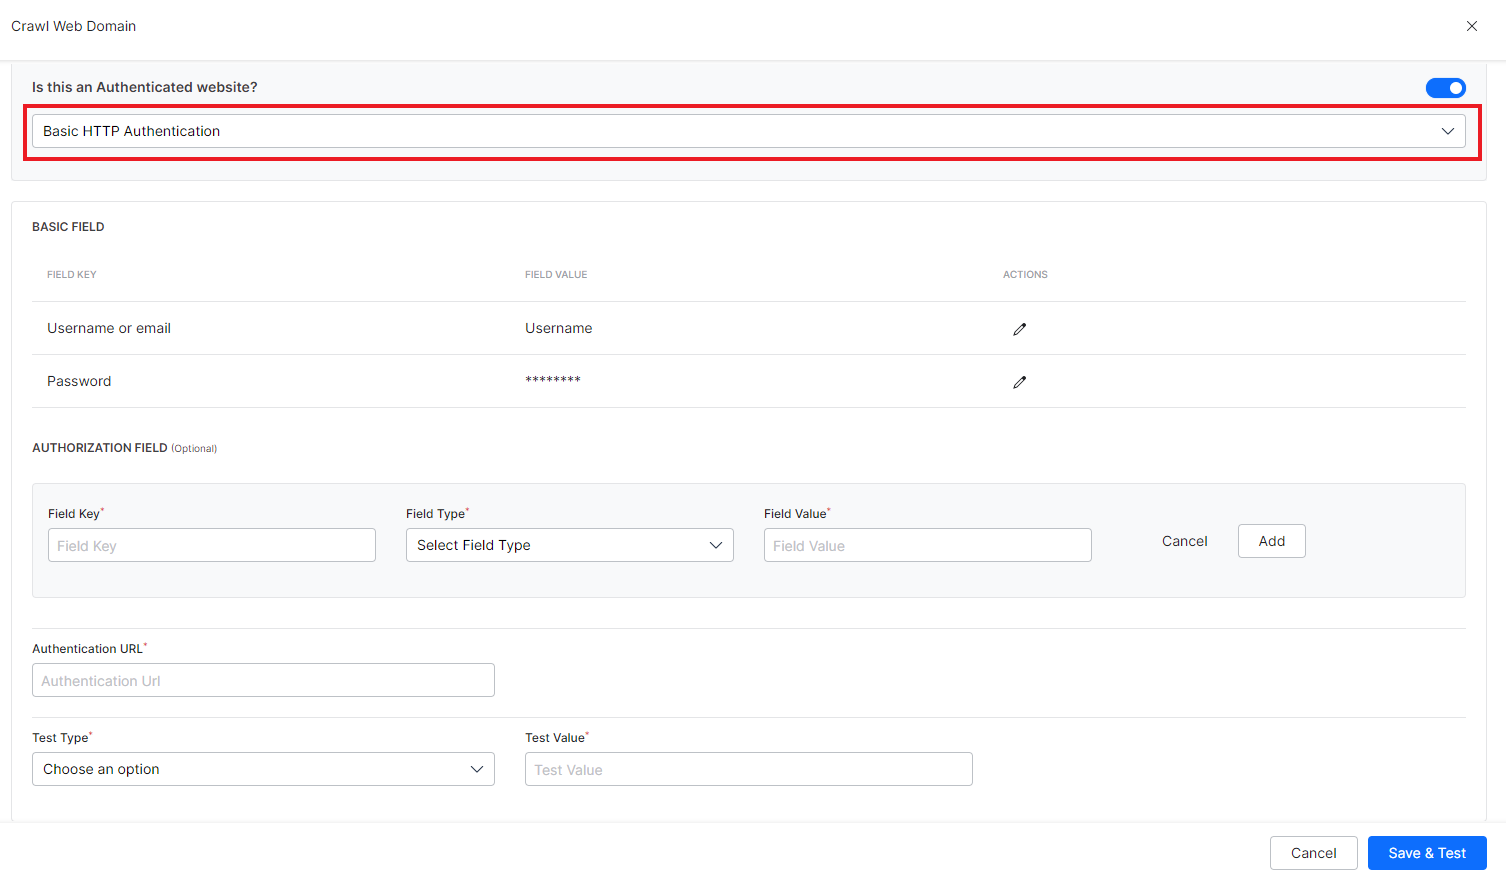
Basic HTTP authentication: Basic HTTP authentication requires auth credentials and other optional auth parameters to be validated to access the website. The authentication URL may or may not be the same as the source URL. So, to enable access to a website, provide the values for the following fields:
| Field | Description |
| Username or email | Username or email address, whichever is used to identify the user. |
| Password | Password corresponding to the username specified above. |
| Authorization Field | Additional field, if any, required by the authentication site for authorization. This is an optional field. You can add one or more auth fields. You can also choose how to send the field and its value in the request like as part of the request header, payload, query string, or as a path parameter. These fields can be used when the authentication URL requires additional fields than the standard ones. For example, if a URL requires an employee ID along with the username and password, add the employee ID to the request using auth field. |
| Authentication URL | Provide the authentication URL where the identity is to be authenticated. This may or may not be the same as the source URL. |
| Test Type | The type of test to be performed on the response from the authentication URL upon sending the auth request. This field can take one of the following three values:
|
| Test value | Expected response from the authentication URL on sending the auth request. This value depends upon the value of the Test Type. For example, if you set Test Type to Status code, set this to appropriate status code values like 200 (OK), 201(Created), etc. Similarly, if you expect certain keywords or text in the response, set Test Type to Text Presence and provide the expected value in Test Value. |
Form-based authentication: In this type of authentication, auth information is required in the form of fields in a form. Enter the values for the following fields:
| Field | Description |
| Form Field | You can create one or more fields in a form to send as auth information. For each field, define
Field key: Identifier of the field Field type: Type of the field Field value: Value of the field. |
| Authorization Field | Additional field, if any, required by the authentication site for authorization. This is an optional field. You can add one or more auth fields. You can also choose how to send the field and its value in the request like as part of the request header, payload, query string or as a path parameter. These fields can be used when the authentication URL requires additional fields than the standard ones. For example, if a URL requires an account ID along with the username and password, add the account ID to the request using auth field. |
| Authentication URL | Provide the authentication URL where the identity is to be authenticated. This may or may not be the same as the source URL. |
| Test Type | The type of test to be performed on the response from the authentication URL upon sending the auth request. This field can take one of the following three values:
|
| Test value | Expected response from the authentication URL on sending the auth request. This value depends upon the value of the Test Type. For example, if you set Test Type to Status code, set this to appropriate status code values like 200 (for success), etc. |
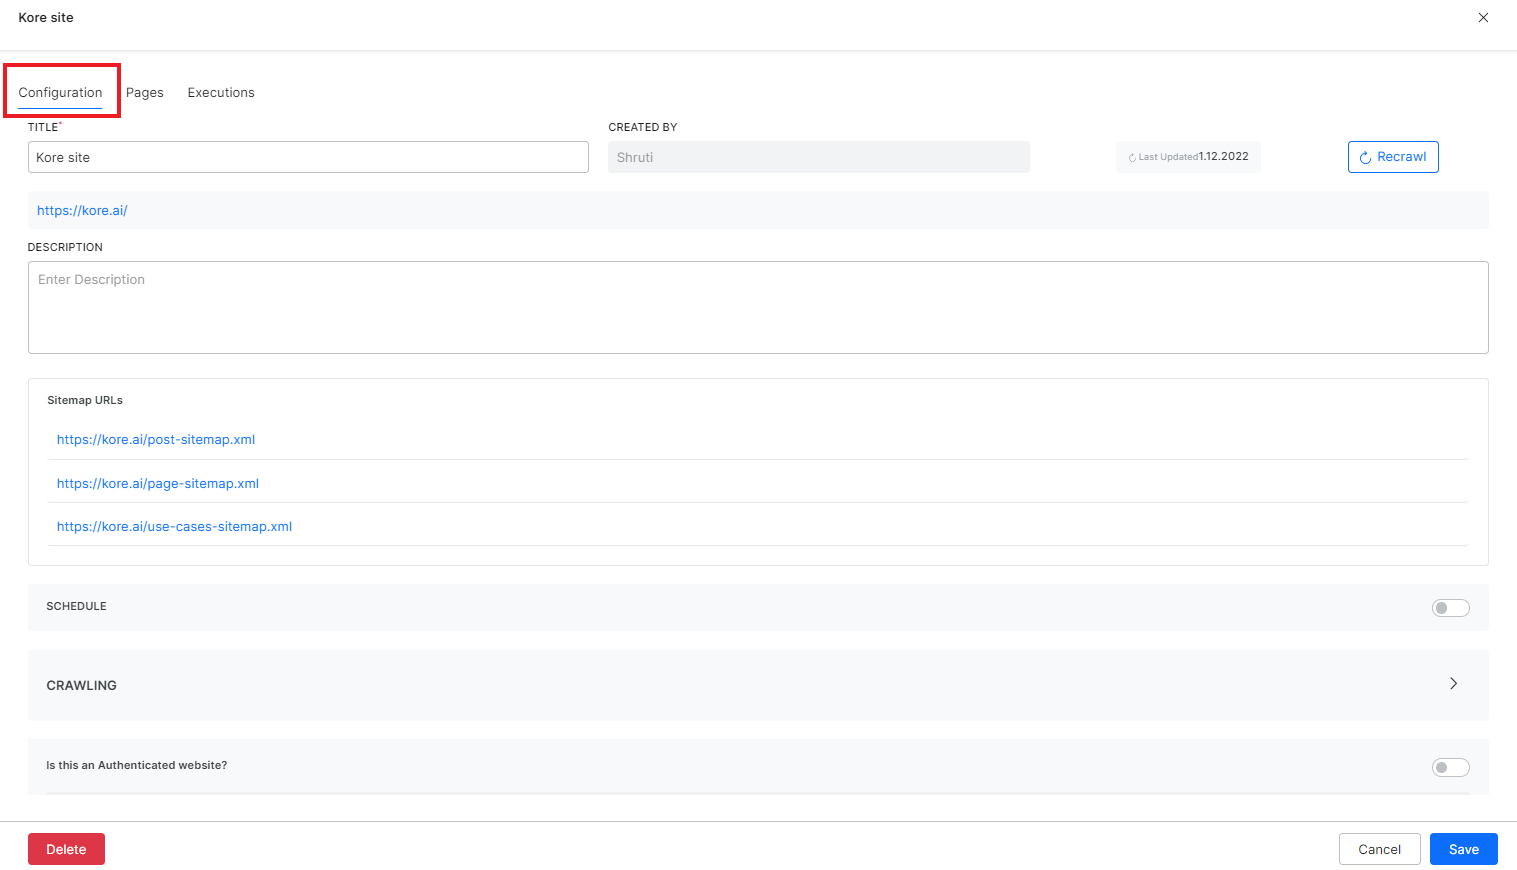
Edit web source configuration
You can edit the configuration for any crawl source at any time. This can be used in case the authentication methods have changed, the credentials need to be updated, the crawling schedule needs to be modified, etc.
Note that the web crawl source cannot be modified.
Any changes made to the configuration will come into effect either when you manually recrawl the domain after making the changes or at the next scheduled recrawling time.
To make any changes in the source configuration, click the source title from the list of configured sources under the Web Crawl page and make appropriate changes under the Configuration tab.
View execution status and crawled pages
Crawling a web domain takes time depending on the crawl options set for the source. For example, if all the URLs are to be crawled and the crawl depth and max URLs are set to maximum, it may take longer than a configuration where the crawl depth is set to 2 and the max URLs are set to 10. When a new web source is added, you can choose to execute the crawling process in the background. Also, the scheduled recrawls which run at specific times are automatically run in the background. To check the execution status and logs, click the source from the Content Management page and go to the Executions tab.
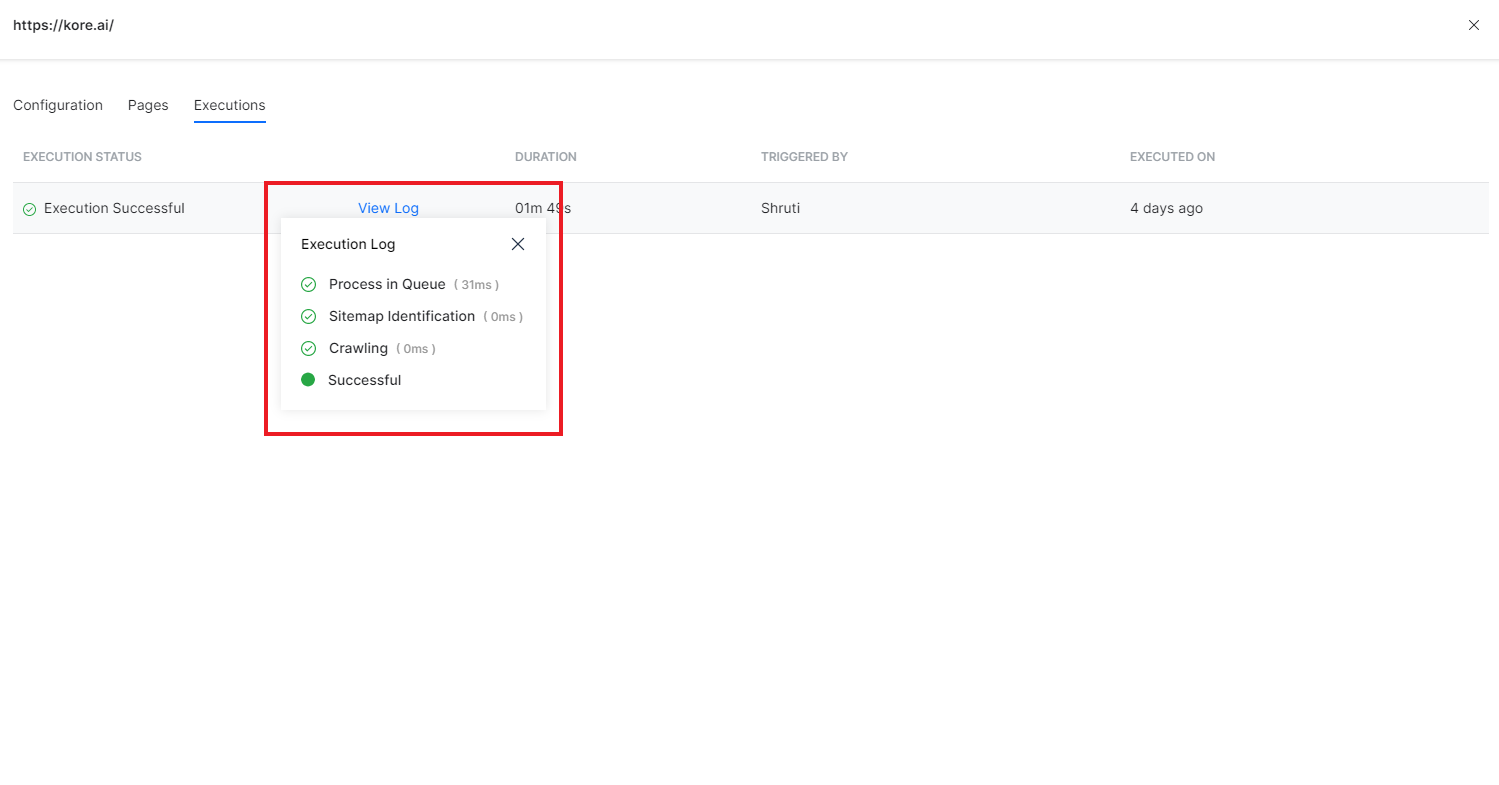
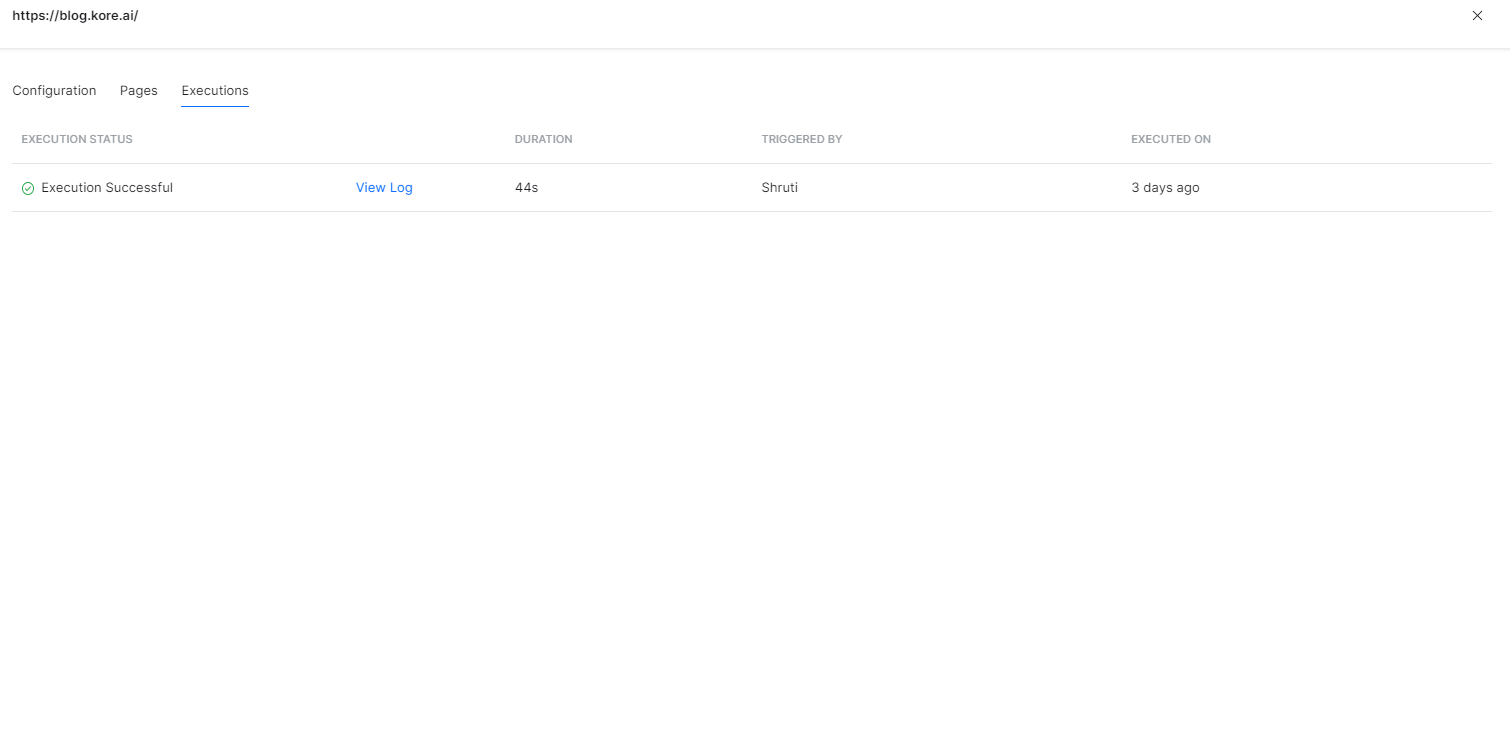 To view the logs for a particular execution, click the View Log link. It shows you the various steps of execution along with the time taken at each step.
 Recrawl web source
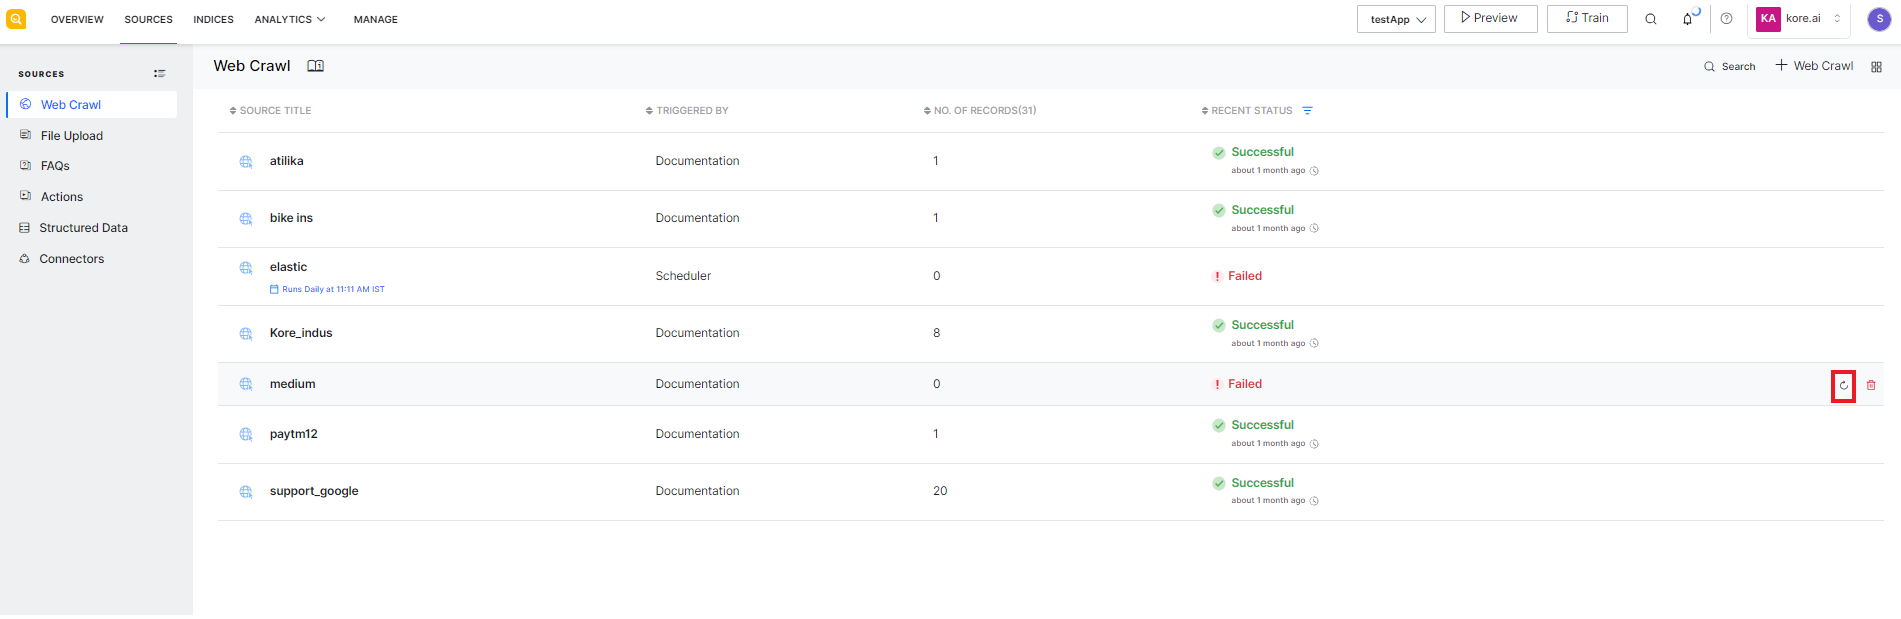
Recrawling is required to keep up with the changes in the source. You can either schedule recrawling of the website at regular intervals using the scheduler or you can manually perform a recrawl operation as and when required. To do so, you can click the recrawl icon against the name of the source.
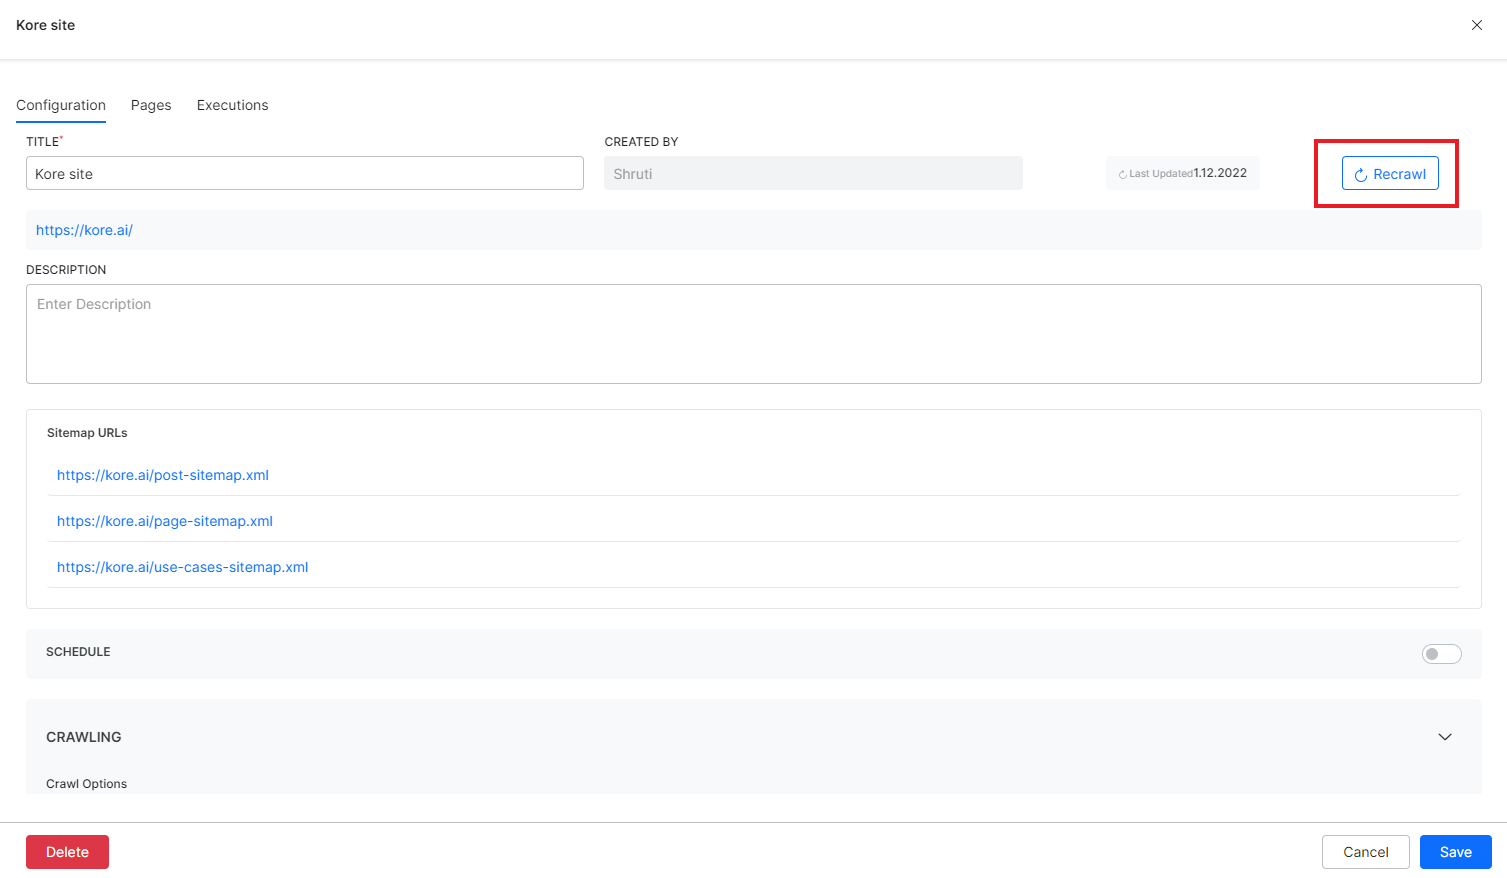
 Alternatively, you can go to the configuration page of the source and click the Recrawl button.
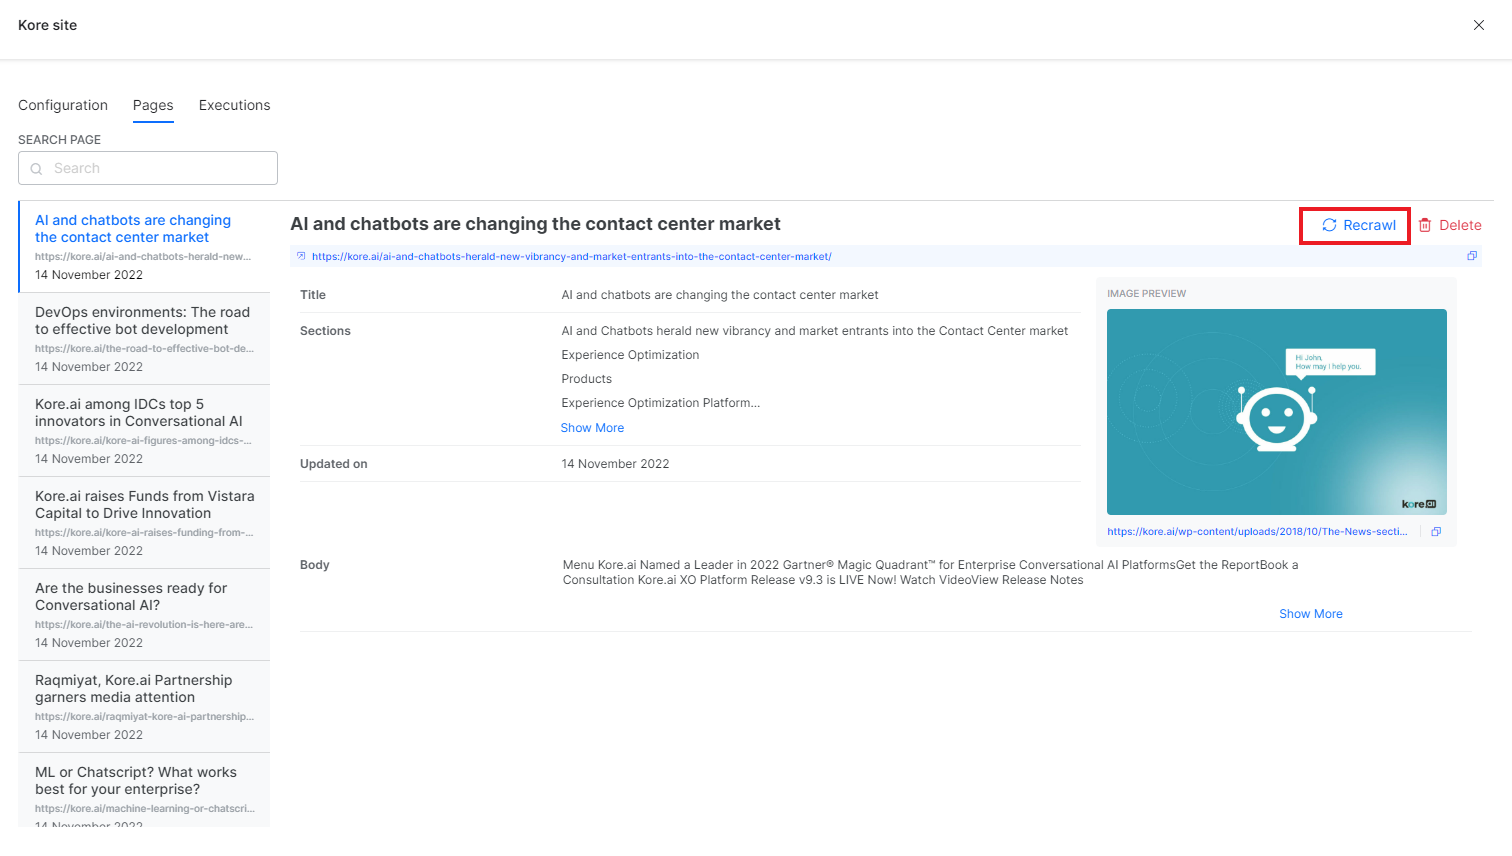
You can also recrawl selected pages of the source when you know the specific pages which have been updated. This can avoid the unnecessary crawling of the whole source. Go to the Pages tab of the source, select the page to be recrawled, and click the Recrawl button.
Delete web source
When a resource is no longer required and you do not want the information to appear in the user search results, delete the source from SearchAssist. To do so, go to the Web Crawl page that lists all the existing sources. Click the delete icon against the name of the source you want to delete.
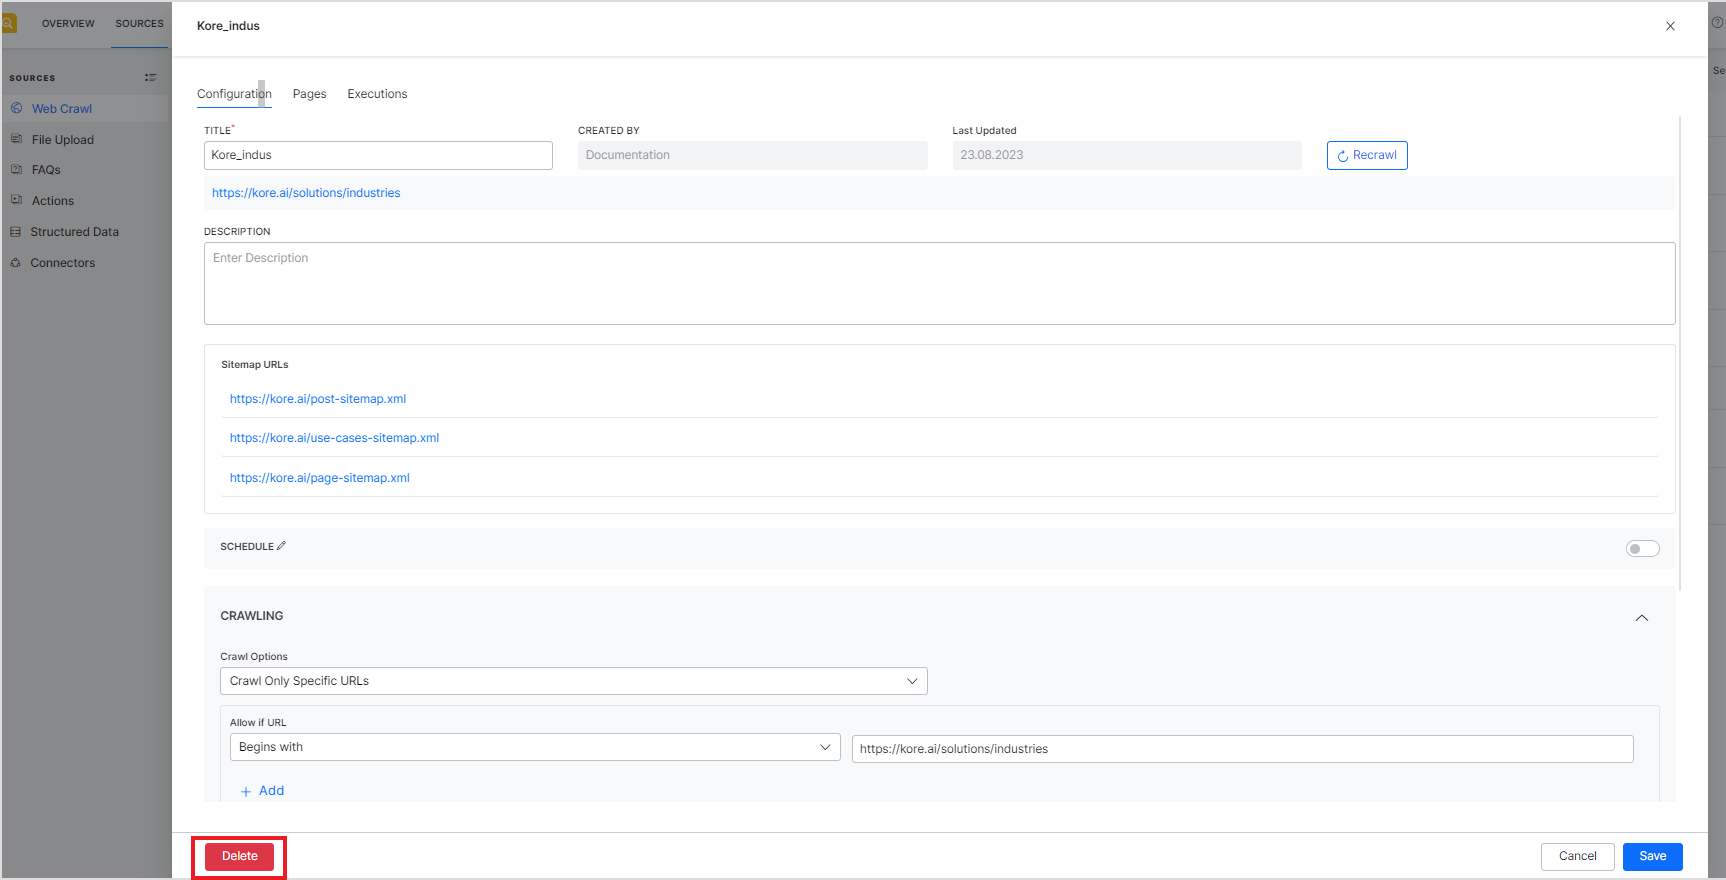
 Alternatively, open the configuration of the source from the list and click the Delete button at the bottom left of the page.
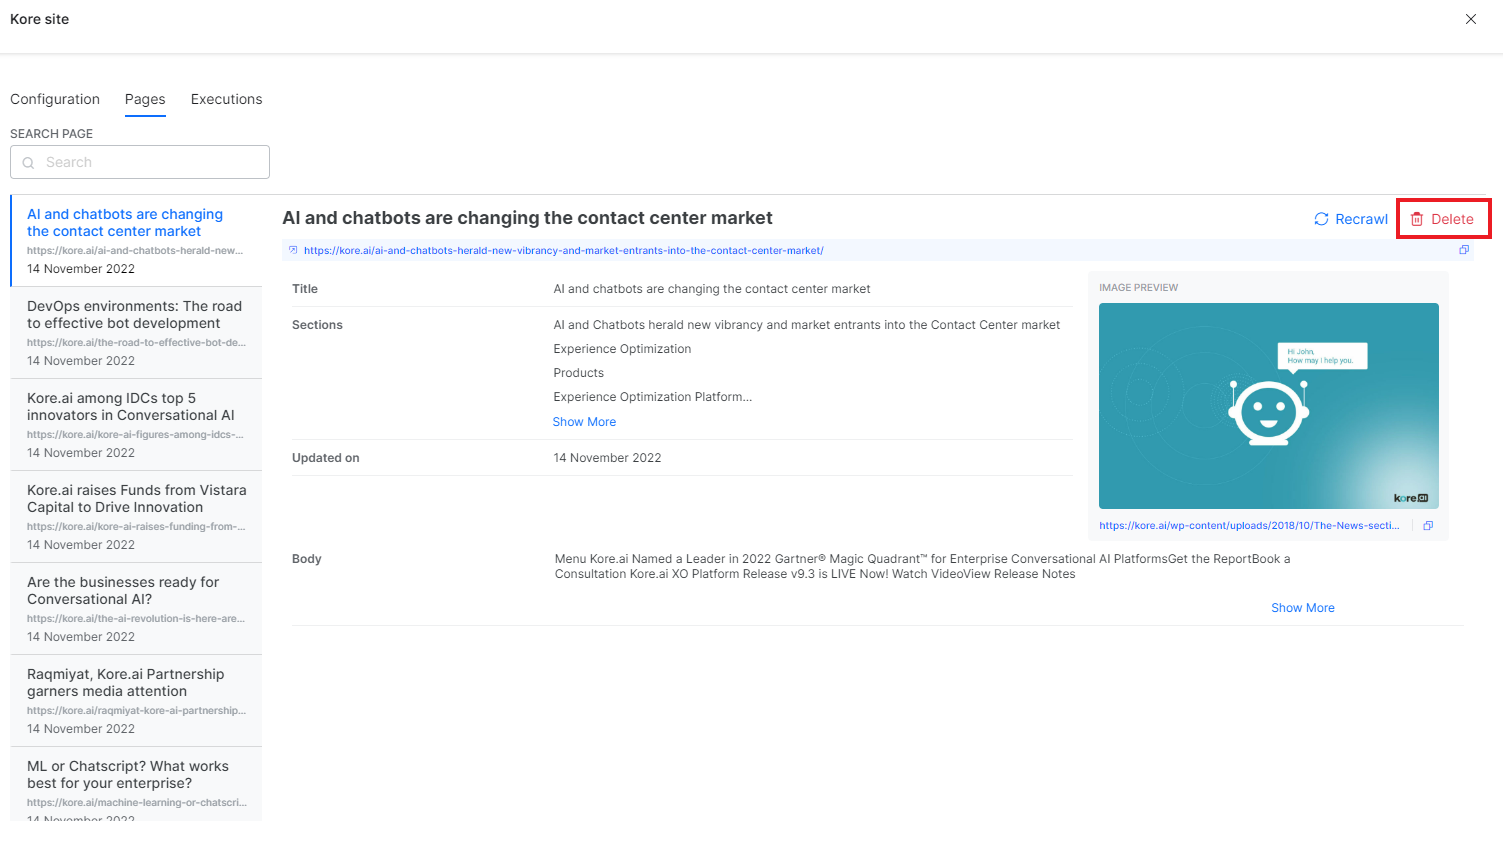
 You can also delete one or more of the crawled pages individually from the source without deleting the source. To do so, click the source name and go to the Pages tab. Select the page to be deleted from the left and click the Delete button on the right panel.
Troubleshooting
There can be various scenarios when SearchAssist either fails to crawl a web page or successfully crawls the page but does not index the web page’s content and, hence, does not return the expected results. Listed below are some of the most common of these scenarios. For any specific queries or issues, please contact us.
1. Web Crawl Failure:
- Ensure you have permission to log in to the web pages you are trying to crawl and have provided the correct credentials in the web crawl configuration.
- Verify that the URL is accurate and complete, directing to the intended pages for crawling.
- Confirm that the domain is whitelisted for the SearchAssist server.
2. Successful Web Crawl but Unsuccessful Indexing:
- Verify that your web pages are not JavaScript rendered. By default, SearchAssist does not crawl JS-rendered pages. Hence, if your pages are completely or partially JS rendered, the web crawl will not index all the content. To enable the crawling of such pages, enable the “JavaScript Rendered” option in the crawl configuration.
- Even with the JavaScript-rendered option enabled in the configuration, web pages that rely heavily on JavaScript and take considerable time to process may still result in inaccurately indexed content. In such cases, it is advisable to introduce crawl delay using the parameter ‘dev_enable_crawl_delay’. This parameter can take any value between 0 and 9, where 0 indicates no delay and 9 indicates the maximum value of delay that can be introduced.
- Verify that the inclusion and exclusion rules are set appropriately.
- Verify that the crawl depth and max URLs are set appropriately. These configuration parameters impact the number and sequence of pages crawled.
- Ensure that the page is discoverable. Web crawler uses sitemaps and links between pages to find a page. If a page is not linked from other pages and is also not listed in the sitemap, the web crawler will not discover it.
3. Web Crawl Takes Too Long:
- Verify if the web pages are JavaScript-rendered, and enable the option if necessary. This situation may arise when many pages on the website being crawled return no content due to being JavaScript-rendered. The crawler continues to crawl the next pages till it crawls the specified number of pages (defined by ‘max URLs’).