
If you are using SharePoint to manage your content and wish to integrate it with SearchAssist to make your existing content searchable, configure the SharePoint connector on the SearchAssist application and get going.
Specifications
| Type of Repository | Cloud |
| Supported API version | Graph REST API v1.0 |
| Search Results Support | .doc, .docx, .ppt, .pptx, .pdf, .txt, .OneNote. |
| Extractive Model for Answers | .pdf, pages/articles(.aspx), .html, .xhtml. |
| Generative Model for Answers | pages/articles (.aspx), .doc, .docx, .ppt, .pptx, .html, .xhtml, .txt, .pdf |
| RACL Support | Yes |
| Note: Password-protected files in any format are not supported. | |
Configuring SharePoint as a content source requires:
- Registering multi-tenant app in SharePoint
- Configuration of the SharePoint connector in SearchAssist
Registering multi-tenant app in SharePoint
App registrations are required to access resources programmatically. Registering an application establishes a trust relationship between the SearchAssist application and the identity provider, the Microsoft identity platform. To register,
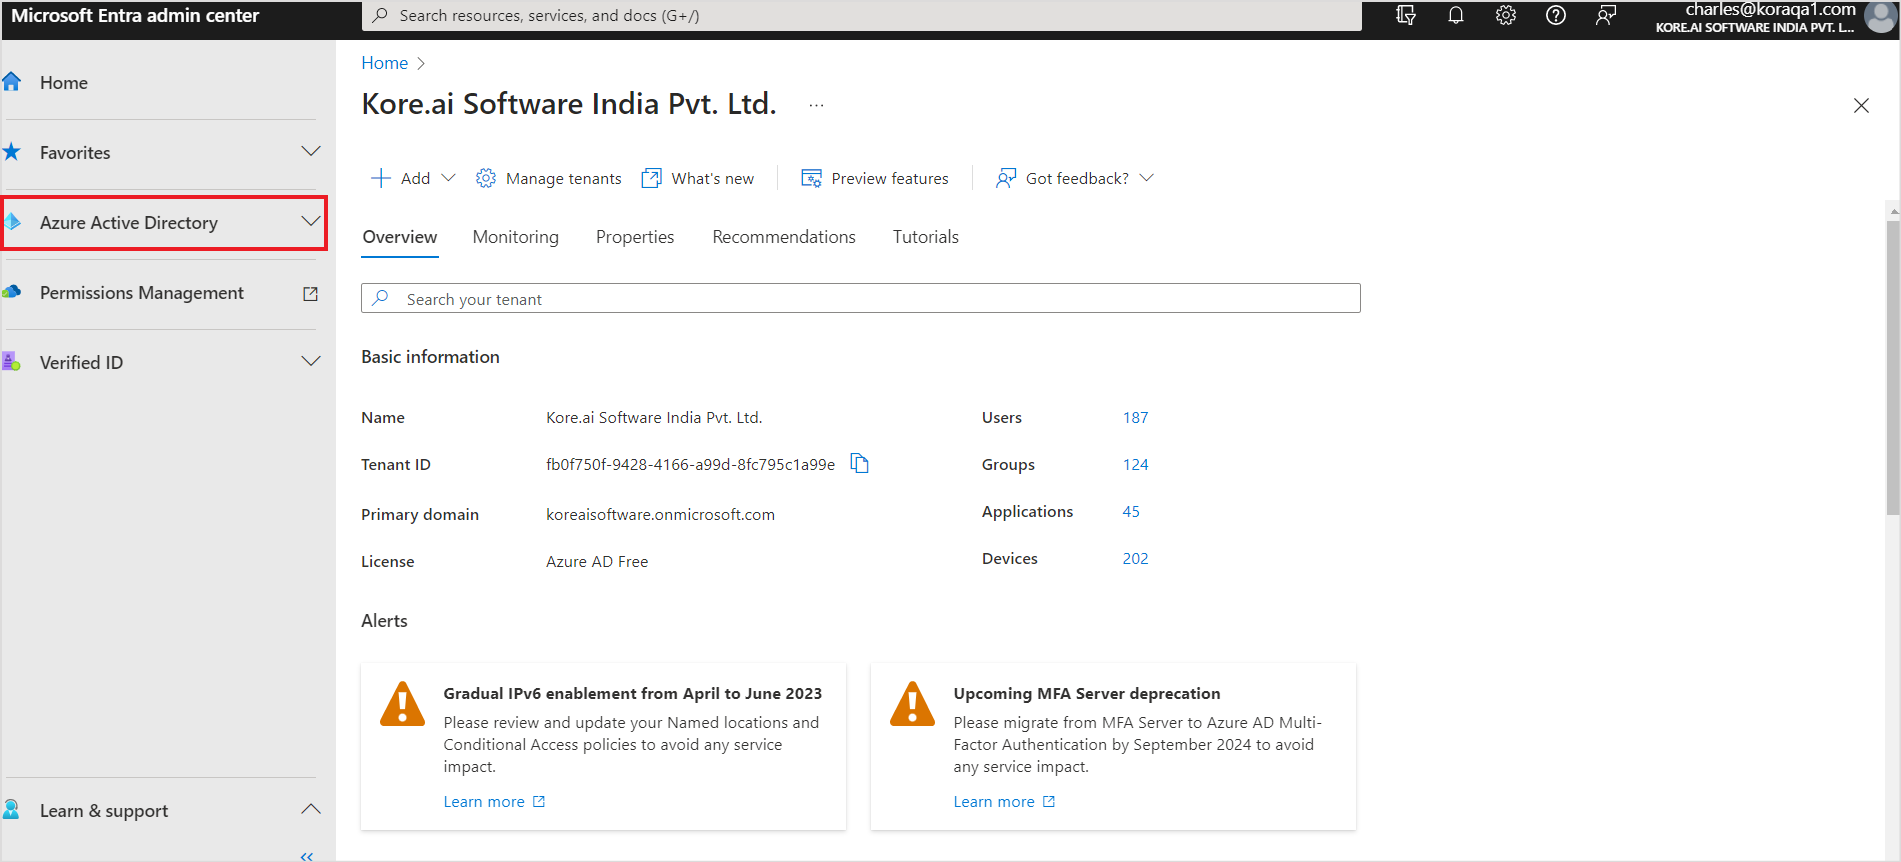
- Log in to the Azure Platform Portal and go to Manage Azure Active Directory.
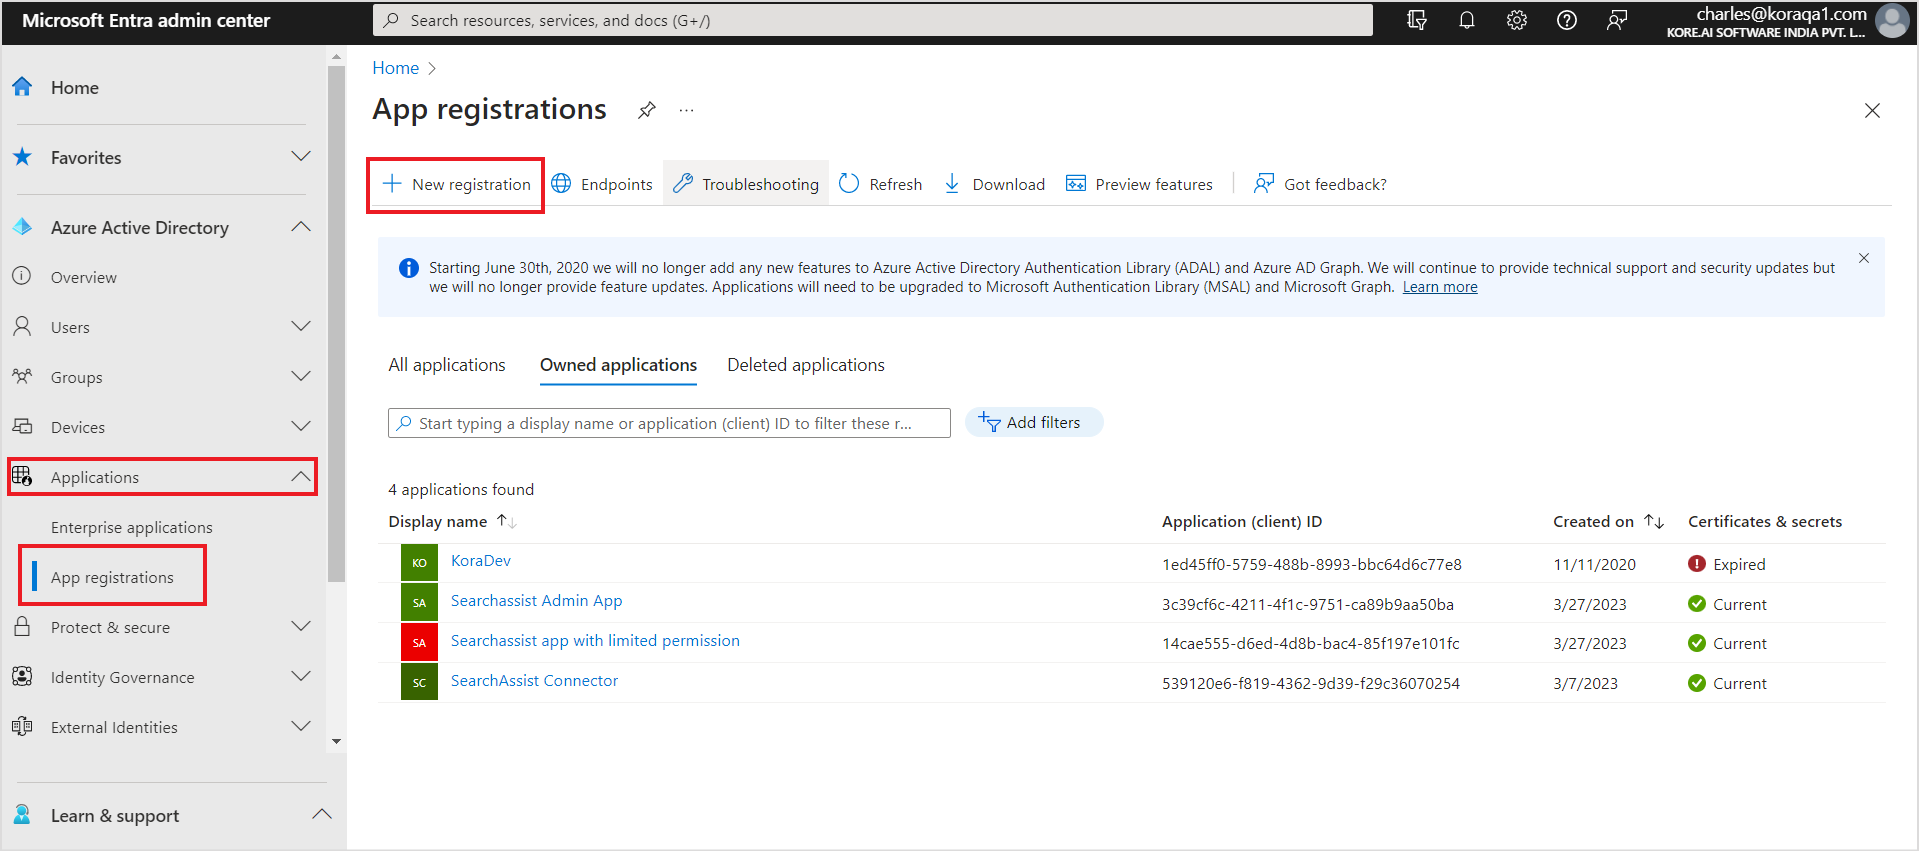
- Register a new application. To do so, go to App registrations under Applications and click on New Registration.
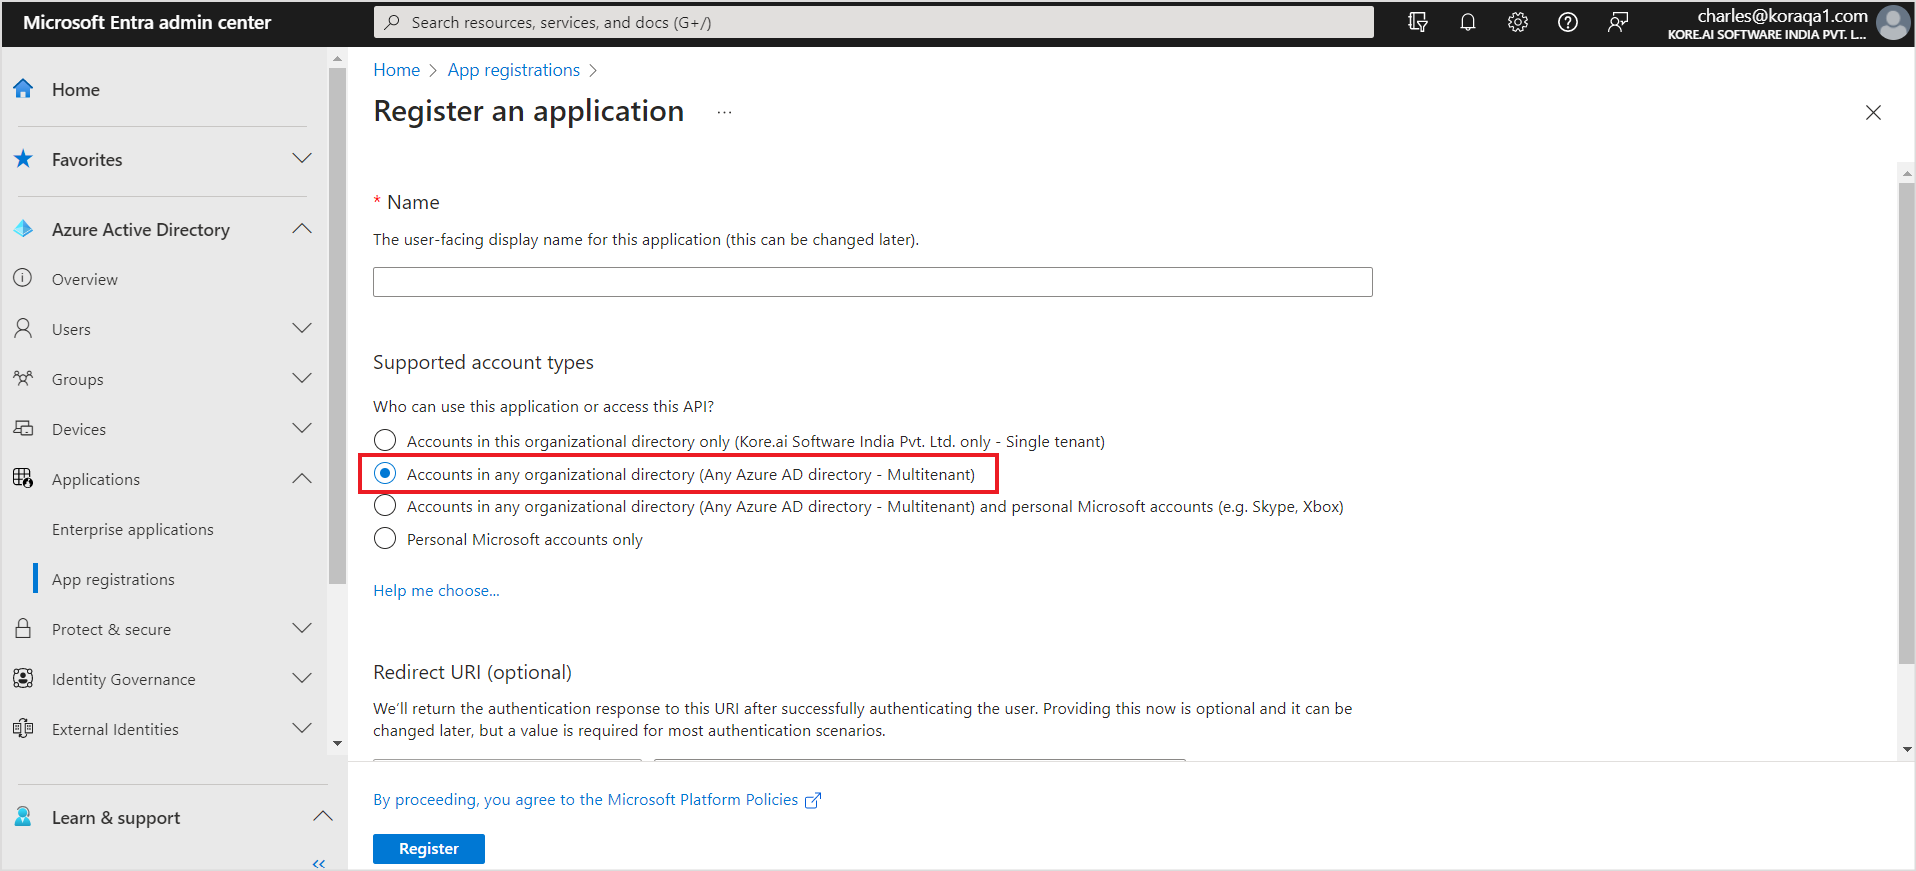
- Enter a name for the application. Create a multi-tenant account and set the account type to ‘Accounts in any organization directory’. You can set the Redirect URI and click Register. You can use one of the following URLs as per your region.
- JP Region Callback URL: https://jp-bots-idp.kore.ai/workflows/callback
- DE Region Callback URL: https://de-bots-idp.kore.ai/workflows/callback
- Prod Region Callback URL: https://idp.kore.com/workflows/callback
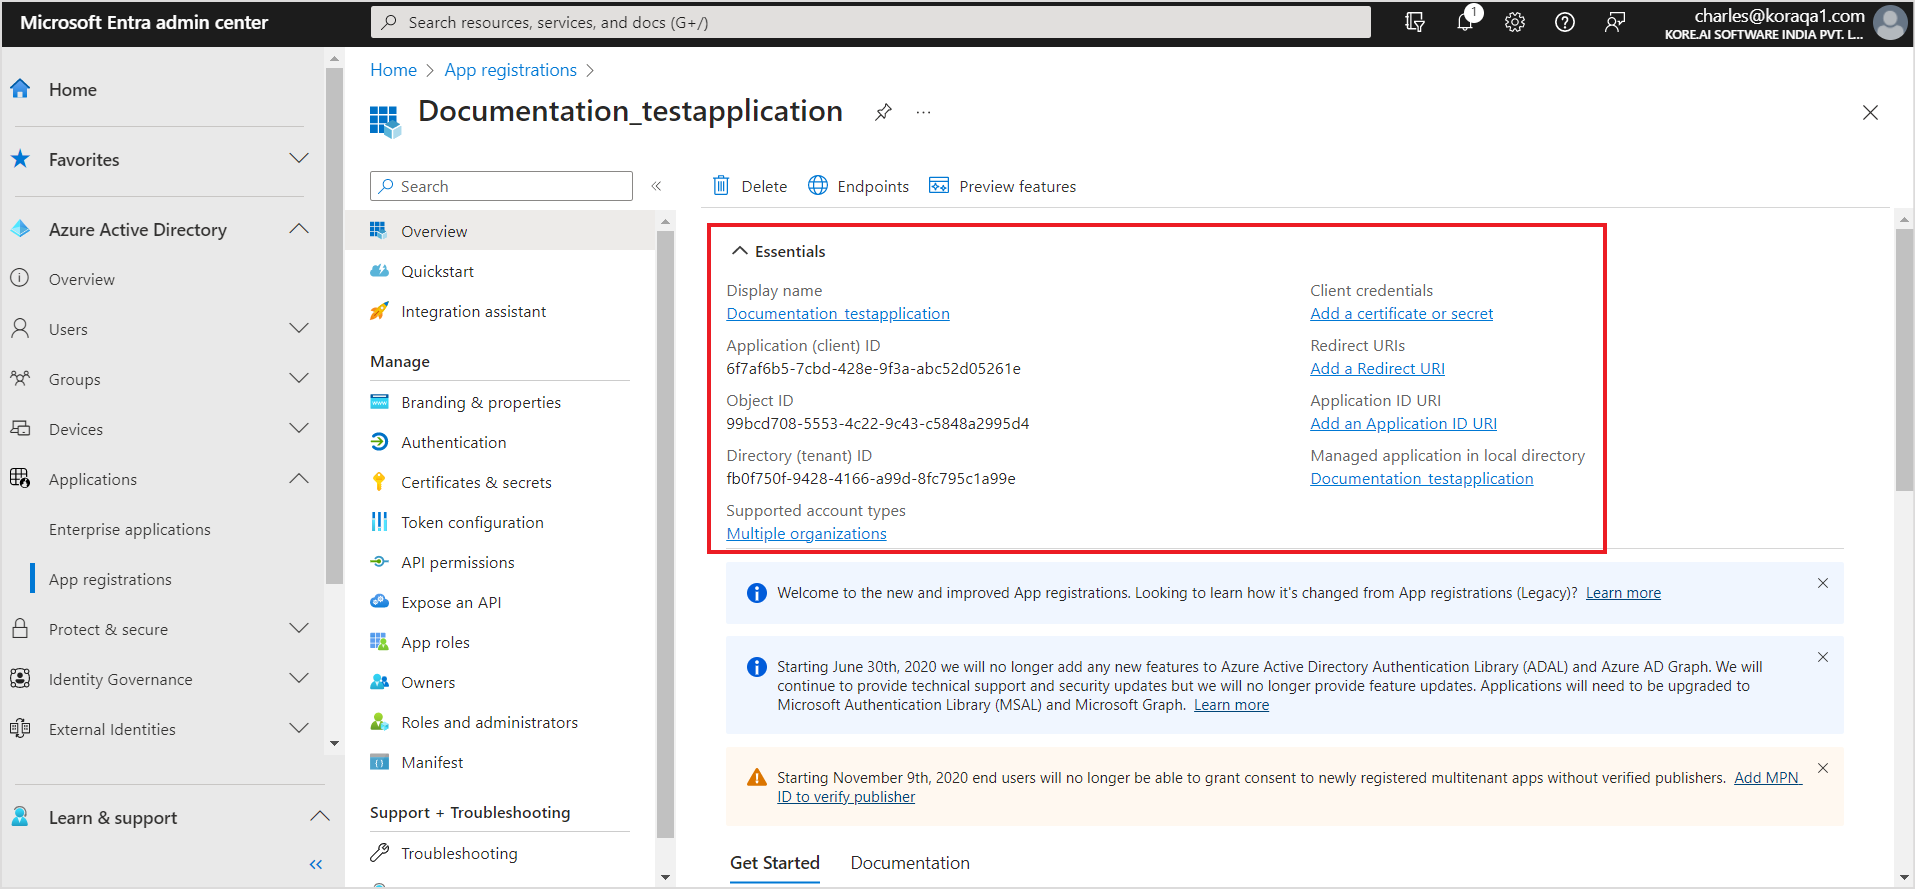
- This will generate a client ID which will be used to identify the application in the Microsoft Identity Platform uniquely. Save the ClientId and TenantId from the Overview section.
- Next Generate a client Secret for the registered app under the Certificates and Secrets tab.
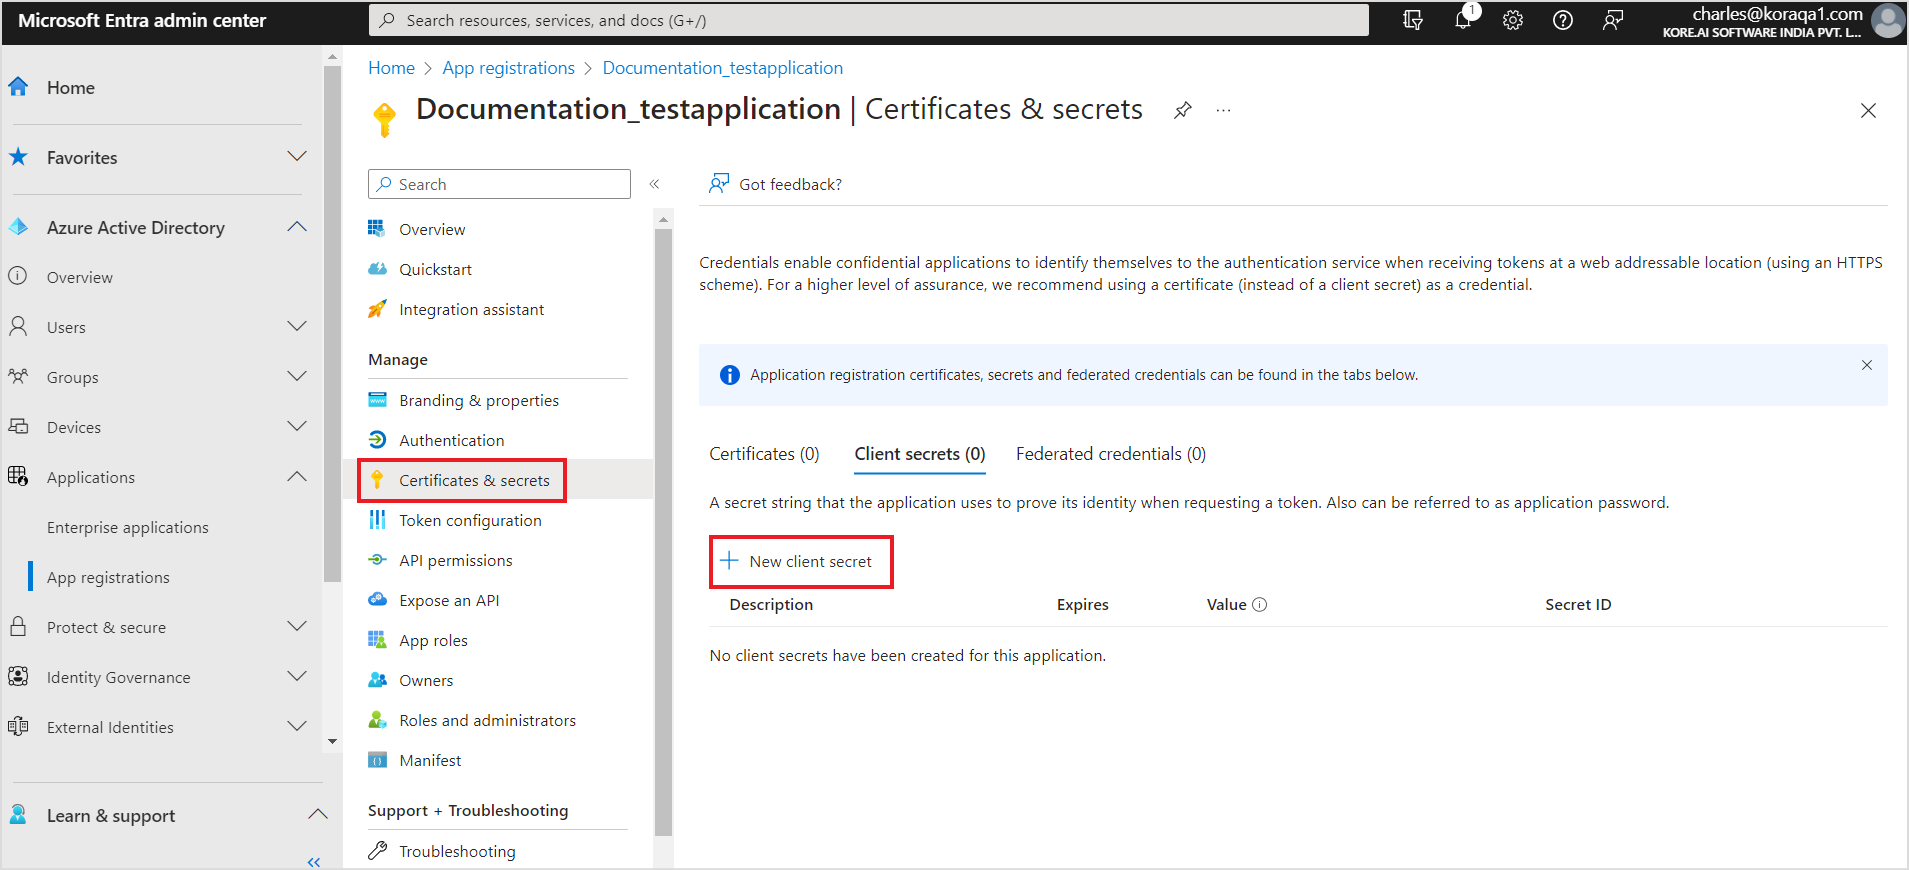
- Enter a description and set the expiration time to 24 months. Click Add.
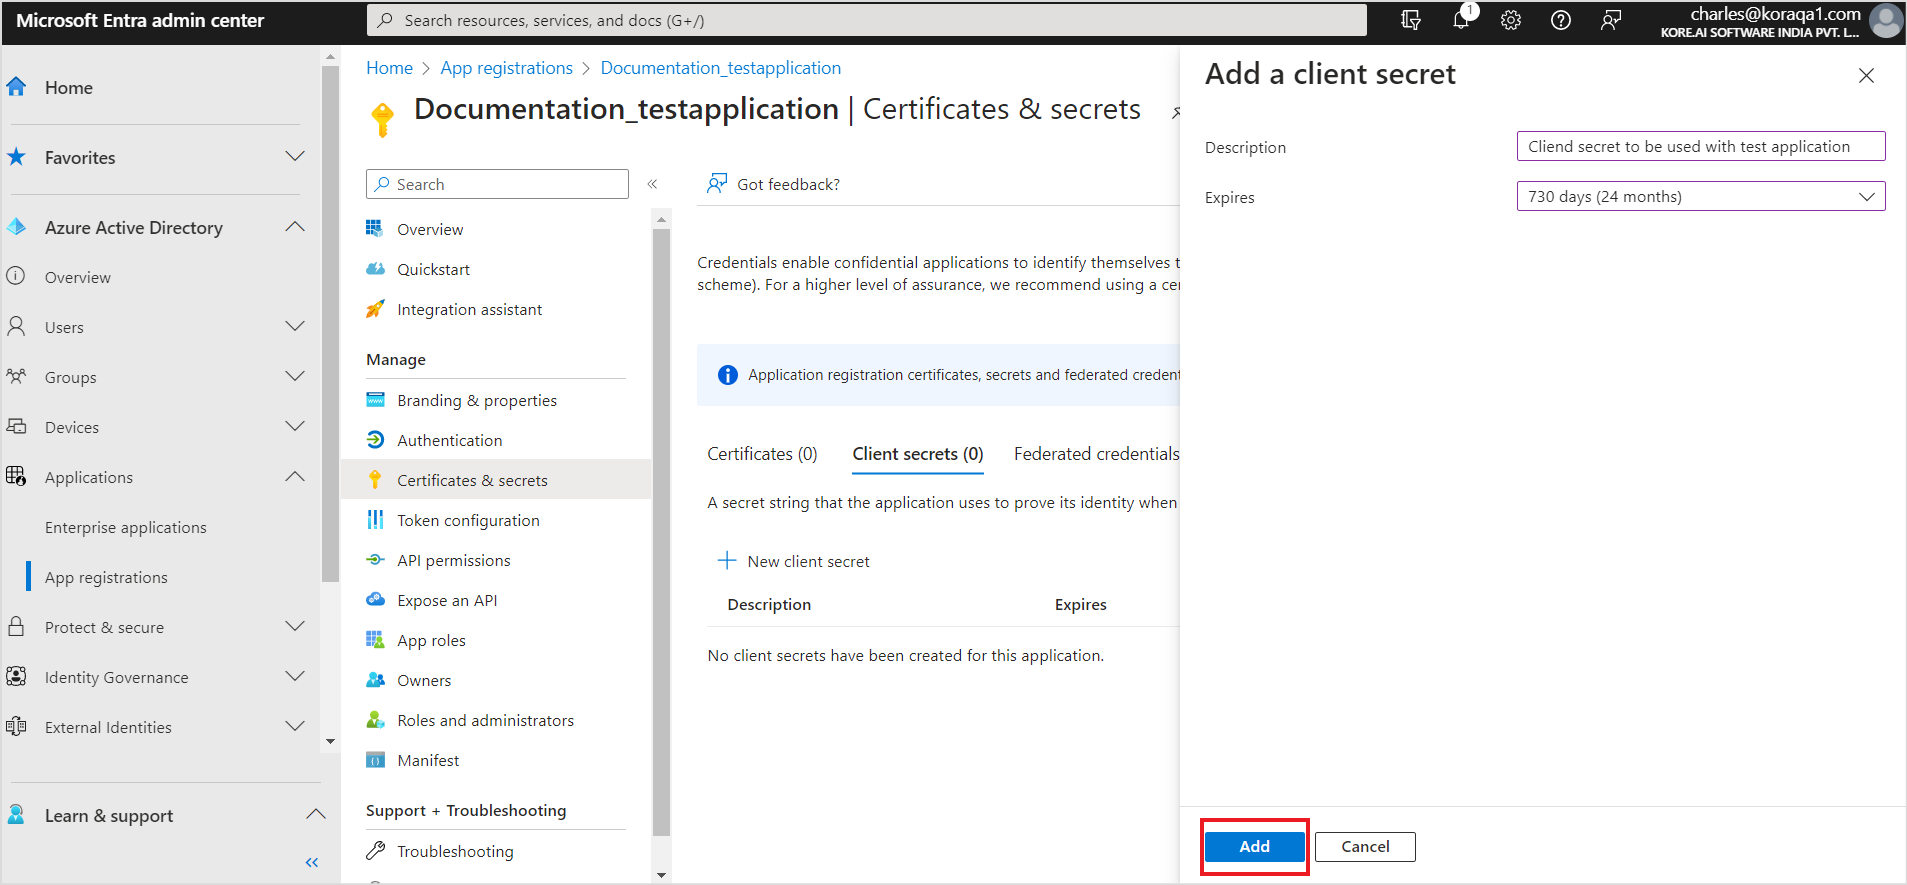
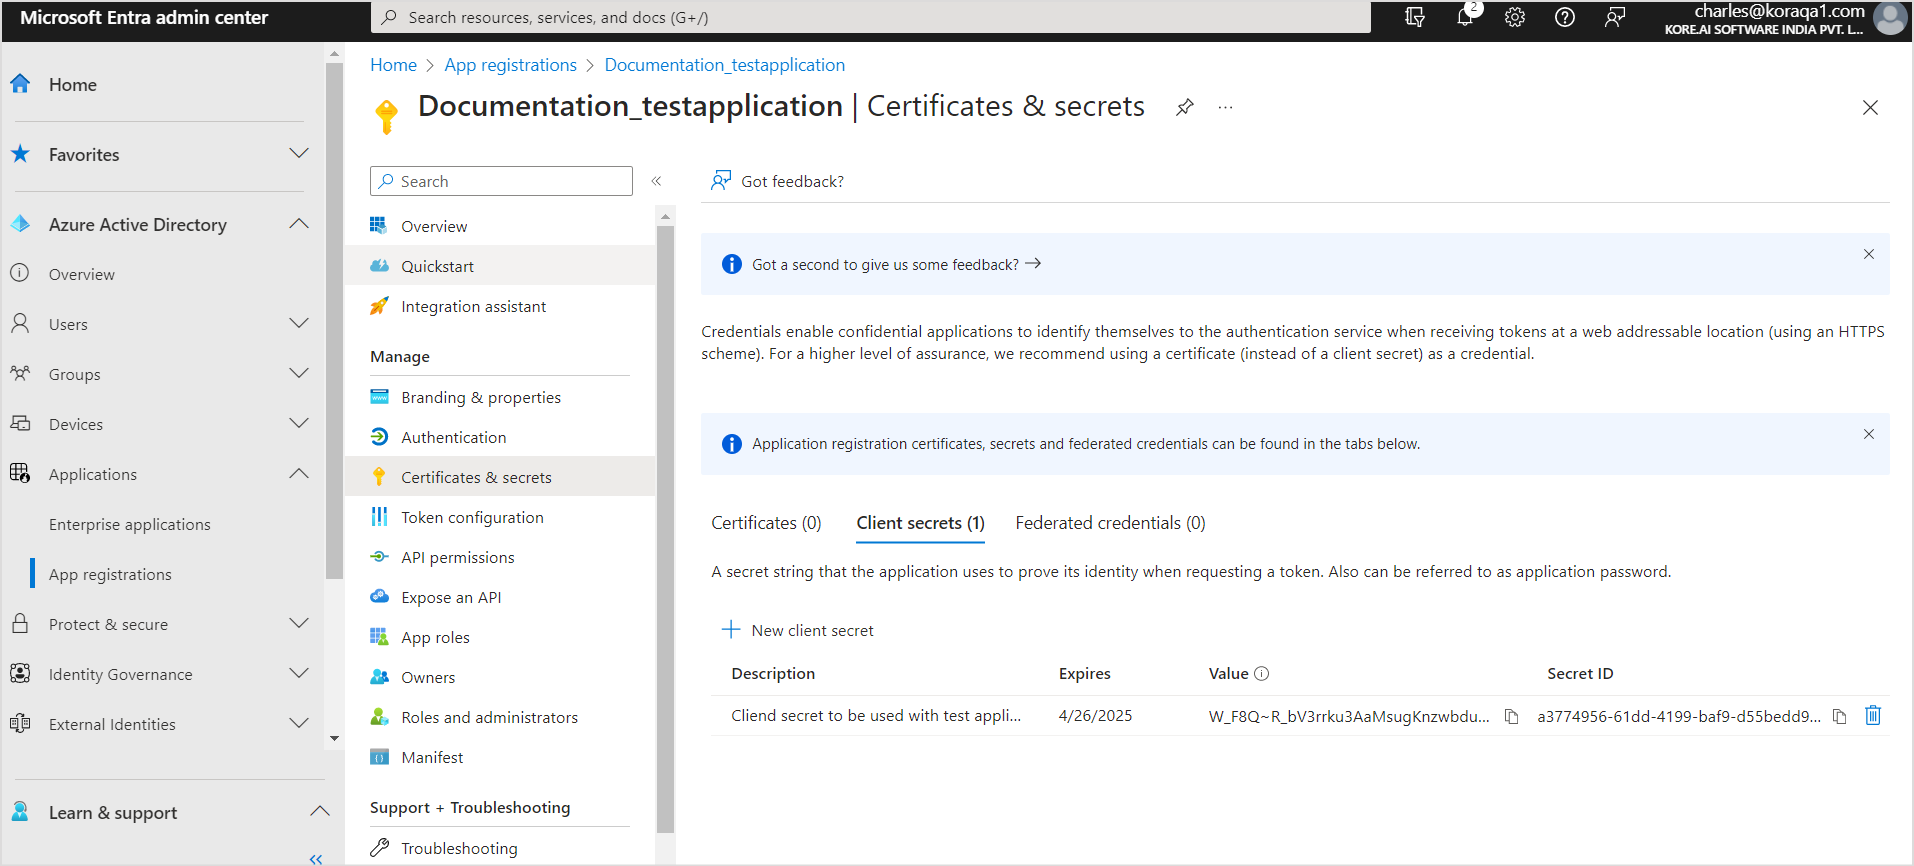
- Save the client secret generated. The client secret cannot be seen again on switching the tabs.
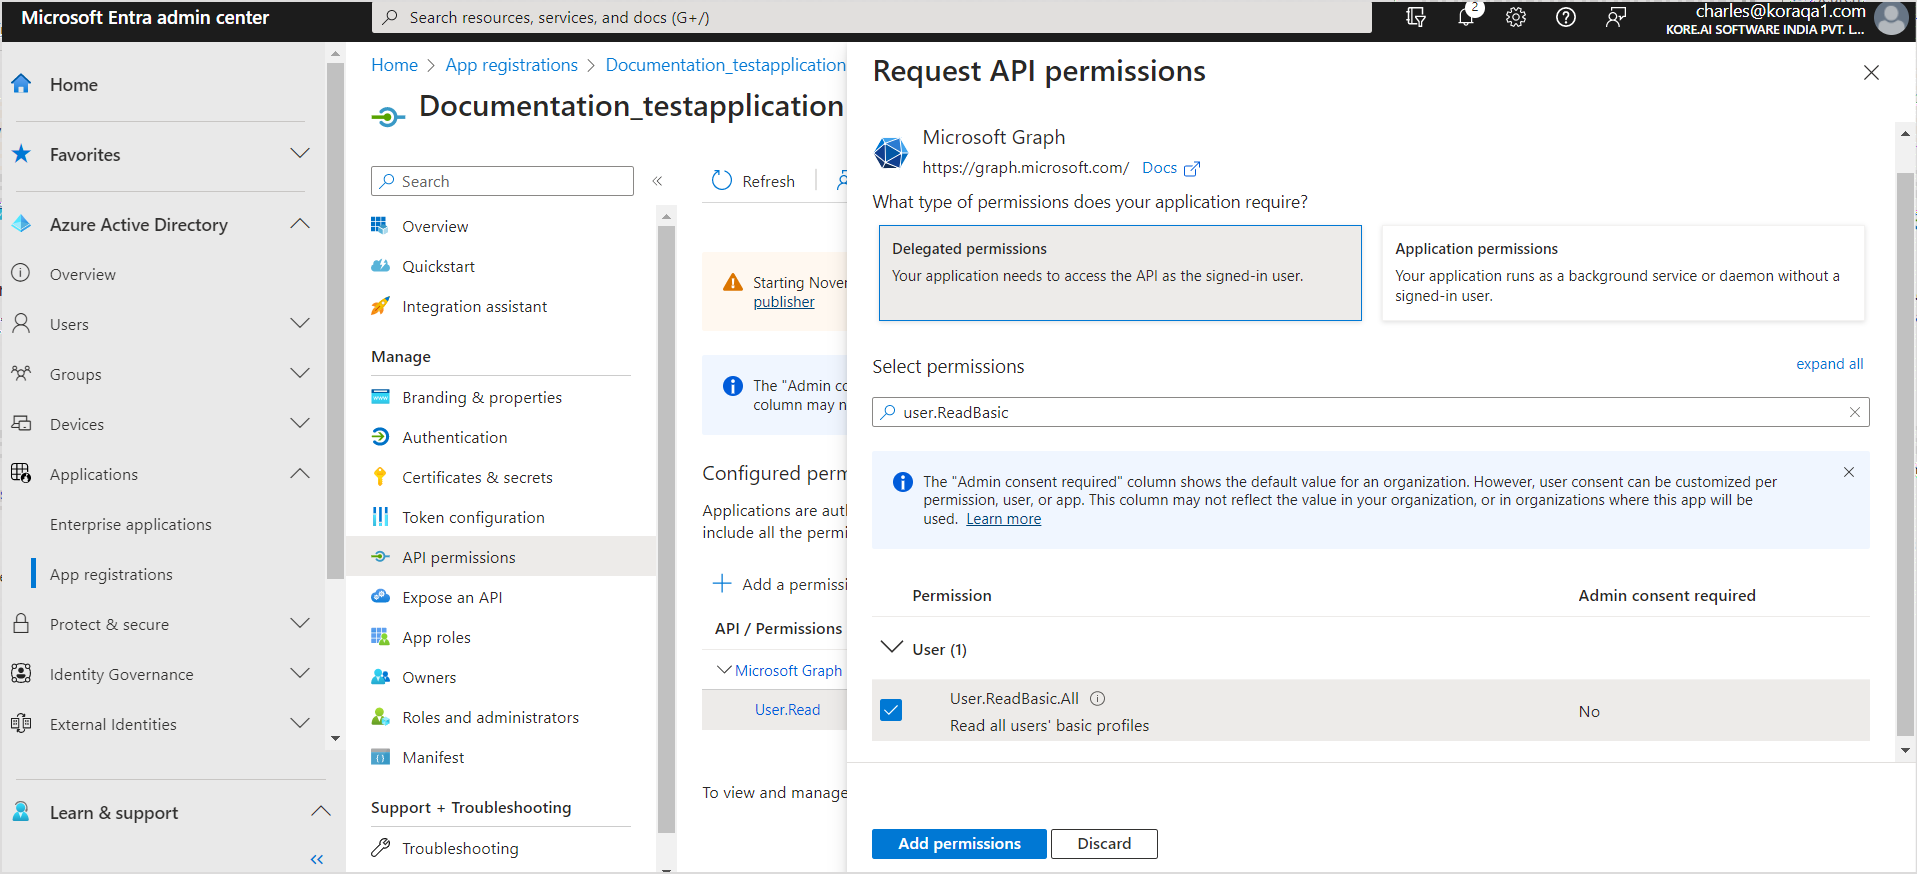
- Next step is to setup the permissions required for the application. Go to API Permissions and click Add a permission.
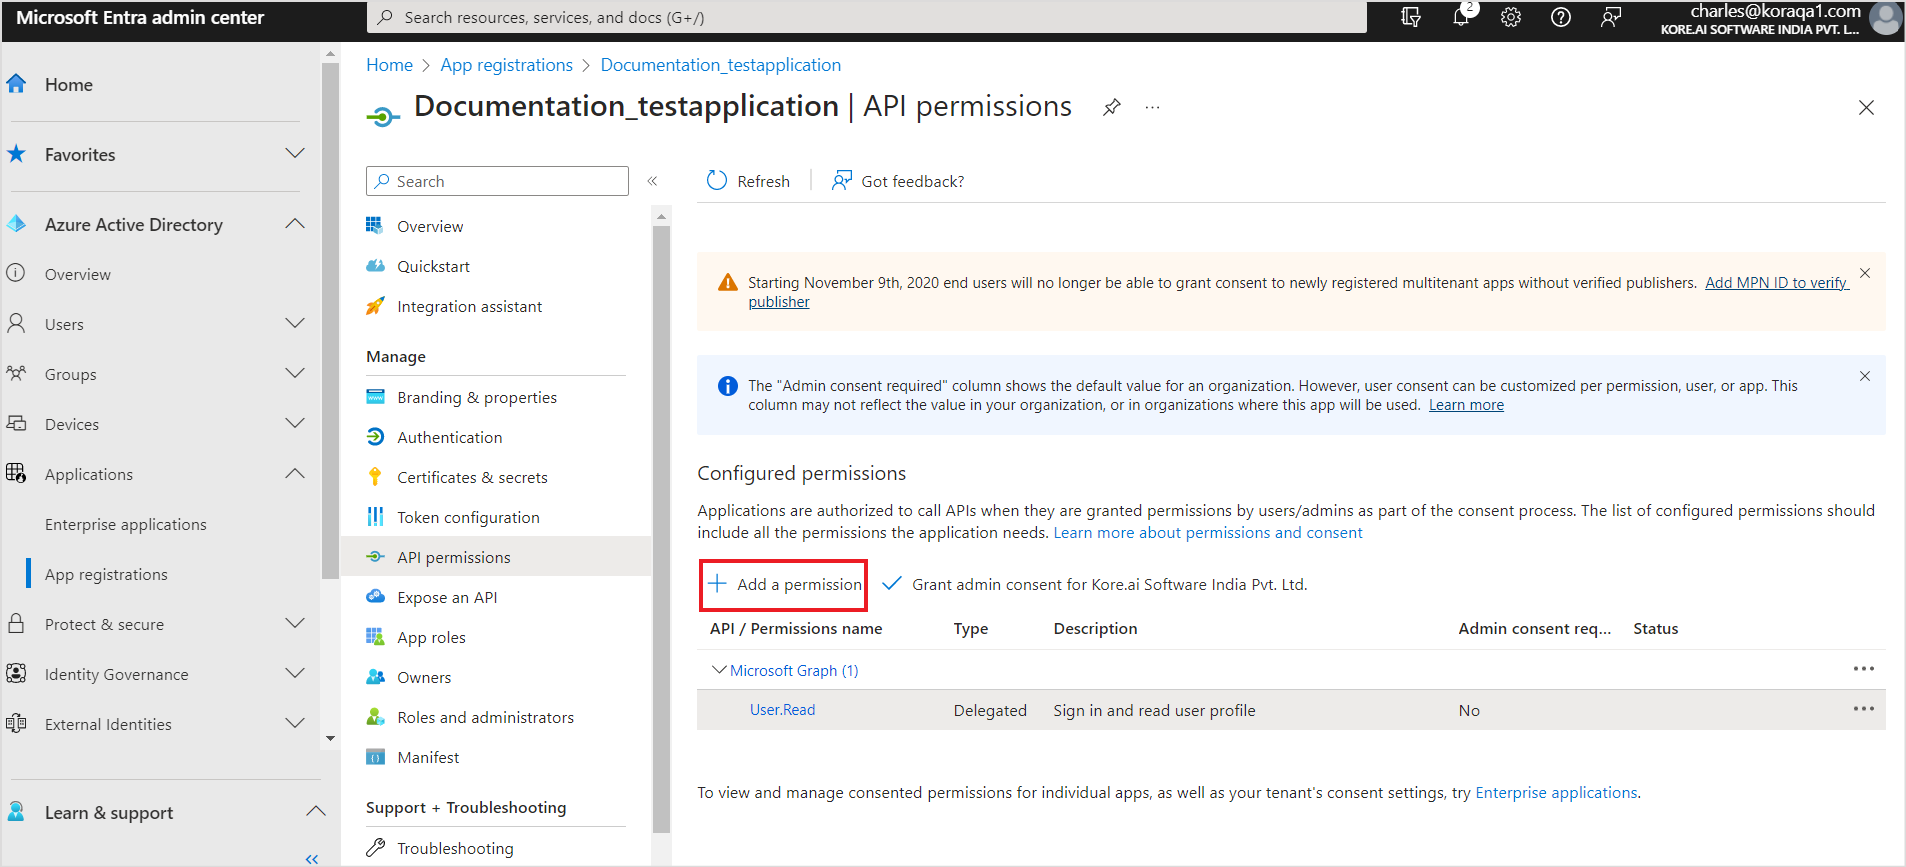
- Add the following delegated permissions found under Microsoft Graph.
- User.ReadBasic.All
- Group.Read.All
- Directory.AccessAsUser.All
- Files.Read
- Files.Read.All
- Sites.Read.All
- Offline_access
- After adding all the permissions, click Grant Admin Consent to grant the permissions to the application.
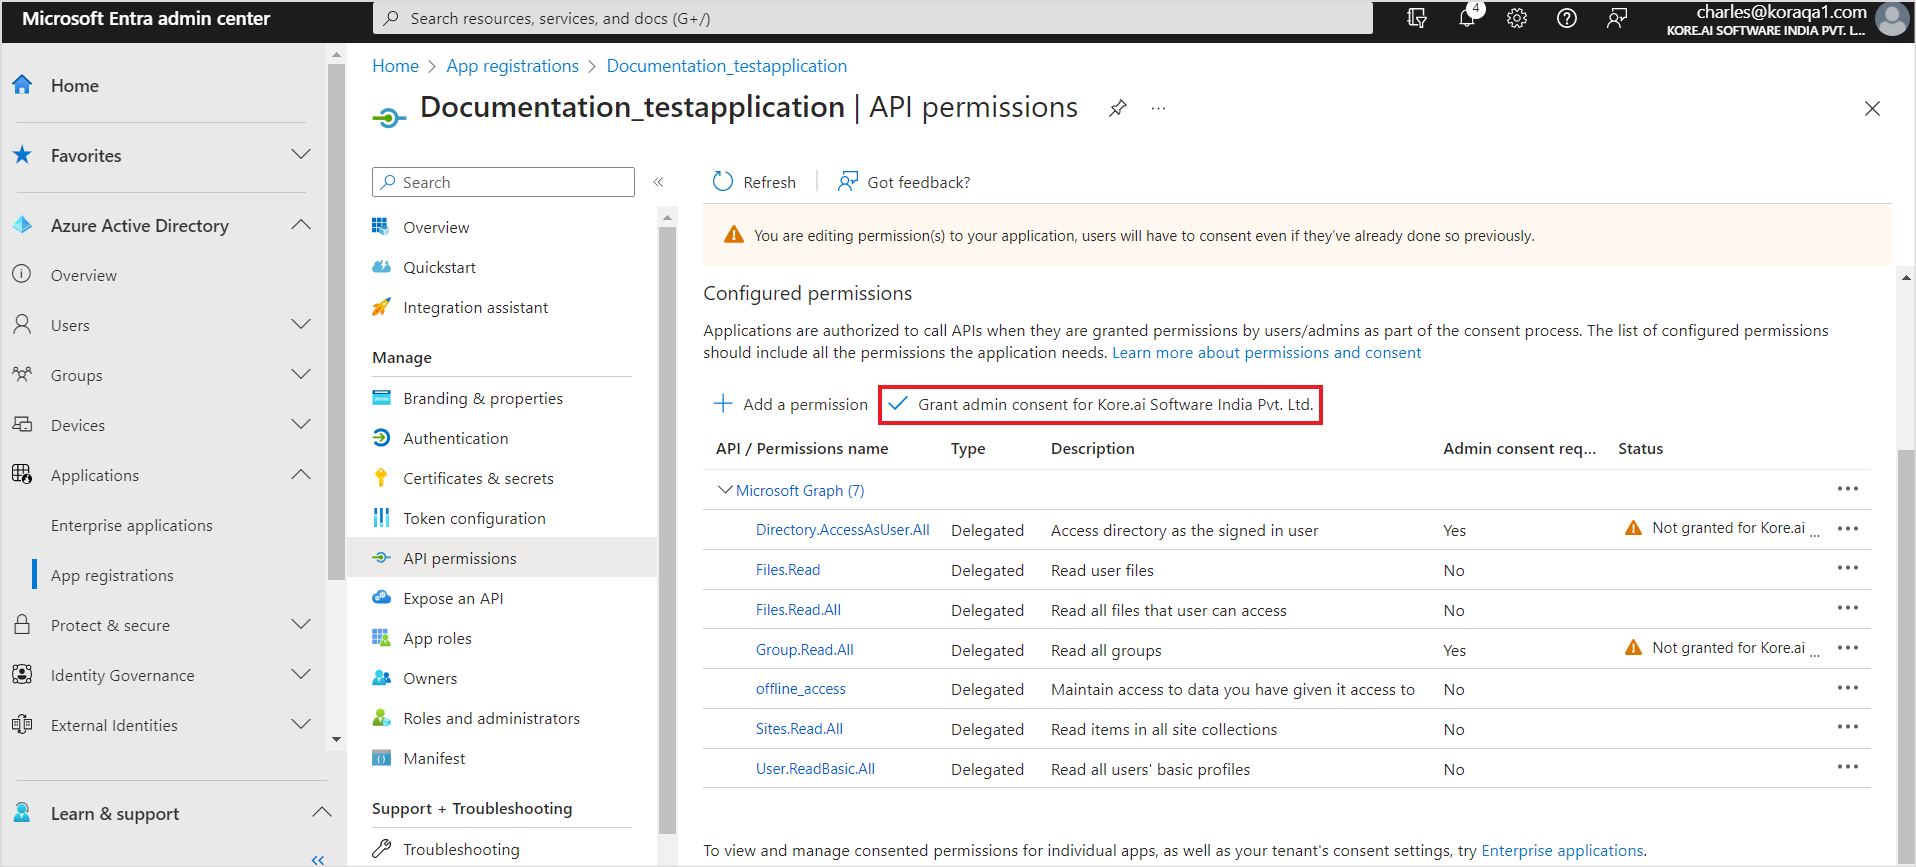
- Use the client ID, client secret, and tenant Id generated above to configure the SharePoint connector in SearchAssist.
For more details, refer this.
Configuration of the SharePoint connector
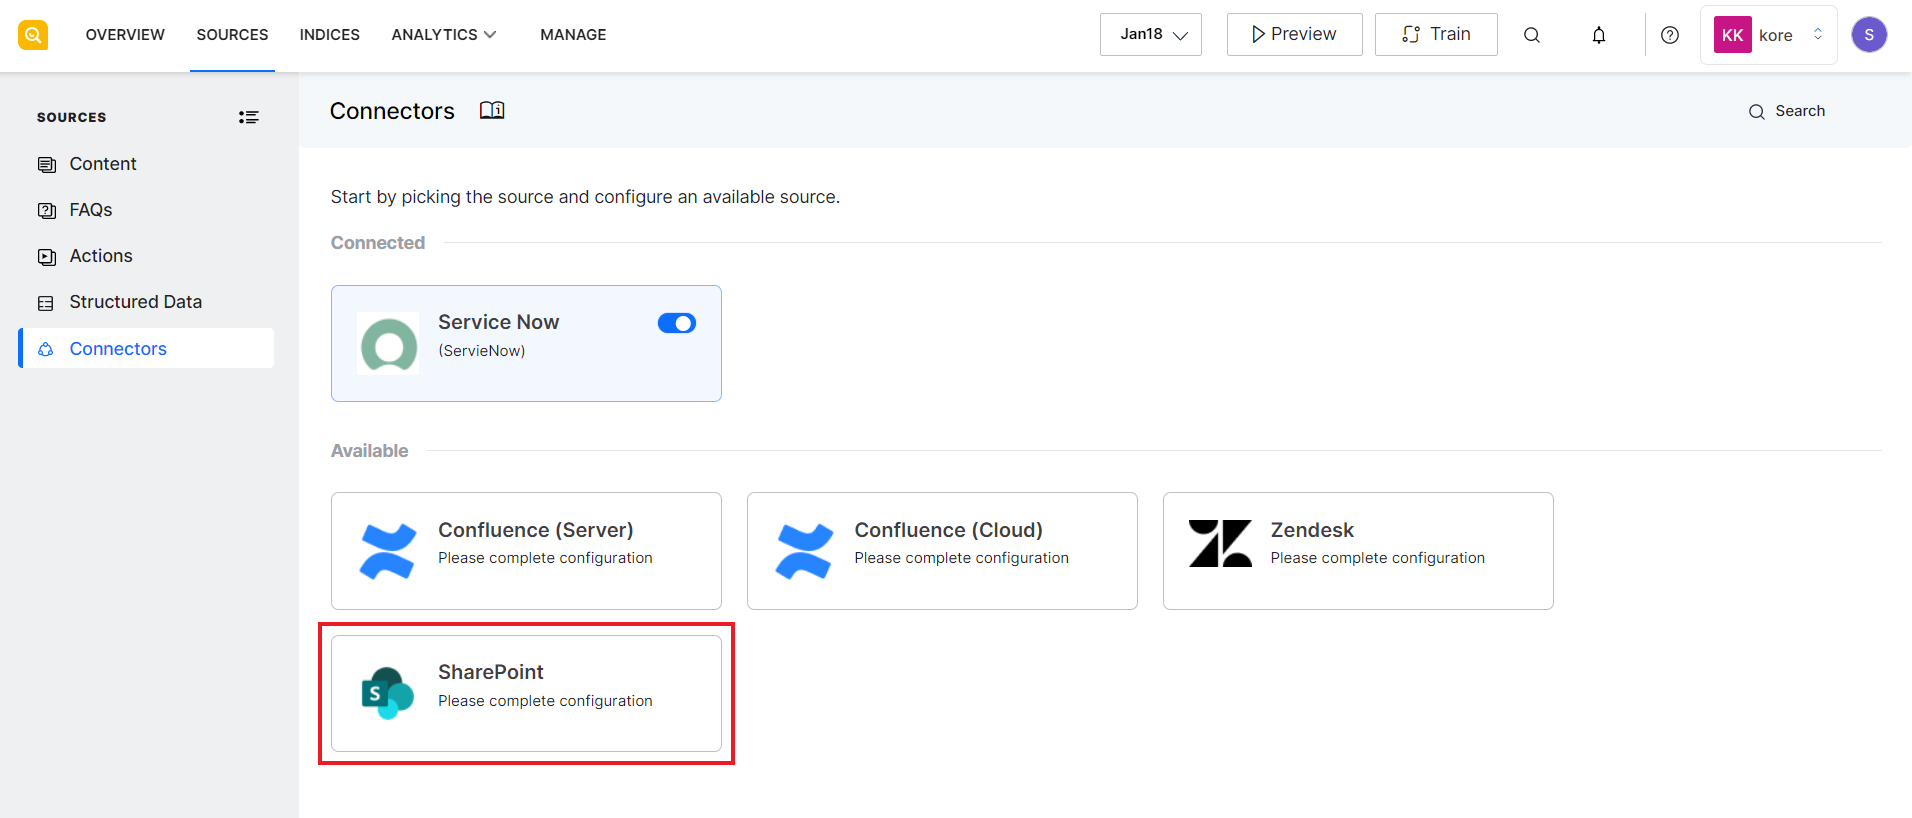
Go to the Connectors page under Sources in the SearchAssist application. Click SharePoint.
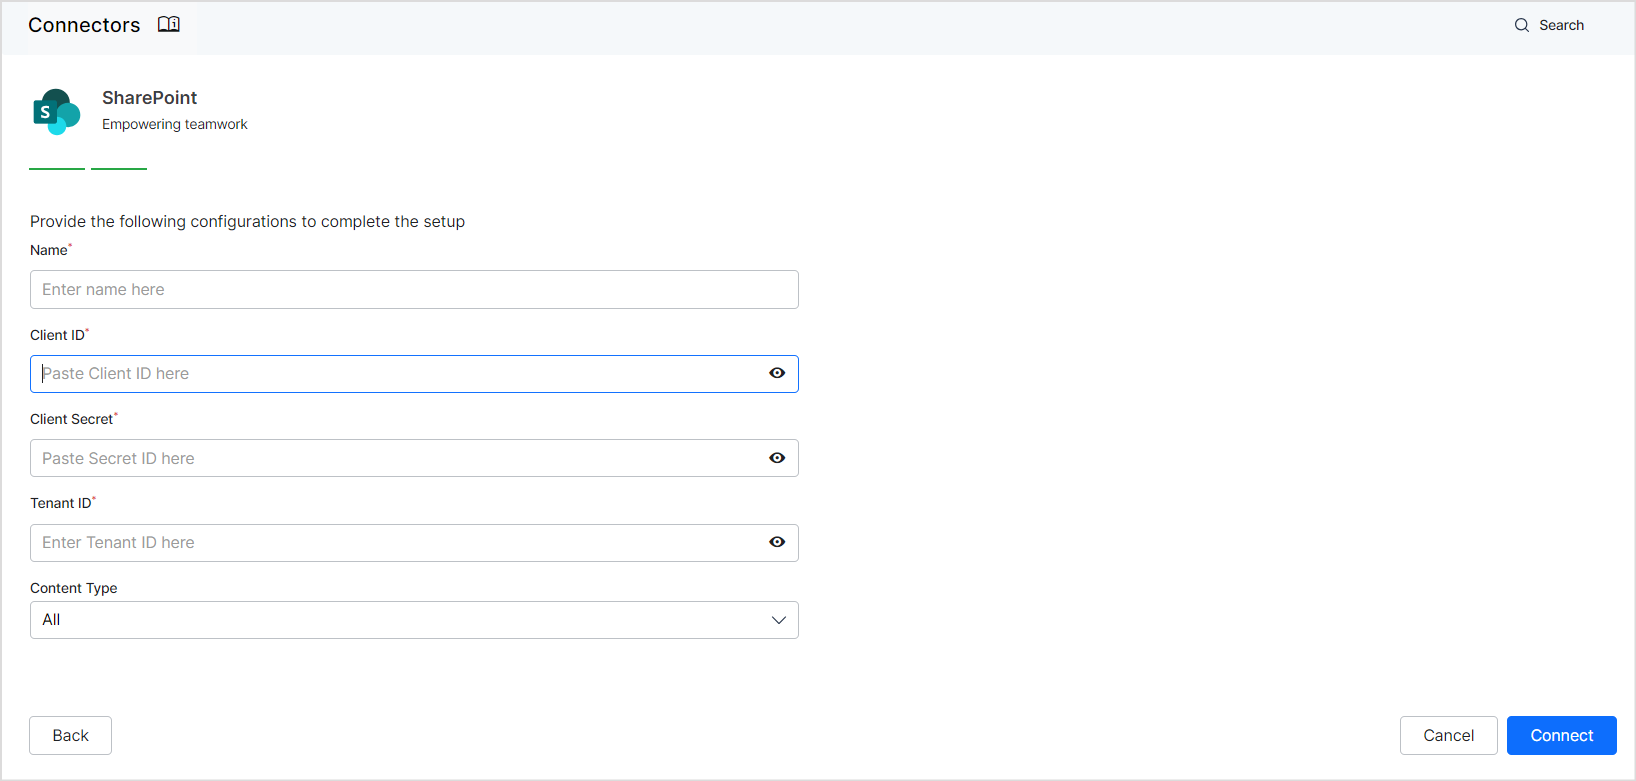
The following page shows the steps to configure the connector. Click Proceed to continue. On the next page, enter the Client ID, Tenant ID, and Client Secret generated during the application registration in the Azure portal. Choose the desired content type—All, Articles, or Files. Assign a name for the connector, then click Connect.
Once the authorization process is complete and the connector is configured, the next step is to select the SharePoint sites from which you want to ingest the content into SearchAssist and make it searchable. Go to Overview section and click the Sites icon. 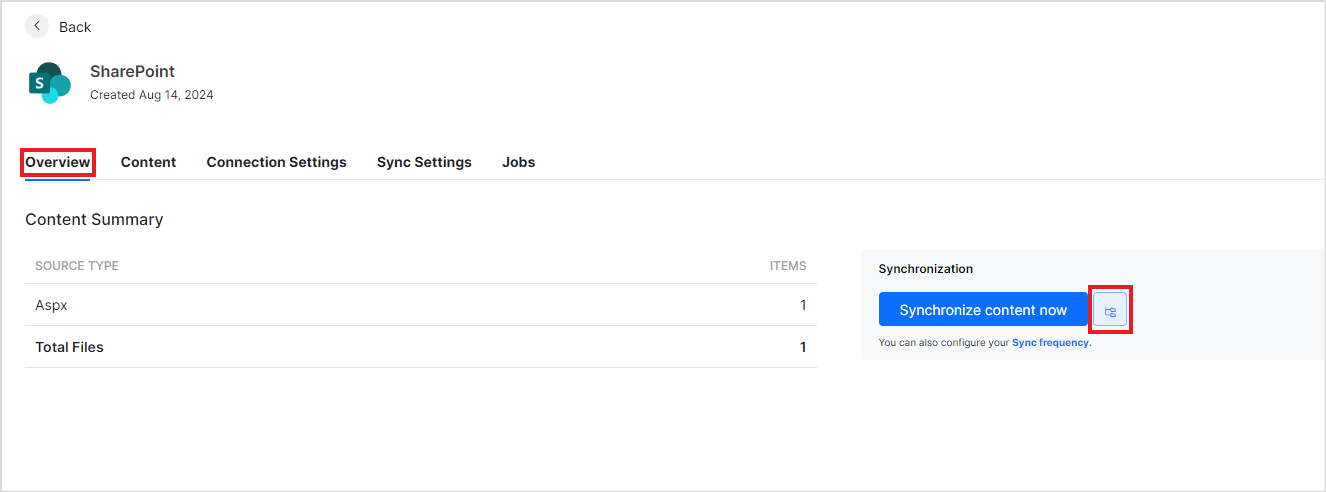
Select the sites and Save Configuration. 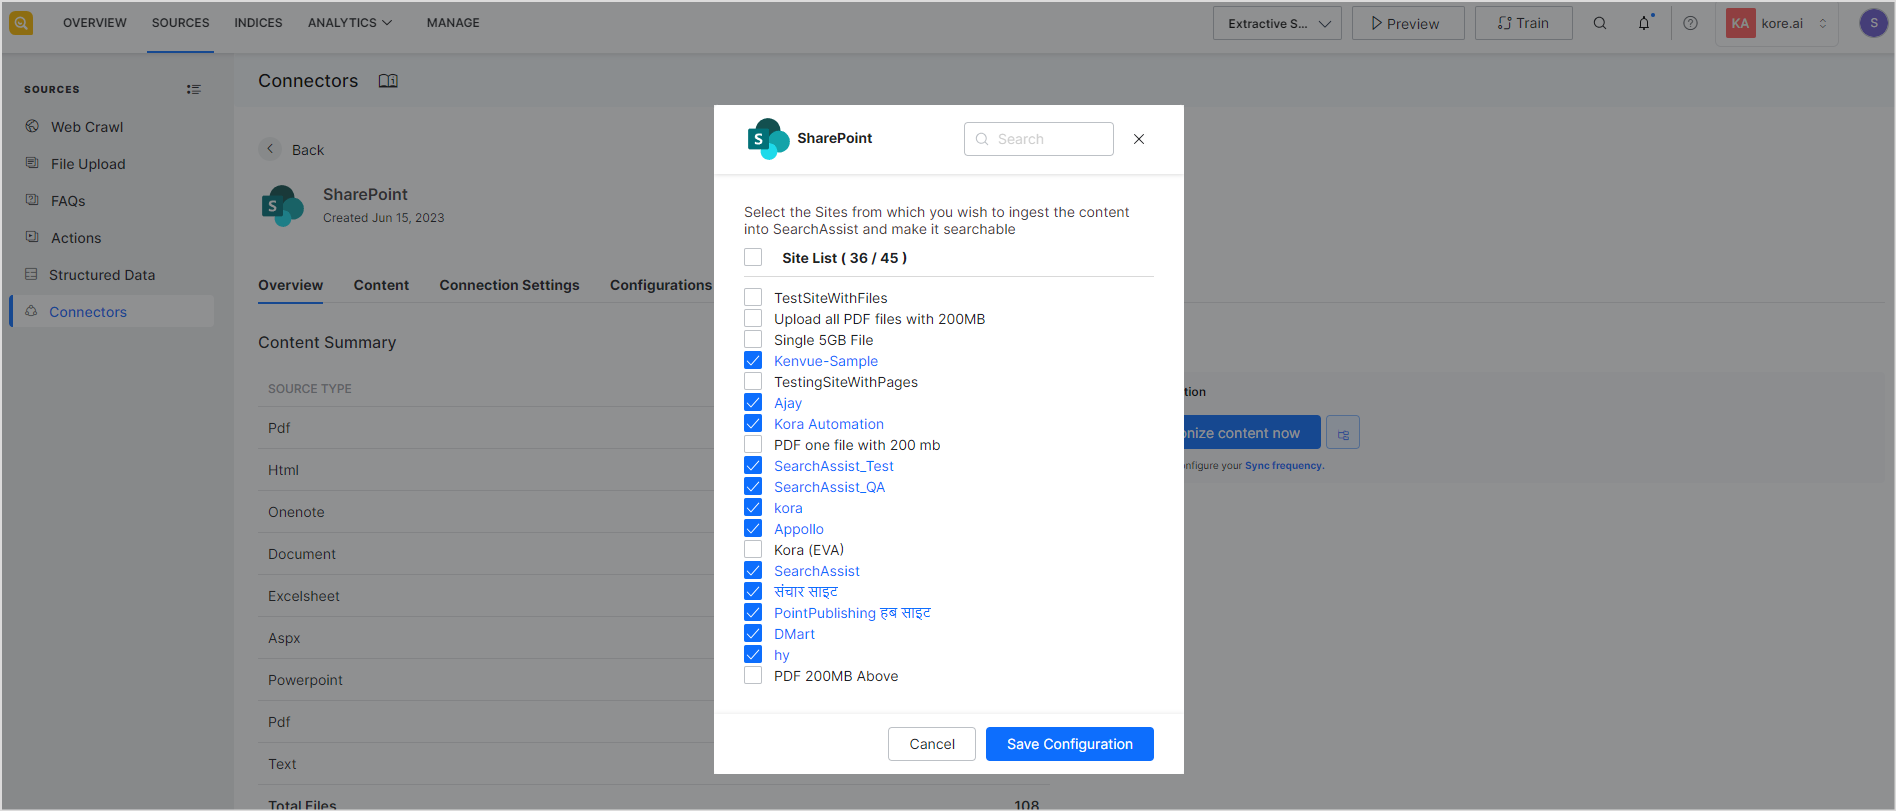
Click Synchronize content now to ingest data from the selected sites. 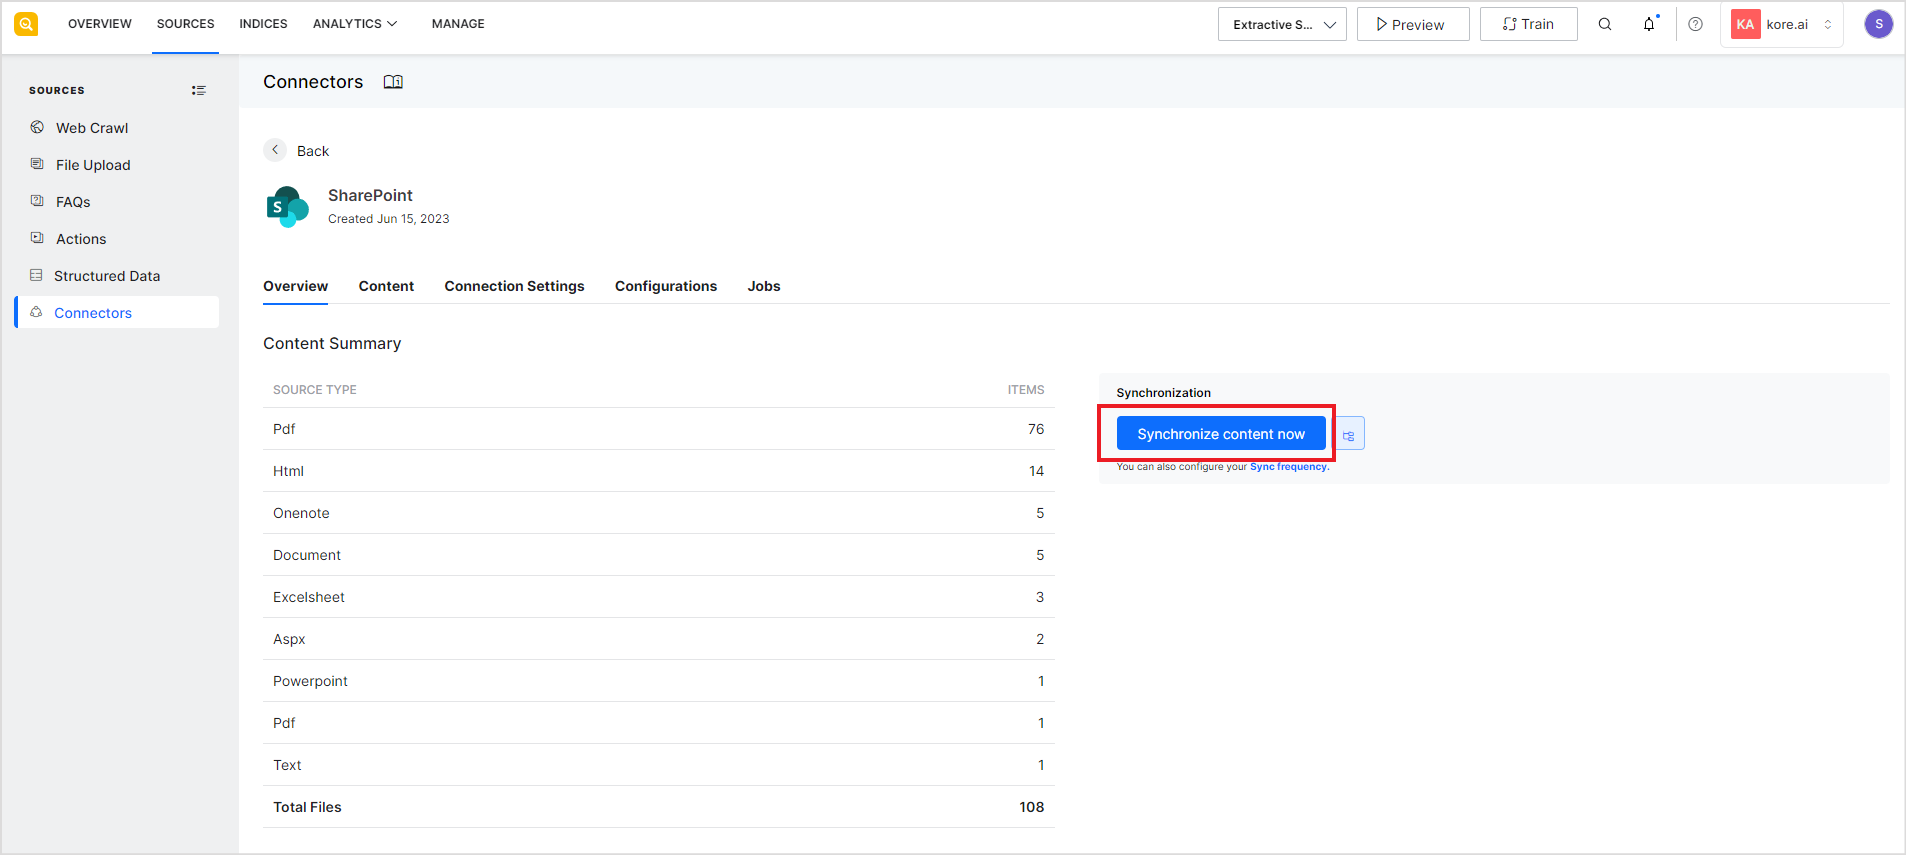
Filtering Content from SharePoint Sites
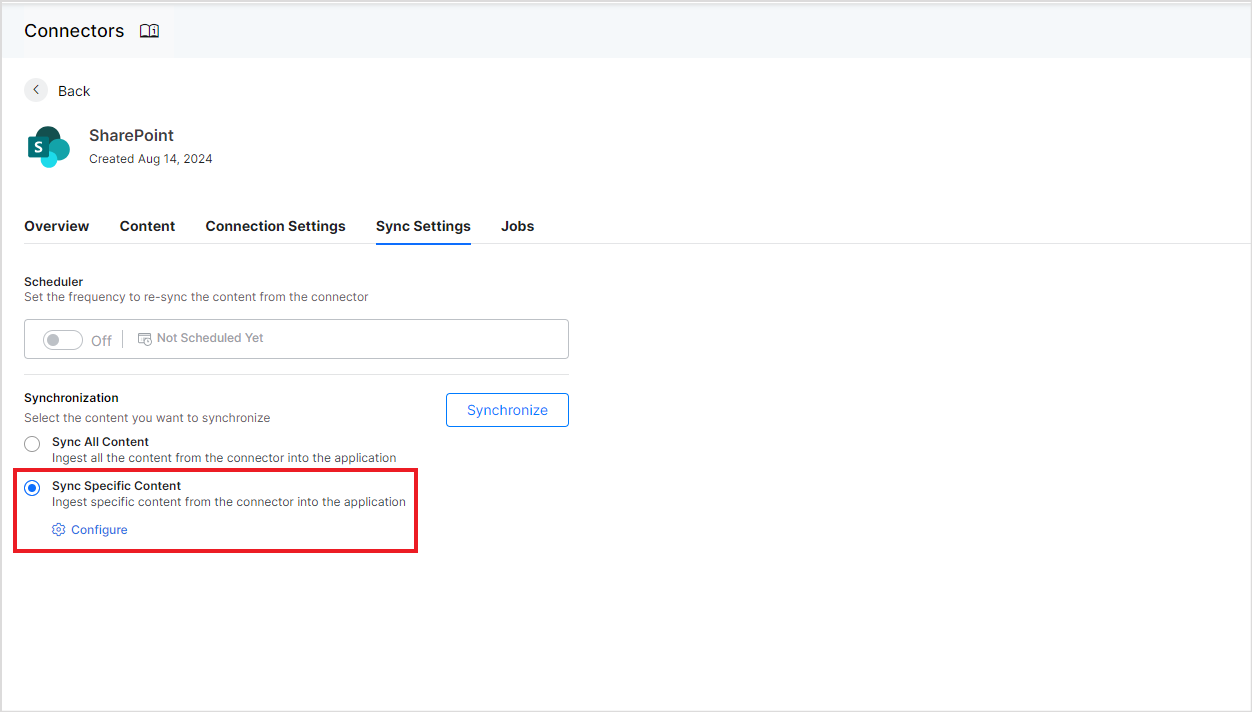
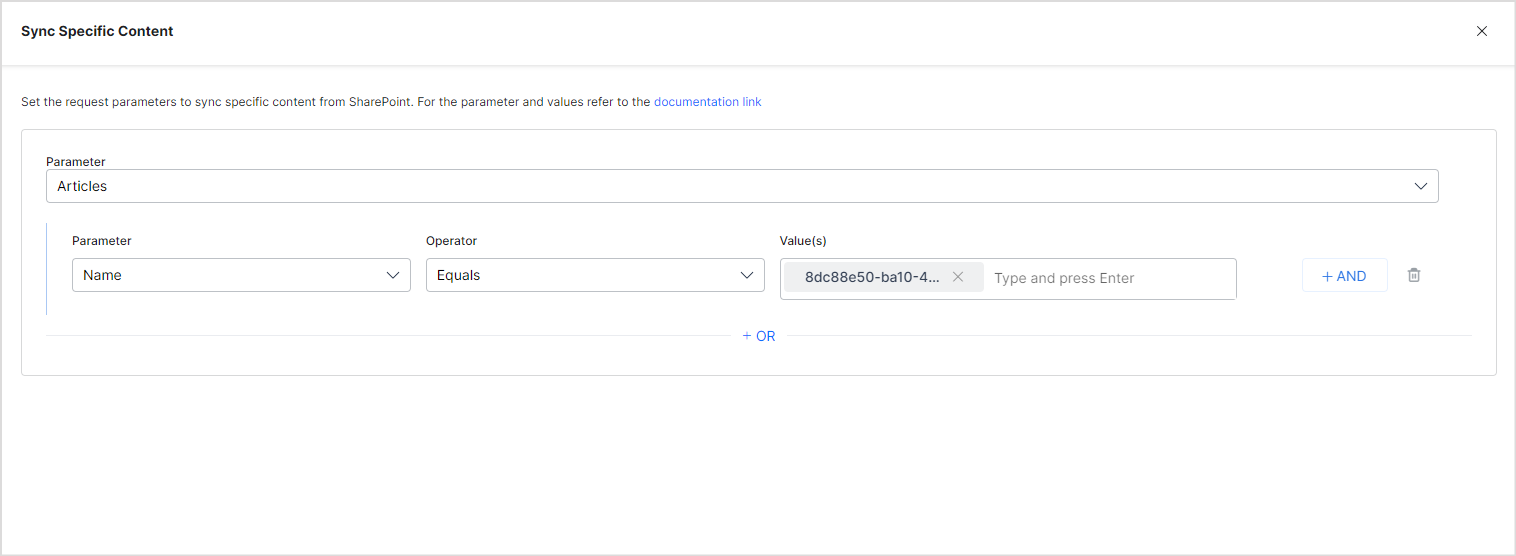
You can also add filters to ingest only specific content into the SearchAssist application. Filters are applied to all the sites selected for content ingestion. Go to the Sync Settings tab, select Sync Specific Content, and click Configure.
Define rules for selecting the content on the following. The parameters vary depending on the selected content type. Each rule can be defined using a parameter, operator, and value of the parameter.
Note: Currently, filters can be added only to the articles in the selected sites.
 The most commonly used Parameter fields are listed in the dropdown. Using the +Add option, you can add new parameters if the content supports it. Refer to the complete list of supported parameters here.
The Operator field can take different values depending upon the parameter selected, such as equals to.
The Value field is used to set the expected value of the parameter. Any parameter’s values are strictly as per the Parameters defined and supported by your application. Refer to this documentation before adding parameters and their values.
Note that if the parameter or corresponding value is not set correctly, the connector may not throw any error, and the filter may not work as expected.
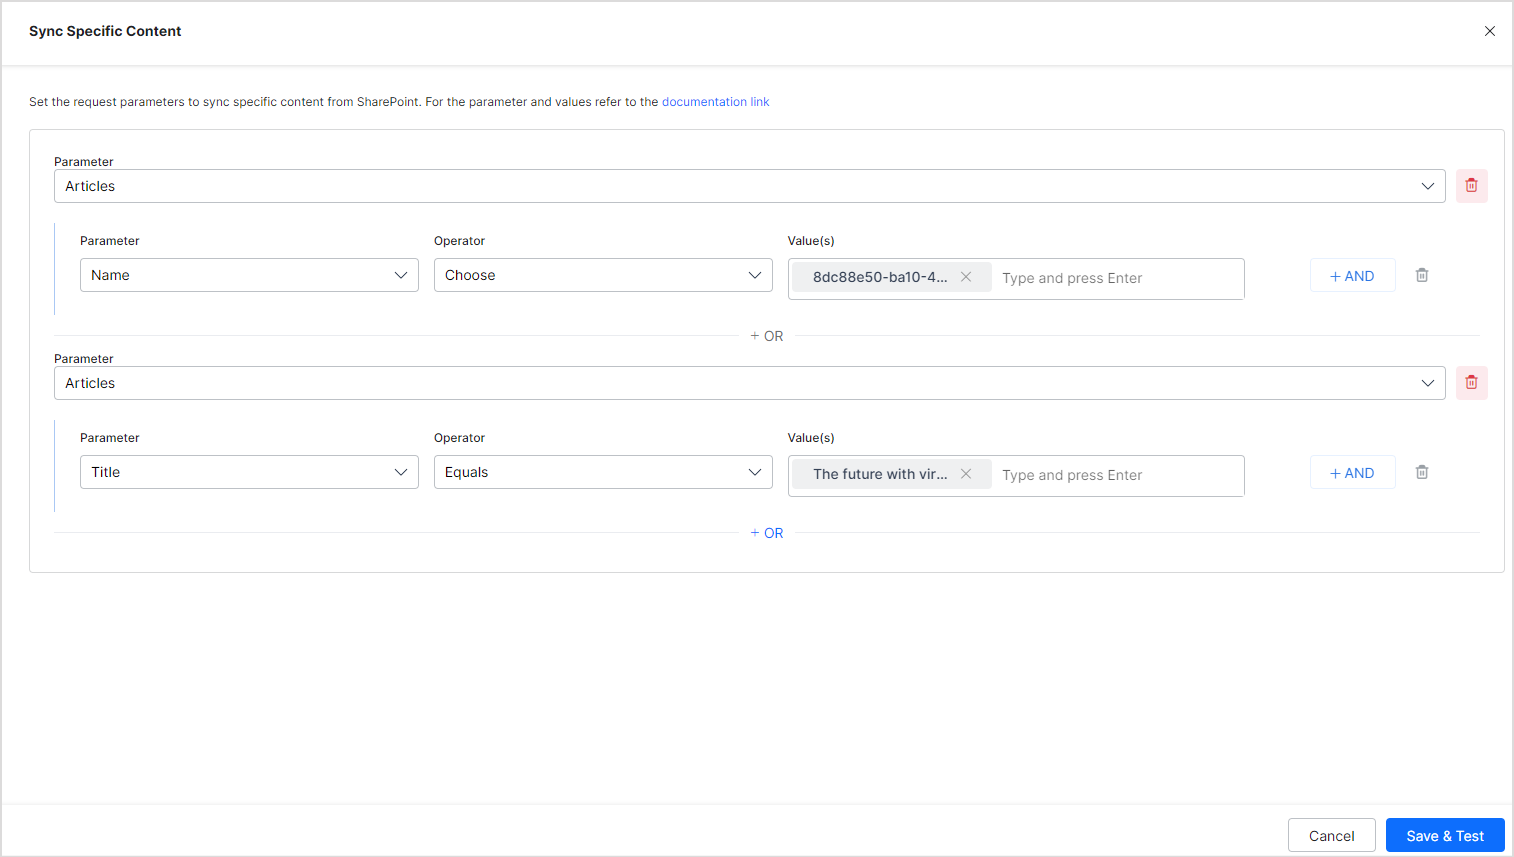
You can also use AND and OR operators to define more specific filters for content ingestion.
Filter Examples
- To select files with a given name or title, add a filter as shown below.
RACL Support
Understanding Permissions in SharePoint
Permissions to files and pages in SharePoint include site-level permissions and individual permissions to the files.
Site-level Permissions
There are two membership groups in SharePoint: Office 365 groups and SharePoint Security groups. These groups grant different access to your site. Users using both groups receive access permissions.
You can view the Office 365 Group Membership for a site here.
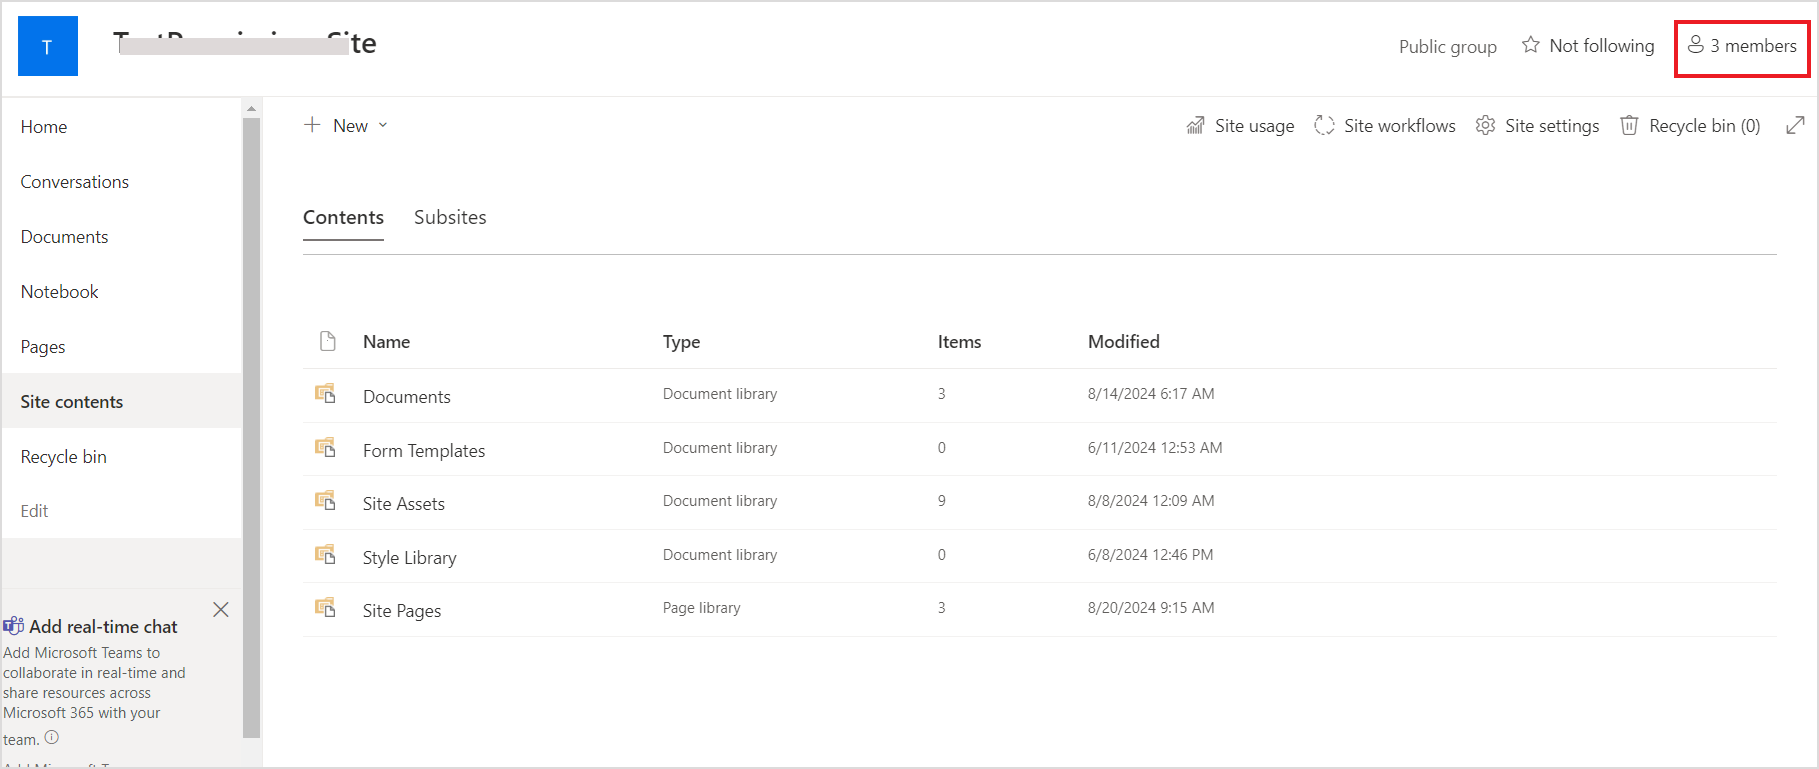
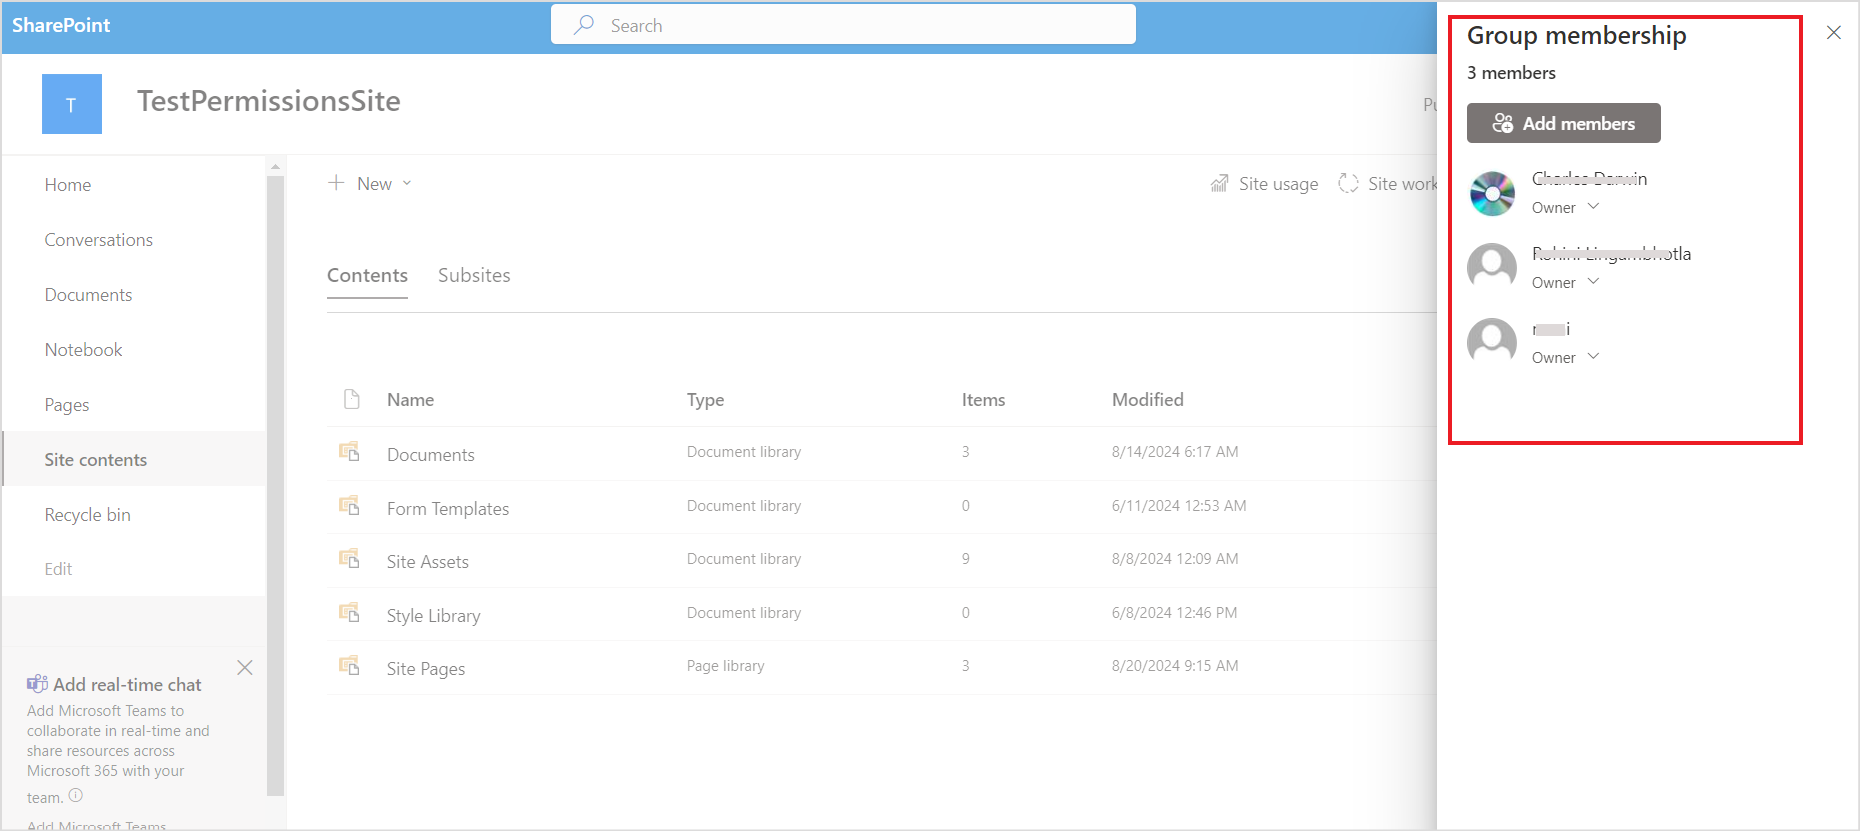
Click on the Members button to view the list of members and their roles.
Another set of permissions allows users to access a site. Go to settings and click on site permissions. These are referred to as SharePoint Security Groups.
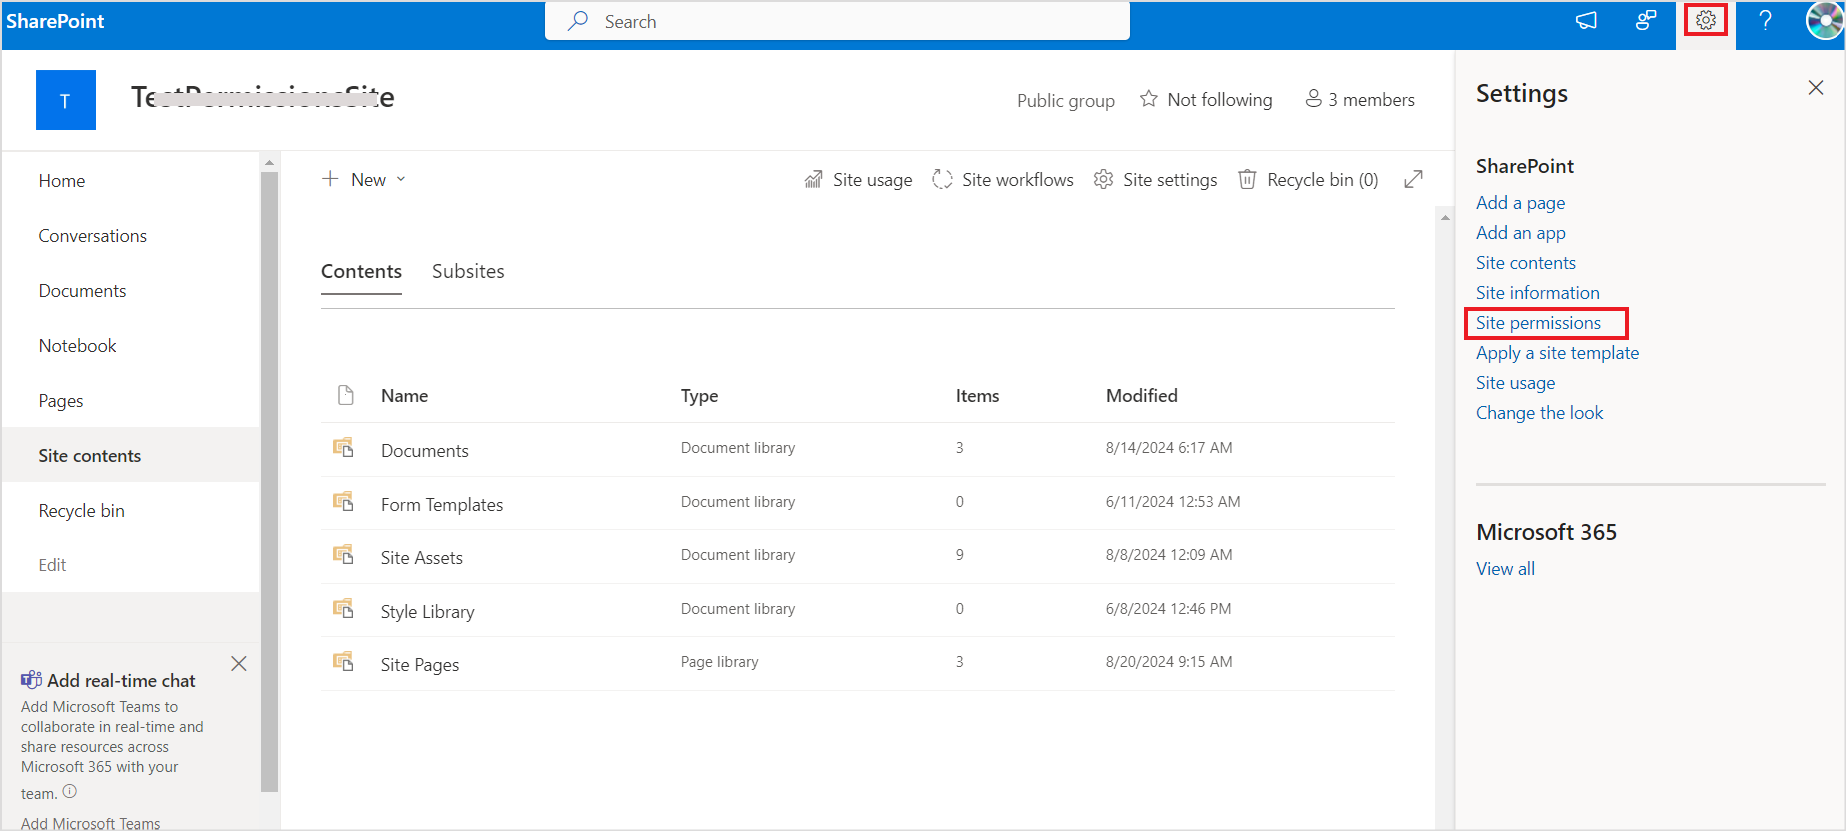
Every site has three default SharePoint permission levels, which differ in the access granted to the users.
- Site visitors
- Site members
- Site owners
Handling of Site Permissions in SearchAssist
Corresponding to the Office 365 Group Membership group, a permission entity is created in the SearchAssist application. All the users added to this group are automatically added to this permission entity in SearchAssist. However, if there are email groups added here, the members of the group should be added to the permission entity manually using the Permission Entity APIs.
Similarly, corresponding to the SharePoint Security Groups, three permission entities are created in the SearchAssist application. The users in these groups should be manually added to the corresponding permission entities using the Permission Entity APIs.
File-level Permissions
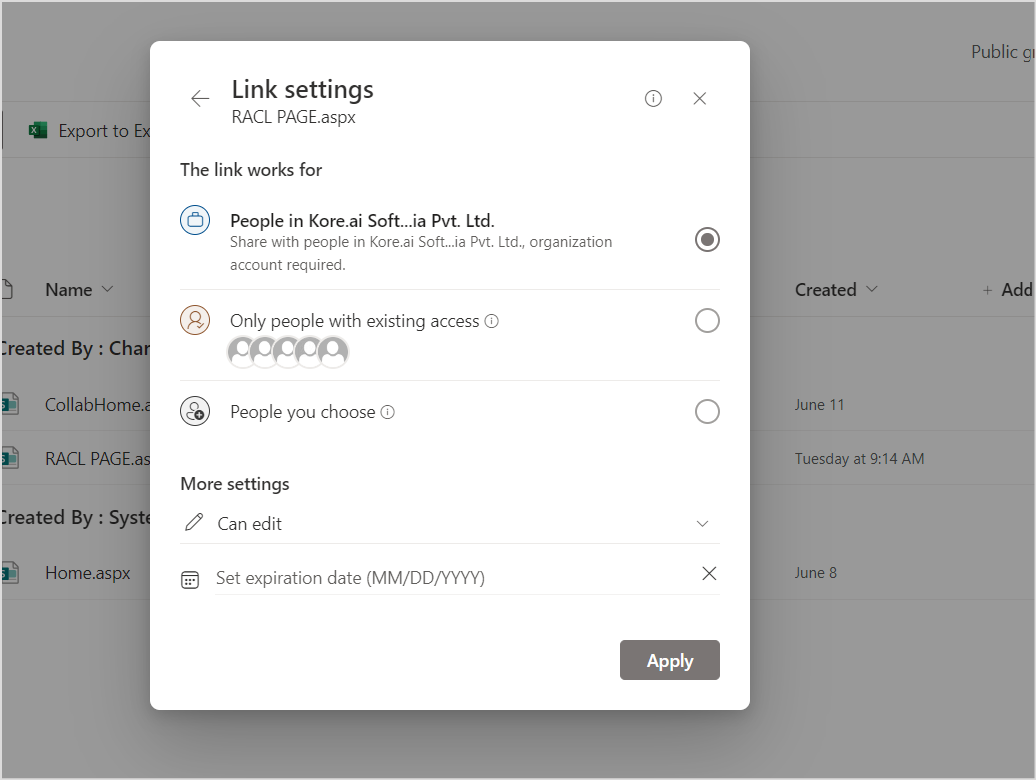
The access control set for a site applies to all the files/pages within the site. Additionally, an owner of the file can share a file with a new user, internal or external. 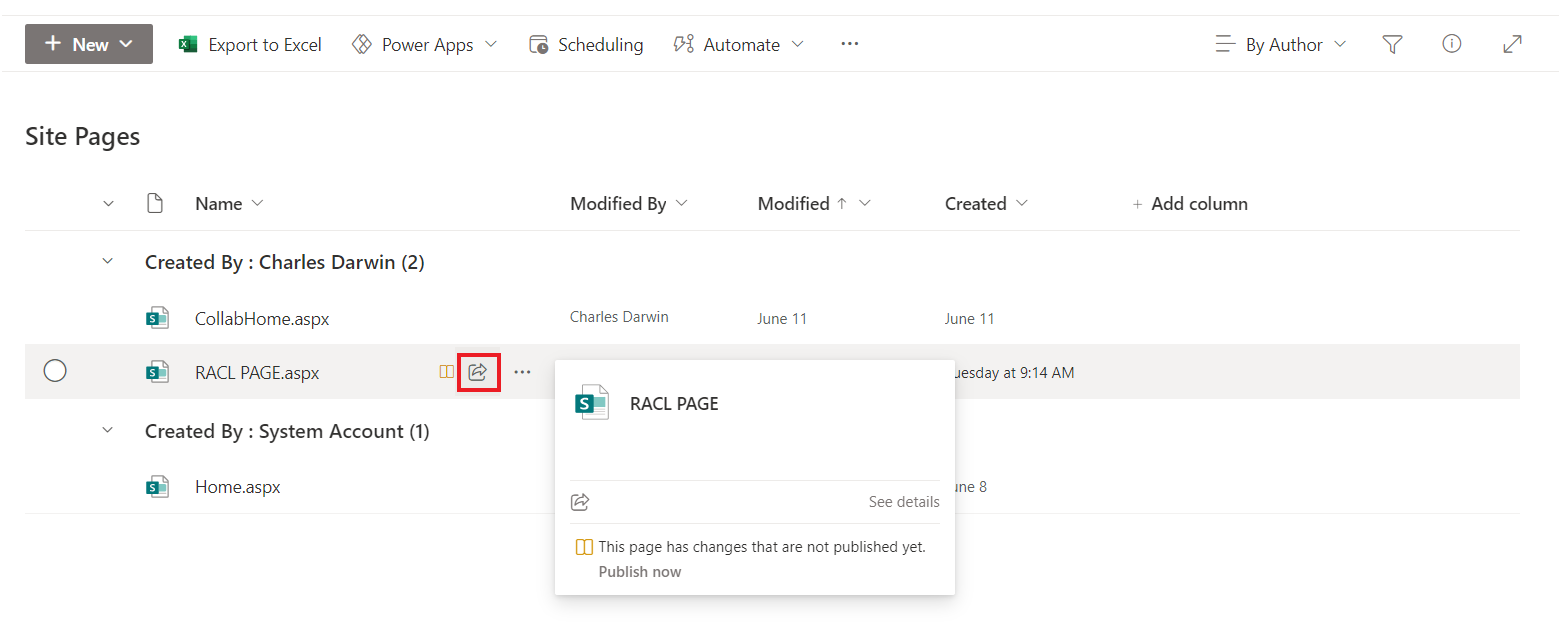
The file owner can also share a file with all the domain or organization members.
Handling of File Permissions in SearchAssist
When a file is shared with a specific user, the user is automatically added to the racl fields of the corresponding files during ingestion.
When a file is shared with a user group, the groupId is used to create a permission entity that can be used to resolve individual users.
When a file is shared with a specific domain, the domain name is stored as a permission entity in the racl fields. SearchAssist automatically compares the user email IDs with the domain name during answer generation. If there is a match, access to the files is granted.