SearchAssist manages relevance by allowing you to fine-tune search parameters and prioritize query results displayed to the end-user. This helps improve the search experience by providing users with the most relevant and purposeful views and results.
Customize search results by fine-tuning the following elements. There are two dimensions of managing relevance: search parameters and results prioritization.
Search parameters
- Weights Each field is assigned a weight that plays an important role in ranking the results. Weights can be modified to fine-tune search relevance.
- Synonyms A broader range of words can help ensure the SearchAssist app identifies user queries more effectively.
- Stop Words Some words might dilute or mislead search results. Marking Stop Words can improve search efficacy.
Results prioritization
- Results Ranking Customize and preview search results as per the business needs.
- Facets provide users with an option to refine their search results by selecting appropriate filters.
- Business Rules Personalize and fine-tune search results based on contexts.
Configuring Search
Search Configuration is the core of results customization. The following elements contribute to results-optimization and can be configured from Search Configuration.
SearchAssist creates a Default Search configuration. You can refine, clone and tweak it or create your own search configuration. Create multiple search configurations to test and enhance search results or cater to different regions, people groups, and contexts.
You can, for example, set a top-down experience for users searching from one region, say India, and assign a bottom-up search experience for users from another region, say the USA.
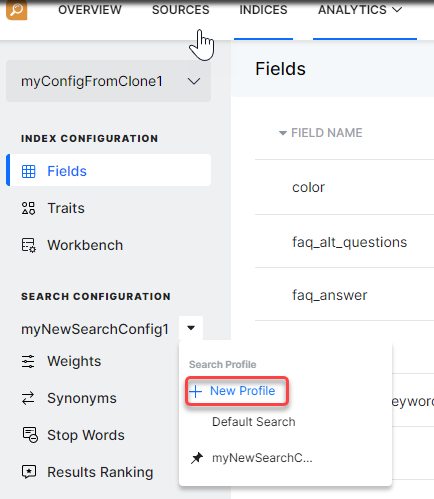
Creating Search Configurations
Follow these steps to create a custom index:
- Click the Indices tab on the top.
- On the left pane, under the Search Configuration section, click the dropdown.
- Click+ New Profile

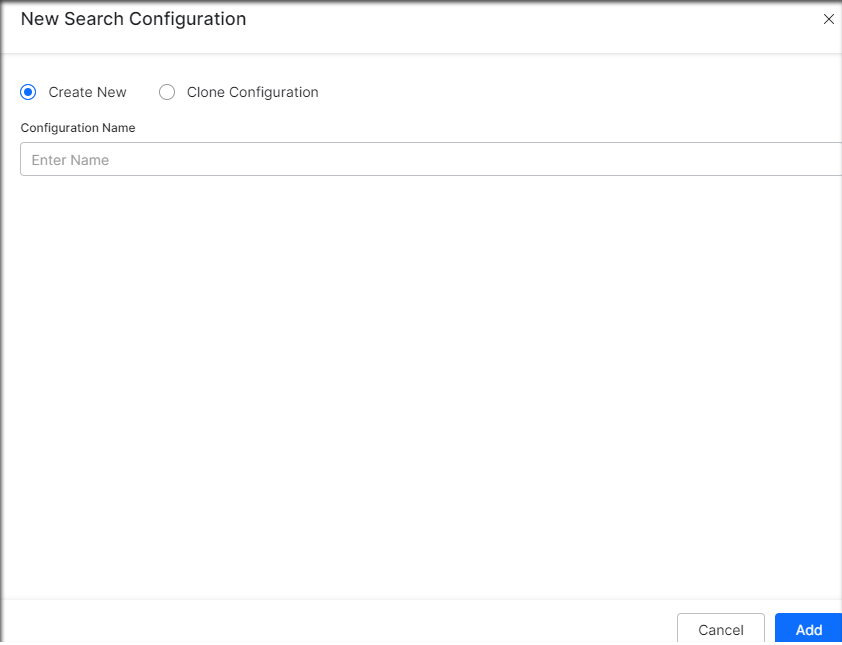
- On the New Index Configuration dialog box, select Create New option.
- Enter a unique name.
- Click Add.
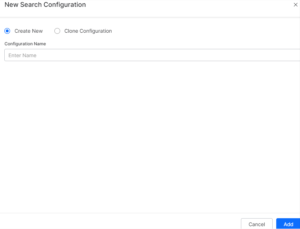
Cloning Search Configurations
Follow these steps to clone an existing search configuration:
- Click the Indices tab on the top.
- On the left pane, under the Search Configuration section, click the dropdown icon.
- Click New Profile.
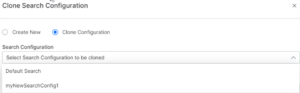
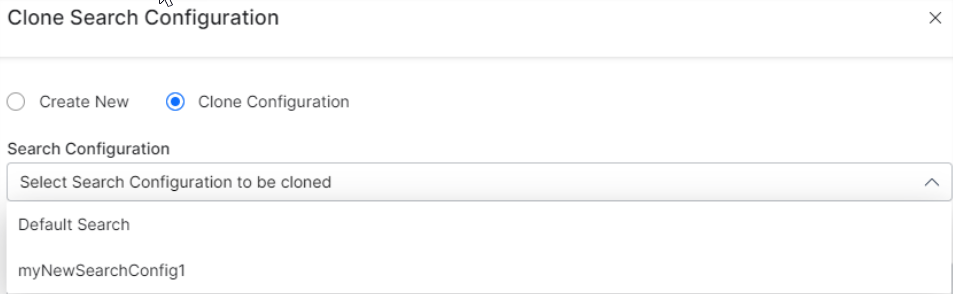
- On the New Search Configuration dialog box, by default, Create New option is selected. Select Clone Configuration.
- Click the Search Configuration field and select an option on the drop-down menu.
- Click Clone.
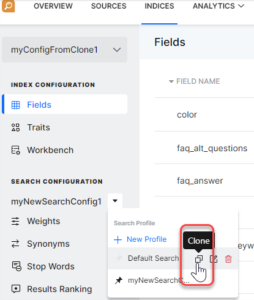

Note: You can also click the clone icon next to the name of a configuration. Click the drop-down icon and hover over the configuration to display a list of options.
Managing Search Configurations
You can perform the following actions on an existing search configuration:
- Mark a configuration as the Default using the star icon.
- Clone the configuration.
- Edit the name of the configuration.
- Delete the index.
Adding Weights
Fields in SearchAssist are assigned weights that help calculate and determine the relevance score of search results. Search relevance can move results up or down the display by fine-tuning the weights assigned to the fields defined in the Managing Indices section.
Assigning weights to fields makes them searchable (i.e. queries are matched with the values in these fields). It also helps determine the significance of these fields when prioritizing search results.
By default, SearchAssist identifies a list of system-defined searchable fields like proximity, exact match, and popularity from the extracted documents and assigns weights to them. You can change the weights of the system-defined fields or add new searchable fields to fine-tune the search results.
Each field is assigned a weight on a scale of 0 through 10. Increasing a field’s weight increases its significance.
If you want a particular page to get more attention or project a particular item in your merchandise (like the latest edition of a book or the model of a smartphone), increase the weights associated with that page title so that it displays above other results.
On the Weights page, you can add various fields and change the weight settings of each field. Run test queries in the search bar and fine-tune your weights until the expected results appear.
Assigning Weights
Follow these steps to add a searchable field and assign a weight to it:
- Click the Indices menu tab.
- In the left pane, click Weights.
- Click Add Searchable Field in the top-right corner of the Weights page.

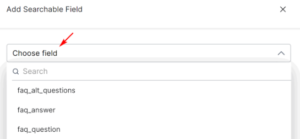
- On the dialog box, click the Choose field bar and select an item on the drop-down menu.
- Enter a description.
- Drag the slider to set the weight from 0 through 10.
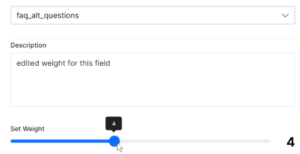
- Click Add.


Managing Weights
SearchAssist allows you to perform the following actions on Weights:
- Change the weight using the slider to increase or decrease the weight.
- For custom fields, click the edit icon to update the description.
- For custom fields, click the trash icon to delete the field.
- Reset the weights using the Reset to Default option. This reverts the weights-configuration to the system default:
- All the custom fields configured by you are removed.
- Any system-defined weights that you removed are restored.
- The weights assigned to each of the system-defined fields are restored to the default values.
Adding Synonyms
Synonyms are words used interchangeably to convey the same intent or sentiment. In the context of search and virtual assistants, a synonym yields the same result produced by a different query word or phrase. For example, in a banking scenario, transfer funds, move money, pay dues, or clear dues all refer to the same intent of making a payment.
The synonyms feature lets you define a set of equivalent words or phrases that expand the range of searching documents with equivalent words thereby improving search quality.
You can add multiple synonyms for a single word. Once created, all synonyms have the same weight as the original word and can be used interchangeably in user utterances.
Synonyms in SearchAssist are further classified into:
- Regular Synonyms Each word in a list can replace every other word in the list. For example, consider a synonym list of [debit ⇔ pay, credit ⇔ receive, get paid]. A search for debit will find results with cards and a search for cards will find debit.
- One-way Synonyms A word or phrase that yields the results exactly or nearly the same as another word, but not in reverse. For example, consider the search for a car. You can search for vehicles to find a car, but not the other way round. You don’t want a car search to find all vehicles (e.g. a search for cars should not result in trucks.) You can achieve this by defining one-way synonyms [transaction -> payment].
Adding Synonyms
Follow these steps:
- Click the Indices menu tab.
- In the left pane, click Synonyms.
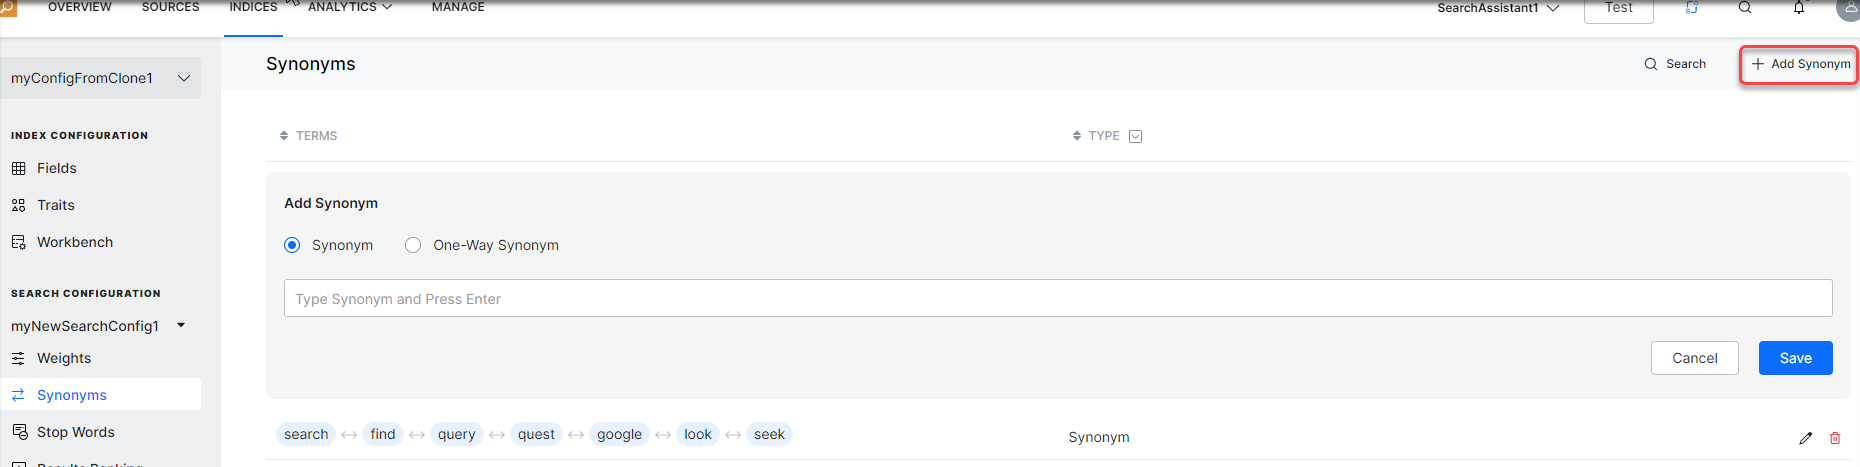
- On the Synonyms page, click +Add Synonym.

- Under the Add Synonym section, select Synonym or One-way Synonym.
- In the text field, enter a synonym
- Click Save.
One-way Synonyms
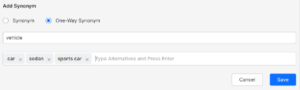
In the case of a one-way synonym:
- Add the search term.
- Add one or more synonyms in the alternative field.
- Click Save.

Managing Synonyms
SearchAssist allows you to:
- Order the synonyms by increasing or decreasing the alphabetical order of the term name.
- Filter based on the type of synonym: all, one-way, synonym.
- Edit to add or delete terms from the synonym list.
- Delete a defined synonym if required.

Adding Stop Words
Stop words are common words (such as the, is, in, a, to, all) that dilute the importance of keywords in a search query. SearchAssist’s search engine is designed to ignore stop words at the query or input level. Ignoring stop words in search queries helps generate more relevant results.
SearchAssist provides an out-of-the-box solution to add and manage stop words. It comes with a default set of stop words which you can edit. You can also create your own list of stop words from scratch.
Adding New Stop Words
You can add stop words to the Default list or create a new list of stop words from scratch. Follow these steps:
- Click the Indices menu tab.
- In the left pane, click Stop Words.
- Click the Add Stop Words button.
- In the dialogue box, check the Default Stop Words option and click Continue. This page disappears as soon as you select an option.

- On the Stop Words page, review the list and delete unwanted words.
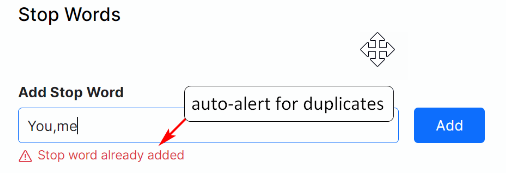
- In the Add Stop Word field, add a word. (optional)
- Click Add.
- Add multiple stop words with comma separation. (optional)

.
Managing Stop Words
- Enable or disable the stop words list with the toggle in the top-right corner of the page.
- Click the search field to look for a specific stop word.
- Click Reset to Default to remove custom changes.
- Click Delete All to remove the entire list.
- Click the X icon to remove a stop word from the list.
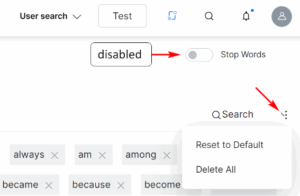

Note: If you delete all the words in the default list by accident, click Reset to Default. SearchAssist restores the default list.
Creating Facets
Facets provide a comprehensive view of search results with single or multiple search criteria or filters.
Facets allow your customers or employees to refine their search results by applying filters based on certain field values or ranges. The facets tool lets your customers or users define how to generate more precise and relevant search results. Activating a facet applies all the associated filters based on the field values and counts. The results are displayed by prioritizing the facet applied.
SearchAssist allows you to add, configure and manage facets for your SearchAssist app. You can mark any indexed field as a facet. Enabling a facet allows the search user to view the filters associated with it and get a count of matched results in the filter.
End-users can apply multiple filters simultaneously to narrow down the search results closer to their requirements. These filters fine-tune the search results and categorize listings without the need to scroll down through long lists.
For example, in an e-commerce search, a user can filter product options based on price range and color at the same time. Items with the specified color in the given price range are listed in the sought order of ascending or descending value of the pricing.
SearchAssist allows you to define two types of facets:
- Range Facet Filter attributes with a predefined range of values such as price and age. It returns the result within the selected range. For example, on an e-commerce website, you can apply Range Facet to show all smartphones in the $1000 to $2000 price range.
- Value Facet Filter attributes that are treated as labels such as color, or gender.
Configure both single-select and multi-select facets. The multi-select facet option lets users select multiple parameters in a filter. With a simple drag and drop operation on the Facets, you can customize the order in which filters are applied and displayed in the search UI.
Adding Facets
Follow these steps:
- Click the Indices menu tab.
- On the left pane, click Facets.
- On the Facets page, click + Add Facet.
- Select a facet type: filter, sortable, or tab.

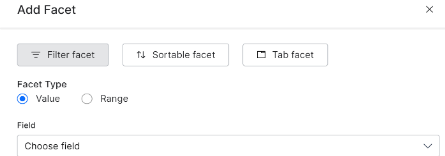
Filter Facets
Choose this option to sort data by values or numerical ranges.
- Click Filter facet.
- Click Value or Range.
- Click Field and select an option on the drop-down menu.
- Enter a unique name.
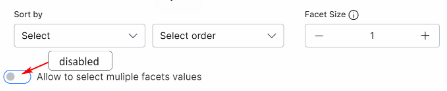
If you choose Value:
- Click Sort by and choose an option: Label or Count.
- Click Select order and choose an option: Ascending or Descending.
- Click the plus or minus icon to set the maximum number of facet values that the SearchAssist app displays.
- Switch the toggle to the Enable position to allow multiple facets. The default setting is Disabled.
- Click Add.
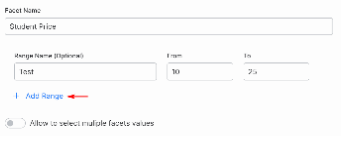
If you choose Range:
- Enter a unique name for the facet and range.
- Enter range values.
- Add multiple ranges. (optional)
- Switch the toggle to the Enable position to allow multiple facets. The default setting is Disabled.
- Click Add.
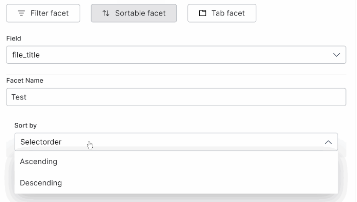
Sortable Facets
Choose this option to sort data in an order.
- Click Field and select an option on the drop-down menu.
- Enter a unique facet name.
- Click Select by and choose an option: Ascending or Descending.
- Click Add.
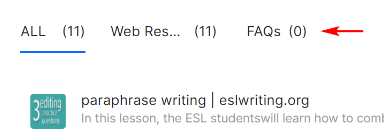
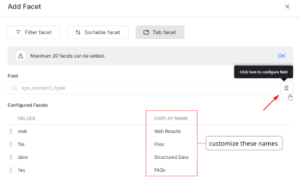
Tab Facets
Choose this option to customize the Display Name that appears as a sub-menu on the results page.
- Click the Tab facet menu tab.
- Click the Configure icon.
- Edit the facets and display names. (optional)
- Click Save.
- Click Save again.
- Click Test to review the results.

Dynamic Facets
Dynamic Facets are a built-in capability that enables the SearchAssist app to detect facets from the user’s search query and then automatically apply appropriate filters. In response to the query, the app personalizes the display of results. Dynamic facets depend on structured data like product catalogs in CSV or JSON formats.
Pre-existing custom facets, if any, have precedence and priority over dynamic facets. The business user or the search engineer has to identify which fields should be considered for dynamic faceting when uploading the structured data.
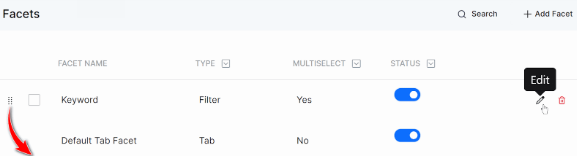
Managing Facets
SearchAssist provides the following features on the Facets page:
- Search for a Facet by name.
- Filter Facets by Type, Selection criteria, and Status.
- Edit or Delete a Facet using the edit/delete icons. You can also delete facets in bulk with the Bulk Select option.
- Use the handlebar to specify the order in which facets are presented to the user.