
Semantic analysis is the technique to understand the meaning and interpretation of words, signs, and sentence structure.
SearchAssist’s Index pipeline supports a Semantic Meaning stage. This stage uses Deep Neural Network algorithms to create embeddings of free text and saves them in a dense vector field. These embeddings are used to rank the documents by semantic relevance. The dense vectors are then indexed in the ElasticSearch and similarity is obtained between the user’s query vector and the indexed content vector.
You can:
- Add multiple semantics to be analyzed from the source field.
- Define a condition for the semantic meaning stage. The semantics from only the documents that satisfy the given condition would be analyzed.
- Re-order or delete semantic meaning rules.
- Simulate the changes before saving them.
Ensure to Train your app each time you make changes to any index configuration. This builds the index based on the updated configurations.
Configuration
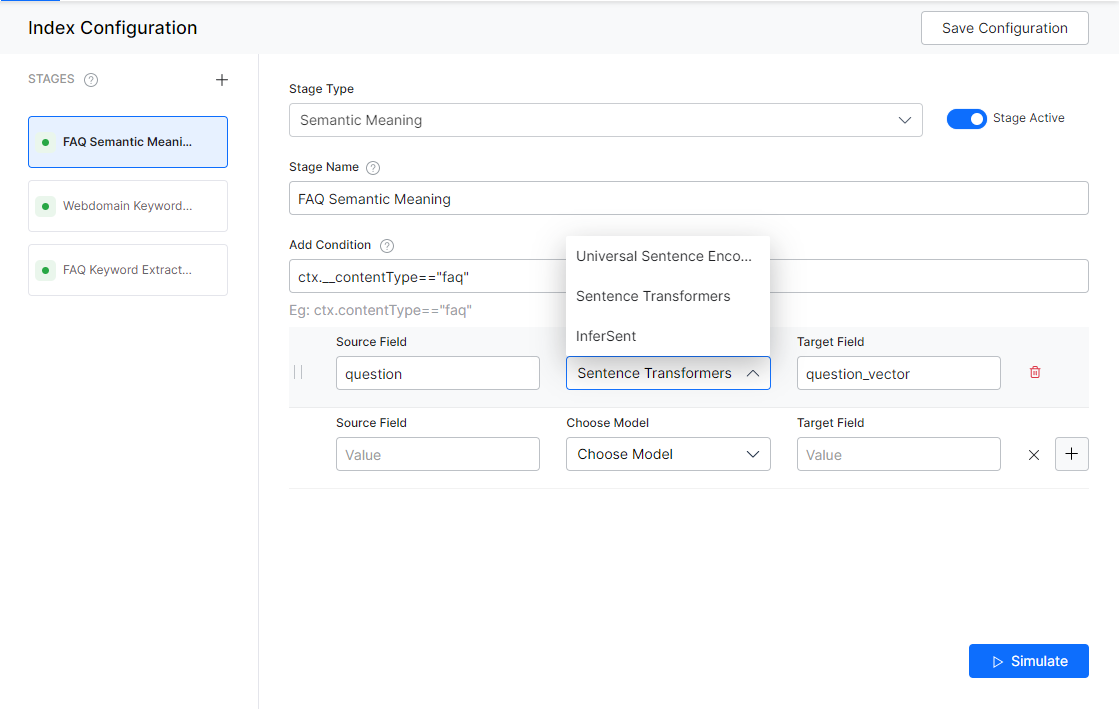
To configure semantic meaning, follow the below steps:
- Click the Indices tab on the top.
- On the left pane, under the Index Configuration section, click Workbench.
- On the Workbench (Index Configuration) page, on the Stages column, click the + icon.
- On the right column, select Semantic Meaning from the Stage Type drop-down list.
- Enter a name in the Stage Name field.
- Enter a condition in the Condition field. You can add multiple conditions using the AND/OR connectors. Documents that satisfy the condition will be executed as part of the stage. See below for details.
- Select the field you want to extract Semantic Meaning from as Source Field.
- Define where you want to store the extracted Semantic Meaning as Target Field. This field is created by the application.
- Choose a model from the Choose Model drop-down list. See below for details.
- Click Simulate to verify the configurations. The simulator displays the Source and the number of documents to which the mapping was applied, and the result. You can change the Source (if not mentioned in the condition) and the number of documents.
- Once done, click Save Configuration on the top-right.
Models
The following models are supported:
- Universal Sentence Encoder – It encodes text into high-dimensional vectors that are used for semantic similarity.
- Sentence Transformers – It is a framework for sentence and text embeddings.
- InferSent – It is a sentence embedding method that provides semantic sentence representations.
Conditions
Condition is of the following format: ctx.fieldtype==value or ctx.fieldtype!=value. The field_name can be obtained from the Fields table under Index Configuration.
For example, ctx.contentType=="web" to restrict the extraction to the content from a web source.