
The Field Mapping stage in Index Pipeline is used to map fields in an index pipeline document to a target field.
You can:
- Set a field value, Rename a field, Copy one field to another, and Remove a field.
- Define a condition for the field mapping stage. The field mapping actions occur on the documents that satisfy the given condition.
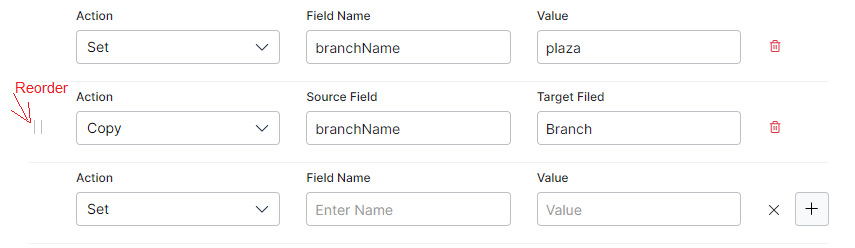
- Re-order or delete a field mapping.
- Simulate the changes before saving them.
Ensure to Train your app each time you make changes to any index configuration. This builds the index based on the updated configurations.
Configuration
To configure field mapping, follow the below steps:
- Click the Indices tab on the top.
- On the left pane, under the Index Configuration section, click Workbench.
- On the Workbench (Index Configuration) page, on the Stages column, click the + icon.
- On the right column, select Field Mapping from the Stage Type drop-down list.
- Enter a name in the Stage Name field.
- Enter a condition in the Condition field. You can add multiple conditions using AND/OR connectors. Documents that satisfy the condition are executed as part of the stage. See below for details.
- Select an action from the Action drop-down list. See below for details.
- Click Simulate to verify the configurations. The simulator displays the Source and the number of documents to which the mapping was applied, and the result. You can change the Source (if not mentioned in the condition) and the number of documents.
- Once done, click Save Configuration on the top-right.
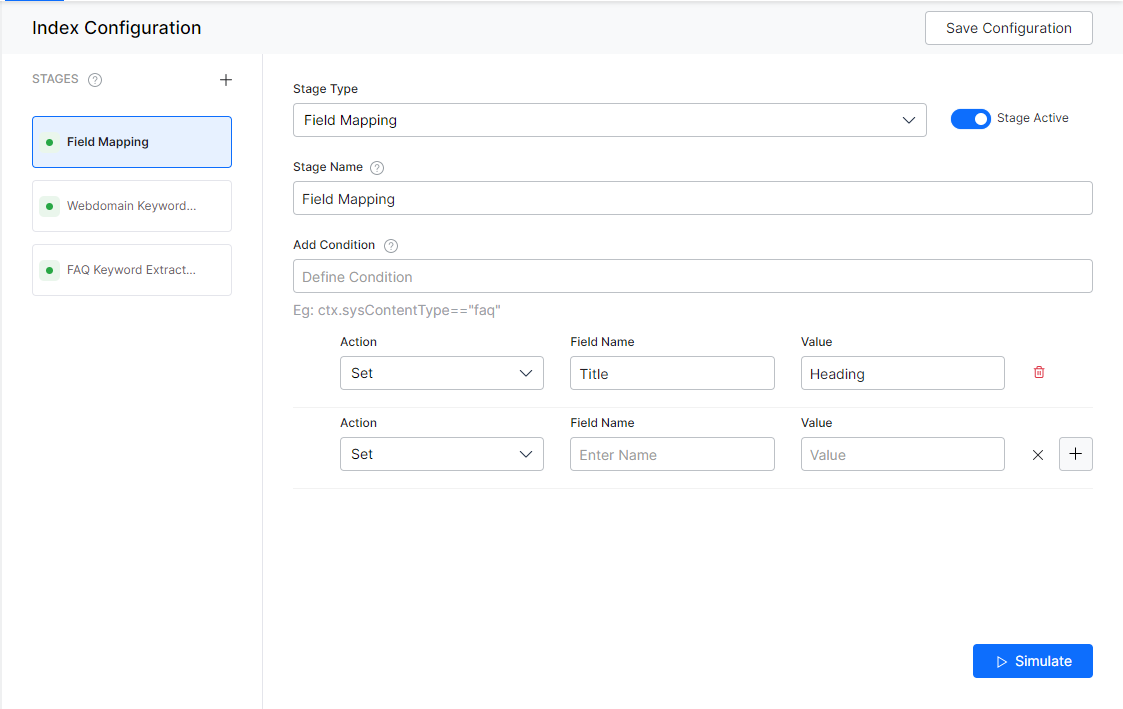
For example, select Set from the Actions drop-down list; enter Title in the Field Name field and enter Heading in the Value field. Click Simulate to verify if the field value is changed.
Actions
This stage supports actions like Set, Rename, Copy, and Remove.
- Set – This allows you to set a Value for the Field Name.
- Rename – This allows you to set a New Name for the Field Name.
- Copy – This allows you to copy the Source Field to the Target Field.
- Remove – This allows you to remove the Field Name.
You can use the handlebar to reorder the action sequence.
Conditions
Condition is of the following format: ctx.fieldtype==value or ctx.fieldtype!=value.
For example, ctx.contentType=="web" to restrict the mapping to content from a web source.