GETTING STARTED
SearchAssist Overview
SearchAssist Introduction
Onboarding SearchAssist
Build your first App
Glossary
Release Notes
What's new in SearchAssist
Previous Versions

CONCEPTS
Managing Sources
Introduction
Files
Web Pages
FAQs
Structured Data 
Connectors
Introduction to Connectors
Azure Storage Connector
Confluence Cloud Connector
Confluence Server Connector
Custom Connector
DotCMS Connector
Dropbox Connector
Google Drive Connector
Oracle Knowledge Connector
Salesforce Connector
ServiceNow Connector
SharePoint Connector
Zendesk Connector
RACL
Virtual Assistants
Managing Indices
Introduction
Index Fields
Traits
Workbench
Introduction to Workbench
Field Mapping
Entity Extraction
Traits Extraction
Keyword Extraction
Exclude Document
Semantic Meaning
Snippet Extraction
Custom LLM Prompts
Index Settings
Index Languages
Managing Chunks
Chunk Browser
Managing Relevance
Introduction
Weights
Highlighting
Presentable
Synonyms
Stop Words
Search Relevance
Spell Correction
Prefix Search
Custom Configurations
Personalizing Results
Introduction
Answer Snippets
Introduction
Extractive Model
Generative Model
Enabling Both Models
Simulation and Testing
Debugging
Best Practices and Points to Remember
Troubleshooting Answers
Answer Snippets Support Across Content Sources
Result Ranking
Facets
Business Rules
Introduction
Contextual Rules
NLP Rules
Engagement
Small Talk
Bot Actions
Designing Search Experience
Introduction
Search Interface
Result Templates
Testing
Preview and Test
Debug Tool
Running Experiments
Introduction
Experiments
Analyzing Search Performance
Overview
Dashboard
User Engagement
Search Insights
Result Insights
Answer Insights

ADMINISTRATION
General Settings
Credentials
Channels
Team
Collaboration
Integrations
OpenAI Integration
Azure OpenAI Integration
Custom Integration
Billing and Usage
Plan Details
Usage Logs
Order and Invoices
Smart Hibernation

SearchAssist APIs
API Introduction
API List

SearchAssist SDK

HOW TOs
Use Custom Fields to Filter Search Results and Answers
Add Custom Metadata to Ingested Content
Write Painless Scripts
Configure Business Rules for Generative Answers

Confluence Cloud Connector

To integrate SearchAssist with Confluence Cloud, you need to 

  • Create an OAuth 2.0 integration on the Atlassian developer portal.
  • Configure the connector in SearchAssist with the OAuth 2.0 integration details.

Specifications

Type of Repository  Cloud
Supported API version REST API v1
Search Results Support Only manually created Knowledge articles in Confluence. 
Extractive Model for Answers  Knowledge Articles
Generative Model for Answers Knowledge Articles
RACL Support Yes
Note: Searching through any other types of uploaded content like PDF files,  docs, and images is not supported.

Configuring OAuth application on Confluence Cloud

Prerequisites 

To create an OAuth 2.0 integration on the Confluence cloud, you need the following:   

  1. An admin account in Atlassian’s Confluence.
  2. A target domain.

Note: Currently SearchAssist supports searching through only manually created pages in Confluence and does not search through any other types of uploaded content like PDF files,  docs, and images. 

Steps to create the OAuth application

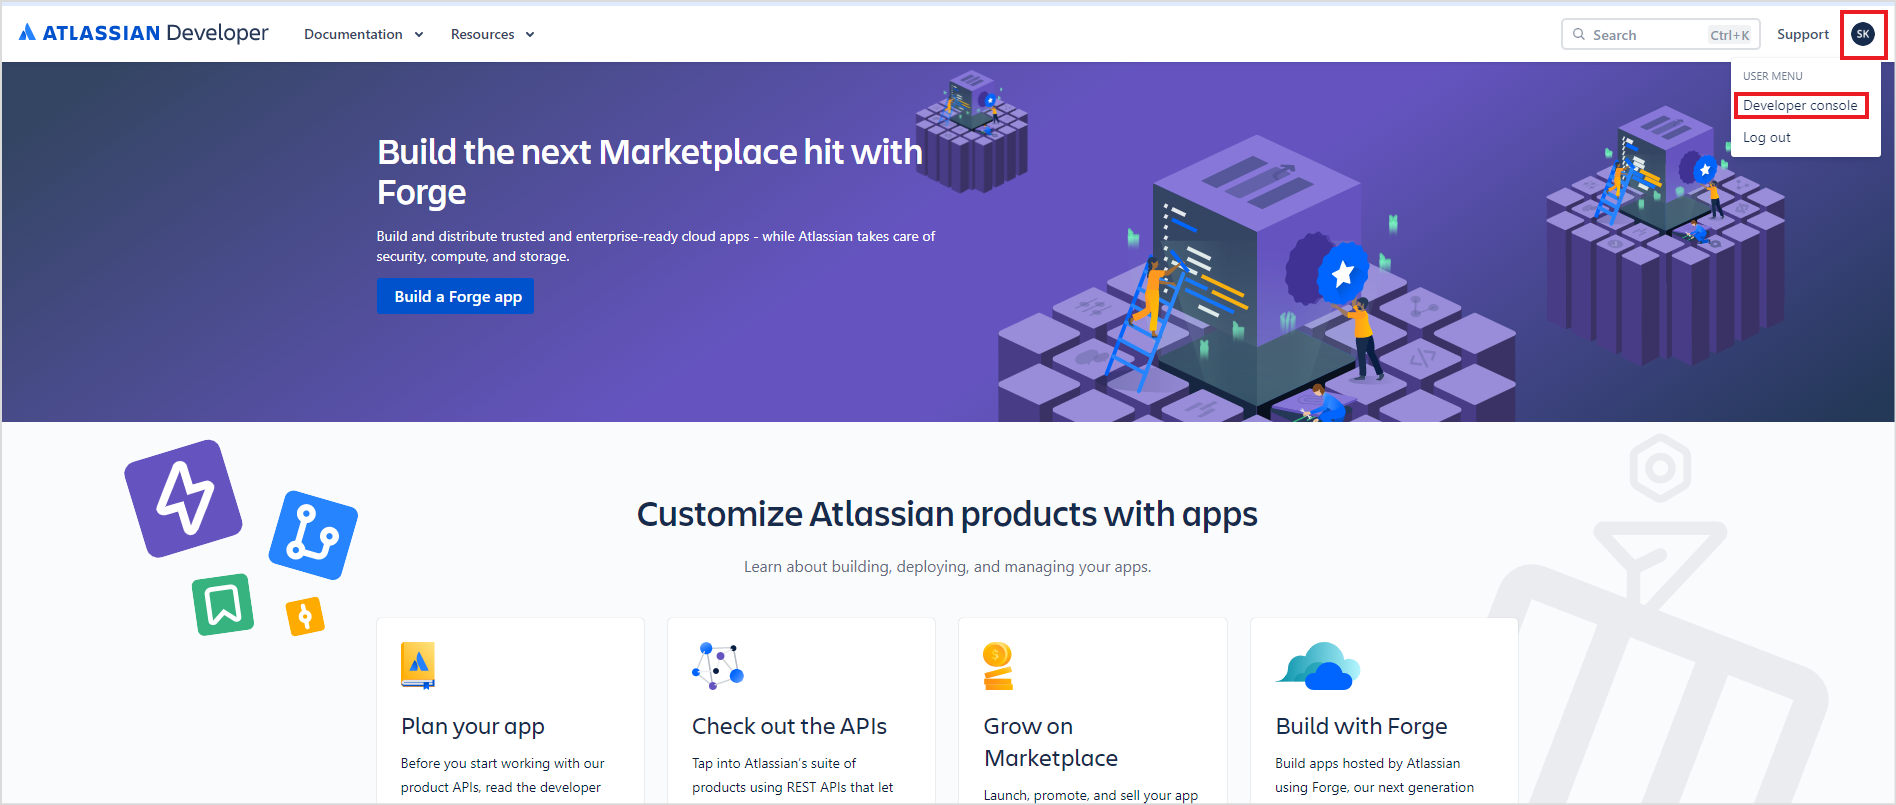
  • Sign into your developer account in the Atlassian developer portal. Click on the profile name at the top right corner and navigate to the Developer Console.

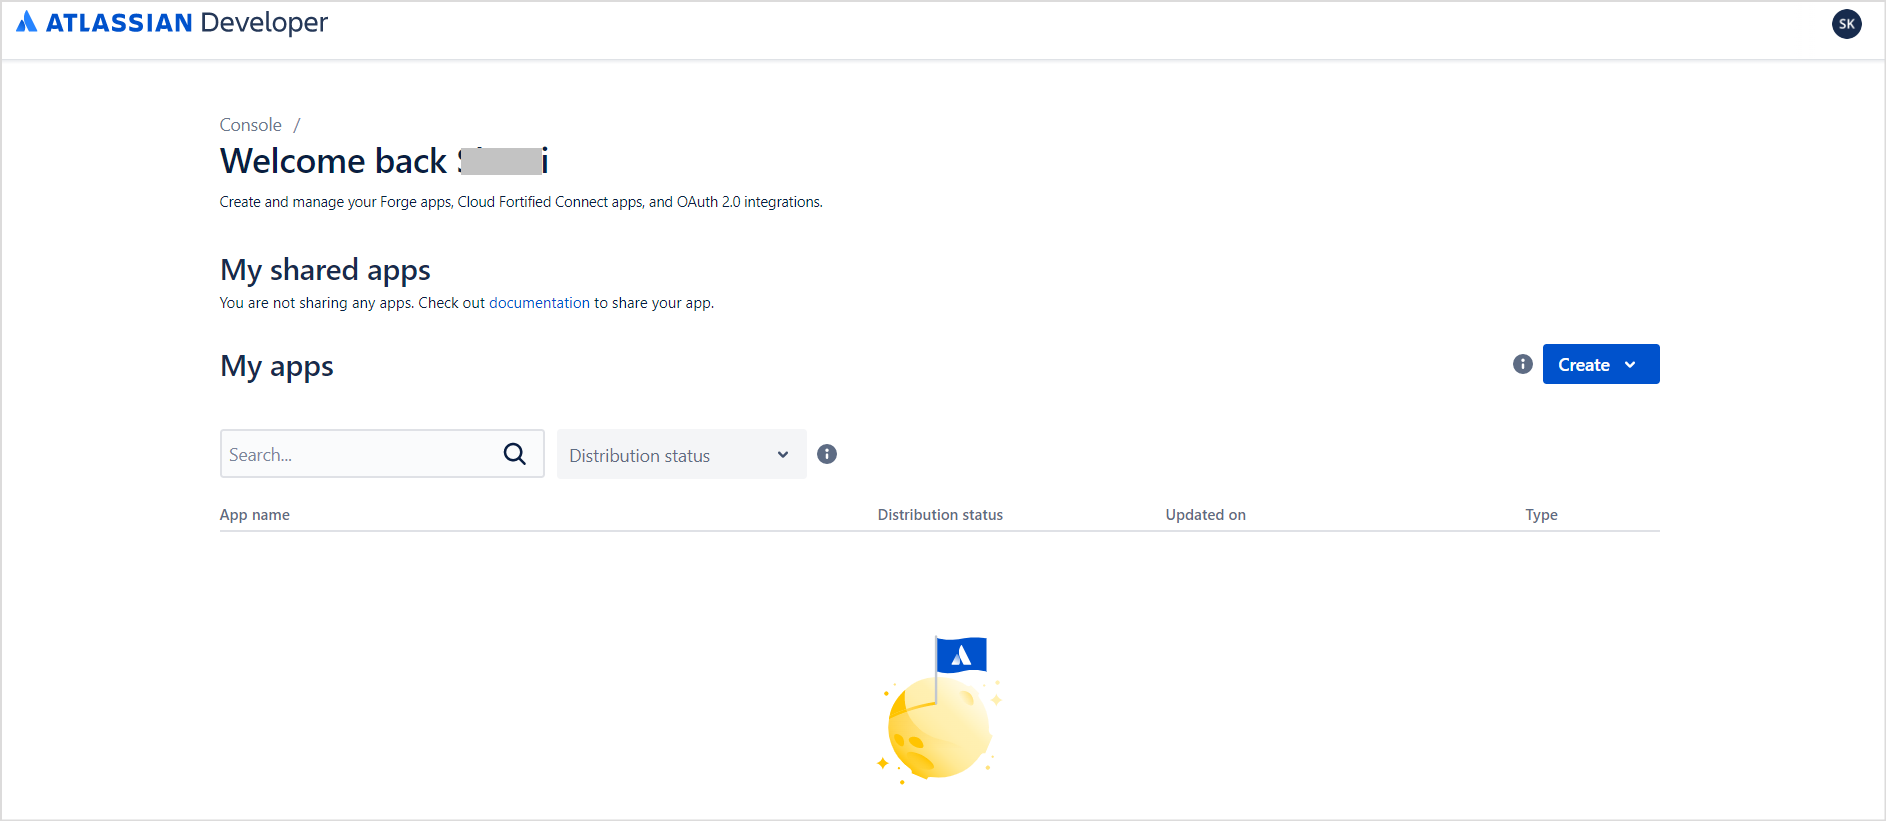
  • The developer console will list all your apps.

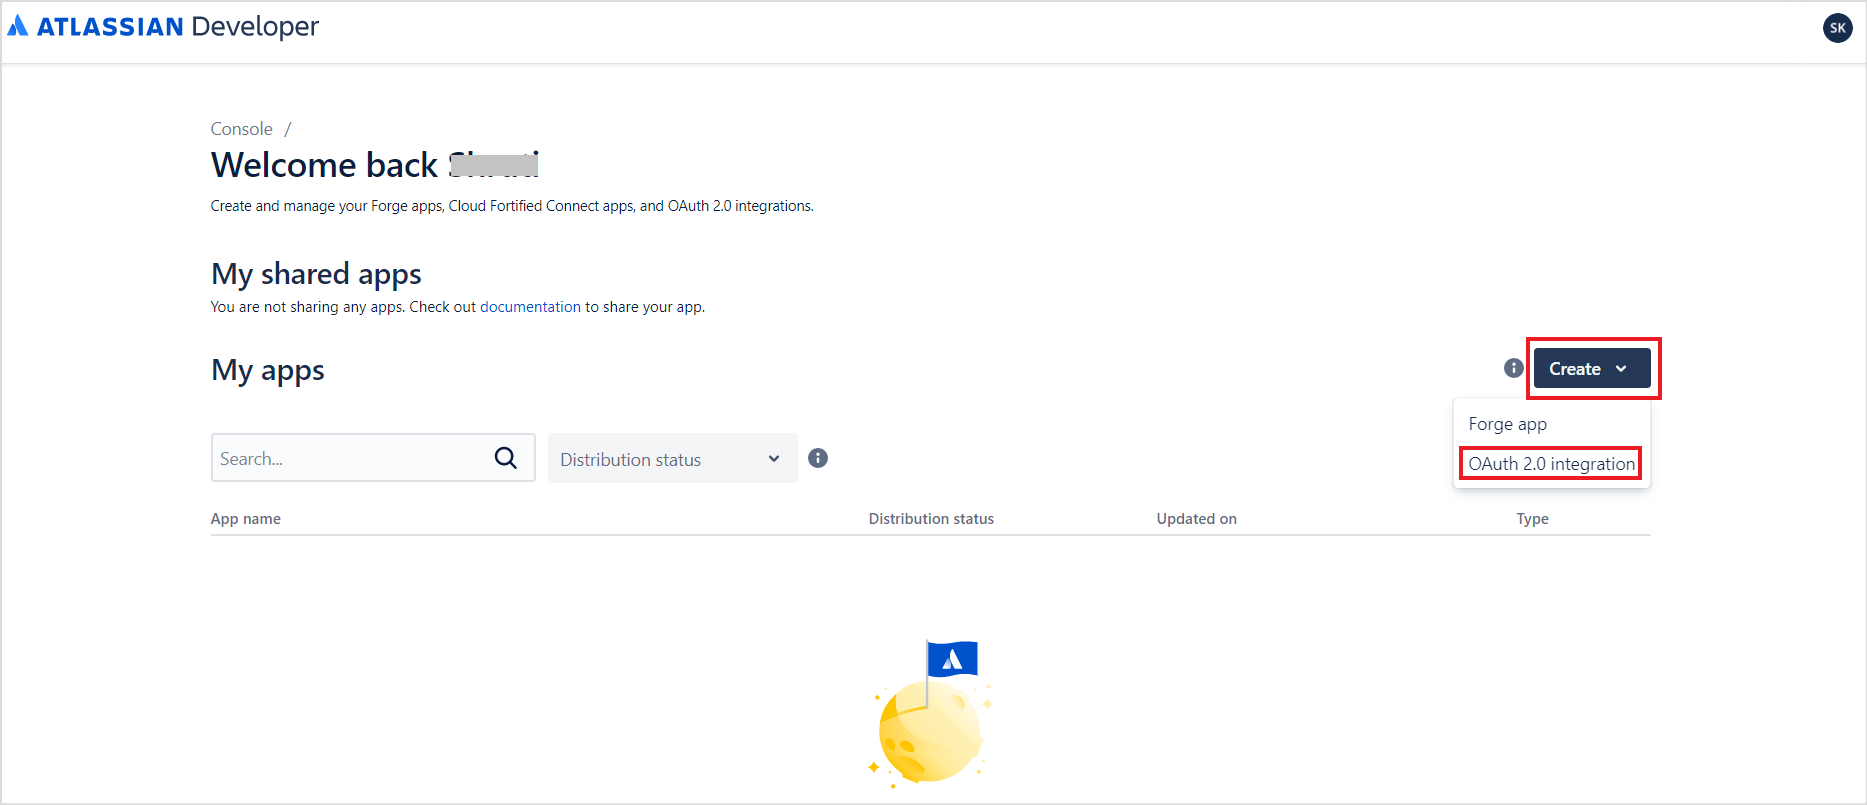
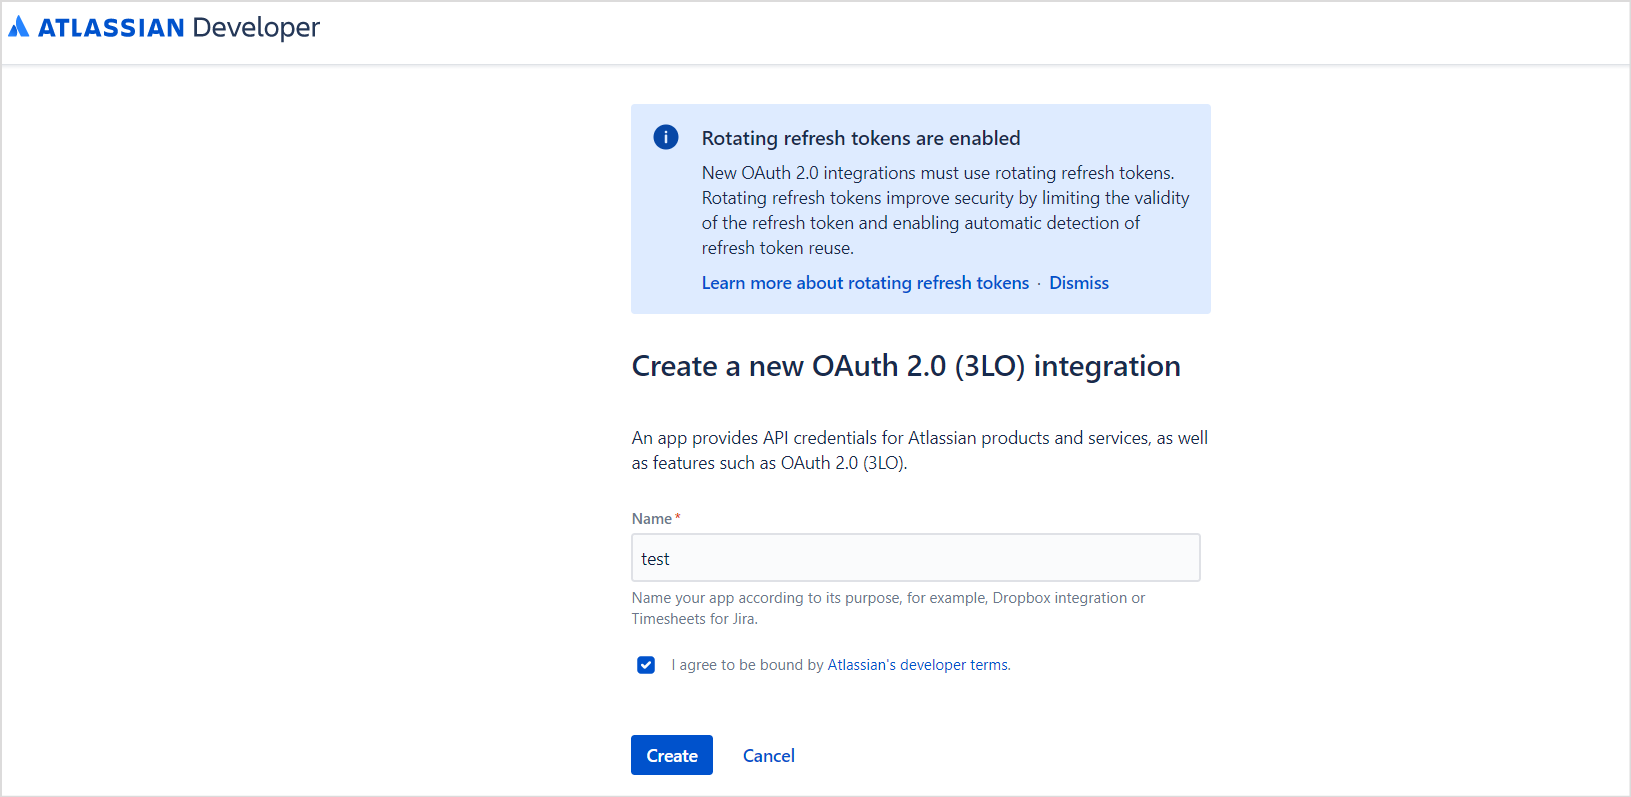
  • Click the Create button and select OAuth 2.0 Integration.

  • Provide a name for the application and click Create.

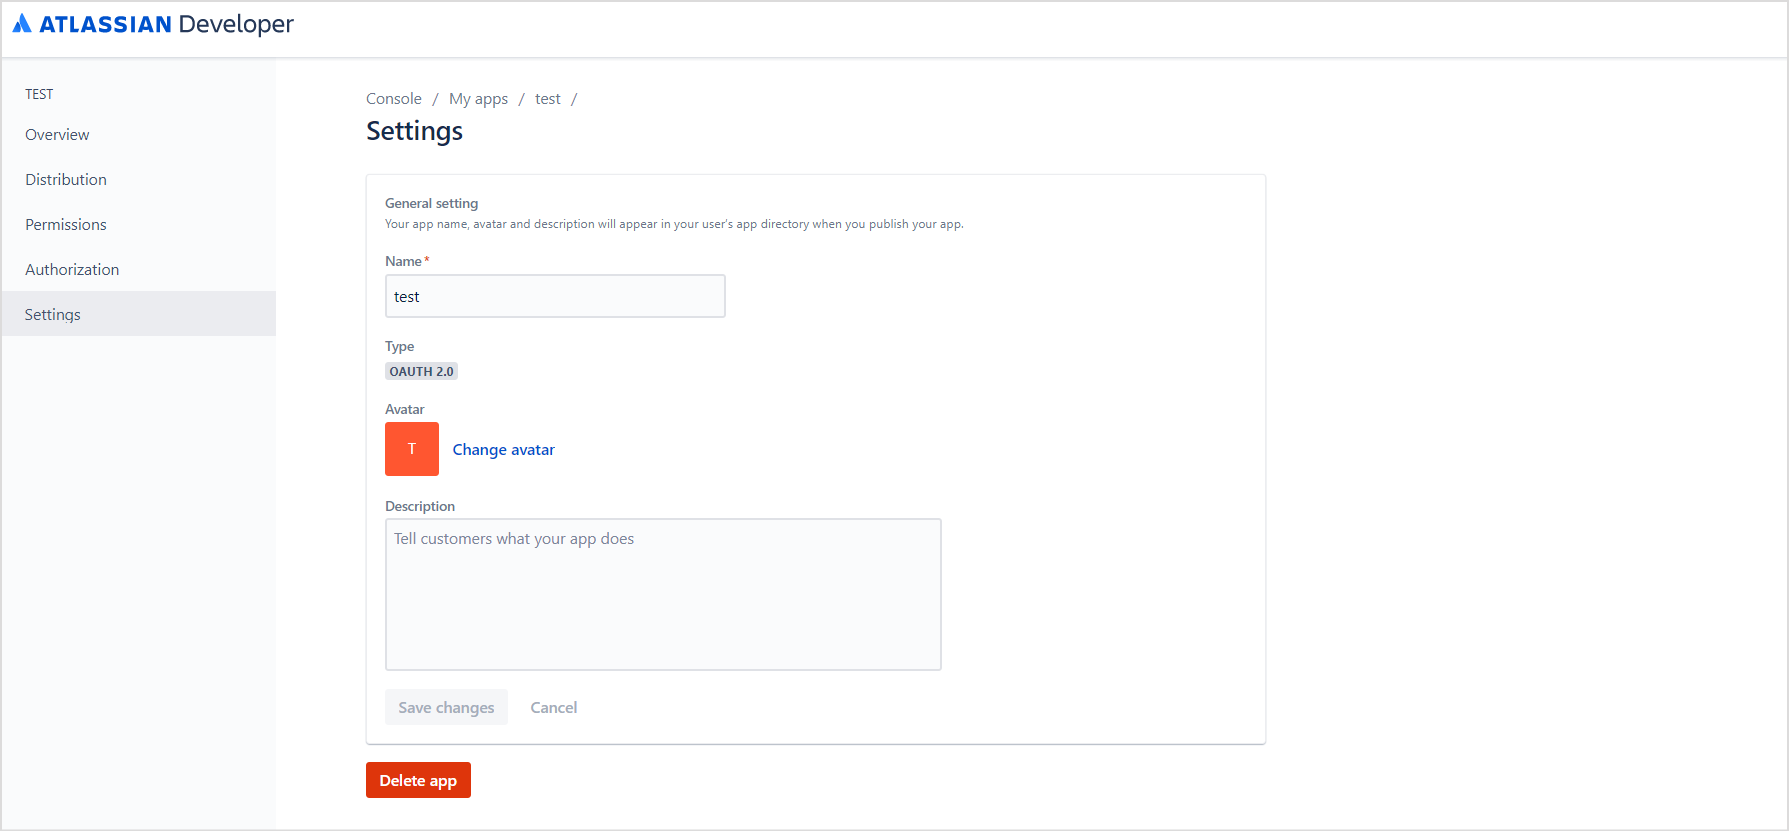
  • Once the application is created, you can update its name, description from the Settings tab. You can also add an avatar for the application. Update the settings and click Save changes.

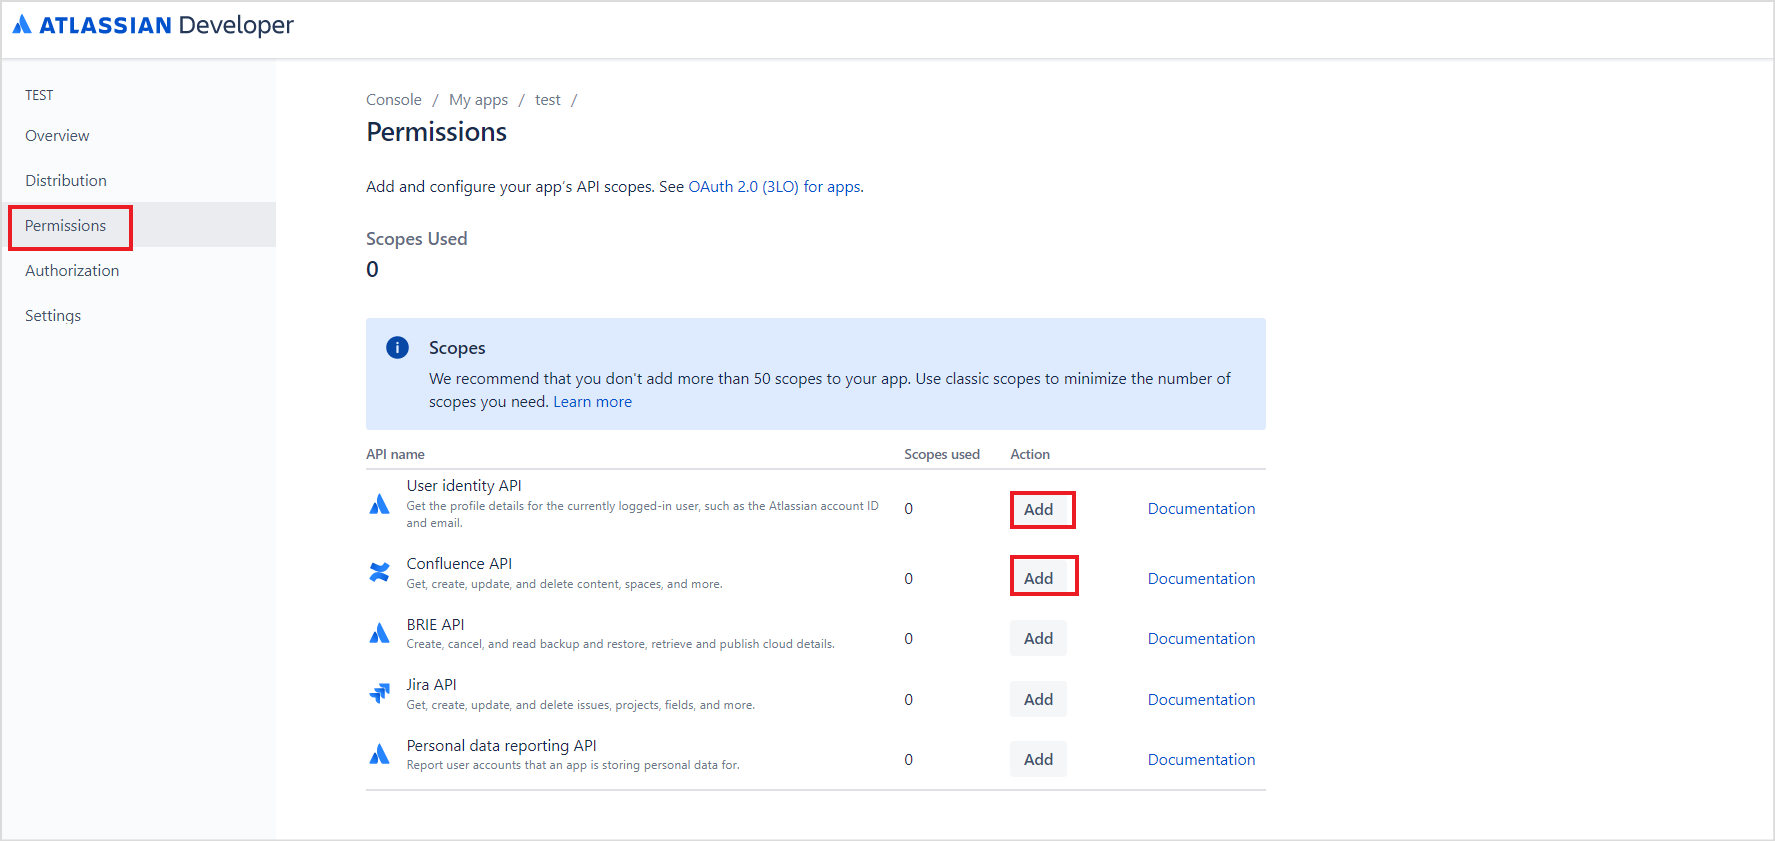
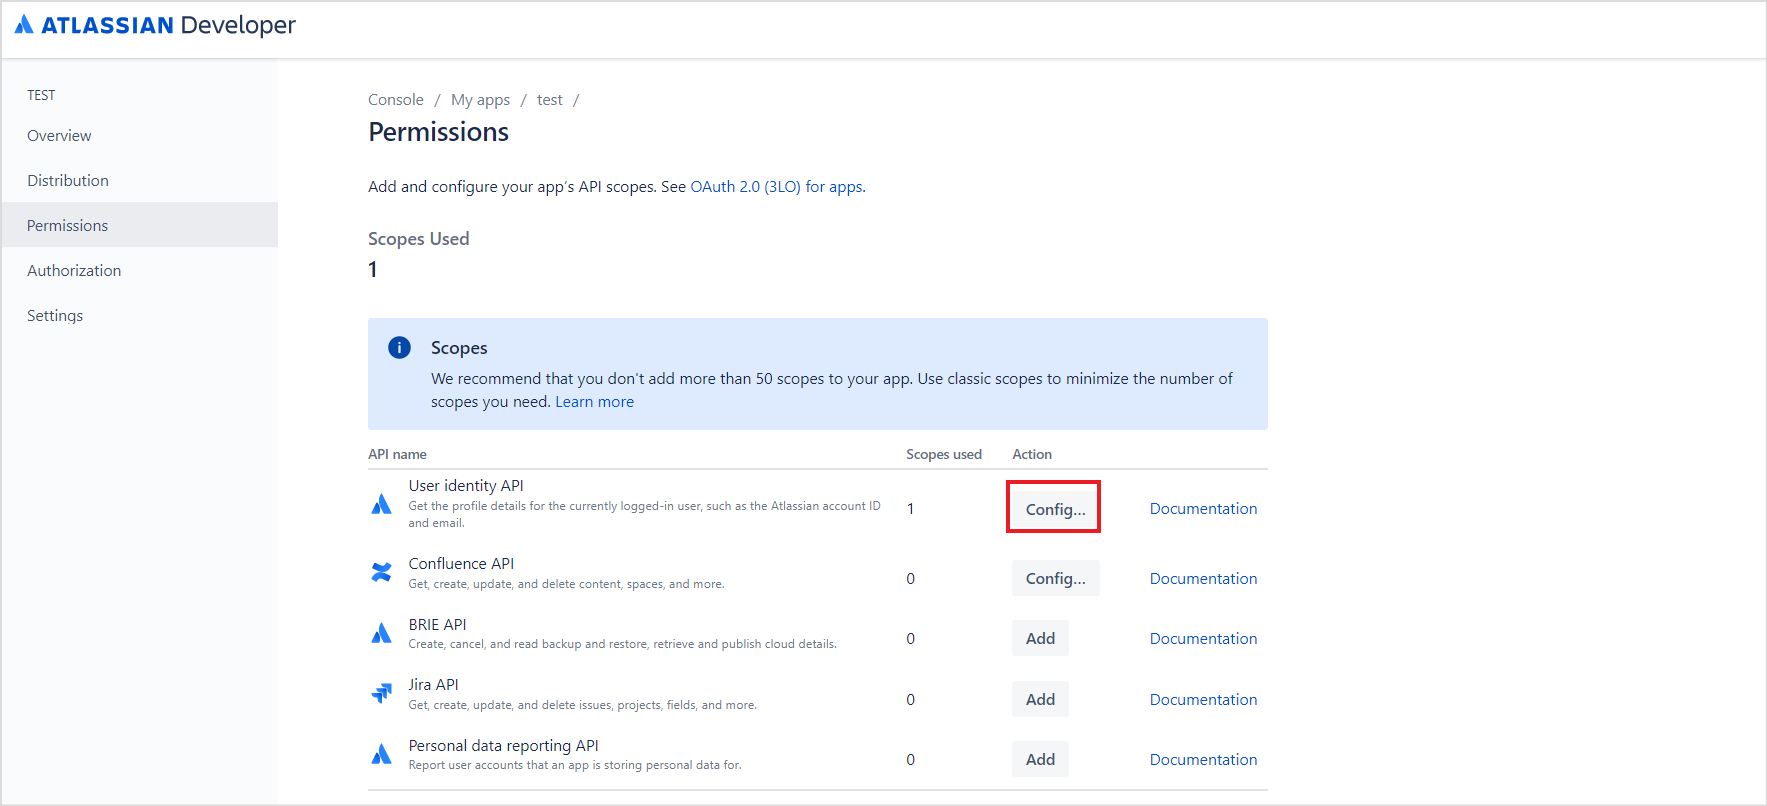
  • The next step is to grant the necessary permissions. Go to the Permissions tab. Add the following scopes:
    • User Identity API
    • Confluence API

  • For the User Identity API, to add the permissions, click the config link.

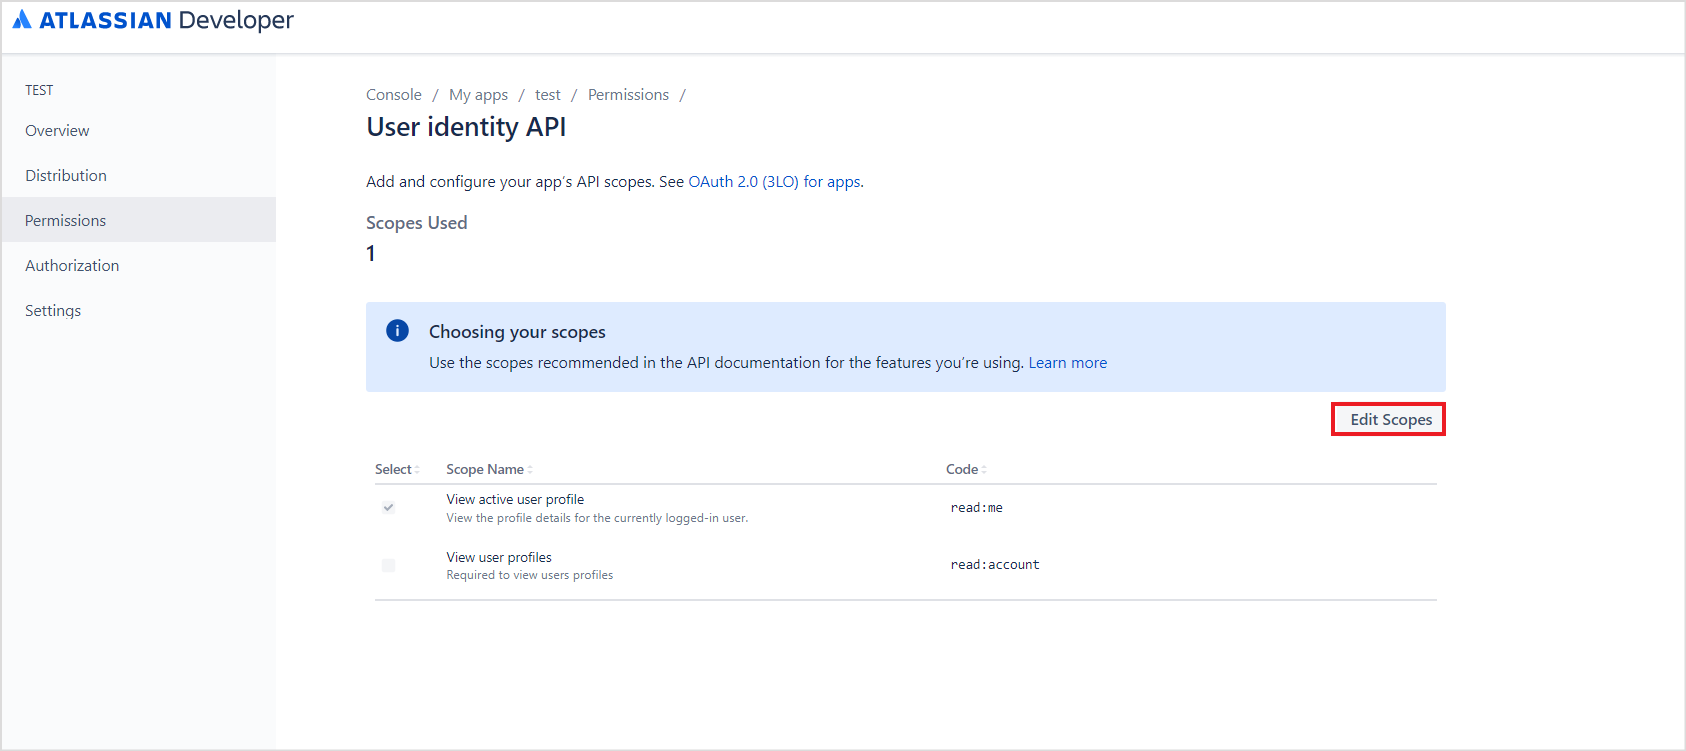
  • On the following page, click the Edit Scopes button.

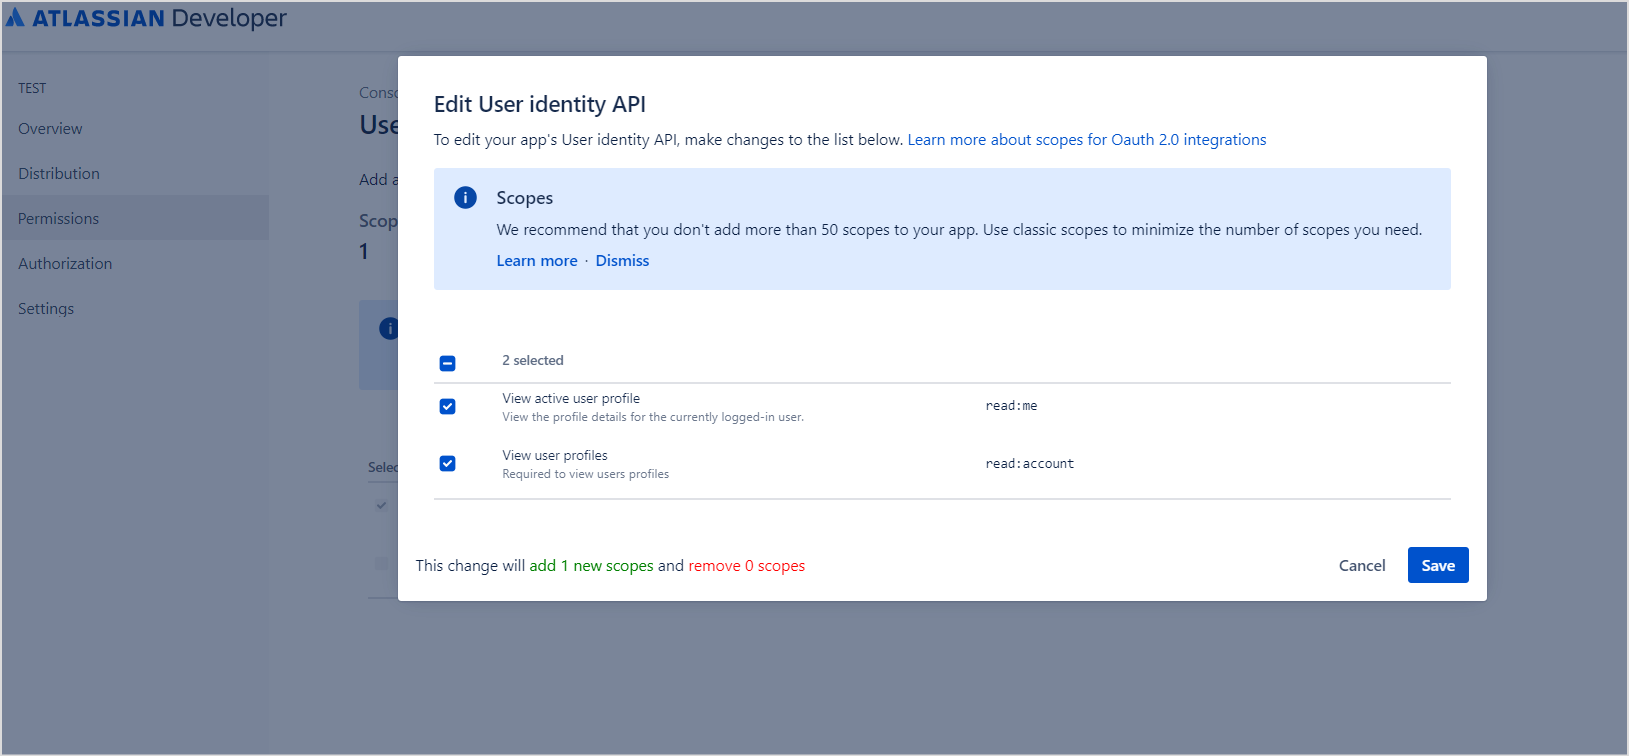
  • Grant the following permissions and click Save
    • Read:me
    • Read:account

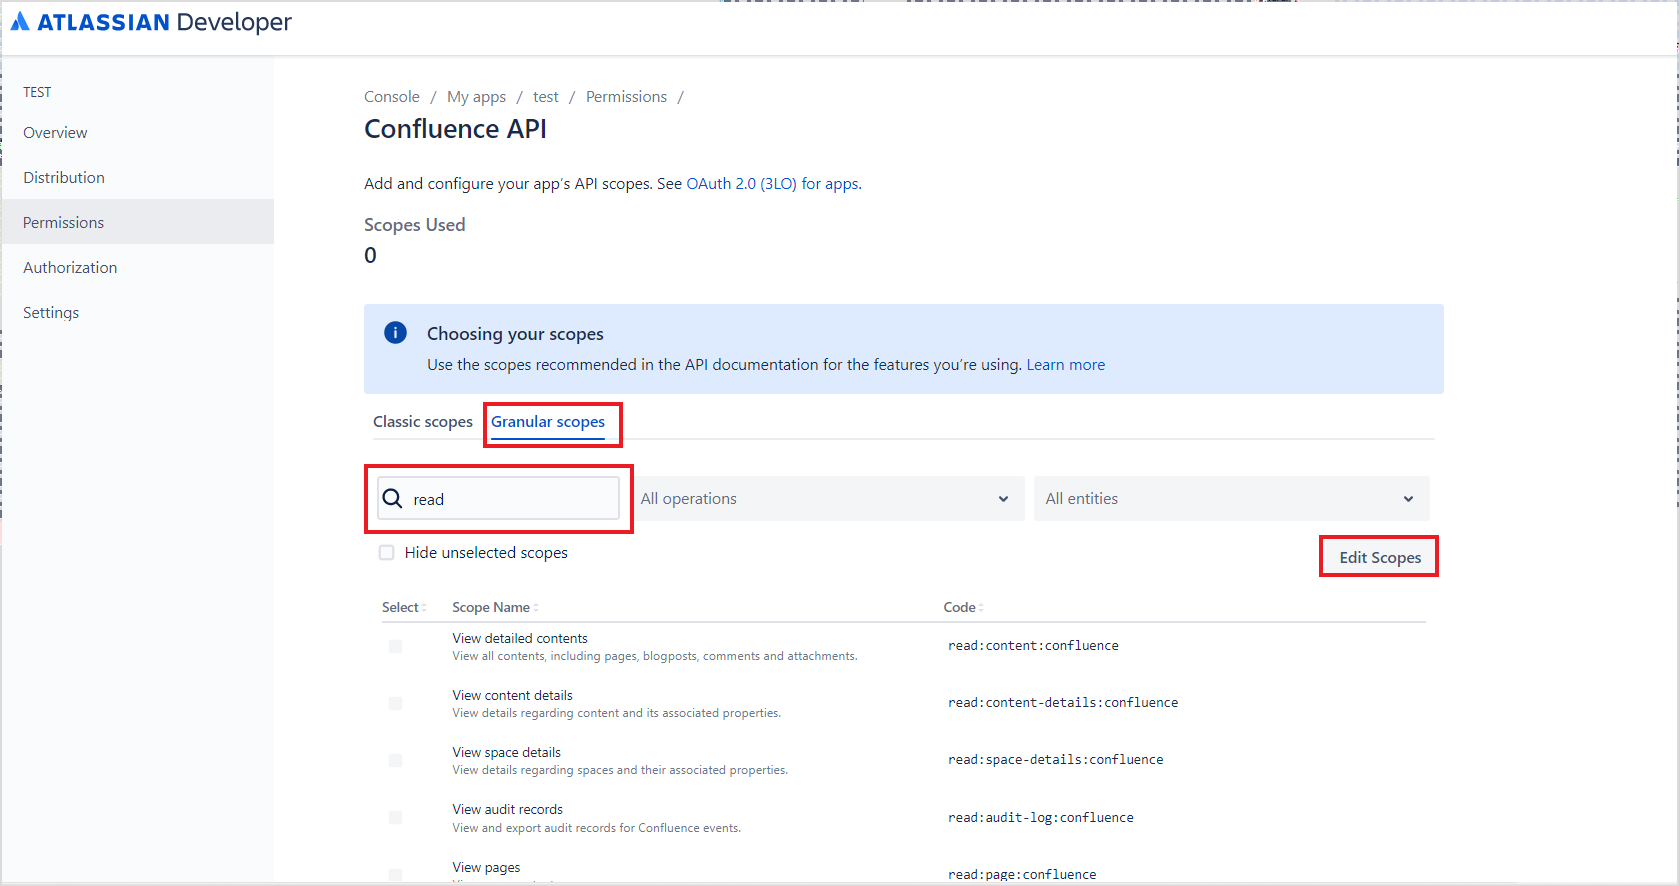
  • Similarly, for Confluence API, go to the Granular Scopes and click Edit Scopes. Add a read operation filter, select all the filtered permissions, and click Save.  

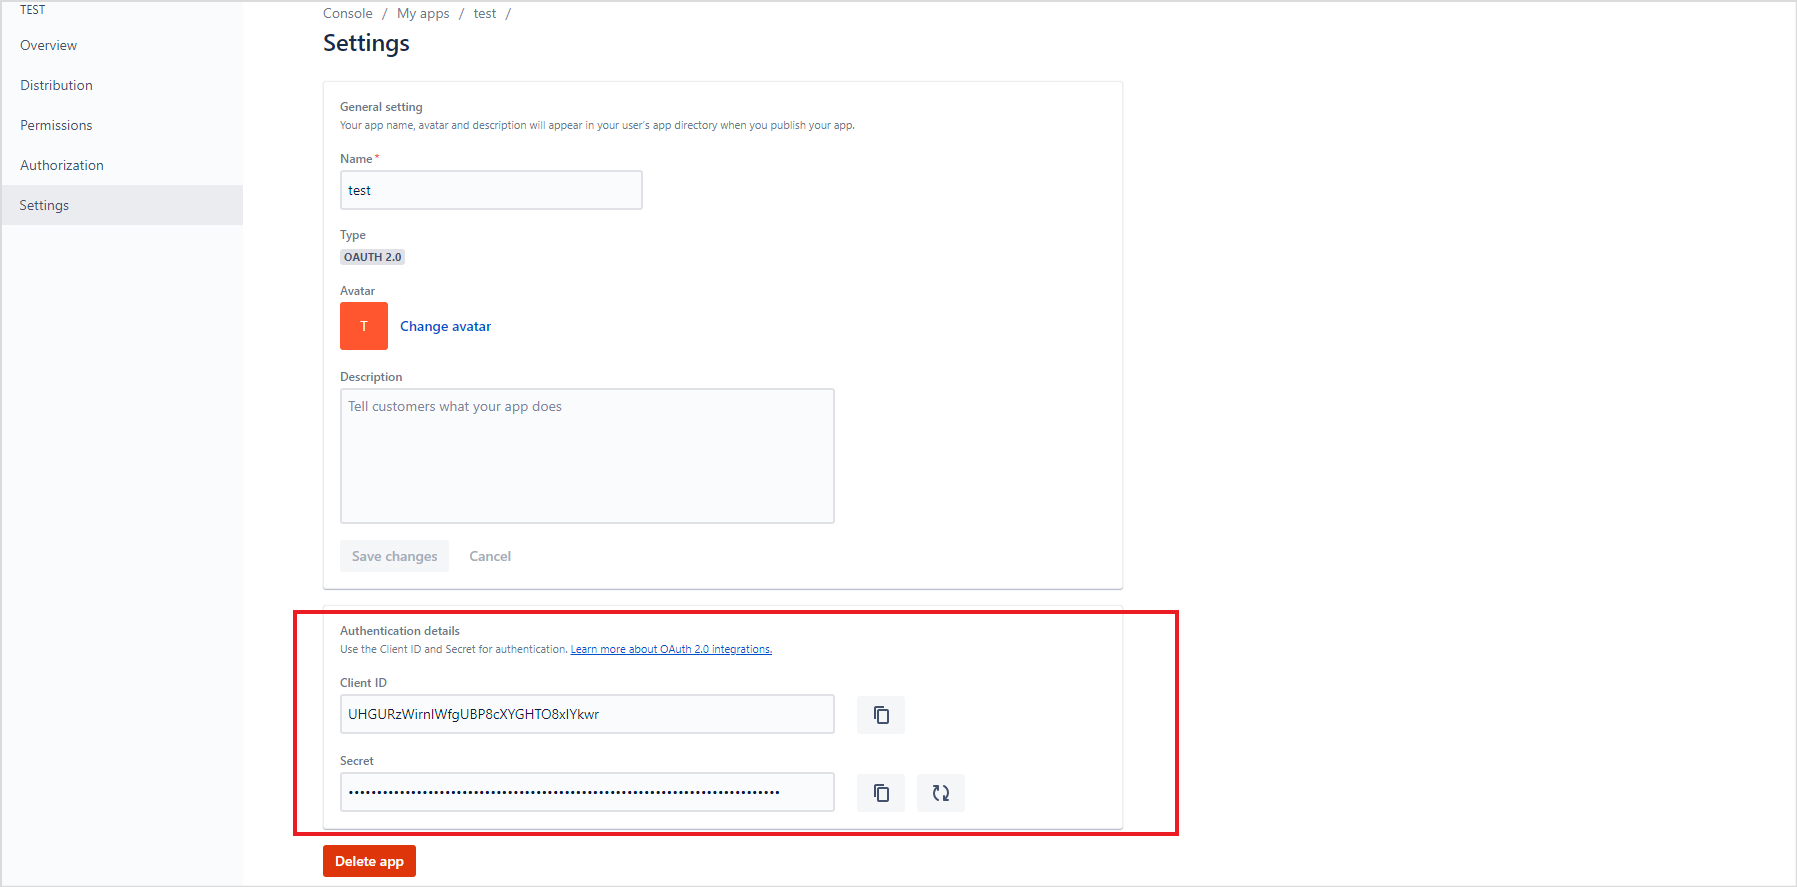
  • After adding permissions, go to Settings and find the Client ID and Secret at the end of the page. Save these fields as these will be used for configuring the SearchAssist connector in the next step.

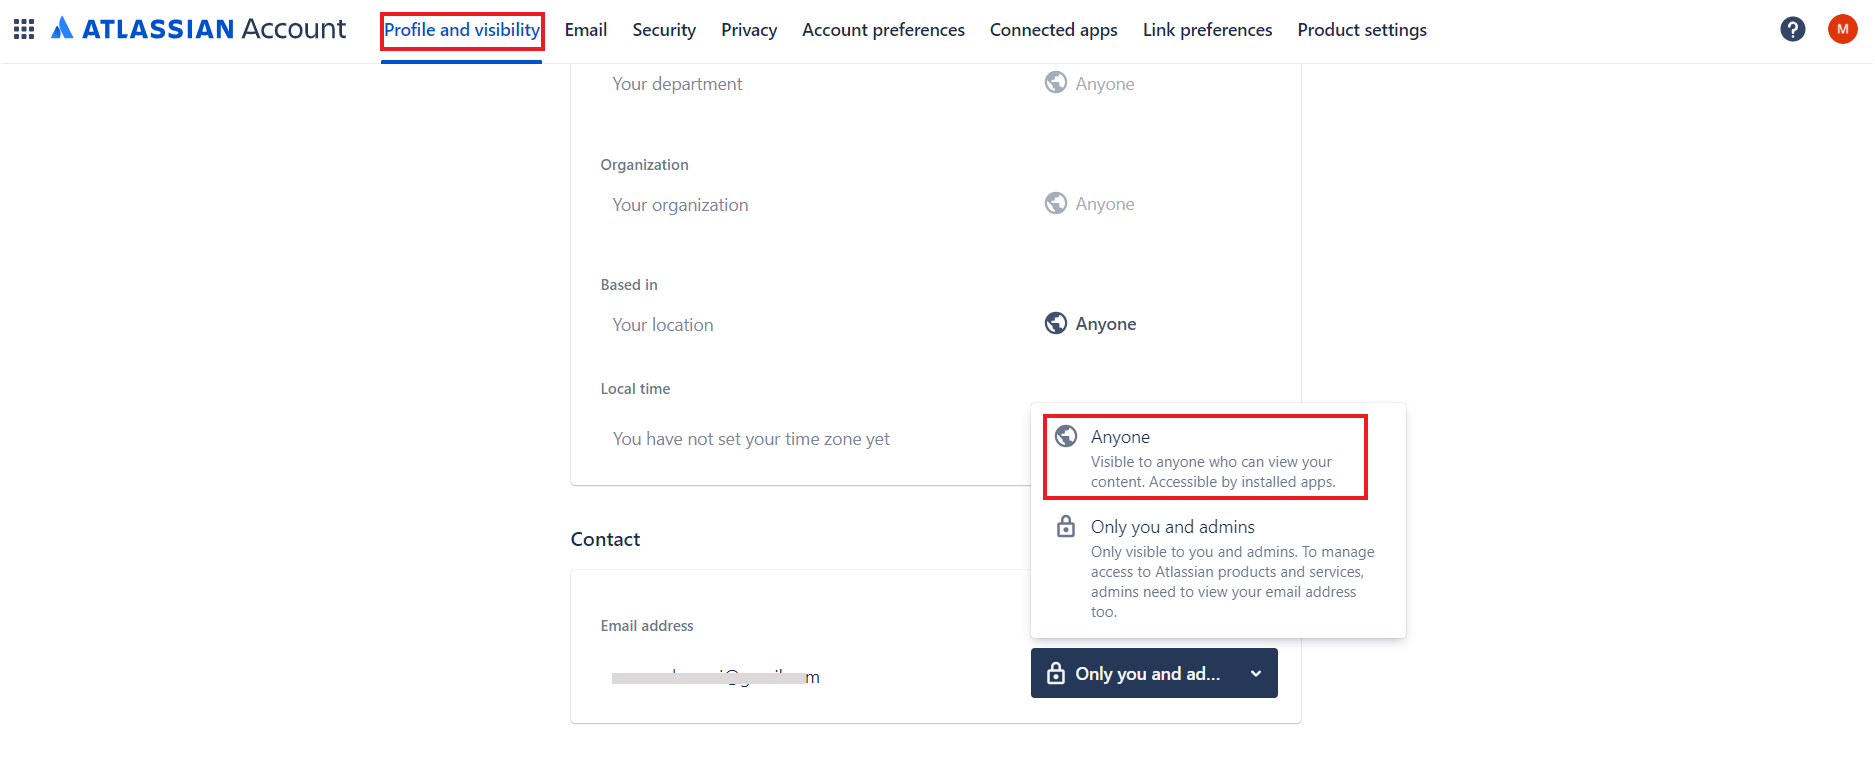
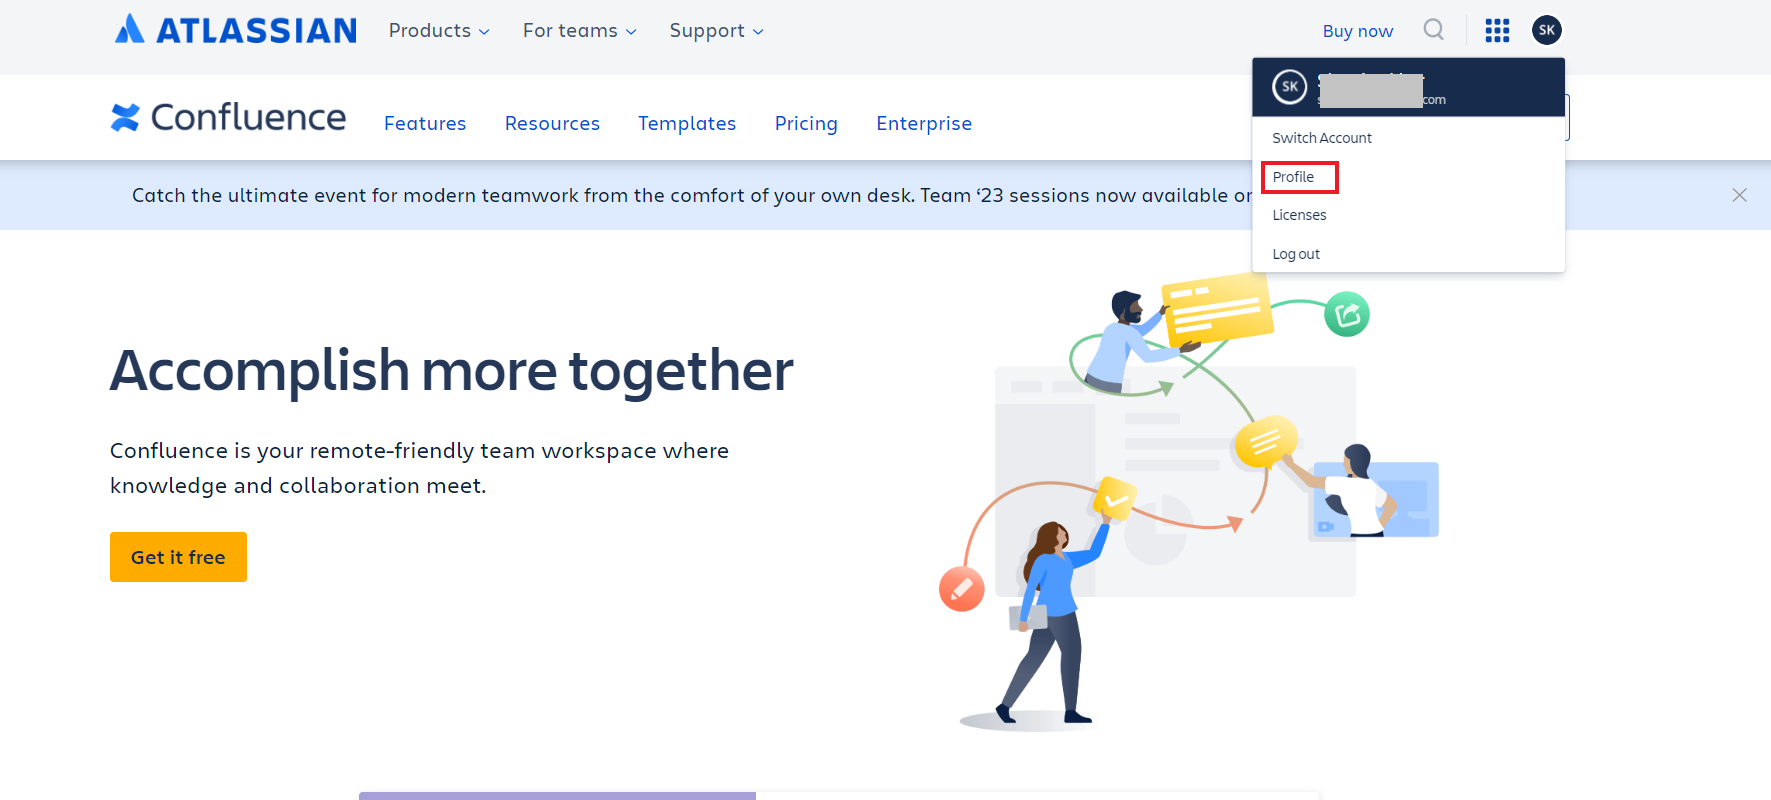
  • We also need the Host URL in Confluence for configuring the SearchAssist Connector.  To fetch this field, go to your Confluence home page and click on Profile.

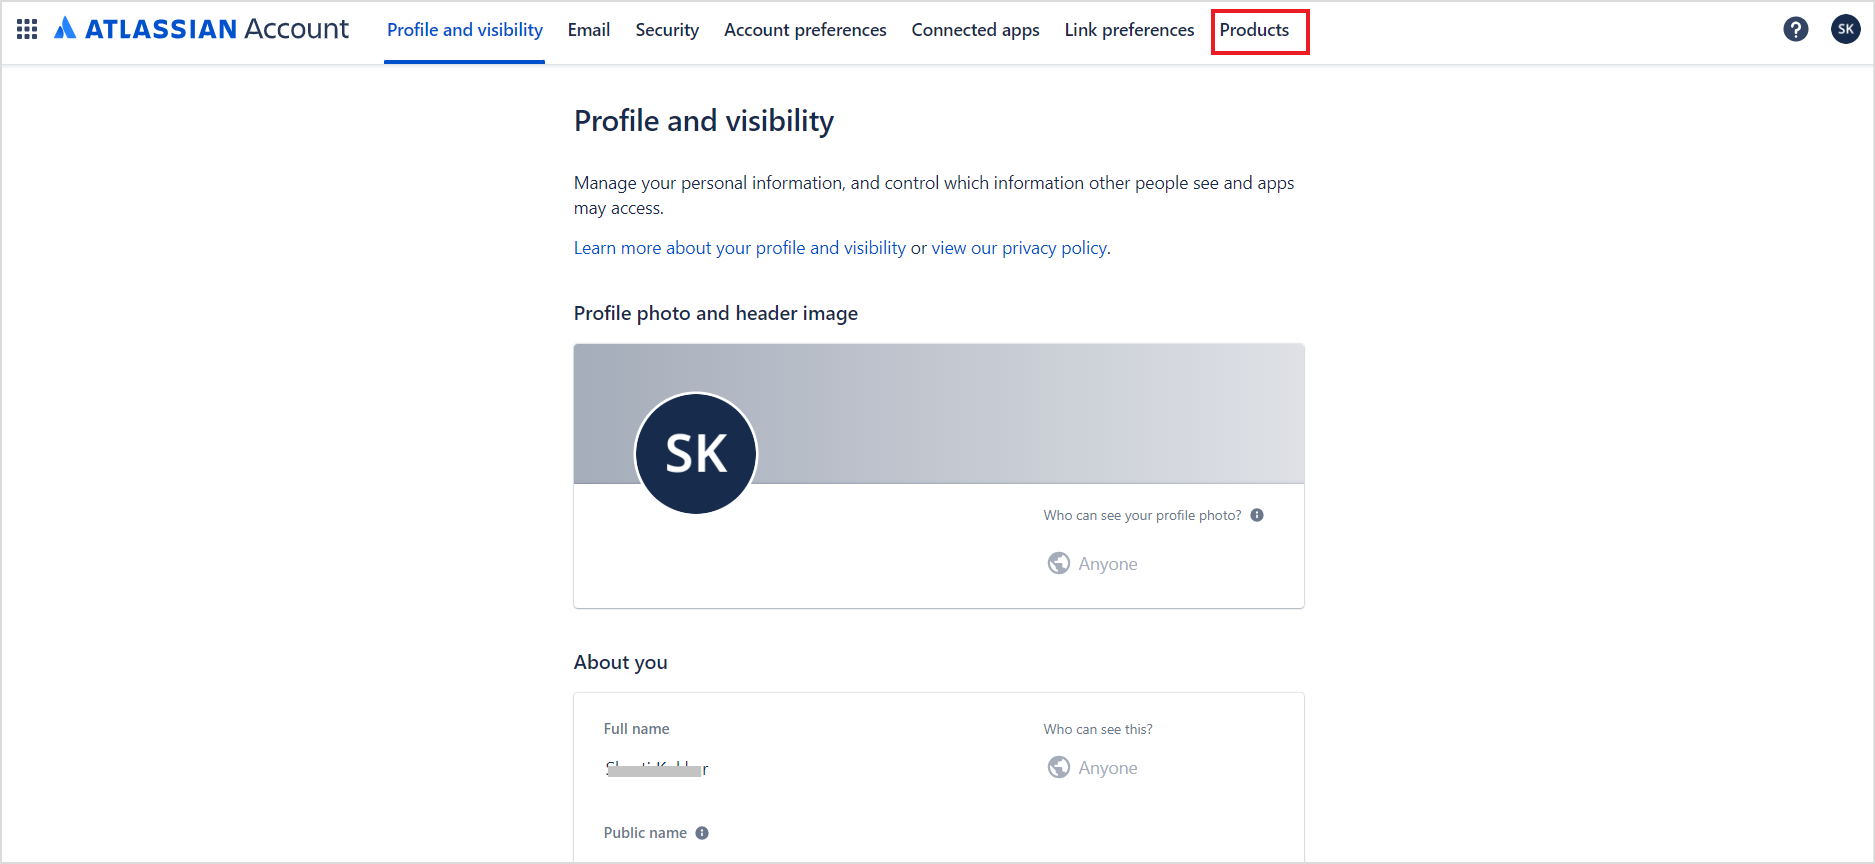
  • Go to the Products tab.  

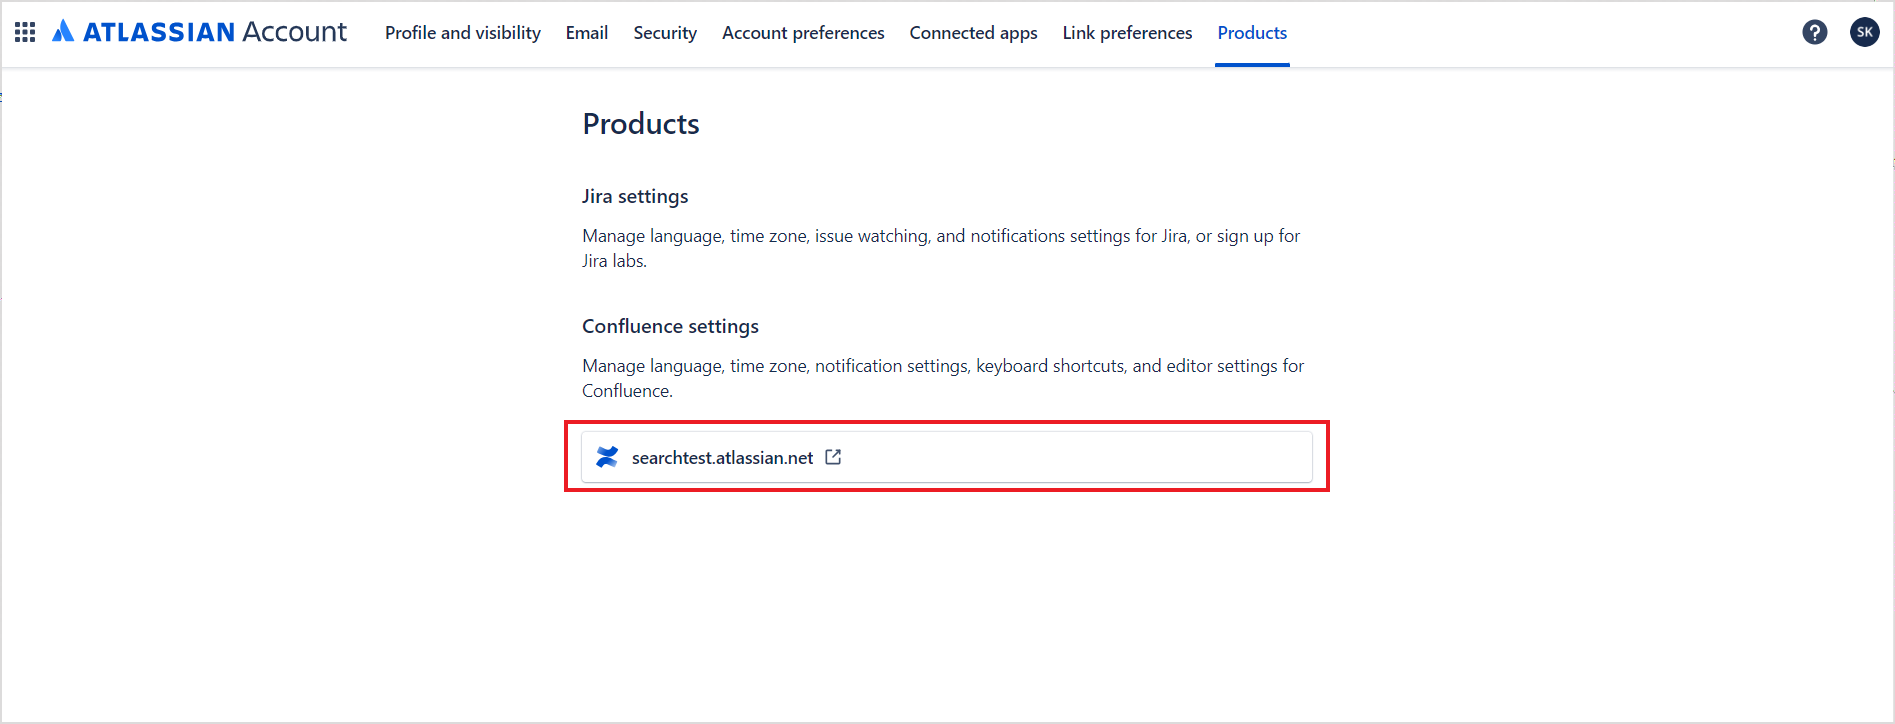
The host URL will be displayed at the bottom of the page.

Configuring SearchAssist Connector

To complete the integration, do the following configuration on the SearchAssist application. 

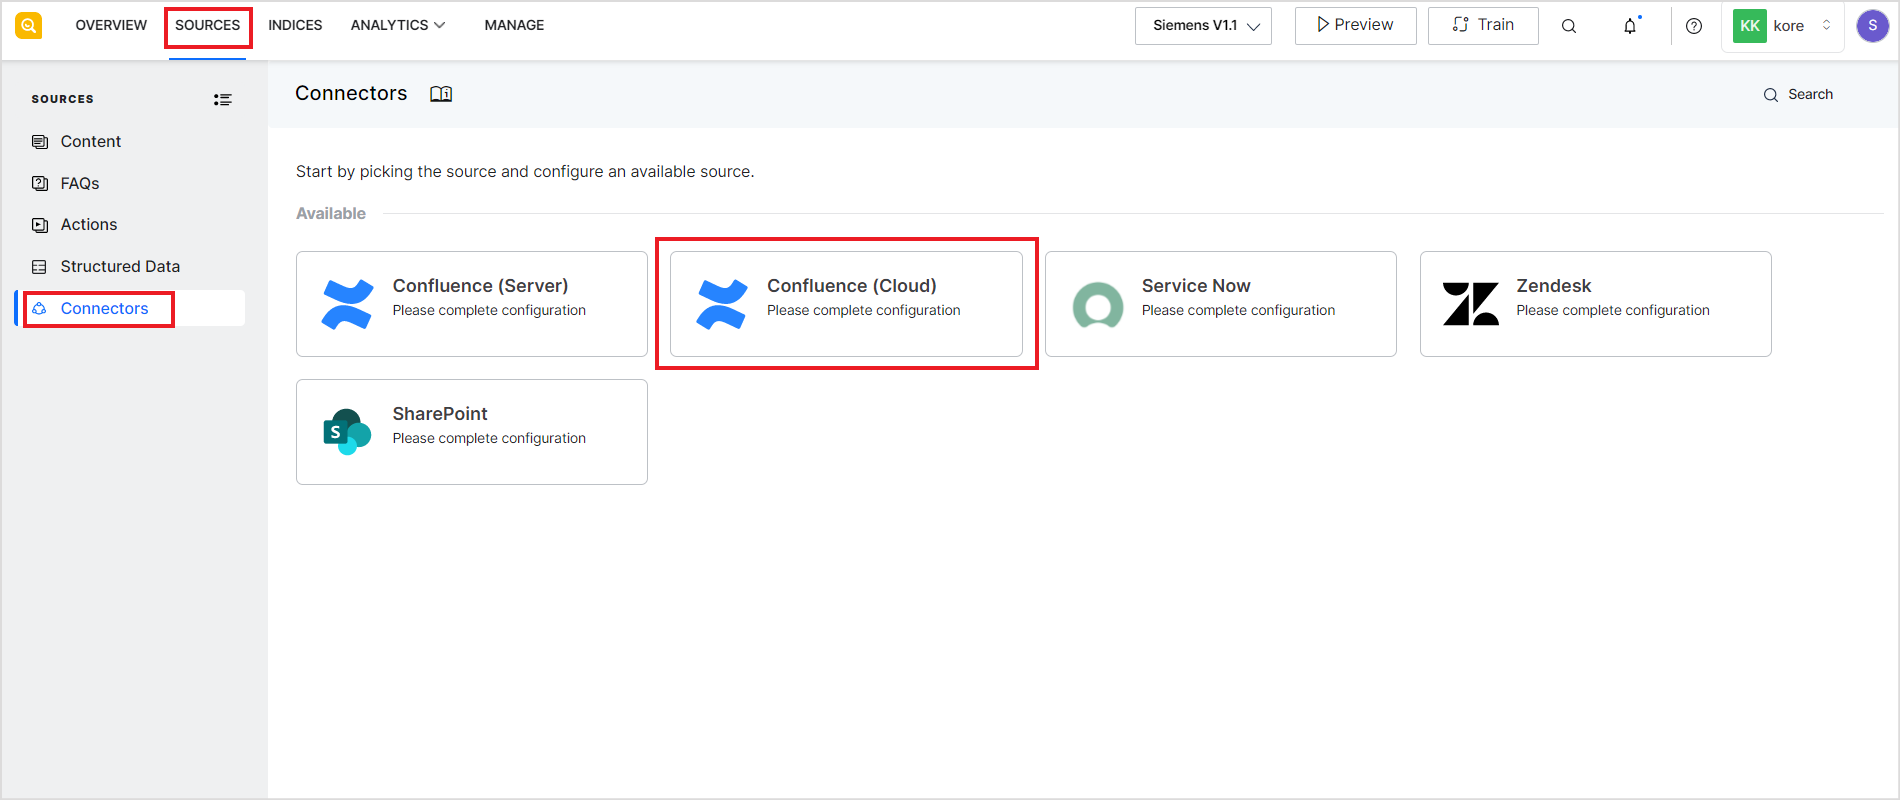
  • Go to Connectors under the Sources tab.

  • The following page provides instructions for the integration. Click Proceed.
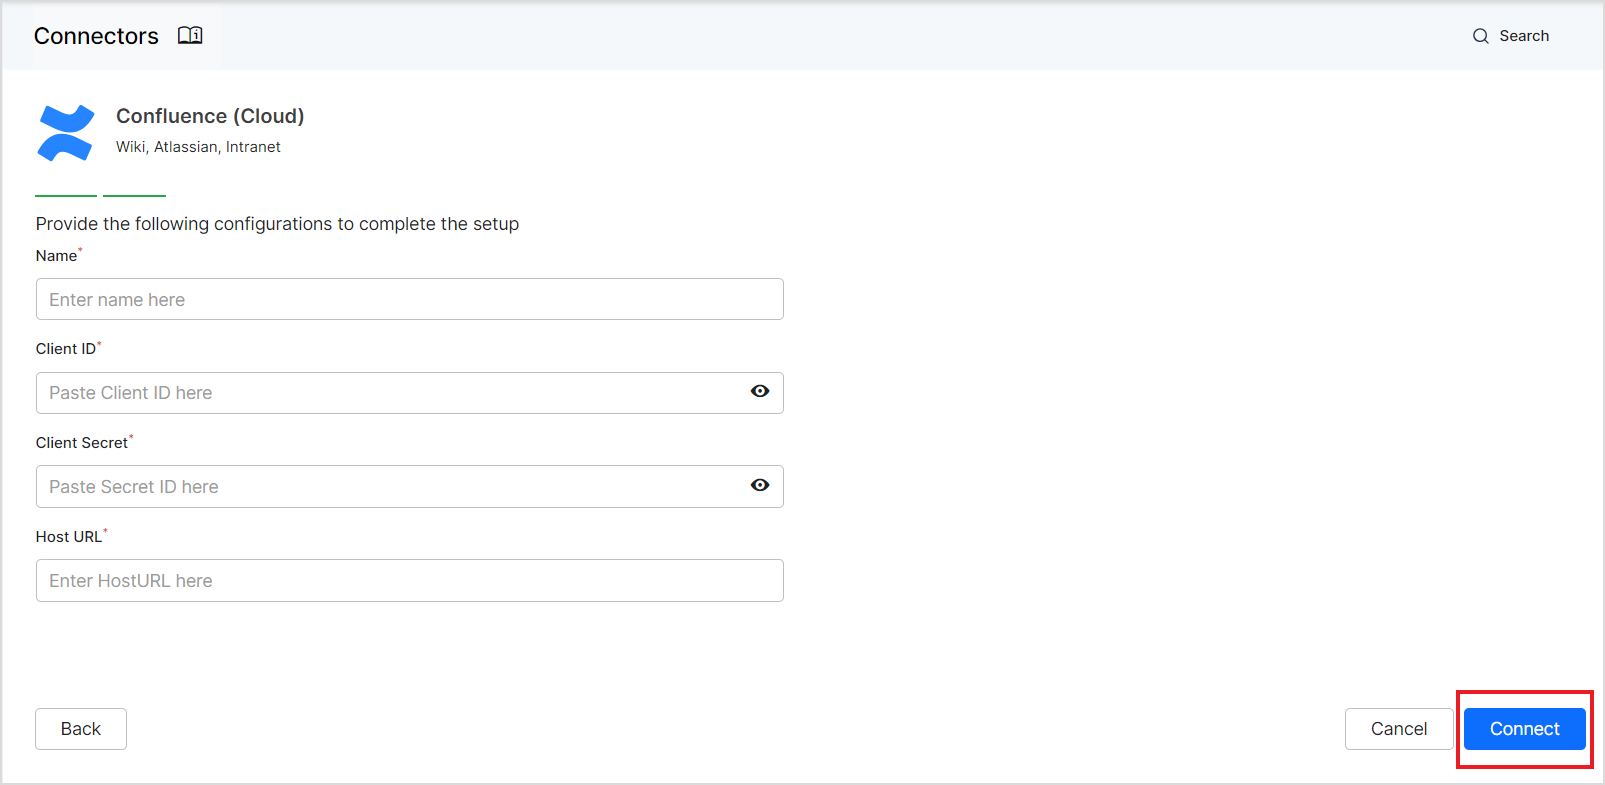
  • Next, provide the details of the OAuth 2.0 application created on Confluence, click Connect, and authorize the connection.
Fields Description
Name  Name for the connector
Client ID Client ID of the OAuth application created on Confluence, as fetched in the last step above.
Client Secret Client secret generated for communication with Confluence. 
Host URL  The confluence server base URL  (without trailing slash), as fetched from the Confluence in the last step.

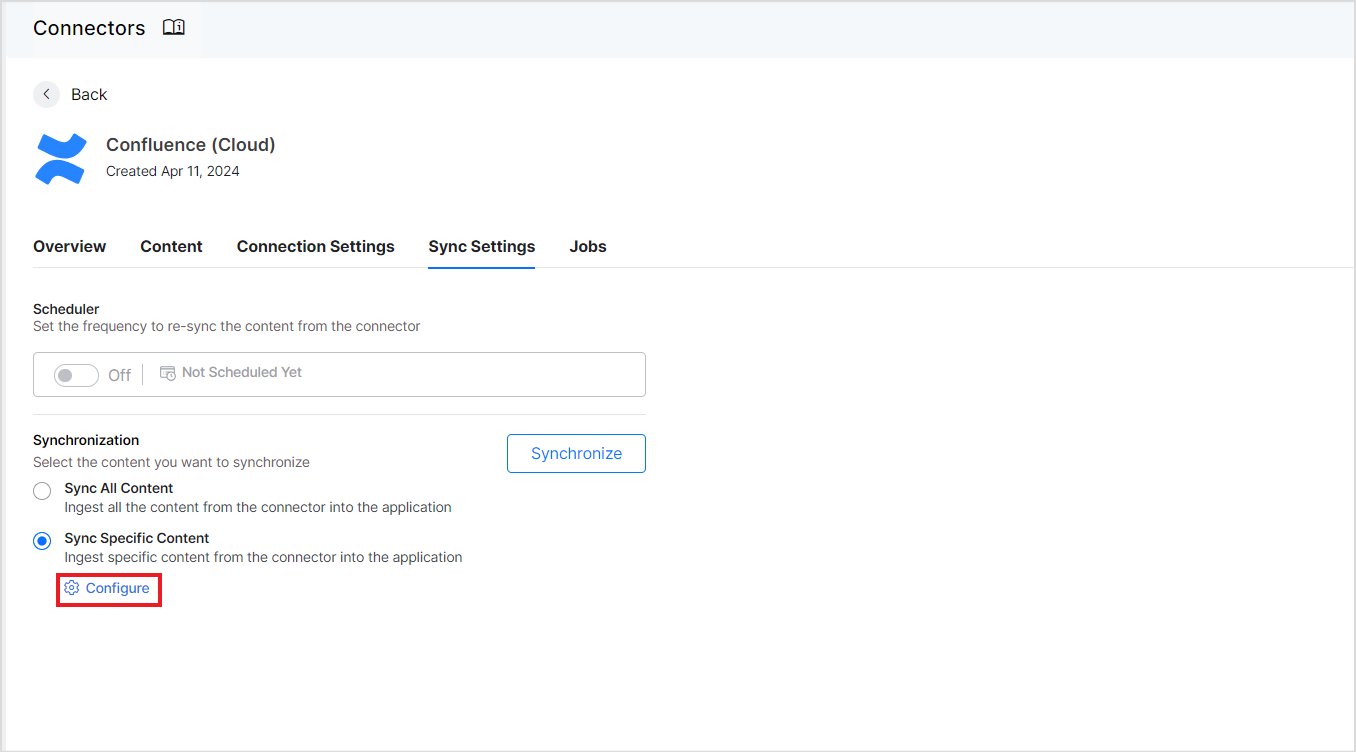
Once the authorization process is complete,  you can select the content to be ingested into the application and initiate synchronization. Go to the Sync Settings tab and select the content. You can choose to sync all the content from the Confluence Cloud account or select specific content.  Configure the content to be ingested and click Synchronize. You can also set a scheduler here for automatic content synchronization at regular intervals.

Defining Rules to select specific content for ingestion

Select Sync Specific Content and click on the Configure link in the Sync Settings tab to ingest specific content. 
You can now define rules to select the content. Each rule can be defined using a parameter, operator, and its values. 
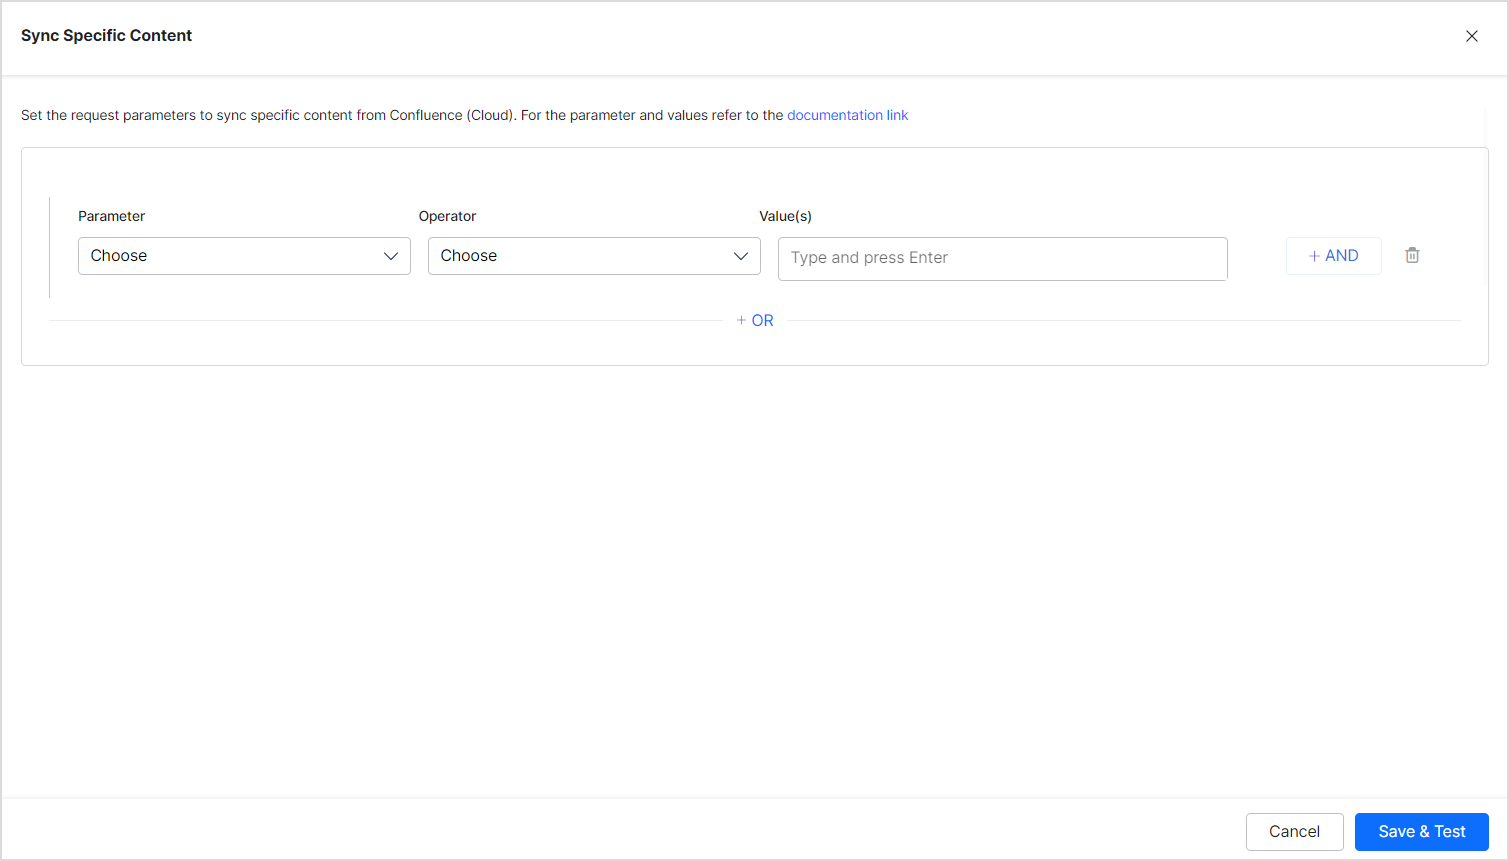
The Parameter field can take one of the following values:

  • Ancestor: Affects the direct child pages/content and descendants of the given content IDs as value. 
  • Content: Affects the content defined using content ID only. 
  • Created: Affects the content with the given creation date. It takes Date as values in the following format “yyyy/mm/dd hh:mm”, “yyyy-mm-dd hh:mm”, “yyyy/mm/dd”, “yyyy-MM-dd”
  • Creator: Affects the content created by the User account IDs provided as values. 
  • Label: Affects the content by its label. 
  • Parent: Affects the content under a given parent. 
  • ID: Affects the content based on its content ID. 
  • Space: Affects the content based on the space that it is available in.
  • Title: Define the rule using the title of the pages
  • User: Define the rule using userId 

The Operator field can take different values depending upon the parameter selected like equals to, not equals to, contains, etc. 

The value field is used for providing the value as per the parameter.

For instance, you can choose all the pages and sub-pages under a given ancestor using the following rule.

Similarly, to selectively ingest only the pages created or modified after Jan 1, 2024, you can configure the rule as shown below.

Note:

  • You can define more than one condition to choose different types of content from the connector using the OR operator. 
  • Every rule can have one or more conditions to select a subset of content using the AND operator. For example, to ingest the latest content created after Jan 1, 2024 and having the word ‘SearchAssist’ in its title, define the rule as:

Access Control 

SearchAssist supports access control for content ingested using Confluence Cloud Connector. You can enable Public Access to the ingested content or choose Default access for the content. 

  • Default Access honors the permissions of a user in the Confluence Cloud. The user will view search results from a file only if the user has access to the file in the enterprise application. 
  • Public Access overrides the permissions of the user in the Confluence Cloud. It allows every user to access the ingested content irrespective of the permissions in the enterprise system. 

Handling Confluence Cloud Permissions in SearchAssist

Two levels of permissions control the user’s access to a page in Confluence Cloud. 

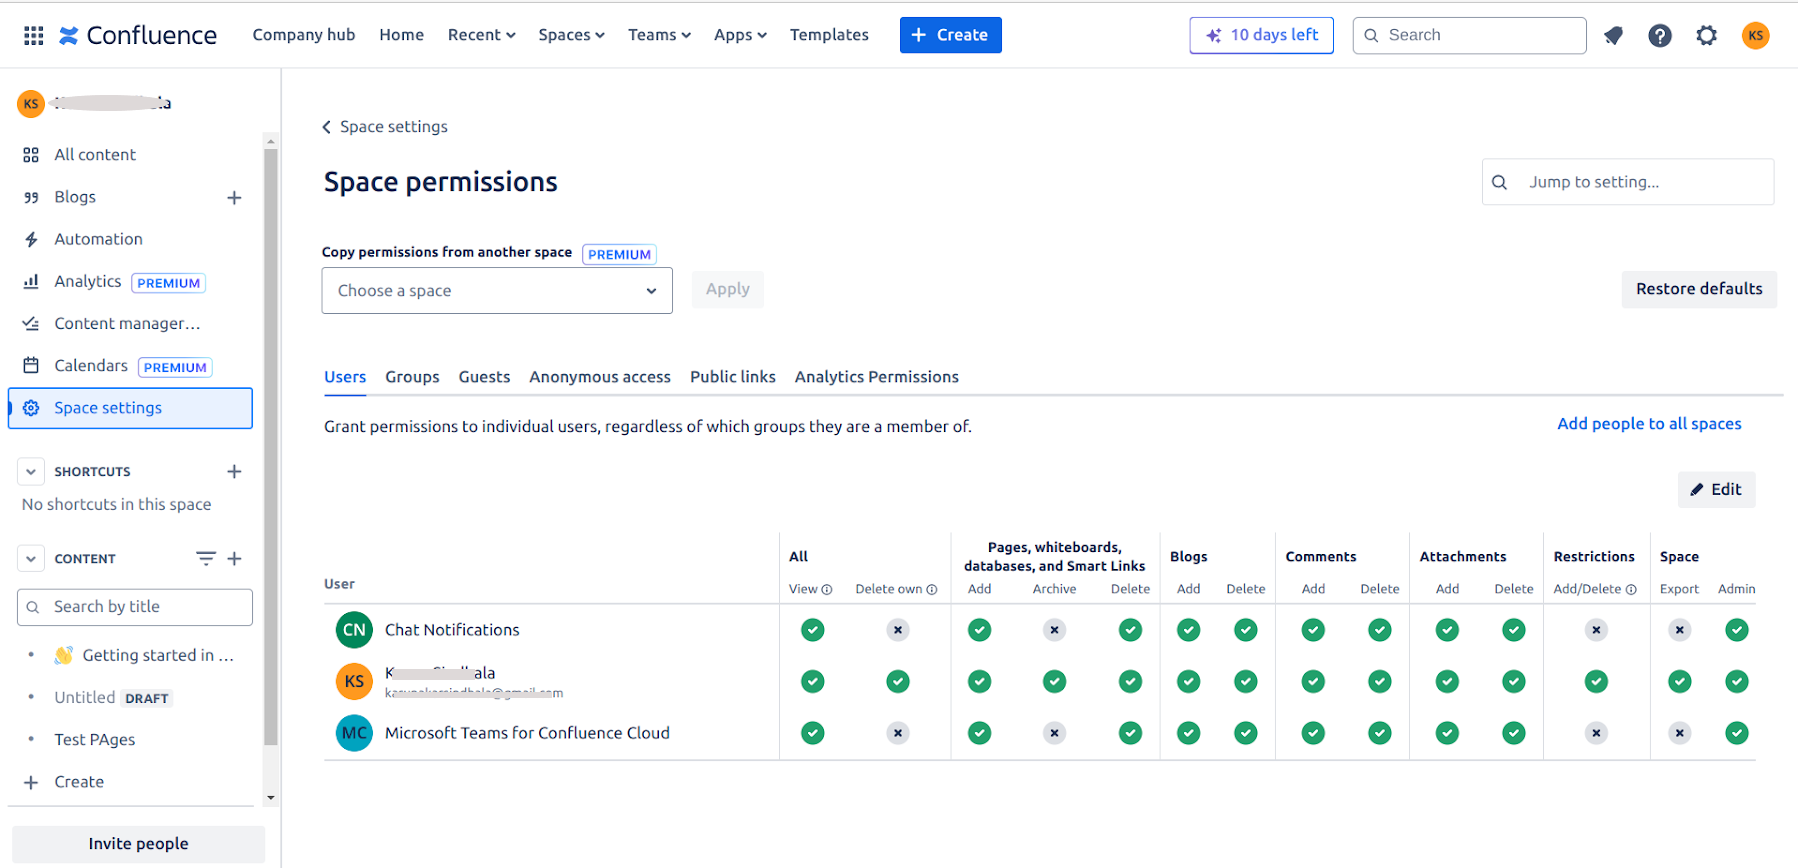
Space Permissions 

Every space has an independent set of permissions managed by the space administrators, which determine the access settings for different users and groups. SearchAssist requires a minimum permission of view to allow a user to access the content.
Page Restrictions

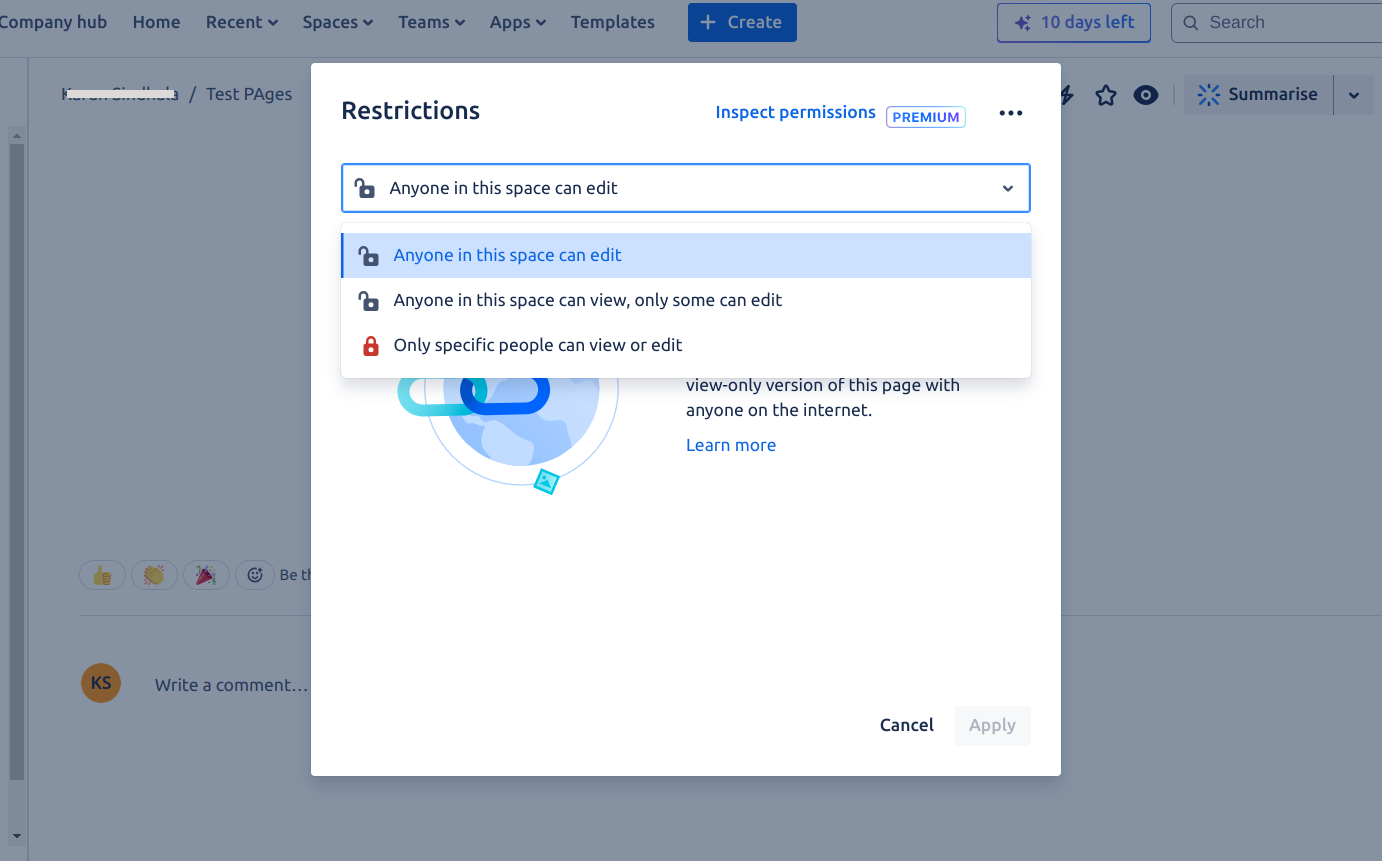
Pages inherit the space permissions. However, a page can define its own restrictions. It can allow access to all the members of the space or restrict access to selected members. If the page restrictions are marked as “Only specific people can view & edit,” then the space permissions are not considered. 
  •  Access: Users who are added to a space or a specific page within that space are listed in the racl (user identity – email address) field of the indexed content in SearchAssist. These users can directly access the content based on their permissions.
  • Group Access: If access permissions are granted to user groups, SearchAssist creates a corresponding permission entity for the group. To enable access for all users within a group, add the users to the respective permission entity using the Permission Entity APIs. In this case, the racl fields in the indexed content will have the permission entity IDs for the groups.

Limitations

  • Anonymous Access: SearchAssist does not support anonymous access to content. If a page is publicly accessible or allows anonymous access in Confluence Cloud, SearchAssist will not currently permit viewing of the file content.
  • User Identity Management: Access control in Confluence Cloud relies on the user’s email address as their unique identity. To ensure proper identity management in SearchAssist, the account used for configuring SearchAssist must be able to view user email addresses. This typically requires using an admin account or ensuring users have enabled the necessary settings in their Confluence profiles.