GETTING STARTED
SearchAssist Overview
SearchAssist Introduction
Onboarding SearchAssist
Build your first App
Glossary
Release Notes
What's new in SearchAssist
Previous Versions

CONCEPTS
Managing Sources
Introduction
Files
Web Pages
FAQs
Structured Data 
Connectors
Introduction to Connectors
Azure Storage Connector
Confluence Cloud Connector
Confluence Server Connector
Custom Connector
DotCMS Connector
Dropbox Connector
Google Drive Connector
Oracle Knowledge Connector
Salesforce Connector
ServiceNow Connector
SharePoint Connector
Zendesk Connector
RACL
Virtual Assistants
Managing Indices
Introduction
Index Fields
Traits
Workbench
Introduction to Workbench
Field Mapping
Entity Extraction
Traits Extraction
Keyword Extraction
Exclude Document
Semantic Meaning
Snippet Extraction
Custom LLM Prompts
Index Settings
Index Languages
Managing Chunks
Chunk Browser
Managing Relevance
Introduction
Weights
Highlighting
Presentable
Synonyms
Stop Words
Search Relevance
Spell Correction
Prefix Search
Custom Configurations
Personalizing Results
Introduction
Answer Snippets
Introduction
Extractive Model
Generative Model
Enabling Both Models
Simulation and Testing
Debugging
Best Practices and Points to Remember
Troubleshooting Answers
Answer Snippets Support Across Content Sources
Result Ranking
Facets
Business Rules
Introduction
Contextual Rules
NLP Rules
Engagement
Small Talk
Bot Actions
Designing Search Experience
Introduction
Search Interface
Result Templates
Testing
Preview and Test
Debug Tool
Running Experiments
Introduction
Experiments
Analyzing Search Performance
Overview
Dashboard
User Engagement
Search Insights
Result Insights
Answer Insights

ADMINISTRATION
General Settings
Credentials
Channels
Team
Collaboration
Integrations
OpenAI Integration
Azure OpenAI Integration
Custom Integration
Billing and Usage
Plan Details
Usage Logs
Order and Invoices
Smart Hibernation

SearchAssist APIs
API Introduction
API List

SearchAssist SDK

HOW TOs
Use Custom Fields to Filter Search Results and Answers
Add Custom Metadata to Ingested Content
Write Painless Scripts
Configure Business Rules for Generative Answers

Introduction to Workbench

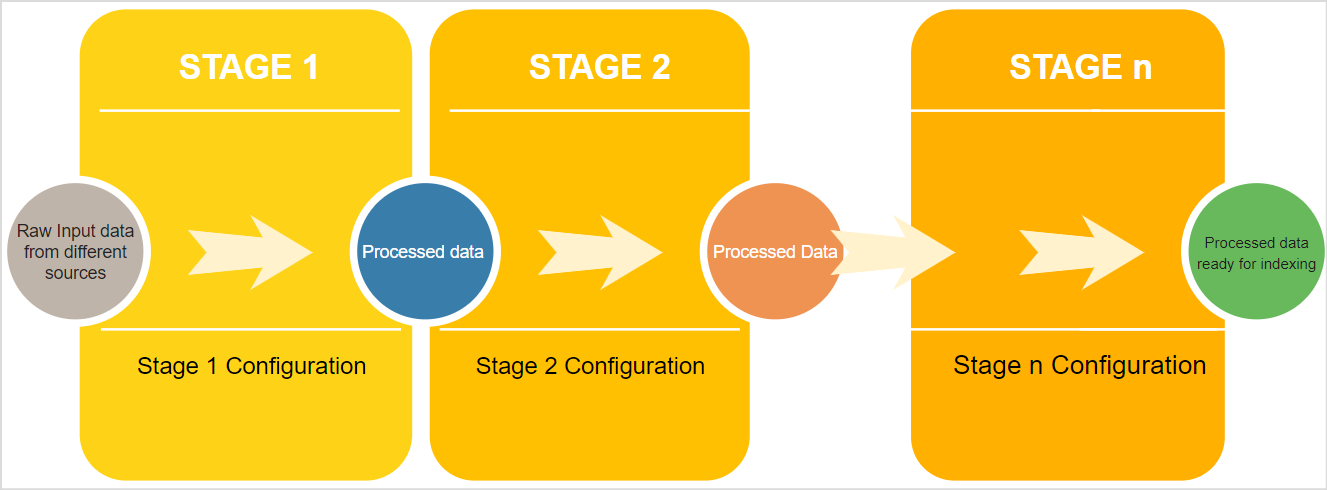
Workbench is a SearchAssist tool that converts content into objectively indexed documents. It processes the ingested content in a series of stages known as the Index Pipeline. Collectively, the Index pipeline converts the ingested content into a document ready for indexing. Each stage performs a specific set of data transformations before passing the content onto the next stage in the pipeline. The data transformations at each step can be customized as per your business needs using the configuration parameters for the stage. You can use the simulator to test the configuration at each step individually or the cumulative effect of the various stages. You can rearrange or sequence the stages in any preferred order as per your requirements. To summarize, the workbench operations can be represented as:

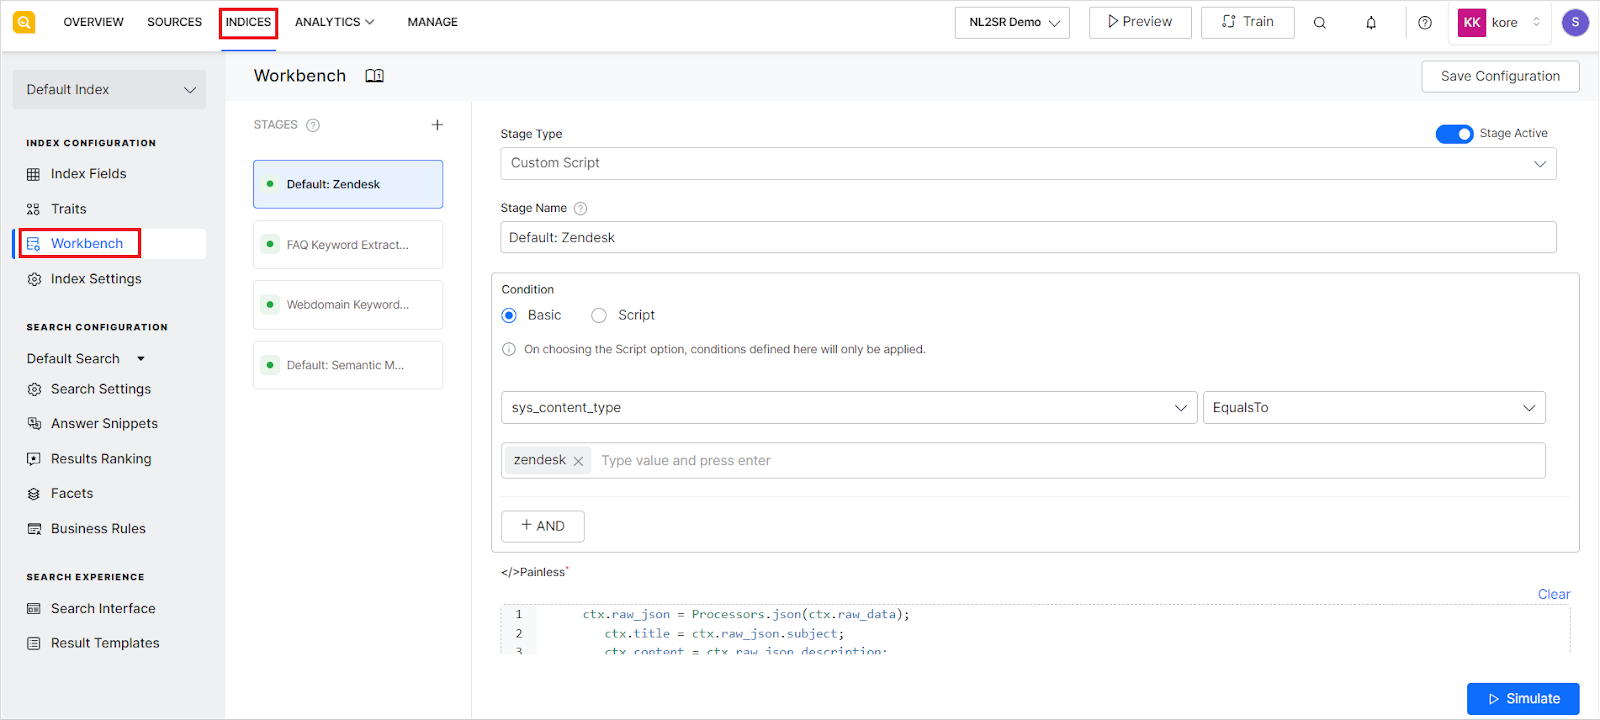
To configure the workbench and introduce Index Pipeline stages for content processing, go to the Workbench page under the Indices tab.

SearchAssist supports the following Index Pipeline stages. 

  • Field Mapping maps fields in an indexing pipeline document to a target field, sets values, copies values, removes fields, renames fields, and more.
  • Entity Extraction uses NLP techniques to identify named entities from the source field. For example, finding dates or geographic locations from a document. 
  • Traits Extraction extracts specific attributes that search users might express in their conversations. When traits are extracted from the source documents, SearchAssist can find more relevant results for the users. 
  • Custom Script stage allows you to enter customized scripts to perform any operations on the fields like deleting or renaming fields.
  • Keyword Extraction automatically detects and extracts important words stored in a field. 
  • Exclude Document stage drops all the documents that match the specified condition.
  • Semantic Meaning is a technique to understand the meaning and interpretation of words, signs, and sentence structure. This stage currently supports web page-related sources only.
  • Snippet Extration stage allows you to configure the answer snippets generation from the documents. 
  • Custom LLM prompt stage allows you to configure the prompts to be used for data enrichment using the third-party LLMs. 

Each indexing stage has properties like stage type, stage name, and applicable conditions to choose the index fields that must be transformed and the change to be performed. 

Every time there is a change in any of the workbench stages or the Index pipeline, train the system before testing to ensure that the latest configuration is being used for indexing.

Adding a new stage to Workbench

By default, the following three Workbench stages are defined for every app: 

  • Keyword Extraction stage for FAQs
  • Keyword Extraction stage for web pages
  • Semantic meaning stage

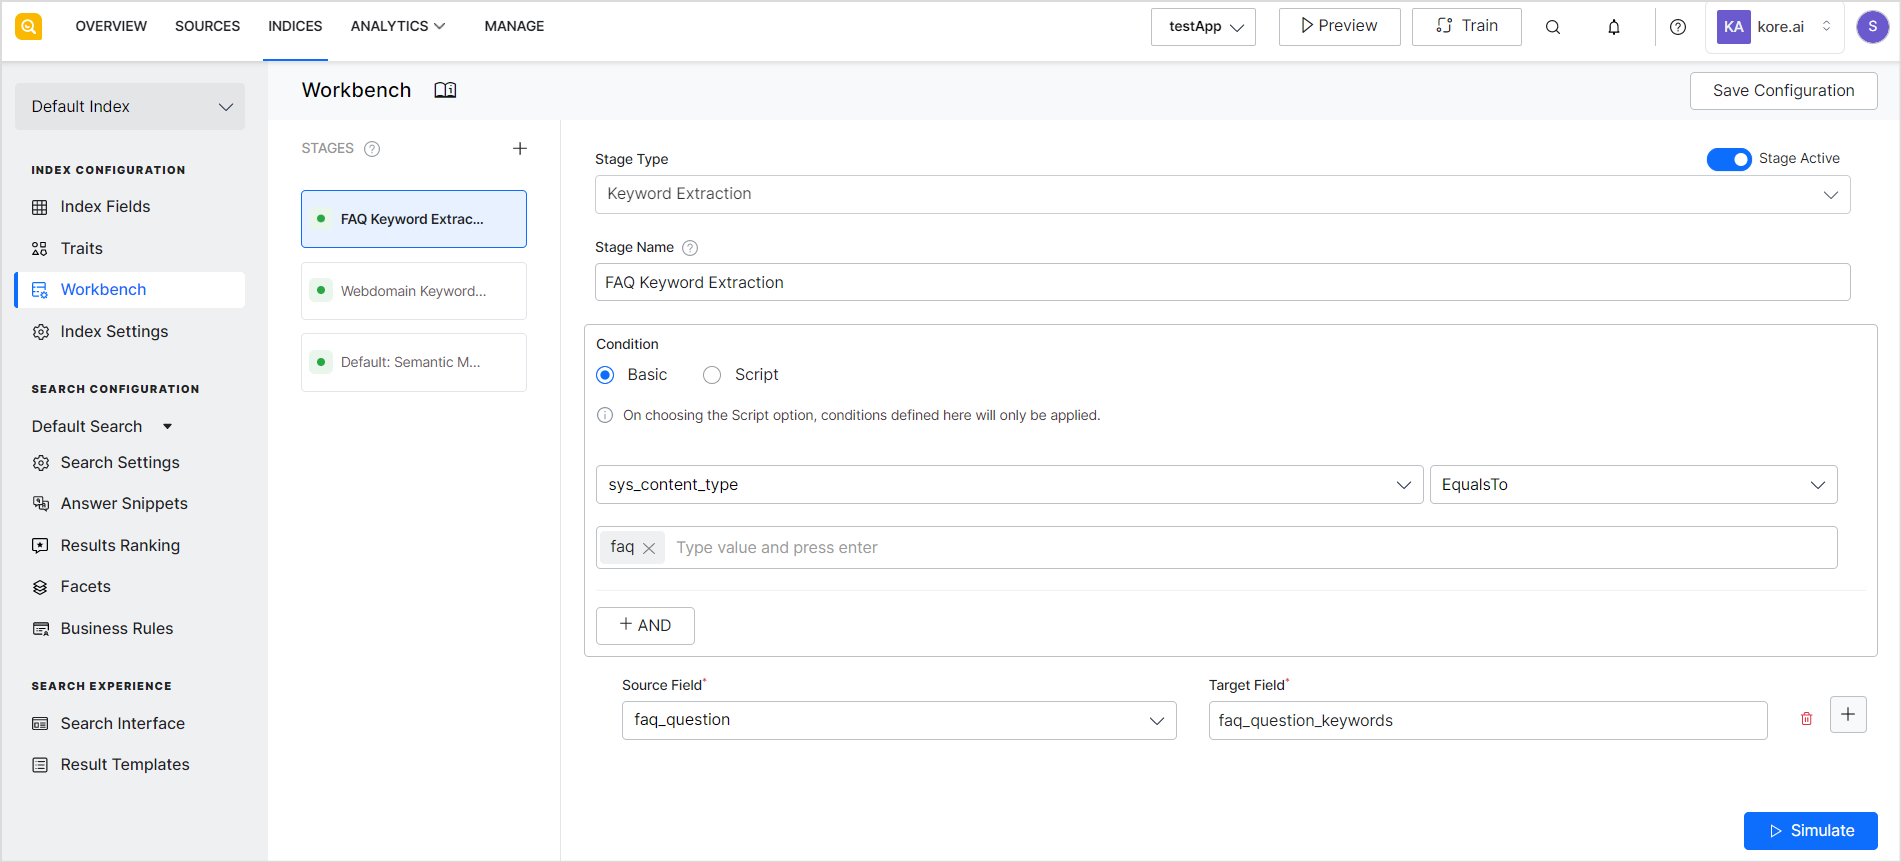
To add a new stage, click the Add stage button or the + icon.  Select the stage type you want to add from the drop-down menu.
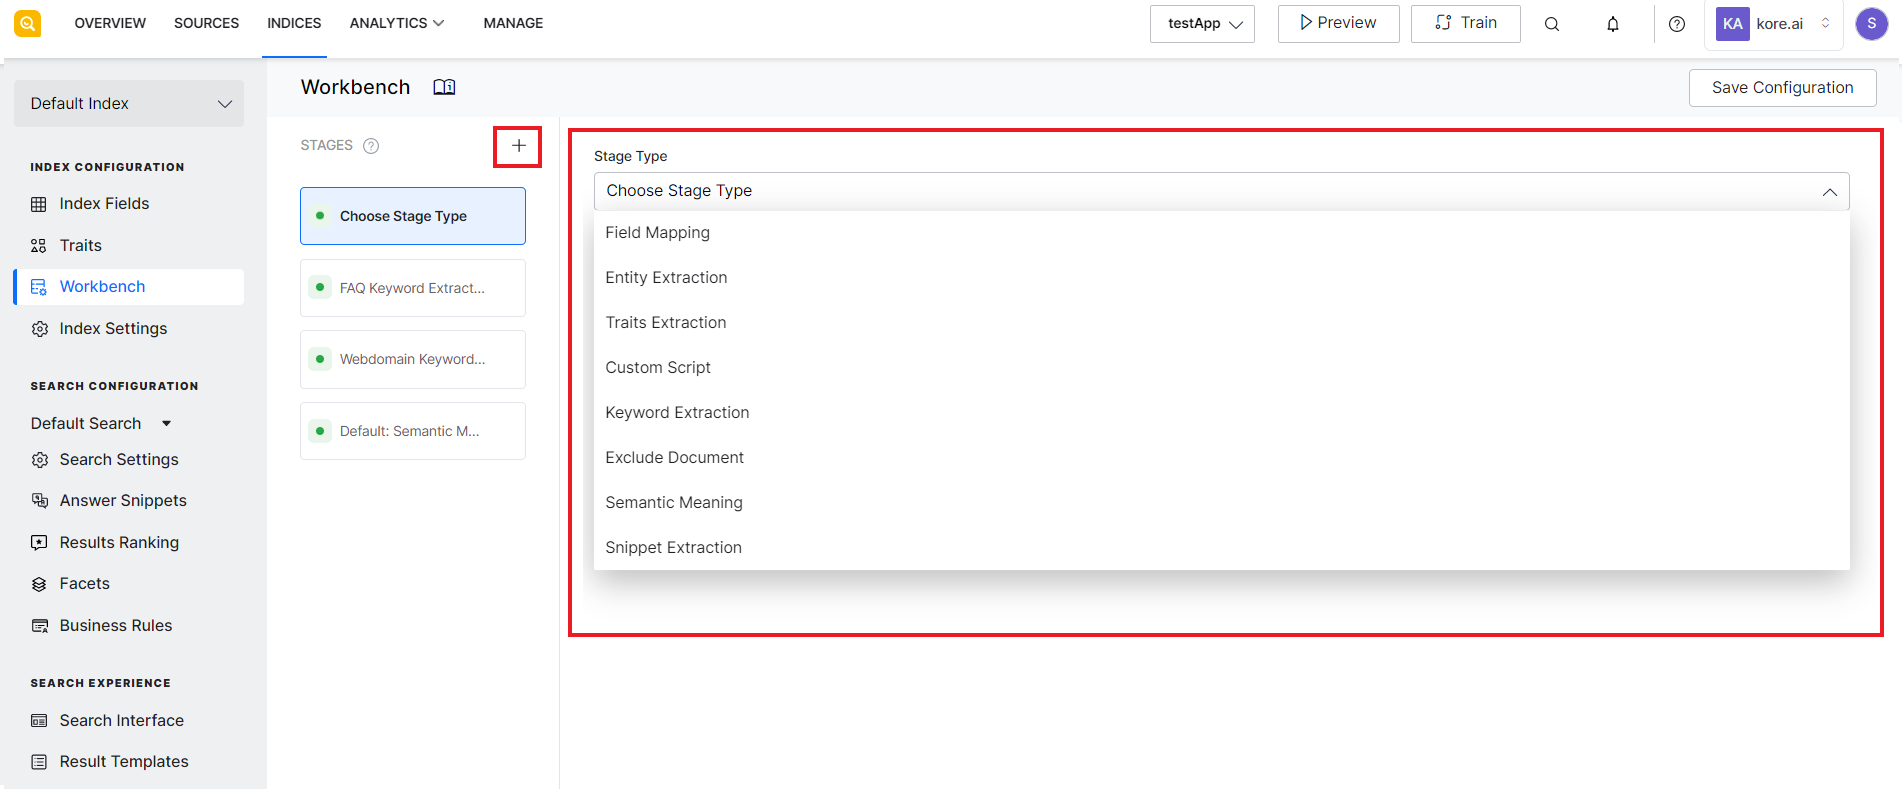
After selecting the Stage Type, set the related configuration parameters.  You can find more information about the configuration parameters for each stage under the details of the corresponding stage. Click Save Configuration to save the changes made to the Workbench. 

Ordering the Stages

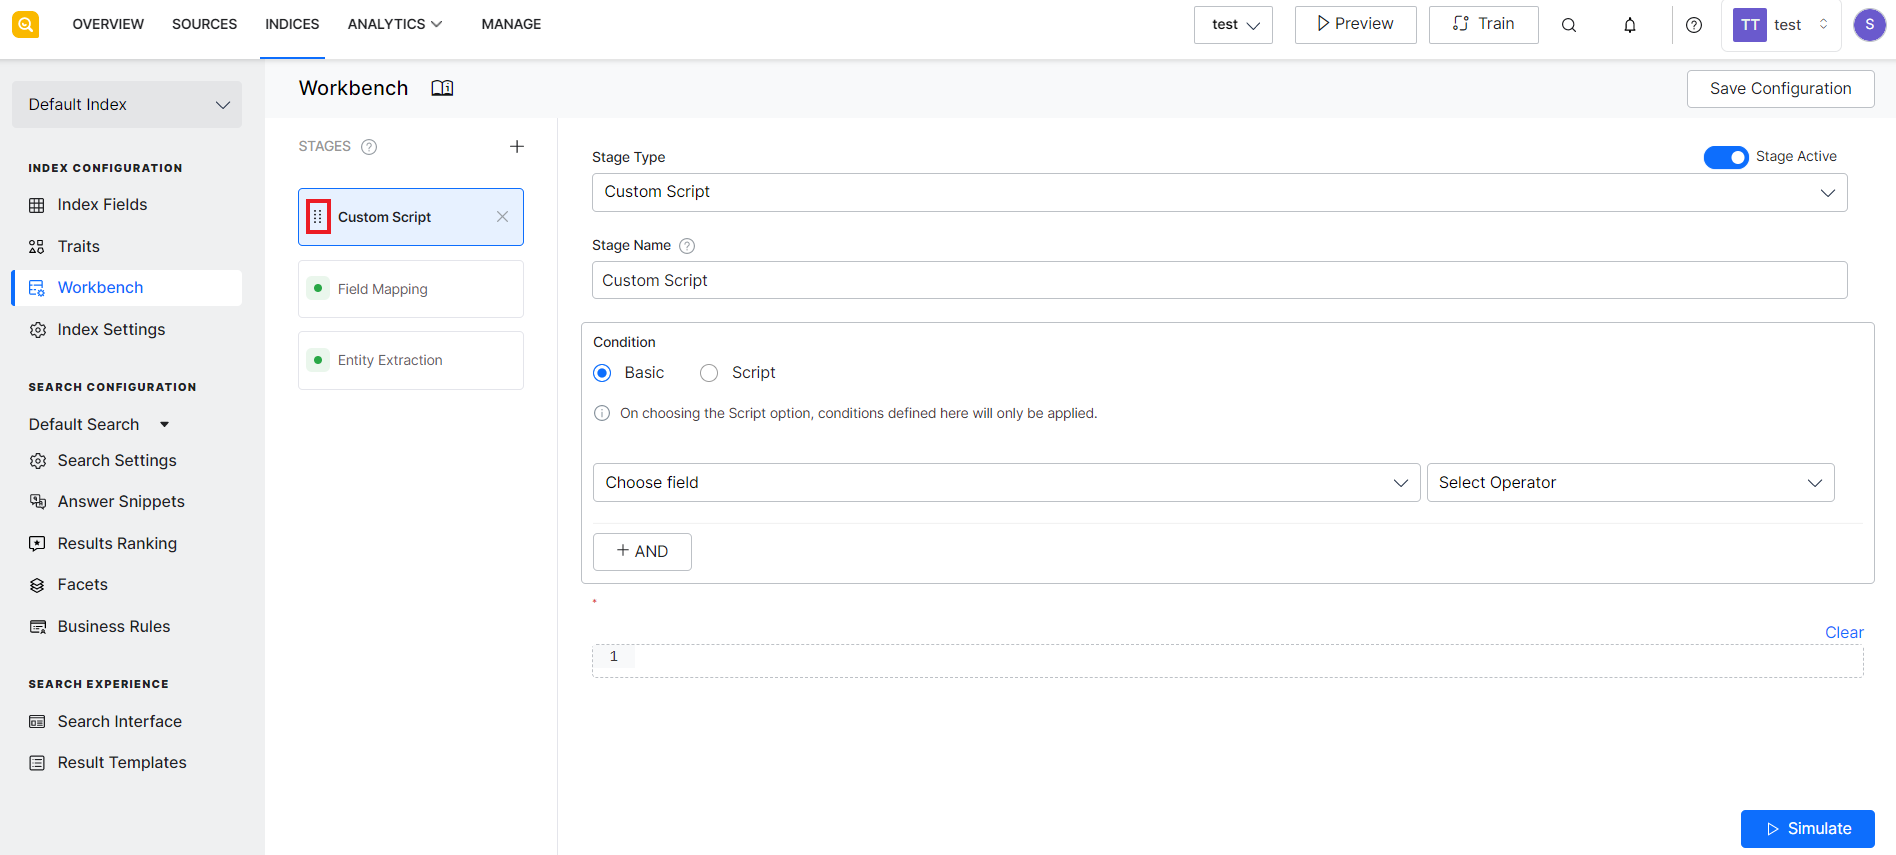
You can rearrange the stages at any time as per the order in which you want the data to be processed. To do so, go to the stage name that you want to move in the left panel and use the draggable dots icon to move and place the stage as required. 
 

Activating or Deactivating a stage

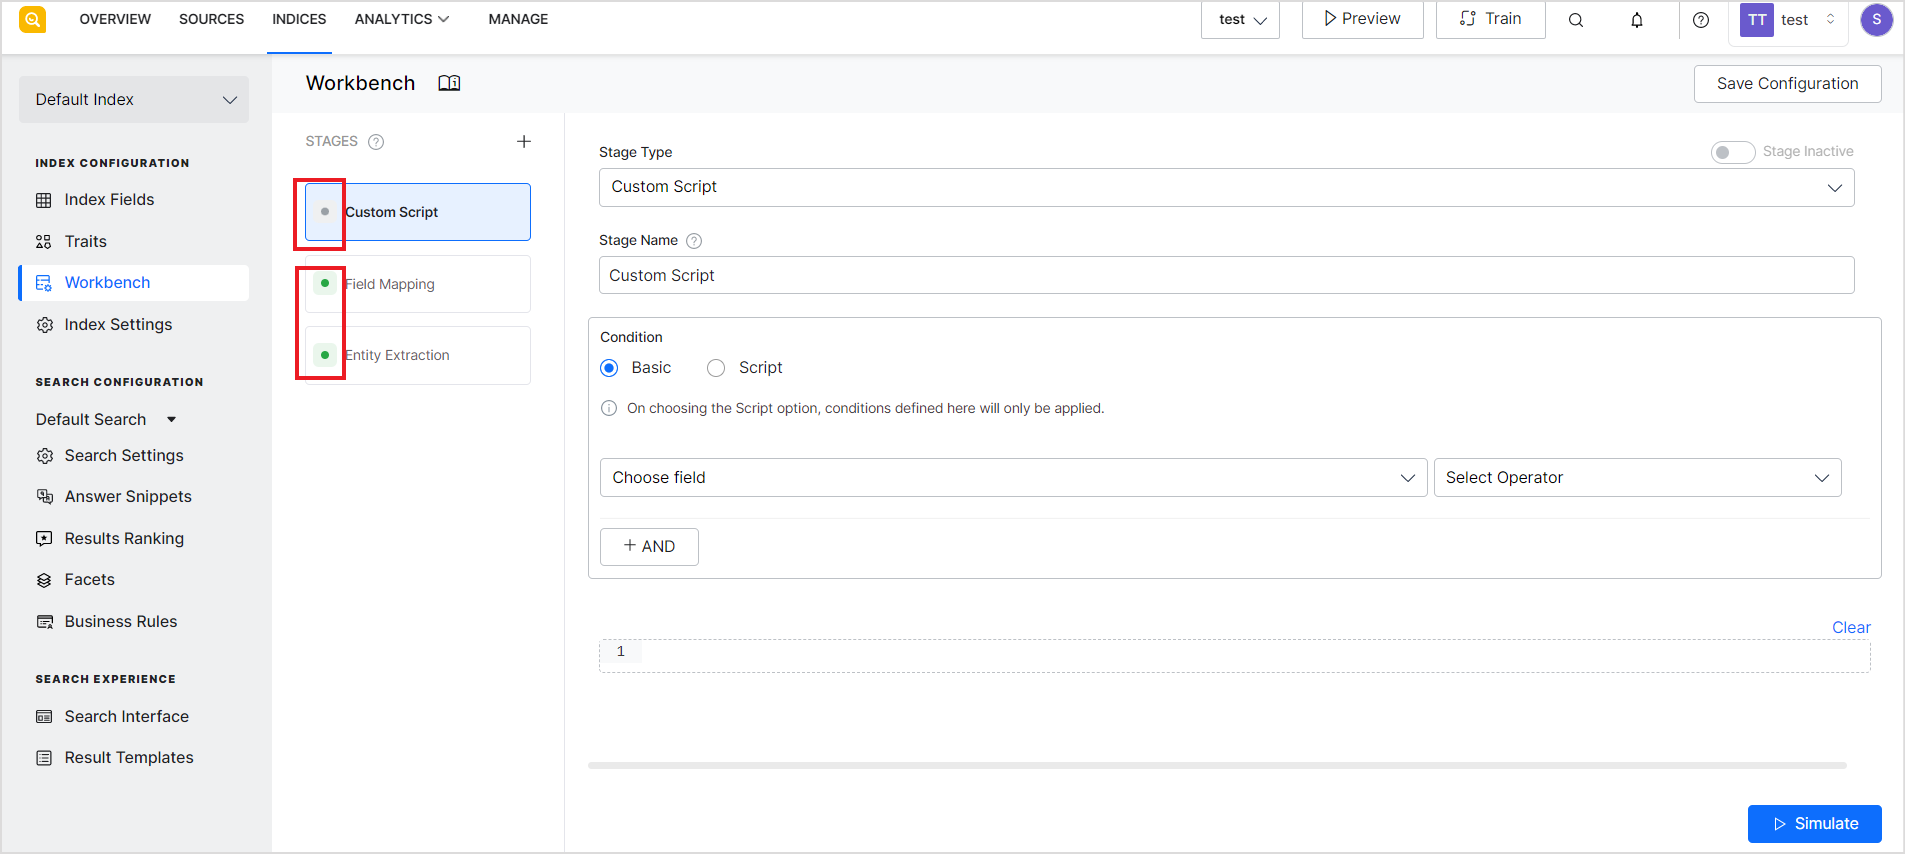
To activate or deactivate a stage, go to the stage and use the toggle button on the top right corner of the page. 
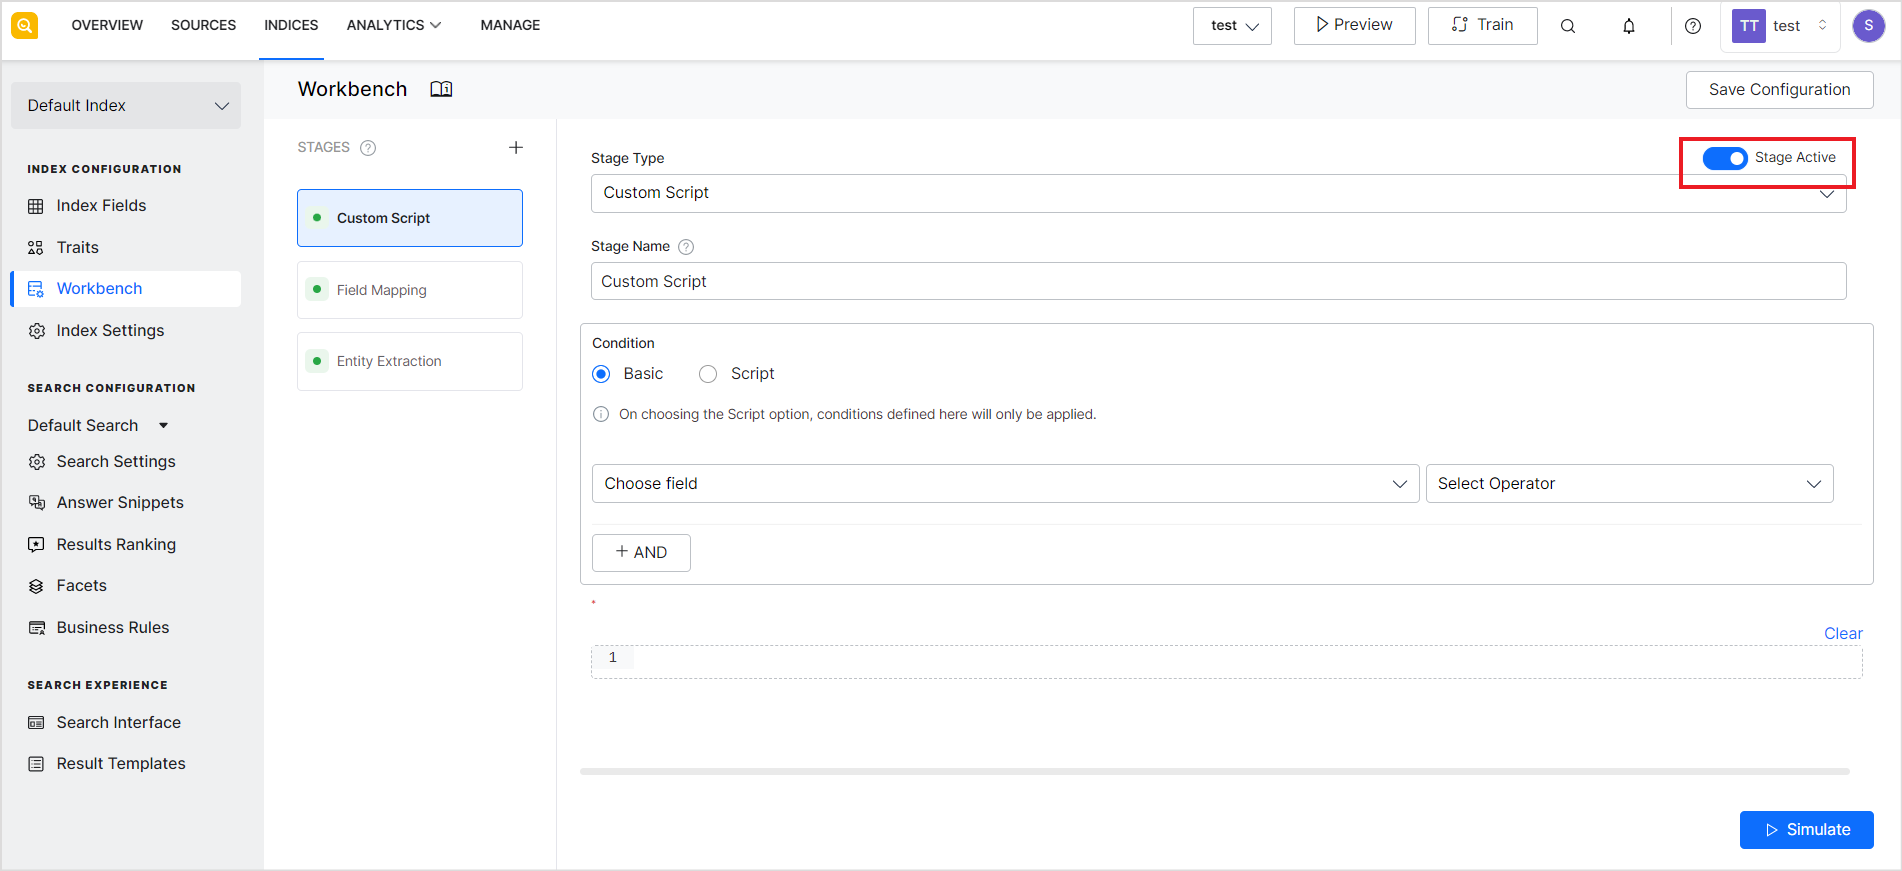
The active stages are represented by a green icon in the left panel whereas the inactive stages are shown in grey. 

Deleting a stage

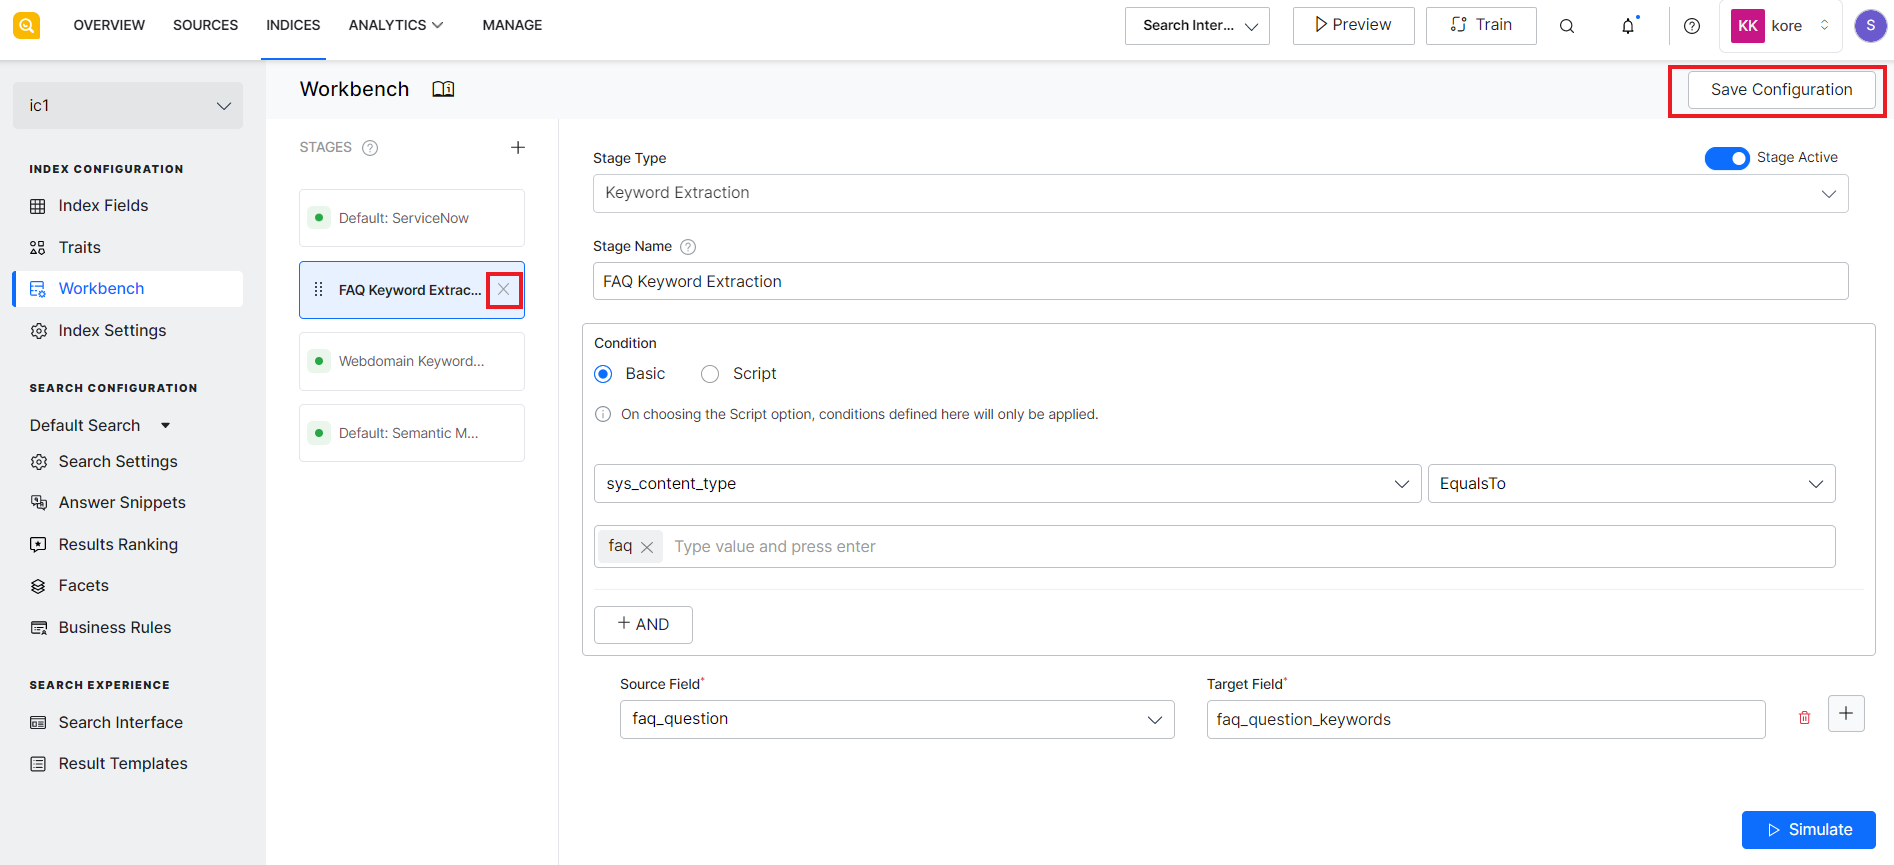
To delete a stage from the Workbench, go to the stage in the left panel, click the cross icon after the name of the stage on the left, and save the Workbench configuration. 
Testing and Simulation

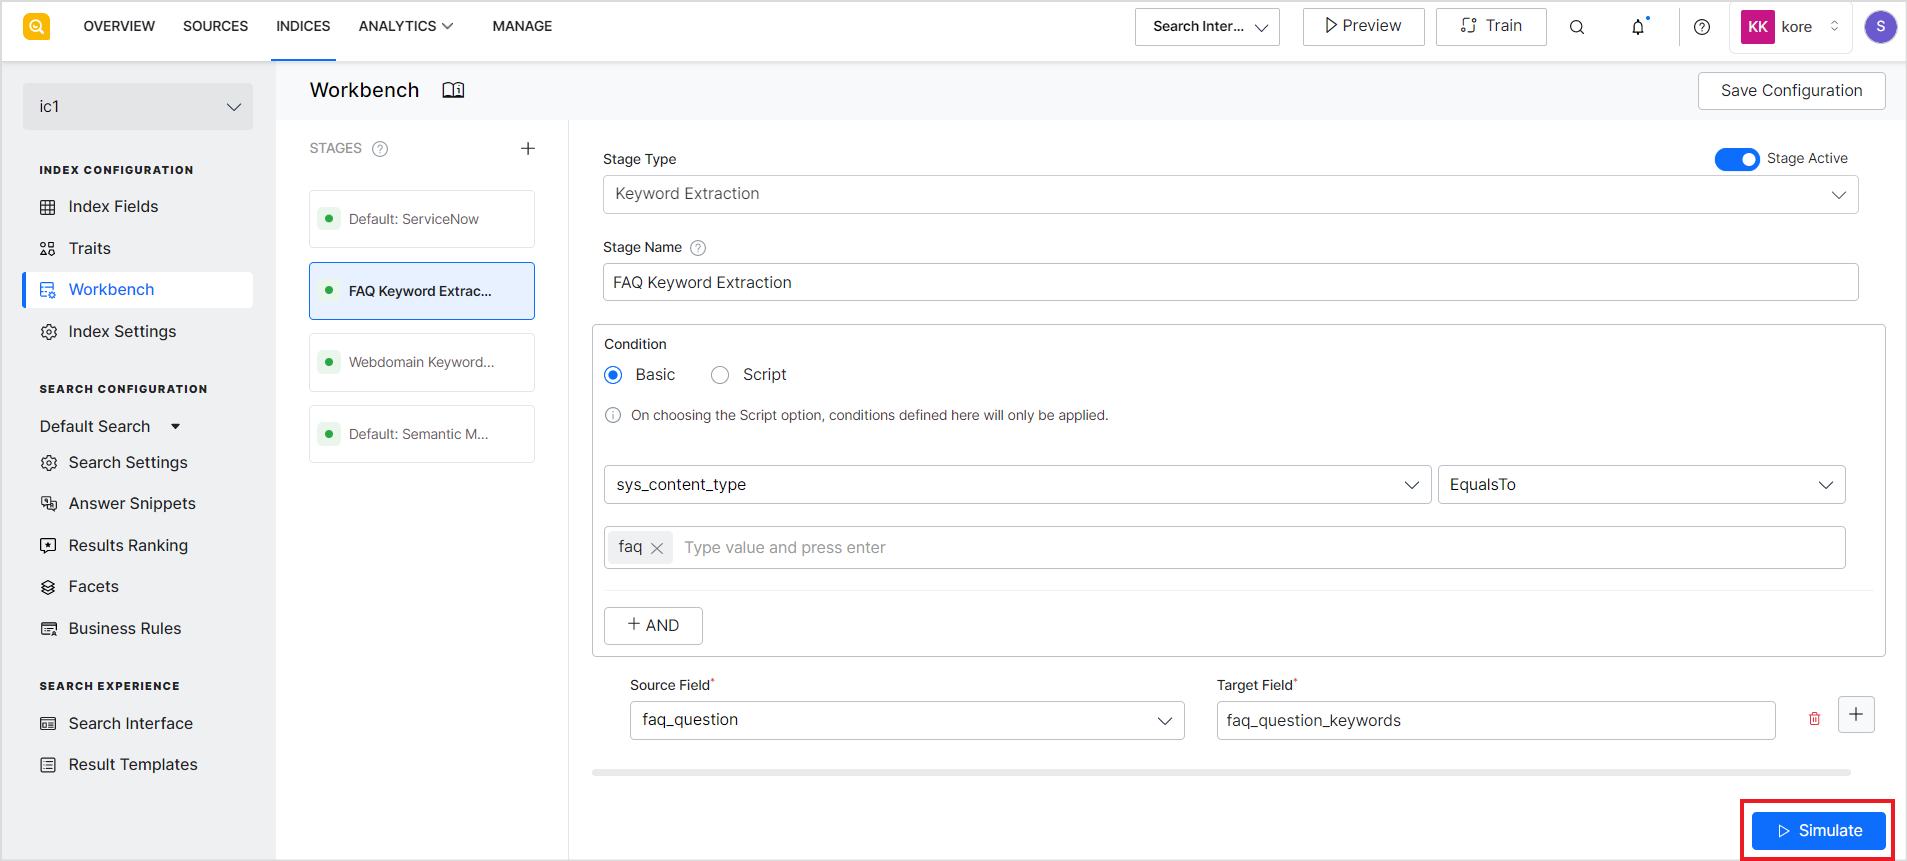
The Workbench comes with a built-in simulator that has an interactive preview of how the stage rules affect a document before it’s indexed. Click the Simulate button at any point to test the changes made to the source data due to the workbench stages. The simulation is performed on a sample set of documents. This can help you test the behavior of the Index Pipeline and fine-tune the output as per the requirements. 

The simulator shows the changes made to the input data when processed through all the stages of the Workbench in the order in which they are listed. When you select Simulate option on a particular stage, the simulation happens as per the stages before that stage. You can also test individual stages of the pipeline by making the other stages inactive temporarily.

The simulator can display up to 20 documents or records. You can choose to see the output of the workbench stages on all the types of source data or only on a particular type of data like webpages, files, etc.