Custom Integration provides a mechanism that enables you to integrate SearchAssist with any third-party LLM. This provides flexibility to the customers to use the LLM of their choice which offers numerous advantages in terms of flexibility, performance, security, scalability, and innovation.
Integration Overview
The diagram below summarizes how SearchAssist can interact with custom LLM. This is implemented using an Answering Service. Answering Service is an interface used to communicate between SearchAssist and the custom LLM. 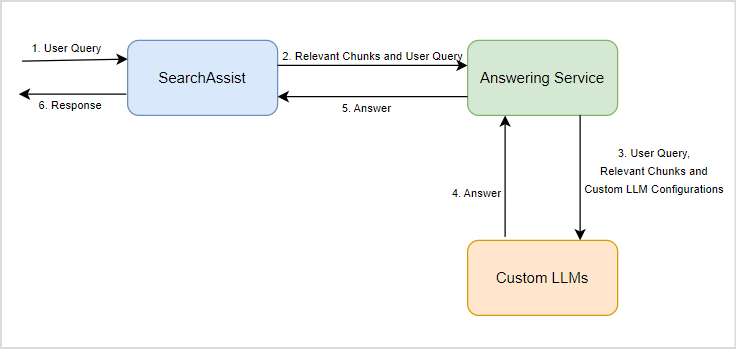
- When a user sends a query to SearchAssist, the application searches for the relevant chunks.
- The relevant chunks along with the user query are sent to the Answering Service.
- The Answering Service further adds all the config information required by the custom LLM to generate the corresponding answer and forwards the request.
- Custom LLM generates the response based on the inputs and sends it back to the Answering Service.
- The Answering Service then sends the response back as Answer to the SearchAssist application.
- The SearchAssist application then displays it to the user.
Note that a sample Answering Service is offered by Kore. You can use it to communicate with your custom LLM or enhance it further as per your requirements. However, it is important to adhere to the request format (in which SearchAssist sends a user query along with relevant chunks) and the response format (in which SearchAssist expects the answer from the Answering Service) for seamless communication.
To enable communication with custom LLM
- Run the Answering Service.
- Enable Custom Integration in the SearchAssist application.
Running Answering Service
- Download and Set Up: You can download the sample service code or implement your service. The sample service can be downloaded from here. It is a Node.js service. If you plan to implement your own Answering Service, adhere to the request and response format published in the sample service for seamless interaction with SearchAssist.
- Configuration: The sample service allows you to integrate with OpenAI and Azure OpenAI for answering. Make necessary configuration changes to enable communication with any custom LLM. For more information, refer to this.
- Run the service: Install the necessary packages and run the service.
Enabling Custom Integration in SearchAssist
Go to the Integrations page under the Manage tab. Select Custom Integration. 
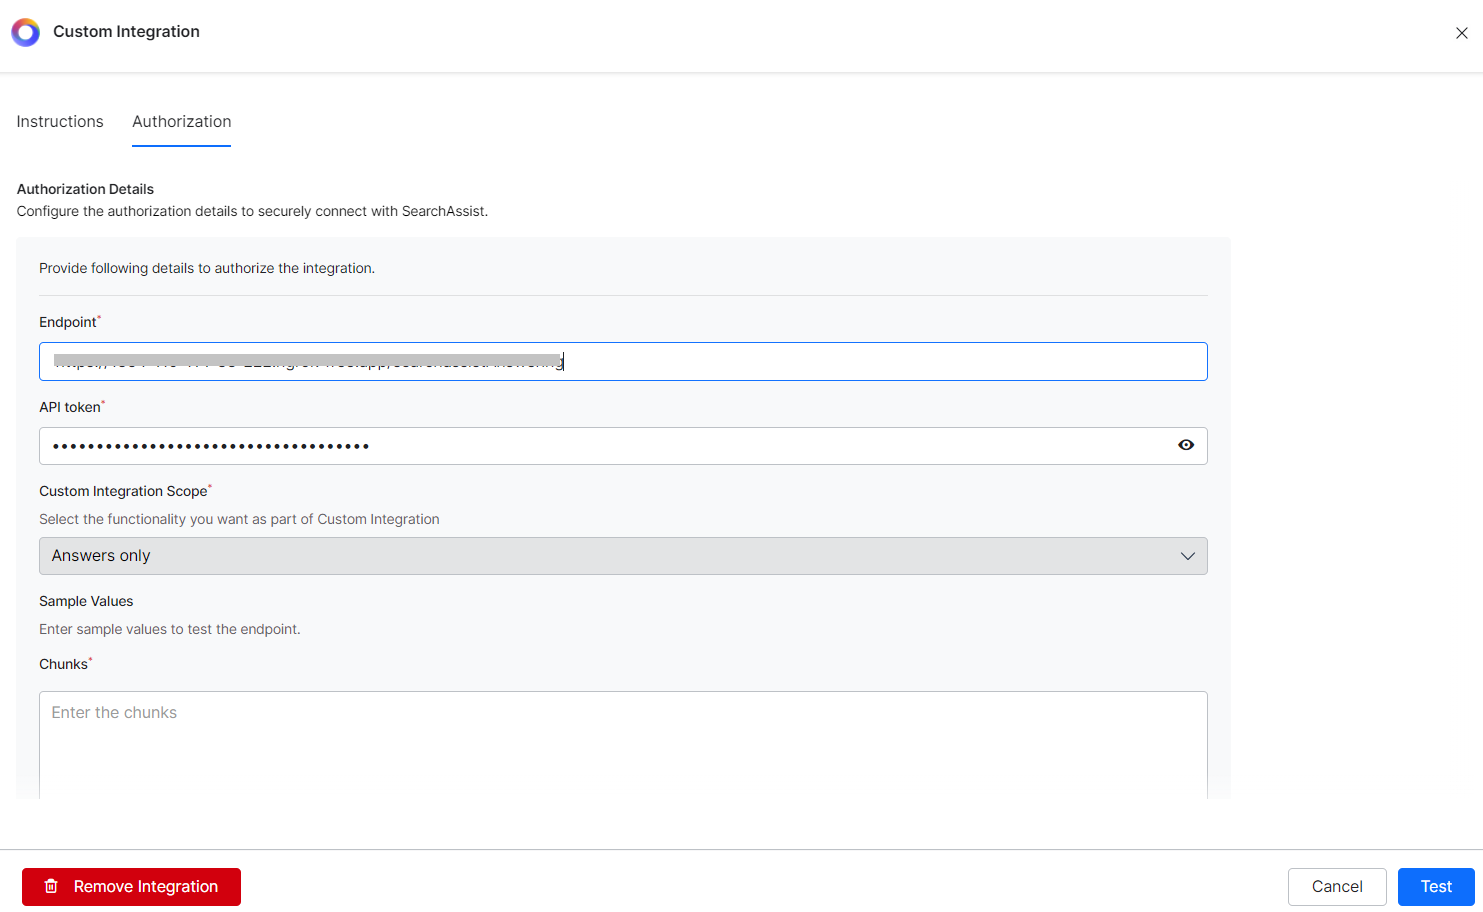
On the Authorization tab, enter the following details of the Answering Service.
- Endpoint: The URL where the Answering Service is hosted.
- Under the Auth tab, choose the authorization profile to be used for interacting with the custom LLM. Refer to Authorization Profiles for more details.
- Under the Headers tab, provide any fields to be sent as part of the headers in the request. Note that to communicate with the Kore-offered answering service, it is mandatory to add the following field.
- api-token: Token for authenticating requests sent to the Answering service.
To test the configuration parameters and communication with the Answering Service, enter sample values for the user query and relevant chunks and click the Test button. 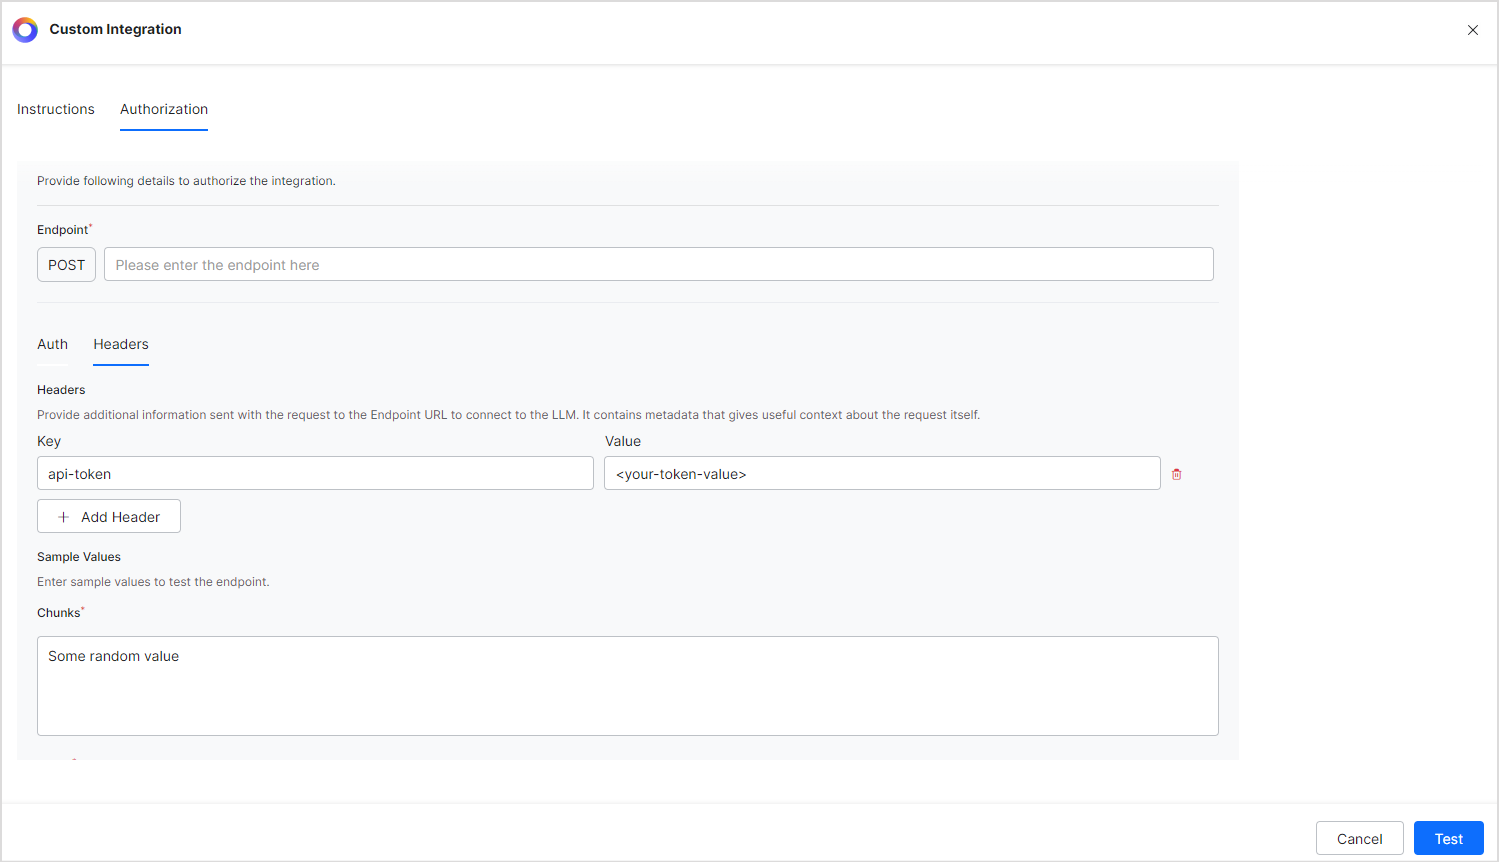
If the connection is successful, you will see the response from the service below the sample values. 
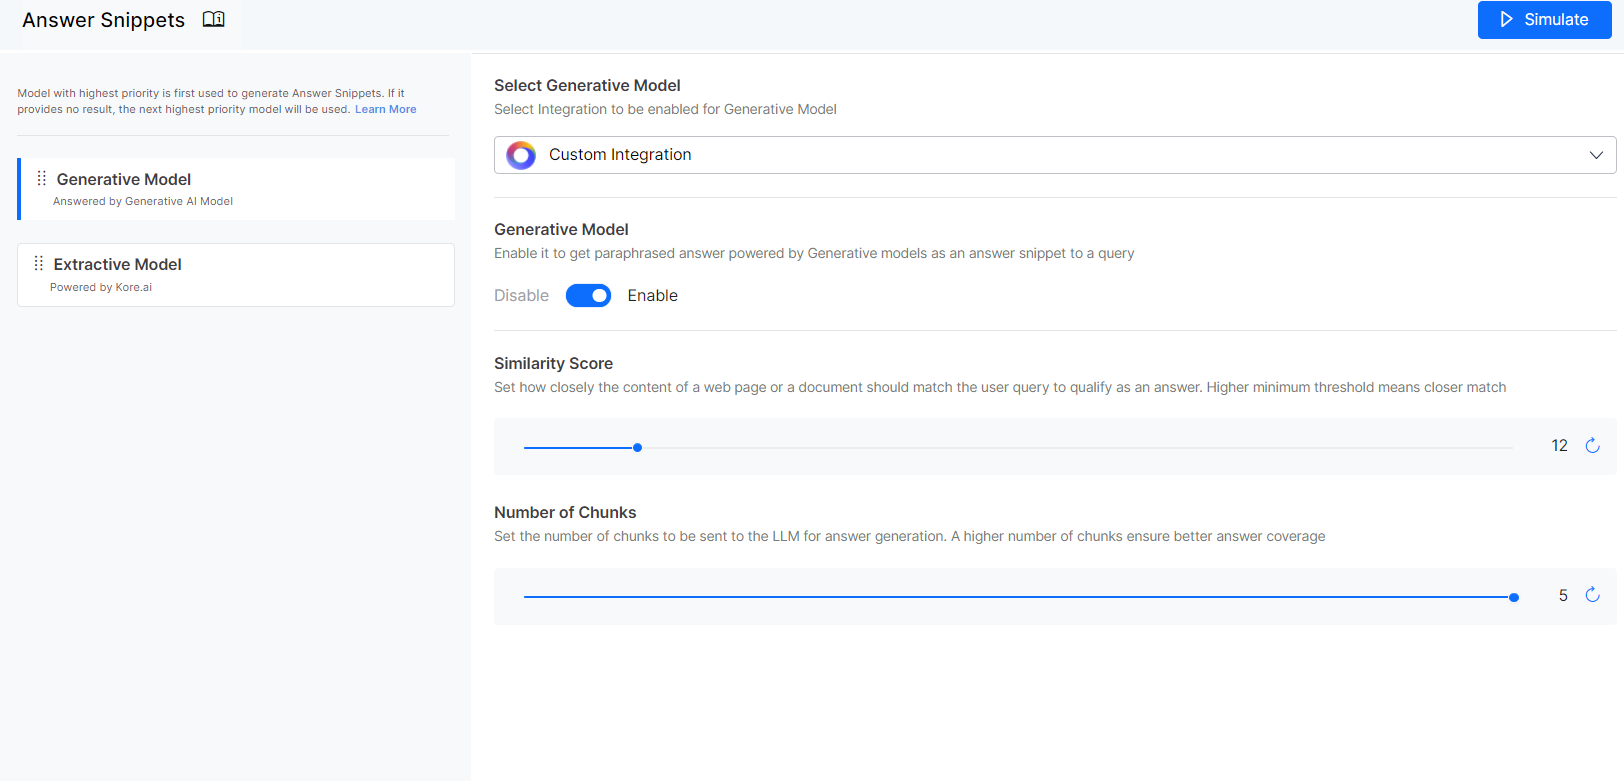
Next, go to the Answer Snippets page and select Custom Integration as the Generative Model. 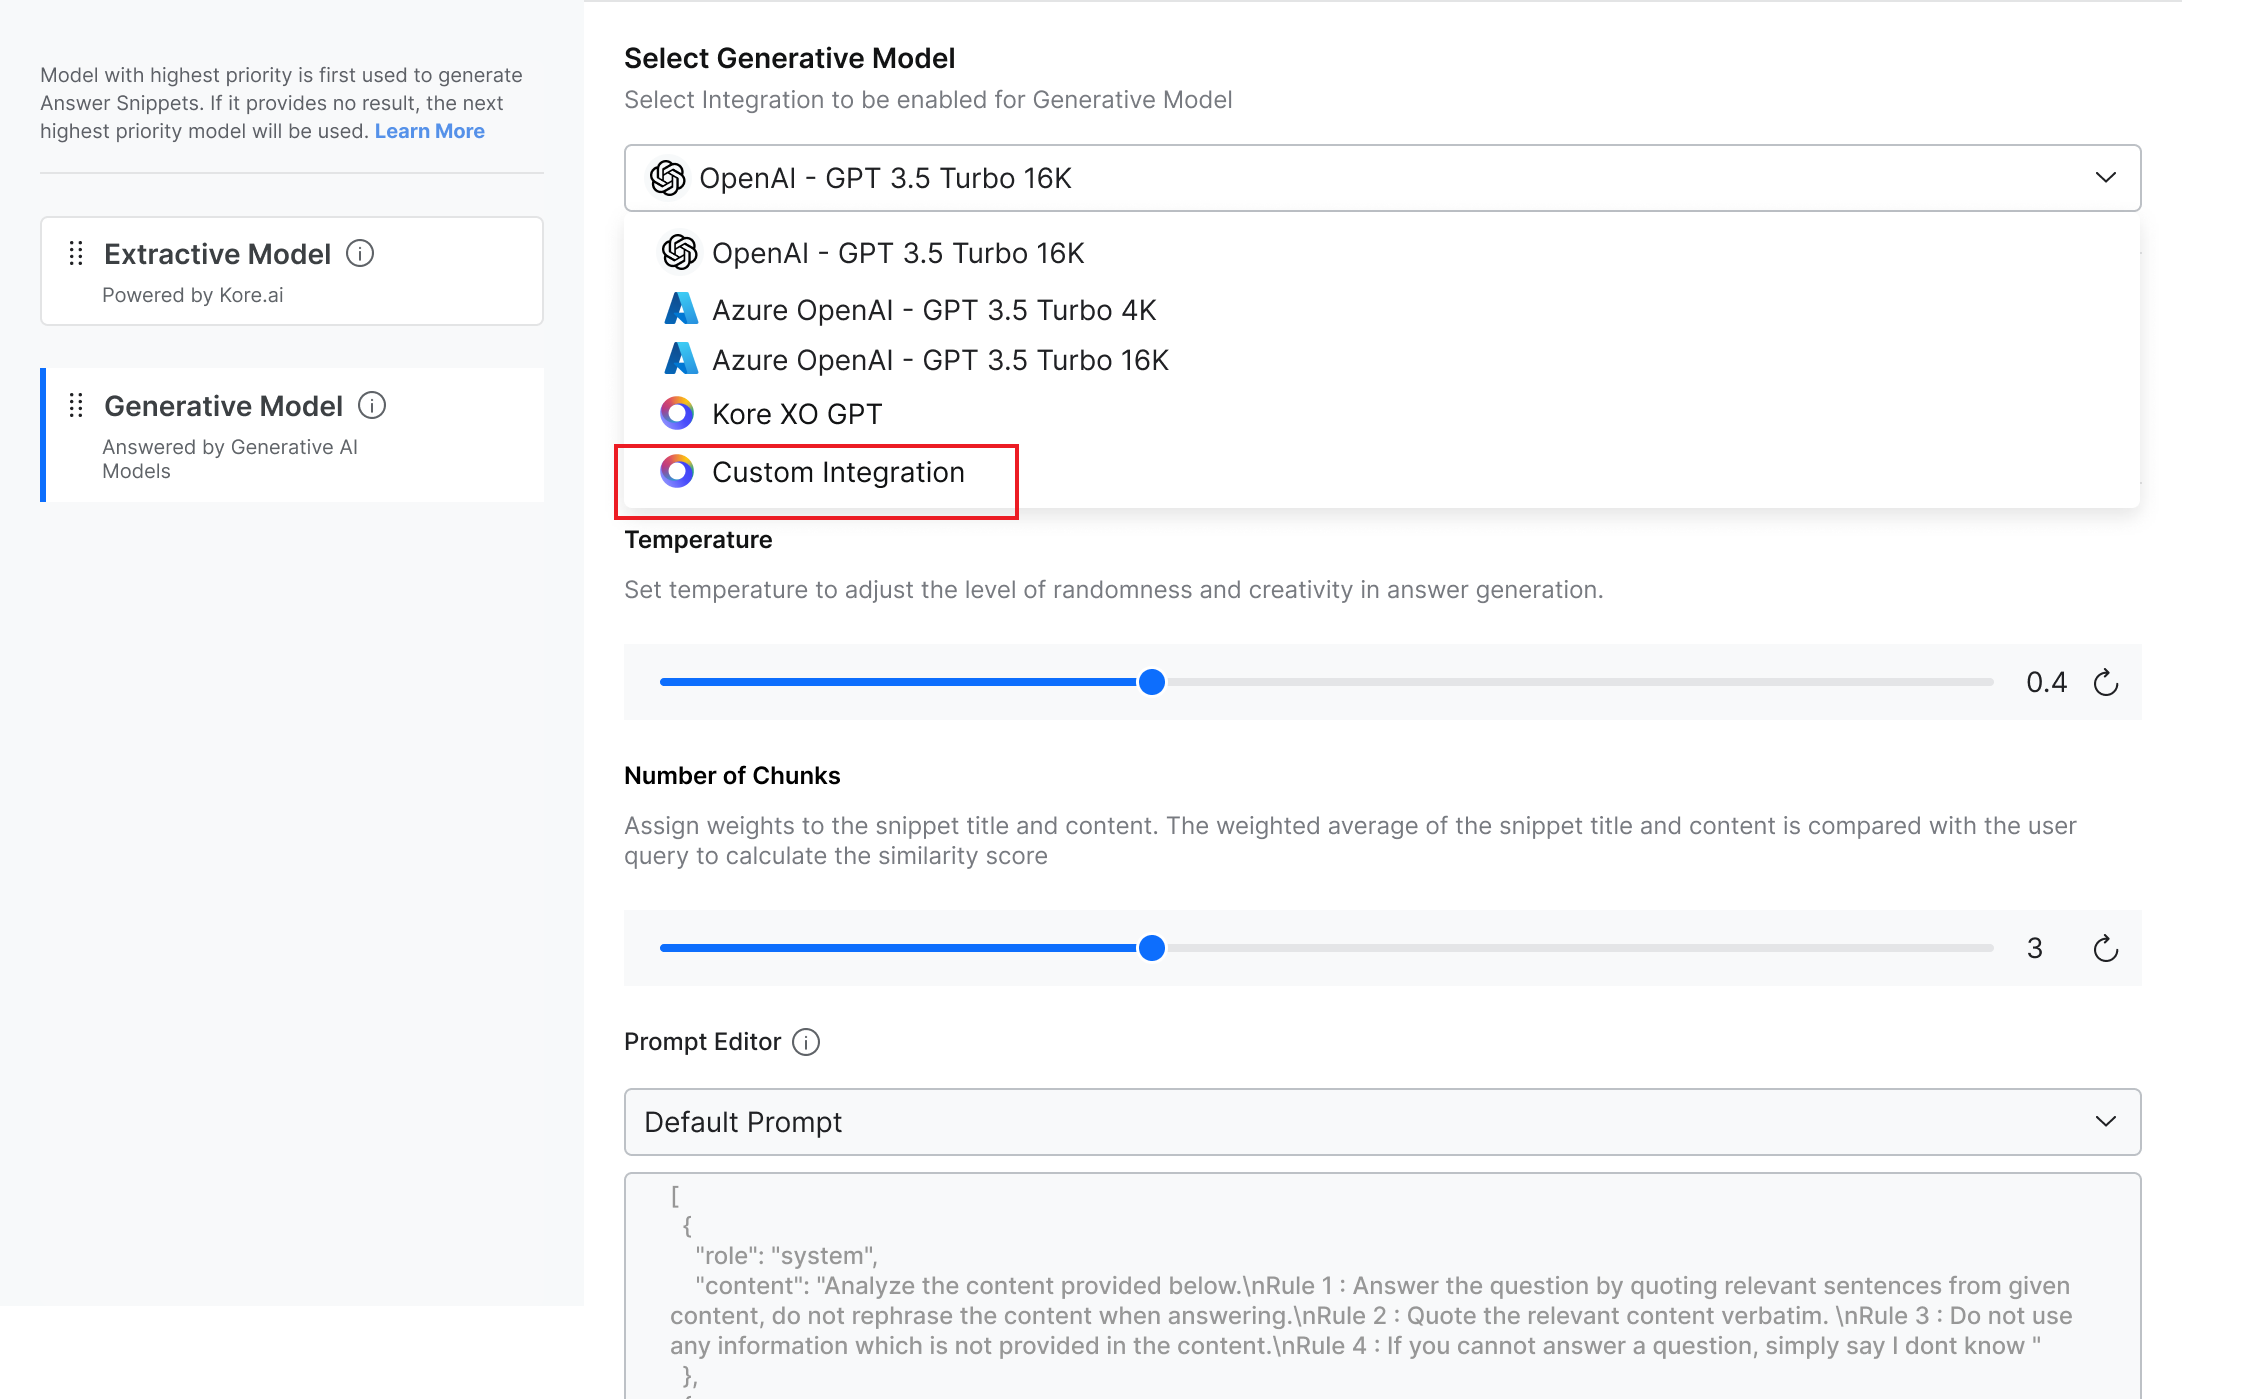
Configure the Similarity Score threshold and the number of chunks to be sent to the LLM.