To allow integration of SearchAssist with the Confluence server and ingest content, you need to
- Register the SearchAssist application in the Confluence Server.
- Configure the connector in SearchAssist with the OAuth 2.0 integration details.
Registering the SearchAssist application in the Confluence Server
There are two ways to authorize and set up communication between Confluence and Server:
- Using Basic Auth
- Using OAuth 2.0
Basic Auth requires you to provide your username and password to login to the Confluence Server. So, no specific configuration is needed on the Server side to fetch content from the Confluence Server.
OAuth 2.0 authentication requires creating an incoming link in the application links section on the Confluence server. During the registration process, set the Redirect URL as per your region and enable proper scopes to limit the range of resources that the SearchAssist application can access.
Depending upon your region, you can use one of the following URLs as the Redirect URL.
- JP Region Callback URL: https://jp-bots-idp.kore.ai/workflows/callback
- DE Region Callback URL: https://de-bots-idp.kore.ai/workflows/callback
- Prod Region Callback URL: https://idp.kore.com/workflows/callback
Once you’ve created the link, you’ll receive the OAuth credentials: Client ID and Client Secret. These will be used to complete the configuration in the SearchAssist application.
For detailed information and step-by-step instructions, refer to this.
Configuring SearchAssist Connector
To complete the integration, do the following configuration in the SearchAssist application.
Go to Connectors under the Sources tab. 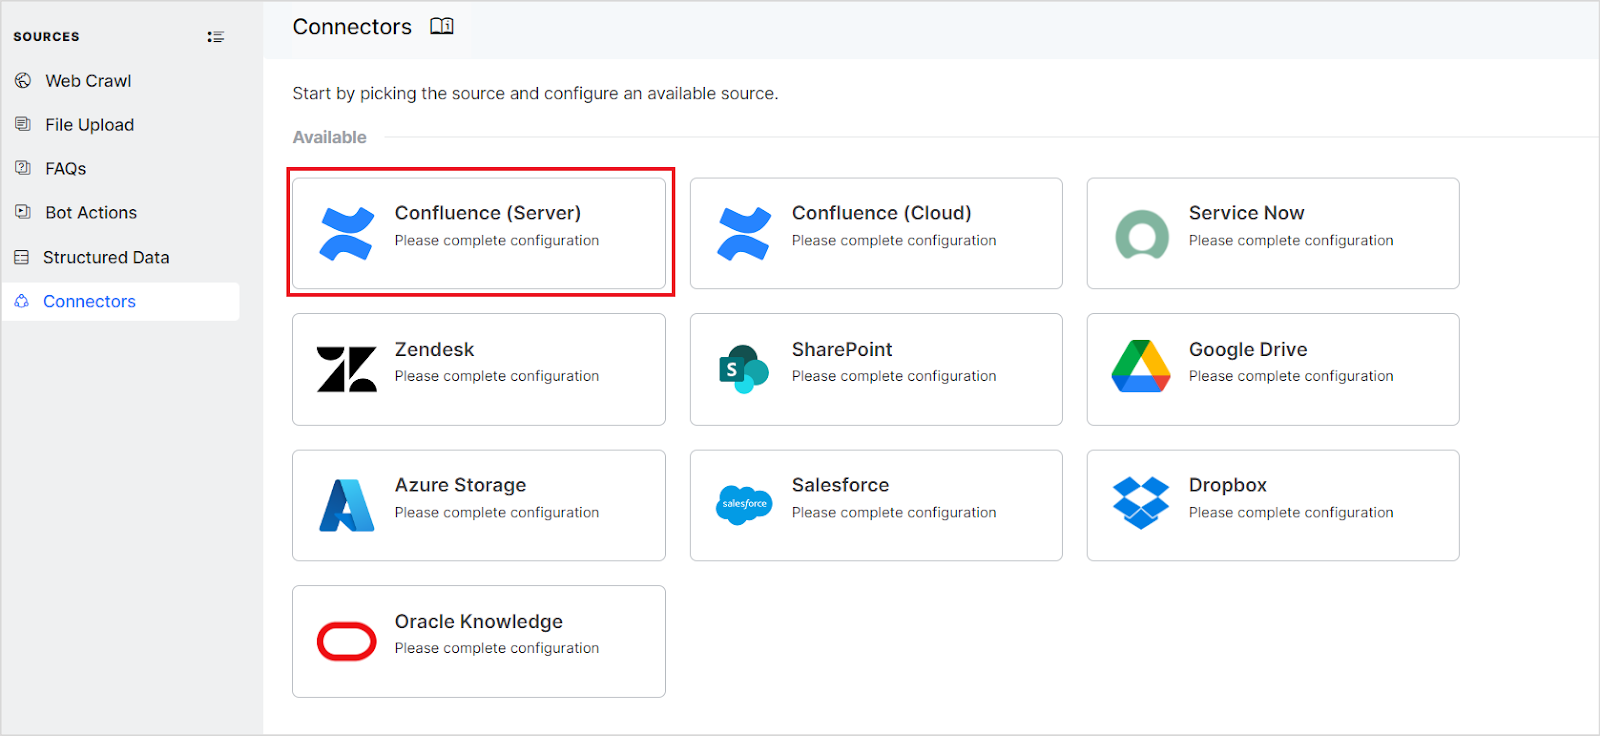
The following page provides instructions for the integration. Click Proceed. Confluence Server offers two ways of authorization – OAuth 2.0 and Basic Auth.
While using Basic Auth, provide the following information:
| Fields | Description |
| Name | Name for the connector |
| Username | Credentials for the Confluence server |
| Password | Credentials for the Confluence server |
| Host URL | The confluence server base URL (without trailing slash) |
While using OAuth 2.0 Authentication, provide the following information:
| Fields | Description |
| Name | Name for the connector |
| Client ID | Client ID of the OAuth application created on Confluence. |
| Client Secret | Client secret generated for communication with Confluence. |
| Host URL | The confluence server base URL (without trailing slash) |
| Host Domain Name | Domain name for the confluence server |
Click Connect, This will initiate the authorization process for the connector. 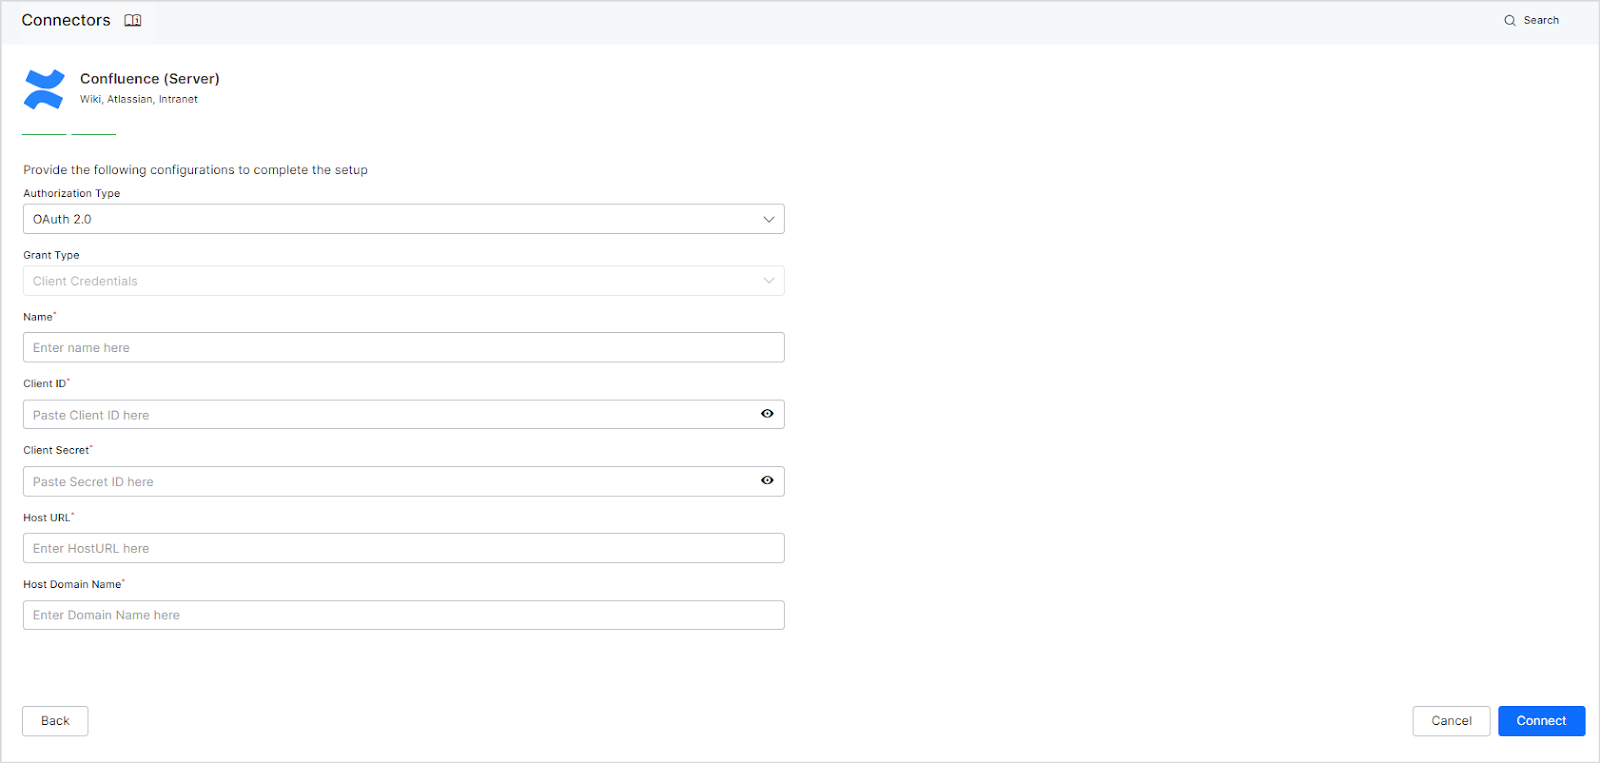
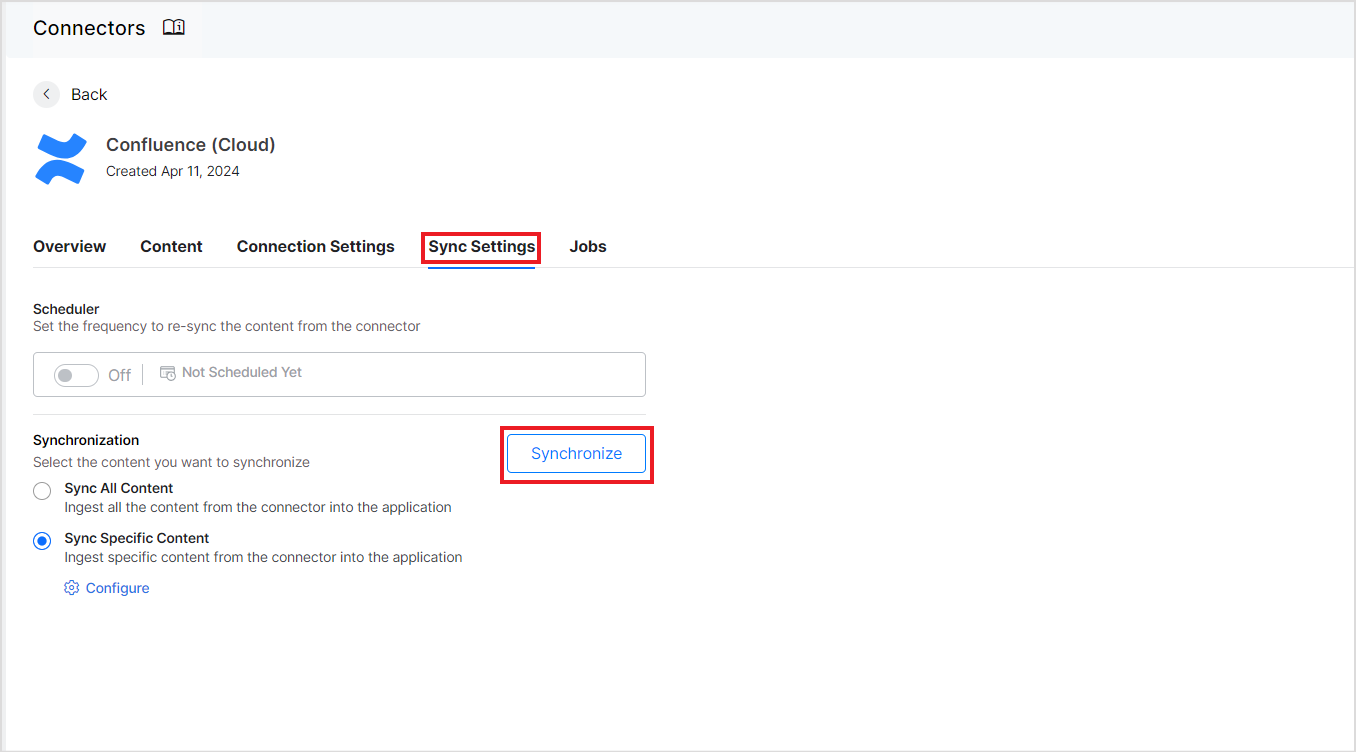
Once the authorization process is complete, you can select the content to be ingested into the application and initiate synchronization. Go to the Sync Settings tab and select the content. You can choose to sync all the content from the Confluence Cloud account or select specific content. Configure the content to be ingested and click Synchronize. You can also set a scheduler here for automatic content synchronization at regular intervals.
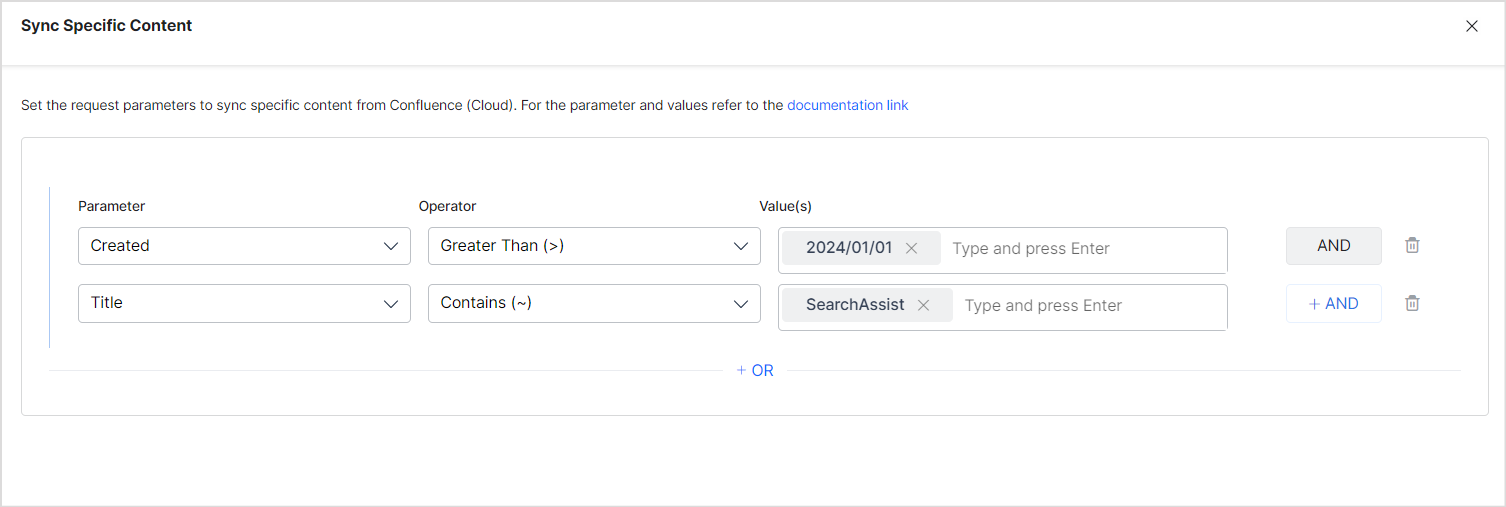
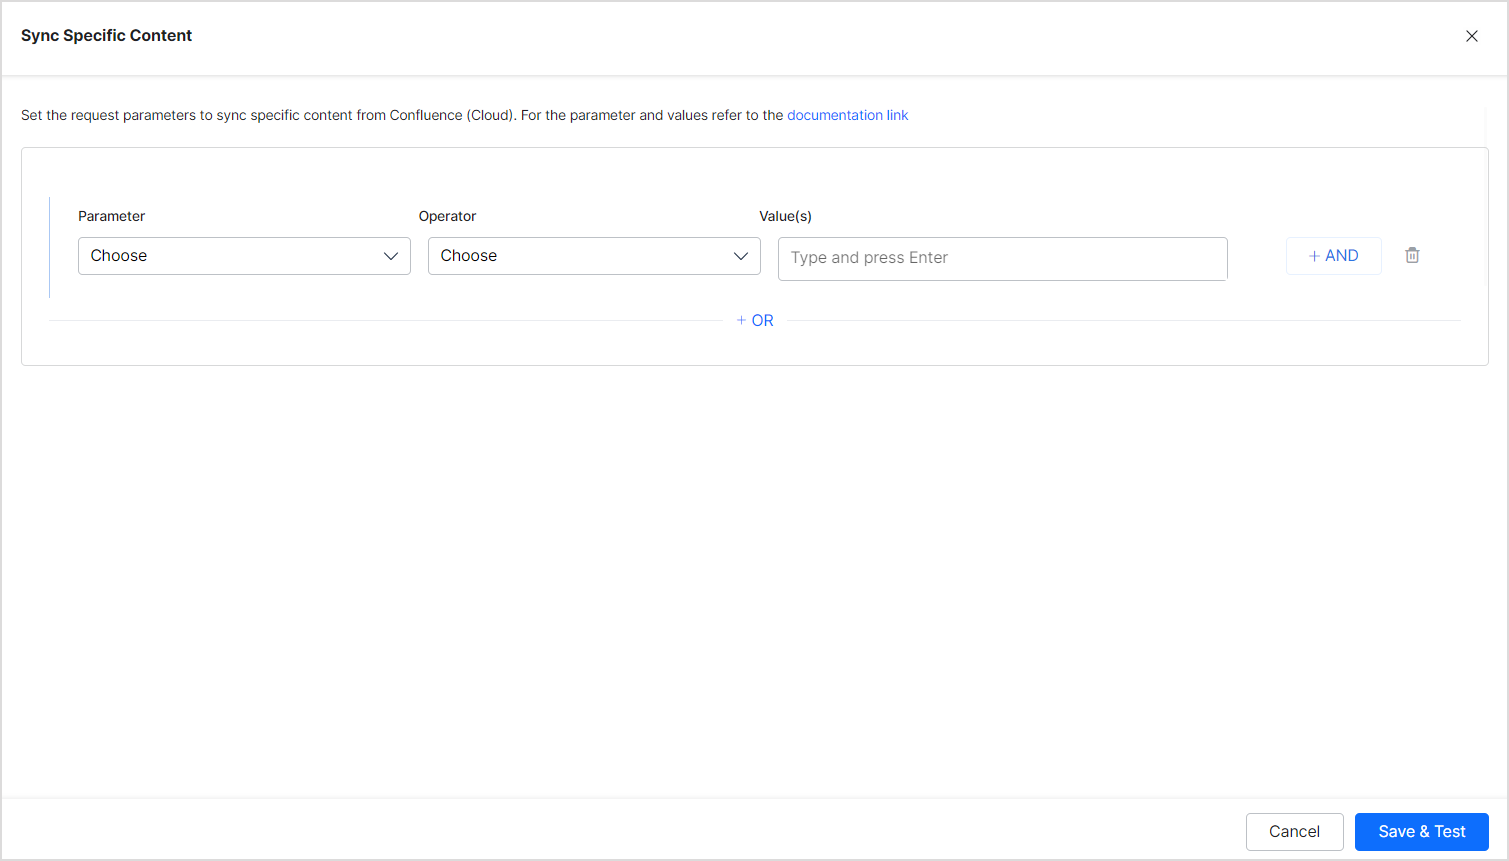
Defining Rules to select specific content for ingestion
Select Sync Specific Content and click on the Configure link in the Sync Settings tab to ingest specific content. You can define rules to select the content. Each rule can be defined using a parameter, operator, and its values.
The Parameter field can take one of the following values:
- Ancestor: Affects the direct child pages/content and descendants of the given content IDs as value.
- Content: Affects the content defined using content ID only.
- Created: Affects the content with the given creation date. It takes Date as values in the following format “yyyy/mm/dd hh:mm”, “yyyy-mm-dd hh:mm”, “yyyy/mm/dd”, “yyyy-MM-dd”
- Creator: Affects the content created by the User account IDs provided as values.
- Label: Affects the content by its label.
- Parent: Affects the content under a given parent.
- ID: Affects the content based on its content ID.
- Space: Affects the content based on the space that it is available in.
- Title: Define the rule using the title of the pages
- User: Define the rule using userId
The Operator field can take different values depending upon the parameter selected like equals to, not equals to, contains, etc.
The value field is used for providing the value as per the parameter.
For instance, you can choose all the pages and sub-pages under a given ancestor using the following rule. 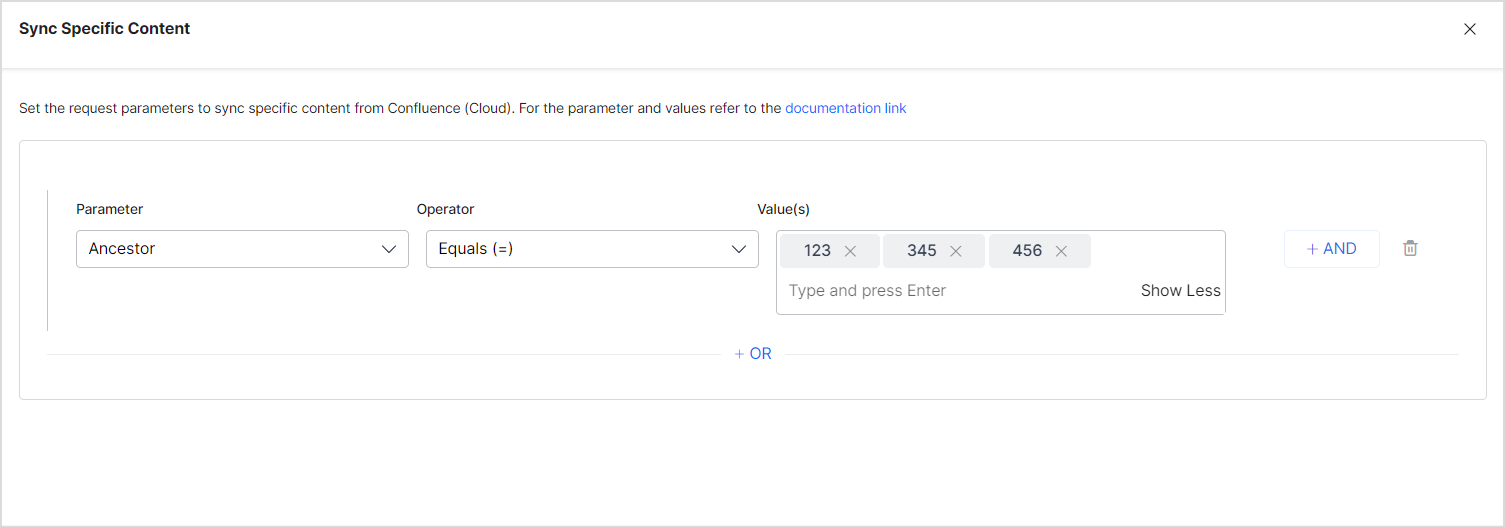
Similarly, to selectively ingest only the pages created or modified after Jan 1, 2024, you can configure the rule as shown below. 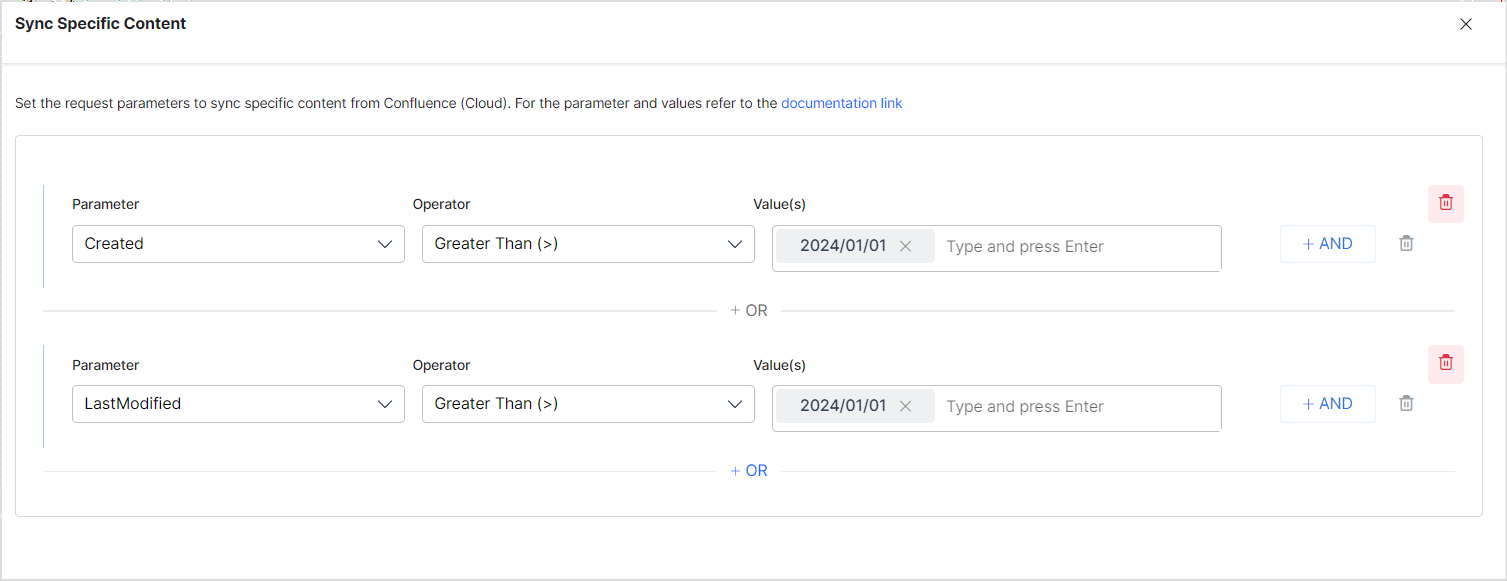
Note:
- You can define more than one condition to choose different types of content from the connector using the OR operator.
- Every rule can have one or more conditions to select a subset of content using the AND operator. For example, to ingest the latest content created after Jan 1, 2024 and having the word ‘SearchAssist’ in its title, define the rule as: