
SearchAssist is a conversational search assistant that combines cognitive search and virtual assistant competencies. It helps business users build a search assistant powered with AI and conversational UI that is smart enough to answer search user queries and perform tasks if needed. It understands the domain language and context to bring personalized and humanized results through multi-turn conversations.
Also, SearchAssist enables businesses to offer the best search and customer engagement experience by providing an enterprise-ready, simple-to-use solution. SearchAssist’s AI-powered search engine presents insights into the ways search users are interacting with the application that helps you serve them better.
Getting Started
To configure and implement a search assistant using SearchAssist, you first need to build a SearchAssist application and deploy it on your organization’s website or any channel of your choice. For this, you need to access SearchAssist.
Access
To access SearchAssist, you need valid credentials.
Sign Up
To sign up for an account, follow the below steps:
- Use the link https://app.searchassist.ai/ to access SearchAssist.
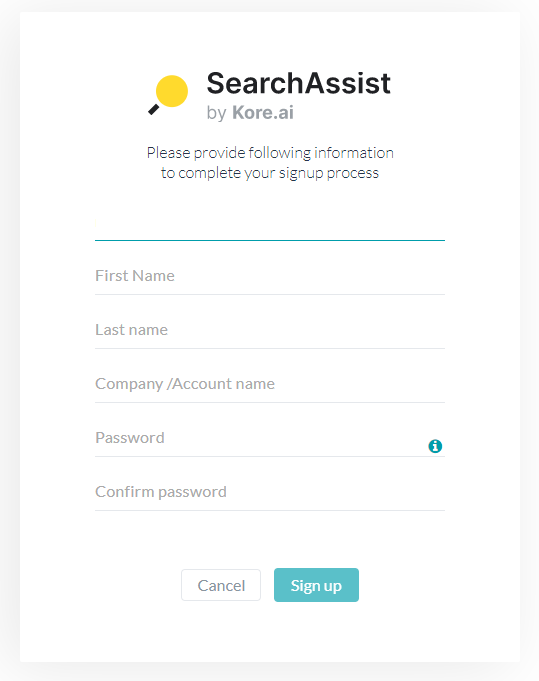
- On the SearchAssist by Kore.ai page, enter the email address and click Continue.
- On the corresponding page, enter the details in the First Name, Last Name, Company/Account Name, Password, and Confirm Password fields.
- Click Sign Up.
- On the corresponding page, it displays Almost done! Please verify your email. Check if you have received the verification email, else click Resend to resend the verification email.
- After verification, it lands you on the application.
Log In
Once you have signed up, you can log in to SearchAssist, following the below steps:
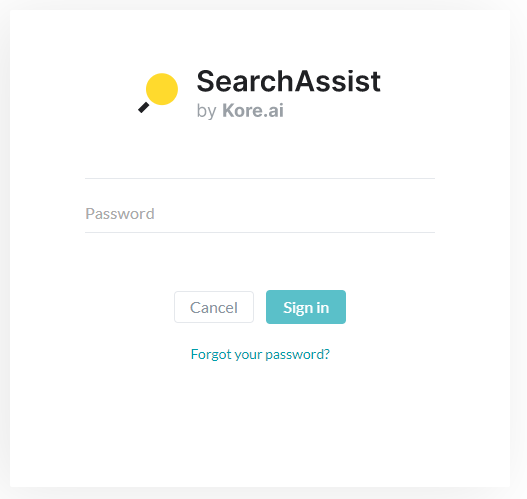
- Use the link https://app.searchassist.ai/home to access SearchAssist.
- Log in to the application with valid credentials.
- After you log in, on the Welcome to SearchAssist page, click Let’s Get Started.
Application
The first step in building a SearchAssist is creating an application.
A SearchAssist Application is a set of configurations and data from various sources. Once you have created and configured the application, you can deploy it on any channel to enable the search users to interact with it. Currently, SearchAssist supports only web SDK channels.
To create an application, follow the below steps:
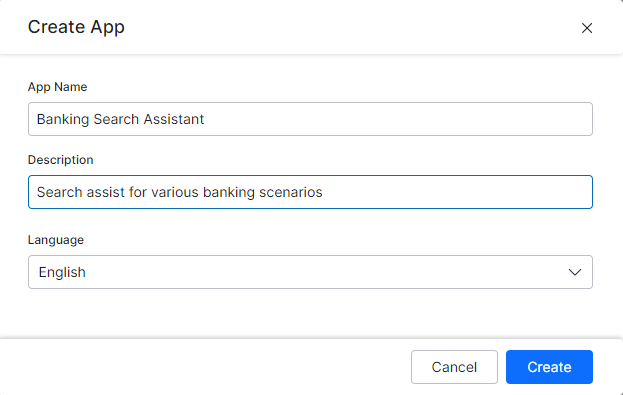
- On the landing page, click + Create your first app.
- On the Create App dialog box, enter the name and description in the Name Your App and Description fields.
- Select the language from the Language drop-down list.
- Click Create.
You can have different applications for different environments, business purposes, regions, etc. When your application runs in different environments, you want to use different sets of data. For example, when you run your application on a staging website, you tend to use test data instead of production data. When you work on a staging version of your website, you tend to avoid hitting your production index for privacy reasons and to avoid skewing your analytics.
There are two ways you can split your search implementation for each environment:
- Separate your environments into different indices on the same application.
- Create several applications, and use one for an environment.
You can set the best approach depending on the isolation level you need between the environments.