To integrate SearchAssist with Confluence Cloud, you need to
- Create an OAuth 2.0 integration on the Atlassian developer portal.
- Configure the connector in SearchAssist with the OAuth 2.0 integration details.
Specifications
| Type of Repository | Cloud |
| Supported API version | REST API v1 |
| Search Results Support | Only manually created Knowledge articles in Confluence. |
| Extractive Model for Answers | Knowledge Articles |
| Generative Model for Answers | Knowledge Articles |
| RACL Support | Yes |
| Note: Searching through any other types of uploaded content like PDF files, docs, and images is not supported. | |
Configuring OAuth application on Confluence Cloud
Prerequisites
To create an OAuth 2.0 integration on the Confluence cloud, you need the following:
- An admin account in Atlassian’s Confluence.
- A target domain.
Note: Currently SearchAssist supports searching through only manually created pages in Confluence and does not search through any other types of uploaded content like PDF files, docs, and images.
Steps to create the OAuth application
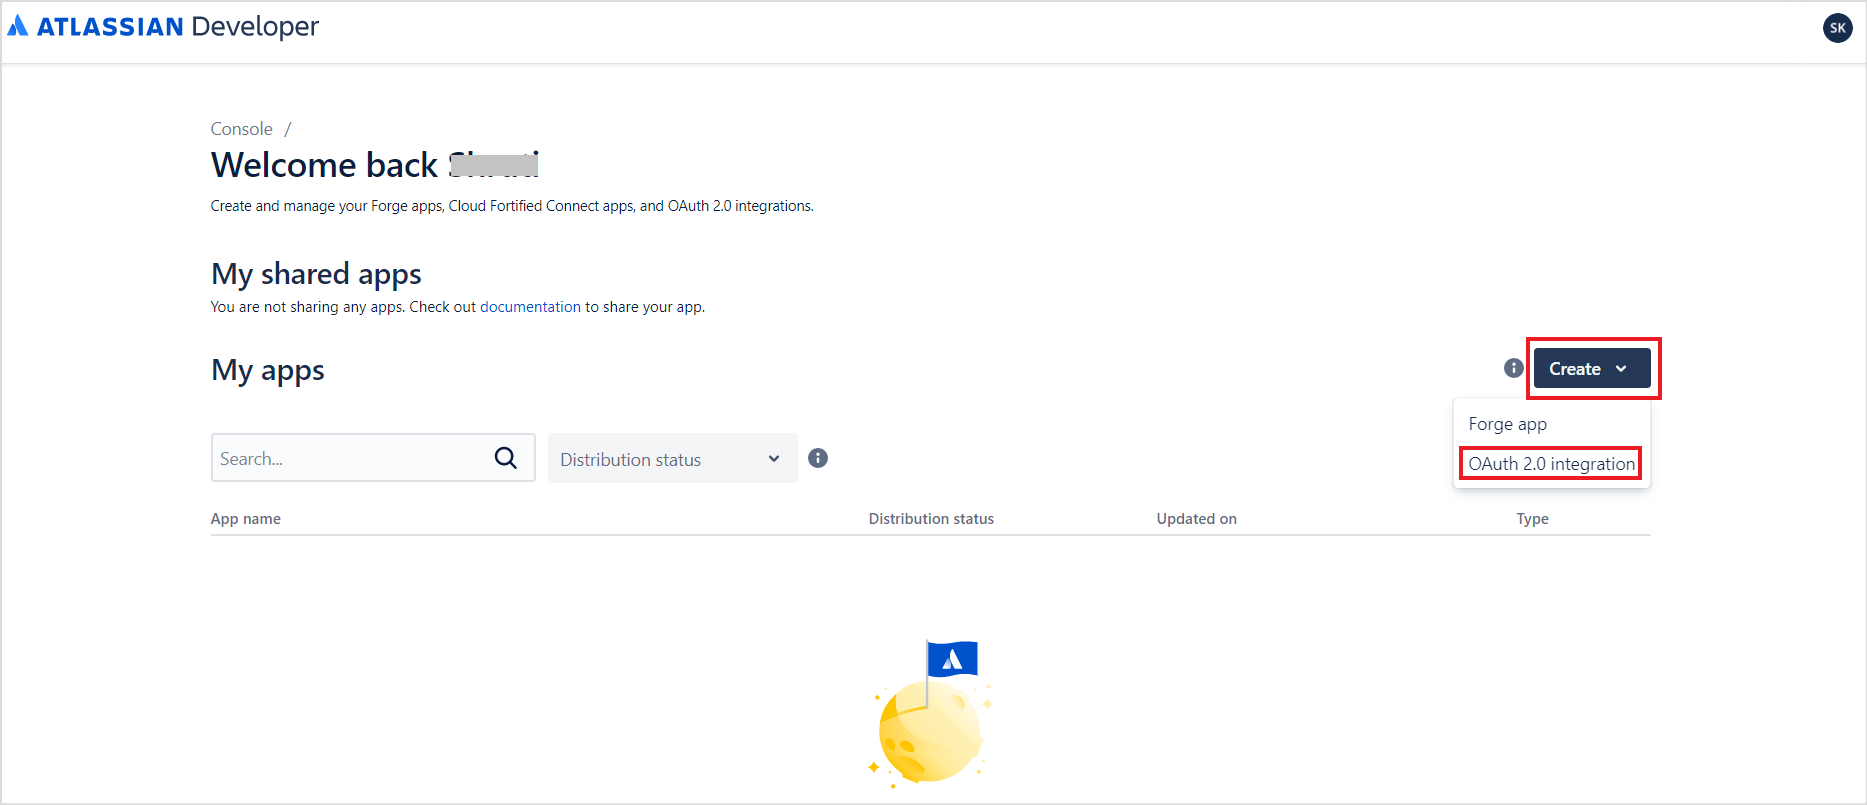
- Sign into your developer account in the Atlassian developer portal. Click on the profile name at the top right corner and navigate to the Developer Console.

- The developer console will list all your apps.

- Click the Create button and select OAuth 2.0 Integration.
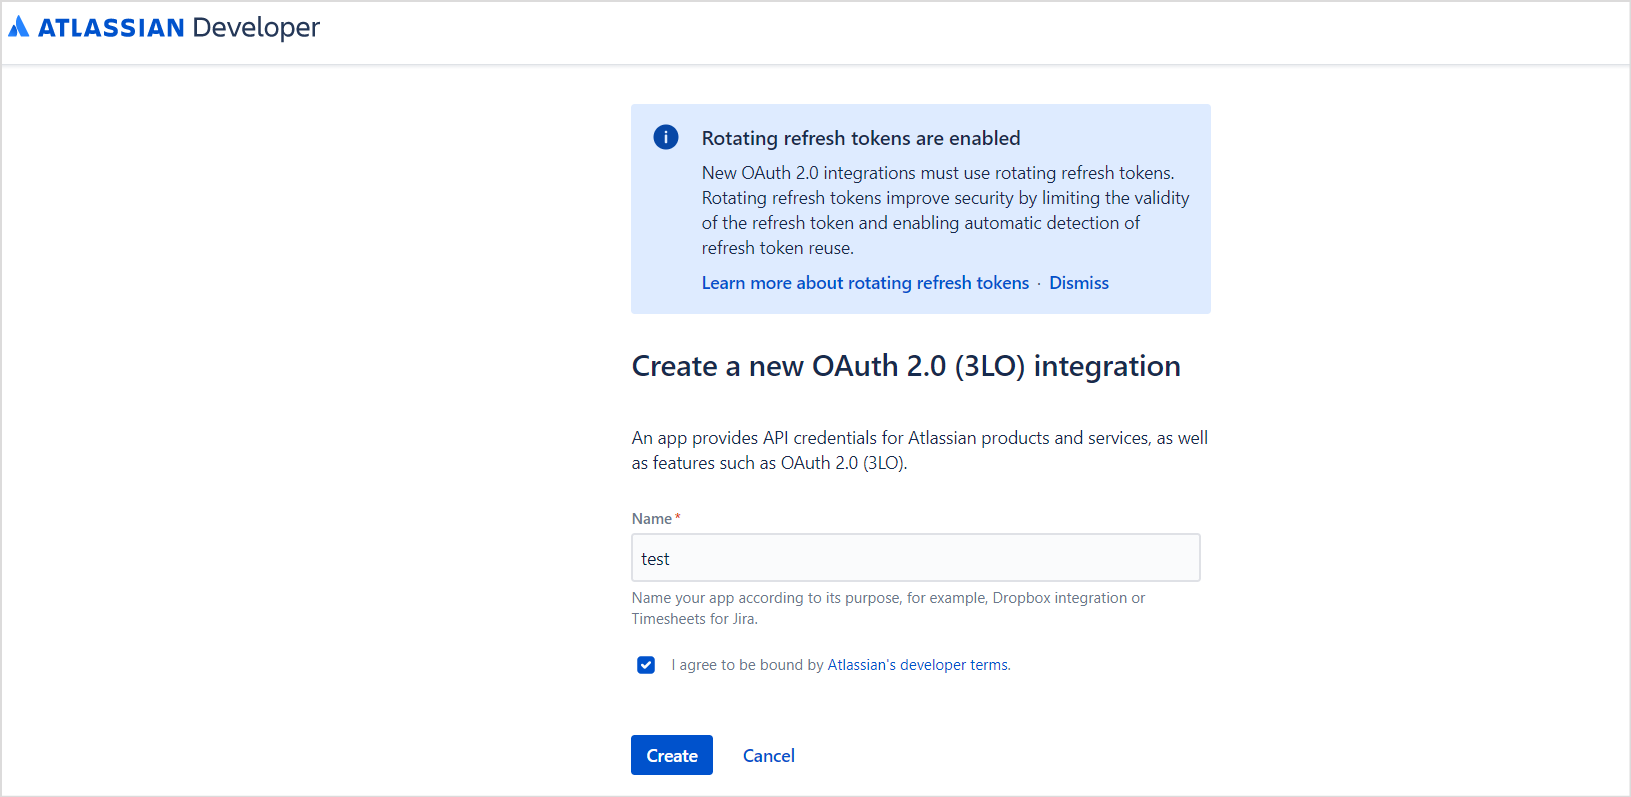
- Provide a name for the application and click Create.
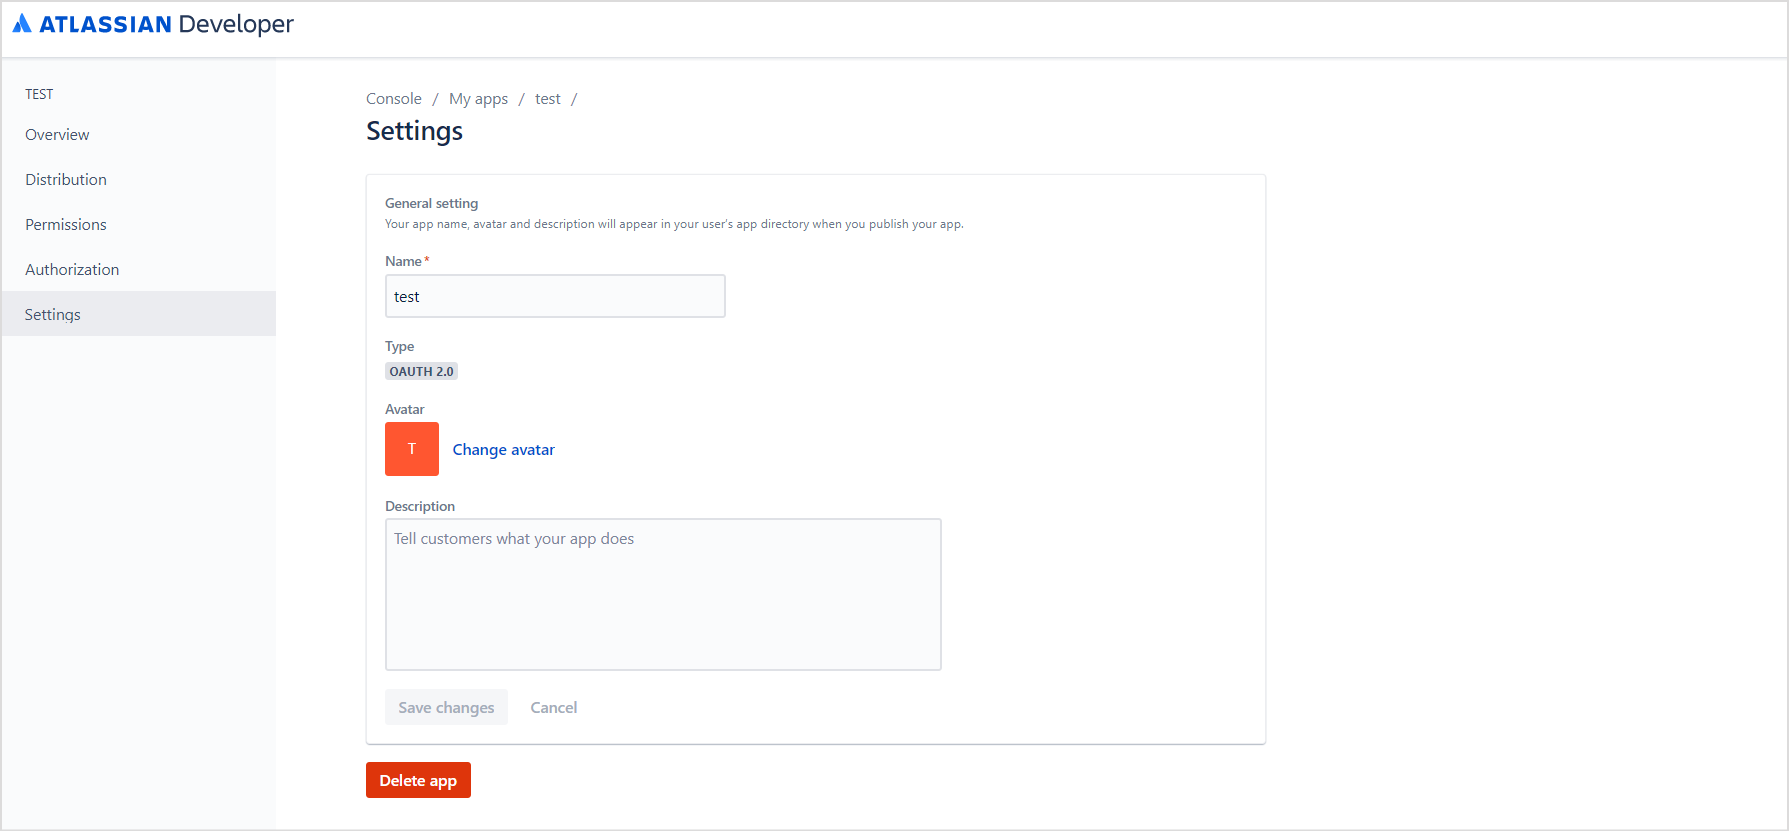
- Once the application is created, you can update its name, description from the Settings tab. You can also add an avatar for the application. Update the settings and click Save changes.
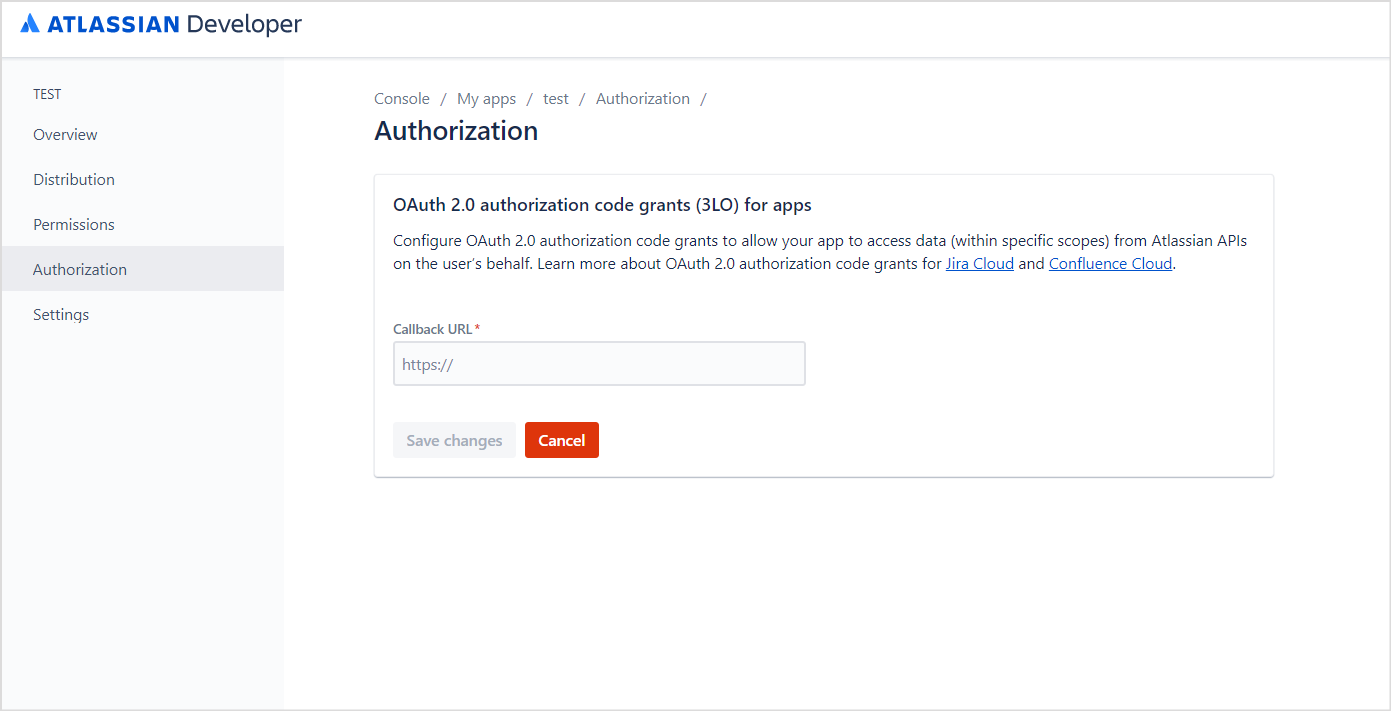
- Next, configure Authorization code grants to allow SearchAssist to access data. To do so, go to the Authorization tab. Enter the SearchAssist Callback URL provided to you and click Save changes. You can use one of the following callback URLs as per your region.
- JP Region Callback URLs: https://jp-bots-idp.kore.ai/workflows/callback
- DE Region Callback URLs: https://de-bots-idp.kore.ai/workflows/callback
- Prod Region Callback URLs: https://idp.kore.com/workflows/callback
-
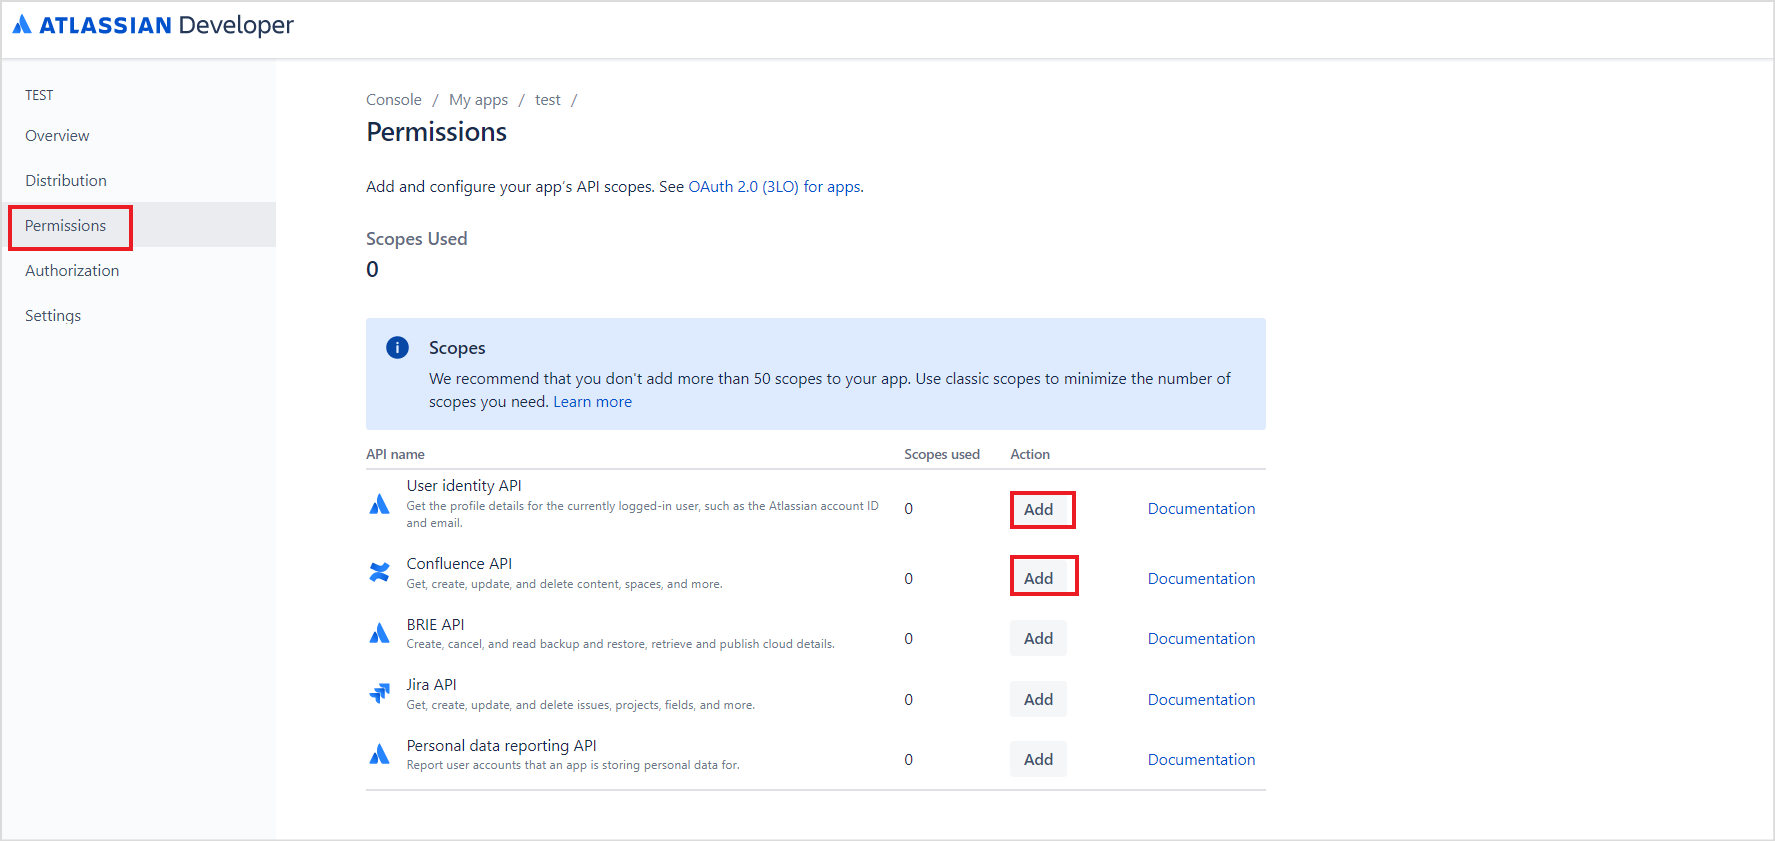
- The next step is to grant the necessary permissions. Go to the Permissions tab. Add the following scopes:
- User Identity API
- Confluence API
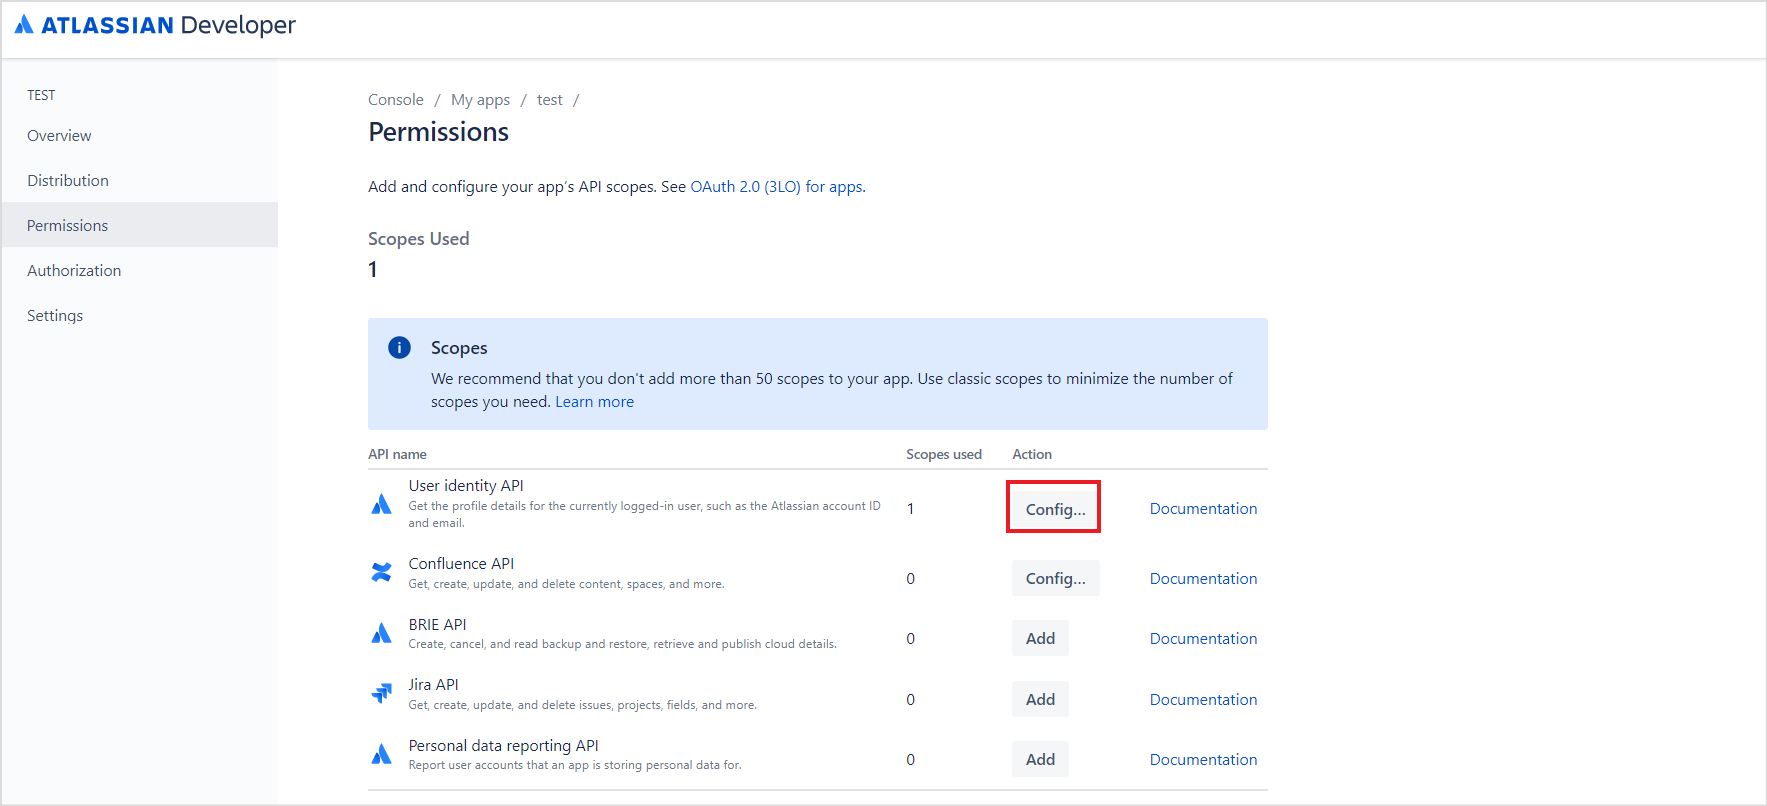
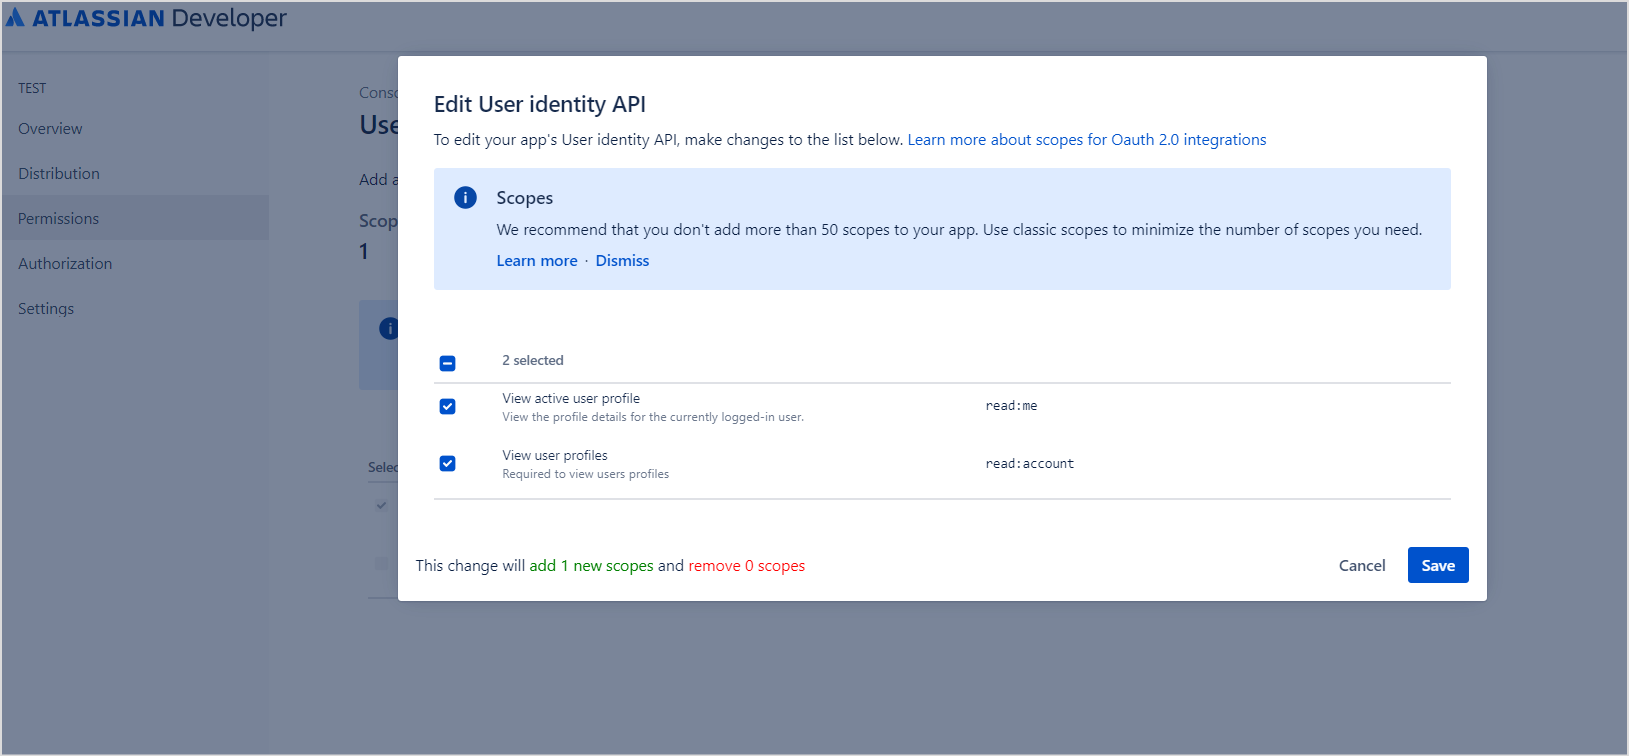
- For the User Identity API, to add the permissions, click the config link.
- On the following page, click the Edit Scopes button.
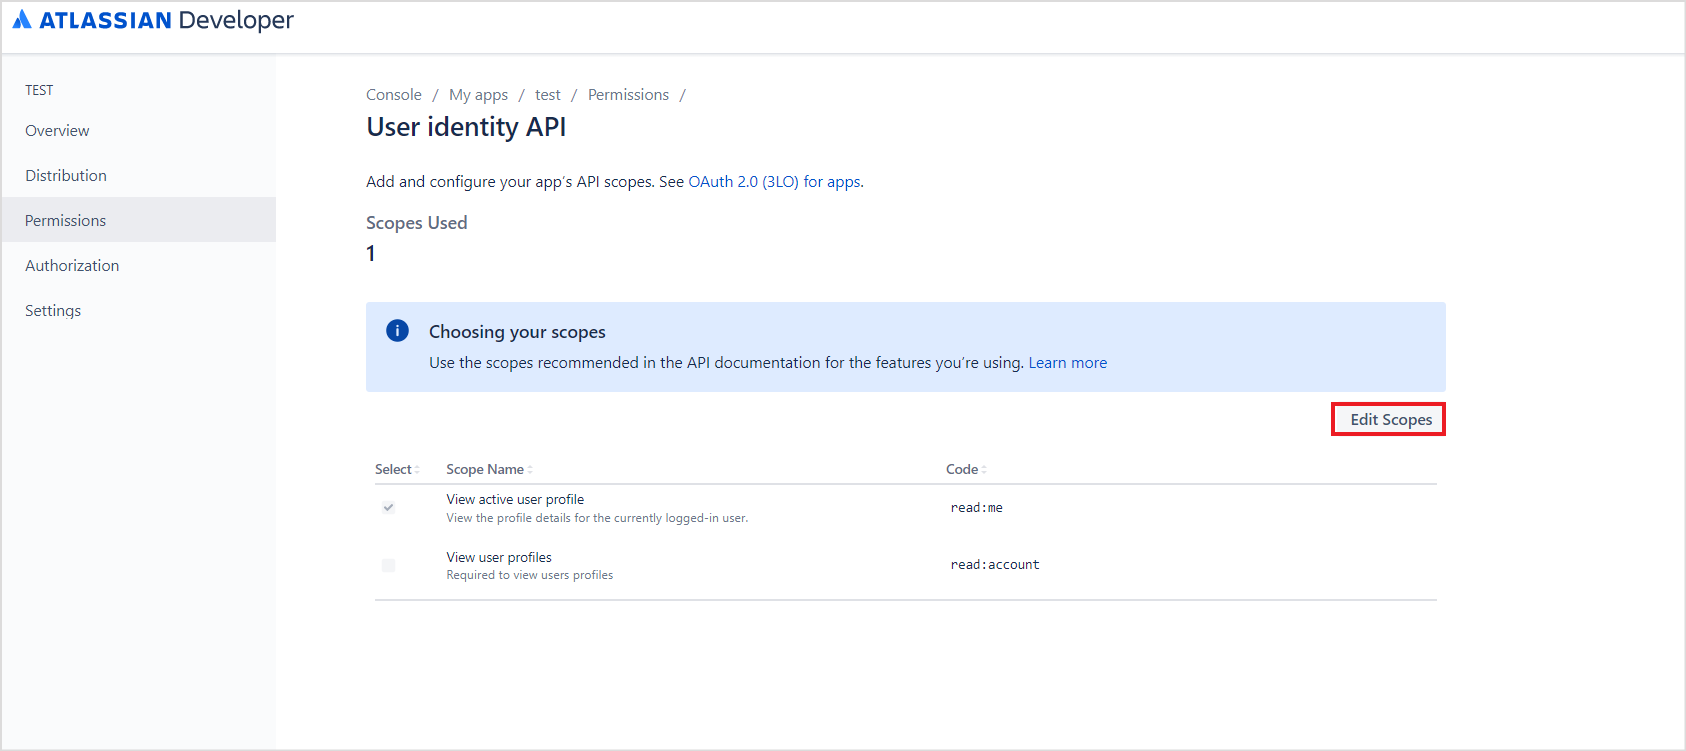
- Grant the following permissions and click Save.
- Read:me
- Read:account
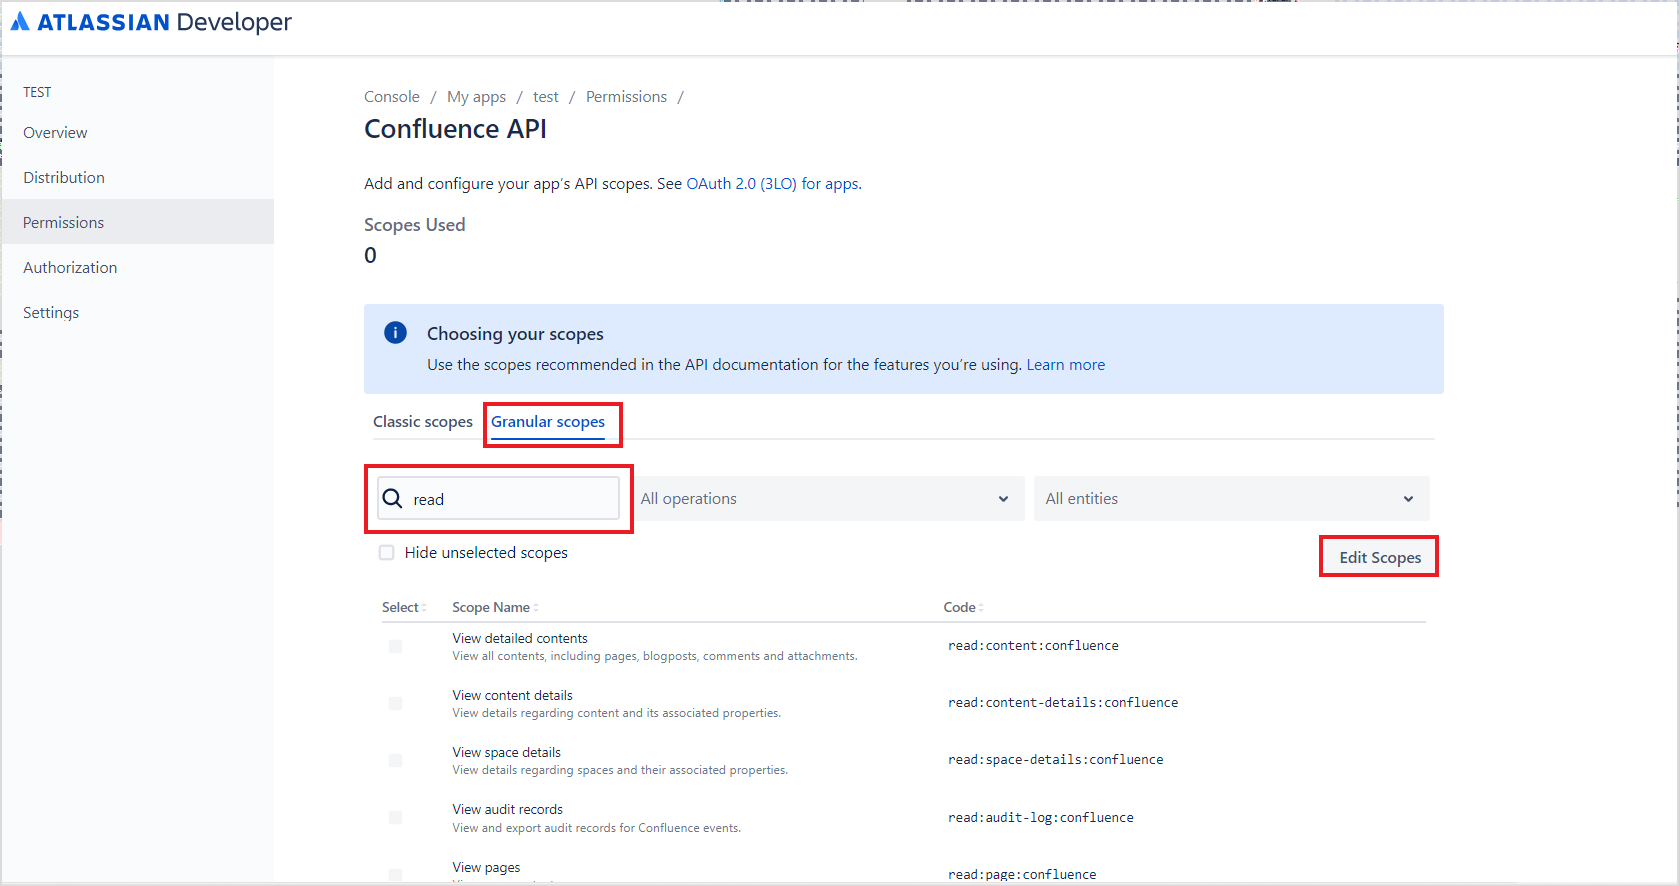
- Similarly, for Confluence API, go to the Granular Scopes and click Edit Scopes. Add a read operation filter, select all the filtered permissions, and click Save.
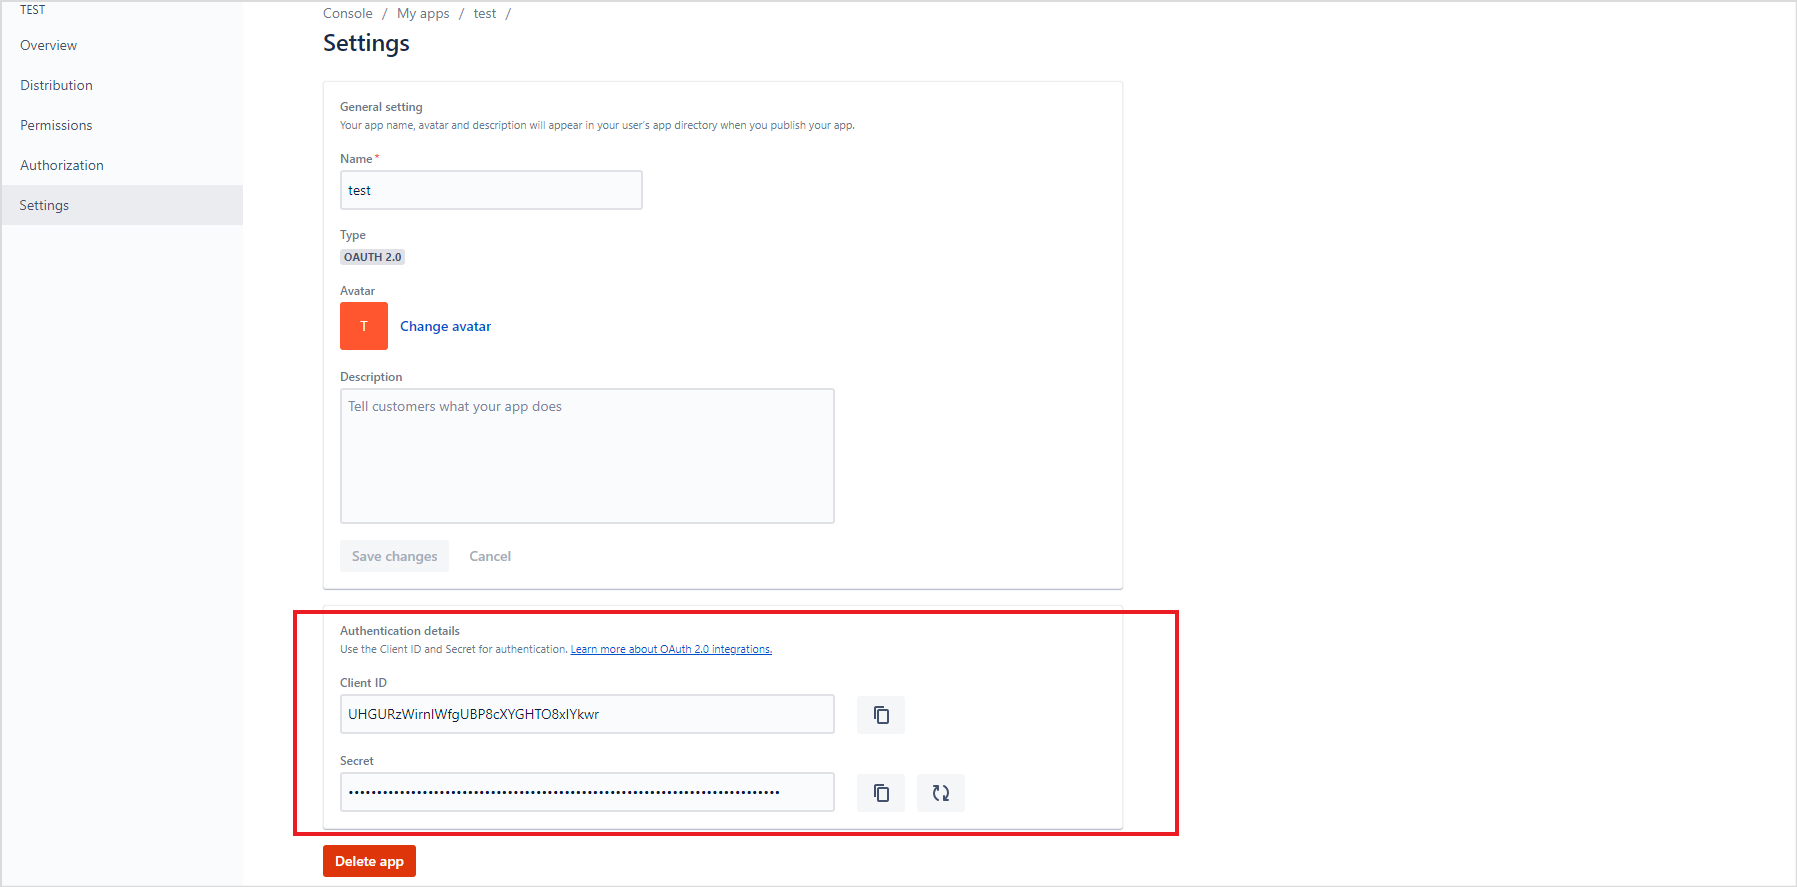
- After adding permissions, go to Settings and find the Client ID and Secret at the end of the page. Save these fields as these will be used for configuring the SearchAssist connector in the next step.
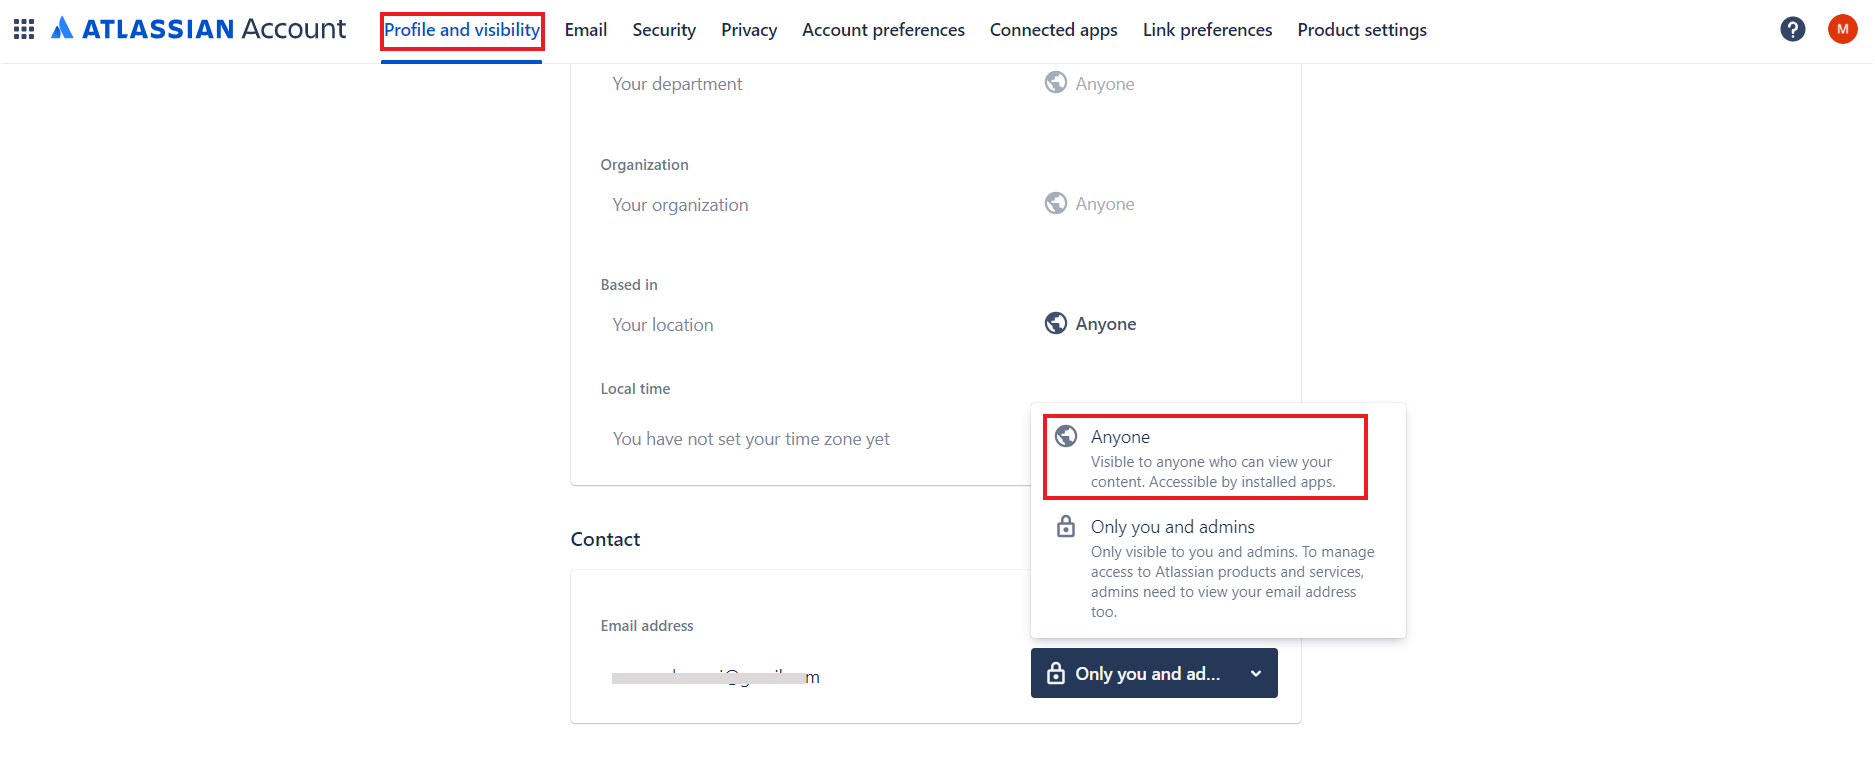
- We also need the Host URL in Confluence for configuring the SearchAssist Connector. To fetch this field, go to your Confluence home page and click on Profile.
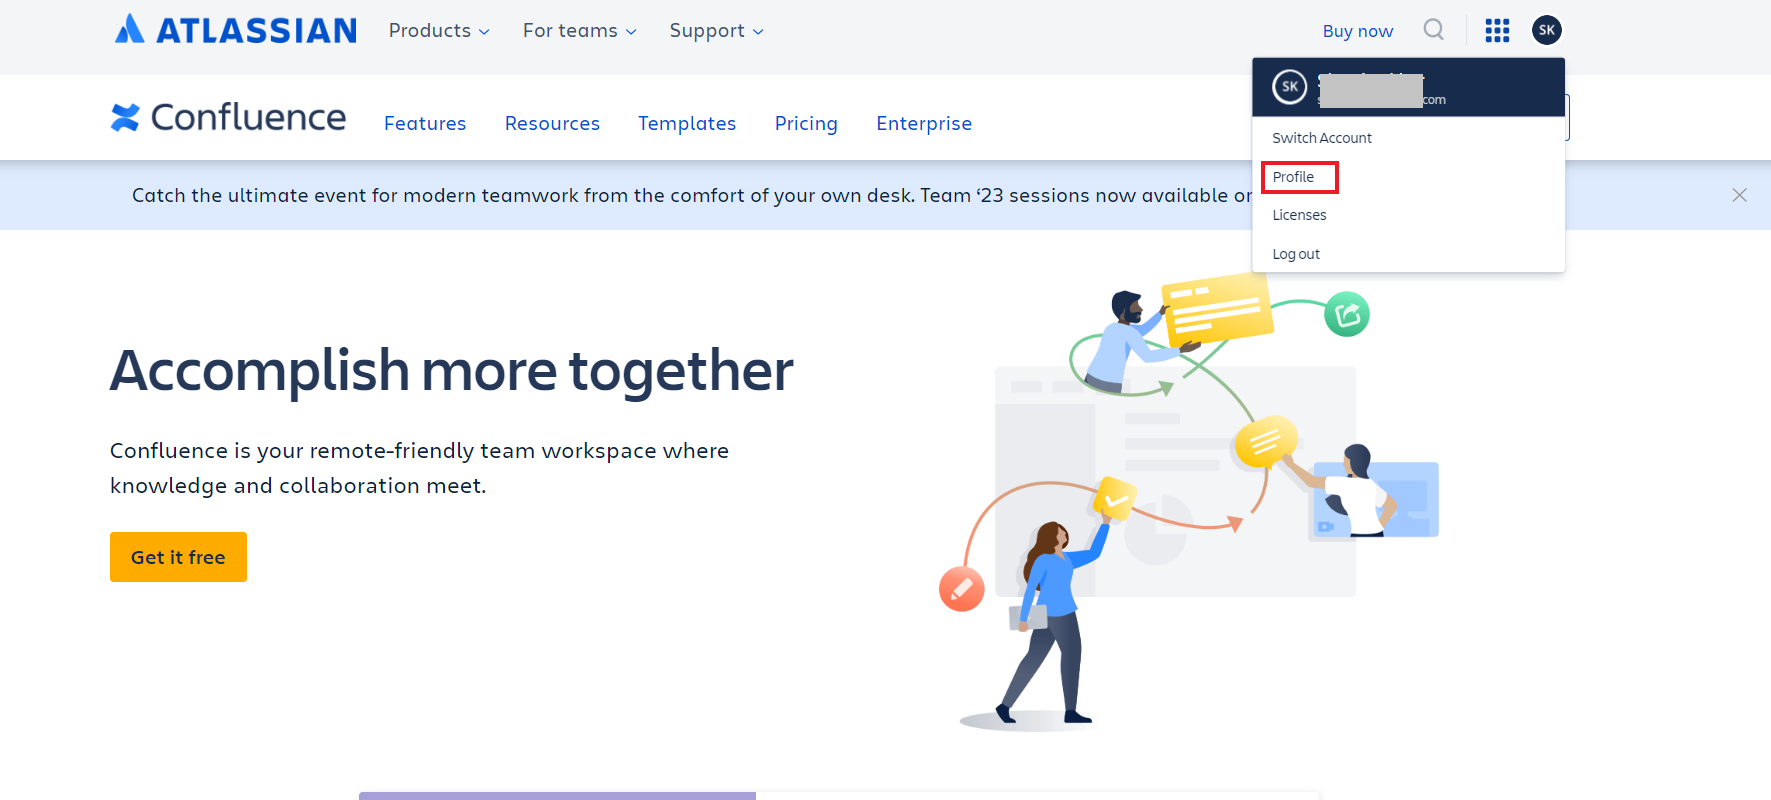
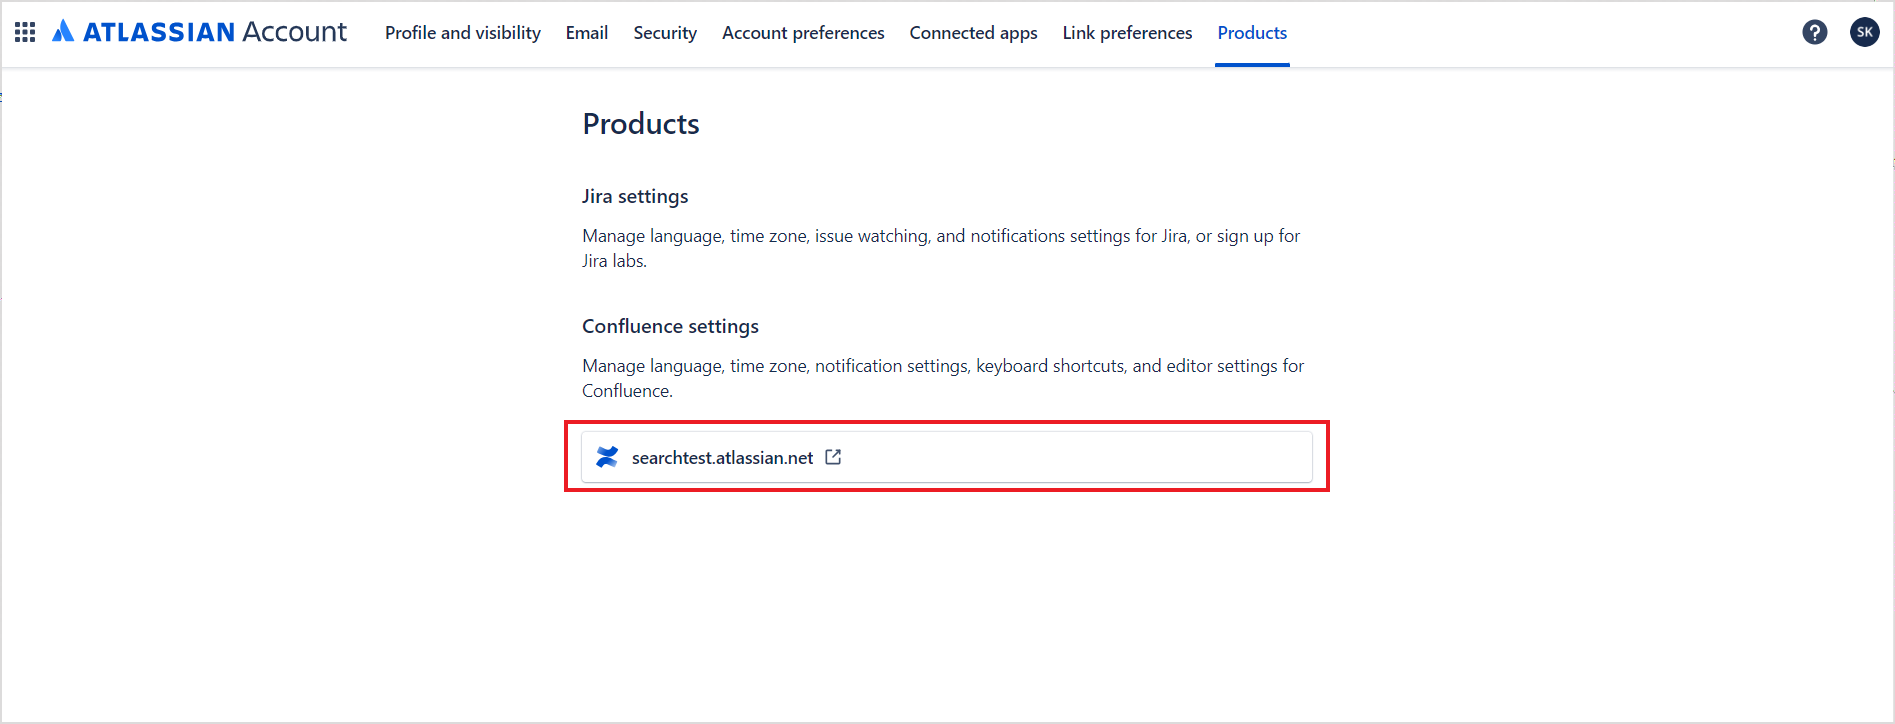
- Go to the Products tab.
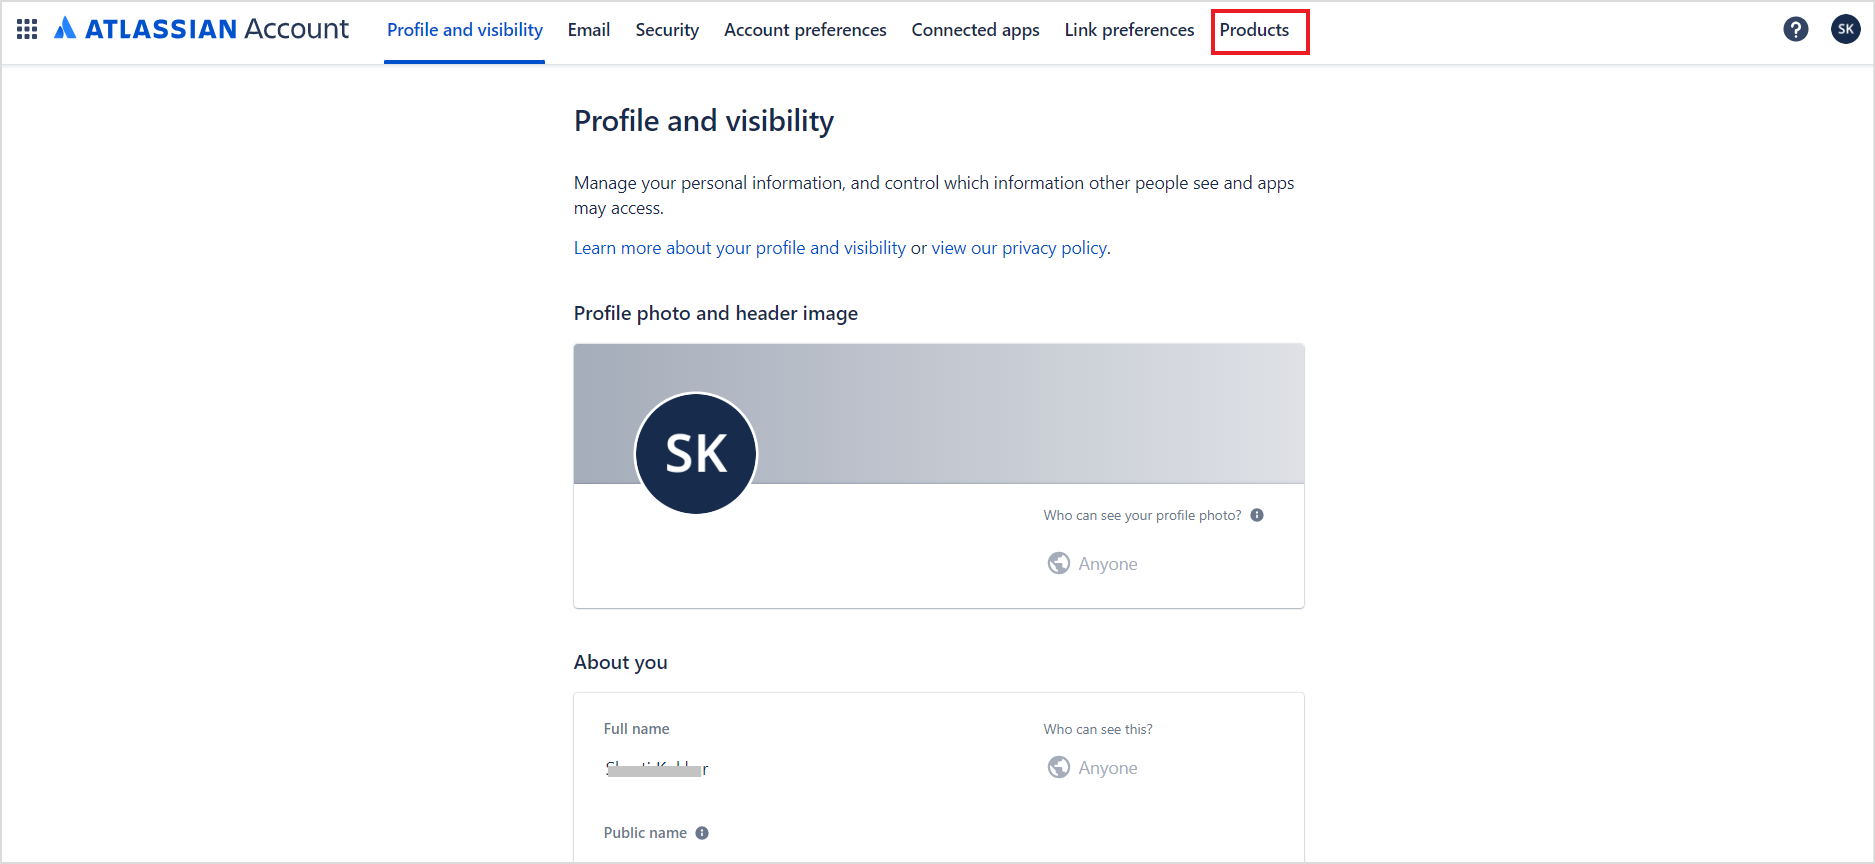
The host URL will be displayed at the bottom of the page.
Configuring SearchAssist Connector
To complete the integration, do the following configuration on the SearchAssist application.
- Go to Connectors under the Sources tab.
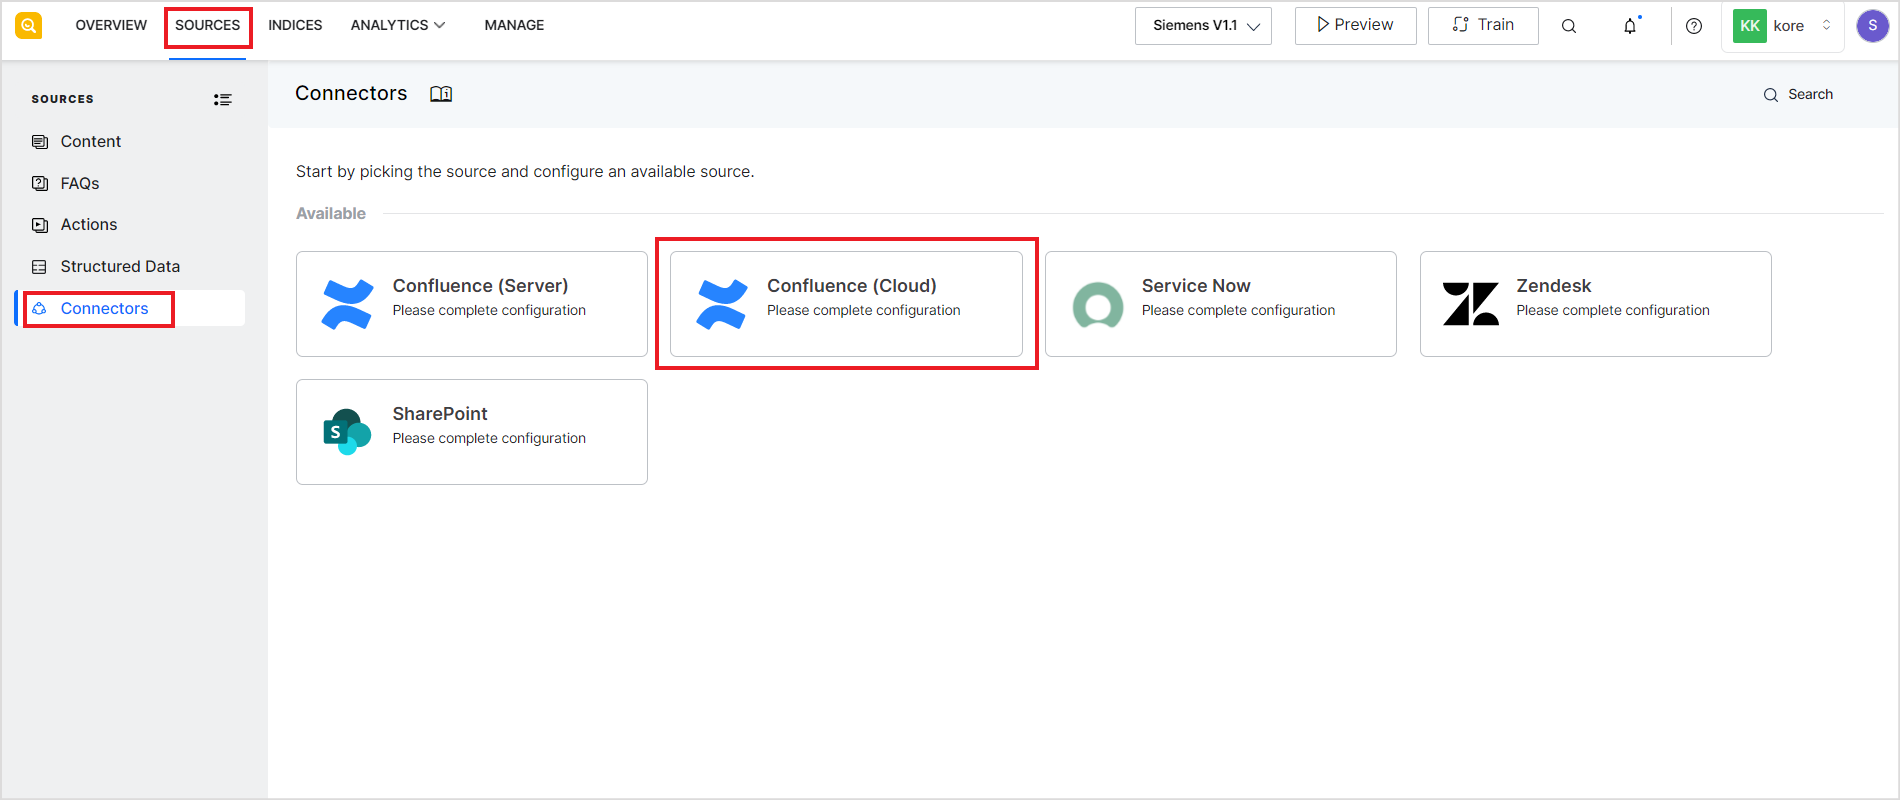
- The following page provides instructions for the integration. Click Proceed.
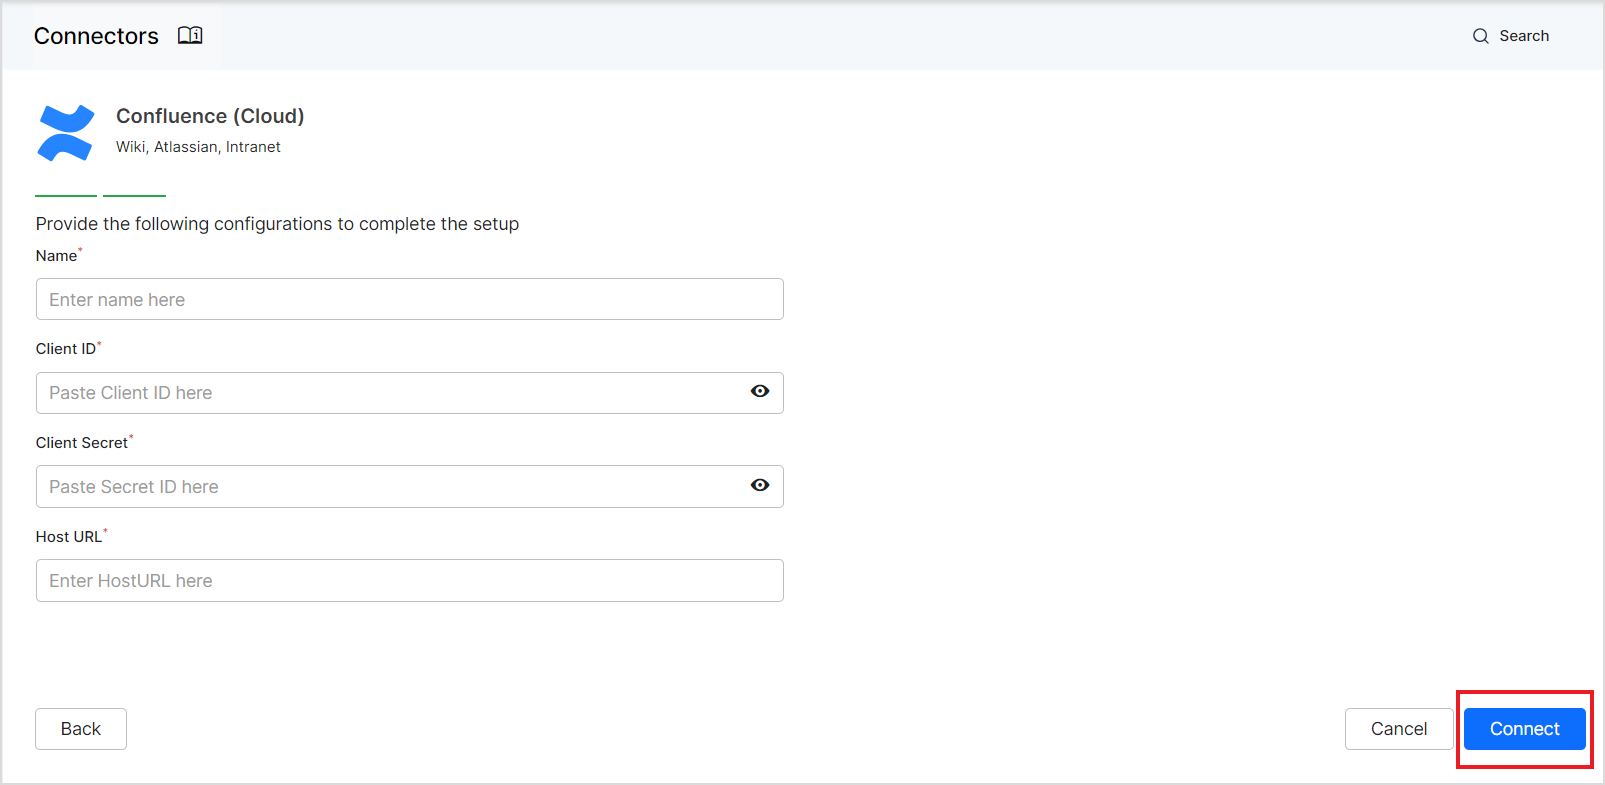
- Next, provide the details of the OAuth 2.0 application created on Confluence, click Connect, and authorize the connection.
| Fields | Description |
| Name | Name for the connector |
| Client ID | Client ID of the OAuth application created on Confluence, as fetched in the last step above. |
| Client Secret | Client secret generated for communication with Confluence. |
| Host URL | The confluence server base URL (without trailing slash), as fetched from the Confluence in the last step. |
Once the authorization process is complete, you can select the content to be ingested into the application and initiate synchronization. Go to the Sync Settings tab and select the content. You can choose to sync all the content from the Confluence Cloud account or select specific content. Configure the content to be ingested and click Synchronize. You can also set a scheduler here for automatic content synchronization at regular intervals. 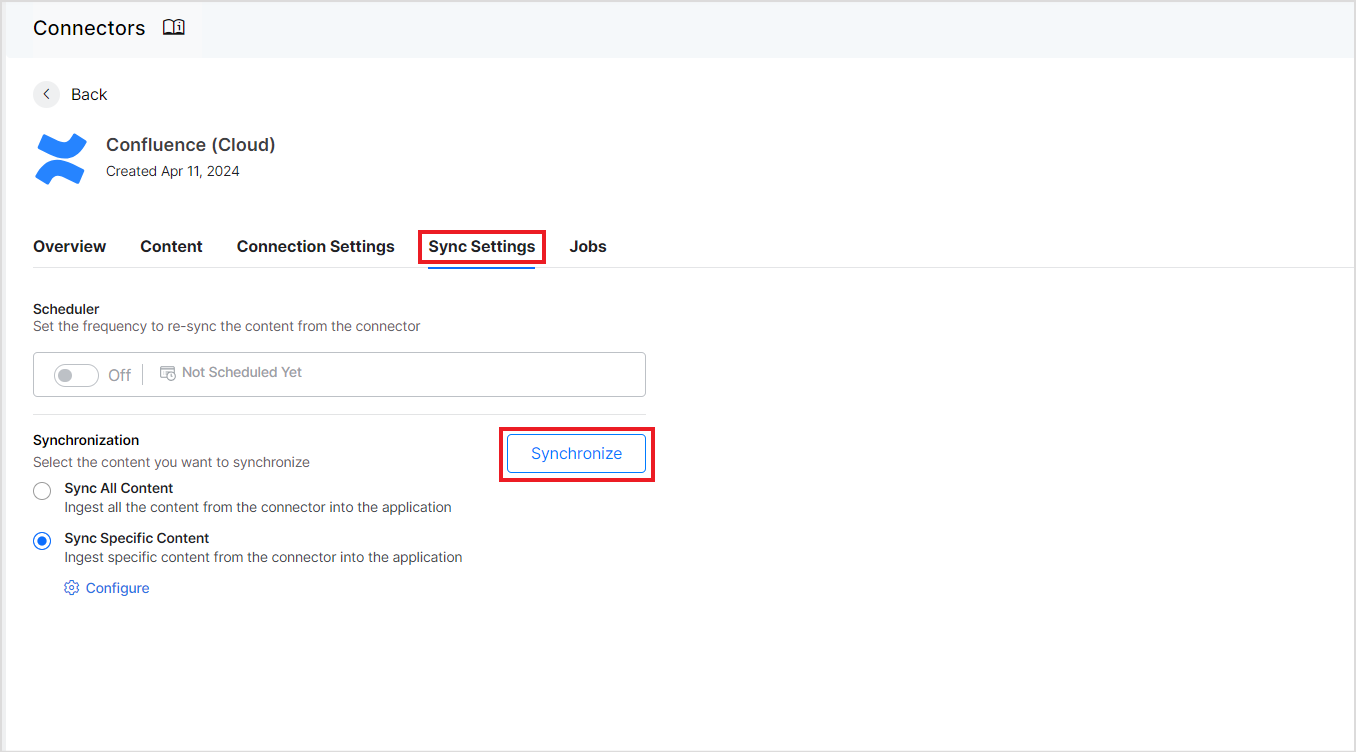
Defining Rules to select specific content for ingestion
Select Sync Specific Content and click on the Configure link in the Sync Settings tab to ingest specific content. 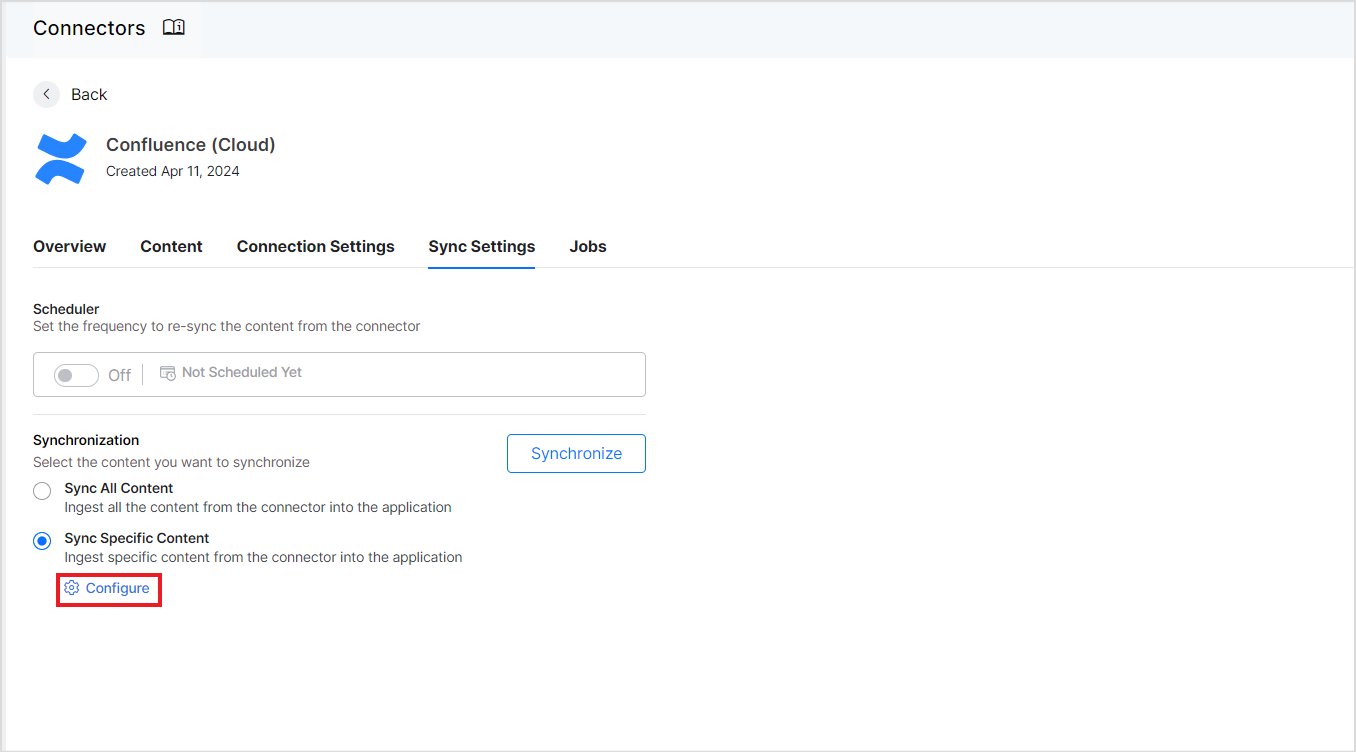
You can now define rules to select the content. Each rule can be defined using a parameter, operator, and its values. 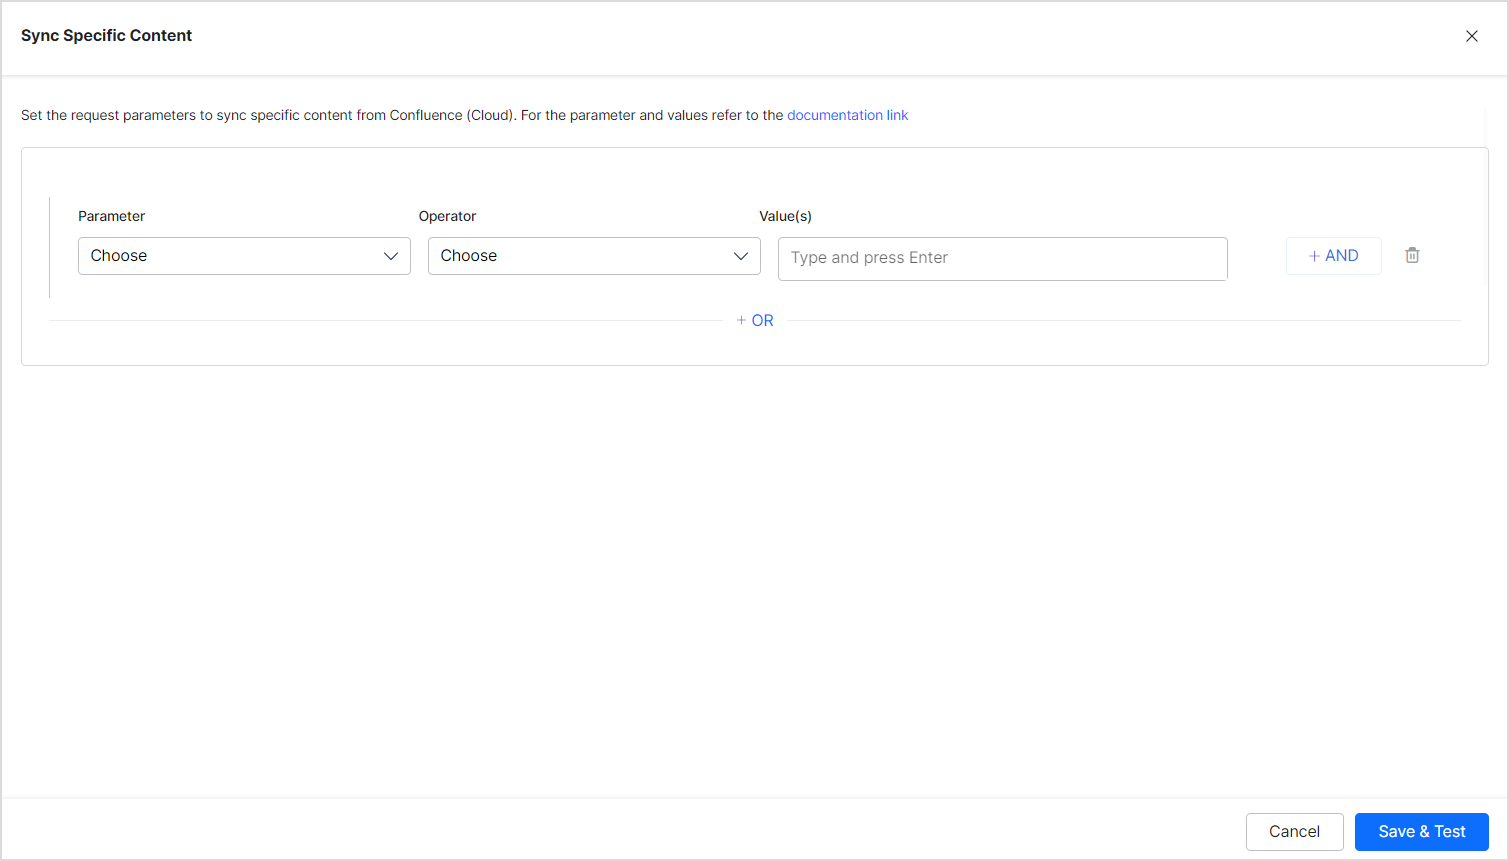
The Parameter field can take one of the following values:
- Ancestor: Affects the direct child pages/content and descendants of the given content IDs as value.
- Content: Affects the content defined using content ID only.
- Created: Affects the content with the given creation date. It takes Date as values in the following format “yyyy/mm/dd hh:mm”, “yyyy-mm-dd hh:mm”, “yyyy/mm/dd”, “yyyy-MM-dd”
- Creator: Affects the content created by the User account IDs provided as values.
- Label: Affects the content by its label.
- Parent: Affects the content under a given parent.
- ID: Affects the content based on its content ID.
- Space: Affects the content based on the space that it is available in.
- Title: Define the rule using the title of the pages
- User: Define the rule using userId
The Operator field can take different values depending upon the parameter selected like equals to, not equals to, contains, etc.
The value field is used for providing the value as per the parameter.
For instance, you can choose all the pages and sub-pages under a given ancestor using the following rule. 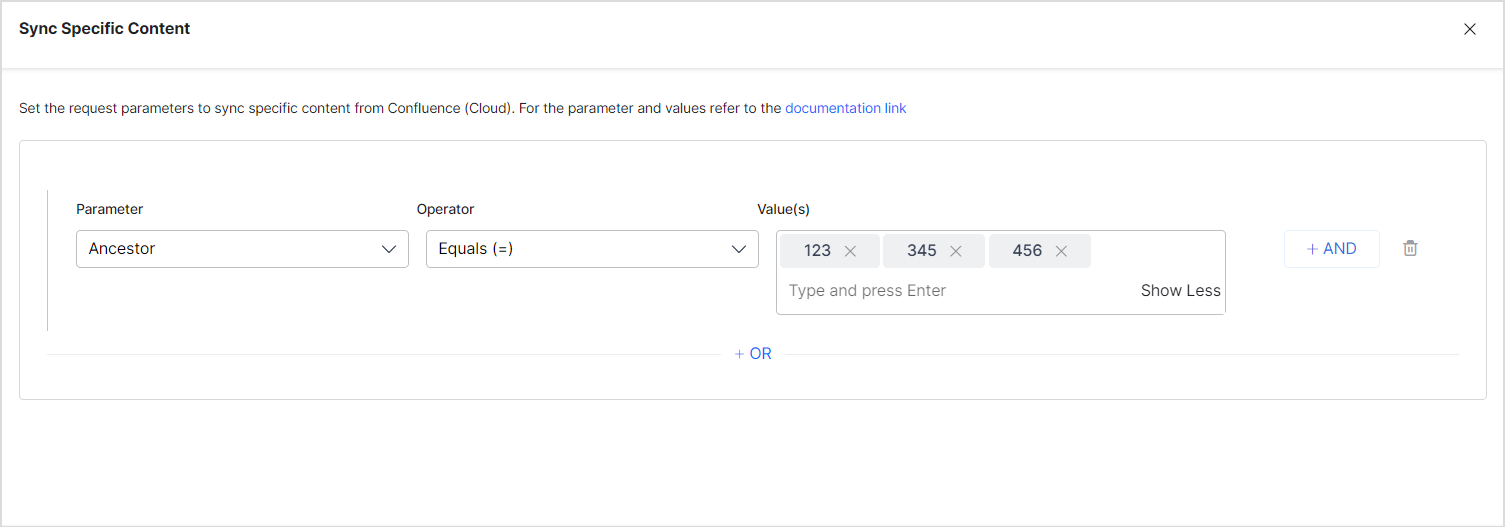
Similarly, to selectively ingest only the pages created or modified after Jan 1, 2024, you can configure the rule as shown below. 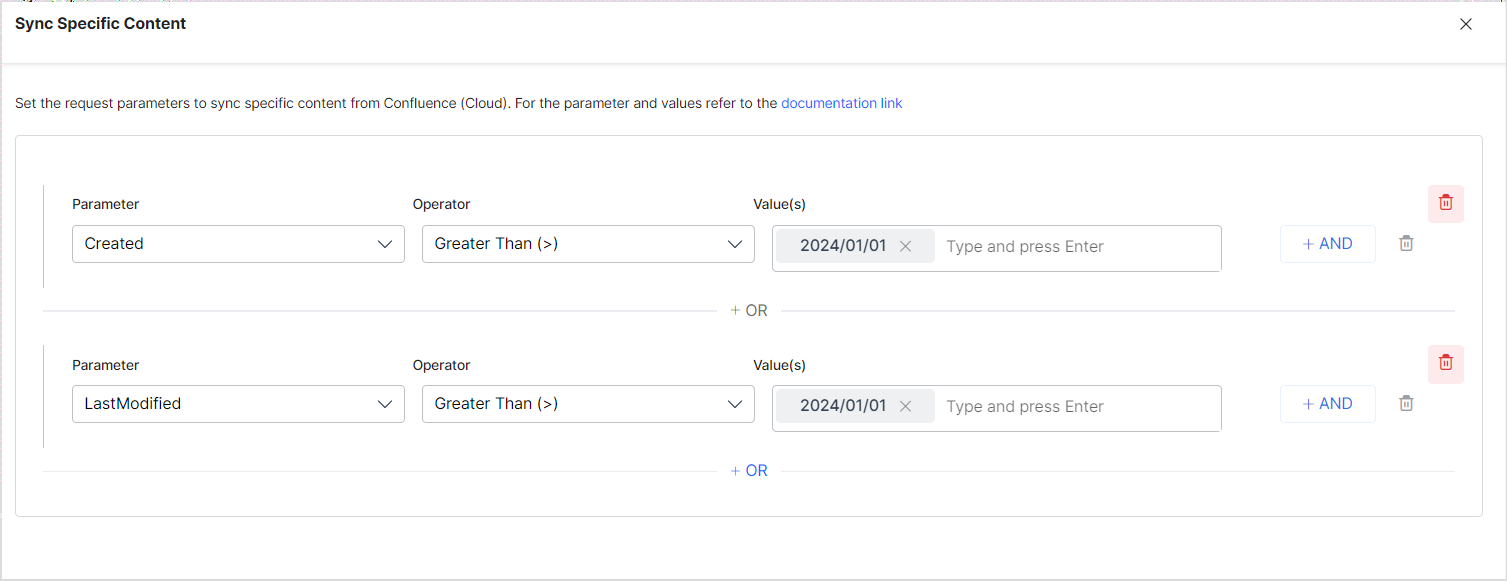
Note:
- You can define more than one condition to choose different types of content from the connector using the OR operator.
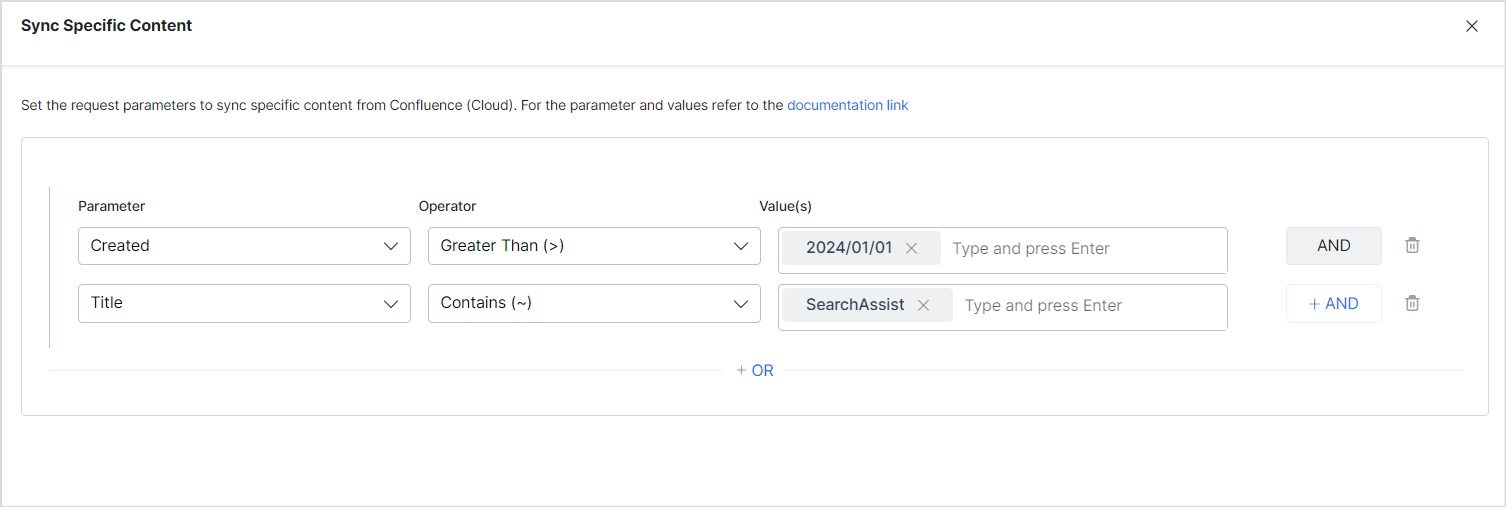
- Every rule can have one or more conditions to select a subset of content using the AND operator. For example, to ingest the latest content created after Jan 1, 2024 and having the word ‘SearchAssist’ in its title, define the rule as:
Access Control
SearchAssist supports access control for content ingested using Confluence Cloud Connector. You can enable Public Access to the ingested content or choose Default access for the content.
- Default Access honors the permissions of a user in the Confluence Cloud. The user will view search results from a file only if the user has access to the file in the enterprise application.
- Public Access overrides the permissions of the user in the Confluence Cloud. It allows every user to access the ingested content irrespective of the permissions in the enterprise system.
Handling Confluence Cloud Permissions in SearchAssist
Two levels of permissions control the user’s access to a page in Confluence Cloud.
Space Permissions
Every space has an independent set of permissions managed by the space administrators, which determine the access settings for different users and groups. SearchAssist requires a minimum permission of view to allow a user to access the content. 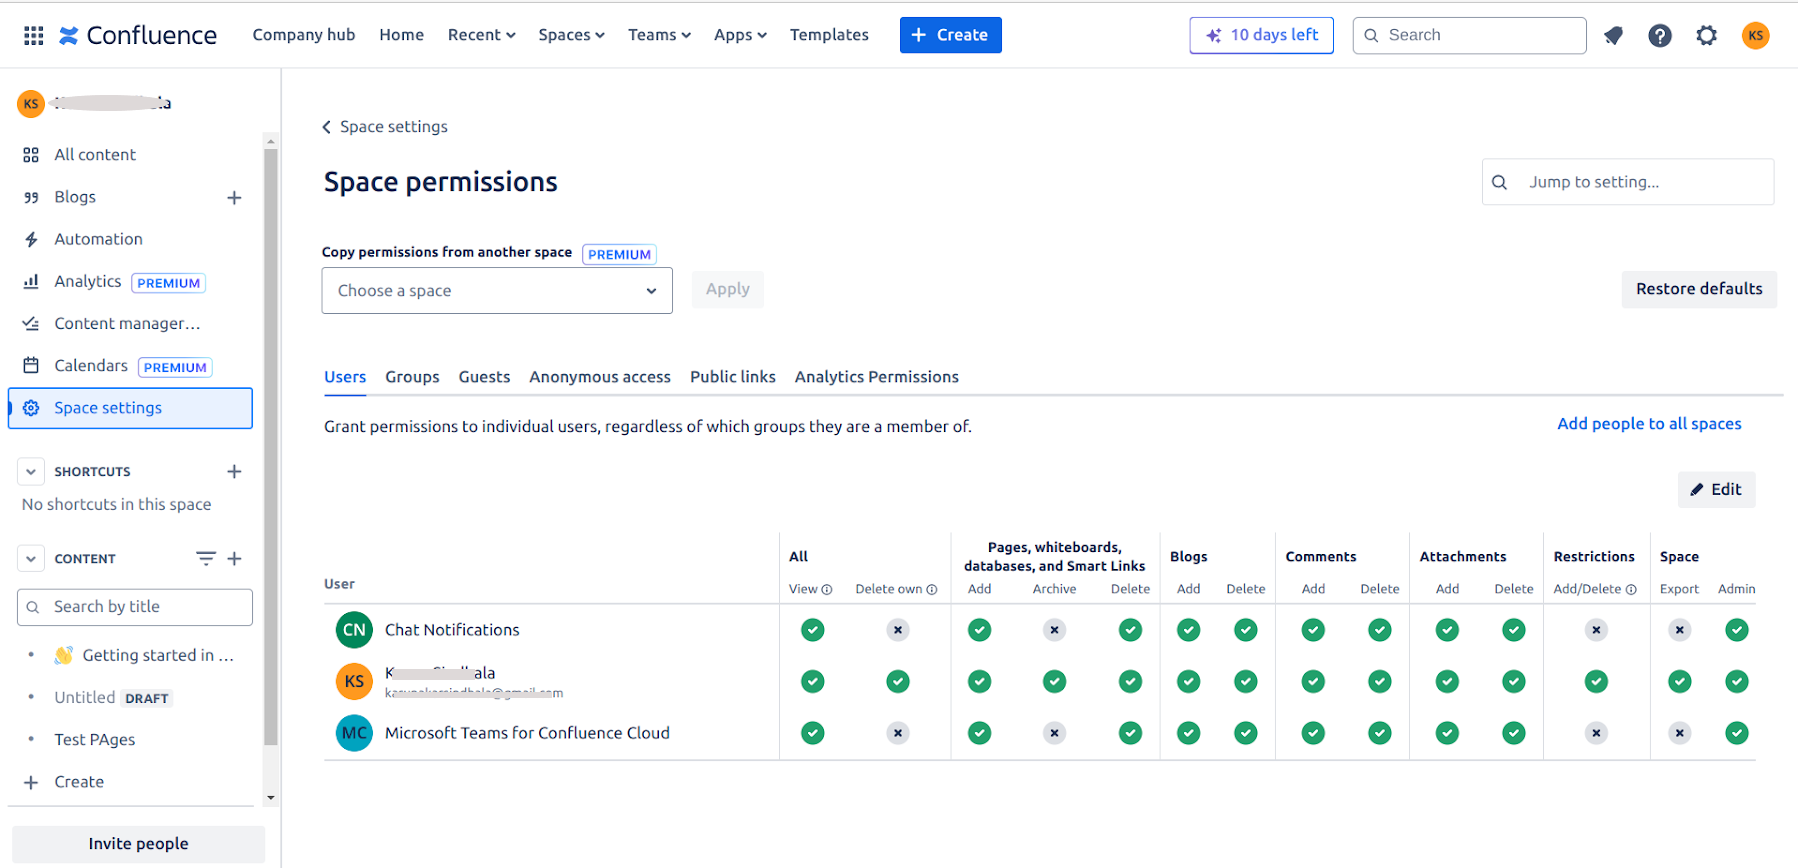
Page Restrictions
Pages inherit the space permissions. However, a page can define its own restrictions. It can allow access to all the members of the space or restrict access to selected members. If the page restrictions are marked as “Only specific people can view & edit,” then the space permissions are not considered. 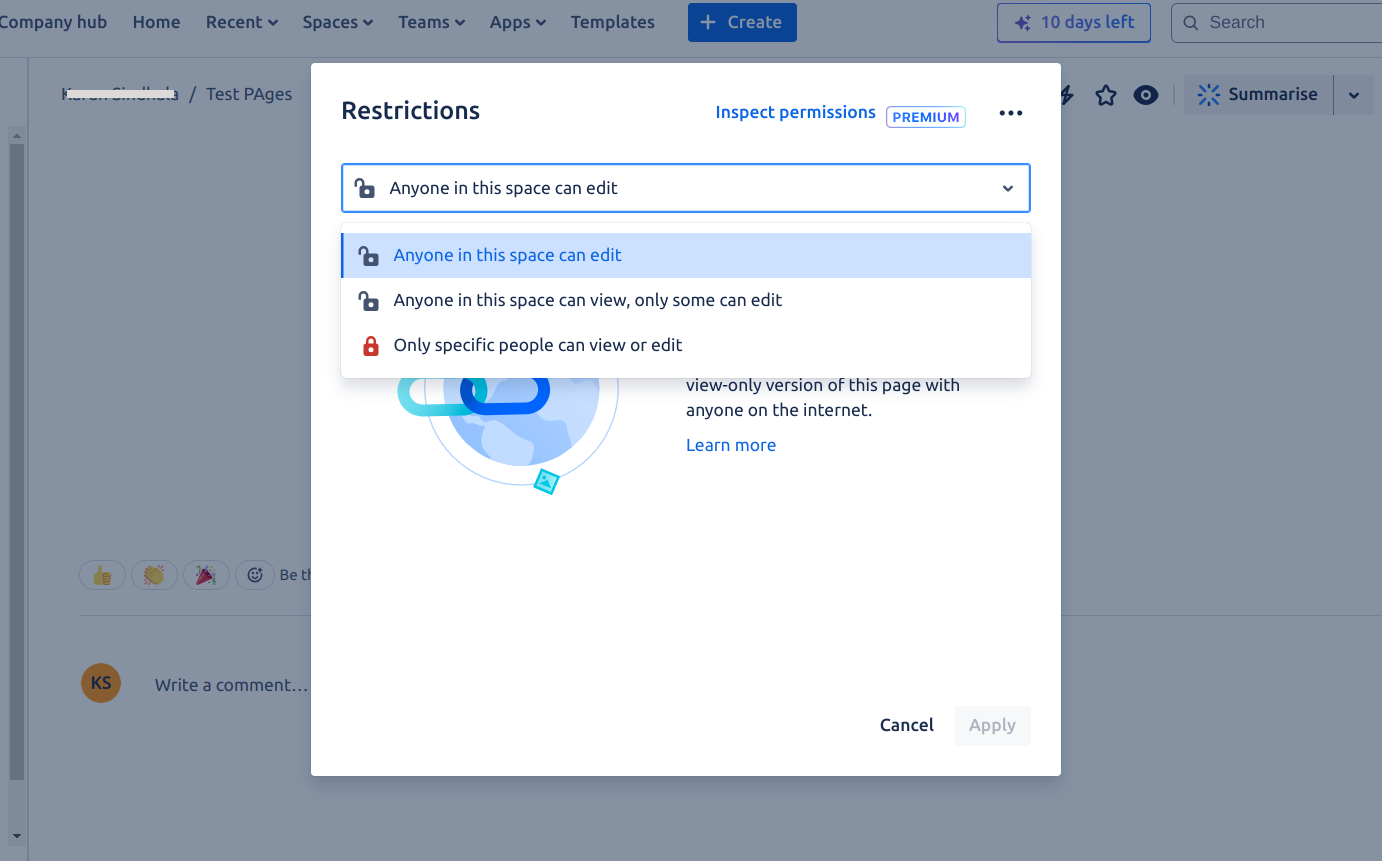
- Access: Users who are added to a space or a specific page within that space are listed in the racl (user identity – email address) field of the indexed content in SearchAssist. These users can directly access the content based on their permissions.
- Group Access: If access permissions are granted to user groups, SearchAssist creates a corresponding permission entity for the group. To enable access for all users within a group, add the users to the respective permission entity using the Permission Entity APIs. In this case, the racl fields in the indexed content will have the permission entity IDs for the groups.
Limitations
- Anonymous Access: SearchAssist does not support anonymous access to content. If a page is publicly accessible or allows anonymous access in Confluence Cloud, SearchAssist will not currently permit viewing of the file content.
- User Identity Management: Access control in Confluence Cloud relies on the user’s email address as their unique identity. To ensure proper identity management in SearchAssist, the account used for configuring SearchAssist must be able to view user email addresses. This typically requires using an admin account or ensuring users have enabled the necessary settings in their Confluence profiles.