Indexing is the technique by which search engines process information to enable quick responses to users’ queries. The search engine retrieves search responses by searching an index instead of searching the text directly.
An index is a collection of documents and each document is a collection of fields that contains the data. It is a database used by the search engine. Searching with an index is a much faster and efficient way to retrieve information when compared to text search.
But, identifying relevant information by sifting through individual pages for keywords to the index can be a very slow process. Instead, an inverted index can be more efficient. Inverted Index is a process that inverts a page-centric data structure to a keyword-centric data structure.
By default, SearchAssist’s search engine applies the inverted index process and indexes all the data in every field, and each indexed field has a separate data structure.
SearchAssist’s Index Configuration allows you to configure the fields relevant to your business use case so that the application can manipulate documents and fields to customize the data and results.
Index Configuration
As mentioned above, once you create an application in SearchAssist, a Default Index is automatically created. By default, SearchAssist creates some fields that will be used in the indexing pipeline. You can fine-tune this Default Index or create your own index configuration. Ensure to Train your app each time you make changes to any index configuration. This builds the index based on the updated configurations.
The index configuration involves the following processes:
- Add Fields as the properties from the data sources that you would want to be included or excluded from the index. Refer here for details.
- Add Traits to help identify specific entities or attributes that can be extracted from the users’ input. Refer here for details.
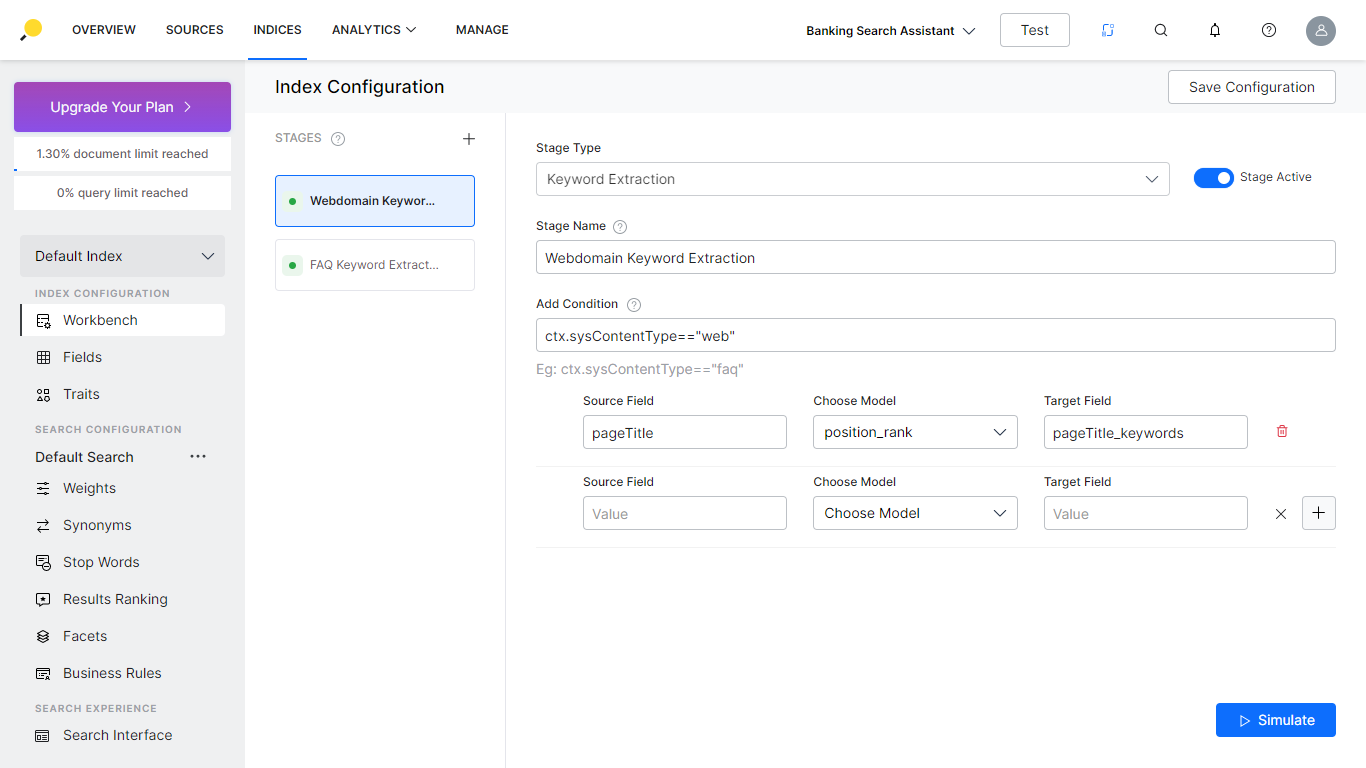
- Configure Index Pipeline Stages to transform the incoming data into optimized documents using the Workbench. Refer here for details.
You can have multiple index configurations to test a combination of configurations before identifying the one that suits your requirements. Sources are common for all the indices. Each index can have an index configuration (Traits, Workbench, Fields) and one or more search configurations.
To create multiple indices, you can clone an existing configuration or create a new configuration.
Creation
To create an index, follow the below steps:
- Click the Indices tab on the top.
- On the left pane, under the Index Configuration section, click the dropdown against the current index.
- Click Create New.
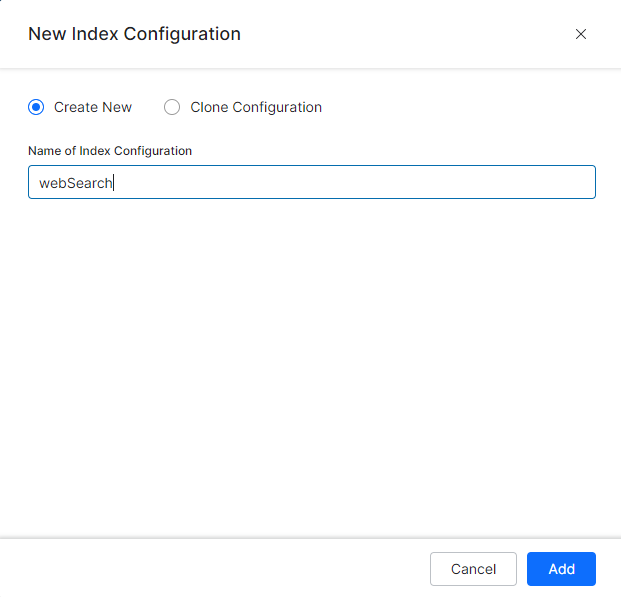
- On the New Index Configuration dialog box, select Create New option.
- Enter a name in the Name of Index Configuration field.
- Click Add.
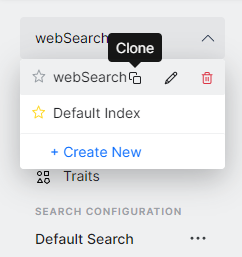
Clone
To clone an index, follow the below steps:
- Click the Indices tab on the top.
- On the left pane, under the Index Configuration section, click the dropdown against the current index.
- From the list, click the clone icon of the respective index (Index A).
- On the Clone Index Configuration dialog box, enter a name for the new index (Index B) in the Index Configuration Name field.
- Click Clone.
Actions
You can perform the following actions on an existing index:
- Click the Indices tab on the top.
- On the left pane, under the Index Configuration section, click the dropdown against the current index.
- Hover over the index name.
- You can:
- Mark the index as default using the star icon;
- Clone the index;
- Edit the name of the index;
- Delete the index.