Conversations
While Q&As help you answer simple customer queries with pre-existing answers, conversations are used for advanced activities like placing an order or checking an order status that requires a multi-step exchange of information between the user and the bot.
Conversations Features
- Utterances – These are the conversational utterances typically used by customers in their queries. For example, a customer looking for a loan account due date would ask – “Can I change the due date on my loan account?”
- Alternate Utterances – Used to augment the primary utterance with similar or alternative utterances like “Change the due date on loan payments.”
- Experiences – These include the responses given to the customer and are configured differently based on the interface they use to call or chat at a SmartAssist-hosted contact center.
- Chat Experience – Delivered to a customer when they use chat on SmartAssist over a medium like a website widget. Responses can be configured for Automated Dialog and Transfer to Agent flows here.
- Call Experience – Delivered to a customer when they call a SmartAssist-hosted call center. Responses can be configured for Automated Dialog, Transfer to Agent, and Deflect to Chat flows.
Conversations – Live Board
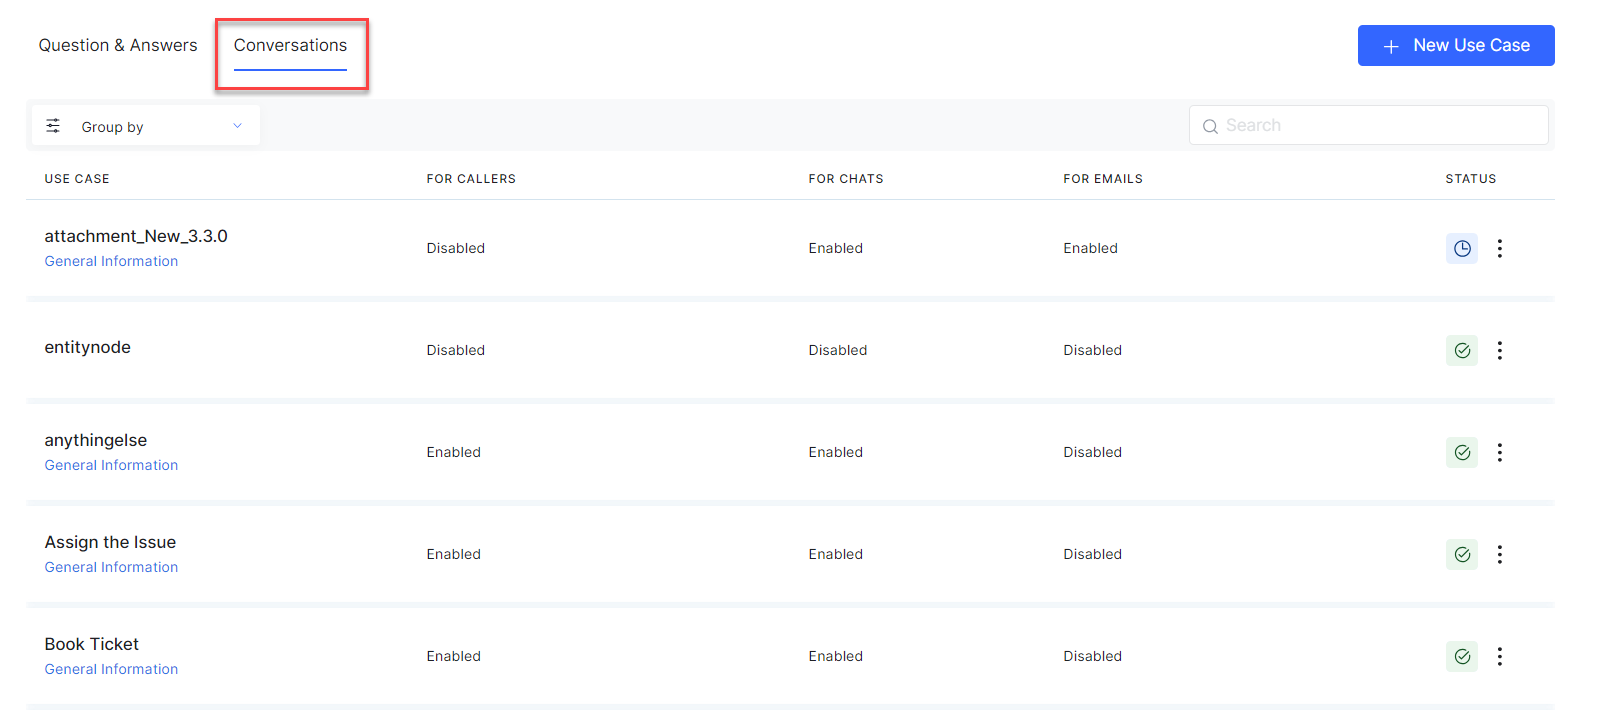
The fields displayed in the table view are as follows:
| Field | Description |
| Use Case | Name of the use case. |
| For Callers | Displays whether the specific use case is enabled or disabled for callers. If enabled, it would be available during a call conversation. |
| For Chats | Displays whether the specific use case is enabled or disabled for chats. If enabled, it would be available during a chat conversation. |
| For Emails | Displays whether the specific use case is enabled or disabled for emails. If enabled, it would be available during an email exchange. |
| Status | Displays the status ‘Published’ if the conversation has been published otherwise displays ‘In Development. |
| Action icon and menu | Click the ellipsis in each row to view the action menu items. Select the Delete option to delete the entry for Conversations. |
Add a Conversation
To add a new Conversations use case, perform the following steps:
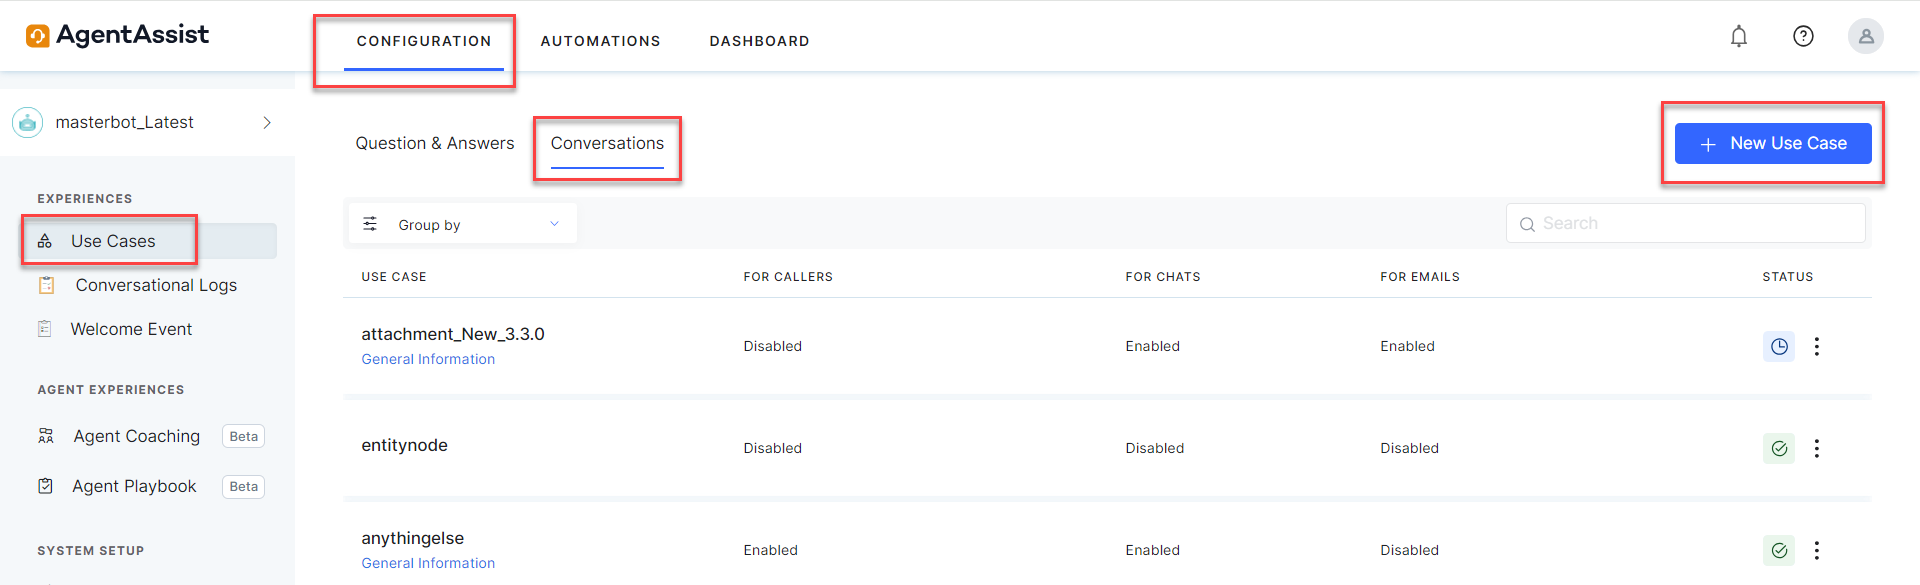
- Navigate to Configuration > Use Cases > Conversations tab.
- Click + New Use Case.
- In the New Use Case > General Setup tab, enter Use Case Name, select Category, and enter user utterances in the Utterances field.
Use the “delete” button to delete an utterance, and click + Add Another to add new utterances or search and add existing Utterances.
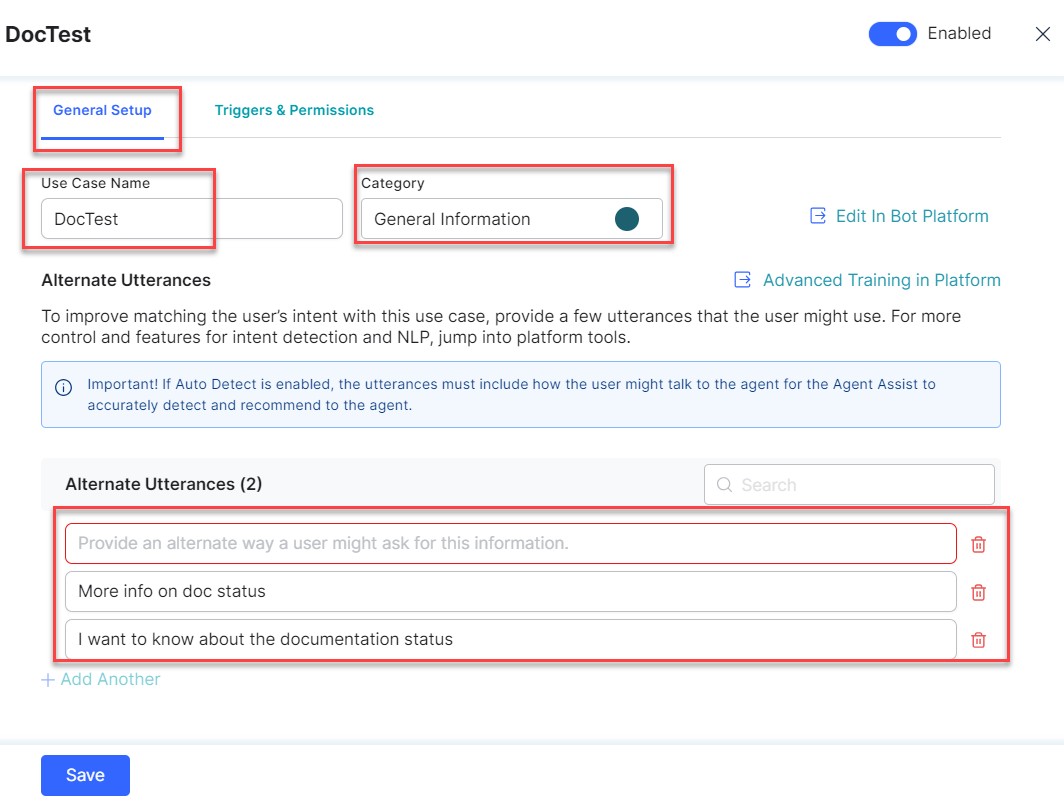
Note: Select Enabled to enable the use case. The use case gets triggered if there’s a user utterance match. - Click Save to save the use case. The new Use Case appears under Conversations.
Configure a Conversation
After adding a use case, you can complete the configuration under Conversations on the General settings and Triggers & Permissions tabs, or you can save the use case and configure it later. The following sections explain the steps to be followed to complete the configuration.
- Click the Use Case under Conversations.
- Click Edit in Bot Platform.
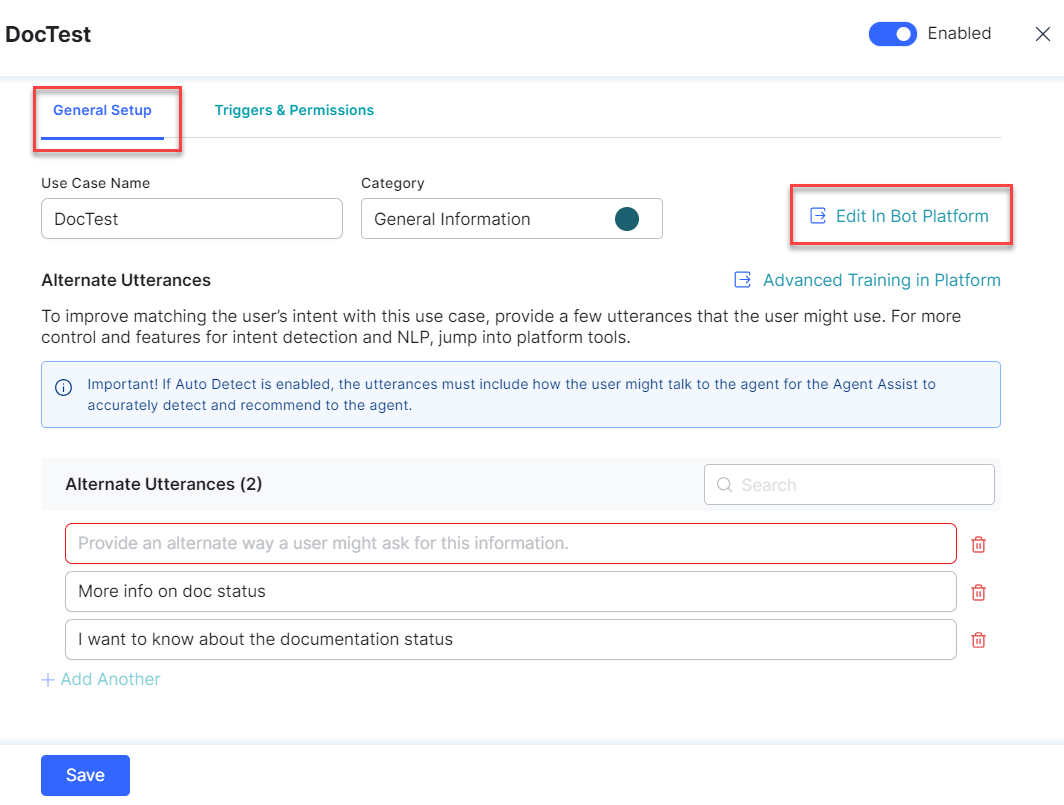
- The following screen is displayed. Edit as required.
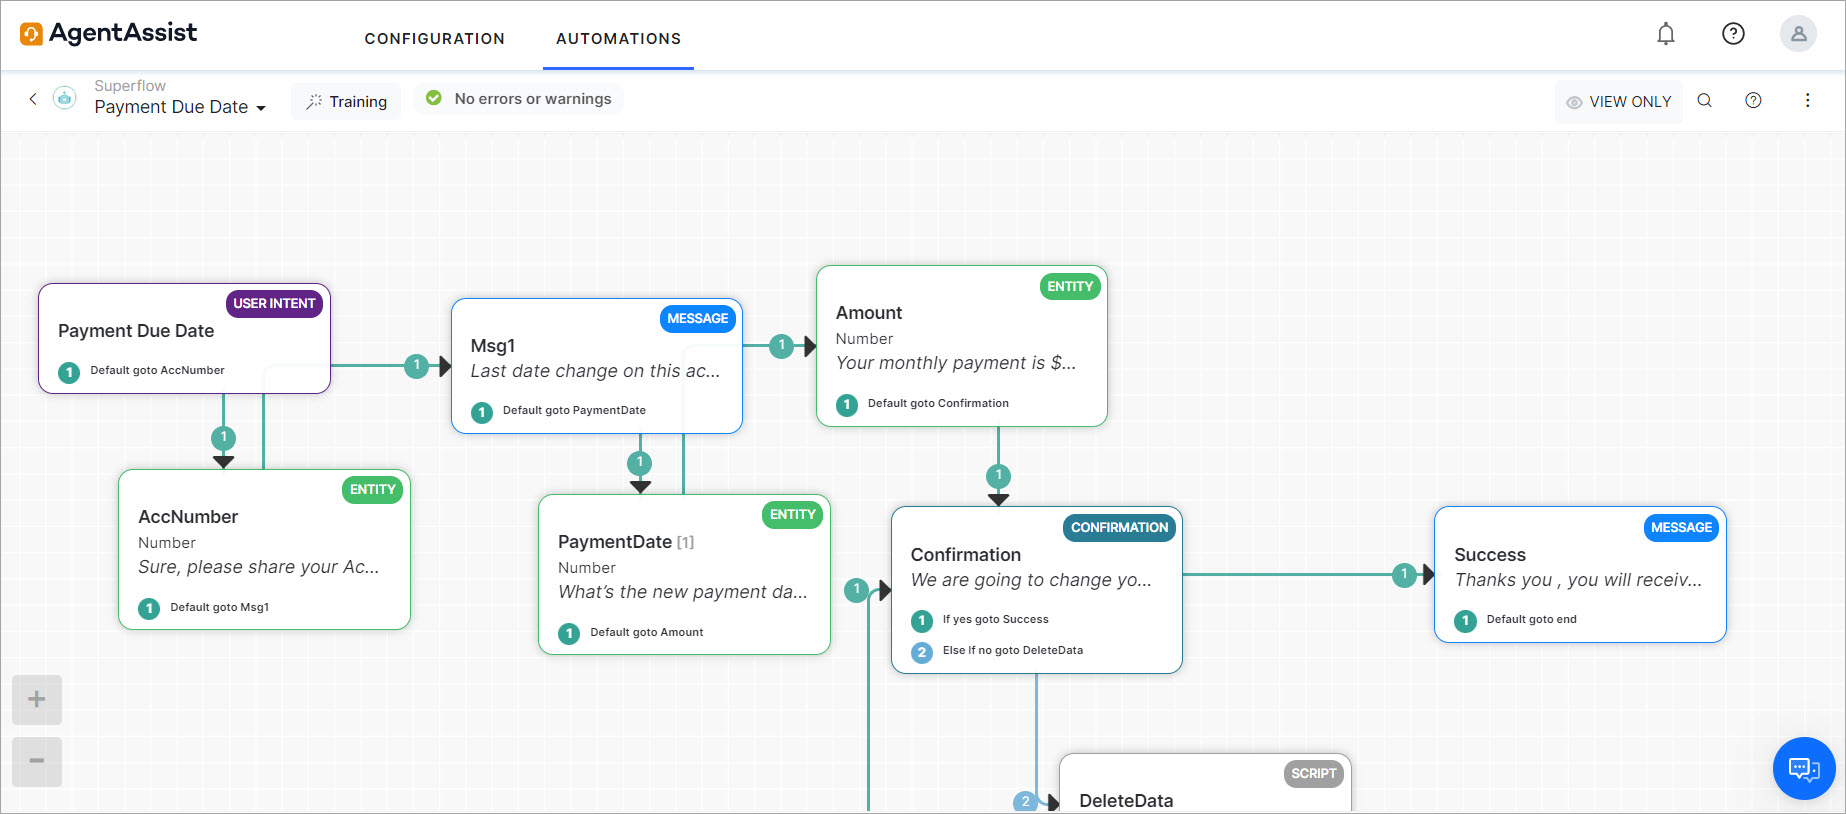
- The following screen is displayed. Edit as required.
Configure Triggers & Permission
Under the Triggers & Permission tab, you can configure channel-specific dialog tasks across all communication channels – Chat, Voice, and Email. You can also specify whether these dialog tasks appear in the list or only when searched in the widget’s library (Search tab). These preferences can be set while creating or editing a dialog task.
- Navigate to Configuration > Use Cases > Conversations tab.
- Click a Use Case.
- Click the Triggers & Permissions tab.
- Use the toggle to enable or disable the During Chats, During Calls, and During Emails channels.
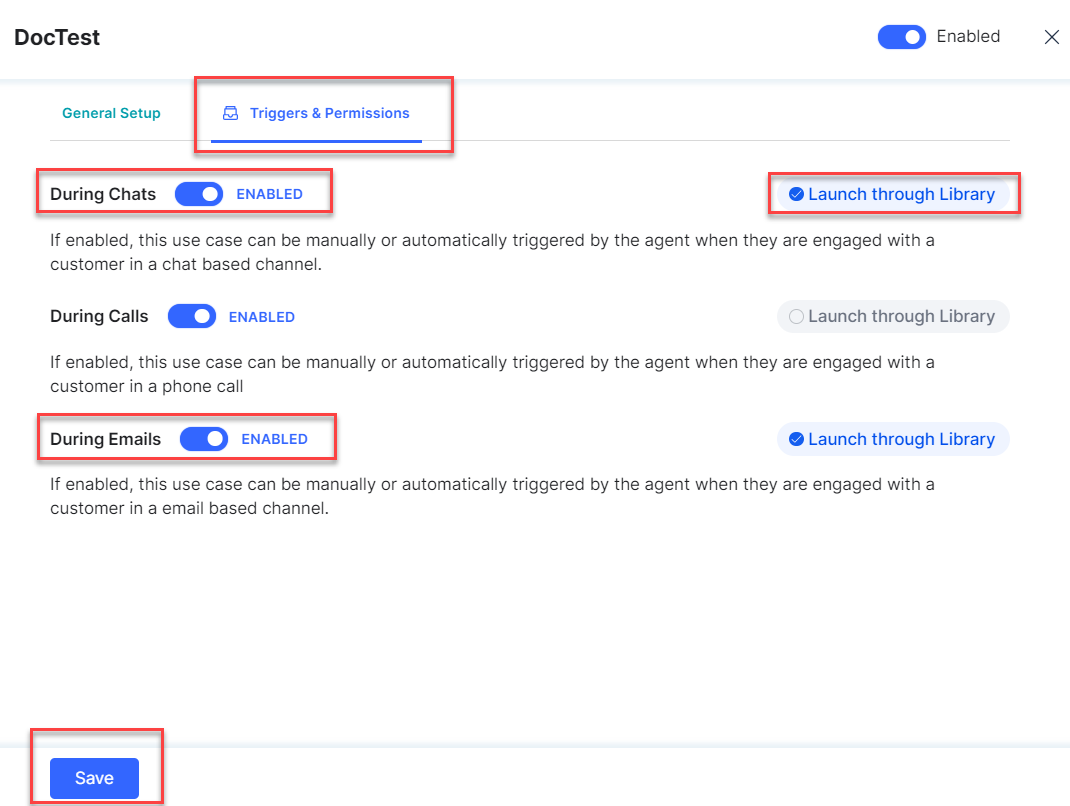
- Use the toggle to enable or disable the Launch Through Library option. You can use this option only for the enabled channels.
Follow the below description while enabling or disabling an option in this section:- During Chats: If enabled, this use case can be manually or automatically triggered by the agent when they are engaged with a customer in a chat channel.
- During Calls: If enabled, this use case can be manually or automatically triggered by the agent when they are engaged with a customer in a phone call.
- During Emails: If enabled, this use case can be manually or automatically triggered by the agent when they are engaged with a customer in an email-based channel.
- Launch Through Library:
- Enabled: The dialog task is listed under all available dialog tasks in the Search tab of the widget.
- Disabled: The dialog task doesn’t appear on the list, but remains searchable via the “Ask a question” search bar in the Search tab, allowing the agent to browse and find this use case to trigger it.
- Click Save to save the changes.
Additional Features
In the Conversations list view page, you can perform more actions as follows:
- Use the Group by drop-down to arrange conversations into groups based on Category or Status (In Development/Published).
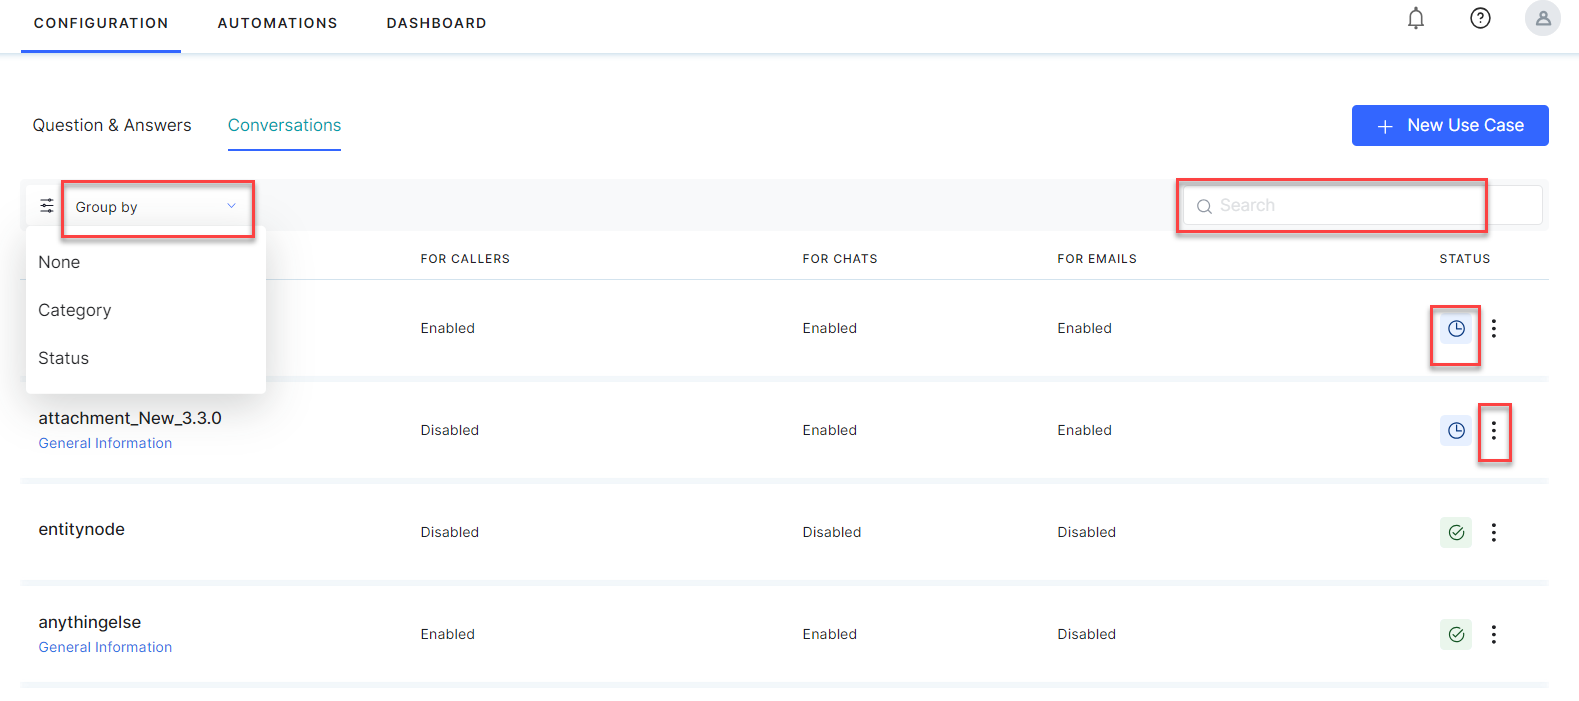
- Use the Search option to use matching words and search for a specific question.
- Click any Use Case to modify the settings.
- If you want to delete the Conversation, click the more (vertical ellipsis) icon for the Delete option.