Integrate Kore.ai Bot on Genesys Cloud CX Messaging

This document explains the Integration of a Kore.ai bot on Genesys Cloud CX Messaging. This process includes creating a bot on Kore.ai, configuring settings, and establishing a connection with Genesys Cloud CX Messaging. This integration enhances the interaction experience with customers and enables businesses to provide automated customer support.

Prerequisites

  1. An account in bots.kore.ai with required dialog tasks for your use case.
  2. A Genesys account with admin privileges. The admin should have the following minimal permissions:
    1. Integrations – Integration: View
    2. Authorization – Role: All Permissions
    3. Integration – BotConnector: All Permissions
    4. Authorization – Grant: Add
    5. Architect: All Permissions
    6. Web Deployments – Deployments: All Permissions
    7. Web Deployments – Configurations: All Permissions

Steps to integrate a Kore.ai bot on Genesys Cloud CX Messaging

Browser/tab 1-Genesys Installer

  1. Sign in to Genesys PureCloud instance with admin privileges.
  2. Install the Kore Bot Automation installer by going to Admin > Integrations > Integrations.

  3. Enter Kore in the search box, locate Kore.ai Automations for Genesys Messaging, and click Install.

  4. After installing the app from App Foundry, click the Active toggle to enable the installer.

  5. After activating the app, manually refresh the web page.
  6. Click Apps > Kore.ai Automation for Genesys Messaging.

  7. Click Start.

  8. Type https://bots.kore.ai in the URL field.

Browser/tab 2-AgentAssist Botbuilder

  1. Sign in to https://bots.kore.ai/botbuilder/login on a different tab or browser.

  2. Click DEPLOY > Channels > Genesys Cloud CX Messaging.
  3. Click Configurations.
  4. Type “https://login.mypurecloud.com” or any other Genesys PureCloud URL based on the location in the Genesys Cloud login URL field.
  5. Click the dropdown list and select your app in the Select App field; in the following example, it is Genesys.

  6. Click the Copy button against the Bot Id field to copy its value.

    1. Paste the bot ID into the Genesys installer Bot Id field from Browser/tab 1-Genesys Installer.

  7. Click the Copy button against the Client ID field to copy its value.

    1. Paste it into the Genesys installer Client Id field.
  8. Click the Copy button against the Client Secret field to copy its value.

    1. Paste it into the Genesys installer Client Secret field.

  9. Click the Copy button against the Callback URL field (go up in the Configurations page to locate it) to copy its content.

    1. Paste it into the callBack URL field of Genesys installer.

      Note: If you have any firewall policies blocking the Callback URL, allow this URL before starting the installation.
    2. Click Next.
    3. Click Install.

    4. Click Go To Application.

    5. The following code and the Genesys OAuth details automatically generate once installation is done:

    6. Copy the values of the Integration Id field.

  10. Paste it into the Integration ID field of Genesys Cloud CX Messaging page of Kore application.

    1. Copy the values of the OAuth Client Id field from Genesys PureCloud.

  11. Paste it into the Genesys channel Client ID section.

    1. Copy the values of the Token field.

  12. Paste it into the Genesys channel Client Secret section.

  13. Click Authorize.

  14. Click Save.
  15. Click OK.

  16. Click Publish to publish the channel.

  17. Click Proceed.

  18. Enter a comment in the Comment field.

  19. Click Confirm.
  20. Click Close.

    1. Go back to the Genesys PureCloud application and click Copy to Clipboard.

    2. Paste it into any HTML page and run any sample application server. For example, python3 -m http.server. A sample URL similar to the following appears on your terminal.

    3. Click the sample URL to open it.
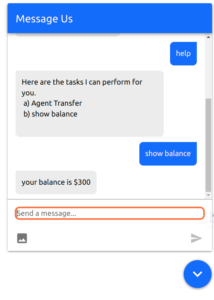
    4. Click the Messenger icon. You can run all your automations on this messenger.

    5. Type “connect me to an agent” or your preferred dialogue for agent transfer and then press the Enter key.
      Note: Agents assigned by the Genesys Admin to the auto-generated queue are connected to the chat conversation.

    6. Click Answer.

      1. The chat conversation begins between the customer and the agent on the queue.


Integrate Kore.ai Bot on Genesys Cloud CX Messaging

This document explains the Integration of a Kore.ai bot on Genesys Cloud CX Messaging. This process includes creating a bot on Kore.ai, configuring settings, and establishing a connection with Genesys Cloud CX Messaging. This integration enhances the interaction experience with customers and enables businesses to provide automated customer support.

Prerequisites

  1. An account in bots.kore.ai with required dialog tasks for your use case.
  2. A Genesys account with admin privileges. The admin should have the following minimal permissions:
    1. Integrations – Integration: View
    2. Authorization – Role: All Permissions
    3. Integration – BotConnector: All Permissions
    4. Authorization – Grant: Add
    5. Architect: All Permissions
    6. Web Deployments – Deployments: All Permissions
    7. Web Deployments – Configurations: All Permissions

Steps to integrate a Kore.ai bot on Genesys Cloud CX Messaging

Browser/tab 1-Genesys Installer

  1. Sign in to Genesys PureCloud instance with admin privileges.
  2. Install the Kore Bot Automation installer by going to Admin > Integrations > Integrations.

  3. Enter Kore in the search box, locate Kore.ai Automations for Genesys Messaging, and click Install.

  4. After installing the app from App Foundry, click the Active toggle to enable the installer.

  5. After activating the app, manually refresh the web page.
  6. Click Apps > Kore.ai Automation for Genesys Messaging.

  7. Click Start.

  8. Type https://bots.kore.ai in the URL field.

Browser/tab 2-AgentAssist Botbuilder

  1. Sign in to https://bots.kore.ai/botbuilder/login on a different tab or browser.

  2. Click DEPLOY > Channels > Genesys Cloud CX Messaging.
  3. Click Configurations.
  4. Type “https://login.mypurecloud.com” or any other Genesys PureCloud URL based on the location in the Genesys Cloud login URL field.
  5. Click the dropdown list and select your app in the Select App field; in the following example, it is Genesys.

  6. Click the Copy button against the Bot Id field to copy its value.

    1. Paste the bot ID into the Genesys installer Bot Id field from Browser/tab 1-Genesys Installer.

  7. Click the Copy button against the Client ID field to copy its value.

    1. Paste it into the Genesys installer Client Id field.
  8. Click the Copy button against the Client Secret field to copy its value.

    1. Paste it into the Genesys installer Client Secret field.

  9. Click the Copy button against the Callback URL field (go up in the Configurations page to locate it) to copy its content.

    1. Paste it into the callBack URL field of Genesys installer.

      Note: If you have any firewall policies blocking the Callback URL, allow this URL before starting the installation.
    2. Click Next.
    3. Click Install.

    4. Click Go To Application.

    5. The following code and the Genesys OAuth details automatically generate once installation is done:

    6. Copy the values of the Integration Id field.

  10. Paste it into the Integration ID field of Genesys Cloud CX Messaging page of Kore application.

    1. Copy the values of the OAuth Client Id field from Genesys PureCloud.

  11. Paste it into the Genesys channel Client ID section.

    1. Copy the values of the Token field.

  12. Paste it into the Genesys channel Client Secret section.

  13. Click Authorize.

  14. Click Save.
  15. Click OK.

  16. Click Publish to publish the channel.

  17. Click Proceed.

  18. Enter a comment in the Comment field.

  19. Click Confirm.
  20. Click Close.

    1. Go back to the Genesys PureCloud application and click Copy to Clipboard.

    2. Paste it into any HTML page and run any sample application server. For example, python3 -m http.server. A sample URL similar to the following appears on your terminal.

    3. Click the sample URL to open it.
    4. Click the Messenger icon. You can run all your automations on this messenger.

    5. Type “connect me to an agent” or your preferred dialogue for agent transfer and then press the Enter key.

      Note: Agents assigned by the Genesys Admin to the auto-generated queue are connected to the chat conversation.

    6. Click Answer.

      1. The chat conversation begins between the customer and the agent on the queue.