After you configure the Voice channel, you can personalize the ASR Engine by configuring speech recognition preference and language for speech-to-text conversion. You can also add call control parameters.
Steps to configure or modify the ASR Engine settings:
- Sign in to AgentAssist using your credentials.
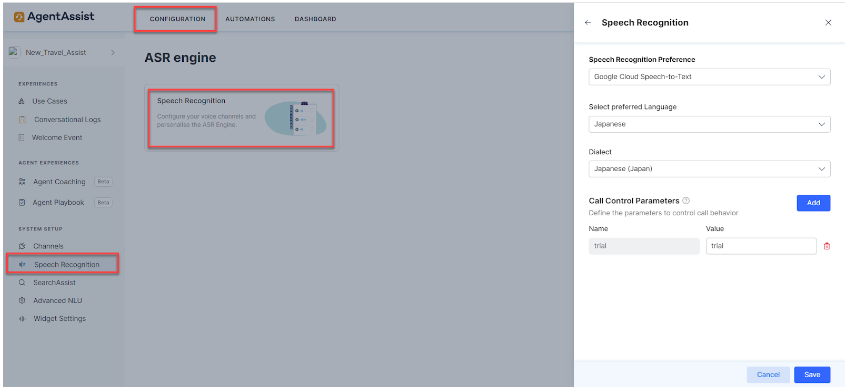
- Click CONFIGURATION > Speech Recognition.

- Click Speech Recognition on the ASR engine page.
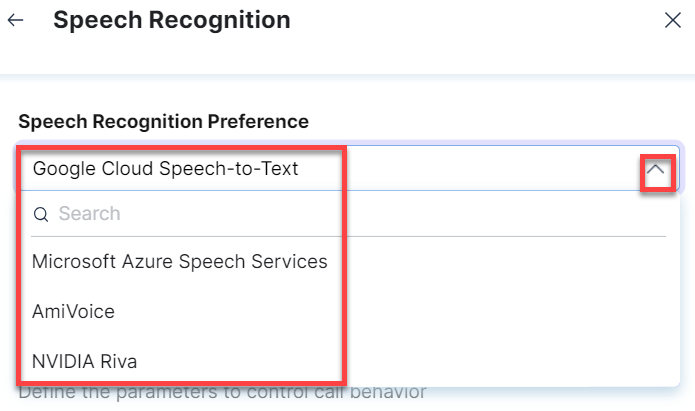
- Select your preference in the Speech Recognition Preference list.
- Select your preferred language in the Select Preferred Language list.
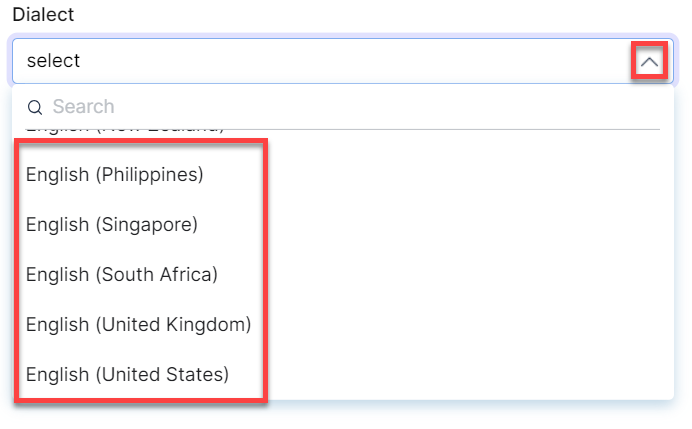
- Select the language-specific dialect in the Dialect list.

- Click the Add button against Call Control Parameters to add a new call parameter. This helps you to control the call flow behavior using the added parameter(s) in the VoiceXML file.
- Enter a parameter name and value in the Name and Value fields.
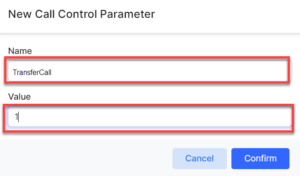
- Name: Parameter name. For example, continuousASRTimeoutInMS.
- Value: Parameter value. For example, 6000.
In the above example, the key name is continuousASRTimeoutInMS, and you can configure the value based on your requirements. If you want the bot to wait for 10 seconds, set the value to 10000. The maximum time frame is up to 60 seconds (as mentioned in the above example).
- Click Confirm.
- Enter a parameter name and value in the Name and Value fields.
- Click Save to complete the process.

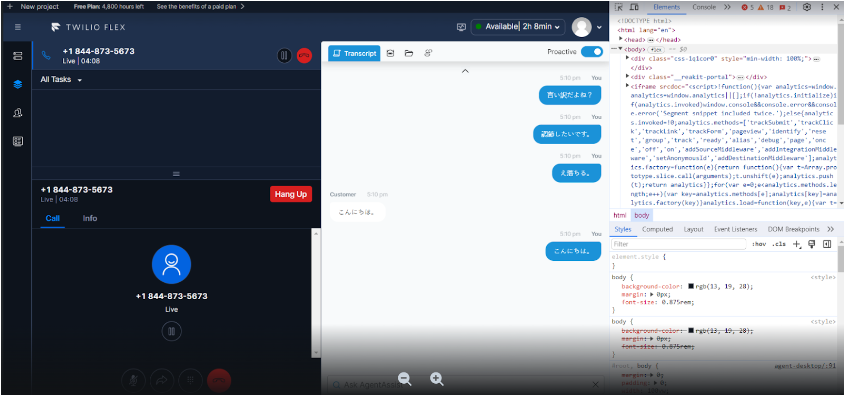
The Transcripts section of the AgentAssist widget reflects your language, dialect, and call control parameters selection. The following screenshot is a representation of Japanese language and dialect selection: